Leaderboard


Popular Content
Showing content with the highest reputation on 07/08/2018 in all areas
-
On the start of a two month fly fishing trip in Idaho I stopped for gas at a Pilot gas station on Interstate 70 about 40 miles east of Kansas City. Sure enough I spied another Oliver! It was hull number 324 and they were from Chapel Hill, NC - just down the street from near where I live close to Asheville, NC. They were headed to Jefferson City, MO (driving East while I was driving West) in order to add to the goal of visiting all the State Capitals. In addition, the owner told me that earlier in the day they had met another Oliver owner - Greg & Terresa from Madison, WI that I had camped right next to at this year's Owners rally. Small world that we live in! Bill P.s. pic is from Victorian Acres, Nebraska City, NE - nice campground right off HWY 2. With temps in the 90's a WalMart parking lot didn't seem to be a very good idea without a generator!
 3 points
 -
Yep, the window wells are a pain to clean, but a very necessary part of maintenance and keeping water from overflowing the wells and into your trailer. After trying a few methods, this is what I have settled on. 1. Completely remove all the exterior gaskets. Don't get them mixed up between windows. 2. Remove interior bug screens. You may have to remove shades as well to completely remove the screens. 3. Open windows as far as you can. 4. Remove as much of the rubber slotted track as you can from the window frame. IIRC, the bottom track goes under the sliding window and is captured, so I pull up as much as I can. 5. Then with shop vac and a duster brush (3" paintbrush) I remove all the debris, brushing it into the vac. I find doing this dry is way better than trying to clean with water and washing out the debris that way. It just turns into a gunky mess with water. 6. Once all the major junk is out of there, I'll finish cleaning the frame with a damp rag and Citrisolve (or the like). 7. Last step! While all the gaskets and rubber track are out, I clean them as well with the damp rag and cleaner and finish them off all sides (once dry) with a good wipe down with 303 Protectant before re-inserting. The 303 makes the windows slide real easy and also protects the gaskets from UV degradation. Seems like a lot (and it is) but that's what I do once a year. My trailer is a 2015 so not that old, but the windows haven't leaked and the gaskets look new. YMMV depending on the roads and environments you travel. Hope I didn't forget a step. A lot of the work becomes apparent as you move along through the process. If someone knows a easier way to do this I'd sure like to hear about it! I'm with you though about finding the ultimate RV window. Maybe the frameless types I'm seeing on the new super rigs out there? Not sure how they function though, or if they don't have their own issues. Happy trails! Dave3 points
-
I blow out the channels on all 5 windows with compressed air after each trip. That includes lifting the thick black rubber weatherstripping to clean under as well. We’ve been in some pretty bad downpours and haven’t experienced any leakage yet. Mike2 points
-
We got home a couple of days ago with our new Ollie and I thought I'd share some thoughts that may be useful to other prospective / waiting buyers. On factory options: ■ Solar is hands-down the easiest choice. Keeps batteries topped off all the time. Allows you to run the fridge on DC while driving and not run down the batteries. Yes it charges off the tow vehicle wiring, but I doubt this would be enough to keep the batteries charged when also running the fridge. ■ The Lagun table was the worst choice for us. I liked the idea, but in practice the table is too bulky in storage (a 3" pipe sticks out from the bottom of the table, plus the arm is not small either) and we're too worried about scratching the surface. We don't like leaving it up while sleeping, and since we're already converting the side dinette to a bed every night for our son, we don't need yet another daily stow/deploy operation. Also now that Overland has pioneered a better mounting method, I would never order this from the factory; do it yourself and get a cleaner solution. ■ The KTT Latex Mattress upgrade was definitely worth it for us. Very comfortable and slept cool in the warm weather we experienced. Yes we had the AC on but we turned it down (raised the thermostat) for bedtime. Man that thing is loud! Anyway we also bought the plastic looped mat to enhance air flow after following this thread. We ended up buying Hypervent from Defender since it was cheaper and looked to be the same material as Aire-Flow. ■ The WeBoost cell booster was a win. We camped mostly in state parks on the way back, many were far off the interstates. It gave us a functioning connection in several places where we otherwise had none. Sometimes it didn't give us a functioning data connection, but even being able to make/receive calls and text messages was great. However having to hold your phone close to the antenna mounted over the dinette is not ideal. I want to plug the output from the WeBoost into a mobile router to enable our devices to connect anywhere in/around the trailer. One day. ■ We ordered the shower track but haven't purchased a shower curtain yet. Wiping down the toilet seat and area around the toilet is not fun. Plus a lot of water seems to collect there so it really saturated our towel (that we keep only for that purpose). So the jury is still out on the shower track but I don't think that having a curtain will be useless. ■ Truma tankless water heater was great. When on full hookups all three of us took nice long showers and never had to worry about running out. Maybe not "needed" but neither is a $65K camper. We got it for the performance but also the ease of use and maintenance. I found Reed's posts on this topic influential (which of course I cannot find right now). Other noteworthy stuff we bought: ■ 18" milk crates. Overland mentioned this in his Snowball thread. I was excited to essentially have the basement packed before we left home to pick up the trailer. I bought these because I wanted to organize my stuff logically: blocks chocks and jacks went in red, water hoses and filters in blue, electric and gas in green. Black stays in the garage and is where I put the hitch, tow mirrors, etc. Perfect. Except that when we picked up the trailer, there was this white plastic sheeting material closing off part of the basement area so the milk crates wouldn't fit in width-wise. I had to crawl in the basement and unscrew the sheeting from a stringer and then the stringer from the floor of the basement. I re-installed the plastic sheet all the way against the rear of the trailer with duct tape to protect the wires and hoses back there but now the milk crates fit. I can get all three in plus my toolbox and Viair compressor, and everything is so easy to pull out and find what I need. Suh-weet! ■ Water filter. Thanks to DavePhelps in this thread for turning me on to RVWaterFilterStore.com. We bought the two-canister Essential system because it seemed like the best compromise between cost, effectiveness, and convenience. We were very pleased with the results. Always had great tasting and feeling (for showers) water even when the campground water was kinda harsh. When we got home and my wife showered in our house she remarked "Meh, unfiltered water...." Also the build quality is very nice. ■ Bed sheets. After much consternation we ordered custom sheets from CustomLinensDirect. They were very soft, well-made, and fit perfectly. We supplied the measurements 75"L x 29"W x 8"D (this is for the KTT Latex mattress upgrade). We bought the 300TC sheets but they also have 500 if that floats your boat. We also bought a few sets of sheets from two different sellers on Amazon as backups and for our son's bed on the side dinette. They were allegedly 300TC Egyptian cotton but after washing just once (and dried on delicate) they were very rough feeling. ■ Plates. We found Corelle knock-offs called Oftast at Ikea. These don't shatter into a billion little shards like Corelle but are still tempered glass so you can use them in the microwave unlike melamine or acrylic. They're also super cheap: less than $1 each. We switched our 4-year-old to these dishes after we discovered them in February and none have broken yet, other than the two I broke for testing purposes. I also want to thank Reed and Karen Lukens for compiling their Amazon Wish List. We didn't buy close to everything on the list, and sometimes we bought different items than what they recommended, but it was a great resource to see things we might have forgotten or not thought about.1 point
-
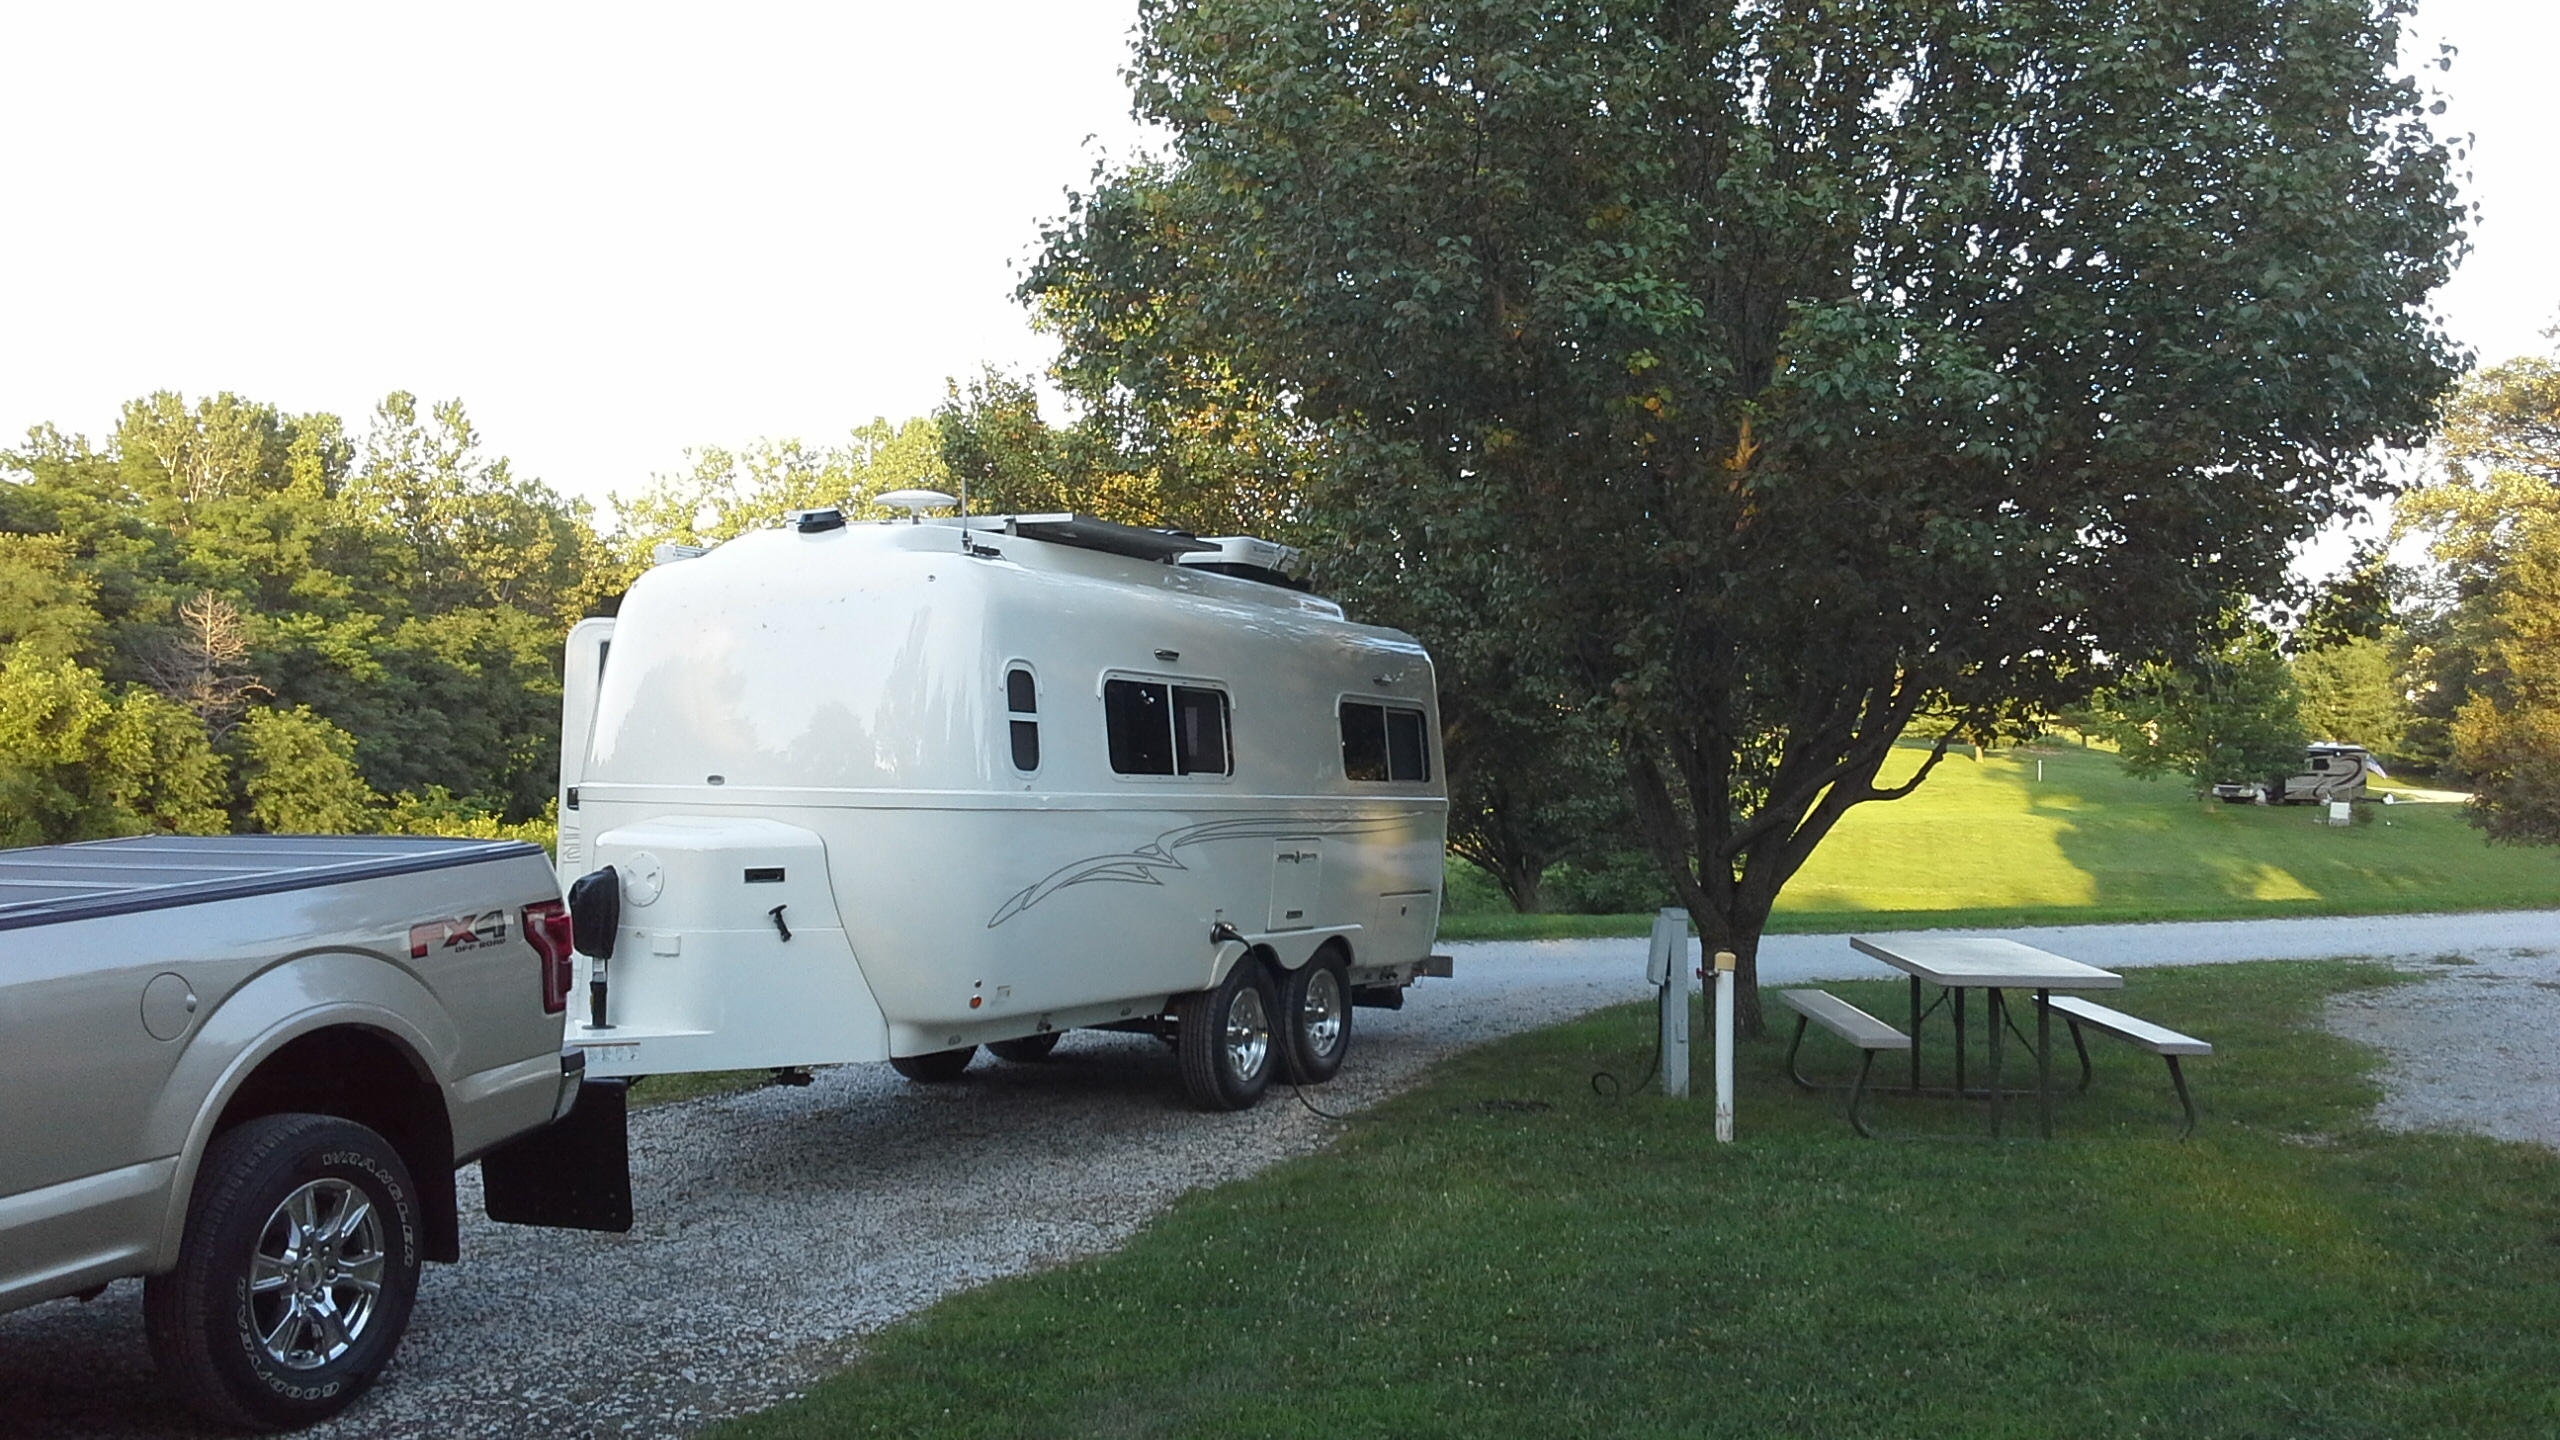
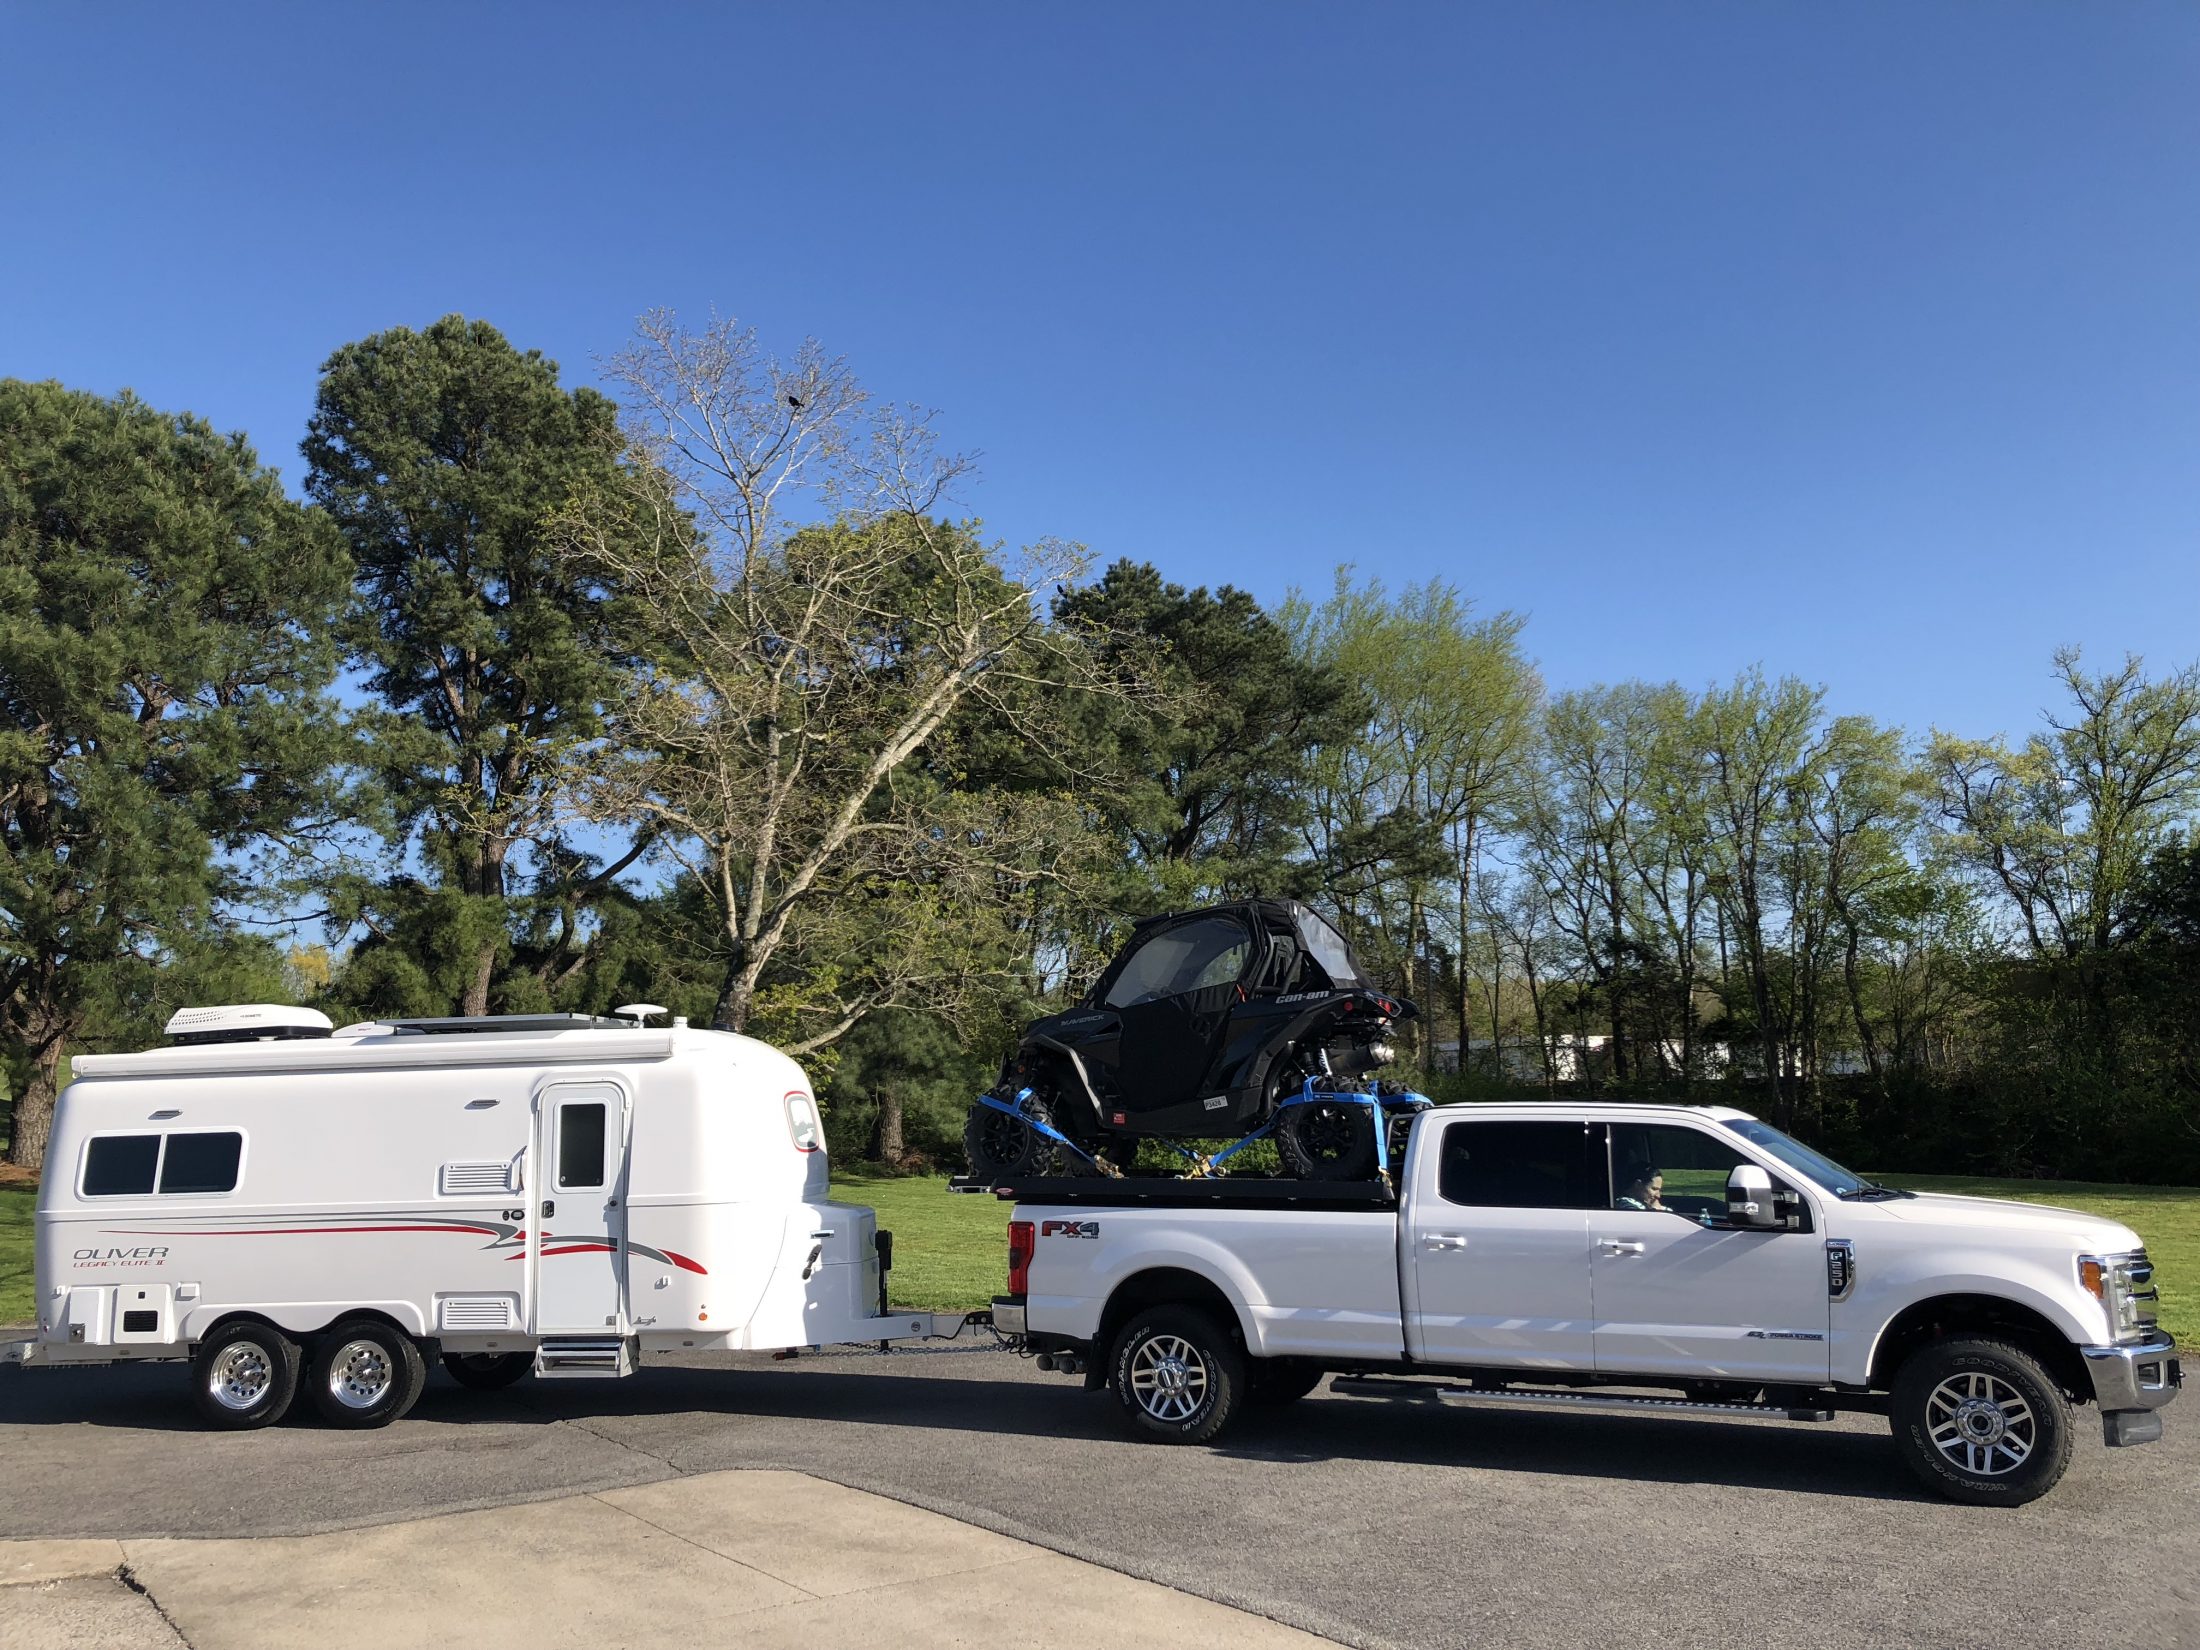
It's official! After five 12-hour days of driving, my wife and I picked up our Ollie on the 19th. It was an excellent experience! I can tell you that these guys are there for the customer, and bent over backwards during the orientation. They made it quick, easy and painless (somewhat). The F250 has extra large eyelets for the break away chains and would not accommodate the hooks. Phil offered to drive me to the nearest hardware store to square it away, but It was only a mile down the road and they had another couple scheduled for delivery that day as well. It's the small things that prove this company was the right choice. The wife and I have been slowly making our way back to Alaska, and the last week has been awesome. We have done a little of everything so far (boondocking, two RV parks and two national parks). We just left Palo Duro Texas State Park and it was an excellent spot to spend two nights. We just arrived in Moab, and are planning to spend 6 days or so here prior to heading to Salt Lake. The Ollie is superior in every manner and it's so nice to see a well researched plan work out. I have researched every item I have purchased for this lifestyle and it has come together well. From my TV, to the bed deck, to the Ollie it's been a great week/trip. If anyone is on the fence about this travel trailer, don't be. You get what you pay for. Daily I find some small detail that I'm impressed with. I'll say the biggest impression is in the docile towing mannerisms. It is truly a joy to pull. I have many miles towing...both overloaded, underloaded, underpowered, etc., and this trailer makes it easy. I see the bigger guys and the fifth wheels in rush hour traffic and smile knowing I made the right choice. Anyways, sorry for the long post, I'm just excited! -Alex
1 point
-
http://www.wowhaus.co.uk/2018/06/26/midcentury-mobile-home-1961-holiday-house-geographic-ebay/
1 point
-
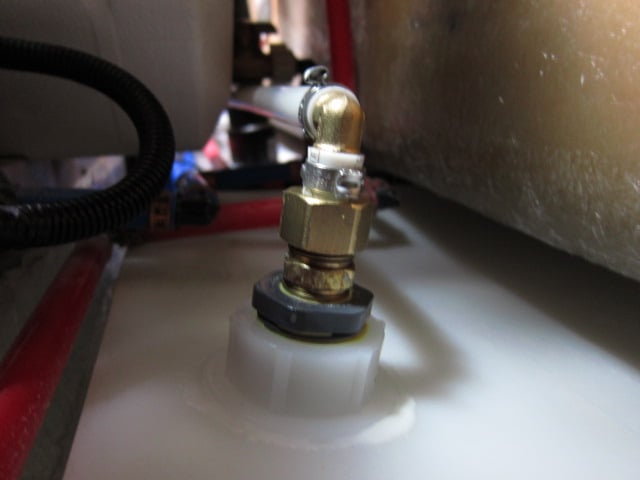
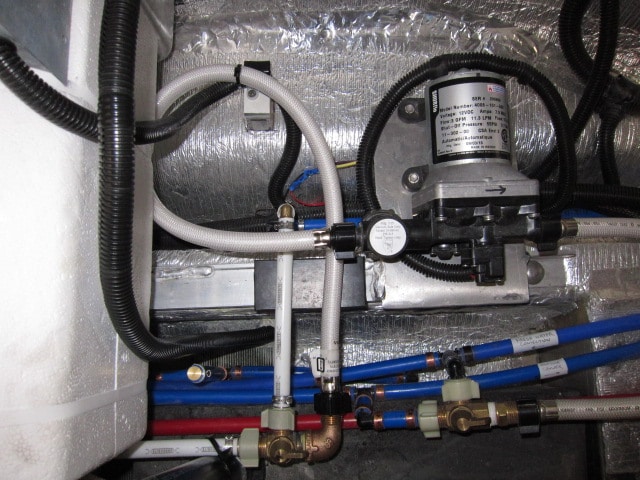
Well I may be kicking a dead horse here, but I finally got around to adding the siphon tube to my Ollie's FWT. Thanks to Raspy and Reed and all others for their input which was of great help to me. I modified Raspy's design just a bit by using a PEX suction tube instead of copper. Don't know if one is better than the other but they do have some subtle installation differences I thought I'd point out. The heart of the setup is the same, the 1/2" brass compression fitting that has been carefully drilled through with a 5/8" bit to remove the internal stop so the copper or pex tube can be pushed through the fitting. The important difference here with PEX is not to use the brass compression ring, but a nylon ring made for that purpose. Here's a pic of the siphon tube setup with all the fittings: Of course the part that gave me the greatest worry was spin welding the fitting on to the tank. I used the same HD fitting that Reed used and I bought 6 of them so I could practice on a piece of scrap plastic I got at a local tank factory (they gave me the scraps). I bought the fittings and the driver from here. They have all the fittings and drivers for that particular fitting that you need, and are very fairly priced. I oversized the fitting and also got the HD version for strength. I oversized because I wanted to screw the brass compression fitting into a bushing and not directly into the spin weld fitting as a hedge just in case! Did I need to? Maybe not, but I felt better doing it. The difficulty on my Elite is that it is crowded down there in between the hulls! I'm no stranger to routers, they are powerful, can impart tremendous torque, and things can go South in a hurry if you don't respect that. Reaching down in there with the router was dicey. My grip was tenuous at best, I needed an extra elbow! I could get a reasonable hold and turn it on, but had to change my grip for the critical turning off stage!! I did not want to change my grip with the router running and court disaster. So finally I put two short extension cords together and had my wife at the ready to pull them apart when I yelled out to her. We practiced a few times until we both felt good about it. Four seconds of terror later the job was done....perfect weld! For those used to using routers with wood and who know what can happen, I would say that spin-welding plastic fittings is pretty easy and forgiving. Timing is the most critical factor. I was glad though that I did a few test tries first, and at only .35 cents a fitting, it was cheap to do so. The rest was easy. Since using a PEX suction tube, I did not cap it but cut out 2 tabs on the bottom on my table saw to keep the tube 1/4" above the tank bottom. Everything else was just as Raspy and Reed did in their video. Here's the pic of the installed suction tube. It's actually straight, camera was tilted a bit. Here's a pic on the pump side: The pickup tube came out just next to the water heater where I strapped it to the drain pipe to the GWT. You can see the brass pulg in the old pickup tube next to the water heater. While down there, I added a brass elbow to the valve on the left for the flex line to the input side of the pump. Originally, there was none and the flex line was badly kinked having to make such a tight turn: So all is well now. Instead of loosing prime at 36% full. The pump just barely makes it to 6% full. That's a lot of water! Things are looking up! Dave
1 point
-
You should worry about any sharp dings that might tear the seal when you put the hub back onto the spindle. Dress the one visible with a fine file and use very fine sandpaper (400 wet or dry, or finer) in a circular pattern on the surfaces that the seals ride on. If there is a groove worn on the spndle, you can install seal saver rings to make the surface smooth, if really bad you might have to scrap the axle. Use high quality Timken or SKF inner seals, not your typical $2 Chinese junk. Those are notorious for leaking, which will ruin your brakes. ... https://smile.amazon.com/dp/B001544U88/?coliid=I312K0P0Q25BPI&colid=305M5TXY22I7S&psc=0&ref_=lv_ov_lig_dp_it John Davies Spokane WA1 point
-
My family used to go to Rifle Gap Reservoir every summer for camping, fishing, boating. I loved it then, but I haven’t been back there in years. It is popular so it may be crowded. I think all the CGs in the park take reservations, so it might be hard getting a site. I have on my “to visit” list Blacktail Creek CG, east of Yampa - it has good Mtn biking. It is a small CG (10 sites I think) and doesn’t take reservations, so you may have luck if you arrive Sun-Thur. I also want to visit Rifle Falls State Park - the hiking is supposed to be great. If you are interested in boondocking, there are a lot of dispersed camping sites along the drive between Yampa and Meeker. I keep track of dispersed camping info in Evernote and here are a couple links I have for the area. http://www.twohappycampers.com/a-mid-week-getaway-to-the-flat-tops-wilderness/ More generally: https://www.uncovercolorado.com/scenic-drives/flat-tops-trail-byway/ Also, look up Browns Park National WL Refuge for amazing scenery and solitude - it’s far enough away that you won’t find the weekend crowds. I love the Gates of Lodore area, but I frankly don’t know much about camping there except from a raft! We have floated it several times and it is so beautiful. The Gates of Lodore CG will be full of rafters, though. That might be entertaining, but it won’t be quiet or peaceful! All this talk makes me want to pack up and go! We are going up to Lake Granby next week, but it won’t be wild, remote and stunning like the areas you are going to visit. But we will be camping with friends with kids and will spend our days fishing, paddleboarding, windsurfing and having general family fun! I don’t know if any of this is helpful, I think you know Colorado better than I do (and I’m a native!). Have a great trip!1 point
-
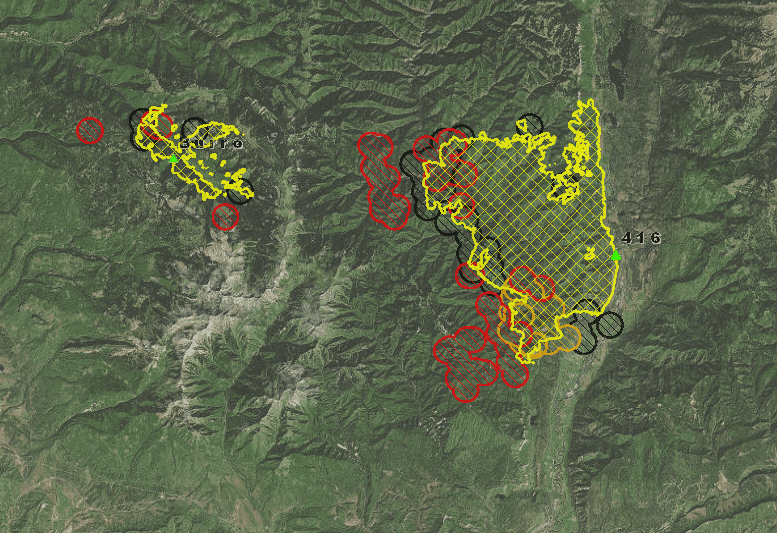
If we're in or headed to an area with active wildfires, we use the GeoMAC website for monitoring conditions - it's really useful. Use the main map to locate individual fires, then use the drop down menus on the upper right to zoom in. You can then use the data layer menu on the left to display all sorts of info. In particular, if you compare the fire boundary with the satellite detection layer, you can get a good idea of which way the fire is headed. For example, the 416 fire looks like it started along hwy 550 and is headed west and south. [attachment file=Screen Shot 2018-06-13 at 9.17.12 AM.png]
1 point


-
Recent Achievements
-


")


")
")
