
ScubaRx
-
Posts
3,307 -
Joined
-
Last visited
-
Days Won
173
Everything posted by ScubaRx
-
 In the early days Oliver toyed with the idea of different colored trailers. They abandoned that idea due to the difficulty of painting every exterior item to match and the additional cost. However, there were two early Oliver's that were painted and sold. Hull #010 is red and currently owned by our forum member bshaffer. I'm not sure of the Hull # of the other (probably #009 or #011) but it was black and dubbed the "Gamblers Edition" due to the unique graphics and interior upholstery. After construction, both of these units were loaded onto a flatbed truck and shipped out West (Jim Oliver has a house in Lake Havasu, AZ) where they were ultimately sold. They also had a partially painted hull section that was blue.
-
Ditto, you can barely feel the mark with your fingertip.
-
Larry (mountainborn) and Betty Harmon bought the very first Oliver (Hull #005) sold on 11/08/2007. There were four units produced prior to this one and three of them were ultimately sold to other owners but when Larry and Betty drove out of the factory nearly ten years ago pulling the first one, they started the parade that we've all joined since then. Of the members still active on our forum, Paul and Sherry (seadawg) left with Hull #012 on 02/22/2008, then Pete Marks (bugeyedriver) in Hull #014 on 03/24/2008. We bought Hull #026 on 06/20/2008. All of these hull numbers were for the original 17 (now called 18.5) foot models produced in their first run and they continued until the last unit (Hull #044) was sold on 08/21/2009. During the last few months of the original production run, the molds for the Elite II had been bought with the intent to begin production of a larger model to augment the lineup with the choice of two sizes. As we all remember, the downturn in the economy in 2009 caused many businesses to fail and Oliver Travel Trailers made the very difficult desicion to cease production until better times could prevail. The plans for the larger trailer (and more expensive) seemed destined to failure. Three units were produced in 2009 and 2010 - Hulls #043, #045 and #046. One unit was sold to a customer (Hull #045) and became the only unit delivered with the official model year of 2010. The other two remained in the possession of OTI although Hull #043 was ultimately refurbished, updated and sold during the present production run. As a side note, no Oliver employees were laid off or lost their jobs because of the ceasation of trailer production and many rejoined the trailer line when it restarted. On 03/03/2013, I was contacted by (then production manager) Robert Partee and asked if I would be interested in owning one of the "big" trailers. He knew we were looking for something larger than our 17 foot Oliver and after talking for about 5 minutes with him explaining that the plan was for restarting production building only the larger unit, I told him I would take the first one they built. Their plan was to build three "prototype/demo" models to get back into the swing of things. During the production of these three, my unit was begun somewhere around the end of the year (2013). Since none of these four trailers had been sold, and upon completion of our unit, I was given my choice of the VIN's that were available (#'s 047-050.) I choose Hull #050 because that was the year I was born. Every member (present and future) owes you a debt of gratitude for your initiative and inventiveness on this modification. I had mine done at the factory during the "eclipse weekend." Thank you very much. The brakes have been wonderful. Not too difficult to install, but obviously more than some folks would want to tackle in the driveway. I have found that they are much more aggresive than the drums, requiring a lesser setting on our brake controller to keep them from all locking up and sliding down the road. Incidentaly, I discovered the locking up when I glanced in the side rear view mirror during a reasonably emergent stop to the side of the road and noticed blue smoke coming from under the trailer and two black streaks behind me. It surprised me and for a second, I could not figure out what was going on because I did not feel any abnormal trailer movement. We do not use any auxiliary towing equipment. Our Oliver's are truly VERY stable behind our tow vehicles. We do not use any axuallery towing equipment.
-
John, my 5200 lb axles were not the result of any changes by Oliver. Our trailer (Hull # 050, delivered in early 2014) was the first Elite II built for a customer. They were trying to get back into the swing of building trailers (after their 4 year hiatus) and had yet to decide on exactly what they were going to use for everything. At that time there were no standards for anything. During the build, I was allowed to pick and choose the components I wanted from the air conditioner to the (now standard) fold down center TV mount. I specified these axles as well as Michelin XPS Rib LT25/75R16/E 115/112Q LRE Tires and 12" brakes in order to make it as heavy duty as possible. The idea of assigning a GVWR was not thought up until after mine was completed and the assigned 7000 lb figure was based solely on the twin 3500 lb axles that they had decided would be standard. My stated 10,400 lb GVWR was entirely fabricated by me based on the same criteria they used, 2 x 5200 = 10,400. Our trailer, ready to travel with food, full fresh water tank, clothes, full 30 lb propane tanks, 3000 watt generator on the tongue and all the other stuff that I think I can't live without weighs well over 7000 lbs (no minimalist here.) I did swap the drum brakes for discs and installed the Dexter EZ-Flex system earlier this year. There are indeed 5 springs in each pack with a 1.875"clearance between the top of the 0.5" U-Bolts and the bottom of the frame. Like yourself, I have slight indention's in the bottom of the frame where there has been contact.
-
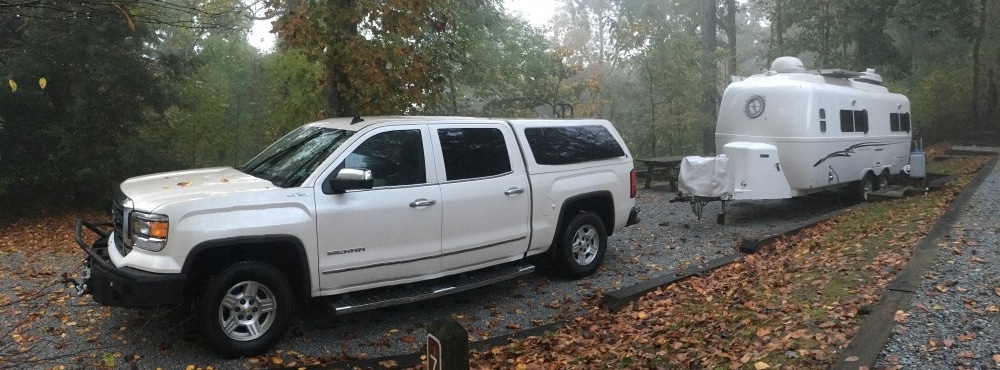
We have recently changed our tow vehicle to a 2017 Silverado High Country 2500HD w/the 6.6L Duramax Turbo-Diesel (445 HP/910 ft lb torque.) The Trailer Towing capacity is 13,000 lbs with a Gross Combination Weight Rating of 25,300 lbs (based on SAE J2807.)
-
At this point (0150 - 09/08/2017) Central GA and the Metro Atlanta area in general are expecting tropical storm winds between 40 and 60 mph with gusts up to 70 mph to occur starting about 2000 - 09/11/2017 (Monday). Based on the predictions as of this morning (Friday), I would be remiss to stop in Atlanta, rather, I would plan to continue West at least another 150 miles. My greatest worry would be the tornado's that are often spawned from these tropical storms. A 70 mph broadside gust of wind on your Oliver might not put it on its side, but a tornado would. Good luck and please stay safe...
-
Unless the method of mounting the battery tray has changed since Hull # 50 was produced in 2014 (and I doubt it has), the tray is not attached with machine bolts and nuts but rather large self tapping screws. These screws go through the tray frame and the fiberglass on the bottom of the battery box. If you go into the trailer, remove the cushions and hatch from the rearmost dinette seat, take a mirror and light and look at the underside of the box, you will see a 4 or 5 inch wide piece of diamond plate aluminum fiber-glassed into the bottom of the box. The screws go through this plate to hold the rack in place. No nuts, no bolts, just screws. You should be able to easily remove them and put them right back into the same holes to install a new tray. If this is how yours is constructed, it should be an easy fix. And, you are spot on about Richie Carroll being a super guy.
-
Very clever and tasteful. We like this.
-
Tom, Living in North Mississippi, it would be difficult for me to address the possibility of snow damage on our Oliver travel trailers. Around here an average snow fall will probably barely cover the ground and that might not happen every year. A really big snow might drop 4 to 6 inches and that might not happen every decade. Ice is another story altogether as it regularly brings down trees, limbs and powerlines. All that being said, if you can afford a carport, then by all means I can highly recommend that route. Not only does it protect from snow and wind in the wintertime, but also the rain during the rest of the year. A carport would also afford you protection from the sun and it's damaging effects on our beautiful gecosts. In addition, you do not have put forth the effort of installing the cover after each outing. All this obviously depends on whether or not you have the financial resources and room at your house for an enclosure and it assumes that there are no restrictions in your neighborhood against such. I am not sure if a marriage could stand the putting on and taking off of a cover too many times!
-
Several have asked about costs and a parts list. I installed disc brakes on The Outlaw Oliver this past March. I posted about it in my thread "Mods of The Outlaw Oliver." I chose to use the Hydrastar/Kodiak products and a list of all parts, their costs and where I got them is listed in the included pdf.
-
Distance between sink and stove - Standard or Sideways
ScubaRx replied to ShallowGal's topic in General Discussion
Tali and I participated in the original design conception for the Oliver Elite II. We had previously owned one of the original 2008 smaller Oliver elites with the stove turned vertically. I suggested at that time that the stove be turned horizontally to create more perceived counter space. That is how it became the "standard." I did not like having to reach across the front burner to the rear. All the observations made by everyone else are valid and it really boils down to which is your personal preference. The amount of counter space is exactly the same no matter which way the burners are turned. -
Wait. Don't toss those eclipse glasses yet...
ScubaRx replied to SeaDawg's topic in General Discussion
Crap, I've got the plumber coming that afternoon. -
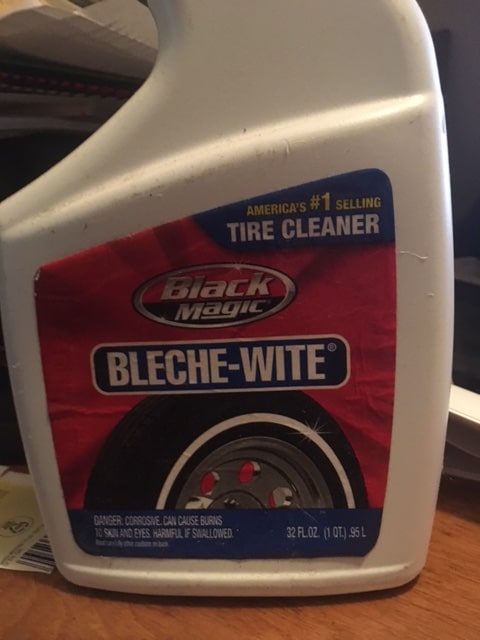
Our white vehicles sit under some kind of tree that provides a ton of shade in the summer but they also drop gallons of sap all over them. A year of so ago The Outlaw Oliver sat out of the garage for a month while I was working on it. The top got so much sap on it it was almost black. I went to NAPA and asked the guys for a recommendation and they suggested this. It did a good job of removing the black stains, although not without some scrubbing.
-
The storage inserts were available in the 2008 and 2009 models of the original Elites. They were constructed in two pieces of some sort of reasonable heavy ABS type material using a vacuum mold system and were then pop riveted together. During the conception and build of the early Elite II's, I questioned their absence and was told that they would no longer be making them due to the increased storage capacity of the larger trailers. Since they were not making the smaller Elite I at that time and had no immediate plan to do so, that idea was placed on a far back burner. As far as I know, that policy is still in effect, and I do not know if they are available for the current Elites. The lower compartments are arraigned completely different in the new models so the old molds would not work for them. However, they worked well in the early models if you used them to store lightweight items. If you filled them with about 40 pounds of canned goods, they then collapsed and fell into the well making it the dickens to remove. All that being said, it would be a good idea to revisit for the Elites since storage space is still at a premium.
-
You could opt for the twin beds. Ours are raised and have 13 cubic feet of storage beneath each one. No set up or take down. A dividing closure is doable. I have seen threads with people outlining the way to extend their dinette tops and realistically, how often will these teens be joining you guys? Usually we eat outside anyway when there's more than just the two of us. From what my AS buddies tell me, to get an AS tricked out with the solar and extra batteries will cost in the neighborhood of $10K. That assumes, of course, you are not looking at a used one already so outfitted. Good luck with your search, both Oliver and Airstream are the best in their respective classes.
-
ALASKA! Share your experiences & dreams
ScubaRx replied to ShallowGal's topic in Campgrounds & Parks
We are planning an Alaska trip in 2018, perhaps heading out after the Oliver Rally or thereabouts. -
We have reserved E-9 and will be wearing our bells.
-
2017 Elite II For Sale in Washington
ScubaRx replied to Mike and Carol's topic in General Discussion
That thread appears to have disappeared. -
Hey Rob, we just returned from most of those places. We found a beautiful Forest Service campground on the East side of Lake Cascade in Idaho. It is French Creek Campground. We stayed there about 5 nights. I think it was about $5-6. Lake was filling up at that time from the melt off from the Mountains further to the East. Should be up by now. There was fresh water available. We had led a group of 15 fiberglass trailers on a 3 week jaunt thru all 5 National Parks in Southern Utah, camping in several boondocking spots and some pretty nice campgrounds (none over $7-8.) We haven't been to WY in a couple of years. One of the other members is going soon but he stated that campsites were few and far between due to the coming eclipse. That's probably the case in most place along the path, but you guys shouldn't have too much problem finding a "wide open space" out there!!!! Good Camping
-
Short of setting something really hot on the counter top surface, I don't believe you could damage the fiberglass very easily. A close examination of our tops will reveal swirls and scratches due to wiping them off, but you would really have to look very closely to see them.
-
What type of cable is it. HDMI, RCA?
-
Fresh water tank modification, new suction line.
ScubaRx replied to Raspy's topic in Ollie Modifications
The regular Oliver sponsored rally is in late spring of 2018 (early May) in Guntersville, AL. I think a Western based rally would divide the population of owners by making them choose which to go to. Have it a little later and we could attend both. -
Mike and Carol and Pete too. They all live in your neck of the woods. You will not be sorry for any of those decisions. Retire when you're able and enjoy life. Buy an Oliver, travel and REALLY enjoy life. Our style of travel is exactly what you describe. We wander the country, boondocking, seeing the sights, especially the units of the National Park system, just taking our time. We recently got back from a trip of about 75 nights on the road. We were only plugged in for 4 of them. Life is good....
-
Tali and I both use a CPAP machine. When we were having the Outlaw Oliver built, I had 12 volt outlets installed inside the cabinets over our twin beds. I also plumbed a fitting thru the floor of the cabinets to attach our hoses to. I found that the commercial 12 volt cords were over $50 each and they had a proprietary plug that went into the machines. I went to our local home health office that provides our machines and supplies and asked if they had any old non-working power supply's. With two in hand (for free) I went home, cut the cords off, attached a 12 volt male plug and viola, free cords. We run both all night, every night with a draw of less than 4 amp hours.
-
IF you have a Blue Sky solar controller with a shunt installed (standard equipment before the Zamp changeover), or IF you ever anticipate installing a shunted battery monitor, THEN the wiring for the 4 x 6 volt batteries is incorrect. All negative leads MUST go the the shunt first in order for any monitor to be able to accurately measure the amps into and out of the batteries. Scott and I talked about this a couple of years ago. None of the trailers produced to that point were wired with the shunt first, but since they were in the "change to Zamp" mode it was never addressed. Since the Zamp system does not provide the amp in/out information, the above wiring is acceptable.