rideadeuce
-
Posts
389 -
Joined
-
Last visited
-
Days Won
19
Everything posted by rideadeuce
-
On Ollie Elite II. D35 bad. D52 good, with Alcan springs even better. 🙂
-
 You camp and learn. We were at my dad’s in southern MI this past week with temps dropping down in the single digits. Atmos 4.4 heat pump quit working immediately and the plug in electric heater was taken out during the last cleaning and forgot to put it back. Propane tank gauges were showing zero and the Truma water heater started blinking yellow. After turning off the water heater and Atmos several times and verifying propane level by weight we turned on the Suburban propane and stayed warm and cozy for the next 2 days without further problems. It is a learning experience every time you forget something or encounter something challenging out in the wild blue yonder. Part of the adventure! Glad you were able to find some AC for heat, redundancy is key .
 -
Trip to Michigan in subfreezing temps put the Atmos 4.4 heat pump to the test. 2nd night starting blowing cold air only and then shut off. After multiple restart attempts, turned it off and started up Suburban propane heater. Also, Truma water heater was not happy with the low propane pressure related to single digit temps. Not a win for cold weather camping. Waiting till we get back South and warmer weather to investigate the heat pump issue, etc. Thank goodness I decided to keep Suburban propane heater!

-
-
So about the same as a Dometic 13.5k AC on high powered by 12V DC.
-
Driving with AC on for a short period
rideadeuce replied to Wayne and Karen's topic in General Discussion
Very easily done. The Cielo Home app and others work great with the Atmos AC unit. Just have to have a compatible unit. You can monitor, change temp or mode, and turn on/off from the tow vehicle cab. I regularly make the journey from Nashville to the beach with the AC set to 72 degrees. Our two Welsh terriers have the best seat/bed for the drive down. We do have a 900 aH battery bank and usually have 20-40% left over sometimes more since the DC/DC charger and high output alternator install. -
Not sure how applicable smart glass would be for an Oliver trailer but the function is awesome. In the camper below, all the windows and bathroom glass are smart glass which can change from clear to opaque with a push of a button providing instant privacy. No tracks to clean or window treatments to manage. https://www.smartglasstech.us/city/usa-smart-glass-technologies-landing/ Changed the video to one without music. It shows the smart glass function but the longer videos show it’s use better. Also, linked made in USA manufacturer site that explains more about the technology. Best, M
-
Curious if you have the vent installed to allow air in when extending the hose with the terminal end closed. I would prefer not to use it if not really needed but my hope with the new system is to keep it always connected. Figured with the electronic black valve closed, I could always just crack the distal end open enough to extend, etc. What has your experience been.
-
The problem starts every time it starts back up! 😆 I know this is a very individualized thing but I actually like the unit and/or fan only running continuously, especially if it is quiet. It was the loud start and stops of the DP2 that woke me up during the night, etc. I am very hot natured and live in the humid SE. What Ron has figured out is better than the other options of timing out, manually shutting off the unit, or using the AUTO mode with no ability to refine temp settings. Hope everyone has a great weekend!
-
I didn’t think I needed this since already having the remote and other app control but I believe I am going to try it. Being able to more clearly refine the control is what we all want. Thx for sharing the product and evaluation. … now, where to place it? USB power makes things interesting.
-
For me, the Pebble Flow made in the USA is the most interesting and beautiful smart EV friendly TT. It has a ton of cool’s features and would be an awesome addition for an ICE or EV setup. My favorite features are the beautiful aerodynamic looks combined with all the new technology like smart glass, app controlled parking, auto camp set-up, magic hitch as well awesome design elements like room flip, huge fold out windows. Also great are Solar and EV importance shown in design like flat roof, integrated solar panels, power assist while driving with brake regeneration. A lot more of very innovative, forward thinking design implementations like off roof silent AC, No TV mounts, etc. Great use of space with room flip and dry bath. Kitchen with open window is amazing, ability to use water from kitchen outside and use of 2 burner induction stove outside as well. Great stuff for the person that loves the outdoors. Integrated rear hitch. Lots more! Video is worth a watch! And No I am not selling my beloved Oliver. Just appreciate innovation Best, M
-
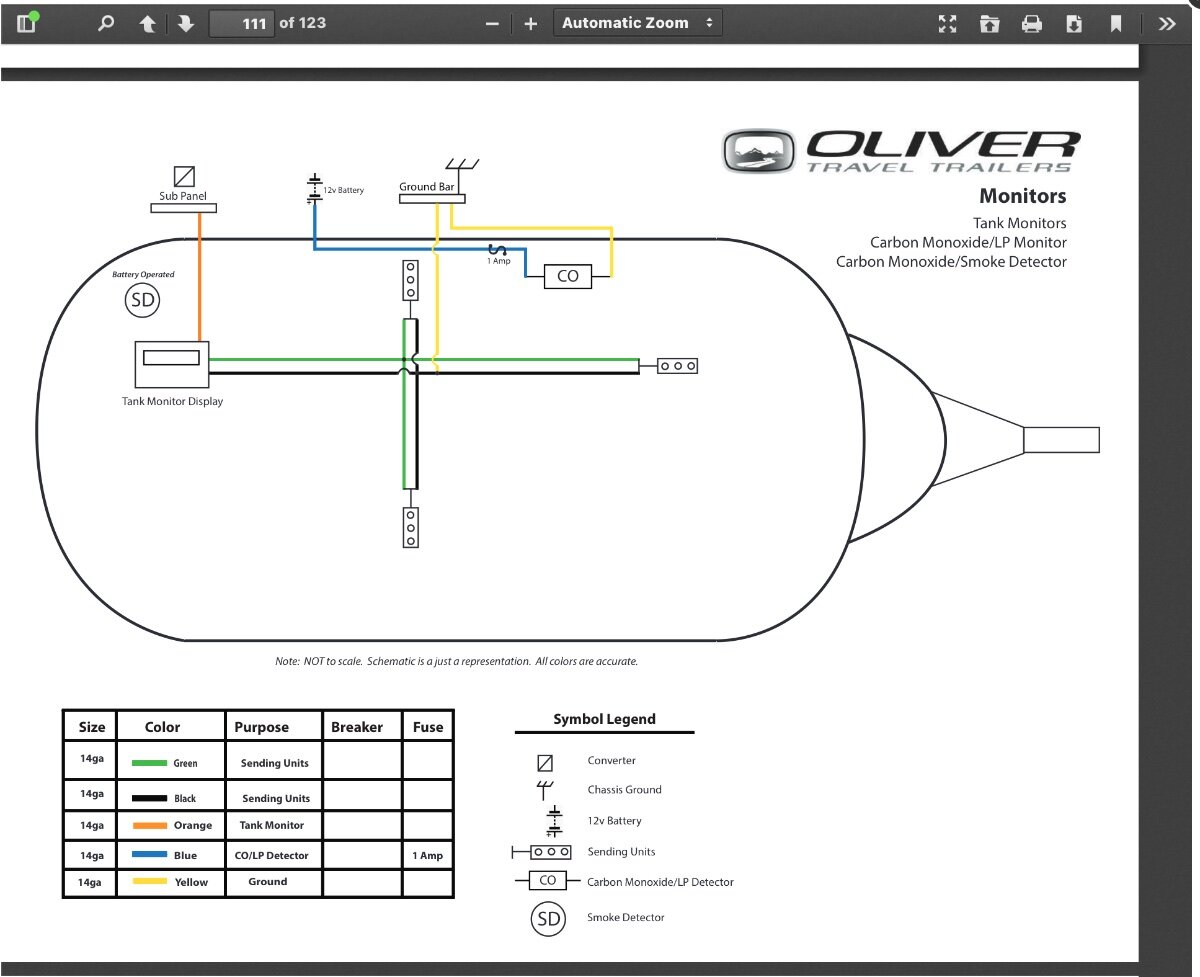
SeeLevel sensors integrated with Victron system
rideadeuce replied to rideadeuce's topic in Ollie Modifications
The red wire from the 4 pin connector, I believe. I am not an expert on this, always have to call myself. Where did you buy the new Seelevel panel? Vanlifeoutfitters was very helpful for me. I had actually got one of the 4 pin connectors loose stuffing it in the hole and finally after taking out and putting it back a couple of times got it back working. Also, the settings for the Ekrano were different than what is needed for the Carbo. Again, I would call Vanlife if that is where you bought the panel, very knowledgeable and helpful folks.
-
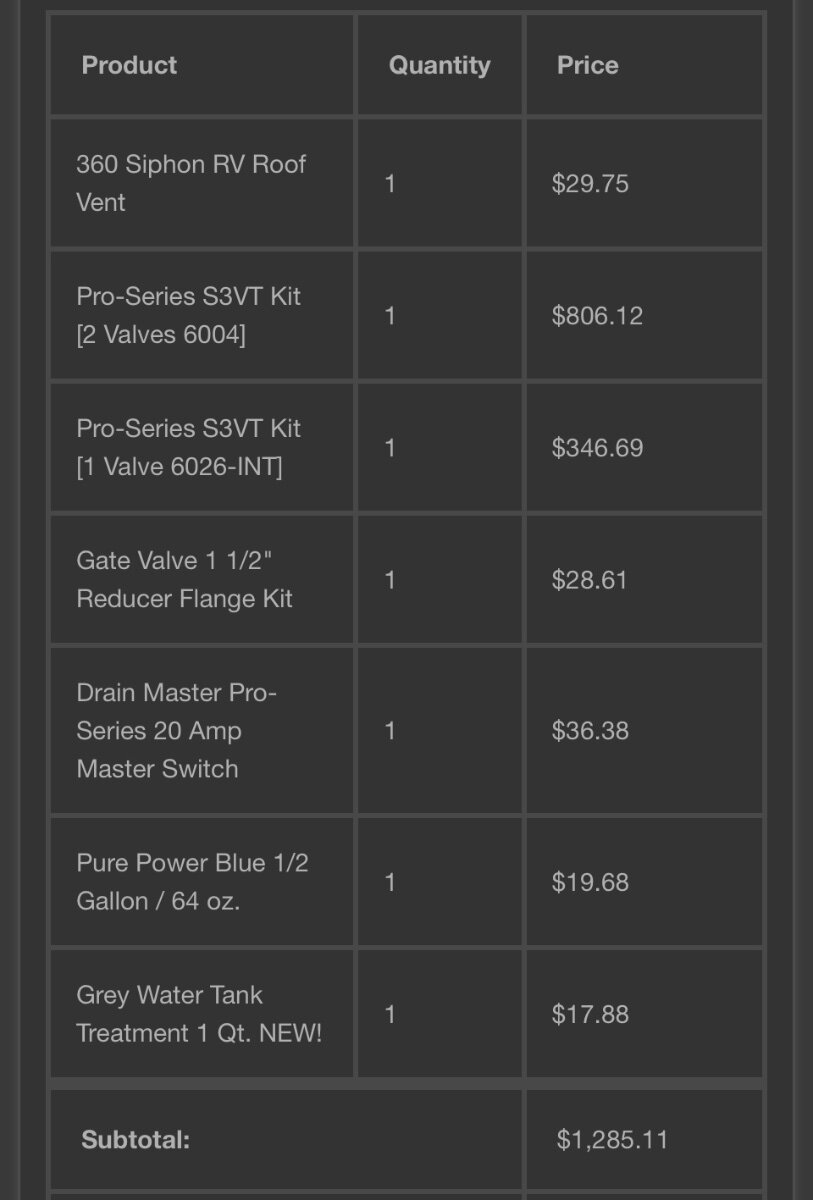
I believe the bundle is 6008 but what they told me to do was if you want the ability to control inside and outside order the double S3VT kit with interior and exterior panels. Ext is waterproof. Then order a single kit with just an interior switch for the grey cutoff plus the added reducer they sell. Hope that helps. Give me a min and I will upload the parts list on my invoice. Here it is: I added a few extra things that I wanted to try. M
-
Just talked with both Sharyl’s at Drainmaster.com, very helpful and knowledgeable. Sent them some pics/links and they think all 3 valves will fit. So I just ordered the bundle plus a 1-1/2 in reducer for the grey cutoff and a main cutoff switch. I won’t be back in town for a few weeks but sure look forward to the installation. Best, Mike
-
That’s awesome. I don’t know how I miss these things! Happy to know it will work easily. Now if the electronic valves work, it will be even better. Thx!
-
You seem to understand why I am so interested in this setup. It is on back order, so I believe it will be 2-3 weeks before it ships. But I will report back when I get it installed. I hope that the cam lock handles clear okay and that I don’t have to change the pipe length at all.
-
SeeLevel sensors integrated with Victron system
rideadeuce replied to rideadeuce's topic in Ollie Modifications
Yes, you have to order new panel from SeeLevel that will connect to Victron system. Easy to switch out. The chart below may be helpful.
-
They make an adapter to fit 1 1/2 in pipe. Thanks for original link.
-
Seriously looking into upgrading the cable pull valves to electronic. Despite regular maintenance the black handle pull has always been terrible. I have already ordered the cam lock waste connector and 20ft sewer hose that collapses to 6ft in length. They also sell an adapter if you need or want to use the old system. Love the built in features like 4:1 compression, see through terminal end with cutoff. https://drainmaster.com/rv/product/waste-master-20-sewer-hose-system https://www.youtube.com/channel/UCFtTb2fHr9X3xyOsqr6QIZw I think from the above information and more research the drain master electronic valves could work on all three valves. But still investigating. If so, it would be a huge upgrade IMO. As my seven year old says emphatically. Mike
-
Great job MIke! One of my favorite up-grades. Much more efficient unit boon-docking and works without worry. I like the fact that if I have to do anything, it is turning the setting down to keep things from freezing. Again, the vents look awesome. BTW, I did have the door come open on our last weekend trip. If you have the door loaded up make sure to use the locking clasp. Best, M It was good to see you at the rally.
-
CGI guys are awesome! Kids always enjoy seeing their chickens and the eggs were tasty they gave us well. Great crew. The glidecoat protection and provided ease of keeping the Oliver shiny and clean is invaluable for me. So much, I had them do my Tundra and Jeep as well.
-
IMG_3418.mov Wishing the rain would go away. IMG_3422.mov
-
The new technology of the 2025 Ramcharger could be a game changer… ChatGPT: Does the 2025 Ramcharger need to recharge when the battery and gas has been depleted? Answer: “ No, the 2025 Ram 1500 Ramcharger does not require a public charger when both the battery and gas run out. It's designed as a plug-in hybrid with a 3.6-liter V6 engine acting as a generator to recharge the battery. This allows it to operate on electricity for a significant range and then transition to gas-powered operation when the battery runs low. Here's a more detailed explanation: Plug-in Hybrid System: The Ramcharger is a plug-in hybrid, meaning it has a large EV battery pack and a gas engine that acts as a generator. Generator Function: When the battery depletes, the gas engine starts a generator that produces electricity to recharge the battery, effectively eliminating the need for public charging stations. Electric Range: The truck has an estimated 145 miles of pure electric range. Combined Range: With a full battery and gas tank, the Ramcharger targets a combined range of up to 690 miles. Charging Options: While it can be plugged in to a DC fast-charger or use its onboard generator, it doesn't require frequent or long public charging sessions. “ The short answer is it is a powerful new technology that has quite the range even while towing. It is not reduced by 50% like the Tesla Cybertruck, etc. SO don’t count out EV trucks as tow vehicles. It only needs a refill of petrol just like any other gas or diesel truck but it is to power the generator to charge the batteries not the drivetrain. From the RAM-TRX forum: The Ramcharger combines a 92 kilowatt-hour battery pack with an onboard 130 kilowatt generator powered by a 3.6-liter Pentastar V6, according to the company. The upshot is a targeted 690 miles of range in a truck that promises 663 horsepower and 615 pound-feet of torque while it manages a 0-60 mph time of 4.4 seconds and towing of up 14,000 pounds. This is the way to go with an EV. All the benefits of the electric motor torque, power and daily convenience without the disadvantages of range limits and charging headaches on long trips.
-
I replaced the Dometic 3 -way with the Canadian made Nova Kool R5810 with the tried and true danfoss compressor and it has been a terrific upgrade. So much so, I seldom check the temperature any more. One less headache. Good luck. There is some great information on installation from other forum members. Although, I would try to dive deeper into why the fridge is not cooling as others above have stated. I don’t think it would be that much to have someone do some basic electrical diagnostics. NOVA KOOL R5810 Selection and Installation (great PDF attached at the bottom of linked info) Guide link:
-
Site G07 Hull #308 Mike, Net and kids. Brentwood, TN Dogs: Roco and Mimi (Welsh Terriers)
-
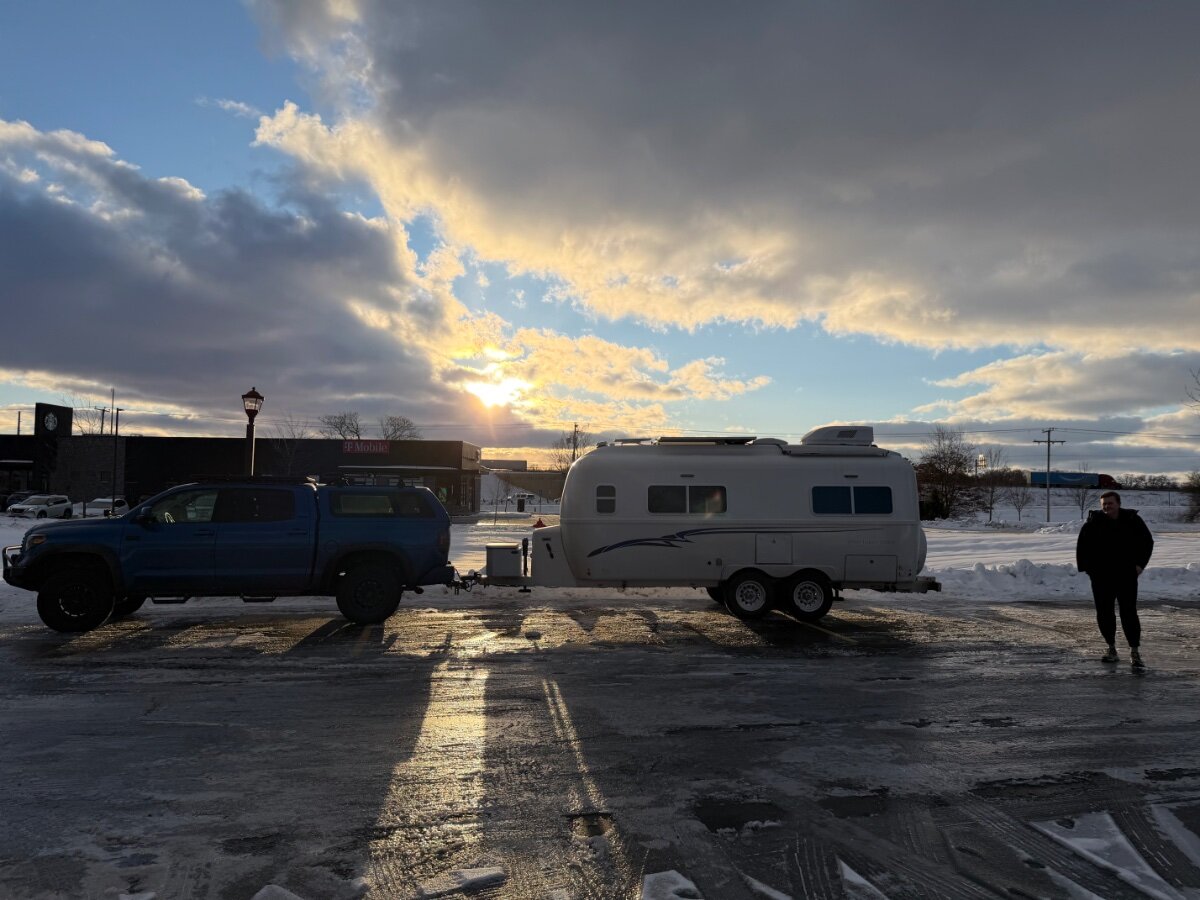
First Spring trip.
We went down with the kids to visit my nephew last night in Birmingham, AL. 3 hr drive. The Oliver is very well suited for city boondocking. We parked with no hookups at his apartment complex in a great spot that very few TT/TV combos could have reached. We had 100% batteries (920 Ah) when we arrived due to the solar and DC/DC charger working great finally.
During the night, it dropped down into the low 40s. We had the heat set at 68 AUTO on the Atmos and I have to say between the quiet and new Tochta mattresses it was probably the most pleasant night I have spent in the Oliver. Comfortable and quiet. Great combination.
When the heat pump was on it was pulling around 98 amps or 1300 W. Woke up with 77% battery left.
I wanted to check out the propane use with the new (2) 30 lb aluminum tanks but will save it for another trip. BTW, filled them yesterday and only got 7.2 gallons in each before the safety pressure valve kicked in. I was hoping for 8 gallons. But they sure felt lighter and it we easier loading them into the new mounts. No rust to look at too!
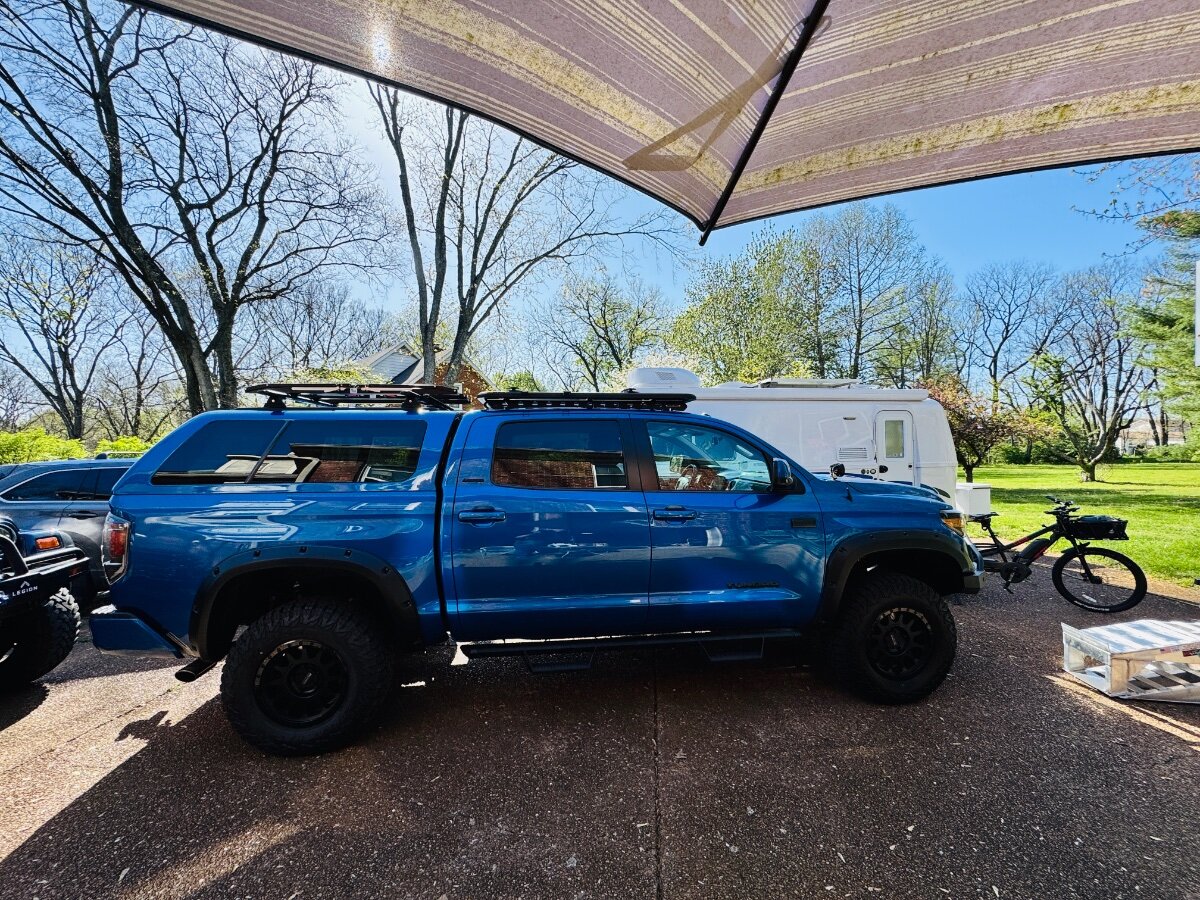
Also, another side note to any Tundra owners. The Dobinsons heavy duty leaf springs are a huge upgrade for pulling the Oliver. Pulled like it was riding on a cloud. Interestingly, the hitch tongue weight never read more than 450 lbs.
Looking forward to annual glide coat application by CGI next month. Since my camper lives outside this has been a game changer for keeping it clean and shiny. Shoulders don't hurt so much.
All good news this morning, after months of tinkering.
Get out there!
Mike


.thumb.jpg.e34bf01ef7f7d5e99ad31856d45afbeb.jpg)