Townesw
-
Posts
553 -
Joined
-
Last visited
-
Days Won
22
Everything posted by Townesw
-
Pulled about 1000 miles with the Rockstar Commercial Tow Flap. I’m pleased with it so far. I’ll post a better picture later.

-

Changing tires in the wild - lessons learned
Townesw replied to John and Jodi's topic in General Discussion
The wire wrapped around the axle is probably the bead wire. I worked in radial passenger and light truck tire manufacturing for 32 years. -
Has anyone tried to use 4 year old Dicor butyl tape BT-1834-1? Does it dry out or get brittle? It has never been out of the plastic bag it came in. Website tech specs say 18 months - 2 year shelf life. @SeaDawgI know that you use butyl tape. What has been your experience? Thanks, Bill
-
Oliver Technical Support says Oliver is not using a combination smoke / carbon monoxide detector now. Only using a smoke detector First Alert SMI100RV. https://www.firstalert.com/products/rv-approved-battery-operated-smoke-alarm
-
First Alert says they aren’t making the model currently in my Oliver. The model in my Oliver is an SCO5RVA. It is nearing end of life. SCO5RVAs are still available online but I suspect they are NOS (New Old Stock) which means they are already a few years old. I don’t want to buy a NOS unit that could be already nearing end of life. That’s why I want to know what detectors Oliver is putting in the newer trailers. If I did find an SCO5RVA on the shelf I would look at the mfg. date before I bought it. I got bit on an LP/CO detector that I bought online from a reputable RV Supply house a few years ago. It had been made the same year as the one I was replacing. https://support.firstalert.com/s/article/rv-smoke-co
-
What smoke/CO detector is Oliver using in the 2025 & 2026 models. Note that I’m not asking about the LP/CO detector under the dinette. Thanks Bill
-
@FloraFauna Thank you for the feedback. That is the exact product and application that I was looking for feedback on.
-
@HDRider Do you have the “Commercial” model or the (non-commercial?) model?
-
Anyone using a Rockstar Commercial full width behind the axle tow flap with cutout for diesel exhaust? What truck do you have it on and does it work well? I’m not interested in any other brand or style. Bill
-
NO BRAKES ; 2019 Oliver Elite II-Hull #448
Townesw replied to BoondockingAirstream's topic in Mechanical & Technical Tips
I’ve not read the entire thread. @BoondockingAirstream when you apply the brakes in the tow vehicle do the brake lights light up on the rear of the Oliver? Bill. -
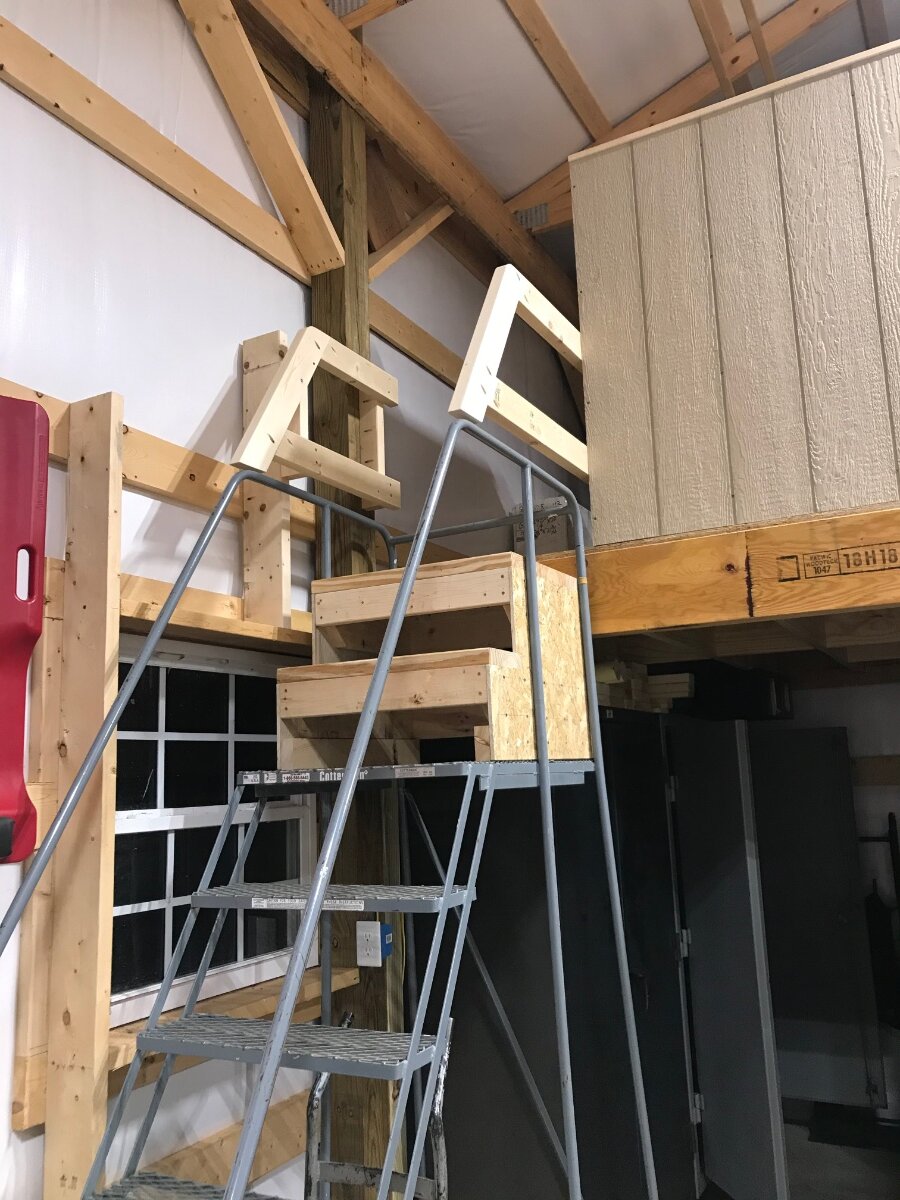
Walking the Plank with the “Little Giant”
Townesw replied to Patriot's topic in Mechanical & Technical Tips
I can stand on the platform, lean on the handrail, and reach the center of the roof. Doubles as stairs to mezzanine in shop.
-
Have you added more fresh water to the tank since you noticed the drip? If you suspect that the fresh water inlet check valve located under the basement floor is not seating you might try adding fresh water to see if it flushes out debris before you replace the check valve.
-
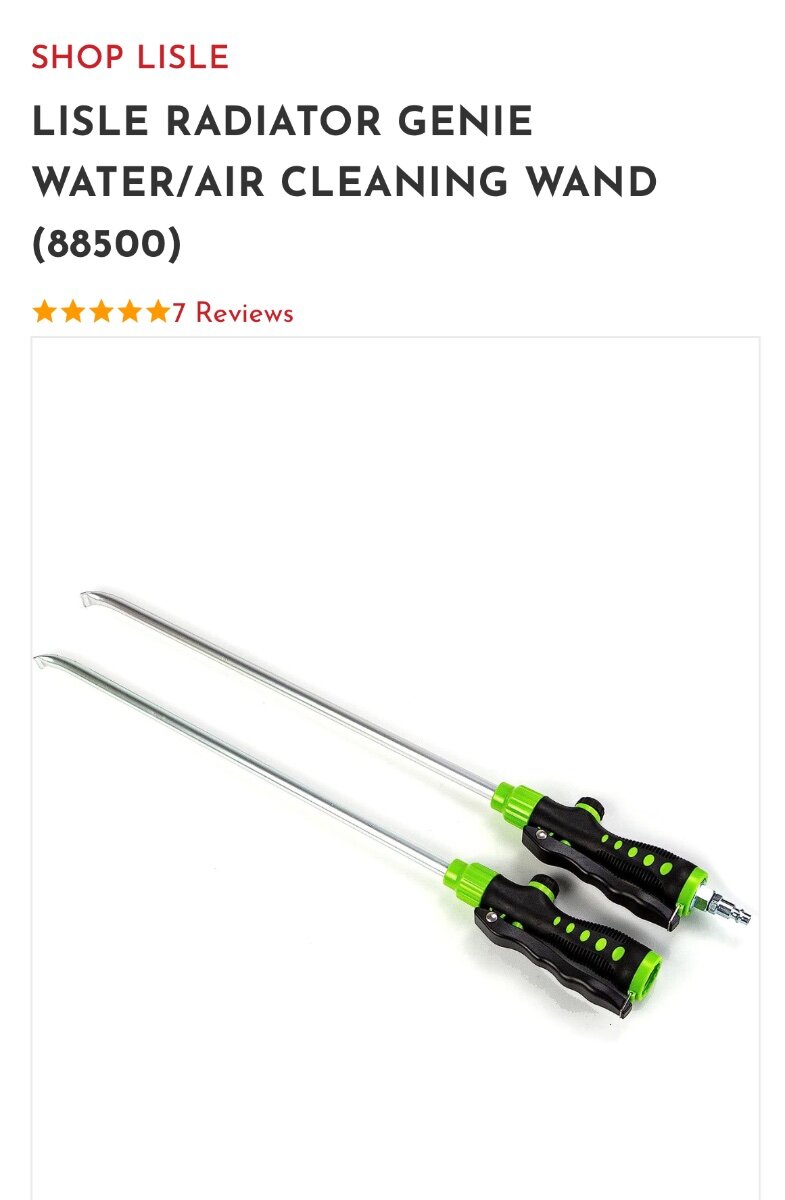
Do you move your trailer or is it set up in a semi permanent location? The reason I ask is it seems like I read one time that you were a campground host. If you are set up semi permanent you might consider using a wand and washing the bottom side of the top (inside) of your black tank to remove anything growing there that might be creating a smell. I have done this without making a mess by stretching a piece of clear plastic over the rim and sticking a flush wand through a small hole poked in the center of the plastic. I used the water wand out of this set and “flushed the s..t” out of it. https://www.jbtools.com/lisle-radiator-genie-water-air-cleaning-wand-88500/?wi=off&gad_source=1&gbraid=0AAAAADsRHpMRXm-qFPZ7YImI7C72eLsmp&gclid=Cj0KCQjwlvW2BhDyARIsADnIe-J2zOxhEo0lRORzmKQs5As-Ci31ib8zUwlffYUqKpuoGVDvXd0Air8aArl6EALw_wcB
-
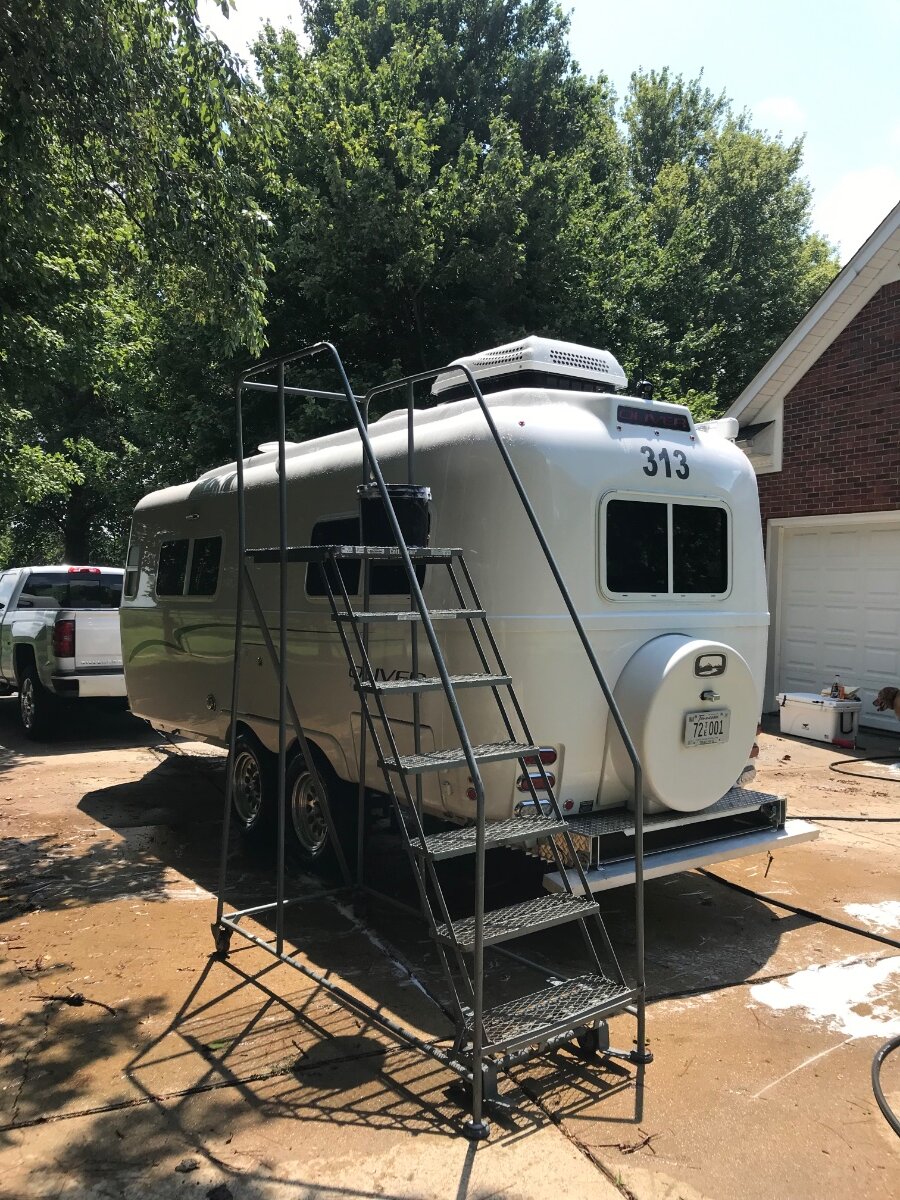
Street side rear on hull 313.
-
Dissolvent for neoprene rubber damn below awning?
Townesw replied to routlaw's topic in Mechanical & Technical Tips
Go to local auto parts store and get a can of 3M adhesive remover https://www.3m.com/3M/en_US/p/d/b40070712/ Or order a can of ASI 0240 https://americansealantsinc.com/product/asi-0240/ -
Here’s another Lisle product that I am using now to pack bearings. You fill it with your grease gun through the zerk on the stem. A lot less waste than packing in your hand using grease out of a tub. https://www.lislecorp.com/specialty-tools/handy-packer-bearing-packer IMG_2453.mov IMG_2454.mov
-
I’ve used Mystik JT-6 since the trailer was new. I use it to pack the wheel bearings also. It’s what they were using at the factory when we picked up hull 313 in March 2018. I think you can get it at TSC. Use a good grease and use it often.
-
Look under street side bunk on the battery box end. Thanks @mossemi
-
HELP! Bad smell from under dinette seat
Townesw replied to NHBoomers's topic in Mechanical & Technical Tips
@Boudicca908Pry off the 4 plastic caps, remove the screws, cut the caulk around the insert using a plastic razor blade. If you intend to remove the insert be sure you have everything on hand to replace it. Keep in mind that the caulk will need to cure for a certain time before it can be wetted. I have taped a piece of plastic over the hole in order to use the shower before I replaced the insert. -
HELP! Bad smell from under dinette seat
Townesw replied to NHBoomers's topic in Mechanical & Technical Tips
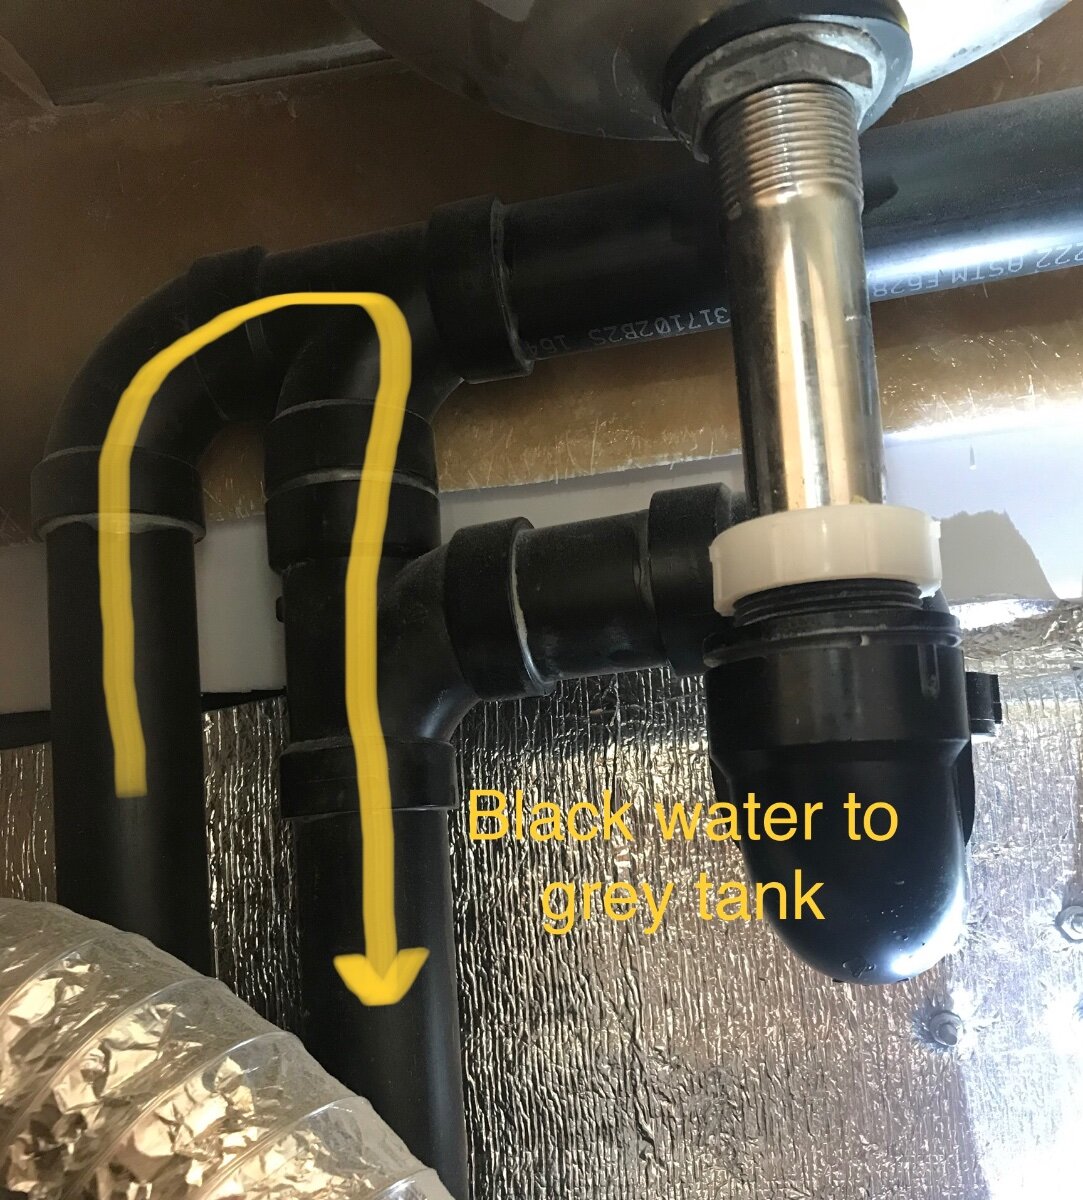
There has been at least one owner (edit: more than a few owners) who forgot and left their black tank flush running. The water filled the black tank and then flowed over and filled the grey tank through the venting under the bathroom sink. The water then came back up through the shower drain, filled the shower pan, then flooded the cabin. If this has happened to a trailer I don’t see how you would ever completely eliminate the smell. I would ask the previous owner if this happened to your trailer. Read this thread https://olivertraveltrailers.com/forums/topic/3447-left-black-tank-clean-out-hose-on/
-
HELP! Bad smell from under dinette seat
Townesw replied to NHBoomers's topic in Mechanical & Technical Tips
Battery gas? Have you looked for leaks in the battery compartment? -
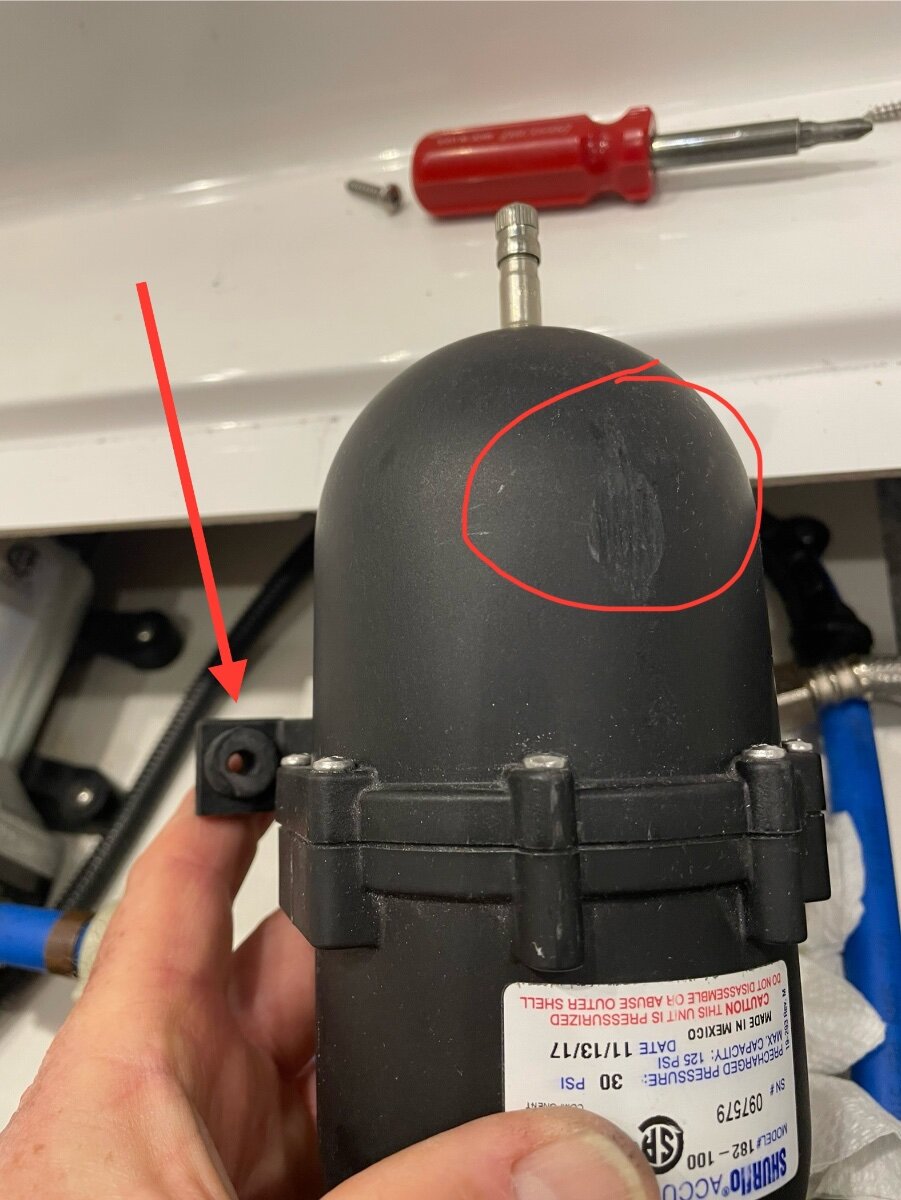
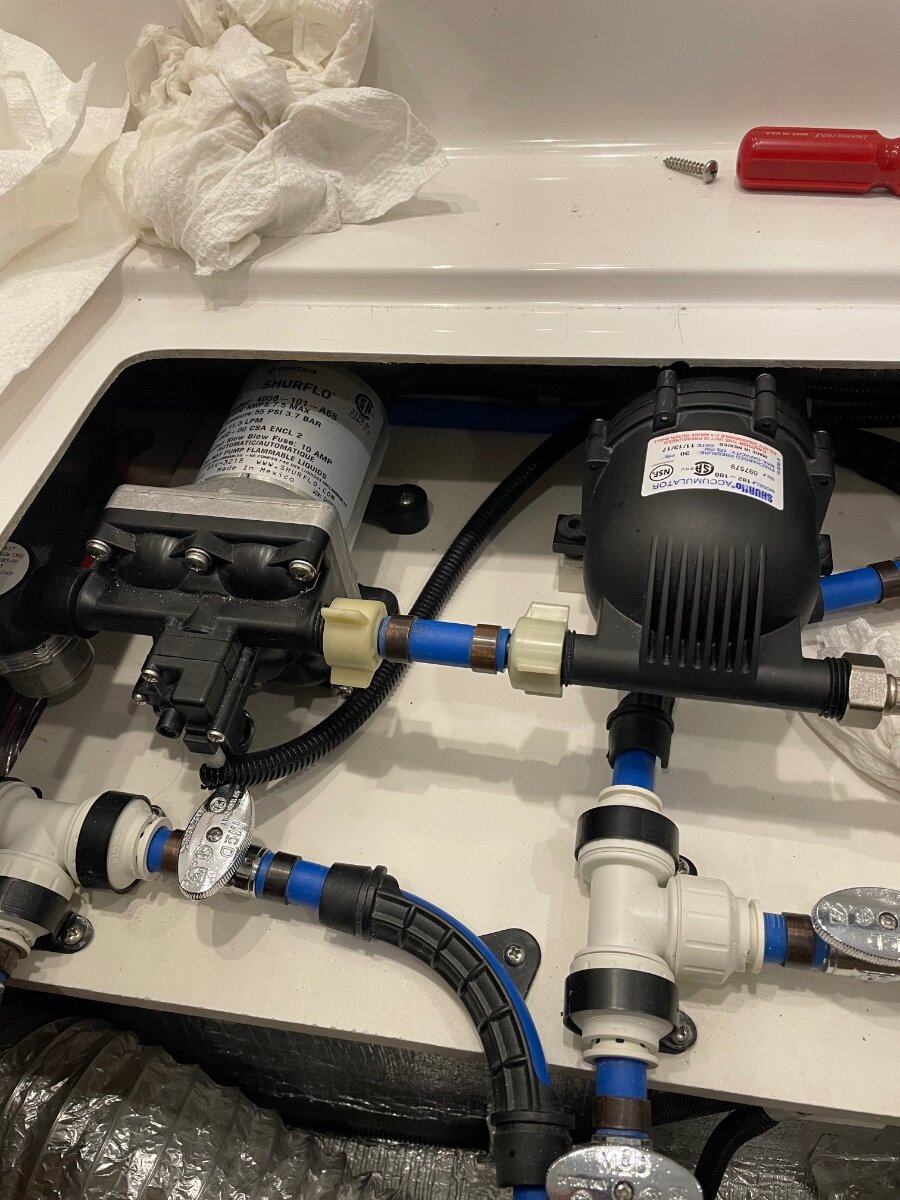
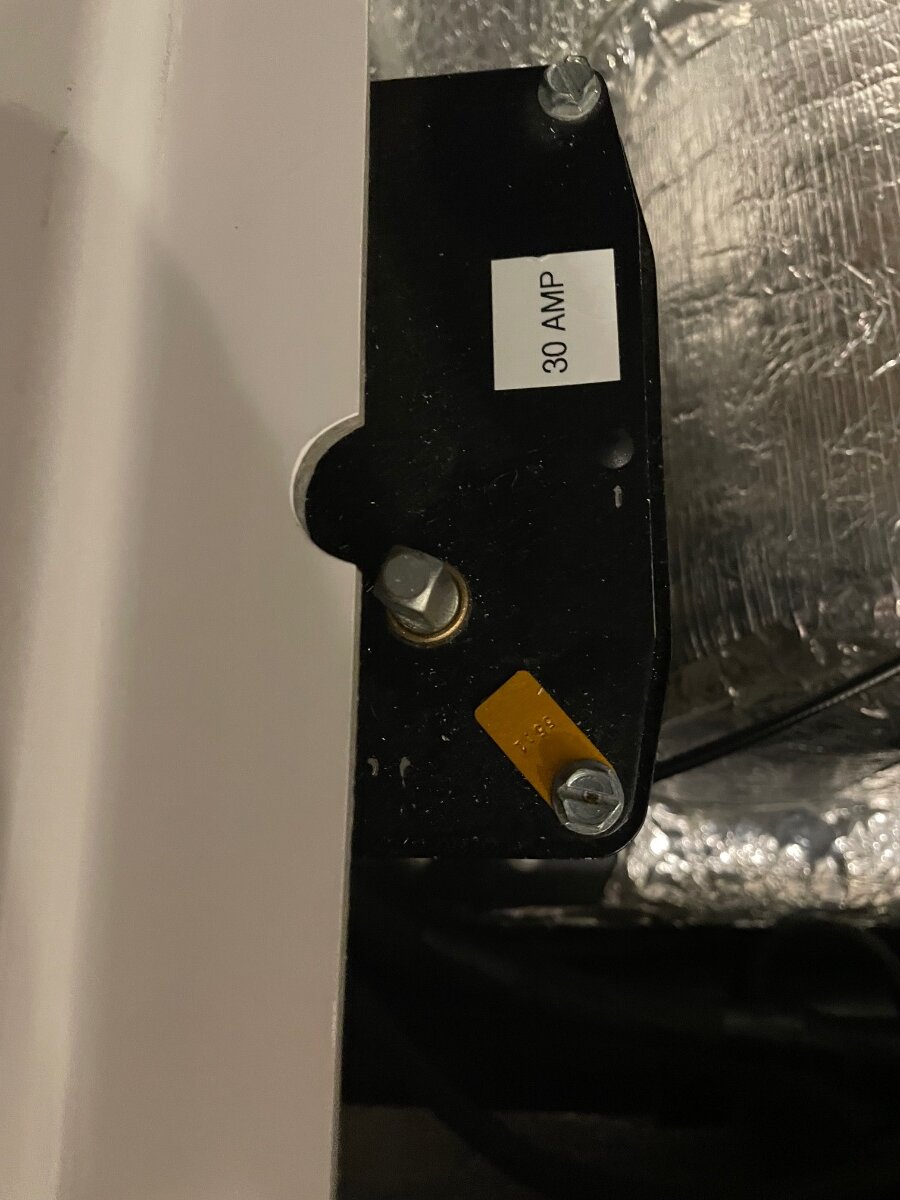
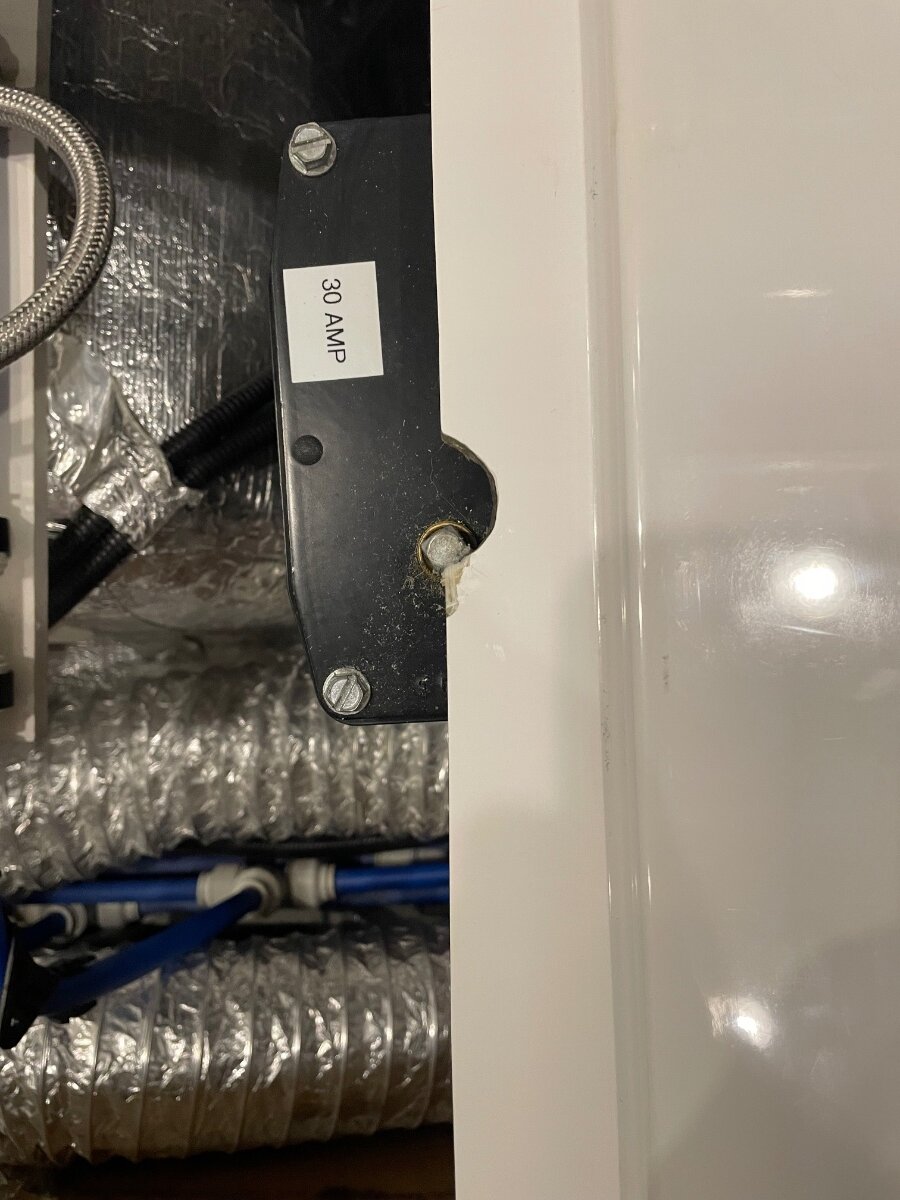
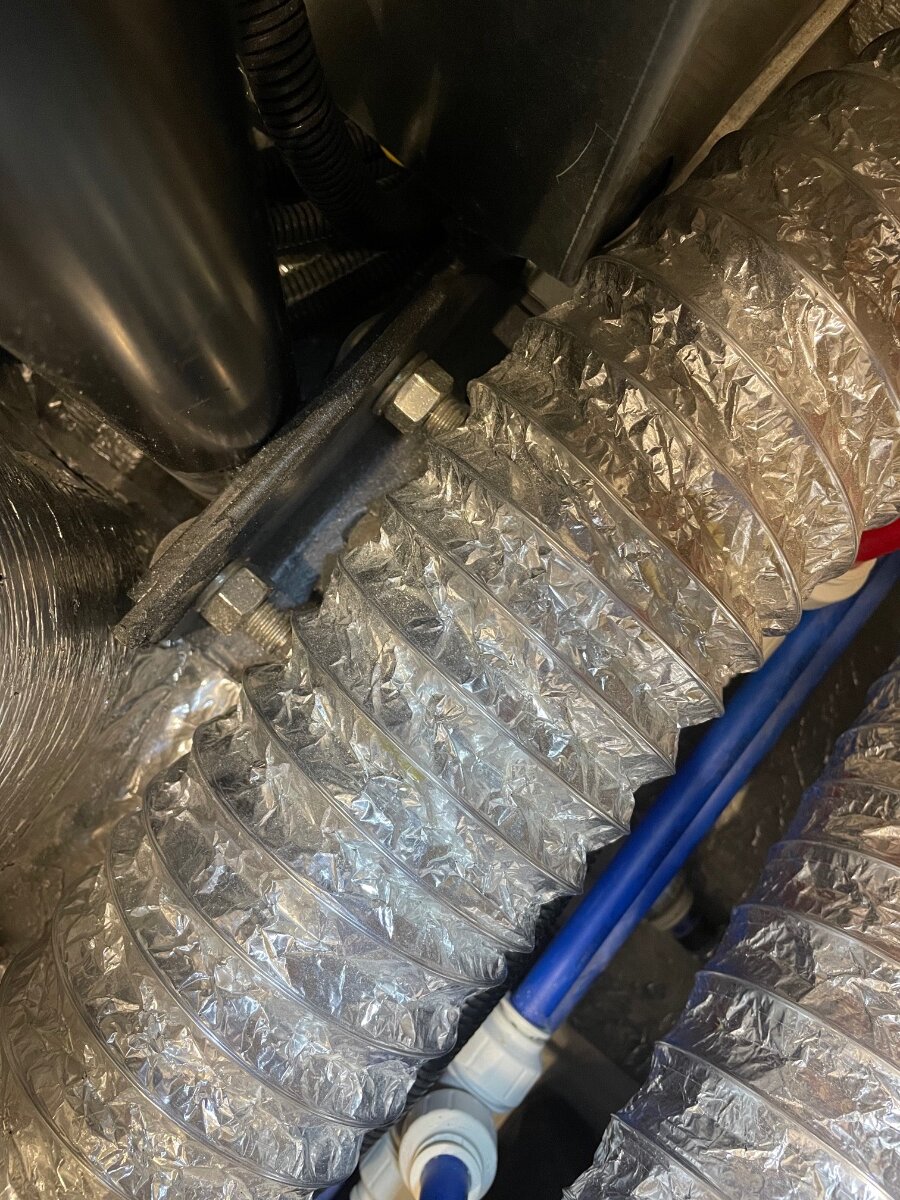
UPDATED : Check your accumulator and other stuff
Townesw replied to Townesw's topic in Mechanical & Technical Tips
@jd1923 What is the stuff attached to the Simpson Strong Tie? Have you replaced the quarter turn valves with solenoids? -
Summary: make sure your accumulator is not rubbing against the bottom of the curb side bunk. Check the cutouts above the rear jacks. Check the duct under the curb side bunk. I noticed black dust on the board that the water pump and accumulator are mounted to. Turns out that the pump, piping, accumulator, valve, etc. assembly doesn’t really fit together well but it is screwed to the board anyway. The misalignment between the pump and accumulator caused the rubber bushing in the mount on one side of the accumulator to become dislocated and the accumulator rubbed against the bottom surface of the curb side bunk. I caught it before it wore through. I also noticed that both cutouts to access the studs to manually operate the rear jacks don't line up with the studs and would have made it hard to manually operate the jacks. I’ll enlarge these later. Also the 2 bolts on the rear curb side jack could rub through the heater duct.
- 9 replies
-
- 12
-

-

-

-

-
If you stay at the campground in Grand Marais drive to the end of the Gunflint Trail and back.
-
Truma decalcification process rinsate
Townesw replied to Townesw's topic in Mechanical & Technical Tips
I received an MSDS from Truma. For those who are interested, see Paragraph 13 on page 7 of the English language version. I think I’ll dump it in my gravel driveway rather than put it in my septic system. truma-watersystems-aquago-decalcification-tablets.pdf