Townesw
-
Posts
553 -
Joined
-
Last visited
-
Days Won
22
Everything posted by Townesw
-
@mossemi OR anyone else that has done this modification, do you have the name and model number of the hatch that you used?
-
@rideadeuce Is the “5” in 5000 a raised or a stamped number?

-
@rideadeuce Hull 313 has the gusset
-

Leave Black Tank Drain Valve Open When Flushing!
Townesw replied to Rivernerd's topic in Mechanical & Technical Tips
I stand outside beside the trailer while filling the black tank through the flush valve. You can hear the water spraying inside the black tank. When I hear the water level in the black tank rise above the flush valve I leave the water running and just pull the black tank dump valve. I do this 2,3,4 times or as many times as it takes until I see clear water and no floaters in a clear fitting at the terminal end of the sewer hose. Only then do I turn off and disconnect the flush hose. Never had a problem doing it this way. Sometimes I delay pulling the dump valve a little just to make my wife hollar at me “Ok OK OK DUMP DUMP DUMP!!” -
Read my posts in this thread for a no-drill install of a new CO/Propane detector.
-
I think they are more of a gimmick than actually a device to chock the trailer. Nothing chocks better than a big chunk of wood or rubber. I don’t think they do much to stabilize the trailer, they are just another step in setting up and taking down, and they are just something else in the way. The simpler you make the process the better.
-
You might consider removing the decorative hub caps altogether. This will allow you to check wheel hub temp using a non contact IR thermometer or by hand. You can also watch for a loose bearing cap. You can also adjust wheel bearing play without having to remove the tire and wheel assembly. I don’t use the x-chocks anymore either.
-
LED Lights Buzz or sound like night-time crickets
Townesw replied to Wayfinder's topic in Mechanical & Technical Tips
@NandNPNW Read this -
I have a lot of stuff in my shop. I’m getting rid of a lot of it but I still have to put our Oliver in an exact place to maximize space and be able to move stuff around it. A few years ago I made marks on a line parallel to the side wall with a paint pen then placed soccer cones on the marks to guide me while backing, keeping the tires close to the line of cones. After the trailer is in place I store the cones an a shelf by the door. Saves a bunch of time when storing the trailer.
-
I use these to get hair out of traps. https://drainweasel.com/ I throw them away rather than clean them. I keep a 3-pack in the Oliver and at home. The kids even got them in their stockings one Christmas🎅🏻 Like the old saying goes “Unclog a man’s drain and you help them that day. Teach a man to unclog his own drain and you help them for a lifetime.”
-
I’m not saying my hull moves on the frame, I’m saying my hull flexes. My bolts are tight. If I were to stand beside your trailer or any other Oliver I’m going to bet all of the hulls flex just like hulls 92 and 313. My point is you can make the frame as immovable as possible and you’re still going to have movement in the cabin due to flexing of the hull. I’m done.
-
I asked this as a rhetorical question. I’m not concerned about the movement because I think all hulls have it. I’m surprised that apparently no one else has seen it or has been out to see if their trailer has the movement since I posted my video. One can use all kinds of jacks, chocks, braces, voodoo, magic, etc. but you aren’t going to get the “Ollie Wobble” out of your Ollie. Hence my comment “You’re chasing your tail trying to make it “non wobbly”.
-
Has anyone else looked at their Oliver and seen this movement? Surely hulls 92 and 313 aren’t the only ones that exhibit this condition?
-
Pictures under the bathroom sink. When water in black tank can’t go out the dump valve it fills the black tank then goes up the black tank vent and down the sink drain to the grey tank if the back flow valve is open View looking down at top corner of black tank and sink drain going under shower View looking at plumbing under vanity adjacent to inside of front wall Path black water takes if black dump valve is closed and water is still filling black tank When water from black tank fills the grey tank it comes up through shower drain. If back flow valve is closed it doesn’t fill grey tank but comes up through shower drain anyway. Either way nasty stuff.
-
@ScubaRx, et alia: Watch video. Disregard cicadas and dog panting. Note movement of body relative to frame. It is not a “distance from wheel skirt to lens vs. frame to lens” optical illusion. Check your Oliver and tell me what you see. I’ve seen it on John Roemer’s hull 92 and my hull 313. I bet they all do it. You’re chasing your tail trying to make it “non wobbly”. IMG_2653.mov
-
In summary, the fiberglass body is not a rigid structure and the attachment of the body to the frame is not a rigid connection. I struck up a conversation with John Roemer, aka Raspy on this forum, at the 2019 Rally regarding the degree of movement felt inside the Oliver. We were sitting beside his Oliver and he was showing me the modified jack stand that he used in an attempt to reduce wobble by reducing the extension of the rear jacks when his wife, a very petite lady, entered their Oliver. While watching the frame area and the right rear jack atop the modified jack stand we noted how much the fiberglass body moved. We asked her to exit and re-enter and to move around inside the cabin and noted that even though the frame was stationary there was considerable movement in the body. I have used x-chocks between the tires and jack stands under the front corners and even though I can reduce the wobble I cannot eliminate it due to the inherent movement of the non-rigid fiberglass structure and its method of attachment to the aluminum frame. We have become accustomed to the movement and now set up with as little extra gear as possible.
-
Towing hook-ups - braided cables versus chains?
Townesw replied to Wayfinder's topic in Mechanical & Technical Tips
Thanks. I wanted to make it simple. -
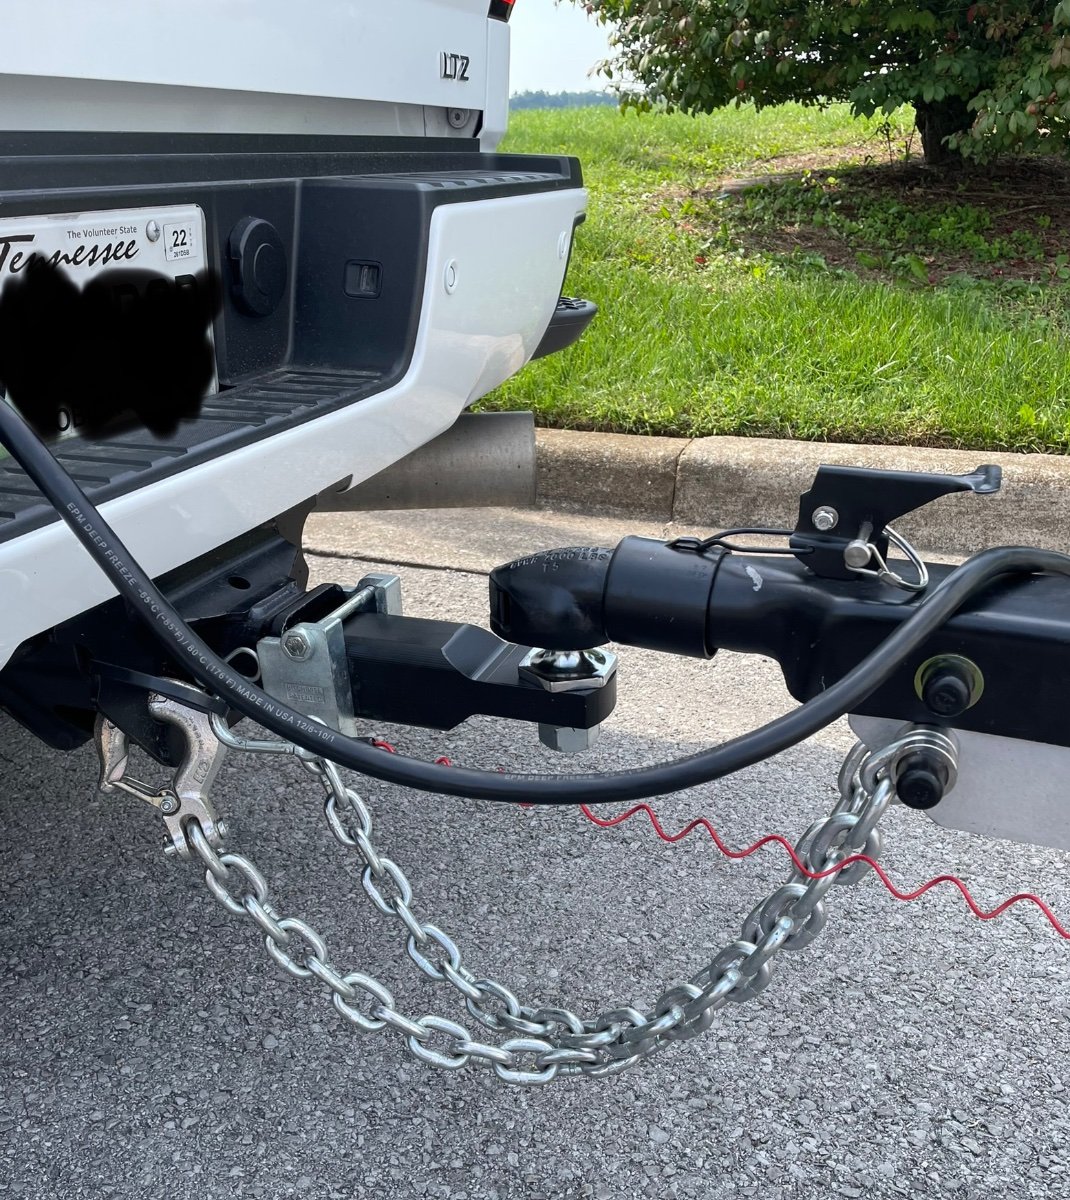
Towing hook-ups - braided cables versus chains?
Townesw replied to Wayfinder's topic in Mechanical & Technical Tips
Chains. And custom ball mount. And anti-rattle Hitch Vise
-
You’ll really like that Duramax / Oliver combination. We started out with a 1500 using the Andersen hitch and running right at max GVWR then switched to the 2500HD and quit using the Andersen. It made traveling so much more comfortable. Hollar back at me if you’re coming back through Union City some time. As for that particular dining establishment, we don’t know how they are staying in business.
-
Hello to the brand new LEII at Applebees in Union City TN on August 12, 2023. I’m the one that left the note on your TV. Good looking rig. Safe Travels.
-
Read my posts in this thread and the linked thread
-
Cricket noises from the lights
Townesw replied to Going Coastal's topic in Mechanical & Technical Tips
Read my posts in this thread -
Wet floor under black mat in closet
Townesw replied to chiwald's topic in Mechanical & Technical Tips
Read my posts in this thread -
Wet floor under black mat in closet
Townesw replied to chiwald's topic in Mechanical & Technical Tips
The caulk around my shower pan was too thin and the flexing of the pan opened up a crack and allowed water under the pan which wound up under the black mat in the closet. I removed all of the old caulk and recaulked after placing a tractor weight in the shower pan to prestress the pan. Haven’t had any water under the black mat since doing this.