
Townesw
-
Posts
573 -
Joined
-
Last visited
-
Days Won
24
Everything posted by Townesw
-
Ok I’ll come clean. I never really intended to put wings on Martha’s Oliver. I just made the OP to see what reaction I would receive. I guess that makes me a troll? But after that post I have caught myself looking at the trailer in passing and imagining how it would look with wings and how I might fabricate and attach them. I might mock up something this winter and temporarily attach them just to see how they would look. The trailer in the OP is sitting at a new business that I pass every day. It’s a small camper sales lot that just started up and it’s owned by a young couple. I stopped in just after they opened to look the place over and wish them luck in their new adventure. The young lady behind the desk asked if I had an RV. I said yes, I have an Oliver Travel Trailer and proceeded with the usual explanation that it’s a fiberglass trailer made in Tennessee, but she quickly stopped me, removed her forearms from the edge of the keyboard and pushed her chair away from the desk and said in excitement “Oh! You have an OLIVER?” She continued saying that she knew what an Oliver was and had contacted the company in an unsuccessful attempt to be a dealer. After talking more about the merits of an Oliver Travel Trailer I left with that usual sense of satisfaction that we experience after being recognized as an “Oliver Travel Trailer owner.”
-
@CorvusThere you go! Merle Haggard. 👍🏻
-
Looking for a pair of wings. Bonus if they are white fiberglass. Extra bonus if they have 12v red lamps on the tips. Have seen these on vintage and retro trailers and I’m going to figure out how to put them on my LEII. I’ll be the first. Everyone will be jealous. I bet Oliver will even make them standard. Or a least an option. edited to add: don’t tell my wife. It’s really her Oliver. It’s going to be a surprise.

-
@AZ Wondererwe need to get them to make a shorter base so that these would work on an LE2. I would be willing to try a set. I really don’t like that there isn’t a rubber bumper to keep the ubolts from hitting the frame. I think I could fab a set of bases using my mill and welder. I sent them a email asking how many springs come in a set. I bet it’s only 2.
-
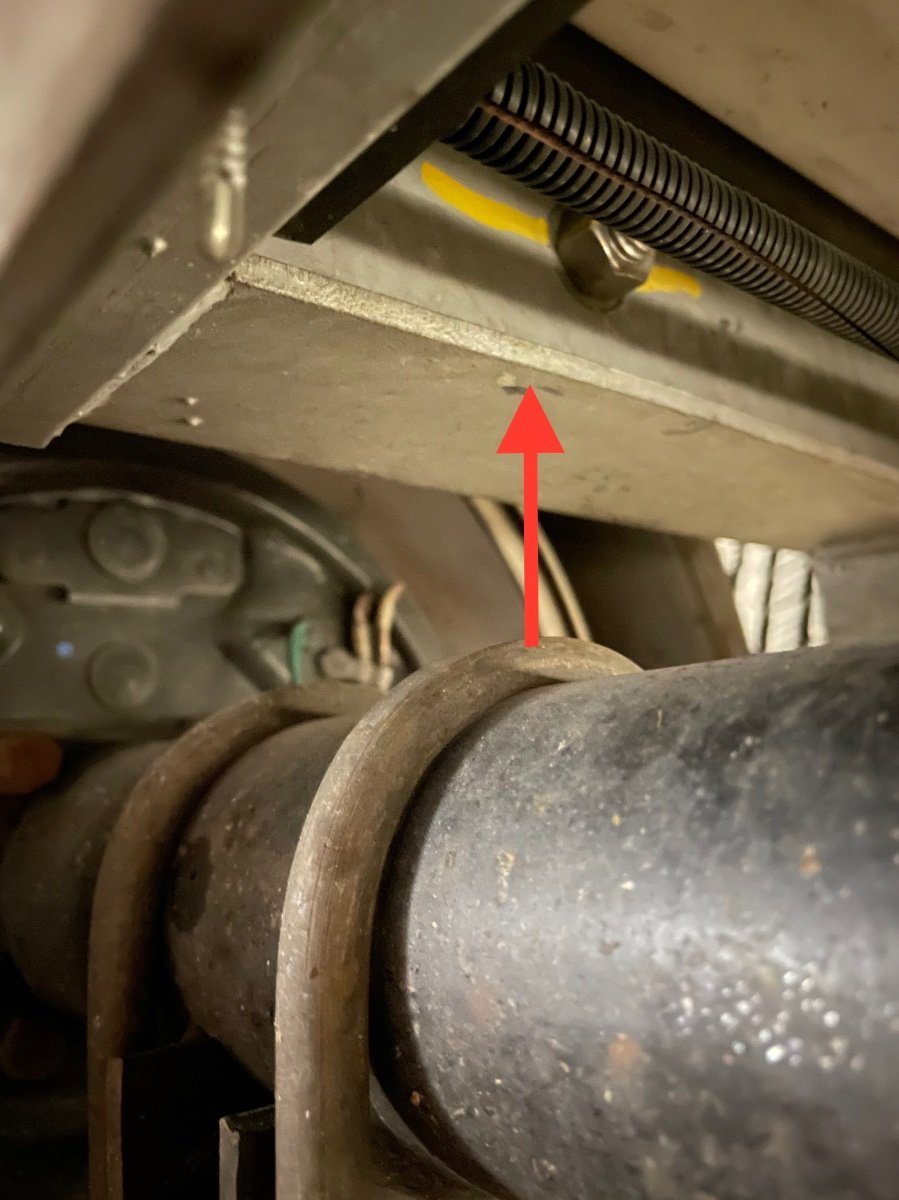
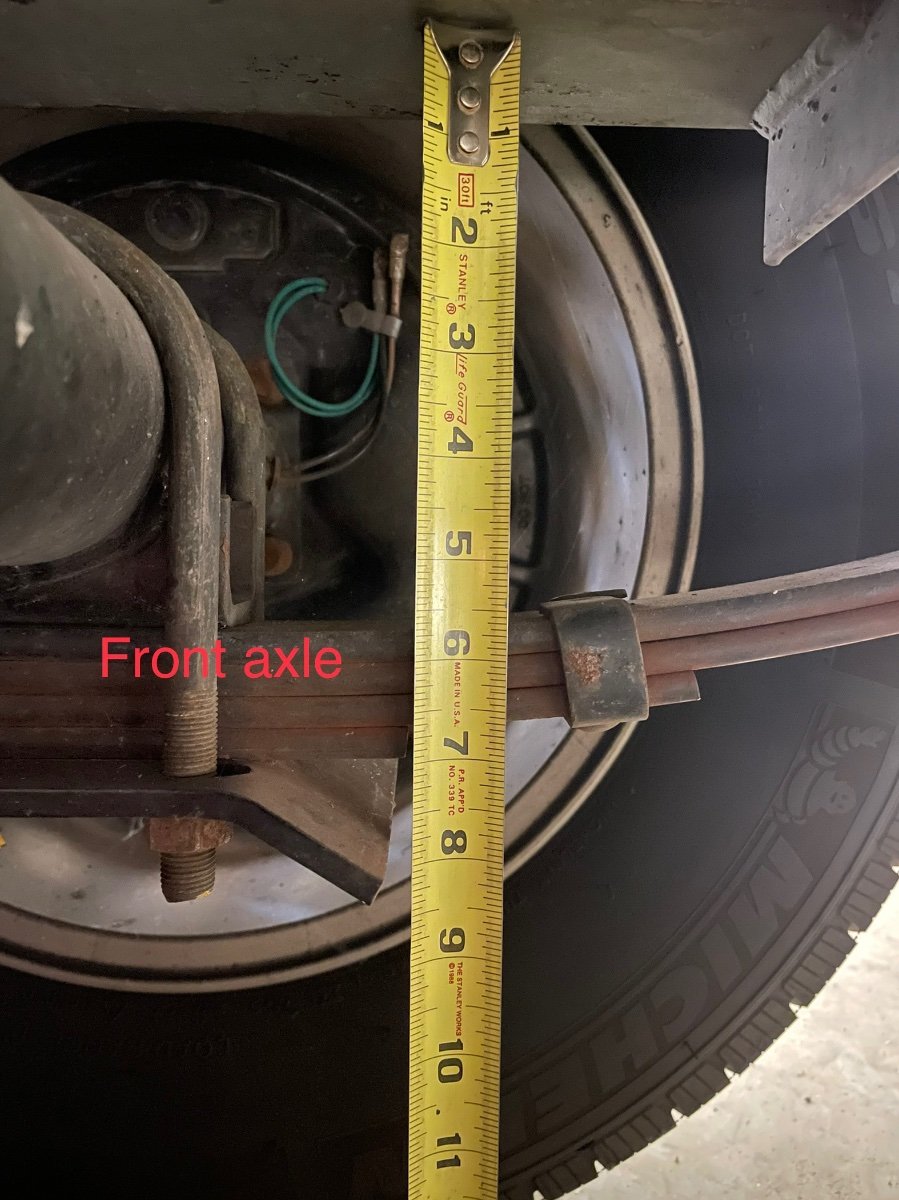
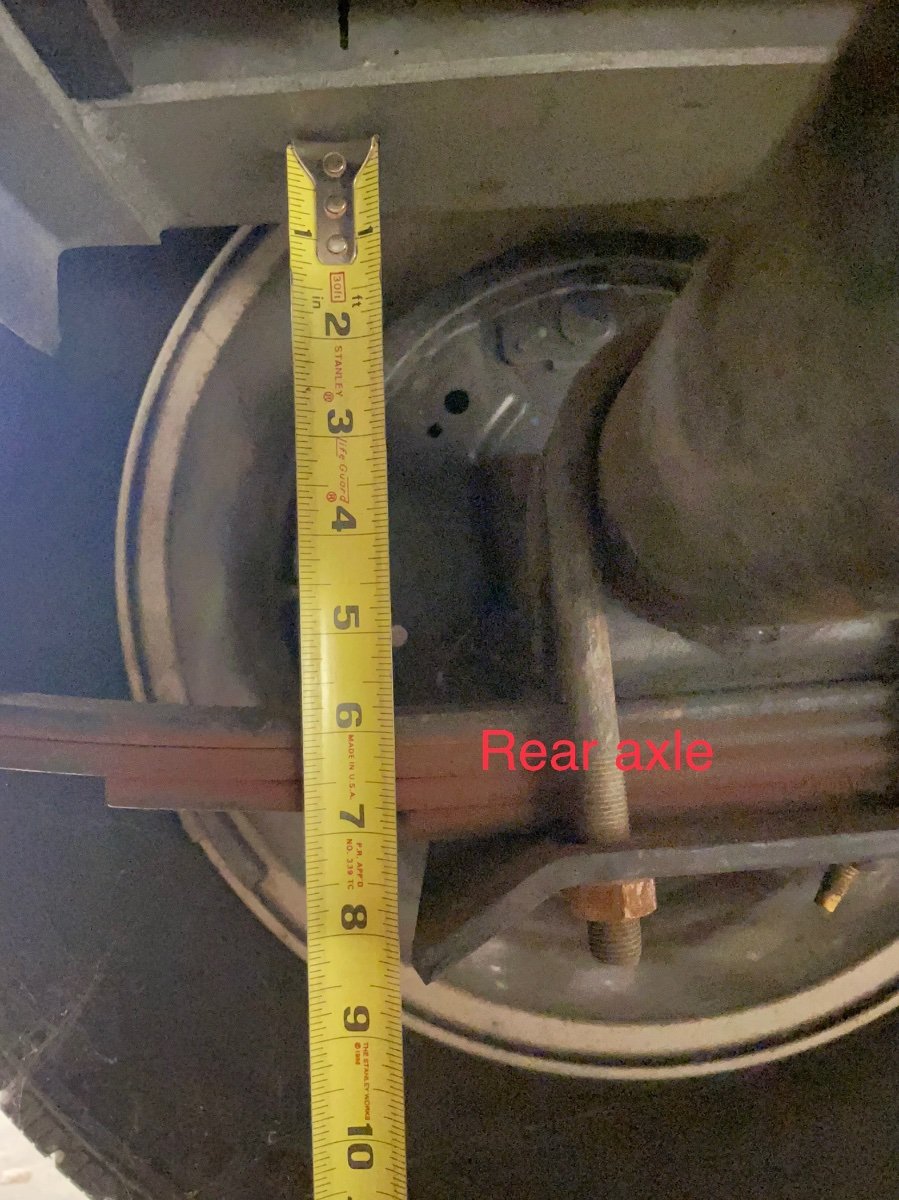
@AZ Wonderer Thanks for your original post. I was interested in this enough that I rolled under my E2 this morning to take a look. My ubolts have hit the frame. There’s less than 2 inches of travel there There is a crossmember in front of the front axle and behind the rear axle so that rules out installation in those positions The product requires a 7.4 - 8.65 inch gap for installation Font axle gap, level, empty, on concrete floor Rear axle gap, level, empty, on concrete floor I like the idea of a bumper of some kind in that location but it doesn’t look like the Sumo Springs will work. Thanks again @AZ Wonderer for posting that link.
-
I installed Sumo Springs on a half ton Chevrolet pickup and pulled an Elite 2 to Maine and back. I was a lot happier when got home and traded that truck in on an HD2500 Duramax. Sumo Springs are a polyurethane bumper. Not the same as steel leaf springs. edit: @AZ WondererI had had a beer or 6 when I read your first post. I have reread your post and now see that you were asking about Sumos under the trailer, not the TV. After watching the video I want to investigate these further since there are no bumpers on the current setup.
-

City water and fresh water hex end wrench -Amazon
Townesw replied to Patriot's topic in Mechanical & Technical Tips
Just disregard the thread jacking that occurred mid thread -
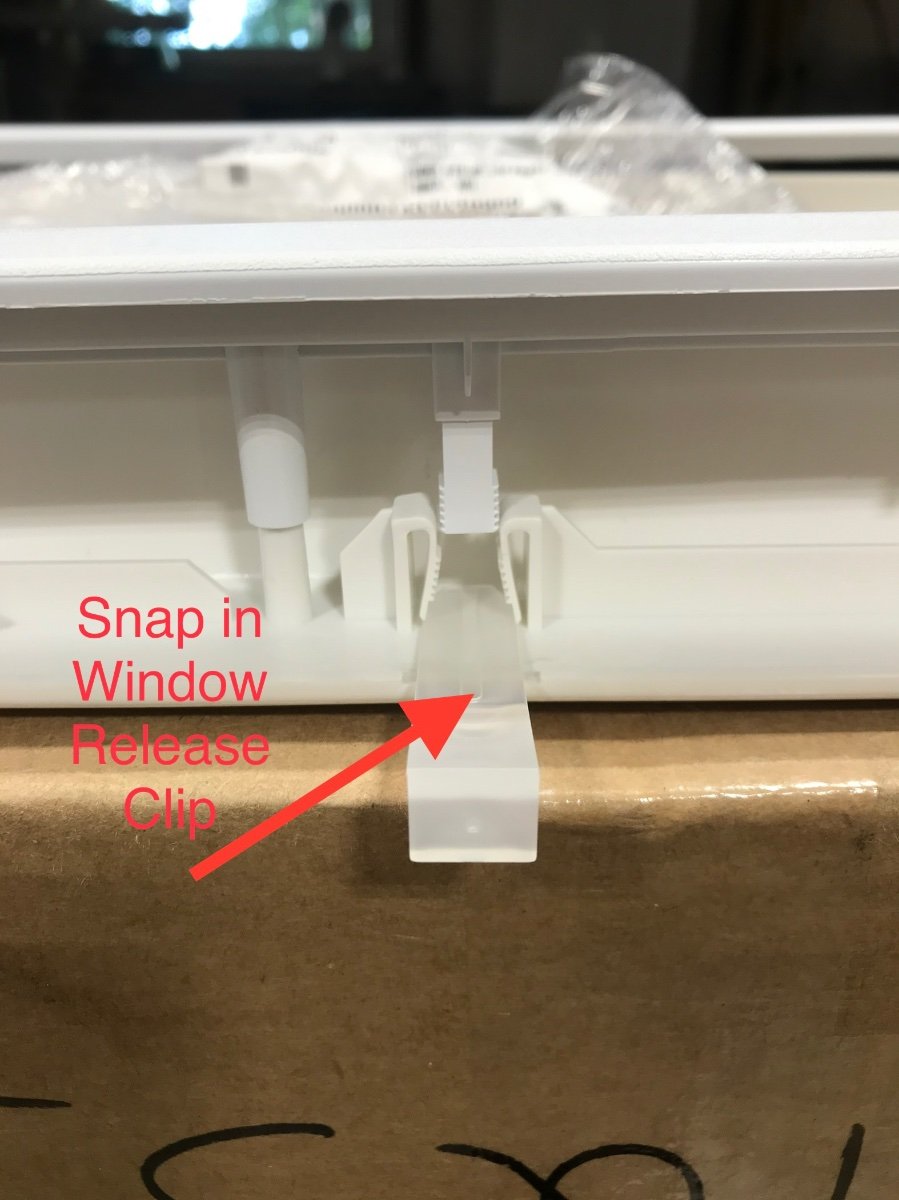
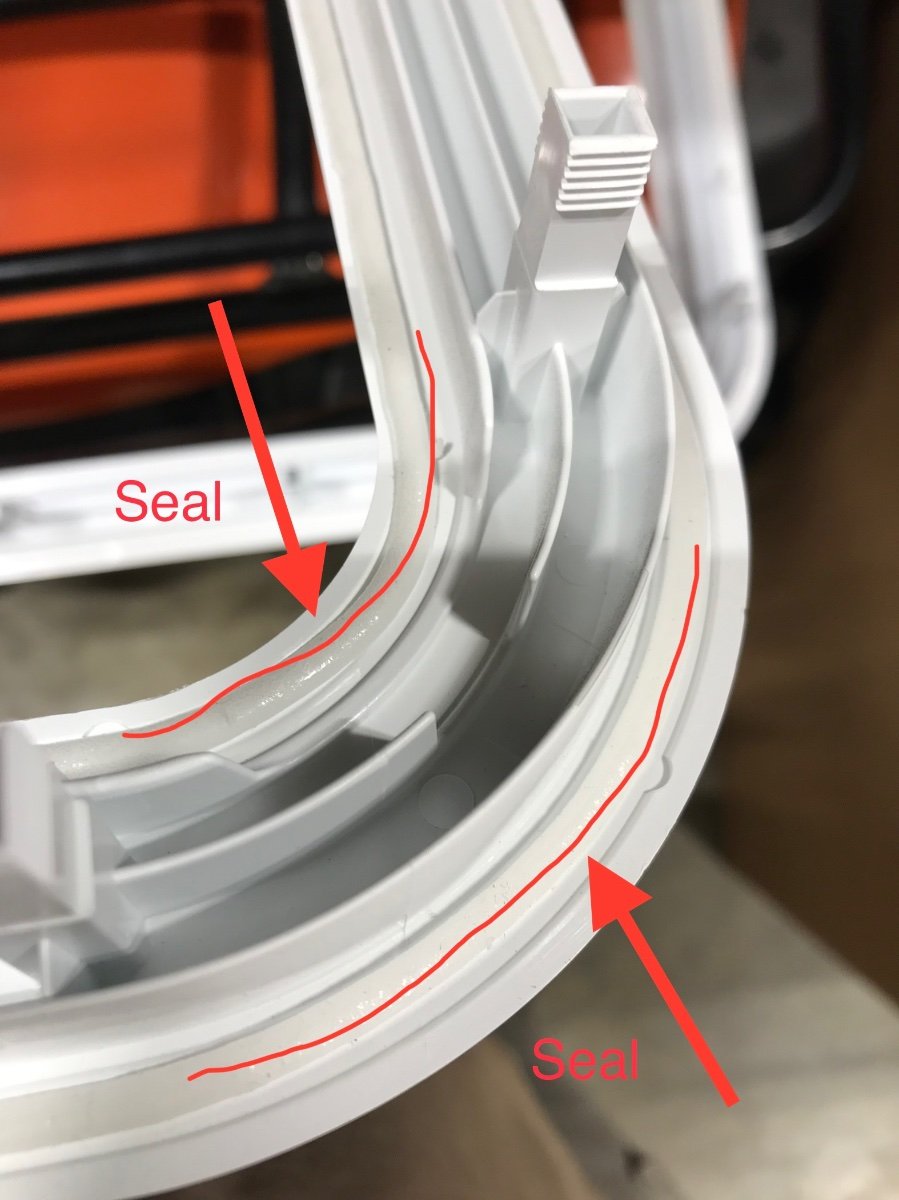
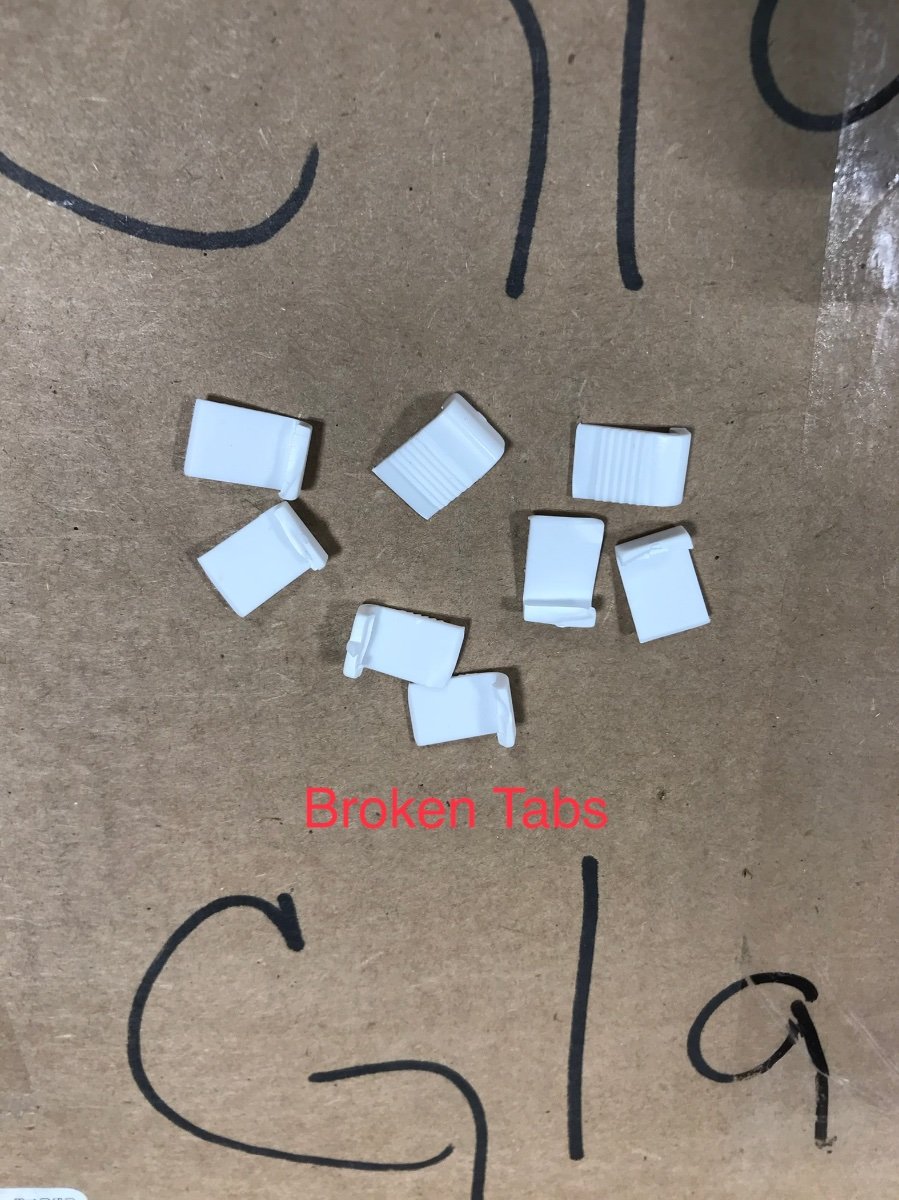
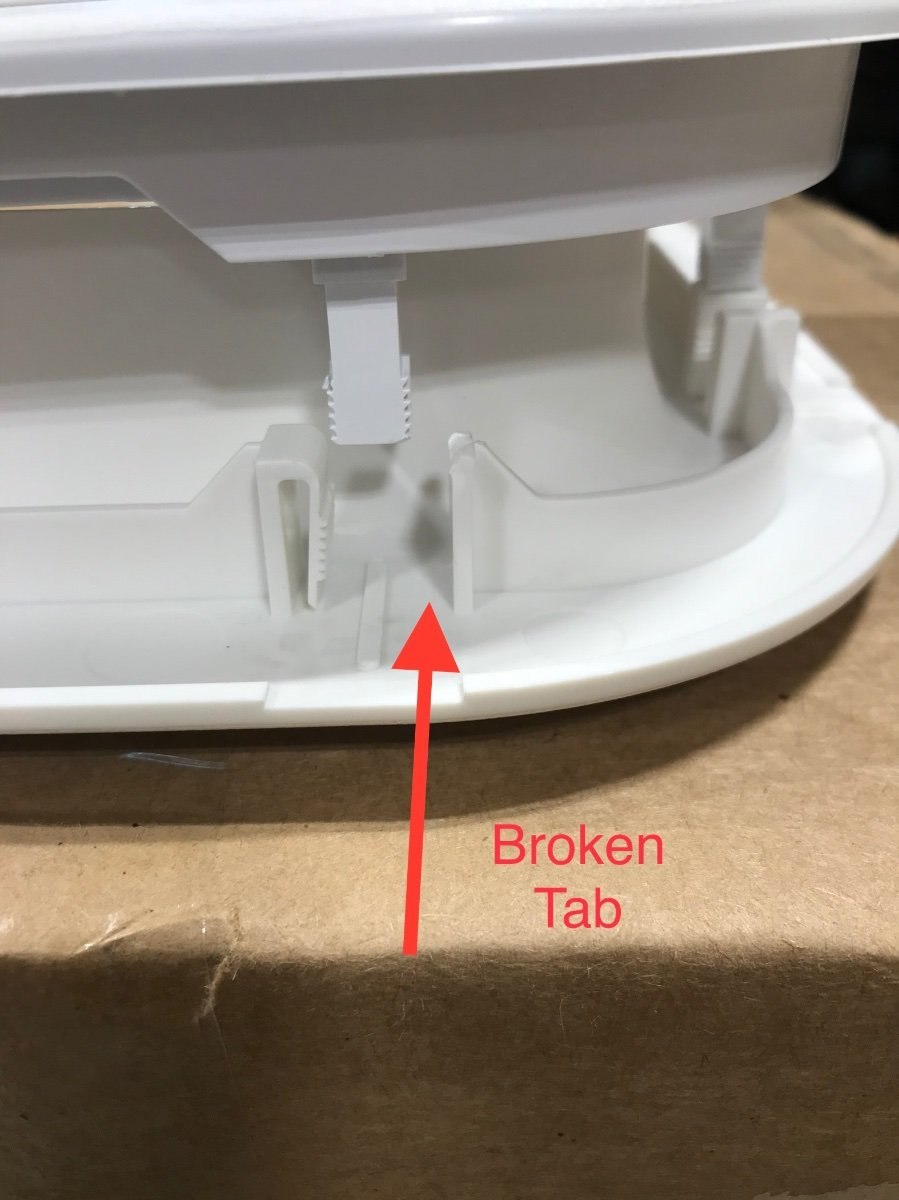
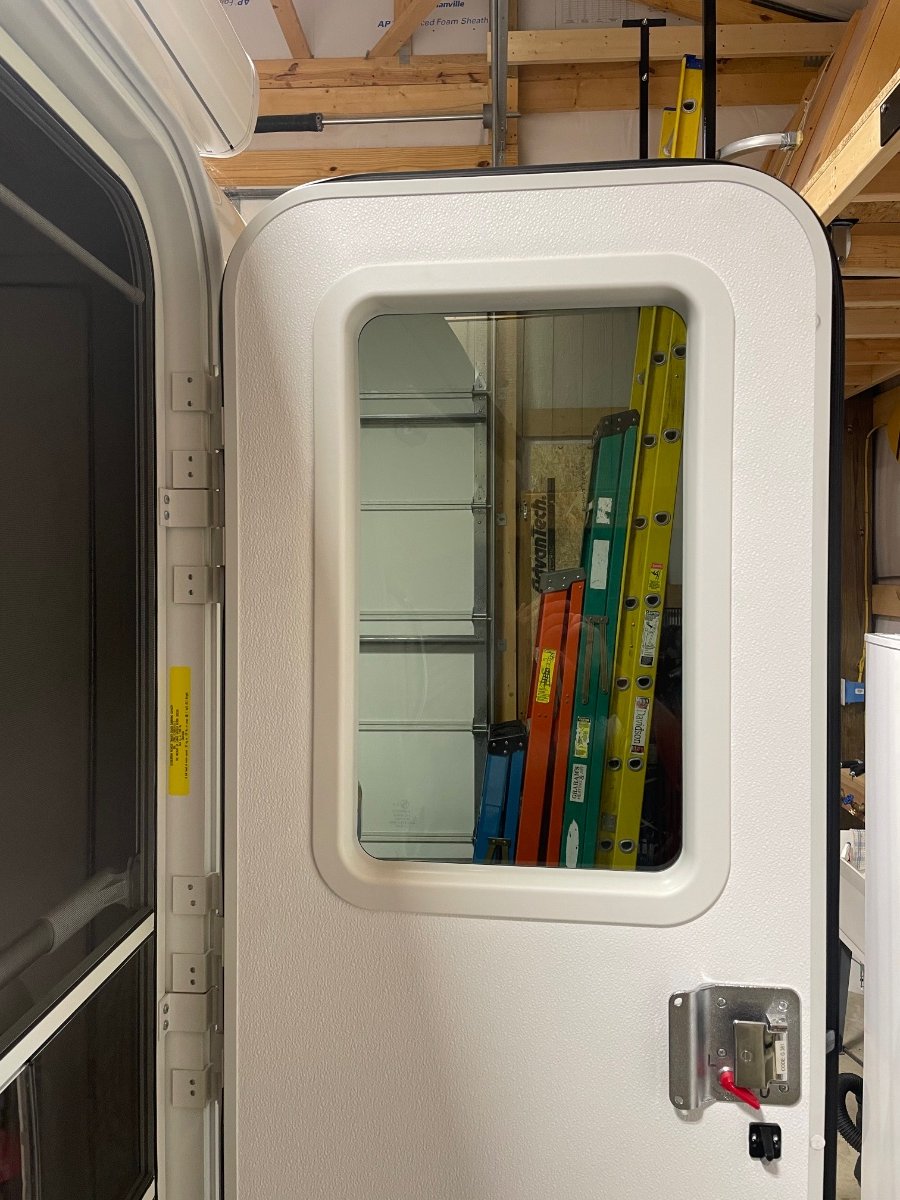
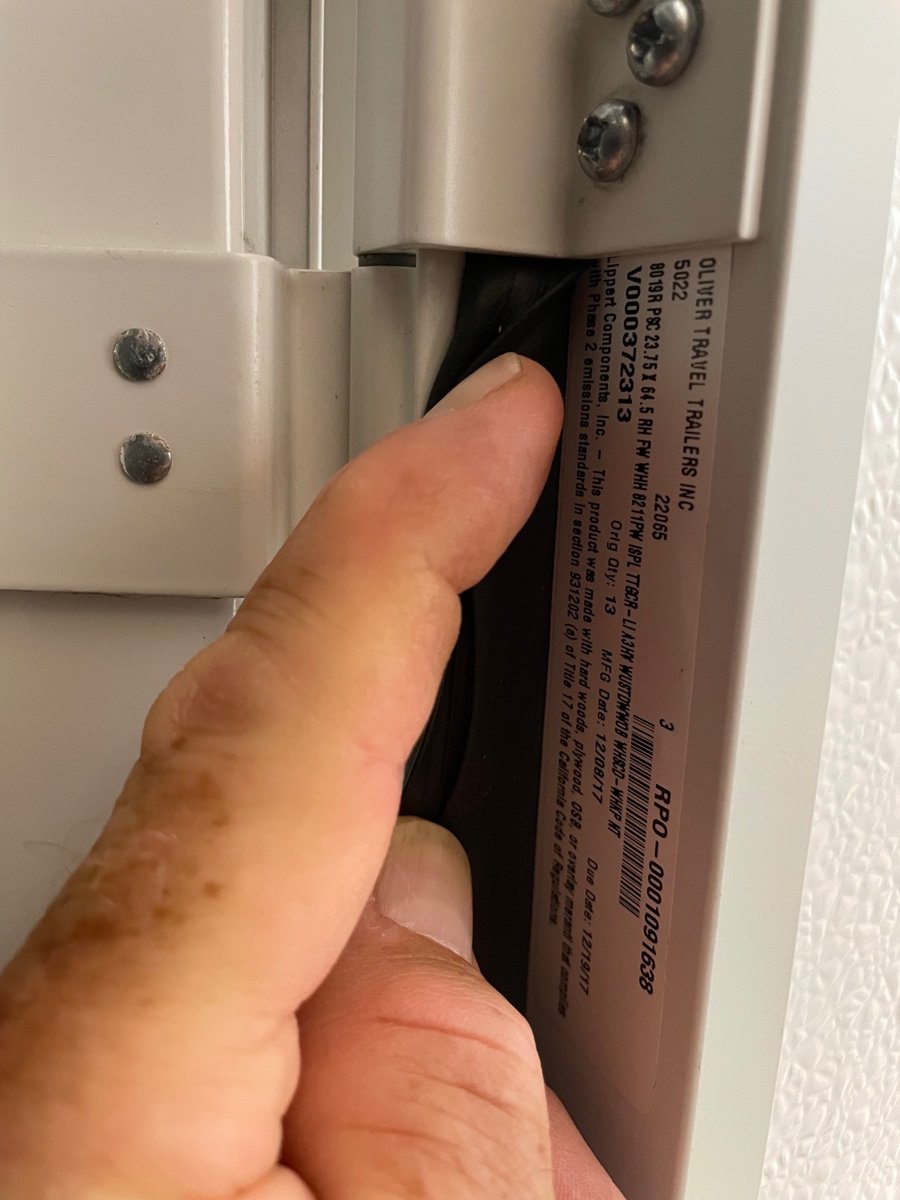
I put a clear tinted window from Lippert in our Oliver entry door made by Lippert. I called Lippert and talked to a real person (Sandra Berg) and told her what I wanted to do. She asked for some numbers off of the door to make sure I ordered the correct parts. Be sure to order the “snap in window release clips”. They are supposed to expand the tabs that secure the inside frame to the outside frame but I still had to break several tabs to get them to release, so you’ll also need a new inside and outside frame. You will want to use new frames anyway so that you have good seals Parts I ended up using for hull 313 706073 GLASS; DARK TINT - G20; 13.25 X 22.24 TEMPERED 429436 SNAP-IN WINDOW CLIPS; 16 PCS KIT 716156 WINDOW FRAME; LOW PROFILE W /SEAL; 15 X 24 OUTER - WHT 716157 WINDOW FRAME; LOW PROFILE; 15 X 24 INNER - WHT
-
Where is this coming from? And is it a problem?
Townesw replied to John and Jodi's topic in Mechanical & Technical Tips
Read this I thought I had a thread on the forum where I talked about my “fresh water tank overflow tube clamp being loose” but I can’t find it. Anyway, if your fresh tank is full and your trailer is slightly nose down and the overflow tube clamp is loose you might be getting water out of that drain. -
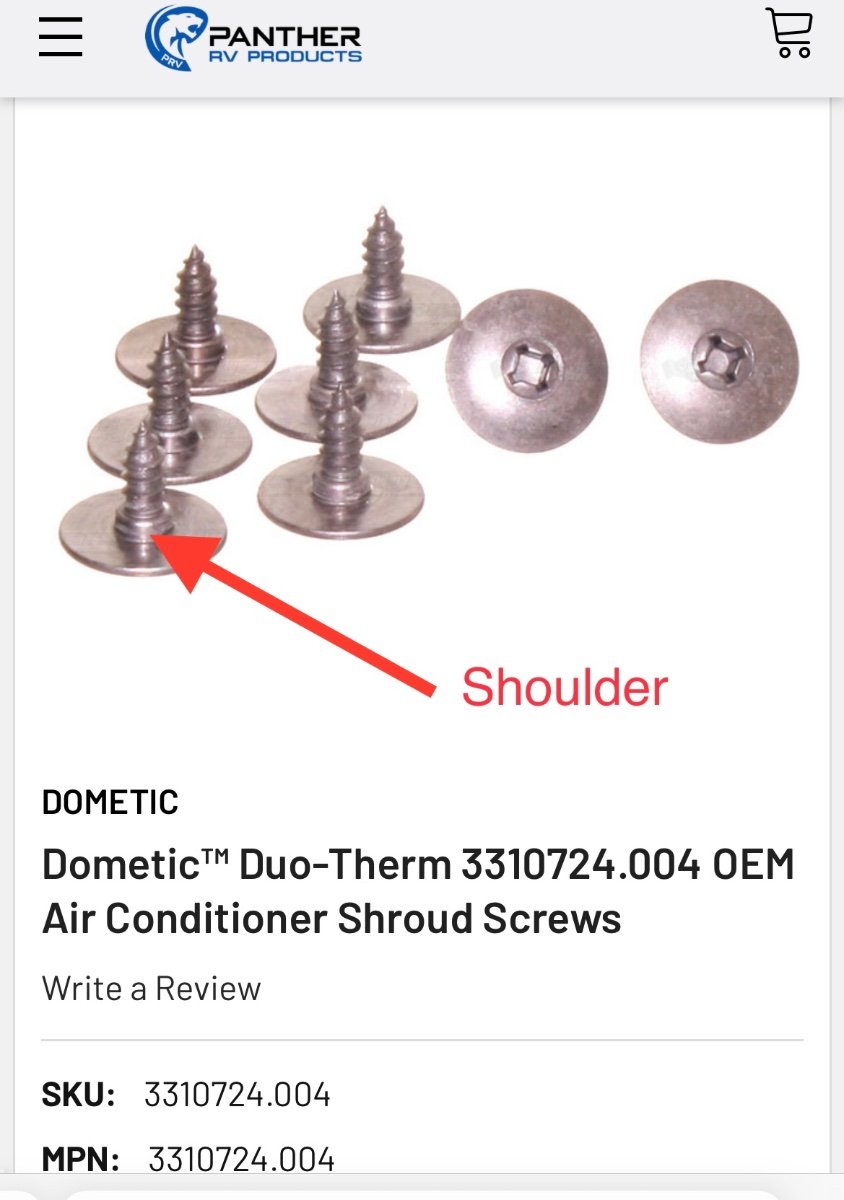
Those screws have a shoulder on them. The shoulder should pass through the elongated hole in the shroud and be tightened down against the steel base, leaving the head of the screw snug but not tight against the shroud to allow the shroud to expand and contract with heating and cooling. You might find that the shoulder was tightened down against the shroud, or the screw was loose allowing too much movement of the shroud. We’ve been in some very strong wind and never had that happen. I agree with @Cameron I’d fix that also.
-
Be sure to set the parking brake while holding the brake pedal in the TV. Just putting the transmission in P doesn’t keep the TV from rolling a little until the parking pawl in the transmission catches. Get out and kick the ball mount. If it doesn’t rattle, let the TV roll up or back then kick the ball mount again. The coupler will release if the ball is loose in the socket.
-
Chock the wheels, uncouple hitch, then level. Don’t try to level while still on the ball. Leveling the trailer while still on the ball will cause the earth to spin backwards. Nevermind. It just occurred to me that you’re using those curved wedges.
-
A/c not functioning well, please help
Townesw replied to Margaret's topic in Mechanical & Technical Tips
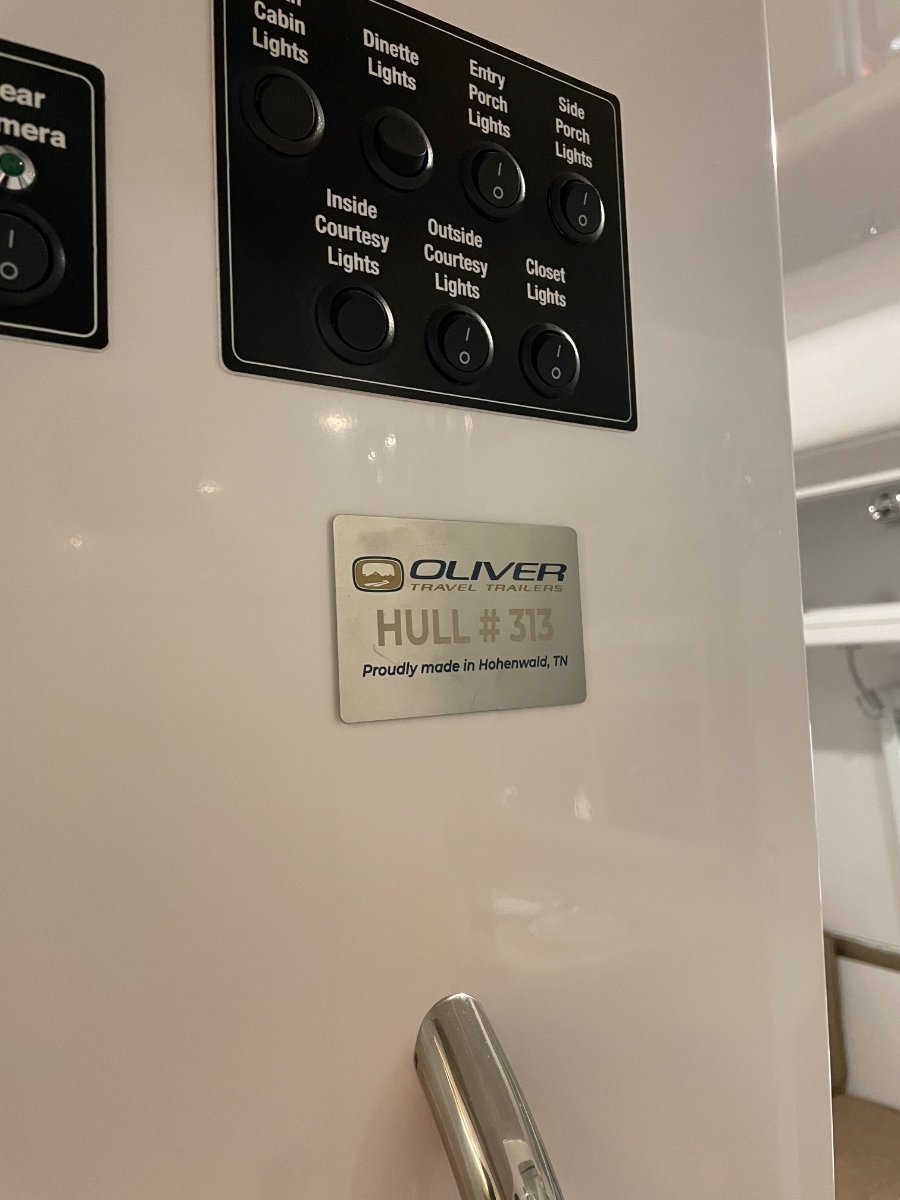
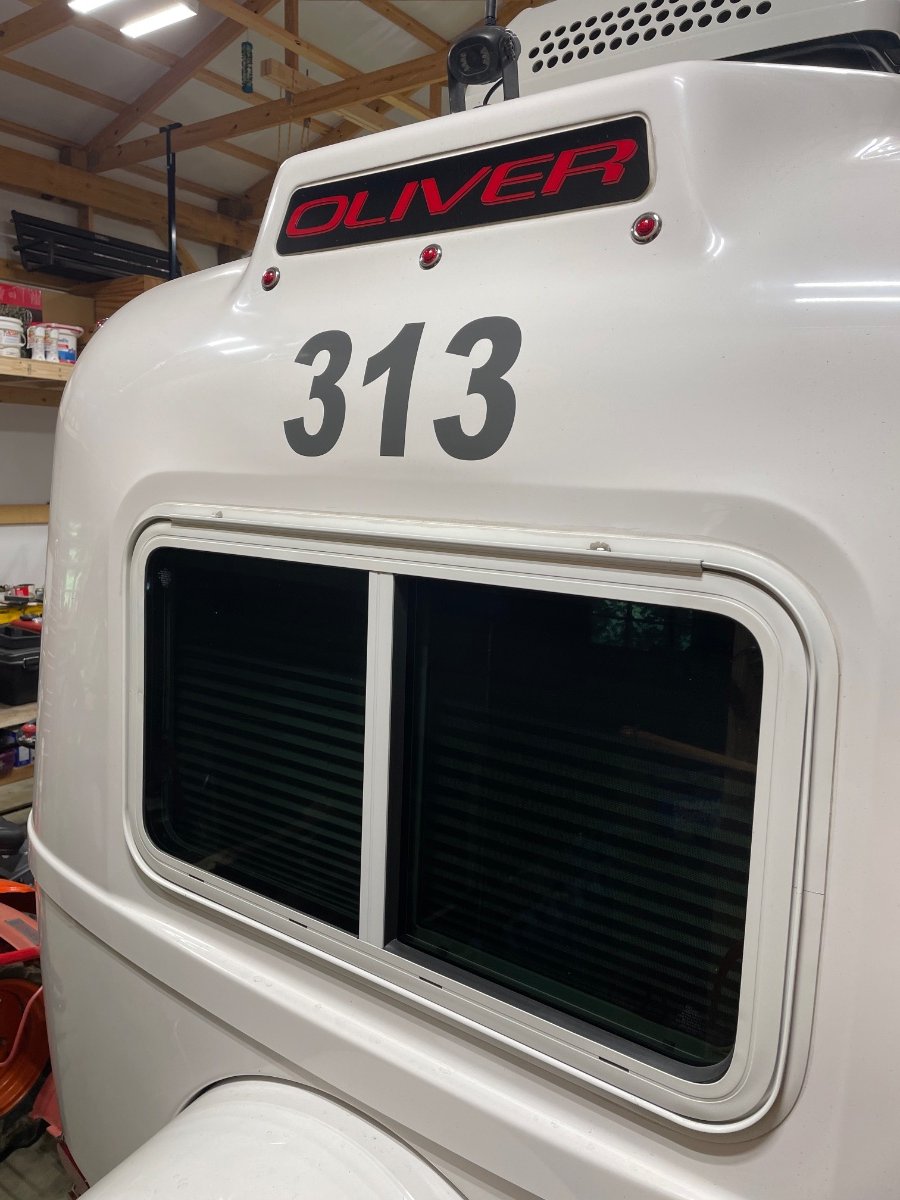
@Margaret At the time your Oliver was built your hull number will be the last 3 digits of your VIN number. Later production Olivers have a hull number not indicated in the VIN. The hull number indicates where in production history your Oliver was built. I have hull 313 so it was the 313th Oliver built. When you ask questions about your Oliver and readers know your hull number it gives us some idea of what might be going on with your Oliver. Some problems are known to be associated with a particular range of hull numbers. Owners that have Olivers built around the time yours was built may be able to provide help because they have already experienced the problem you are having. By listing your hull number in your signature line readers have some idea as to how to better respond to your questions. Look for VIN sticker on left front corner Or on a sticker near the hinges on the door Your Oliver might have a hull number plaque near the door Some Olivers have the hull number on the top rear
-
A/c not functioning well, please help
Townesw replied to Margaret's topic in Mechanical & Technical Tips
@Margaret Do you have hull number 179? -
A/c not functioning well, please help
Townesw replied to Margaret's topic in Mechanical & Technical Tips
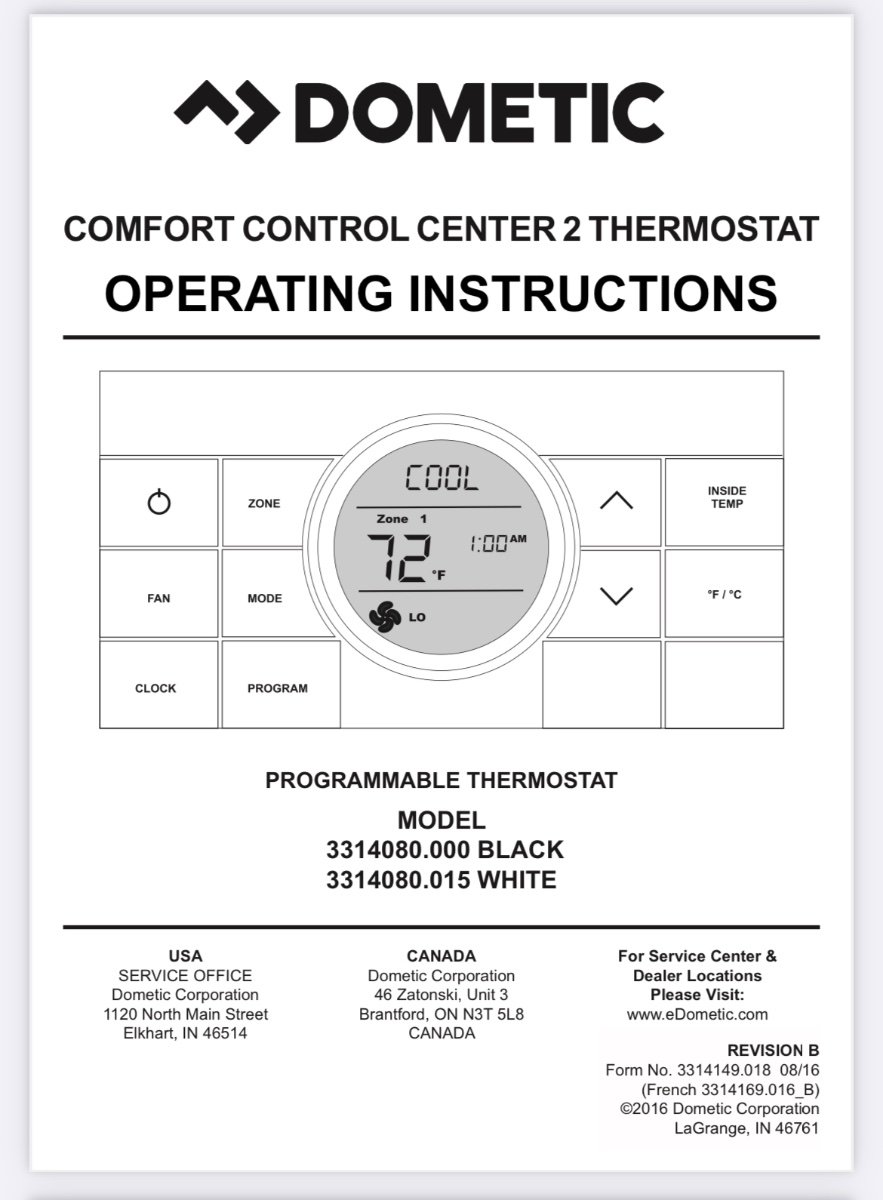
@Margaret I have a newer thermostat so I can’t be any help with yours. Looks like there is a Dometic 3314080 and a 3314082. Do you have a manual for the thermostat? This might be it https://www.dometic.com/externalassets/thermostat-control-box-ccc2_64755.pdf Here is a users guide for a similar thermostat https://www.intechtrailers.com/images/info/PDF/Dometic/thermostat-guide.PDF
-
Length of Sewer Pipe Extension Needed
Townesw replied to aquestell's topic in Mechanical & Technical Tips
@Alberta and Randy You have an earlier hull number. It looks like your pipe extends out further. I have hull 313 and the pipe does not extend that far out which allows me to leave the hose connected when the bumper is closed. At some point in production they must have shortened the length of the pipe inside the rear bumper area.
-
A/c not functioning well, please help
Townesw replied to Margaret's topic in Mechanical & Technical Tips
Stick your fingers in the opening on the front and gently press down on the return air filter/grill then remove the two and separate them. Clean the filter and grill. Leave them off if the filter is completely plugged and see if your air is cooler. You will need to get an RV Tech to remove the a/c shroud on top and check for dirty coils. -
A/c not functioning well, please help
Townesw replied to Margaret's topic in Mechanical & Technical Tips
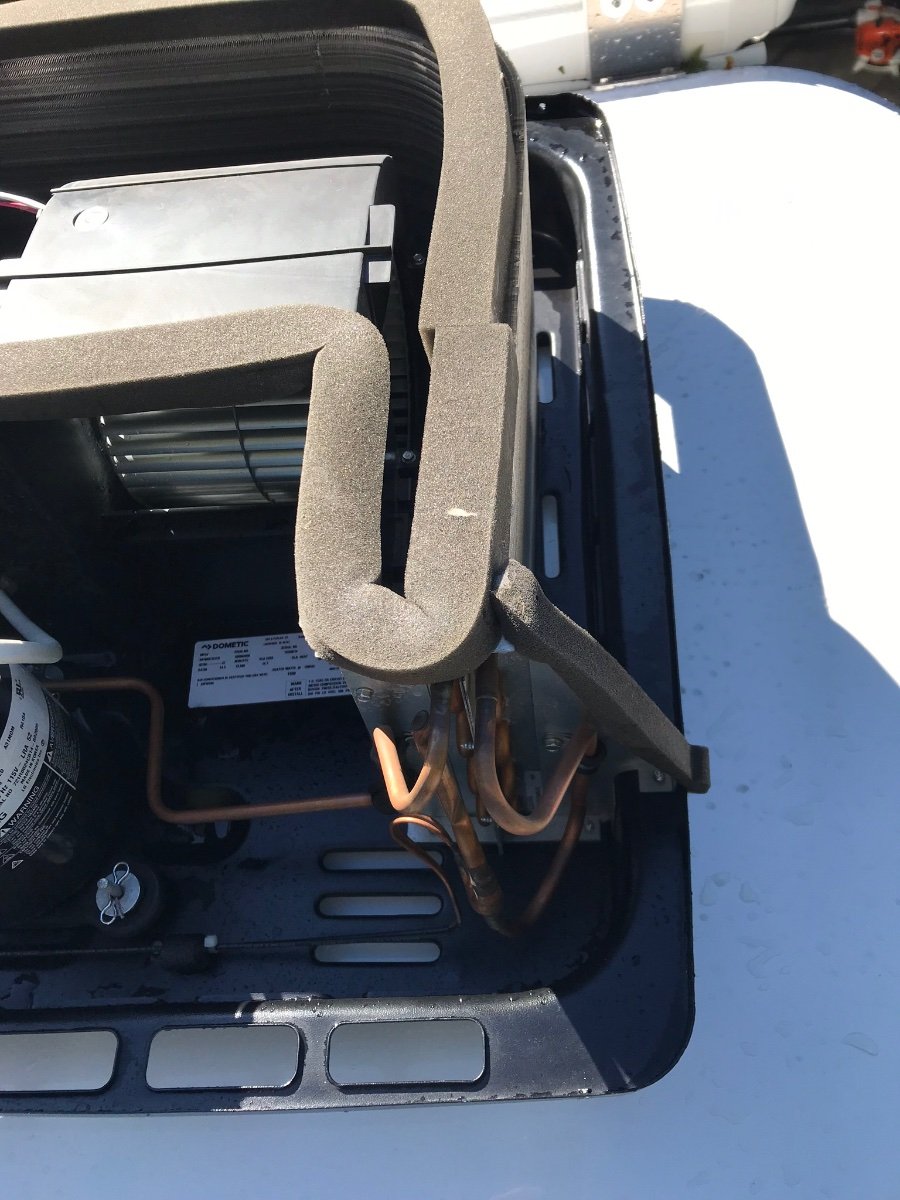
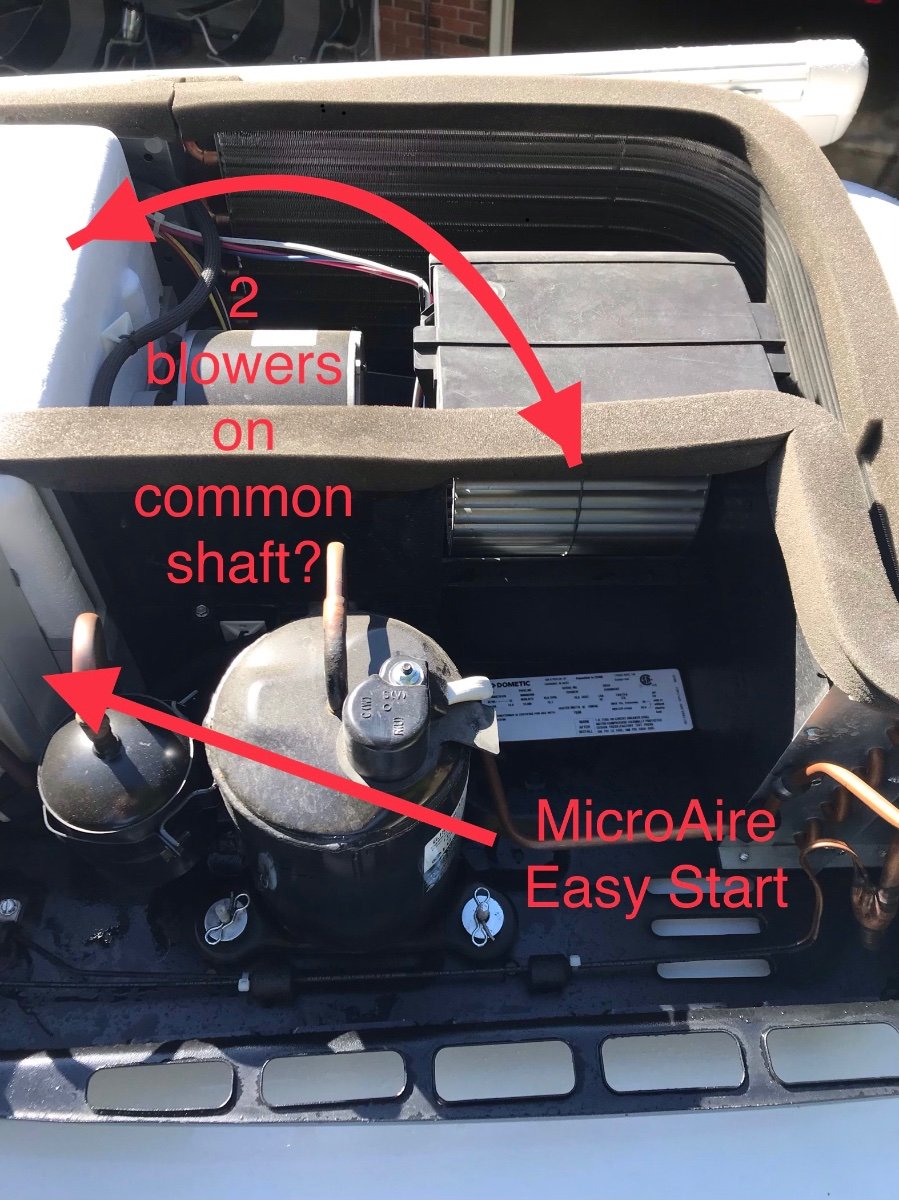
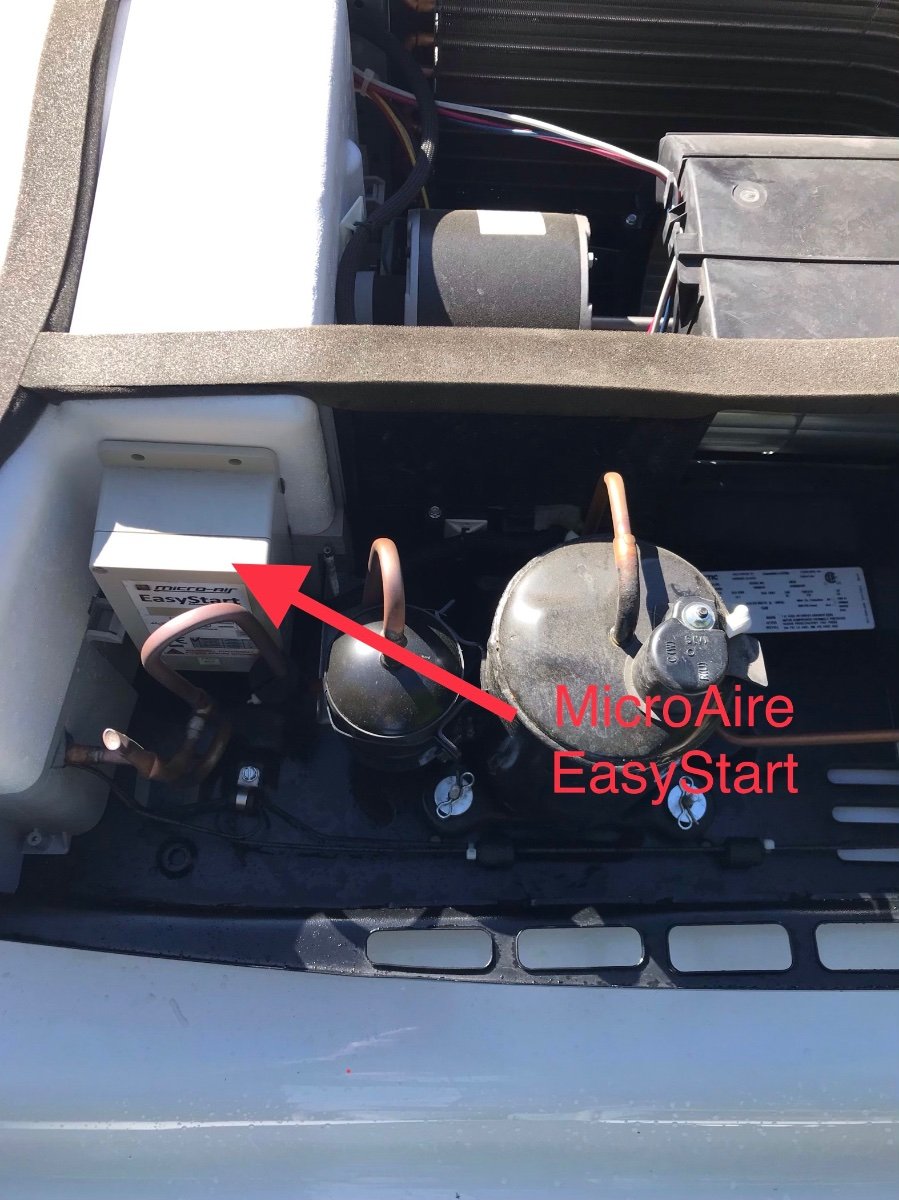
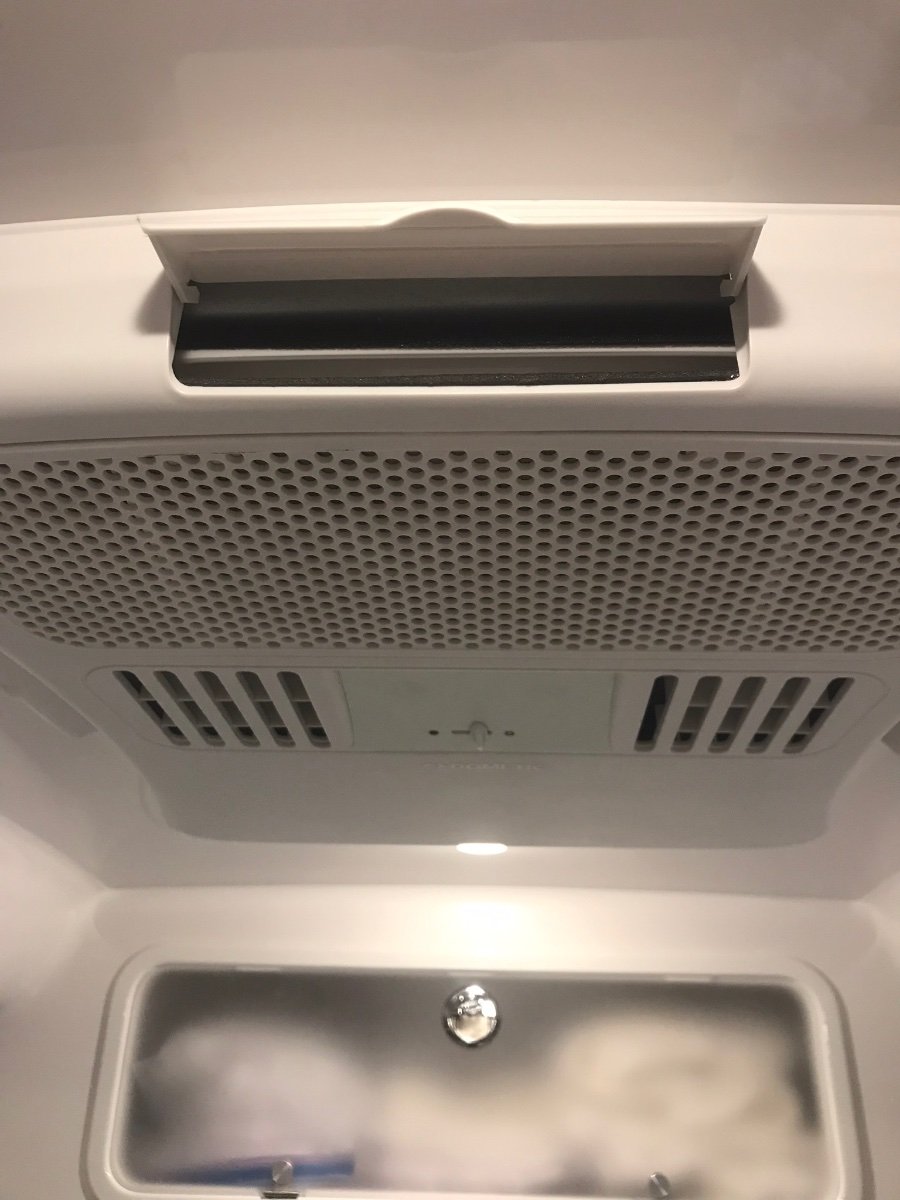
Is the return air filter clean? It is located under the grill shown in the photos below. Be careful removing the grill. It’s easy to break the tabs off and it’s not available as a separate part. Do you feel air coming out of all four openings on the sides and the sliding grate on the bottom? Your trailer is a 2017 so it has been in storage. Has anyone checked to see if the coils under the shroud on top are clean? (Disregard arrows and text, I used these photos before to explain something else.) What is the voltage shown on your Progressive Industries display?
-
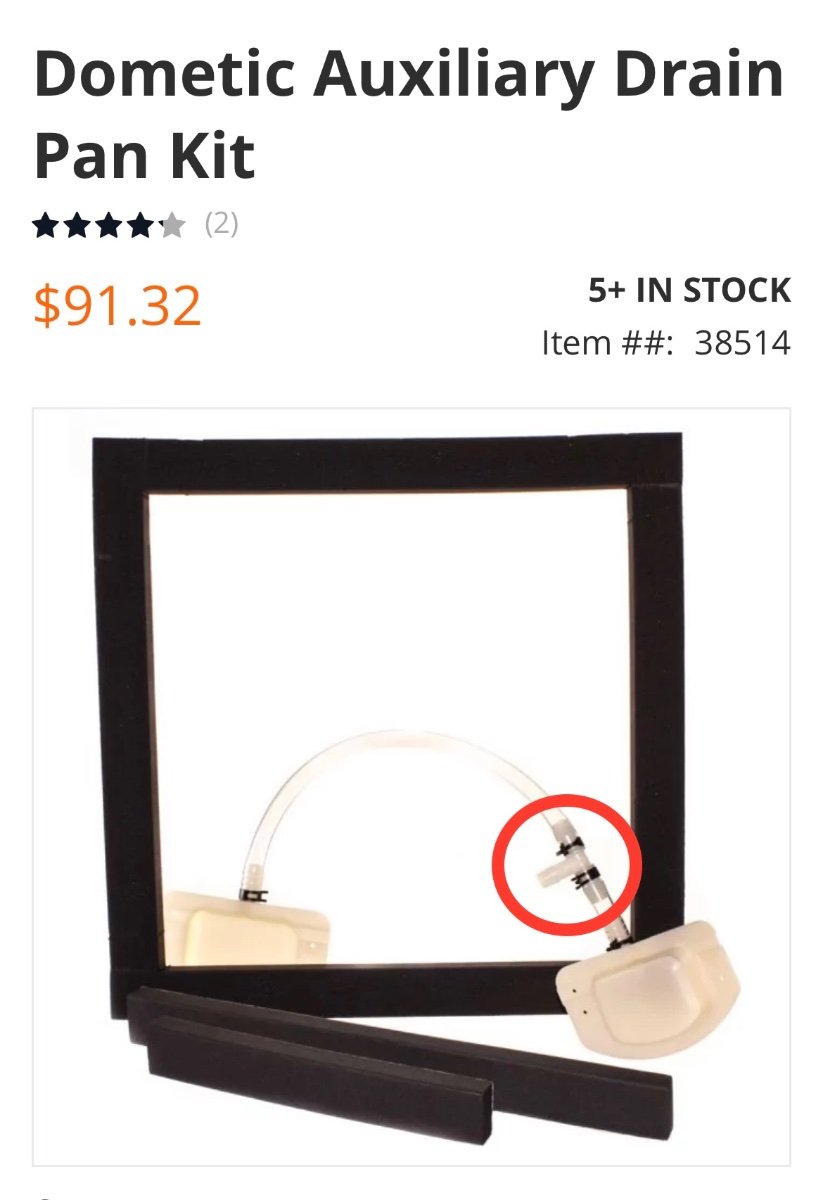
I believe this is the auxiliary drain kit that includes the small pans, one of which is shown in the picture in my previous post. The tee shown in your second picture is the tee in the picture below. The tube that eventually exits at the rear street side corner is attached to this tee. https://www.dyersonline.com/dometic-auxiliary-drain-pan-kit.html
-
On hull 313 the tubes run to these white condensate catch pans on each side of the A/C
-
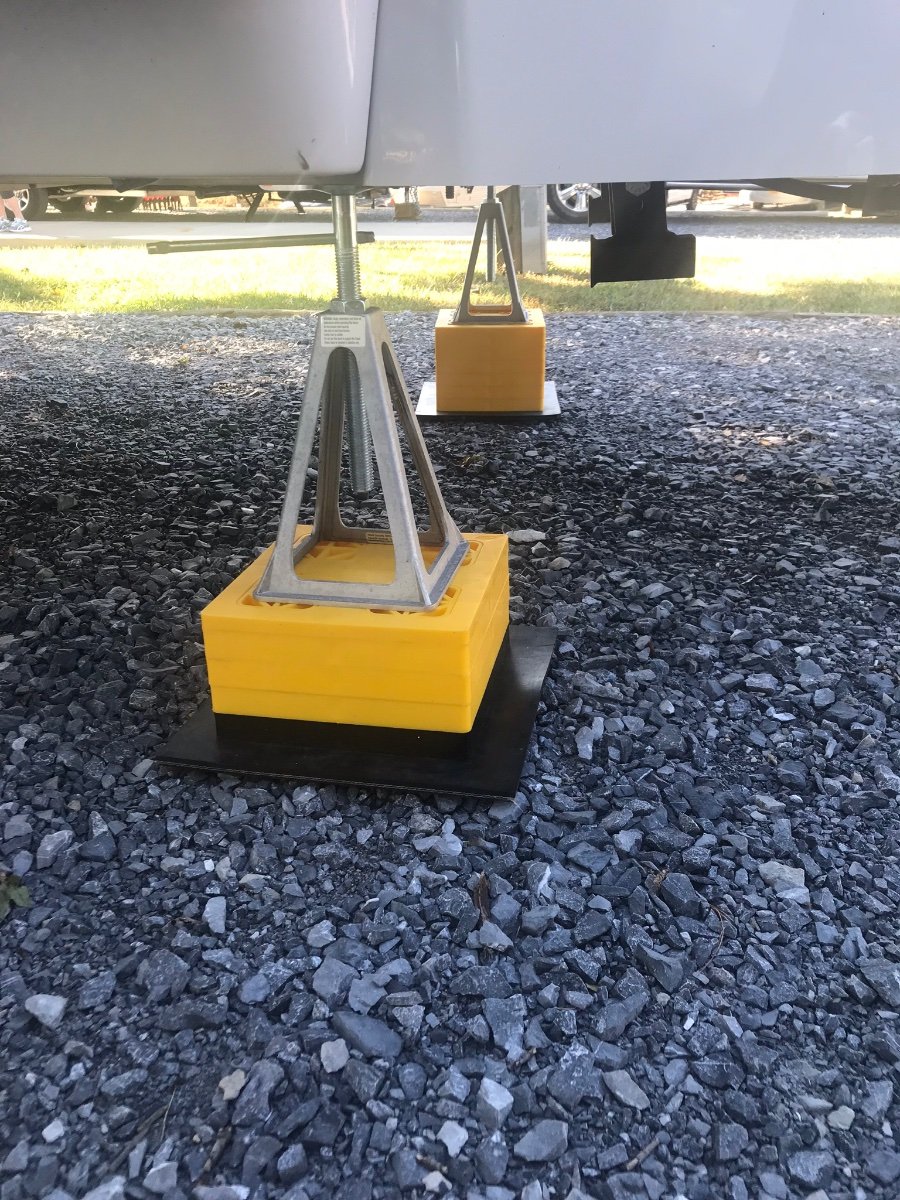
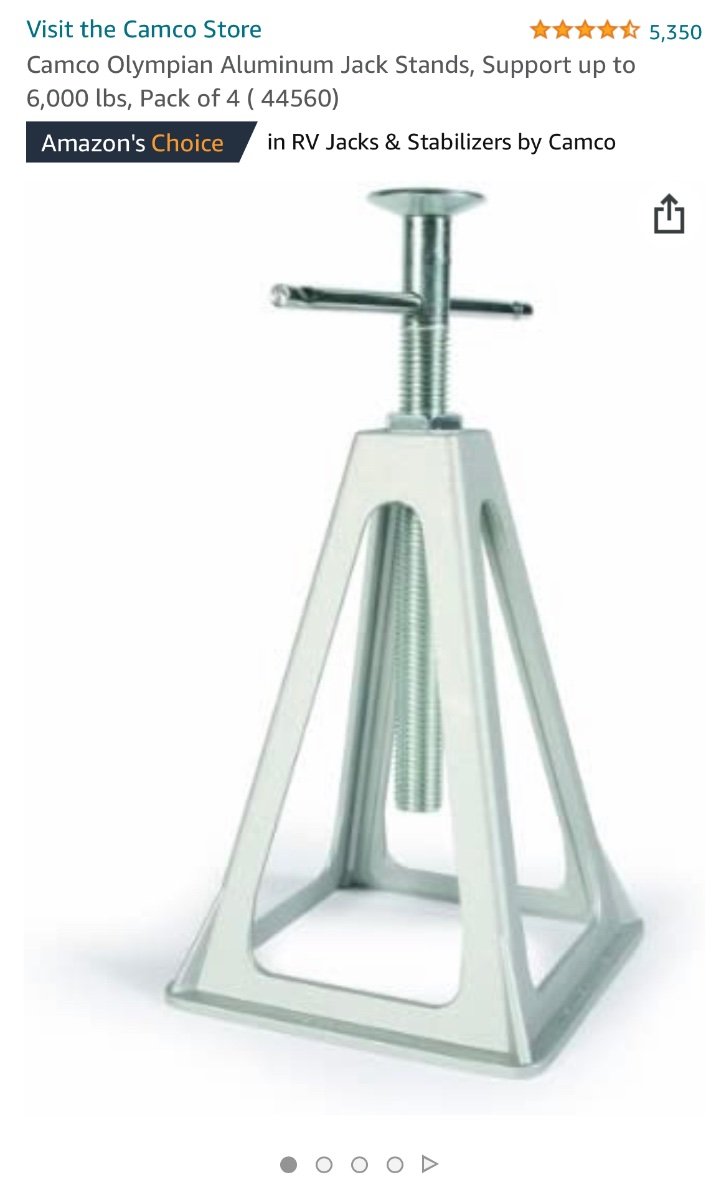
These will dampen most of the movement. Just snug them up against the frame. Don’t support the weight of the trailer with them. I used to use them until we got accustomed to the wobble. It’s an Oliver thing. https://www.amazon.com/Camco-Olympian-Aluminum-Stabilize-Position/dp/B000760FWU
-
Removing the Interior Ceiling Shroud from the Air Conditioner
Townesw replied to fairmontrvpark's topic in General Discussion
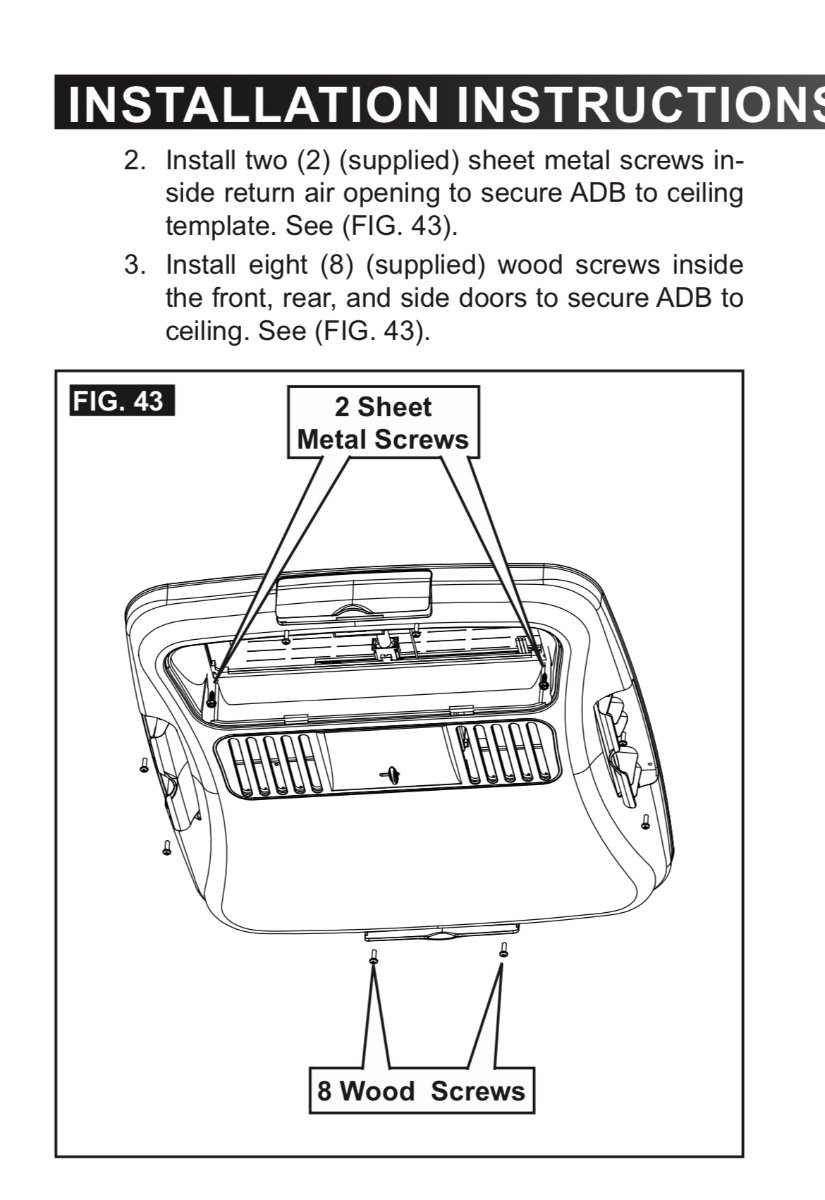
Look for 2 sheet metal and 8 wood screws. This is for a Dometic 3314850.000 Air Distribution Box. Yours might be different. https://epi.dometic.com/externalassets/dometic-penguin-ii-13-5k_9105304179_71275.pdf
-
Auto-Motion Shade Inc. 400 Bentley St. Markham, Ontario L3R 8H6 - Canada Tel. (905) 470-6198 (Ext. 0022) Fax (905) 479-2136 www.automotionshade.com At one time there was a program to get them replaced if they had “slits” in them. I received a complete set of replacements and they were just as bad as the original set.
-
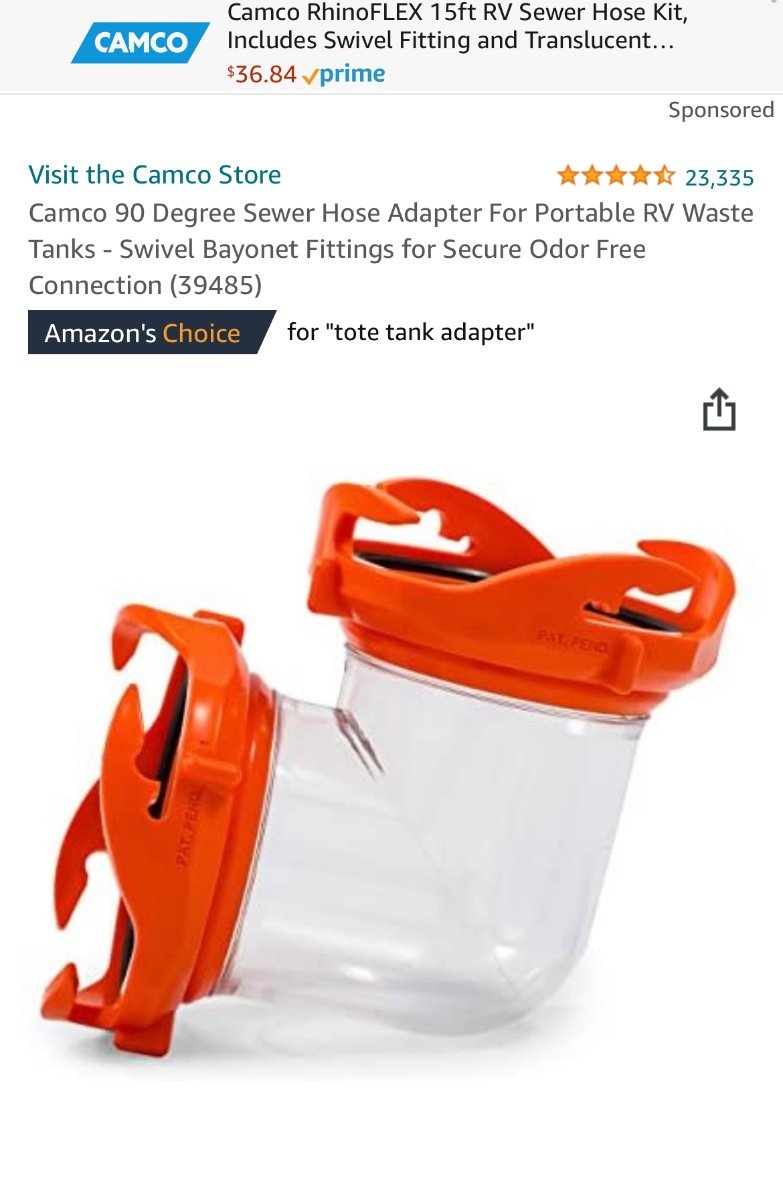
I keep (2) sections of 10 foot sewer hose (one attached to the Oliver), the 90deg adapter, the clear extension, the rubber seal, the hard plastic threaded adapter and an assortment of caps in the bumper all of the time. These components will allow me to make proper sewer connections at 95% of our setups. If we are staying somewhere without sewer hookup, I add a Barker wheeled tote (modified with foam filled tires in place of pneumatic), the short hose that came with it, and a special adapter to allow sewer hose connection to the tote (note the bayonet attachment on both ends). https://www.amazon.com/Camco-Degree-Sewer-Adapter-Portable/dp/B00OJHOL1O/ref=asc_df_B00OJHOL1O/?tag=hyprod-20&linkCode=df0&hvadid=312202698398&hvpos=&hvnetw=g&hvrand=9090870160881797098&hvpone=&hvptwo=&hvqmt=&hvdev=m&hvdvcmdl=&hvlocint=&hvlocphy=9013575&hvtargid=pla-451786929497&psc=1
-
The threads on the sewer connection are often buggered so I use this to make a somewhat sealed connection https://www.campingworld.com/3-in-1-flexible-sewer-hose-adapter-112501.html?utm_source=google&utm_medium=ppc&utm_campaign={Campaign}&gclid=EAIaIQobChMIs5iF_unw-AIVKhbUAR1aBACrEAQYByABEgIWuvD_BwE&gclsrc=aw.ds