-
Posts
145 -
Joined
-
Last visited
-
Days Won
4
Everything posted by ADKCamper
-

Winter heating with a small electric heater
ADKCamper replied to Carl Hansen's topic in General Discussion
I like the idea of being prepared for a potential furnace failure, so thanks for all the useful information! Interesting observation - after reviewing the specs on quite a few Vornado models, it appears that *all* of the Vornado User Guides specify that the Vornado heater is not to be used on a GFCI protected circuit. I don't know why that would be the case, unless they leak current to ground somehow (even though many models have only 2-prong plugs) instead of returning on the neutral line. At least in our Elite, all of the 120V receptacles are GFCI protected, which suggests that the Vornado should not be used in the trailer??? -
Hmmm... similar vintage here (#409, late 2018) so also wondering how to inspect. Would like to see more pictures or video if possible to understand what I'm looking for. Will take the "mirror on a stick" and a flashlight next time I visit the storage unit to try and see the burner area deep inside.
-
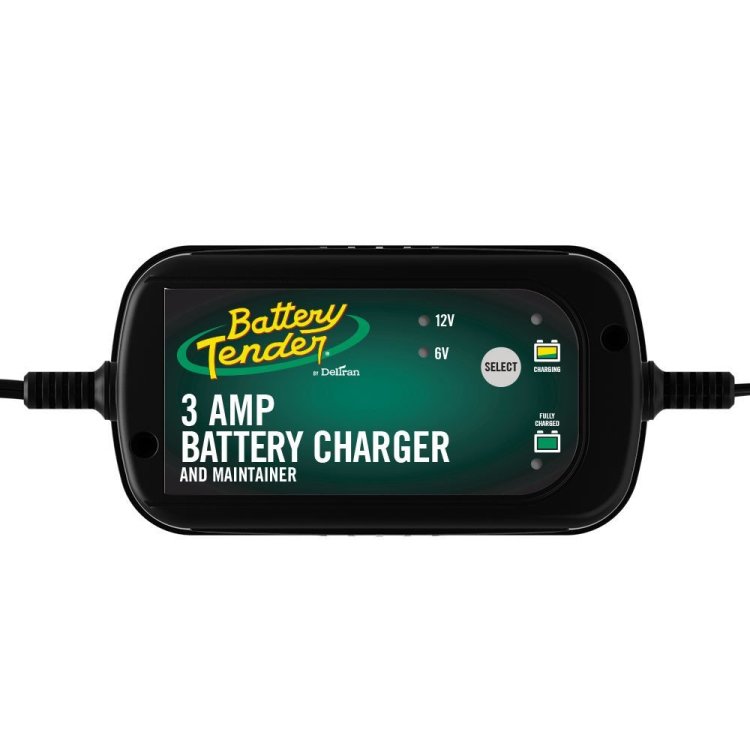
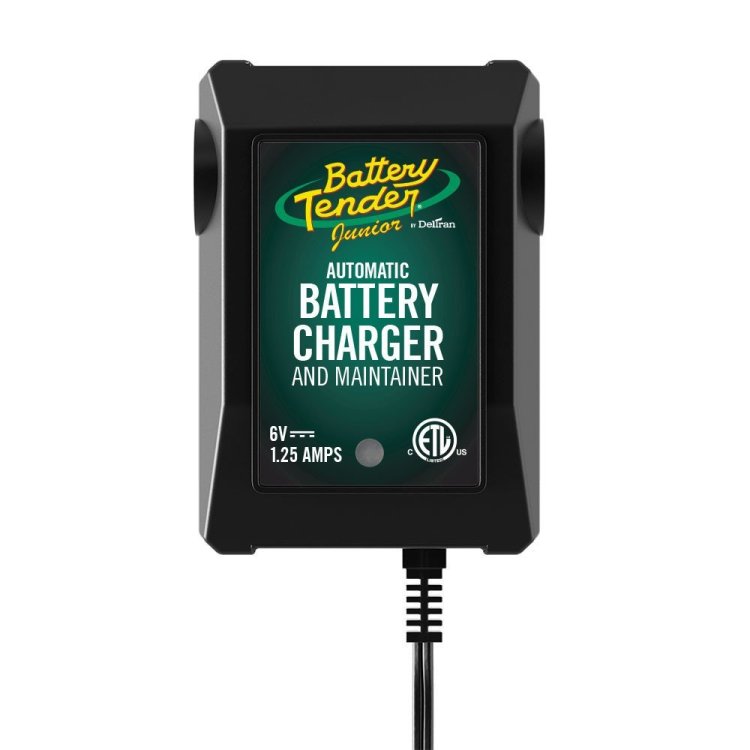
Deltran (Battery Tender) has several models that support either 6v and 12v, or just 6v. They are rated for wet cell, gel or AGM. Battery Tender for both regular and maintenance charging: SKU: 022-0211-DL-WH 6/12V, 1.25Amp, https://www.batterytender.com/Battery-Tender-6V-12V-1.25A-Selectable-Battery-Charger SKU: 022-0202-COS, 6/12V, 3.0Amp, https://www.batterytender.com/Battery-Tender-6V-12V-3A-Selectable-Battery-Charger_7 SKU: 022-0209-BT-WH, 6/12V, 4.0Amp, https://www.batterytender.com/Battery-Tender-6V-12V-4A-Selectable-Lead-Acid-Lithium-Battery-ChargerBattery-Tender-6V-12V-4A-Select (both 6/12V for wet cell, gel, AGM or 12V only for Lithium) Small/lighter/cheaper Battery Tender Junior for lower-rate charging and maintenance charging SKU: 022-0196 6v , 1.25Amp, https://www.batterytender.com/Battery-Tender-6V-1.25A-Battery-Charger_2 I've used both 022-0202-COS and 022-0196 for AGM maintenance charging during winter storage, beginning with the batteries mostly charged, maintenance charging the 1st battery for 1 week, then letting the 1st battery rest for 3 weeks while I used the charger to maintenance charge the 2nd battery for 1 week (our Elite only has 2 6V AGM's), as described above. Repeat charging sequence each month in storage. I have 3 years on this initial pair of AGM's... and so far no issues 🙂
-
Some observations regarding the window seals on our Elite: The exposed top width of the seals on the rear emergency / escape window is about 3/4", while the exposed top width of all the other window seals is about 1" (0.960" according to Pellandent). I haven't pulled the rear seal out, so I don't know if the ID is the same 1/2" that it is for all of the other windows, or not. I also didn't see any 3/4" (top exposure) window seal on the Pellandent website... so... do folks trim the 0.96" top exposure down to 3/4" with a razor knife before installing, or what? After measuring the length of the window seals on my 2018 Elite, noticing the varying lengths of window seal to purchase being recommended above, looking at photos of the Elite and Elite II, and taking into account the option of replacing the emergency/escape rear window (or not), I can only conclude that the windows on either side of the rear dinette/bed area are larger on the Elite II than they are on the Elite. Approximate window seal length measurements for my 2018 Elite are as follows: Rear Emergency/escape window: 3/4" wide top exposure, 47" long Curbside bed window: 1" wide top exposure, 39" long Streetside bed window: 1" wide top exposure, 39" long Streetside dinette window: 1" wide top exposure, 57" long Bathroom window: 1" wide top exposure, 24" long Total 2018 Elite window seal length (not including rear emergency/escape window): 159" = 13'3" Total 2018 Elite window seal length (including rear emergency/escape window): 206" = 17'2" So for all windows on a 2018 Elite, *assuming* we can use the same size seals for the rear emergency/escape window, 17'2" (plus a little bit of spare... rounding up to 18' as recommended above) should be enough. The Elite II *appears* to have larger rear dinette/bed windows, likely with 57" seal lengths, so the 21' measurement referenced above *should* be sufficient for the Elite II. I don't have an Elite II handy to personally measure, so if someone with an Elite II can confirm this window measurement assumption, that would be helpful for the sake of clarity. Echoing what many others have already said... thank you so much for documenting and sharing "everything Ollie" 🙂
-
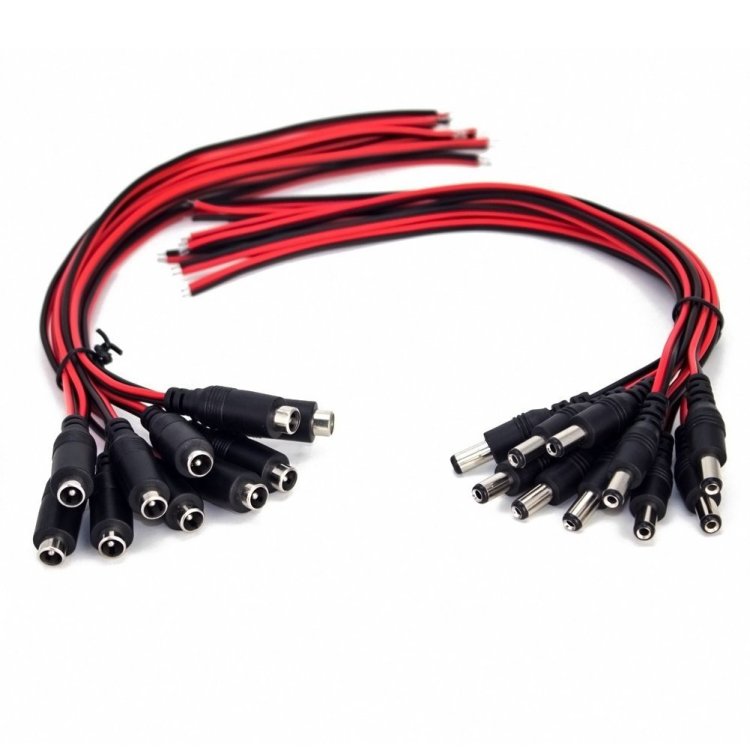
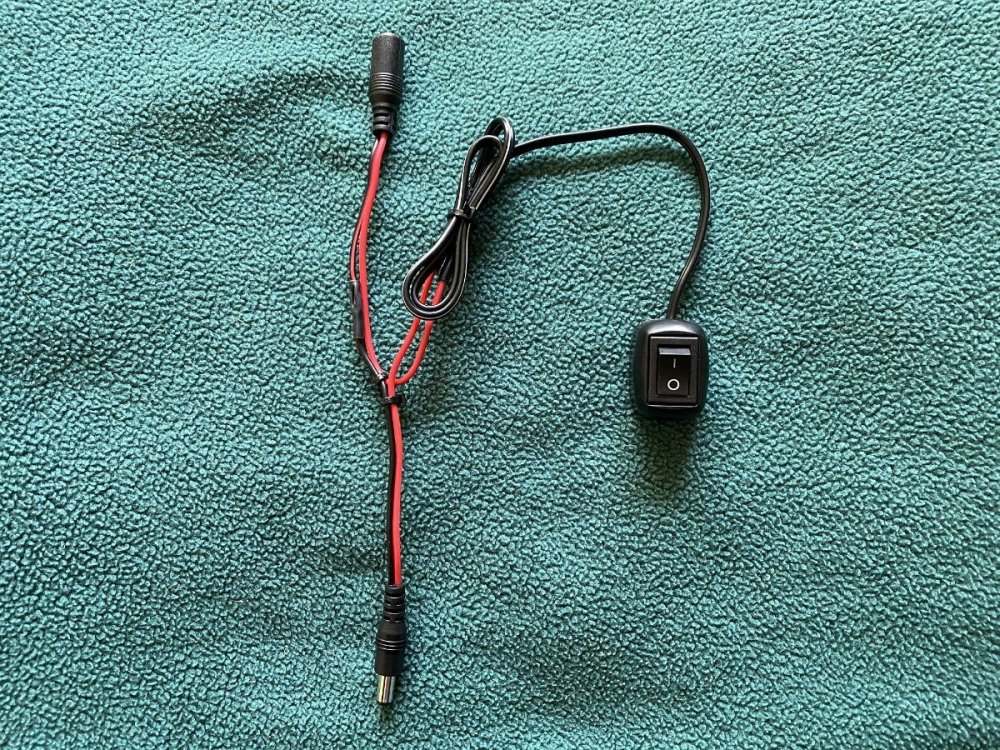
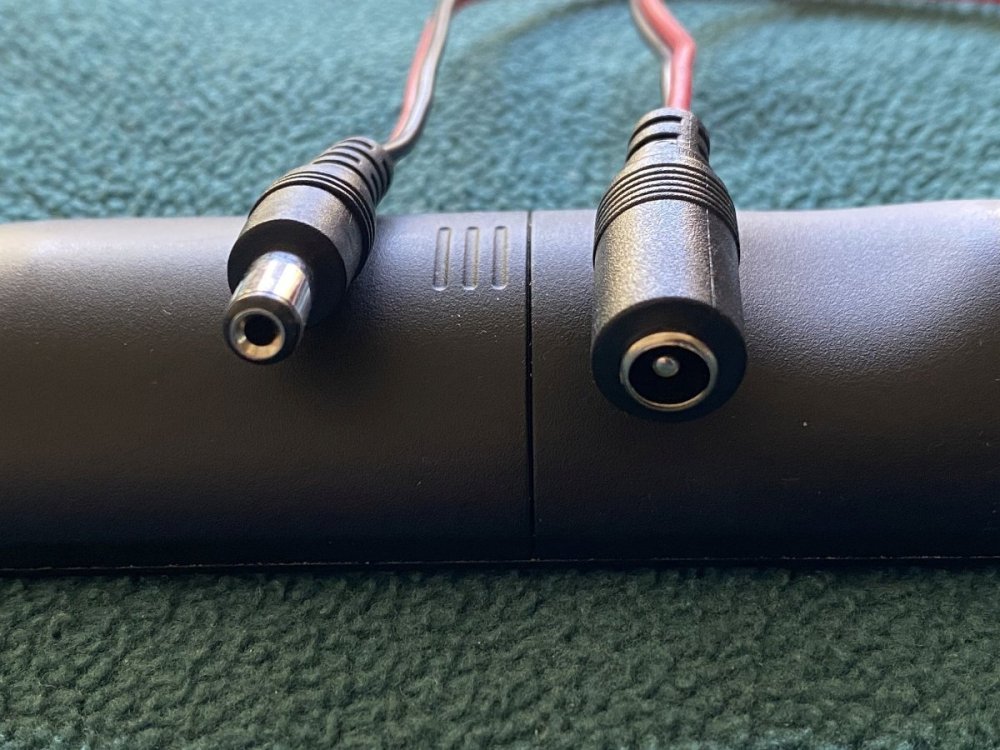
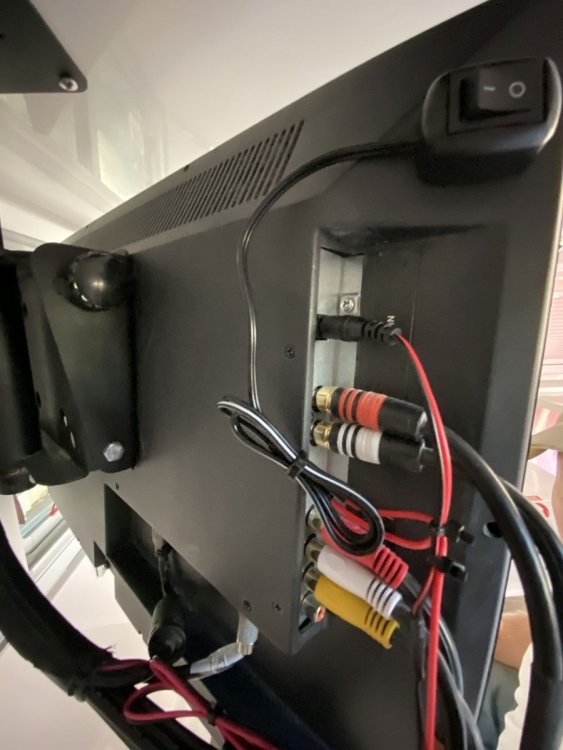
These are the connectors I used to avoid cutting the TV's OEM power cord and also to make the whole switch assembly easily connector-removable: https://www.amazon.com/Pigtail-Female-Connectors-Security-Adapter/dp/B07C7VSRBG/ref=pd_sbs_328_2/147-5472012-5513723?_encoding=UTF8&pd_rd_i=B07C7VSRBG&pd_rd_r=4d4a4233-ce04-4370-a00b-c599dcee81af&pd_rd_w=auQA9&pd_rd_wg=FsjF2&pf_rd_p=52ff3488-8ecd-4341-9663-52e4fb00f500&pf_rd_r=TX8N0D8R7FK6E6ANGQS2&psc=1&refRID=TX8N0D8R7FK6E6ANGQS2 Not exactly heavy duty either... the wire is very fine and definitely not 18 AWG as the Amazon listing claims. Works with the Jensen JTV24DC 12v television in our 2018 Elite. If you have a different TV, you may need a different connector or beefier wire size...
-
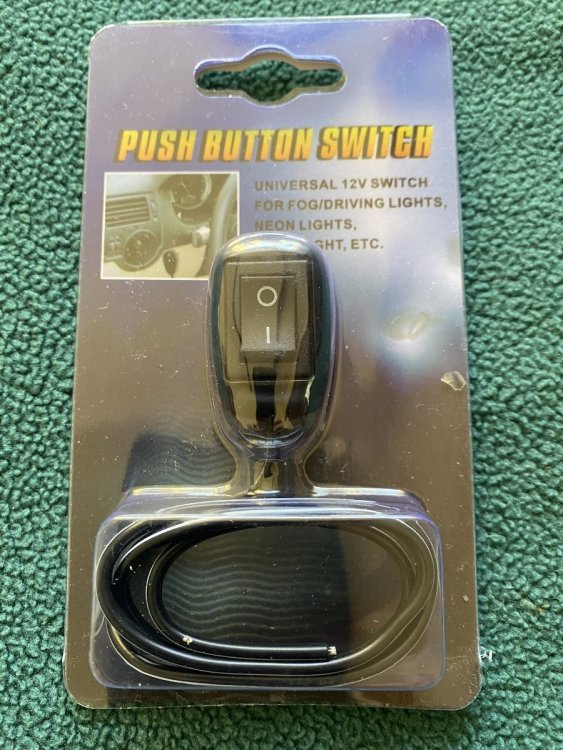
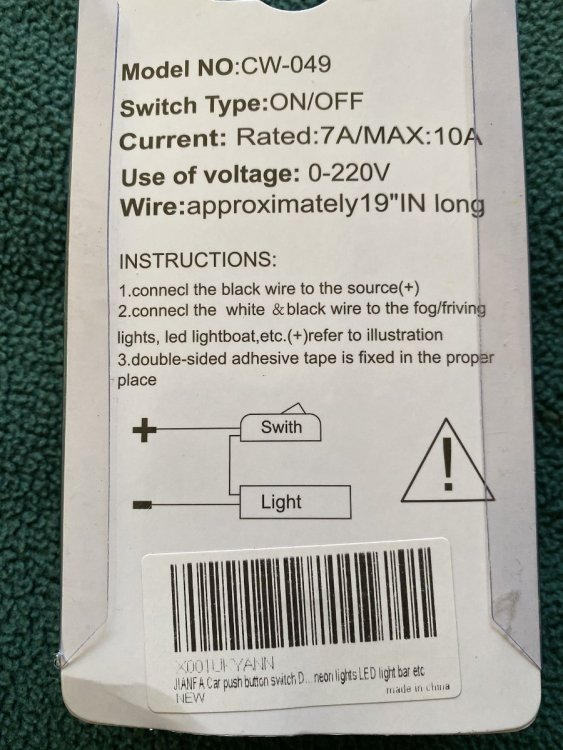
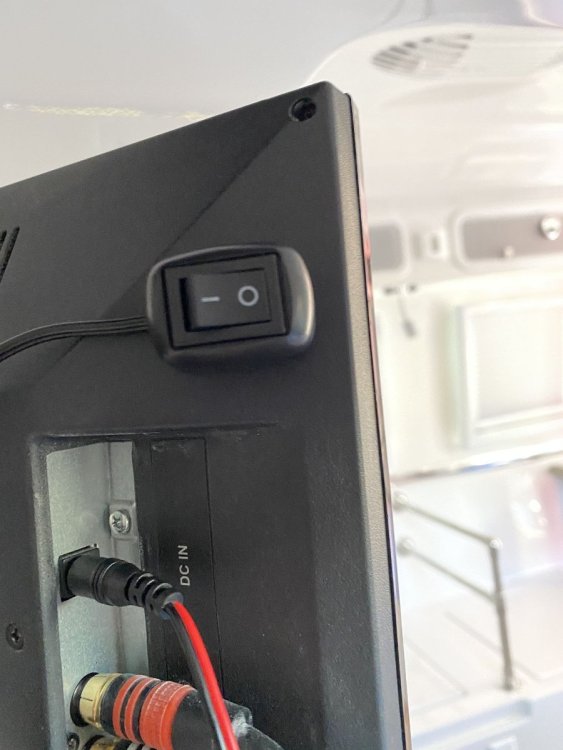
Switch was indeed from Amazon.Its rated for 12VDC at either 5 amps (according to Amazon) or 7 amps (per the packaging), so make sure that's consistent with the current draw of your TV or whatever other device you're switching... Not exactly heavy duty, but easy to replace if/when it dies... just unplug it and put the original power cord back into the TV power input jack. https://www.amazon.com/button-switch-universal-driving-lights/dp/B07G17HWW8/ref=sr_1_2?dchild=1&keywords=JIANFA+Car+Push+Button+Switch&s=industrial&sr=1-2
-
Thanks! The dimming stickers look interesting & worth a try! We have an Elite with less solar / battery capacity, so phantom current draw is more of an issue than it is for the Elite II's. We replaced the factory USB charging outlets with higher capacity ones with no LED; less phantom current draw and faster charging. We put a rolled up pair of socks in front of the surge protector display in the upper rear attic compartment 🙂 We also added an in-line on/off switch to the TV in between factory power cord and the jack on the TV, which was very bright and in-our-face all night since we sleep "sideways" in the smaller Elite. It kills the light when we're not using the TV, is easy to turn on/off, and eliminates yet another phantom current draw.
-
We used to have a front mount hitch on the family truck when I was a kid... back when trucks actually had steel front bumpers 🙂 At one point I did read another thread discussing front mount receivers. All of the commercial ones that I've seen have at least some of the structural components stick down too low (below the factory air dam) on the front of my un-lifted Silverado 1500. I already have occasional clearance issues with backcountry sites either above or below road grade, so I can't tolerate giving up any of my current ground clearance... maybe if I switched to the Silverado 2500 HD 🙂 I did see a reference to a custom-built receiver that directly replaced a tow-hook, since discontinued. An ideal scenario would be (2) 2" front receivers, each attached where one of the tow hooks currently are, with a "cross-bar" attached between the 2 receivers (and in front of the plastic bumper), and the ability to pin-locate a hitch ball anywhere between the left and right receiver locations, without protruding below the front air dam. It would need to support at least a 700 lb tongue weight (i.e. either model Ollie or our 6600 lb boat / trailer) both from a hitch design and front suspension perspective. Practically speaking, I only fully load up the RV bay with the winterized boat and the Ollie once each fall. Maybe at some point I'll get that beefier truck with the bigger engine and the higher ground clearance that won't fit in my garage any more 🙂
-
For the first time we rented an RV storage bay this year. Initially we thought we would need a trailer tongue dolly to precisely position a boat and the Ollie in the same bay with limited clearance. It turned out that with patience and a lot of getting out of the truck to repeatedly check clearances I was able to do it with the truck, so I never purchased a trailer tongue dolly. However, I did a bunch of research on trailer tongue dollies in case I could not maneuver the truck enough to fit both units into the RV bay. Although expensive, it looked to me like the Airtug is the safest and most capable /robust one out there. They have both electric and gas engine models rated for 8,000lb or 15,000lb. Originally designed to move small aircraft, they have a modified version for trailer hitch ball mounts. https://airtug.com/product-category/trailer-mover-tugs/ If moving exclusively on the level, the 8,000lb unit would be fine for either Ollie. If you have any significant incline to deal with (literature mentions inclines as low as 3%-5%) you might want the beefier model to be able to handle the increased load. Tom
-
And... assuming you want AGM battery technology (vs wet cell lead-acid or lithium), the 6V AGM's are already quite heavy (66 lb each for Lifeline GPL-4CT's) so you probably won't enjoy lifting/moving 12V AGM's around if for instance you take them out annually for winter storage.
-
We have a 2018 LE and like quite a few others, we leave the larger rear dinette in its "bed" configuration. So far we have been using the factory cushions for the bed, with a mattress topper over them. We didn't want to setup and tear down the dinette every day when traveling. The bed is 2" narrower than a full/double mattress and you sleep cross-ways, so the person closest to the rear window has to climb over their partner if they need to get up in the middle of the night. For us, a small inconvenience in exchange for the smaller trailer for easier towing and access to tighter campsites. There are several bed configuration options in the LE II, a little more headroom and more available storage space... so quite a few puts 'n takes to trade off against your own camping style, interest and capabilities. We've been camping for decades, working our way through backpacking & canoe camping, tent camping out of the car trunk, pop-up trailers and now the LE for the two of us and an occasional grand-kid. Someone above recommended the factory tour, which is a GREAT experience if you think you might be interested in an Ollie and can get yourself to TN. Also as mentioned, many Ollie owners are more than willing to show off their trailer to potentially interested customers, discuss their own personal post-purchase modifications/add-ons and experiences with towing, maintenance, options selected, etc. If that's something you might be interested in just call the sales office and they can match you up with a near-by owner of the model you're considering. Best of luck with your research!
-
Same thing here. A couple of random times this summer the LP alarm in our 2018 LE has gone off with no apparent provocation. Atwood P/N 36636, mfg date Jun 2018, so only a bit over 3 yrs old. Has never alarmed (yet) when actually camping, only when the trailer is parked in the driveway with the propane turned off at the tanks, all DC loads off except for the small number of tiny phantom loads that aren't easily disabled (LEDs on USB outlets, panel display on Furrion radio, battery monitor display, solar charge controller, CO/LP alarm), and shorepower off/disconnected. Manufacturer's quality control is disappointing, but sadly no surprise in the modern era. Might have to order a new one for next season and hope for the best 😞
-
Yes, you are correct. The Honda EU2200i companion has a NEMA L5-30 3-prong twist lock receptacle. You will need an adapter from this receptacle to the TT-30 3-prong straight bladed plug on the trailer's power cord. FYI you will also not get 30A without pairing up (2) 2200i's using the optional cable from Honda made for that purpose...
-

Code 10, norcold 3000 series fridge
ADKCamper replied to Moonlight Mile's topic in General Discussion
Similar experience... our fridge cord also came unplugged, twice now. I blame the most recent occurrence on a very long stretch of rough interstate pavement with patches on patches. Used a flashlight and a mirror-on-a-stick to see what was going on behind the cabinet's rear wall. This time I tie-wrapped the cord (near the plug end) down to something solid. We'll see how that holds. -
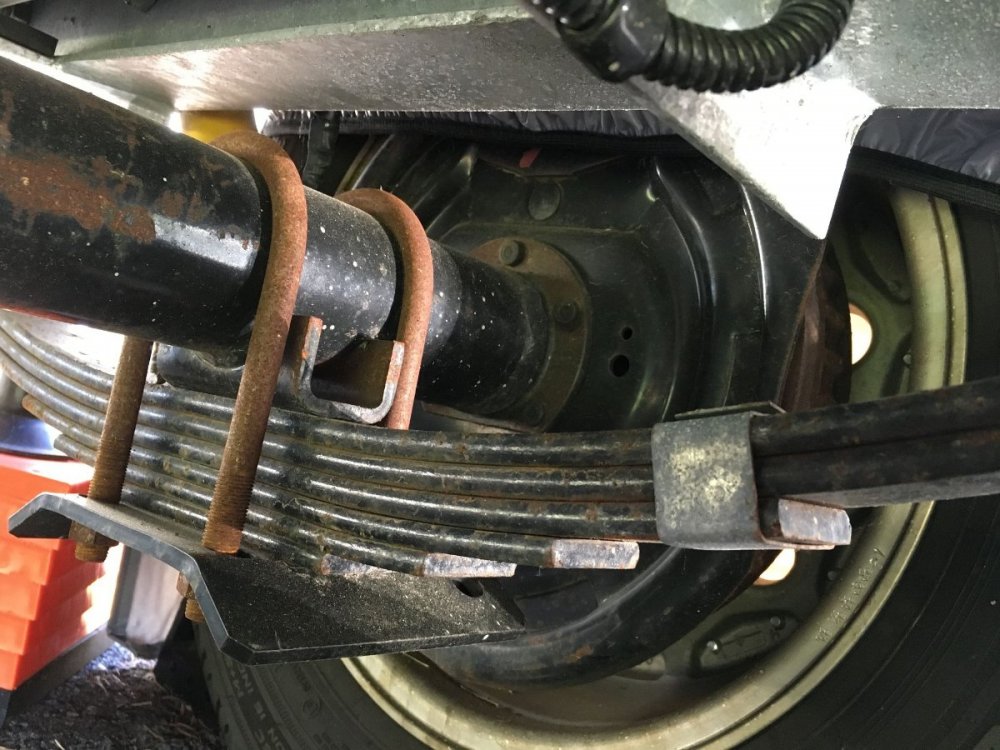
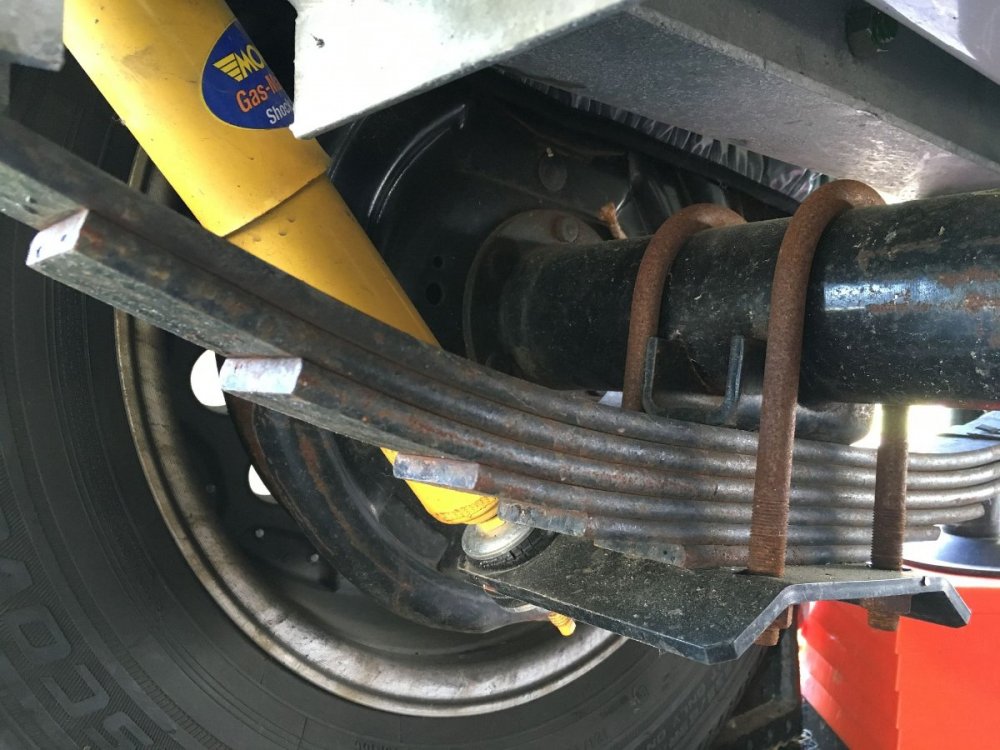
Our 2018 Elite I is finally out of winter storage... our axle ubolt-to-frame clearance is 1-1/32" on the curb side and 1-1/8" on the street side (with trailer "dry", level front-to-back, and no gear loaded). Rear spring shackle is the proper "longer" Dexter HD variant for the single axle Elite I (3-1/8" center-to-center bolt holes, 4-5/8" overall length). Bushing is installed on the leaf-spring end of the shackle only. I'm not sure what the reason is for the discrepancy in clearance height between street-side and curb-side. Our driveway is slightly out of level side-to-side, so maybe that influences it. May also be a difference in the trailer's side-to-side weight distribution. I'll measure again when its on more level ground. It will also be interesting to see how the clearances change with a tank full of water and our standard load of camping gear. Definitely less than the 1-1/2" quoted above from Oliver QC/Engineering dept.
-
Thanks, Longstride! Love to hear the loons calling in the evening when sitting around the campfire or drifting off to sleep. We have our share of pot-holes here in central NY State as well 😞 Our Ollie should be out of storage in 2-4 weeks and I will be able to measure the clearance then. Will also check out our spring shackle dimensions compared to the Dexter K71-358-00 kit referenced above. Hoping to get camping again soon... we definitely didn't get in enough "Ollie Time" in 2020!
-
I can't measure right now as our 2018 Elite I is currently in winter storage. Looking at a couple of photos from 2019, it looks (at least from the angle taken) that we have a bit more clearance than the 1/2" described above, but not a lot. There is some evidence of minor "bottoming out" events visible. Over time we have become better at anticipating such events and adjusting speed and trailer positioning relative to obstructions accordingly.
-
We have (2) Lifeline GPL-4CT 6V 220Ah AGMs in our 2018 Elite-I. This is what Oliver was using with the Solar option late in 2018. At the risk of tempting fate they've performed well so far, although its only been 2 years.
-
Our Ollie (Elite-I) is in winter storage now, but last fall I scoped out the route of the pink BAS feed to help me understand what's what if I ever got to the point where I could install EOH disc brakes. On my Ollie the pink wire goes from the battery side of the 20A self-resetting breaker on the tow vehicle 12V charge line (street-side,, adjacent to the wheel well) into a bundle of split-loom protected wires. It exits the hull from the bottom of that bundle somewhere very close to there, and comes out right above the street-side end of the axle. From there (also covered by split-loom) it goes to the center of the trailer and then follows the hollowed-out path forward along the bottom of the hull, along-side the soft copper propane line to a point near the front of the fiberglass chassis. From this center-forward position the pink wire then heads street-side where it is butt-spliced to the "hot" pigtail on the breakaway switch.
-
So it might be worth a try electrically, without major modifications, if I get that far :) Max PSI is 1600 for disc brakes, so that draws more current than at 1000 PSI as shown on the chart, but unsure how often/for how long full pressure is actually reached. Some experiments would be in order with a clamp-on dc ammeter and a handful of fuses. I hope not to be driving with the trailer in below-zero (deg-F) temps, so that helps. If necessary I could also try a slow-blow 40A fuse in the tow vehicle 12V charge line. And... maybe if the Hydrastar sucks too much current the voltage at the trailer will drop enough that the dc-dc charger will shut itself down temporarily, thinking the engine is off.
-
Disc brakes have been on my wishlist for a while as well. I have an Elite with the 5200lb axle, which I would want to swap out for the same size axle but with E-Z Lube spindles and idler hubs, plus the Kodiak disc brakes and Hydrastar electric-over-hydraulic controller. I have previously swapped surge drum brakes on a boat trailer for Kodiak disks... they performed wonderfully but it was an easier task than changing over the Oliver. I am uncertain where I would locate the Hydrastar controller... I mocked up a cardboard Hydrastar and there is definitely not enough clearance in the Elite-I propane shroud for it to be located there, along with 2 tanks and the box/wiring for the rear stabilizer jacks. I could put it on the tongue, but I would rather not as it might invite mischief being so visible. Maybe slung underneath and partially between the frame members so that the fluid fill and bleed fittings are accessible behind the propane tanks from above, although it would hang lower than the rest of the frame in that area. It would be technically possible but more challenging and less desirable to locate it on the floor in the front closet (with a waterproof penetration through the hull for the wires and brake line... plus some potential risk of a brake fluid leak in the closet). Another concern with this mod... there's not enough capacity in the my tow vehicle's 12V charge line (fused at 40A, but I doubt the actual wire is sized for that... will have to look) to power both the Hydrastar controller (maybe 18A-25A draw in warmer climes, 40A draw below 0 degrees) and any kind of dc-dc charging of the Ollie's battery. I could make a more complicated solenoid interlock somewhere so that only one was actively drawing current at a time, *or* perhaps just dedicate the 12V charge line to charge the Ollie battery (e.g. Redarc or Victron Orion isolated dc-dc charger) and run a separate 12V feed back from the Ollie battery to the Hydrastar (or maybe share the existing feed to the hot side of the breakaway switch with the Hydrastar 12V input... replacing it with a larger gauge... I tried to determine if that was allowed but could not find any relevant reference with a sufficient level of detail to answer the question). Tom
-
Had a similar experience with our Elite (#409 - late 2018) shortly after pickup. Fridge was working fine on AC at first, then it wasn't... After a bunch of poking around I discovered the AC plug was dangling almost out of its receptacle, which was located on the curbside wheel well (to the left of the refrigerator as viewed from the outside lower vent panel) behind a foil-sealed "plastic cardboard" panel. It was tricky to get in there without messing up that panel. No way to tell if that plug was initially fully seated or not. Haven't had a problem with it since. I'm surprised that such a "buried" outlet location meets code... or maybe it doesn't? Seems like that outlet should be in plain sight behind the refrigerator lower vent cover, probably with a weather-proof cover on it. Also had issues with the window shades falling off a few times. I found & replaced a couple of broken clips... and... lowered the tire pressure to 55-60psi. No problems with either of those issues since!
-
We typically don't use it when parked in our own driveway, but everywhere else we do. Just like electrical "surges", you will never know when you need it until its too late...
-

Zamp solar controller question
ADKCamper replied to tallmandan's topic in Mechanical & Technical Tips
So-called "parasitic loads" could also (collectively) be keeping you just shy of a full charge. Depending on your configuration, you could look for things such as: Inverter "powered on" but not being used (we turn off the remote switch *and* the switch on the inverter itself when not in use) Water pump left on (even though not being used) Truma (for us) water heater 12v controls left on (remote switch inside and 12v controls switch outside on the heater) Of lesser concern, and not enough by themselves to inhibit a full charge status, but possibly "adding to" the loads from above: Radio/audio system (no switch to turn completely off) TV has no real on/off switch.... its always sitting there looking for the remote to say "turn on" (we added a switch to ours... not because of the parasitic load while off but because the bright little power-on LED interferes with DW's sleep). CO monitor Off-the-Air antenna amplifier And taking it to a ridiculous level... the little LED's on all the USB charging ports I haven't read the Zamp ZS-30 charge controller manual lately... does it need to be "trained/synchronized" to recognize a full charge?


