-
Posts
145 -
Joined
-
Last visited
-
Days Won
4
Everything posted by ADKCamper
-
I finally was able to measure the size of the freezer compartment on our (absorption) Dometic RM2454: W=17",H=6",D=8" = 816 cubic inches = 13.4 liters. As mentioned Dometic is somewhat elusive with their specs, but they do claim the overall size is 4 cubic ft = approximately 113 liters. The Dometic and the 115 Elegance have *approximately* the same overall capacity, with a larger freezer in the 115 Elegance. The Nova Kool has a larger overall capacity, primarily by being somewhat deeper than the other 3, with a similar freezer size to the Dometic. To summarize a few of the recently mentioned options: Dometic RM2454: 4 cu ft/113 liters overall, 13.4 liter freezer, ~99.6 liter refrig (by extrapolation) Isotherm Cruise Elegance 130: 4.6 cu ft/130 liters overall, 6.0 liter freezer, ~124 liter refrig (by extrapolation) Isotherm Freeline 115 Elegance: 4.1 cu ft/115 liters overall, 32 liter freezer, ~83 liter refrig (by extrapolation) Nova Kool R5810: 5.8 cu ft/164 liters overall ,11.3 liter freezer, ~152.7 liter refrig (by extrapolation) As (almost) always, there are trade-offs to be considered 🙂
-
It wasn't us, but we were in Oregon with our LE back in late Sept / early Oct. We entered from southern Idaho, through Vale (OR) and then went up towards Mt Hood. From there we concentrated mostly on coastal lighthouses, following mostly US 101 along the coast roughly from Tillamook to the California border. We switched focus to the redwoods and sequoia of northern CA and wine country in and around the Napa Valley. Then we headed eastward to see lotsa different types of rocks through Yosemite, Zion, and Arches on our way home to upstate NY State. Its a beautiful area... lots to see. We'll be back again for more 🙂 We did not see any Ollies on the western portion of that trip, and only slightly less than a handful as we traversed the mid-west out and back again.
-

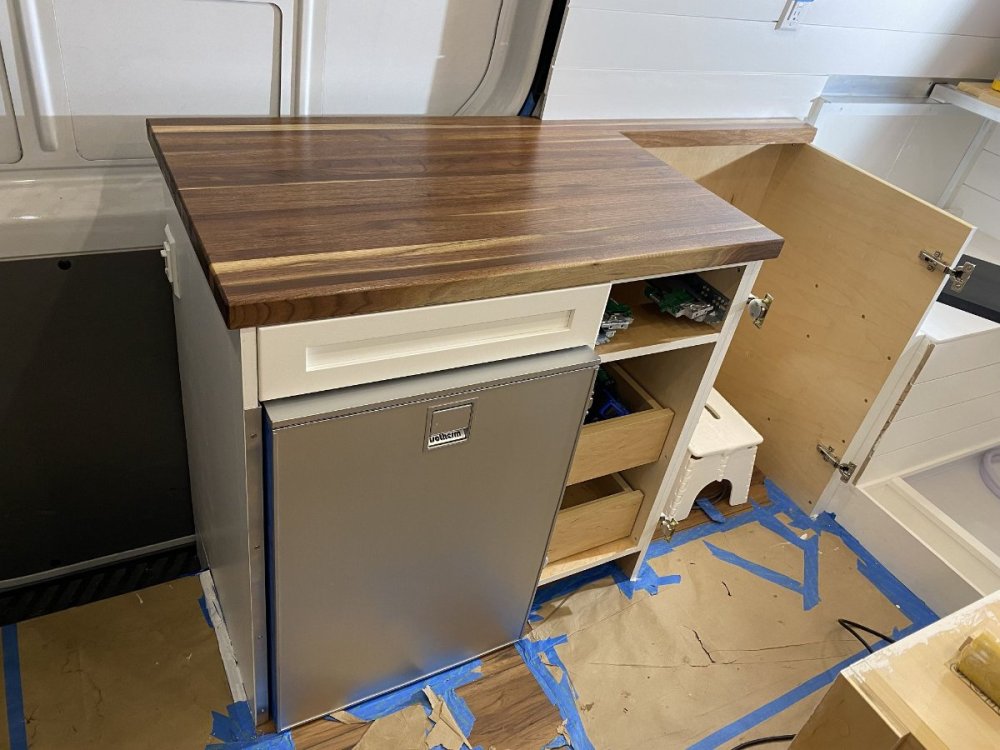
Sound test of my new Isotherm fridge. Pretty amazing!
ADKCamper replied to John E Davies's topic in Ollie Modifications
Ditto Rivernerd's comments! Might find myself in the same situation a few more mods down the road... John Davies - that poor fridge sure looks abused. Amazing there is no damage. Shippers and warehouse forklift drivers are not known for their gentleness and respect for our expensive toys 😞 -
I don't know about the newer LE's... but our late 2018 LE does not heat the lower mechanical areas as well as the LE II. The furnace has only 2 outlets; one directly through the forward bulkhead into the bathroom and the other on the aisle side of the forward dinette seat (right next to the bathroom door). There is no ducting under the floor or in the mechanical spaces to move heat into the rear under-floor spaces where the water pump, water heater and outside shower plumbing reside. On my list of things to do... is to create a couple of vents, one on each side of the aisle under the rear dinette, and mount a ~3" computer fan in each opening, pulling ( warmer air in the spring & fall / cooler air in the summer ) from the aisle and forcing it into those 2 rear mechanical spaces. There is precious little room under the floor in the LE to run additional flex ducting. IMHO the LE is more of a 3-season camper than a year-round camper, at least as regards the water system. With the water system winterized (and thus unusable) it should be possible to camp year-round. So far we have camped down to 19 degrees F (while winterized) a couple of times, and around 28-30 degrees F overnight (not winterized), warming to above freezing during the day, and both of those scenarios worked out fine.
-
We have had generally good luck towing our LE with a 2017 Silverado 1500 LT (5.3L V8 gasser, 355 HP, 383 lb-ft torque, 3.42 axle, 4x4 double cab/std bed, max payload 1850, max conventional tow 9200) without the WDH. No discernible sway issues and generally reasonable performance when climbing and descending in most locations (using lower transmission gears as needed up and down in steeper sections). I haven't been through a CAT scale yet, but I expect we are close to max payload as we have a fiberglass cap on the back and assorted camping gear in the bed (no cast iron, and generally no higher than the rails). Our LE tongue weight is about 460 lb loaded for camping, with 30 gal of water and empty black/grey tanks. Our LE sticker gross weight is 5,000 lb and I expect we are slightly under that, but we'll see what the CAT ultimately says. We did have some modest difficulty maintaining speed and running hot when climbing through the Medicine Bow National Forest in Wyoming, or the (in)famous "IKE" stretch of I-70 in Colorado, 7% grade eastbound from Dillon to the Eisenhower Tunnel at the Continental Divide, heading towards Denver. There's always trade-offs... the 1500 is my daily driver, and last year we were only camping for 53 nights. If we're going to continue traversing the Rockies, the next time the truck is replaced it just might be a 2500.
-

Appropriate Grease for Dexter EZ-Flex Suspension
ADKCamper replied to Tom and Doreen's topic in General Discussion
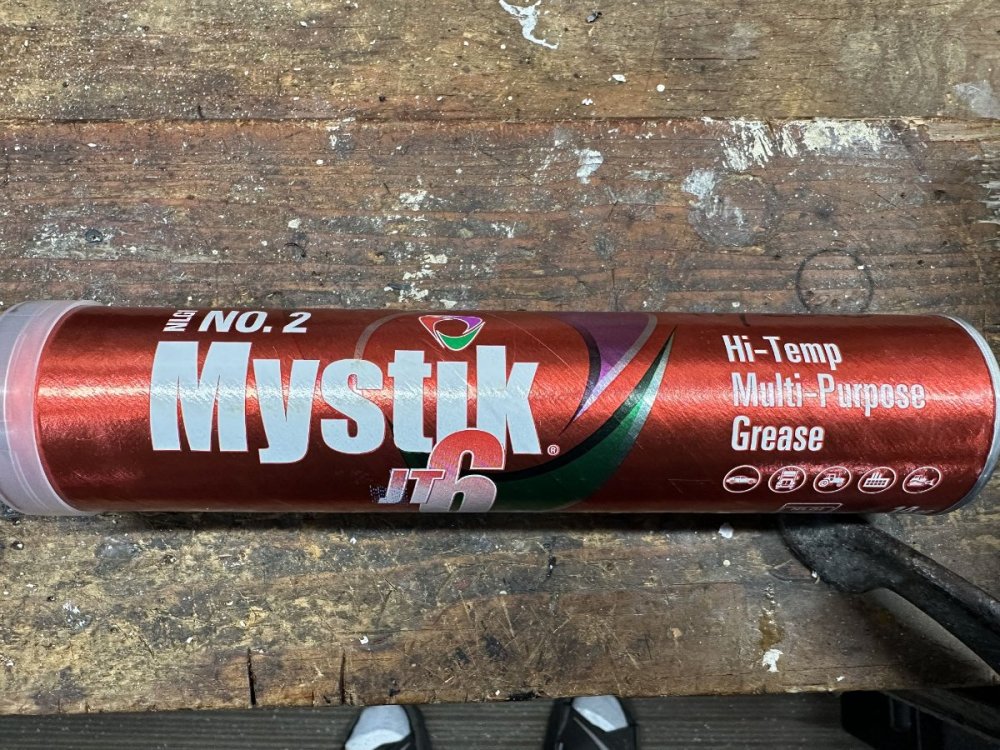
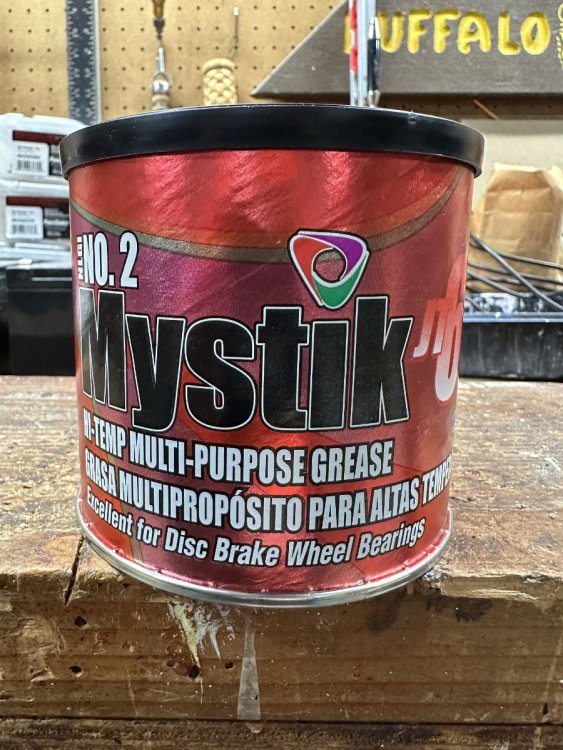
Lucas Red & Tacky is a good choice. I've been using the similar Mystik JT6 NGLI #2 Hi-Temp grease for trailer wheel bearings (Lithium Complex, non-Moly), spring shackles and tow vehicle lube points for quite some time now. Works well, is affordable and easy to find. I don't know if this is still the case, but at trailer pick-up (late 2018) I asked what wheel bearing grease they use, and this is what they told me was in our bearings... Boat trailer wheel bearings and gimbal bearings get Quicksilver High Performance Extreme Grease (NGLI #2, Calcium Sulfonate-based) because of its higher level of water resistance. -
In addition to the NovaKool referenced above, Isotherm has a newer Elegance model with a larger freezer - the Freeline 115 Elegance (CR115EL). It appears to be 2 inches taller than the Cruise Elegance 130, with the same width/depth H:31.4" x W:20.7" x D19.5" +2" door depth proud of flush). Not sure if that fits in the available Oliver spaces or not... It *appears* to have the functionality of the Intelligent Temperature Control built-in with its "ECO" mode (267 W/24Hr vs 418 W/24Hr for the Elegance 130 without the ITC). Slightly less overall volume (4.1 cu ft vs 4.6 cu ft for the Elegance 130) but a much larger freezer compartment (32 liters vs 6 liters for the Elegance 130). Some places show it as 12vdc only, and others seem to have a 12vdc/120vac version. Its compressor is bottom-mounted but has the same Danfoss/SECOP components as the Cruise Elegance 130. https://www.westmarine.com/isotherm-cruise-115-freeline-stainless-steel-fridge-freezer-ac-dc-internal-mounting-system-3--side-flange-20597779.html?cm_mmc=PS-_-Google-_-DSA>Galley%20%26%20Outdoor-_-Null&creative=638403958720&device=c&matchtype=&network=g&utm_medium=cpc&utm_source=google&utm_campaign=OutdoorandMaintenance&gclid=EAIaIQobChMIsIn0rtiQ_QIVCVVyCh3eMAqFEAMYASAAEgIt0_D_BwE https://www.indelwebastomarine.com/us/products/product/show/freeline-115-el/ https://defender.com/en_us/isotherm-cruise-freeline-115-elegance-refrigerator-freezer Could be worthy of investigation for those that want/need a larger freezer space.
-
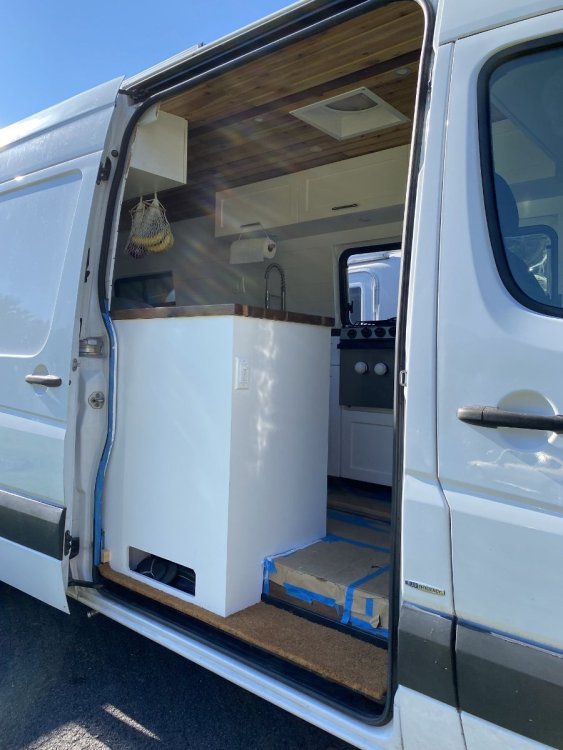
Yes, for now the exhaust comes out below the drawer. We've been watching for signs of overheating, but its been fine so far. There is some air intake from the bottom rear of the cabinet, through a space designed to hold shoes. If necessary we can add more exhaust venting at the top rear or the end of the cabinet, which is exposed within the van's sliding door opening.
-
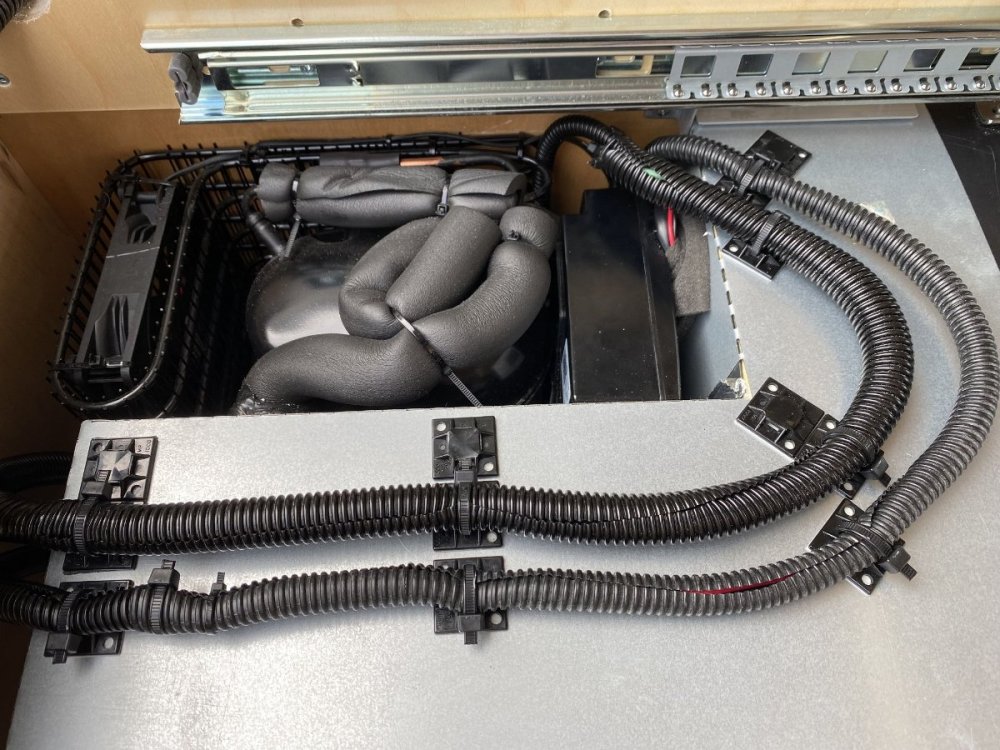
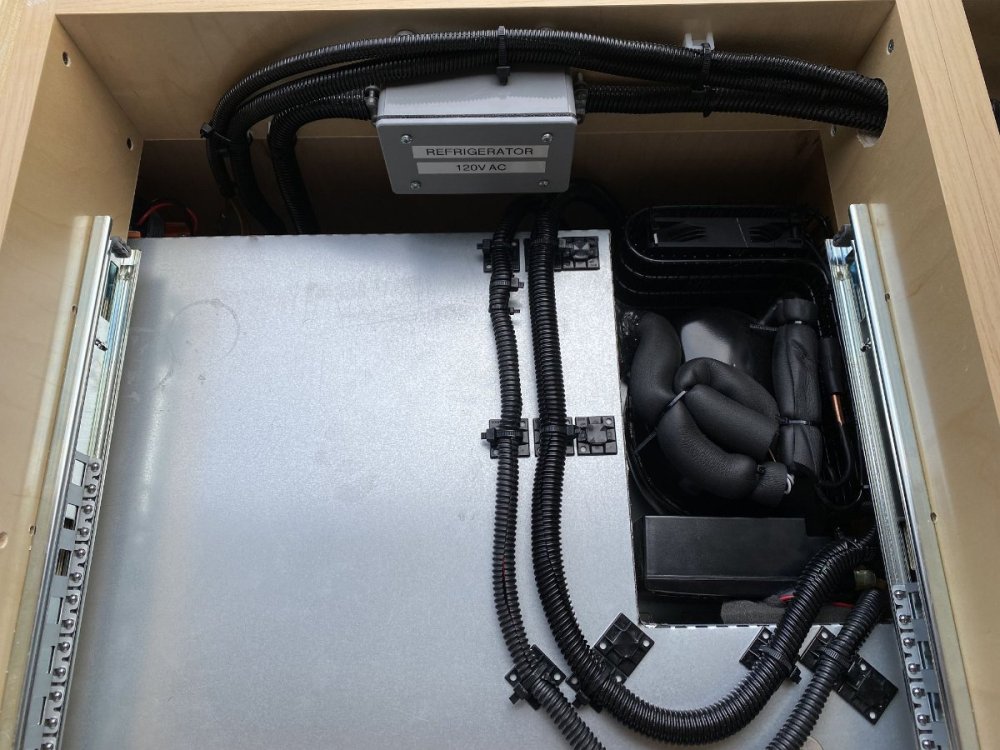
I helped install a similar if not identical model in our son's Sprinter van conversion. From memory, there was a cord with 3 pigtails on the end, 2 of them with push-on connectors as shown above. There was a designated grounding screw on the flat surface just below the SECOP unit (although tiny and not painted green...). See attached photos for how we secured the 12vdc and 120vac wiring...
-
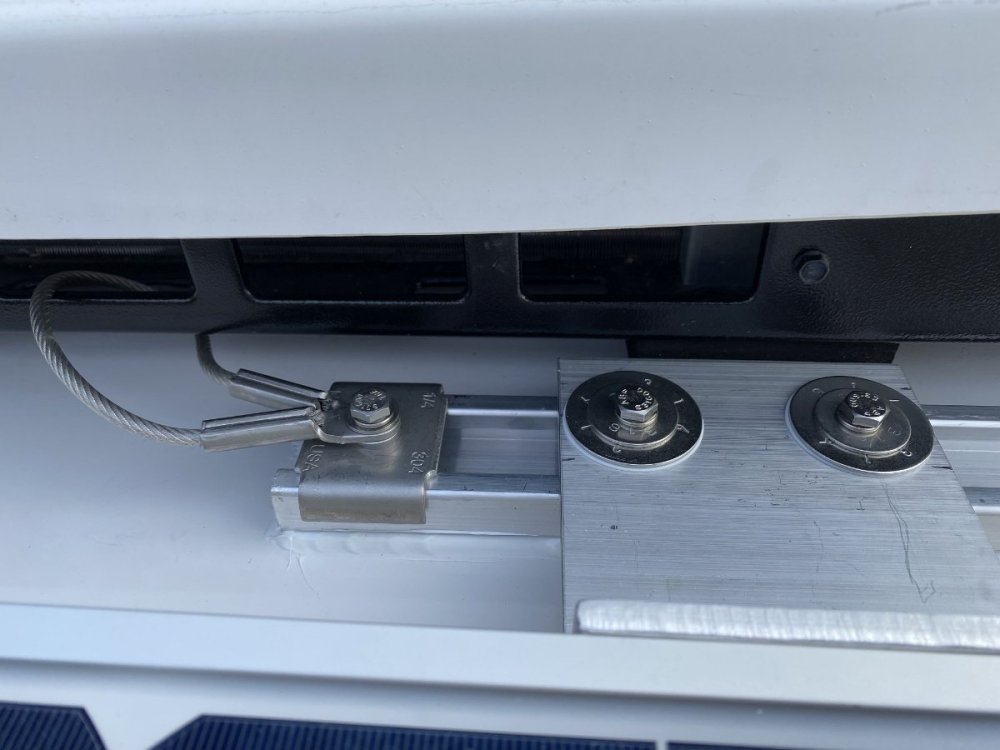
The LE only has 3 awning brackets. Using the front or middle bracket directly would cause interference between the existing panels and the new panel, so I used an offset from the middle bracket, plus the rear bracket. Awning off: Bracket alignment and attachment. Bottom 2 screws are flat-head so as not to interfere with awning attachment. Upper 2 hex head bolts are temporary until the awning is remounted through those holes. From memory, the awning brackets were something like 9 degrees from vertical, so the new solar brackets needed to be bent in order to be vertical where the solar panel attaches on the top. You can never have too many clamps and spacer blocks! Curbside brackets cut to proper height and mounted. Note the inboard aluminum strut channel is VHB taped to the roof... it had to be partially cut in 2 spots in order to be able to bend the flat, continuous base to follow the slight front-to-back curvature of the roof while still keeping the strut in one continuous piece (for maximum VHB tape contact area). Inboard brackets made from large aluminum angle, one rightside up and one upside down to follow the curve of the roof. Rear inboard angle bracket mounted "upside down" and at a slight angle to follow the roof curvature "Belt 'n suspenders" bracket at front of strut channel to help keep strut from lifting with wind load on the panel. Rear attachment to strut channel, with safety cable to help keep strut/panel from flying off the roof if VHB tape lets go. Top view of almost-completed installation Completed and in-service!
-
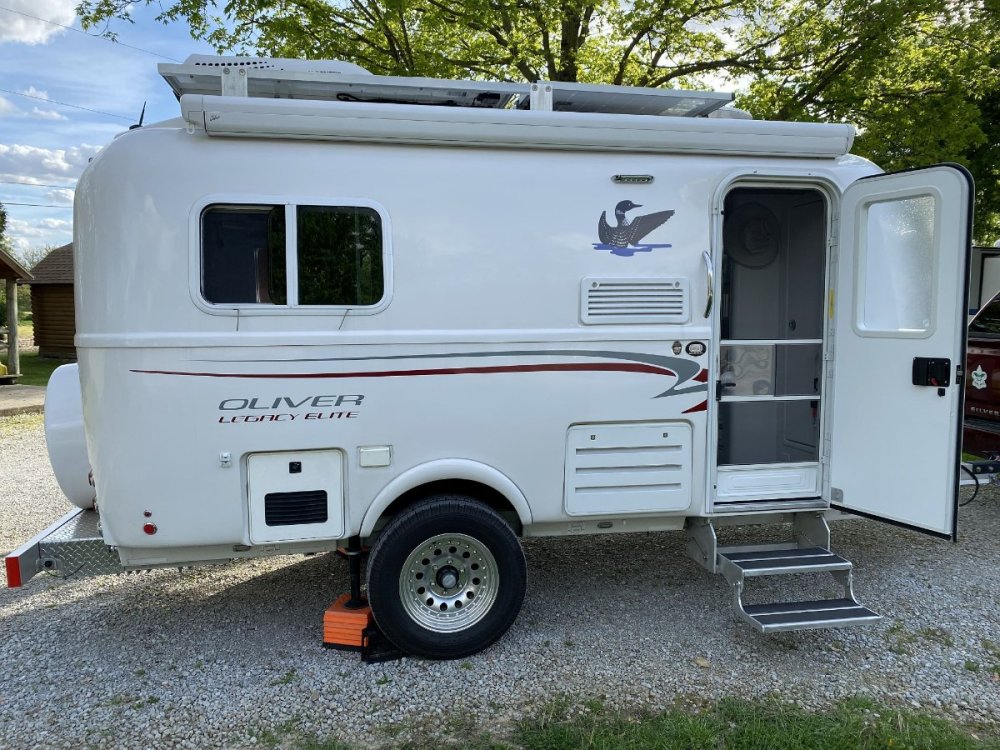
A couple of folks have posted threads detailing solar panel mounts utilizing awning brackets: https://olivertraveltrailers.com/forums/topic/3379-zamp-solar-panel-add-ons/ https://olivertraveltrailers.com/topic/added-2-90-watt-panels-to-the-solar-array-for-520-watts-total/ We did something similar on our 2018 LE... adding an extra 90 watt panel parallel to the curb-side awning, attaching the "outboard" side of the new panel to the awning mounts and the "inboard" side to a long (approx 3ft) piece of aluminum strut channel that was VHB-taped to the roof. As a belt 'n suspenders safety feature, the front end of this strut channel was bolted to one of the existing solar panel brackets, and the rear end was stainless steel cabled around one of the air conditioner frame vents. Lots of custom angles and tapered spacers to match up with the roof contours, but it turned out quite solid. We get up there and check the attachments a couple of times each year just to be sure. Might be possible to make a cross-frame between both awnings to support solar panel(s). We only had the one awning however.
-
Our late 2018 LE came with LT rated tires - Cooper Discoverer HT3 235/65R16C M+S, Load Range E, max load single axle 3195 lb at 85psi, 28.03" diameter. When inflated at delivery to 70 psi, we had issues with window shades popping off their clips, cabinet drawers and the bathroom door flying open, and cushions and other loose gear migrating around during travel. We've settled on 60 psi (cold) for "smooth" travel, and 50-55 psi for slower speed rough terrain travel when needed. Sadly, even the interstates are not necessarily smooth in some locations any more, and upon occasion we've had to slow down below the speed limit to accommodate 😞 Not sure yet whether we'll replace with LT or ST tires when the time comes. We do have newer ST tires (2022 Goodyear Endurance) on our dual-axle boat trailer, which seem to be greatly improved over earlier ST offerings.
-

Trailer Length vs "pretty" campsite
ADKCamper replied to Dennis and Melissa's topic in General Discussion
We come from a backpacking, canoe camping, car camping and pop-up trailer background, so our 18.5 ft LE feels like a palace 🙂 As others above have said, our intention is to be outdoors, experiencing the nature and scenery around us, so time inside the trailer is usually reserved for sleeping, inclement weather and some but not all of the cooking. The short LE fits well in most commercial campgrounds/state parks and almost all BLM/COE/USFS sites we have enjoyed. The older national park campgrounds can be a problem, as indicated above. This year we had a difficult site in Zion's older South Campground... the campground loop road was quite narrow so there was minimal tow vehicle maneuvering room. The pad for our site was perpendicular to the road, not angled to ease the backing-in process. As the final challenge, there was a tree on one corner of the site's entrance and a big rock on the other! Fortunately... the site directly opposite ours was empty both when we arrived and when we departed, so there was a place to maneuver the front of the truck partway through the alignment process. Our second night was in Zion's Watchman Campground (couldn't get 2 consecutive nights in the same site) which seems to be somewhat newer, and the loop road and sites were slightly wider and nicely angled. Someday maybe we'll have tow vehicles with all-wheel or joystick steering 🙂 -
Yikes! That would definitely ruin your day... I wonder if there's any way to analyze that action in a simulator, and/or practice how to correct for the effects of this scenario?
-
Thanks so much for the additional details... Nice retrofit, and well thought out!
-
Congrats! Looks like a nice job! We have a 2018 Elite and have been contemplating just such an upgrade for a while. I have successfully done this on a boat trailer in the past. One thing that I haven't been able to figure out... where did you put the electric-over-hydraulic controller? There's not very much room in or on an Elite for a unit of that size, that doesn't hang down too low, with routing opportunities for electrical cables and brake line... It looks like you have a different spindle than the more recent Elites, with a zerk fitting for greasing the bearings. Is that original?
-

Electric brake and taillight power source
ADKCamper replied to GreenFlash's topic in Mechanical & Technical Tips
Under "normal" circumstances, the trailer brakes and tail lights/directional signals are powered by the tow vehicle. HOWEVER... in the case of a tow vehicle / trailer disconnect, the trailer battery is required to power the trailer brakes when the emergency disconnect cable/switch is engaged. Without research, I suspect it is likely illegal in most states to pull a trailer with electric brakes and no on-board battery in case of a disconnect... -
A couple of additional comments… we found a rubber cover for the trailer 7-pin connector that keeps the water out if stored vertically. It MIGHT have come from eTrailer.com?? We also have a water resistant fabric cover over the head of the tongue jack, and sometimes slip the 7-pin connector up under that cover to keep it dry.
-

Best Replacement for Lifeline gpl-4ct agm battery
ADKCamper replied to roguebooks's topic in Mechanical & Technical Tips
We have a late-2018 Elite with the (2) Lifeline 6v AGM's... now in year 4 and still holding up well. We will probably switch to lithium when these die. Yes, as mentioned you can change the Zamp solar controller charge profile. However, our 60A Progressive Dynamics PD4060CSV converter (bundled in with the breaker panel under the side dinette) does not support a lithium charging profile. Battleborn (and I'm sure other places) sells a replacement PD4060LICSV converter with a lithium charge profile. The converter swap-out is pretty straight-forward. A year or so ago I saw them on sale for about $187... I haven't looked lately, and almost everything is more expensive now! -
Great photos of great locations and great trailers! We hope to camp at many of those same locations at some point as well... All the best to you and Susan!
-
At least in our 2018 Elite I, the battery compartment is indeed smaller than in the Elite II, nominally holding 2 batteries of "normal" size. Lithium was not an option when we purchased our Elite I. We have the high-tech upgrade for that time - two 6V 220Ah AGM batteries in series, with (2) 115 W solar panels on the roof and the 2000W Xantrex inverter. We are by nature pretty frugal regarding our electrical consumption. We rarely use the inverter, and the Air Conditioner is not on the inverter circuit (which wouldn't have enough power from the AGM batteries anyway...). We camp a lot in the Northeast with partial-to-full shade and cloudy weather and can't always recharge to 100% every day. Its not unusual to be at 80-something percent at end-of-day under those conditions (as long as we're not using the furnace overnight and run the fridge on propane). We do carry a small generator but so far have not needed it to recharge the batteries. Newer lithium options should provide additional electrical "range of discharge" while waiting for a sunny afternoon to come along.
-
We have a very similar curved leveler from one of Anderson's competitors... Beech Lane. It is black instead of orange, *slightly* less expensive (but not significantly so), same max 4" lift, rated at 35,000lb instead of 30,000lb for the Anderson (again, not a significant difference for trailers in the Oliver weight class). Same/similar lifetime warranty (we didn't read all the fine print). They're spec'd/sold by an American company but it looks like they're made overseas somewhere. They're sold in one and two-packs. We gave them the edge back in 2018 based upon some online reviews that *claimed* they were less likely to break than the Anderson model. Our Beech Lane's work fine and have not broken, but we've never had the Andersons, so I can't confirm or refute that claim. References: https://www.beech-lane.com/camper-levelers https://www.amazon.com/dp/B07PPC57T7?ref=myi_title_dp&th=1
-

Winter heating with a small electric heater
ADKCamper replied to Carl Hansen's topic in General Discussion
Thanks, JD for the comment you found from Vornado Consumer Service. I agree there's likely a preponderance of legal risk management going on there. People run 1500W hair dryers on GFCI's in bathrooms all the time. RE Vornado's comment "GFCI outlets not only protect against ground faults (arcing)..." As I'm sure you know (but apparently Vornado Consumer Service doesn't), ground faults are not necessarily "arcing"... which is of course why the newer AFCI's were developed. In my opinion the design of AFCI's is still a work in progress, but that's a discussion for another time. Good news is there is not (yet) an AFCI in my trailer 🙂 I also agree with routlaw regarding 4-season camping in the Olivers. I've lived and camped for years in several locations in central and northern NY State, and while our weather isn't as consistently cold as in Montana, it certainly gets there from time to time. Sometimes we just have to bite the bullet and winterize the trailer's water and waste systems, and pay attention to the (lithium) battery temperatures...


