jd1923
-
Posts
3,605 -
Joined
-
Last visited
-
Days Won
276
Everything posted by jd1923
-
We had the KTT mattresses which on our very first trip seemed uncomfortable, too soft and too difficult just to sit up in bed to watch TV. We have Brooklyn Bedding and home and went with two of these" https://rvmattress.com/products/brooklyn-wanderlust-memory-foam/rv-bunk-30x75-12-inch I went with the 12" for its 3 layers of foam and medium firmness. They are very heavy and 12" is really too tall! Added Bonus: at this height our old dog Charley can't jump up on the beds anymore! (He has his own bed.) We opened the stitching on a corner seam and with an insulation knife cut a 14" radius to fit. They have the 30x75" size in several mattress heights. As far as lifting beds. Stop doing that! We use our boondocking port almost every time out. When I'm ready outside, Chris just throws two switches under the bed to refill the FWT from the backup water tank in the bed of our truck! OTT should read the below post for new design ideas, but who cares about what comes in a new Oliver anyway? Not me, now that this has been corrected!
-
I upgraded ours to the 2 5/16" ball with new cone earlier this year. After upgrading to Alcan Springs, I do not feel the need for a WDH anymore! It's like since the Oliver suspension is holding its own, not porpoising up and down, we're now towing smoothly without it! Anybody need a full setup like new? Likely there are a few sitting in Oliver garages! Still pretty much necessary for many 1/2-ton trucks.
-
Did you coat this yourself or did you have a local dealer service the coating? Looks like it requires special equipment. We just got our Oliver polished and ceramic coated and it looks better than ever up front and all over. However, we off-road with a Lexus GX470. Had it painted a couple years ago and it looks great except the LARGE plastic front bumper has gotten scratched up, paint pealing only on the plastic from off-road use and pressure-washing. A black vortex coating may be the answer! I would remove the bumper to get it sanded and coated properly.
-
Original owner replaced the Suburban furnace with an Atwood, so ours is somewhat different. It works great, coming up to temp in a few minutes. So, if you set yours to 70F, will it not get there? We set ours at 64F overnight, comfortable sleeping temp, but I often bump it up to 68-70 in the evening when I feel cold. I also did duct work. Removed the duct under the beds, removed the furnace outlet facing the rear, so that greater airflow would be in the proper direction. The air out of the kitchen duct is HOT to the touch and now we get decent heat to the bathroom. Does the heated air at the kitchen duct feel HOT? Do you feel good heat outside at the exhaust? Hard to determine cause from afar…
-

Installing Pioneer Inverter AC
jd1923 replied to Treasure Coast Vault's topic in Ollie Modifications
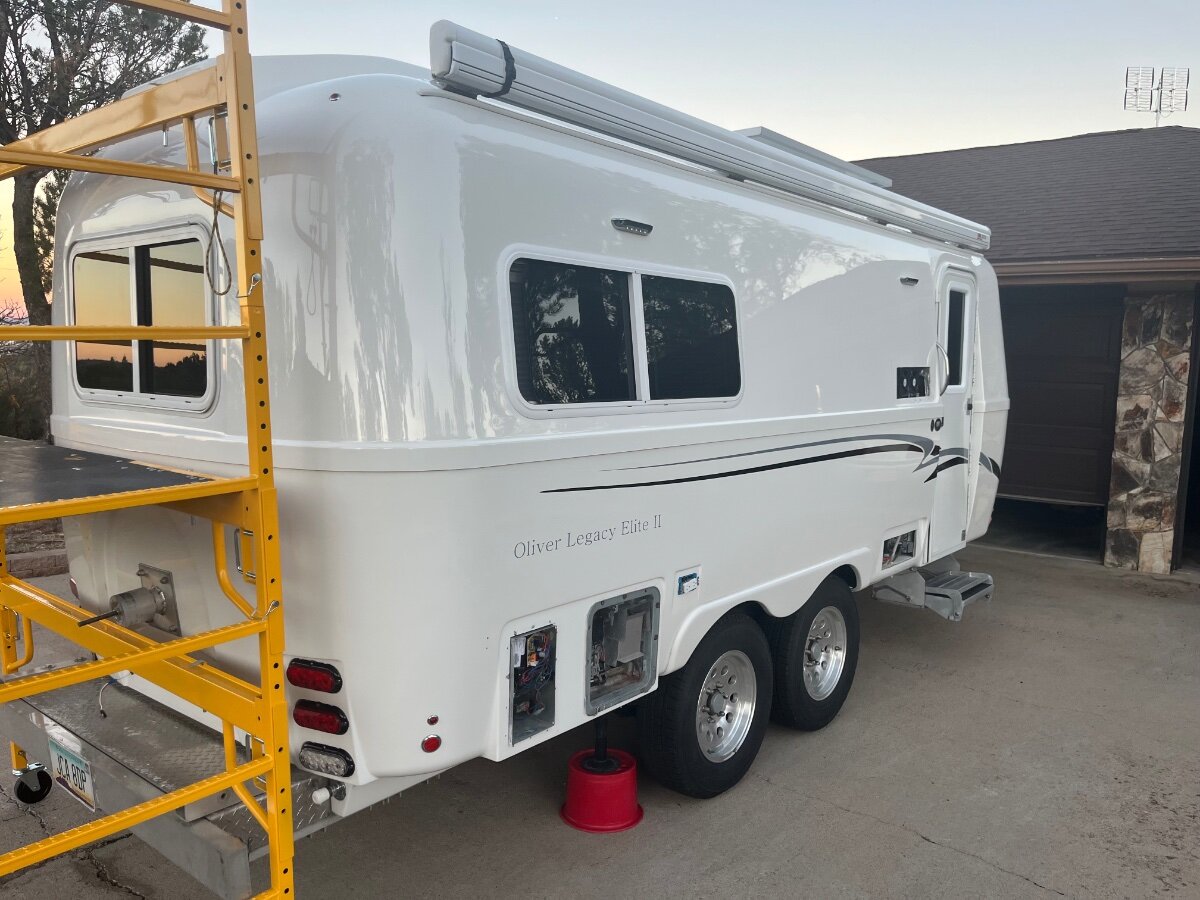
I had a great Kubota with front-end loader 20+ years ago when we lived in N VA. But not anymore! We just installed our new Greenland Inverter A/C. It did not seem as heavy as advertised and much less weight than the Dometic P2 we removed! My son Adam and I carried the new unit onto a stand I positioned near the scaffolding at the rear of the Oliver. Another lift got it up head-height and onto the scaffolding. Then we climbed up and one more lift from the scaffold flooring to the roof of the Oliver. Easy Peasy! I had raised the scaffold platform another 6” from where it’s pictured and raised the upper bar to be level with the roofline to provide a temporary holding position. I also placed a towel on the roof since we just had it ceramic coated. We slid it on the towel. Then I went inside as Adam stayed outside for a final adjustment. I found it already 2" further up than needed. I lifted the A/C and pulled the towel down through the opening. The two of us pulled it back a little and wiggled it until the 4 corner bolts lined up nicely. Took 15 minutes at most with the scaffolding already in place.
-
What exterior caulk is the factory using now?
jd1923 replied to Townesw's topic in Mechanical & Technical Tips
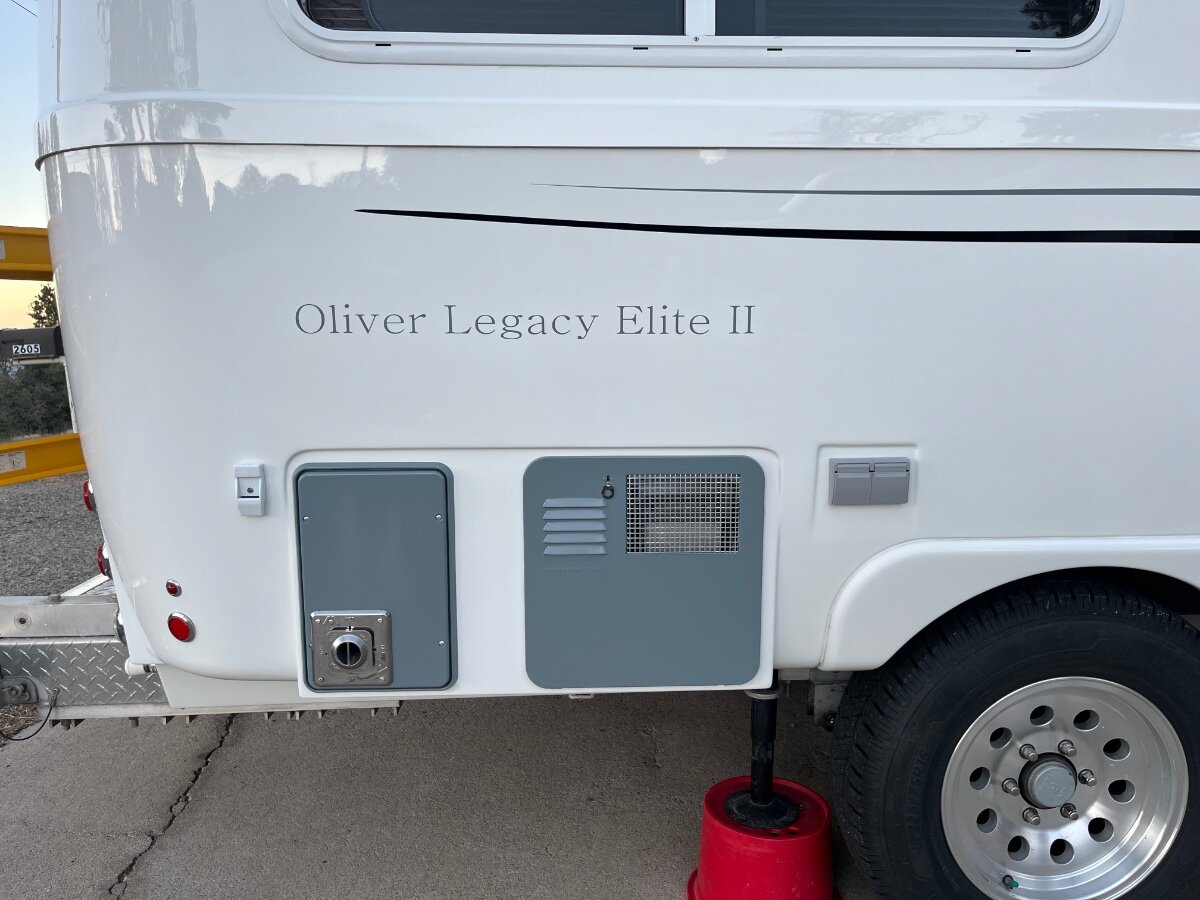
I put some caulk UNDER not around the furnace frame and none around the windows. Looks much better now!
-
What exterior caulk is the factory using now?
jd1923 replied to Townesw's topic in Mechanical & Technical Tips
I'm going with NO silicone after spending many HOURS removing all the caulk on caulk spread aimlessly through the years. Compare this picture to the ones above! And notice all the CR@P on the ground, never again! 😎
-
Sorry I don’t. Didn’t ask any trade secrets and I’d never do this myself. I figure I’ll just let ‘er get dirty and bring it back for an “annual!”
-
You’d need the smaller snap-ring pliers, a 1 7/16” socket and breaker bar to service the brakes. Then a torque wrench at 150# to reinstall. Dexter via Alcan replied the spindle nuts are reusable. Easy job, no grease to mess with! 😎
-
Cave Creek Regional Park, our 3rd visit! Site #9 is the best spot in the park! Better yet, @ChristianD will stop by soon to meet. They live only 15 min away. 😂
-
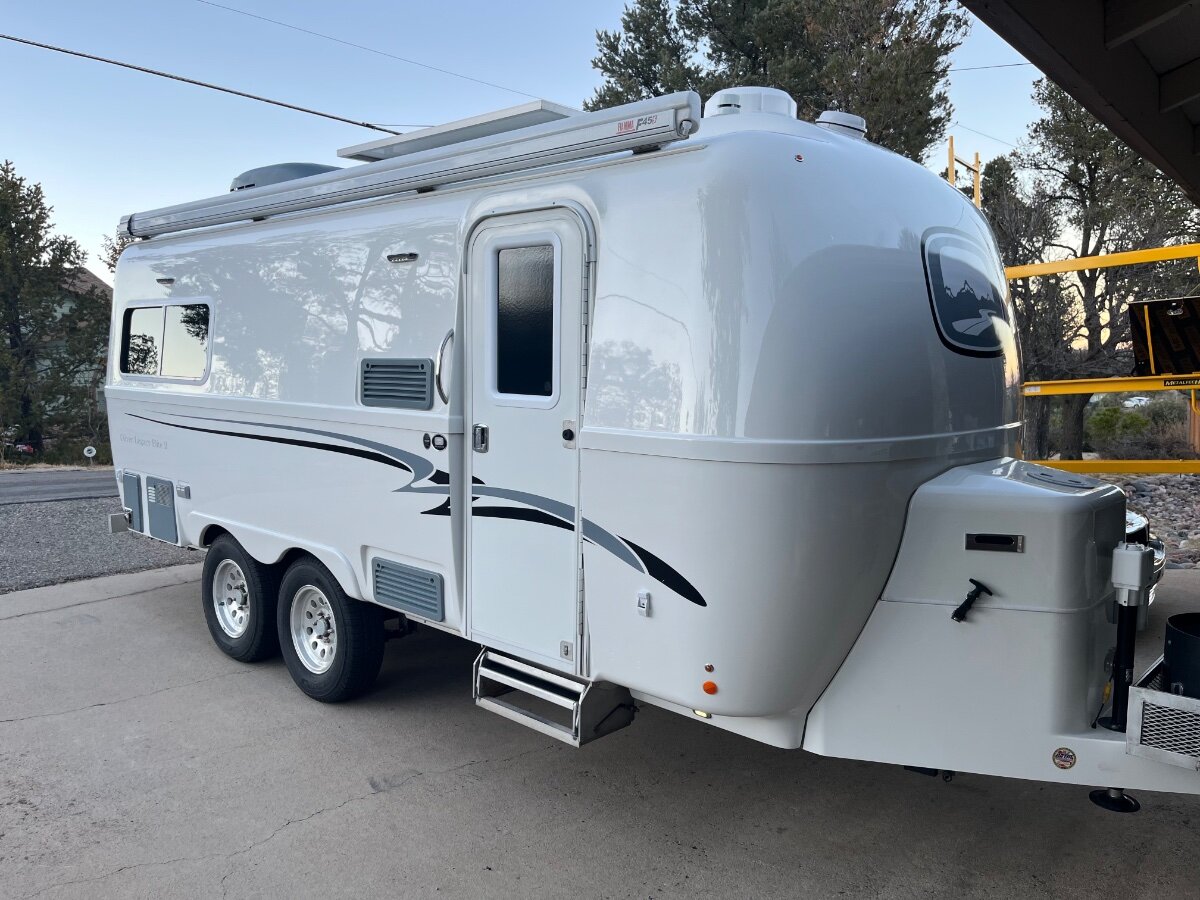
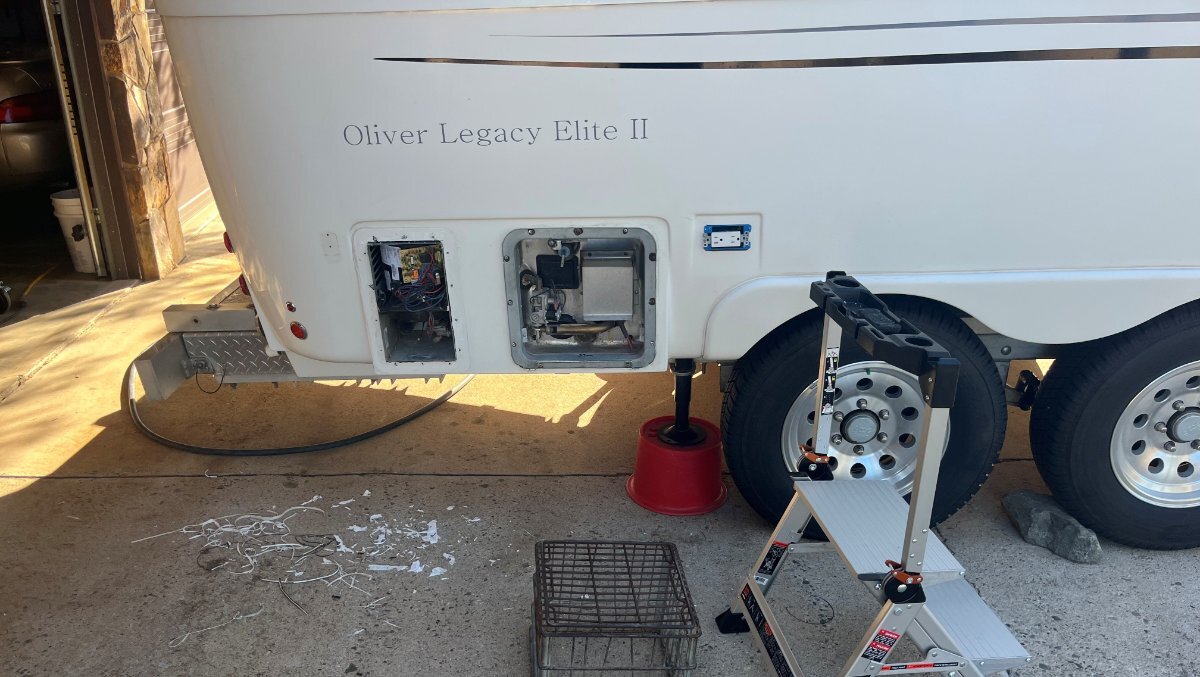
John, my good friend! I’ve been away from this forum and very busy! Like my new theme? (grey accents to match our graphics and tow vehicle). Found a local guy. He brought back our pasty 10-year-old hull to looking factory fresh again! Didn’t cost near the CGI advertised price. 😎 I was cleaning and painting parts while it was in the shop and it took me 2 long days to install everything including the new A/C (I removed the old unit, temporarily patched the 14x14” opening so the detailer could clean everything up top!).
-
@Gene G. Most here have gone to Epoch (15% OFF ended yesterday! 🙃) or LiTime. Search for these keywords. Install new batteries, get rid of extra wires in bay in preference of new internal busses. Change charger configuration or replace charger for LiFePO4 type. That’s all. I installed 600 Ah Epoch summer of 2024. Just purchased on sale another 300 Ah Epoch Essential and soon we will have 900 Ah snug in the bay! 😎
-
I also found it useless! Removed the rooftop rectangular antenna box, inside HW and cabling. Patched the Fiberglass on the roof for all the too many drill holes made in installation! Weboost is old-tech. Phones today have very good internal antennas! We went with a tow vehicle mounted Pepwave router and Parsec cell antenna with a T-Mobile 5G business plan! 😎 It doesn’t boost cell, but we’re online and text more often vs. talking when traveling. We’re connected wherever we travel, Chris can use her computer while I’m towing or away from the trailer in a day trip. We add Starlink when there’s no cell service Boondocking!
-
GJ thank you, my friend! Given I’m spending this kinda money… I’ll add 40 hours of my labor to make things right! A detailer can work around these, but with a little extra effort, the overall finish will be much better! 😎
-
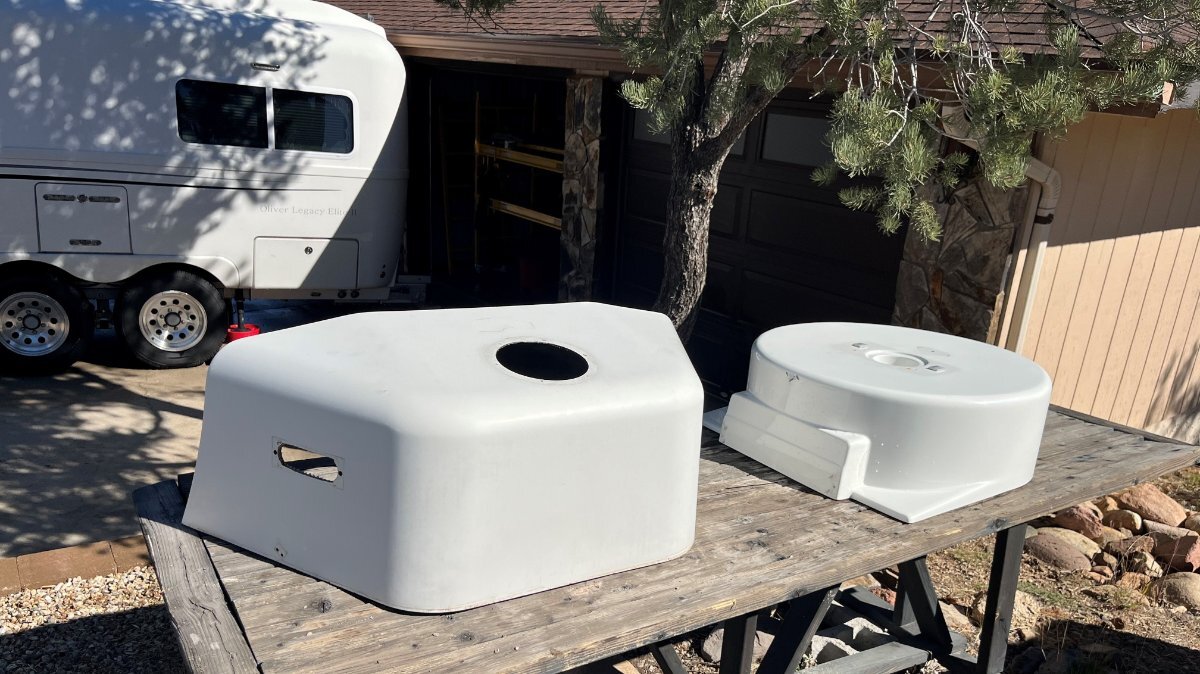
Funny that GJ revived this thread today. Coincidence given this morning I had an auto-body/detailing professional come to our home and quote finishing our Oliver. Old hull #113 will again have a shine on her! 🤣 Scheduled for the week after next, I’ve been busy removing items like all the covers, furnace, HWH, fridge vents, outlets, awning lower mounts, etc. Everything possible to make for a better detail job. Doghouse and spare tire covers completely stripped down. I’ll post a new thread with pictures in a couple weeks! Almost forgot, I’ve also removed about 2 LBS of silicone caulk!!! (see driveway in first pic)! First time I restored a vehicle, every nut-n-bolt removed, was an Alfa Romeo Spyder, Spring of ‘78. This is the way I work! Tear everything, clean and condition each and every part. 😎 For 2 1/2 years we’ve just gotten our Oliver sun-baked and dirty, now time for some love! Thanks for posting John! 🤗
-
What exterior caulk is the factory using now?
jd1923 replied to Townesw's topic in Mechanical & Technical Tips
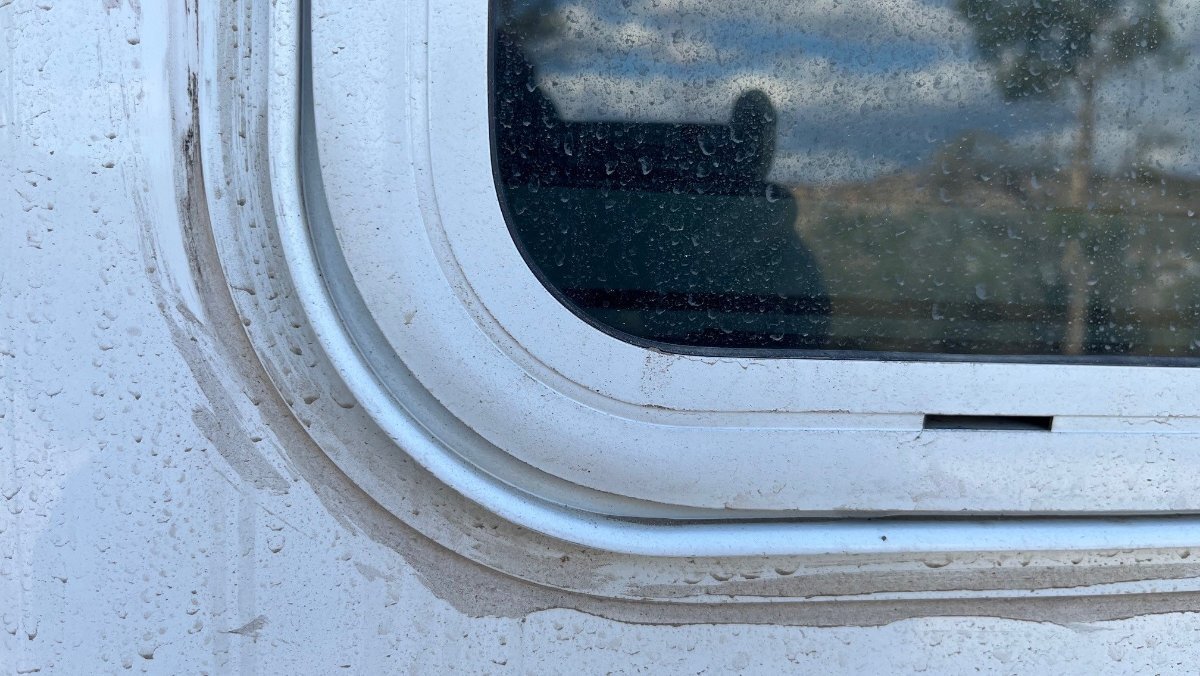
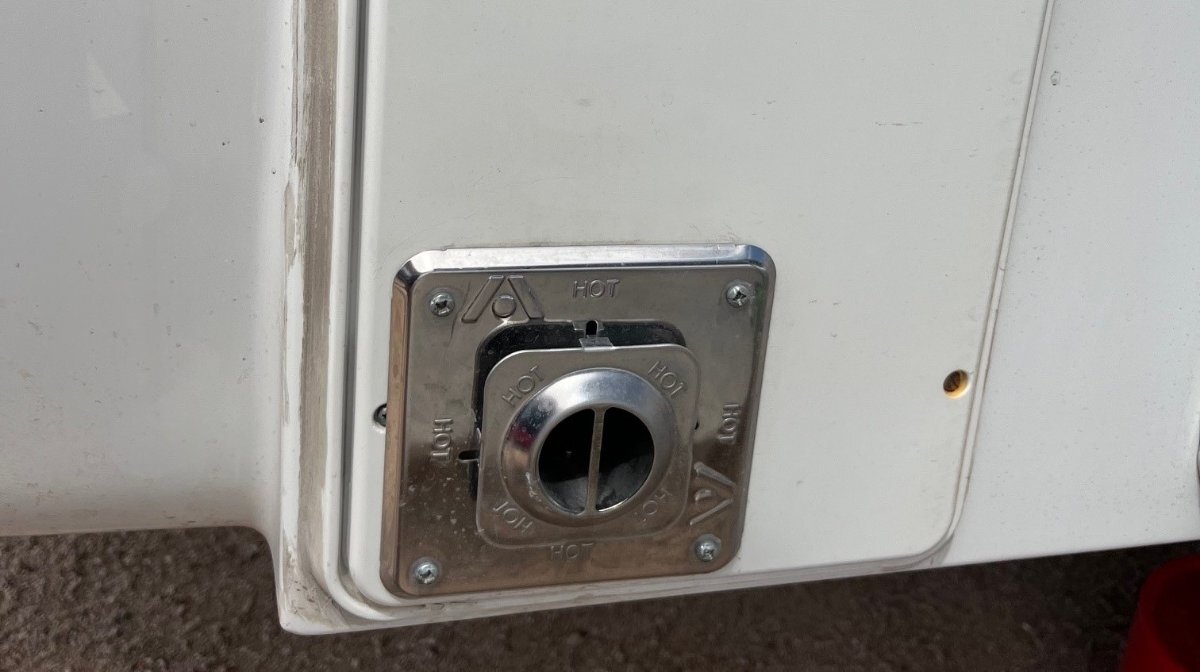
Thank you, Jim & Chris. Good advise! When I sprayed some the first day, I followed up with soap and water per the instructions. Day two, I sprayed the marine solvent at a sponge in a container and sponged it on the surface only. I've always believed this and never have seen it written so clearly. Thank you again. I've spent too much of my life removing what others think "improve cosmetics" which in essence just collect DIRT! If you're going to caulk (not me), trim back the old caulk first! Caulk on old caulk is not cool. There is no reason for this silicone caulk, period! The sealant is under the mounting frame. They even caulked the refrigerator vents on our hull, OMG! These vents allow highway speed rains to run right through them! Go figure? These pictures show an ugly mess, that btw is no longer there! 😎
-
A picture is NOT a signature! Are you mocking us? Asking Forum Mods to review this account.
-
What exterior caulk is the factory using now?
jd1923 replied to Townesw's topic in Mechanical & Technical Tips
So, 1 1/2 years since this post, and near 2 1/2 years of Oliver ownership and I'm finally getting to making our Oliver look better! I believe it's better to do maintenance and repair, mechanical and electrical work, before the cosmetic work! I've got a guy coming over today to quote the buffing and ceramic coating work. He runs his own business and has good references. Hope he's reasonable! But I'm not having this kind of work done without all the proper prep work. Doing what I can do myself. Spent half a day, used a half dozen razor blades, and made good headway. Check out all the caulk on the driveway, mostly silicone and some butyl from around the furnace cover. I found a new Atwood furnace cover for only $25 on eBay. Thank goodness I do not have to clean the caulk off those parts, certainly worth the money to replace it. Next step, using light 3M pads and solvent to remove the silicone from the window frames and body around the furnace. The frames are painted or powder coated as I can see aluminum in a couple very small spots. This is the waste from this area only (including the window above)! Four windows, the entrance door, and this utility area, lots of useless gunk. I had three piles of caulk to vacuum up end of day!
-
Agreed, it sure does look good. And excellent installation work too! I'll keep my side decals for now (pic). They're in decent shape and they are of the vintage style. I would like to replace the front Oliver logo, not as good in condition. I have time. I'll use Christian's artwork unless Bill @topgun2 is successful in hunting down OTT original artwork. Thanks to both of you!
-
Another issue with a Truma heater.
jd1923 replied to Buddhabelly's topic in Mechanical & Technical Tips
Hull #? Signature? Please update asap... -
But.., We would like you to take care of your laundry before I/we help again. @ScubaRx, Oliver Elder and Senior Forum Mod asked you to update your profile. That done and add a proper signature with hull #, etc. and then “Welcome to the community.” You have a couple threads started and we do help known Forum Members.
-
I believe the answer to your question is in your second sentence. You have your warranty claim entered and acknowledged. The schedule is now up to you! The crack ain’t going anywhere! It will either stay the same or grow a little longer. A proper repair can happen sooner or later, it makes no difference. Be cool. 😎
-
And BOTH bolts holes are too large. When they are the correct size you will not see the square opening at all as it should be completely hidden by the head of the carriage bolt.
-
I believe it's OK when the OP broadens the scope of the thread. @Steph and Dud B can reword the title to, "Found a Crack - Defect #21!"
-
I attached a picture of the tack-weld failed mount when I submitted a service ticket and was told OTT did not have brackets they could send me! My next service ticket was re artwork for the front hull. When I was told again NO, I asked why I should ever again enter a service ticket? Five (5) times and not once have I received useful help. But then, if you want something done right… Obviously they do have these brackets. At least the one I fab’d is better than OEM. My square holes for the carriage bolts are of correct size. No need for precision when you drill holes that wide! It’s not easy making square holes in 1/4” steel in a home shop, but should be EXACT when manufactured! if yours is still lose, replace them with hex-head bolts, use a washer and position a wrench on the topside, against the bracket, while you tighten from down below. Sheesh! If half of your 21 issues are like this quality made bracket, I’d feel the same way! Ours is only in good shape after I’ve put 1000+ hours into ours in sweat equity! Which is btw crazy.