-
Posts
3,134 -
Joined
-
Last visited
-
Days Won
226
Everything posted by jd1923
-
Reminds of an award we had as members of the Chrysler 300 Club International (was a member 15+ years while I restored a ‘59 300E)! We had two meets a year, spring and fall meets. In a way similar to the spring OTT National Rally and the fall Texas Rally. Of all the awards, People’s Choice, Concours Judging, my favorite award was the Long Distance Award, given to those who in their old classic drove the furthest to get to the meet! This was the true badge of honor, no points for the sitting Trailer Queen. It took work and time on the road to achieve this award! For those of you who put real miles on your Olivers should deserve such an award! 😂
-
I liked when Steve started this thread! As of Sunday, which was also Father's Day, we hit the our 100th overnight in our Oliver. We just passed the 2 year mark in our ownership, and although we only did one 2-night trip in our first 7 months, we're catching up now! By the time we get home on July 3rd, it will be 118 nights over the last 18 months. That's a better rate than I had expected, but a lot of short trips will add up! Starting to feel we're getting our monies worth too. The Oliver, the tow vehicle and the tens of thousands of upgrades on each! 🤣 She also had a bath for our special day!
-

Battery and Solar Disconnect Install Questions
jd1923 replied to Tony and Rhonda's topic in Ollie Modifications
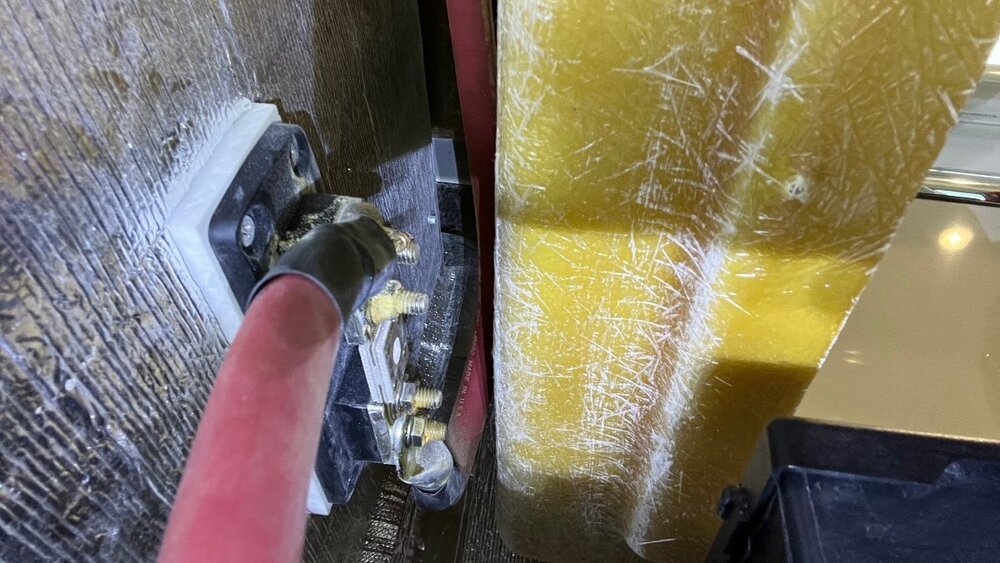
True, but you need to size wire AWG and the fuse rating based on load requirements. The single largest load in a 12V RV system is the inverter, given you have one. And inverters have overload protection and so do modern LiFePO4 batteries and either can fail, so we use fuses or circuit breakers. From the examples I've seen, OTT installs 4/0 battery cables whenever they install an inverter. This is more cable than you need, over-engineered. There are so many wire gauge charts but I like this one since it covers short wire lengths. Although I do not know the source of this tables, the numbers seem to make sense. When I pulled the original 4/0 cables in our hull, cleaned them up and reused them for new batteries and the larger capacity Victron inverter, I noted each cable was less than 5 ft long. Based on this table, B+ plus B- lengths of 4/0 cable adding up to 10 ft can safely carry 600A. Victron specified a 400A fuse for their product which also has a built-in safety factor. They spec'd 400A,so that is what I installed. There is another conclusion you can make from reading the data in this table. If the 250A fuse was all that was required in the 2KW Xantrex inverter that was originally installed in our hull (and others as the example pictured above), OTT could have installed 1/0 wire which can handle 250A up to 12 ft long. -

Battery and Solar Disconnect Install Questions
jd1923 replied to Tony and Rhonda's topic in Ollie Modifications
Sorry, I assumed Geoff installed his since he suggested adding the switch with installation instructions. It read to me like he had added his, my mistake. So now we see Rich has the same on a much newer hull. Who knows why OTT stopped switching the SC on hull #251 and perhaps others of that era! ? -
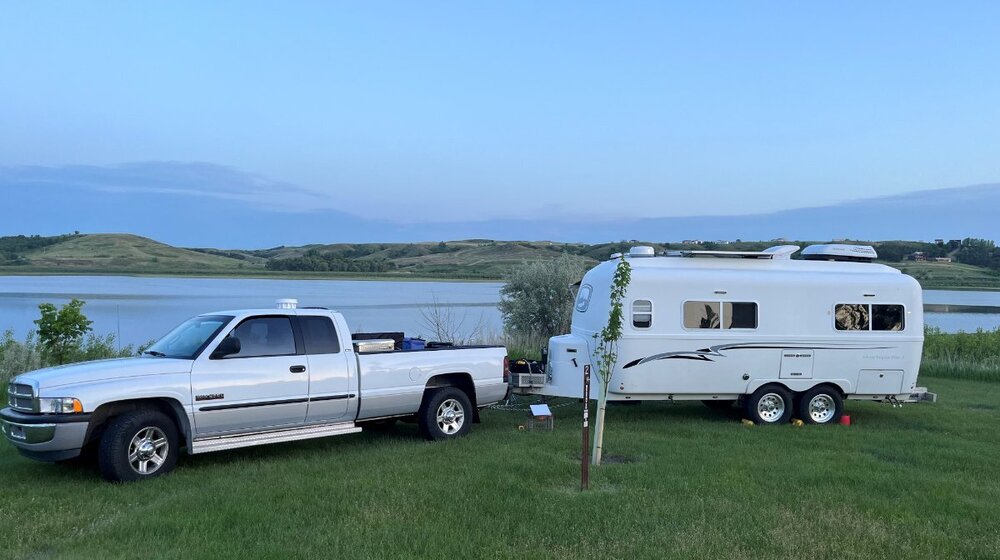
So we woke up the other morning in central North Dakota, it was cloudy at 52F. We drove to our next stop, it got sunny along the way and later very hot, 85F and humid. Our camp was on lush grass by lake which made it feel worse. So I thought, why not try the awning? It truly made a difference. With the breeze off the lake it felt 20 degrees cooler in the shade of the awning. It worked well. I could tighten it and then you could hear it vibrate in the wind and a turn looser was perfect. The setup was less cumbersome than I had remembered it. I took it down as it got dark and good thing since we had light hail, heavy rain and winds that literally shook the Oliver! I couldn't figure out the rafter. The awning had a proper receptacle for it on the extended side. Up along the Oliver roof it did not seem to have the same mount, even though the rafter has identical fittings on each side. I got it somewhat connected and even being tall I could not reach the tightening screw without a ladder or at least standing on metal milk crate we have. I just left it there untightened as it did not seem to matter. Is the rafter truly necessary? Any help or advice on how to mount it correctly and get it tightened?
-
Jeff & Cindy, we're on one of those "meandering trips" right now, so we certainly understand. One thing is for sure, 5 weeks is not nearly enough time to leave AZ, see family in MN and have much time for multi-day stays in between! I like how Mike said it: I much prefer short drives each day and taking each day as it comes. Then as Mike wrote, staying a couple nights to "rest up" which we tend to do when we find a spot we like! I thought we would have some 3-day stays on the way back. That's not going to happen. We have 2860 miles so far and a good 1600 miles to get back home. We setup camp as needed on a daily basis. On one-nighters I prefer to stay hitched and even on some 2-night stays if we are just going the rest up and enjoy the campsite. Sometimes I'll decouple to get the tongue up high enough to level, but just keep the truck in place for quick coupling when leaving. I'll ask Chris about what's for dinner and sometimes we need the grill or not. If it's cold out I'll pull the fire ring out of the front basket. We cook over the fire ring too using skillets on a grate or the Lodge Dutch Oven. We've had more rain, certainly than we're used to, so I'm often partially breaking camp the night before to be prepared for a Midwest storm. Several nights I put our lawn chairs inside the pickup so they would be dry in the morning for coffee outdoors. When we leave, Chris works inside and I do the outside, it only takes us 20 minutes to break camp ready to leave. No checklists but we have it down now. Got to see all we can on our large travel loop. I remember the map of your large loop which is at least as big. I'm not pulling the Oliver, not likely to Minnesota again in my lifetime, so we want to make the most of it on our way to and from! Enjoy your trip and best wishes, JD
-

Battery and Solar Disconnect Install Questions
jd1923 replied to Tony and Rhonda's topic in Ollie Modifications
For the main battery fuse, check your inverter spec. OTT had a 250A ANL fuse installed in our hull for the 2KW Xantrex that was our original system. When I upgraded to the Victron Multiplus II 3KVA Inverter-Charger the manual stated using a 400A fuse. Most applicable inverter specs will be in the range is 250-400A. When choosing a cut-off switch, it should be rated equal to or above the proper fuse rating. Most go with the available Blu Sea 300A or 350A rated switches. For your solar, use what is specified for the solar charger. Or if your MPPT Solar charger is rated for 30A, then a 35A or 40A breaker or fuse is appropriate. Our Blue Sky SC is rated for 25A and OTT installed a 30A breaker. When I added a Victron 30A MPPT SC, I believe the book said 35-40A and I installed a 35A breaker. So not to get shock while working with battery cables --- It is common practice when installing battery cables is to install the B+ side first since when the ground is not connected, the B+ side has no potential. When removing battery cables, use the reverse order, remove the B- side first. This is why in my battery installation, I positioned the main B- battery closest to the door. This way I can remove the ground (vs. having a switch) even without sliding the tray open and the closest B+ connection is 8" deeper into the battery bay, providing a very low chance of touching it by accident. -
I'm not seeing this on Campendium or Recreation.gov. The one I see at Devil's Tower is Belle Fourche, the FCFS campgrounds I referred to:
-
Yes, it has been an amazing, yet awaking adventure! 🤣 So it's Sunday and we're in Central ND, and only 2-3 days out to Mt Rushmore SD, and I finally realized, "I'm friggin' crazy!" It's mid June and we're driving into the greatest tourist stop in the National Park system, OMG! We not only have no reservations, but been so busy in our day-to-day travels that we have no idea where to stay, or even what are the possible choices! So first, I truly needed a strong drink to deal with this situation and promptly got on Campendium and Recreation.gov! I quickly found Horsethief Lake Campground, a primitive campsite only 15 min from Mt Rushmore. They had 3 sites open only on Thursday 6/19, so I booked one for the one night that was available! Before getting there I figured we would boondock on the Badlands Wall and afterwards would head to Devils Tower. There is a FCFS primitive site very near there and most RV people gotta have hook-ups, but knowing so little I thought not to count on that. Then I booked 2 nights at Rueter Campground, and a nice drive through the Black Hills to get there. This was done on Father's Day evening. In between I got calls from my step-son and later my son. After another drink, Chris made us a great grilled Walleye dinner, creamed broccoli and baked potato, nice! It was finally time to enjoy the wonderful campsite we had booked for two nights, Beaver Creek Recreation Area just on the river from Linton North Dakota, life is good!
-

Battery and Solar Disconnect Install Questions
jd1923 replied to Tony and Rhonda's topic in Ollie Modifications
Good thinking, you want both. Your batteries feed your 12VDC loads (and 120VAC loads if you have an inverter). Your solar panels through the solar MPPT charger also feed 12VDC to everything wired in the circuit. You must cut off all power sources to do M&R or make mods on your electrical systems. Some place a blanket over the solar panels, which is fine if you must! Better to be able to open any and all electrical systems with a breaker or switch. -

Battery and Solar Disconnect Install Questions
jd1923 replied to Tony and Rhonda's topic in Ollie Modifications
Nice install Goeff, on the Zamp cutoff. If there is extra length on any of the Zamp wires, that would be perfect for the short length needed to a switch in this close location. No more opening the marine hatch, easily accessible, nice! -

Battery and Solar Disconnect Install Questions
jd1923 replied to Tony and Rhonda's topic in Ollie Modifications
That’s great! Now @Tony and Rhonda you have a forum electrical expert that knows the Zamp! -

Battery and Solar Disconnect Install Questions
jd1923 replied to Tony and Rhonda's topic in Ollie Modifications
I agree with the premise here. On the rare occasion, when I need the batteries disconnected, I merely grab a 1/2” wrench and remove the ground. That’s me and we use our Oliver during all seasons, never stored nor winterized. Issue with the latter suggestion is the breaker is under the bed! It’s a whole lot easier to cut power just inside the battery bay vs. removing bedding and mattress to do so. This is more important if you have thick heavy upgraded mattresses and your wife doesn’t want nicely made beds all messed up! OTT mounted stuff anywhere they could glue down a board with little thought to practical use during ownership. I made a whole project and post re relocating all breakers, switches and +bus that OTT had under the street-side bed to under the rear dinette seat. Where btw the DC fuse/AC breaker panel and negative bus are located. It’s just common sense. From the many posts I’ve read, those who regularly store their Olivers are very happy after adding a battery ground cutoff switch. -

Battery and Solar Disconnect Install Questions
jd1923 replied to Tony and Rhonda's topic in Ollie Modifications
I'm not certain re the Zamp. On our Blue Sky SC, their tech support wrote me that either side could be switched. Maybe work your cutoff switch for now and re the Zamp you could leave well enough alone since it has been fine for many years as it was installed. -

Can I tow an Oliver LE2 with a 2006 SR5 Tundra Double Cab?
jd1923 replied to Dirt Duff's topic in Towing an Oliver
My mistake GJ, I had not remembered the post migrated to comparing the Toyota 4.7L and 5.7L engines. The 5.7L must be a beast! Best wishes, JD -
Do that. We have a simple 1" drip edge on the curbside and do not get streaks. Nothing on the streetside, it gets streak. If I was to ever get our Oliver polished and waxed or otherwise coated, I would put new drip edge on BOTH sides.
- 107 replies
-
- 1
-

-

Battery and Solar Disconnect Install Questions
jd1923 replied to Tony and Rhonda's topic in Ollie Modifications
Something like this: https://www.amazon.com/Tynulox-Copper-Electroplating-Jewelry-Plating/dp/B0B9NF3X1T/?th=1 This is the cheapest one I could find on Amazon today. This would make two adequate 4" bars. When I did this in an older installation, I drilled two 5/16" holes in each end and then used heat shrink to somewhat insulate the length of the bar. -

Battery and Solar Disconnect Install Questions
jd1923 replied to Tony and Rhonda's topic in Ollie Modifications
Agreed, I do not see power switches. In your second pictured I copied almost every device is a fuse or the obvious breaker. This wiring is foreign to me, nothing like our hull built in late 2015. God love OTT, that they would install the display to your Progressive Industries EMS under the bed! Are you kiddin' me, now I have seen all in Ollie-land! 🤣 In later hulls they put the display in the attic which is almost as bad, without having to lift a bed! Yep, after you plug into shore power, run as fast as possible into your Oliver, open the Attic door, see that all is good, and then go back outside to get back to what you were doing! As far as you main fuse, and as Dan wrote above, you likely have one and Dan did not change that part. He just added the shut-off switch to the ground. Yours is likely OK too, but who knows for sure until you chase it down. If you follow your 4/0 positive cable after it enters the hull, on the left side of your battery bay, you likely have a 250A ANL fuse as we do in our hull. See my pic. This can only be seen if you open the rear dinette seat, get your head in there and look up at the opening in front of the pantry! 🤣 -

Battery and Solar Disconnect Install Questions
jd1923 replied to Tony and Rhonda's topic in Ollie Modifications
Flood away! Any and all the questions you have are good. 😂 Your are correct in the second statement I quoted. Either a shorty cable or some use a copper bar. The second picture you copied, I believe is Dan's @tallmandan. This is the more common wiring, where you fuse the positive side and switch the ground side. Please provide pics of your battery installation and your Zamp setup. I've never seen the OTT Zamp install. In our older hull we have the Blue Sky SC. OTT installed a Blue Sea switch on the feed coming into the charger and a breaker between the SC and the positive bus. It would surprise me if one year or so later OTT went to the Zamp and installed it with neither a switch or a breaker (you only need one) at all! But who knows? Those who have the Zamp SCs please chime in. Love to see a picture of it. Best wishes. -

Can I tow an Oliver LE2 with a 2006 SR5 Tundra Double Cab?
jd1923 replied to Dirt Duff's topic in Towing an Oliver
I believe @Dirt Duff has the 4.7L which was the standard V8 in older Toyotas. Newer Tundras, which are certainly bigger and heavier, have the 5.7L which must be more powerful. We have the same 4.7L in our 2008 Lexus GX470, hence the model number. The GX will get up and go, being 100s of lbs lighter than the next gen GX, but it doesn't have a feeling of torque. The Tundra could be geared differently though. It's all in the gearing! -
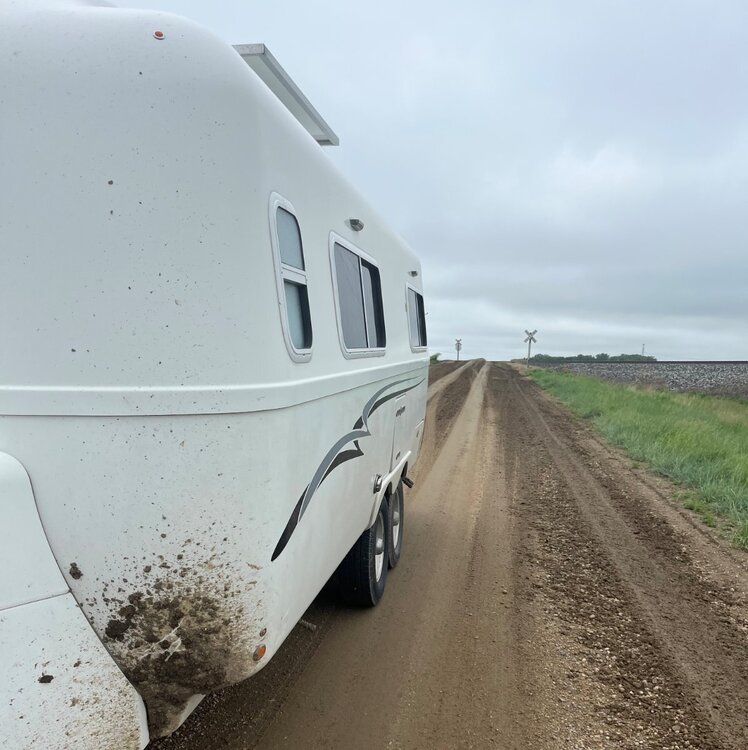
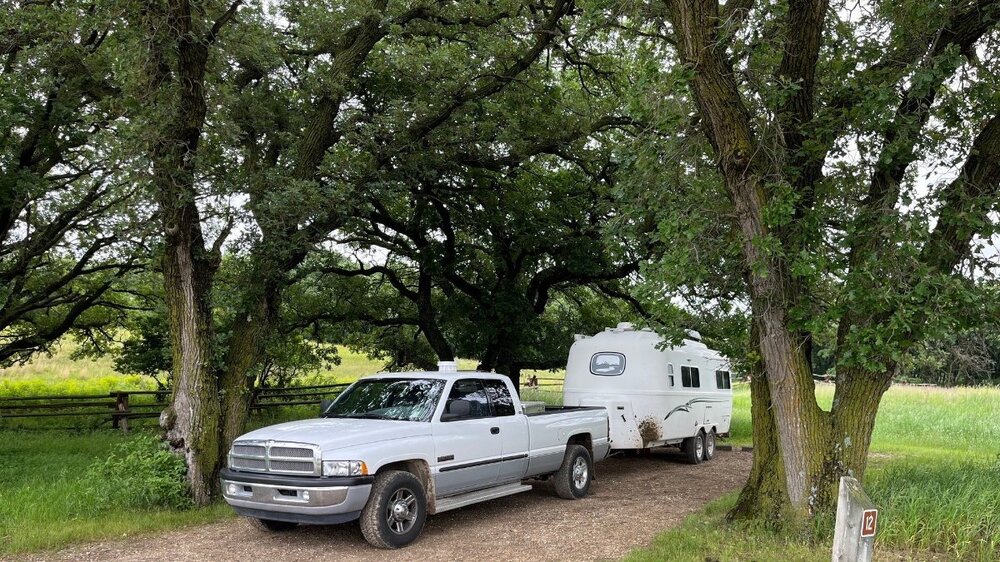
There was a little hiccup getting into the Sheyenne National Grassland. The last 3 miles were dirt and it had been raining everywhere. Given the condition it drove like a single-lane road. Then up ahead were train tracks with a hill to climb to get over them and strange thing was the dirt up at the tracks was muddy black dirt! I was worried in getting over it and since we are running with a 2WD truck, I thought to get a little more speed leading up to it. Wow, first time towing the Oliver we fishtailed at the crest and when the truck went one way, the Oliver went the other. Since I was brought up driving in snow, I gently turned into the direction of the spin and after my heart moved up into my throat for a few seconds, all was good. Whew! The first picture was taken the next morning going the opposite direction. It shows the mud that hit the Oliver, but look behind the Oliver to see the train tracks on the hill and the muddy section. Then look even more closely and you can see the tire skid marks made by the Oliver the evening before! Good thing on the way back it was a soft glide downhill over the tracks. So we're driving an hour north to get to Fargo and as soon as we got on I-29N I said to Chris, "Try to find a truck wash." I was thinking the kind of place that has a tall booth and a pressure-washer, the DIY kind of wash. Turns out it wash a full-service truck wash. This is the best invention! I walked in first to see if they wouldn't mind washing our non-commercial vehicle. Then waited in line for 20 minutes with 18-wheelers fore and aft. Not only the mud on the rear of the truck and the entire Oliver, but after 2400 miles on the road we had bug splatters all over both fronts. I paid to clean both TV and TT with an under-carriage wash. This was the absolute BEST $75 investment I've made for the Oliver! Works well in our budget vs. that $3K CGI detailing. Pics attached of Dirty Ollie and Happy Ollie! 🤣
-
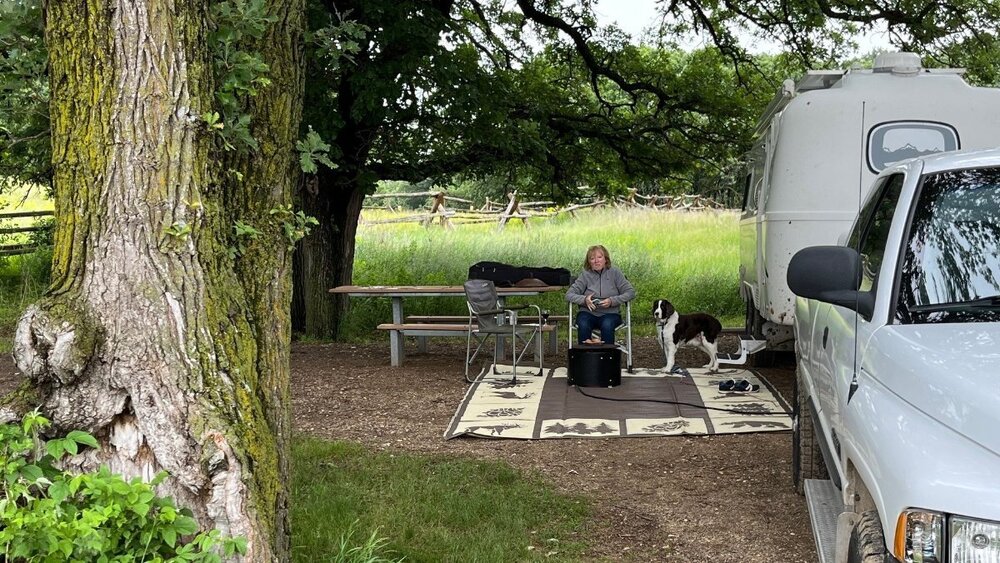
We ended up in the Sheyenne National Grassland in southeastern North Dakota at Hankinson Hills Campsite and what a beautiful place. 😂 Amazing! The green and golden pasture views with cross-fencing like a Civil War battlefield! We drove up just after one trailer had parked, two of us in 25 campsites. They took their loop and we took the other. A little later, three girls with two trucks and horse trailers came to camp and pulled in next door to us. We walked over to say hello and what beautiful people with their draft/show horses. These 3 women is their 30s had never traveled out of North Dakota in their lives! Chris and Kayla are pictured below. We would have stayed 2-3 nights but wanted to get to Fargo the next morning and then head west in search of sunshine again...
-
We've been moving slowly the last few days, family can do that to you. Looking for meat stores and country markets and we had Walleye for lunch on 4 consecutive days, love it! 😂 The 5th day, not finding of a worthwhile establishment, we cooked grass fed burgers tailgating in the back parking lot of America's best, the Dollar General! 🤣 On the road again... From Brainerd we headed to Fargo and then made a detour south and found a treasure... 😂
-
So... Before leaving Brainerd MN and heading west, I thought to watch the movie Fargo! Streamed it on Amazon Prime and after half watching it, last time in the late 90s, we had no idea it took place mostly in Brainerd Minnesota! 🤣 Like the movie Fargo, the next few days would take some time, but I promise nobody we know ended up in the chipper-shredder!
-
It’s likely the age difference between our hulls. If you keep up with yours every year or two they may stay nice!


