jd1923
-
Posts
3,231 -
Joined
-
Last visited
-
Days Won
240
Everything posted by jd1923
-

Dexter Axle Upgrade Options - To EZ or NevR Lube Design
jd1923 replied to Geronimo John's topic in General Discussion
We stand corrected. Question is, is it a good idea, and would you truly want to? Disc brakes cool better, but will a 10” disc brake system stop better than a 12” drum? Absolutely not IMHO. They will stop some better that the 10” drums, so your adding more stress to the weaker 3500 lb. axles, smaller bearings, etc. Also, you’d end up spending near $2K adding disc brakes, so why not spend $2K for new axles, Nev-R Lube bearings, new brakes, everything new and 5200 LB HD! That makes better sense! -
Dexter Axle Upgrade Options - To EZ or NevR Lube Design
jd1923 replied to Geronimo John's topic in General Discussion
I'm in agreement with @mountainoliver and @Patriot and will add more detail from my point of view, in the order of your questions: 1) This is likely my biggest reason. Having 12" brakes over the 10" on 3500 lb. axles is huge in size of the contact area of the shoes. I have always felt they are not enough on mountain downhills. The self-adjusters don't full adjust/tighten up especially on the rear axle. I had one of 4 brakes lock up the other day, thought there was a kid in a sports car, burning rubber behind me from the sound. No, it was just one brake on the Oliver. 2) The brake drum bolt pattern must match the wheel choice, independent of the axle. However, it is industry standard that 5-bolt patterns are used on 3500 axles and 6-bolt on 5200s. OTT has over-engineered everything but the axle, the weak link. I have a dual-axle 12 ft flatbed trailer at home that we use for OHVs. It has the same two 3500 axles, 5-bolt 15" wheels with ST tires and it weighs only 1100 lbs When load with our SxS, a dirt bike and gear, adding about 2400 for 3500 lbs. total, half the 7K limit. Rock solid for that use. As Ken stated above, The Oliver is at the limit of 7K in axles, most of us carrying 6400+ lbs. and the Oliver is tall, not truly top heavy but the top can in certain conditions sway back and forth quite a bit. Consider your precious cargo and what Ken said to me last night, "no more worries." 3) I also understand, they do not manufacturer disc brakes for 3500 trailer. Besides wheel bolt patterns, 3500 lb. axles have a 4-bolt pattern, axle to braking plate and 5-bolt on the 5200 lb. axles. The connection, axle to brake plate, to wheel is 25% stronger. 4) An axle can fail/ bend in extreme circumstances, but more often the smaller bearings and brakes on lighter axles failed. You're thinking the 4-leaf design which Alcan has made available on request. They are a costume shop. They suggest the 5-leaf product which was their original design. As we've heard from their reps, "the Oliver is under-sprung." I believe this is true watching our hull waddle like a duck over irregular RR tracks, gas station driveways and DIRT ROADS, every time the suspension has to take a height change on an angle. And re the 3500 lb. axles, I would say the Oliver is under-supported. And btw, OTT has finally decided that the D52 axles are standard equipment. For those that are minimalists, and there are a few of you out there that tow with 1/2 ton trucks and always keep your Oliver curb weight under 6K lbs, the 3500 lb. axles and 4-leaf springs are certainly enough. -
Dexter Axle Upgrade Options - To EZ or NevR Lube Design
jd1923 replied to Geronimo John's topic in General Discussion
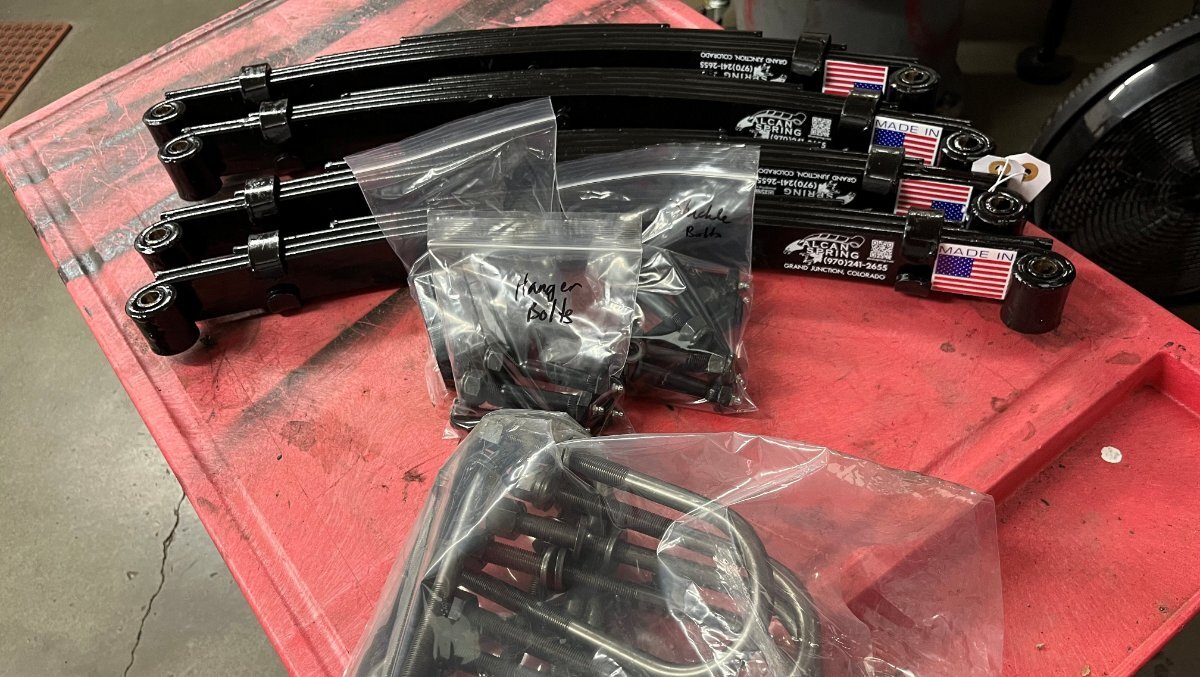
I visited Alcan Spring today in Grand Junction CO. I was impressed by their operation and service, what they were able to accomplish on a minutes notice. As a medium-sized manufacturer and automotive service company, I quickly noted their company quality, efficiency and fully capable staff (see picture of a portion of their operation). I purchased leaf springs for our Oliver, including HD shackles, new wet bolts and U-bolts (pic2). Our Oliver requires the 50.00 length axles. They measured our Oliver. For comparison they manually measured their 50.50 springs which they stock for Oliver customers. I asked them how can I go about getting the correct D52 axles for our hull. They replied that the could special order axles for me and charge me the same price as the axles they stock and buy in bulk for Oliver owners. And that's what I did. Getting my special-order axles will take 6-8 weeks and they will ship to me when ready. I was out the door in an hour. Four staff members were working together to help me. Simply put, they were awesome! I had a smile on my face, the whole way to Montrose to see our friend Ken. He was happy to see the parts, since he has a full installation scheduled soon. RE the purpose of this thread. Alcan only sells the Dexter Nev-R Lube axles. They report good reliability with these sealed bearings, not hearing of premature failures. So they do not have experience with the EZ Lube product. When asked about replacement bearings for the Nev-R Lub, they replied they would ask their Dexter rep and get me a quote. @CRM if you have a link for the correct Timken brand replacement Nev-R Lube bearings, please advise. I appreciate that @John Dorrer has posted his experience so far, and of course if/when any of us have failures, we should read it on our OTT Forum. I'll be working my installation later this summer and will start a new post documenting the job. Like I mentioned before, it will be fun getting into this! 😂
- 42 replies
-
- 14
-

-

-

-
Dexter Axle Upgrade Options - To EZ or NevR Lube Design
jd1923 replied to Geronimo John's topic in General Discussion
Excellent info! I’ll see what Alcan reps say about this. -
Dexter Axle Upgrade Options - To EZ or NevR Lube Design
jd1923 replied to Geronimo John's topic in General Discussion
Thanks, Rich! Will do after we return home in a couple weeks. -
Dexter Axle Upgrade Options - To EZ or NevR Lube Design
jd1923 replied to Geronimo John's topic in General Discussion
Is there any knowledge or do our forum members have opinions on this subject? After 26 pages of comment re leaf springs I’m disappointed not a word here! This is equally important. I read the entire 5-page link GJ provided, when he posted a few weeks ago. I could not see on that forum that they achieved consensus. Maybe somebody can show how Nev-R Lube lives up to their claim. Keep in mind it’s Dexter. Some have seen failures in 1 year, others 5 max, it cannot be never! I will be at Alcan Spring today. I will purchase their HD springs, shackles and wet bolts. I cannot have 5200 lb axles installed since I need 50” and they stock 50.5” that most later hulls need. I will ask why +/- 0.5” matters. I will ask their opinion on new EZ or Nev-R bearings a why they decided to stock kind. Maybe they can drop-ship me the correct axles. Or maybe I can get a good used set of 5200 lb axles, with tried and true conical bearings, any length and have them cut and welded to size, bolt on new bearing/brake assemblies. We’ll see. I don’t believe in annual bearing service anyway. Annual inspection yes, but when bearings are cleaned and packed correctly they will last 3-5 years with average mileage. I replaced bearings with Timken 2 years ago. I’ll open one up to see next summer and will post pics. If anybody wants to learn the correct method, let me know and I will start a new post. Most of you will prefer the claim of EZ or Nev-R when you don’t work this service yourself. I didn’t want Alcan to work my installation anyway. That would take all the fun out of it! 🤣 -
I thought I was done, but... The older hulls did not have labels for jack points. Be VERY careful if jacking up you Oliver at these locations. If your jack arm is too wide or it slips you could so easily crack the fiberglass hull there. It is surely safer to use the stabilizer jacks. To have viable jack points, OTT could have made the steel sub-frame 18-24" longer so that there was steel at the jack points. Instead, the marked jack points are on the aluminum frame. When I purchased our Oliver, it had two broken welds, two cross-members disconnected, right behind the curbside wheel. Right where the jack point label is shown in the picture above.
-
I did mention the method I use was not the official OTT position, but so many of us the Oliver stabilizer jacks for quick jobs like changing a tire. Another thing, I did not state to jack the axle. That would be wrong, as stated in the instructions @Patriot cited. They do so because someone inexperienced could use a floor jack and jack up the middle of the axle. If doing so, it would likely bend, throwing off the alignment of the wheels attached to that axle. It's good practice to put a jack stand under axles when working on a truck or trailer, period. I've been doing it for 50 years and all professional mechanics would agree. People have literally died, crushed under vehicles 100s of times since the model-T. You jack by other means and place the jack stand for safety. It has a rounded top holder that the axle fits into nicely and you place it as close to the wheel as possible. In the case of a trailer, adjacent to where it is u-bolted to the leaf springs. I promise, any axle is strong enough regardless or 3500 or 5200 lb. ratings. You can go without for a tire change, but be careful, and you certainly should for maintenance work like packing wheel bearings on a trailer. I have one jack stand and a bottle jack in my TV toolbox and if I did not already have these tools for decades, I strongly recommend the combo unit that Patriot linked. That tool must be awesome, great idea! Get one. OK, so what I found today is going to be revealing! These instructions are quoted from the 2016-OTT-Owners-Manual.pdf: Loosen the lug nuts on the tire you want to remove. Check for a stable footing under the jack and place an ABS footing pad or block of wood about 4” in height below the jack foot plate. Raise the jack until the tire clears the ground, then finish loosening and removing them. Pull off the old tire, slide the hubcap out backwards and insert it on spare. Set spare tire evenly on the lug nuts and hand tighten lug nuts. Retract jack back to travel position. Now tighten lug nuts completely. Lug nuts should be torqued to 90 ft lbs. Place the flat tire in the spare location. From at least 10 years ago, OTT knew and put in writing that you could, should use the stabilizer jacks to change a flat tire when on the road. Then they hired lawyers who got in the way of physics and the basic common sense of good mechanics. I rest my case. 😎
-
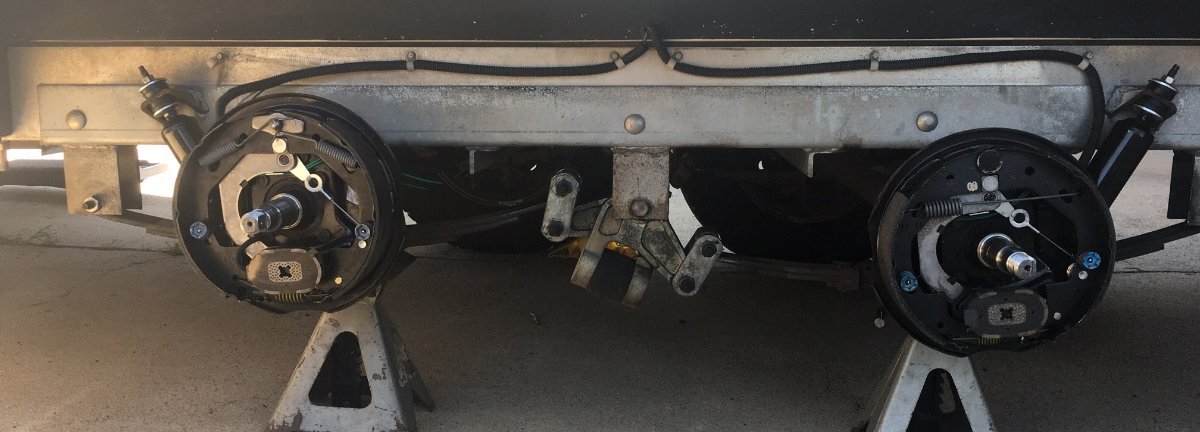
Manufacturers always recommend what limits their warranty liabilities. You can use just the stabilizer jacks for a quick tire change, but having a jack stand is a redundant safety measure. I will not get under a vehicle without it. In the picture shown above, I had it up on stands 2 days on each side to completely disassemble and rebuild everything. I wouldn’t let the weight sit on these internal stabilizer jacks for long periods of time, but some do and they would likely be fine.
-
This is not the official answer, but the easiest way to change a tire or service bearings. You will not need a jack, instead only jacks stand(s). BTW, it's extremely difficult to get any kind of jack on the steel sub-frame, so if using an external jack you would have to lift the aluminum frame which is not a good idea. Use the onboard leveler jacks to get your Oliver up on one side, wheels off the ground. Then place the jack stand(s) supporting the axles (not the frame) at the point just inside where they are u-bolted to the leaf springs. In this manner, you are not contacting the frame at all. The axles are designed to support the weight of the trailer. If you are changing one tire to fix a flat, one jack stand on that axle point is sufficient. If you are doing brake and bearing service, put stands under both axles as pictured, If you want to service all four with 4 jack stands you can then do the other side. If you tear apart all 4 brake assemblies for servicing, make sure you take good pictures before doing so.
-
Nope, maybe next time. We’re budgeted on time! In Caspar WY (correct spelling) today and soon to Colorado to meet up with Oliver friends this Wednesday! GJ, you will be very happy to know I’ll be at Alcan, Grand Junction CO in just two days. I will observe their operation, expect nothing but the best and will report here…
-
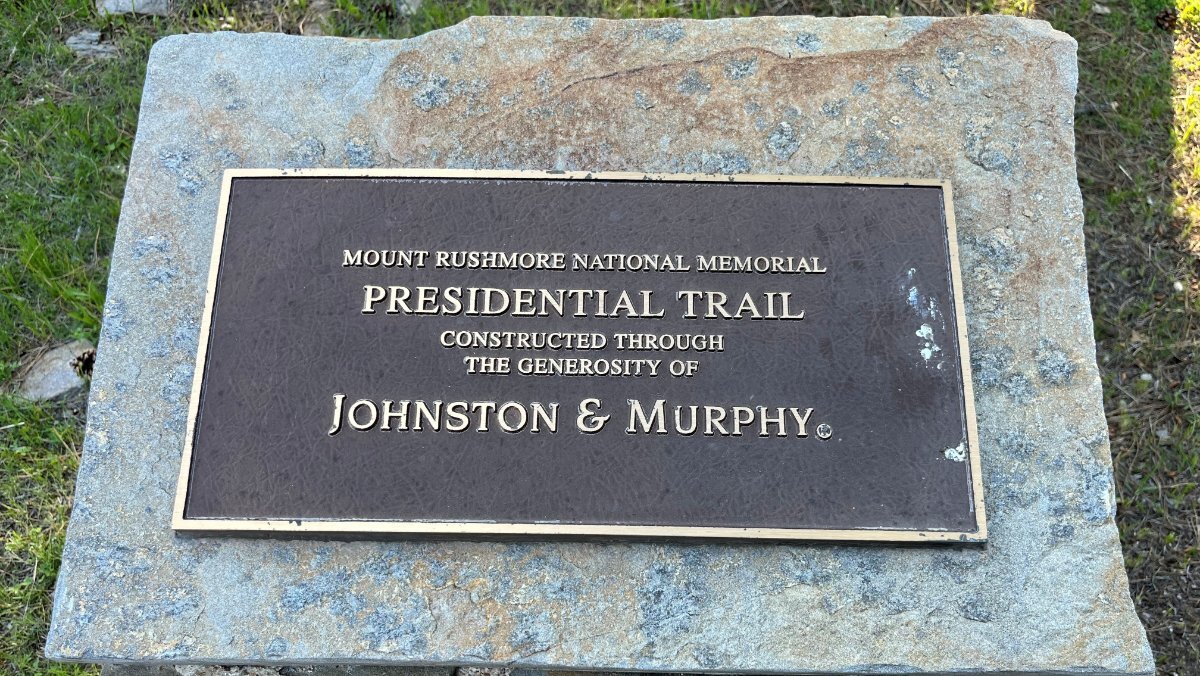
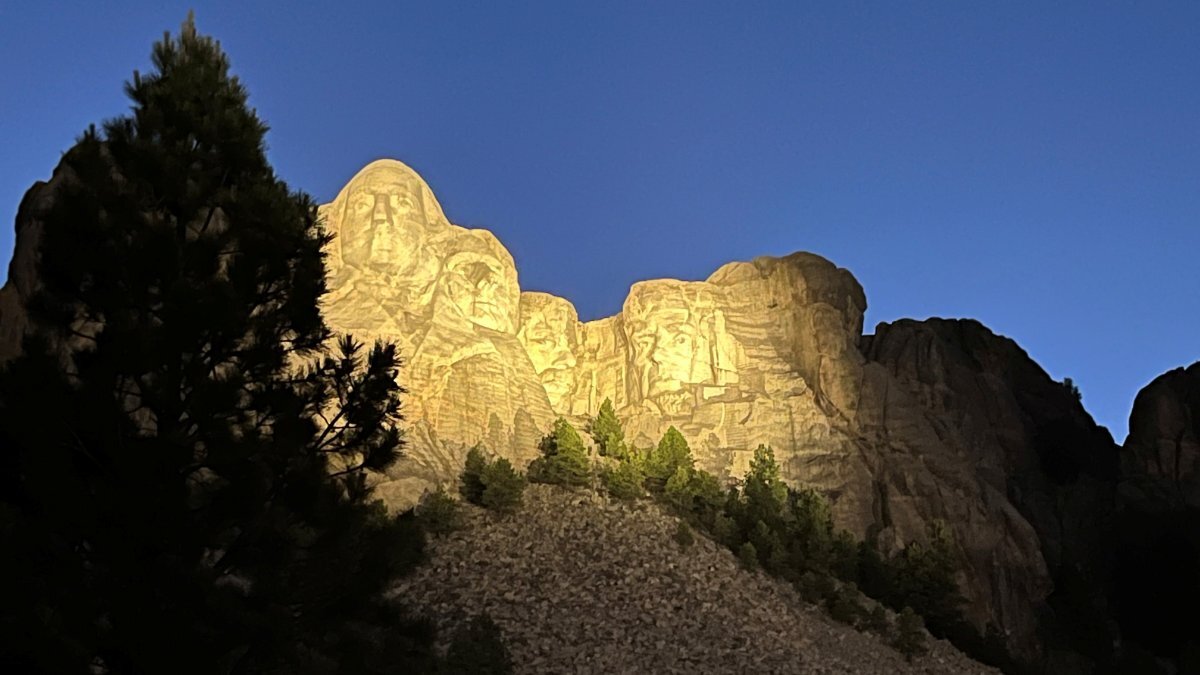
LOVED the Black Hills! I must learn what makes the stone black. Need to make another trip here to get deeper into the hills. Rapid City though is certainly a tourist-trap but Mt. Rushmore makes it all worth it. What a wonderful celebration of America! Chris and I have wanted to come here all of our lives. We had a great FS site booked just 10 minutes away, but it got into the 90s and needed electric to run the A/C. While eating donuts in our truck at Wall, I made a same-day reservation at Holy Smoke Resort just north of Keystone. It all worked out. We waited 'til after 5PM due to the heat and then hiked the Presidential Trail. We really wanted to see the night ceremonies but during June they start late at 9PM. So we went to dinner at the Powder House Lodge and returned just before nine. It was great, Bison Filet for Chris and Bison Stew for me, yum! Both the daylight and nighttime visits to Mt. Rushmore were something we will always remember. They ended with a salute to our Veterans, who were called on stage and the rest of us were clapping loudly, for a long, long time. Yes, thank you to our Vets! 😂
-
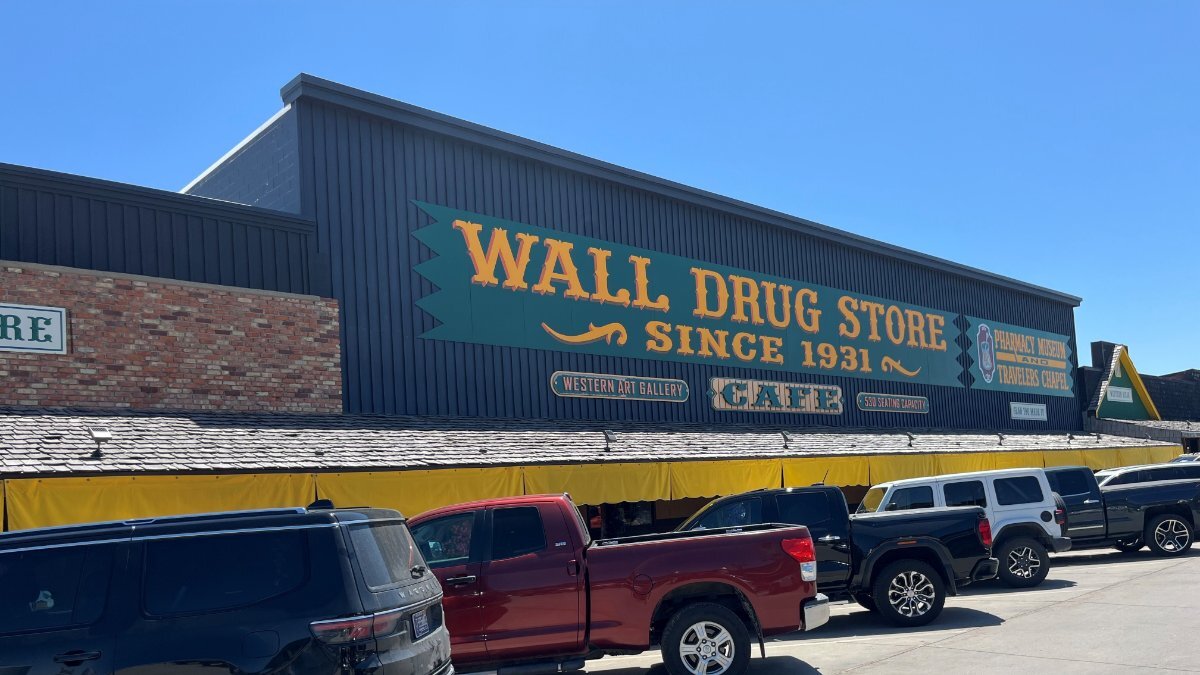
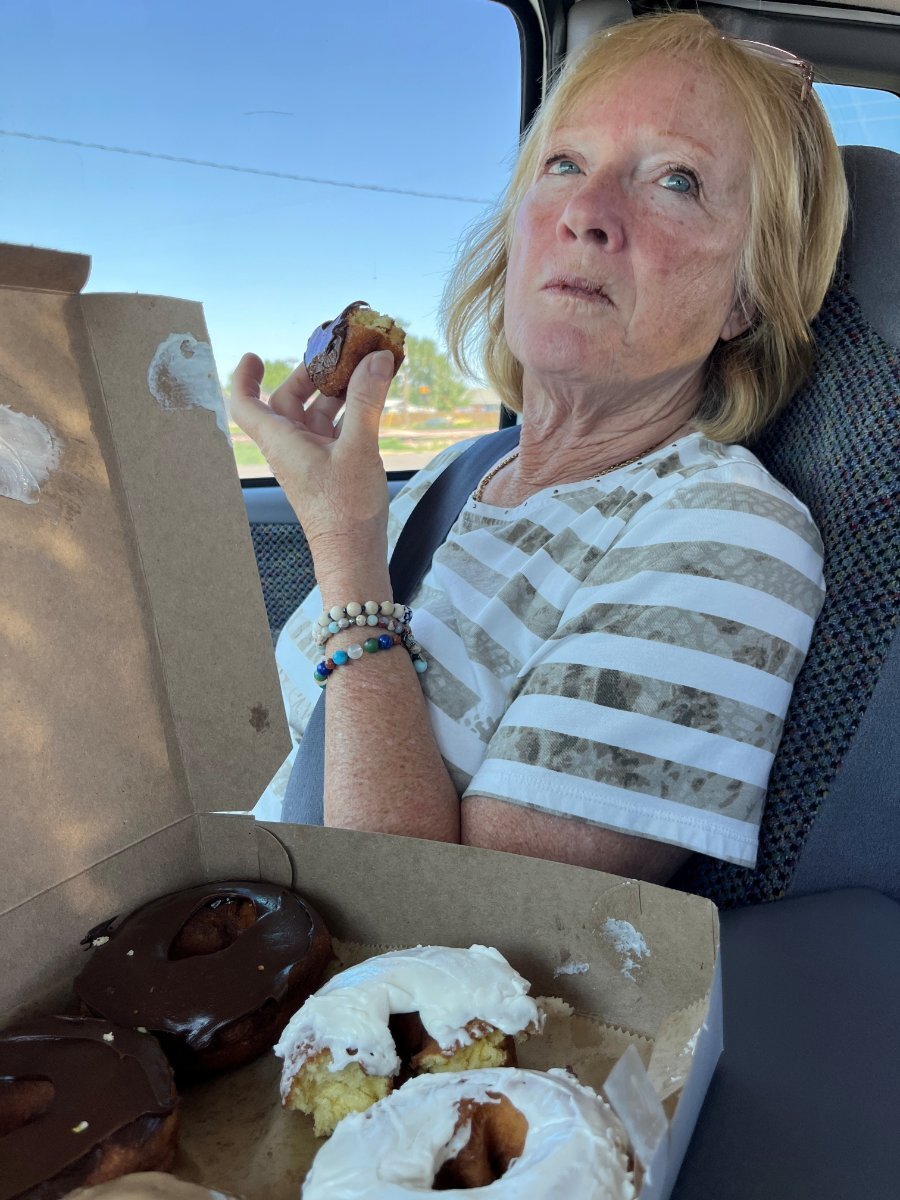
A week has gone by and we're stayed at so many great places in SD and WY! Badlands NP: liked the ease of entering from the east, exiting west after seeing the sights right at Wall SD. It's so stark, its topography is certainly out-of-place! Honestly, I was a little disappointed, not our favorite place in SW SD. Those who love this place, please do not get upset with me, but I believe if the same range of barren hills was somewhere in the middle of Arizona, it would not make the Top-10 list. It's just were it is located that is freakish! I posted pics in Where's Ollie? and I saw an Ollie threads so will skip those here. We boondocked the wall at Buffalo Gap National Grassland. It was pretty cool. Good that they have changed the rules that you must disperse camp at designated sites. Must have been a zoo prior to that. Still not everybody abides by rules! Somebody towing a 5th-wheel, tandem-towing another trailer with a SxS, came in after 11PM and camped right below us on our designated site. Who are these ________ who arrive at campsites after dark? Then he had the gall to run a friggin' generator all night long! I used to have a temper and too bad I'd get in trouble if firing a warning shot! We left late by noon, since it was going to be in the 90s that day and and it was somewhat cool in the wind on the ridge. Headed to Wall Drug, got in and out quickly. Here are the important pics. Their cake donuts are truly great! They only got us for a half dozen, no t-shirts or other nonsense, and two free water!
-
The more travel pics of Oliver owners, the better, something we can all agree on. But what just happened to us recently makes this thread special and I’m certain similar connections have been made over the last 9 years! Ken and I have been friends, communicated since their previous trip west when he and MK came to our home last September. We had a quick great day together, night at a local steakhouse! We also met up for a day during the Texas Rally. I knew he had an appointment with Alcan but did not add up their timing and travel route until he posted his Montrose camp picture here yesterday. I just made a reservation at the same park and we’ll soon have a couple days together! Thanks again Mike! I know you and Carol are great friends with them. Please keep this thread going and It’s up to all of you reading to do so!
-
Wow, I skipped the word ‘June’ when reading, focusing on the picture! Our trip was June too, fog where I could only see at most 30 yards ahead!
-
June 1996 we stayed in a cabin at 10K ft on the Salida side. Chris and I had headaches the whole week not being used to altitude at the time. Drove to Gunnison one morning, fog on the pass, was quite scary. Would not want to be there during winter like Mike! We didn’t make it as far as the Black Canyon, but should make up for that Thursday of this week! 😂 Joe & Mindy, not sure which direction you’re traveling, but there will be two Olivers at Riverbend RV Montrose Wed-Thu this week. One will be there much longer, the retired guy with his better half!
-
After the day at Devils Tower we road into our campsite and there she was, another Ollie! Only the second time for us, not counting the Q or Texas Rally and there was a 3rd time, but they left early morning without us meeting. Both times the Oliver owner was named Gary. The First time it was Gary from CO at Lost Dutchman and yesterday it was Gary from Harrisburg PA in Hull # 833! Gary wanted to check out my Epoch installation. He has 4-year-old AGMs not holding charge like they used to. I believe we've heard that story before! 🤣
-
How long you going to be there Ken? We should be there later in the week, Just got to Casper WY’
-
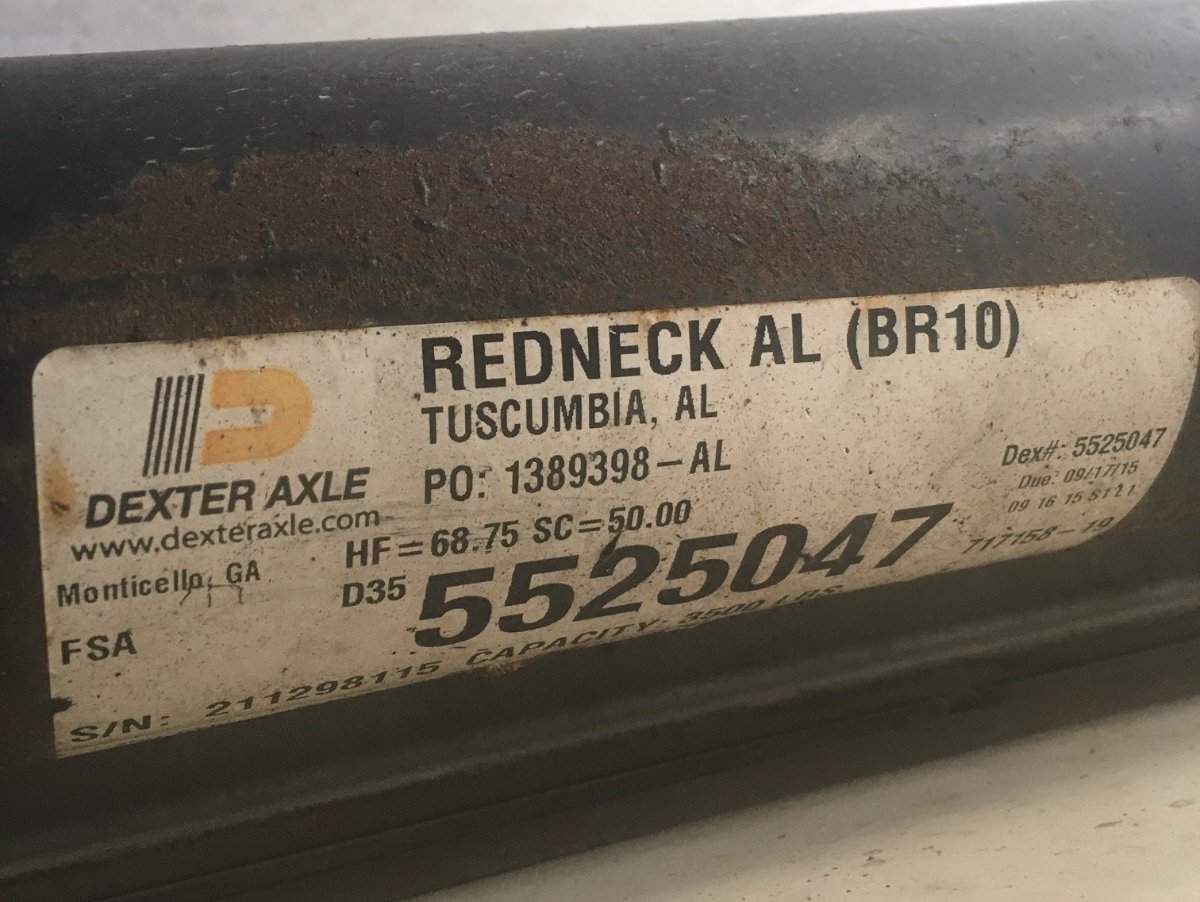
Thank you very much. I see the marking 50.50 which is the length in inches. Your picture reminded me that I took a picture of our label 2 years ago when servicing the hubs and installing Timken Bearings. So, I don't have to get under and measure again. Our hull has the 50" axles, see the 50.00 in my picture. I still would love to see a label picture showing D52 and 50.00, somebody please?! Thanks again!
-
Installing Pioneer Inverter AC
jd1923 replied to Treasure Coast Vault's topic in Ollie Modifications
Very well stated, to which I wholeheartedly agree! 9K BTU should be enough for the Cu Ft of an Oliver. Of course, I have less concerns re humidity than the two of you from Houston and Tampa! We are 4 weeks into our longest Oliver trip and there's been a heat wave, thank Goodness it just ended. Had to run the awful Dometic P2 over 4 nights and likely a couple more as we approach AZ. Noise was my greatest concern, but now it’s 2nd to Ah consumption. I ran it while towing for 90 min (see my post) and used 216 Ah. I could only afford to do so since we were driving to a campsite with electric. Given the Inverter A/C numbers hold true, we could do the same likely using <100 Ah and would be able to continue A/C use for a few hours at a dry campsite. The Atmos/Tosot may be quieter, but either choice has got to be half the dBs of the P2! So @CRM, I’m counting on you being next! I’m now strongly in this camp and will upgrade prior to getting stuck on the next trip in a heat wave. You guys are always in a humid heatwave! -
Yep, good decision. Like buying a truck that’s on the dealer’s lot. You’ll get a much better price than ordering a factory build. Why I buy low mileage excellent condition used. I can remember buying only 4 new vehicles in 40+ purchased over the last 50 years. We would never have known about Oliver if there was not one locally available used. I believe we paid half to 60% of the cost ordering new from OTT and they haven’t changed much through the years. This allowed us budget for all the many mods we’ve made. I would not trade ours even for a new one! And there were no dealers 2 years ago, still none in AZ, with the Phoenix Valley being one of, or the largest RV market in the country. @David and Gail, we hope you are as happy with your new Oliver as we are with ours! Best wishes in your travels, JD
-
Delete the Optifuse asap (China cr@p) and replace it with a 300A ANL fuse. On a recent post by @John Dorrer I listed Amazon links for the parts required. I have an ANL fuse in line with our Victron inverter and can run the A/C and microwave simultaneously! Not that you’d want to, but it does so without blowing the fuse! You don’t want a breaker for this connection and OTT knows this (finally), now that they’re not using the Optifuse anymore. That’s what Jason should have told you.
-
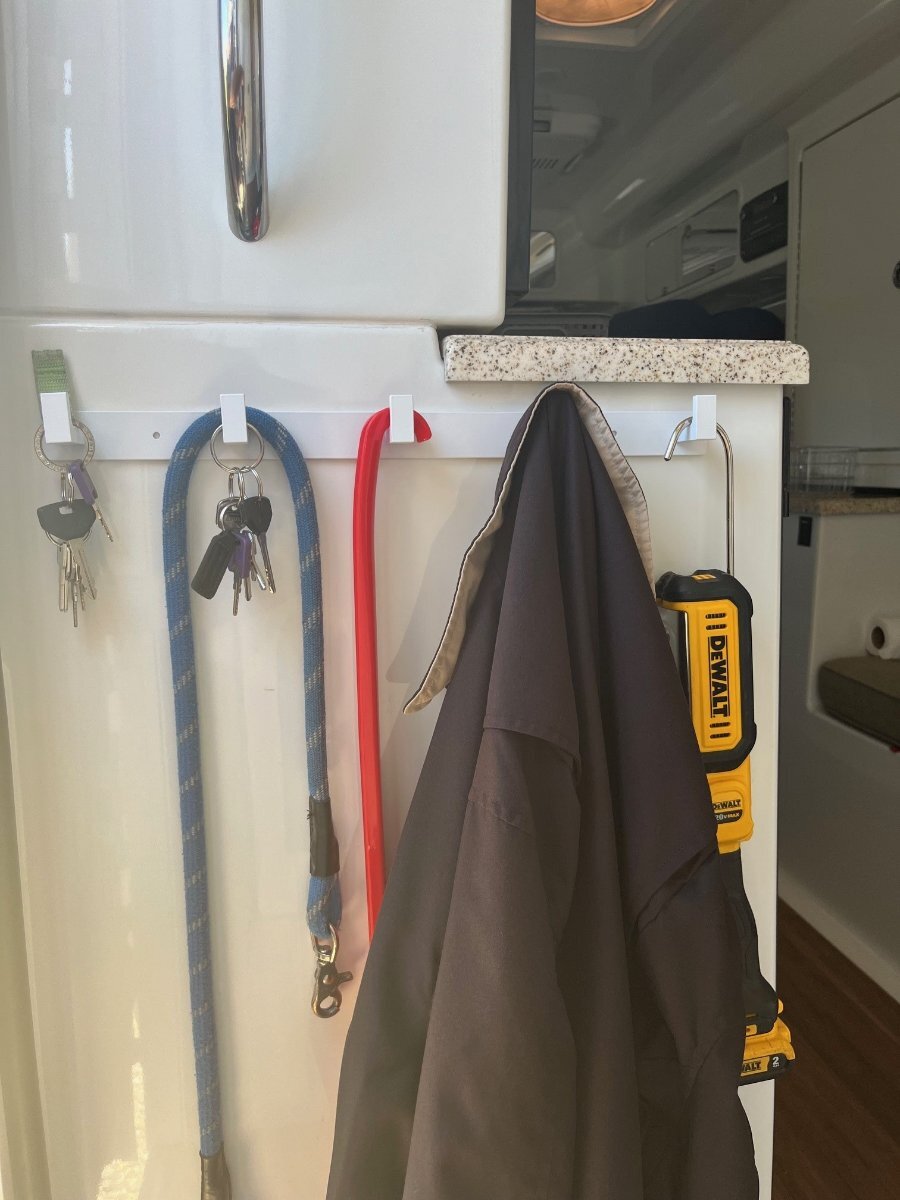
How many different KEY's do you have?
jd1923 replied to Dave and Kimberly's topic in General Discussion
Thanks @Dave and Kimberly, this is a fun thread! 🤣 Another thing that has helped up immensely is having a key and coat rack that can be reached standing outside the door of the Oliver. When I put my keys here they are not lost!
-
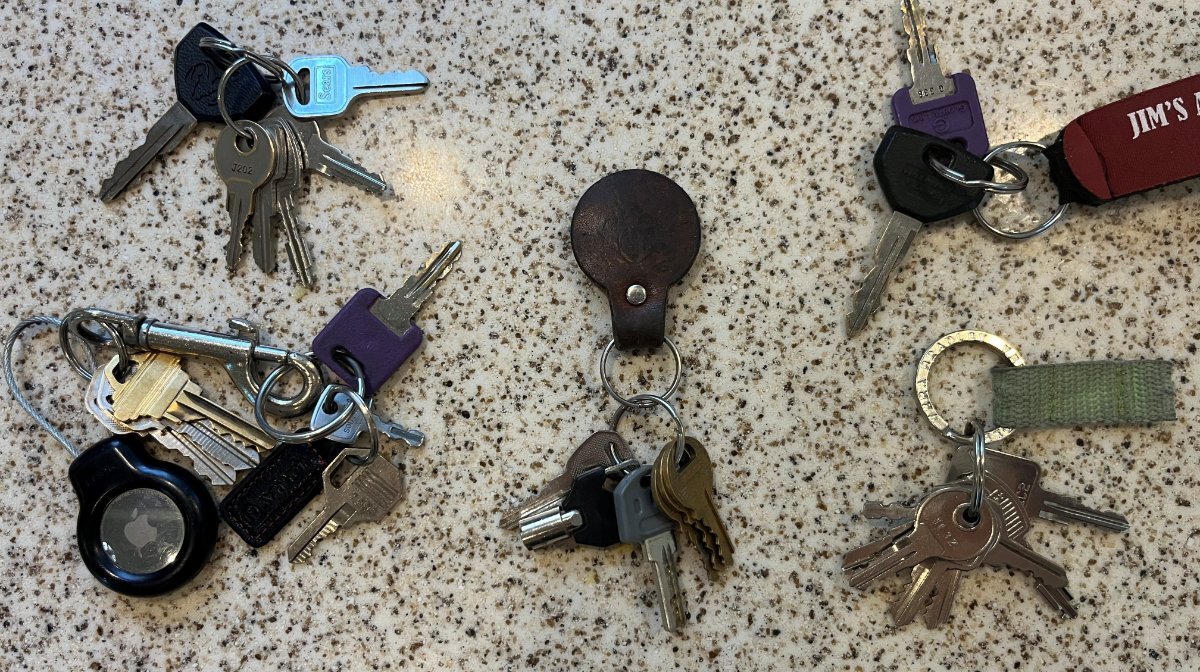
How many different KEY's do you have?
jd1923 replied to Dave and Kimberly's topic in General Discussion
So this can get complicated so I've attached a pic! 🤣 If I carried all our required, notice the hook, I can be the janitor too! The keys on the left are my set, Chris' on the right and we each have every possible key for the Oliver and TV. The keys in the middle are used for hitch locks, our shed where we keep our camping stuff when home and some padlock keys. This set just stays in the truck toolbox side pocket and are always there unless hitching. I always carry the top left ring which has everything for the TV, 2 toolboxes, fuel cap and tailgate key, etc. and they fit nicely in my jeans pocket watch pocket. Bottom left are my Oliver and house keys for when we return and I always keep these in the TV console unless when rarely needed. Chris has a duplicate set. She is in charge of the Oliver door and when we take a hike, walk the dog, or the like, she carries the two keys top left on a wrist band and I leave my TV keys on a hook just inside the Oliver. At home, I have a whole special box full of keys; 2-3 sets for each vehicle, bikes (not bicycles) and dirt vehicles, shed and outbuilding and more and the box stays in a locked closet, key hidden in the nearby cabinet. I also have a hidden key box in the frame of the truck because I'm only going to lock my keys in the truck once without a backup! I loose my keys ALL the TIME! But they're always somewhere in the truck bed or on the Oliver bumper or somewhere like that and we never leave camp without my keys. Chris NEVER looses her keys, period end of story! She reminds me of that when she helps me find my keys. 🤣
-
We had GEICO for several years after Farmers got far too expensive! Then GEICO became a pain. They stopped allowing us to make changes online. Then they wouldn’t allow me to change what family member was driving what vehicle and charged us for commuting and I hadn’t driven to my job in years! I remember trying progressive online years ago after all the Flo commercials and it was very expensive. Recently we went with a local independent agent. He shopped many companies and he got us into a preferred account with Progressive. Costs were 20% or more less than GEICO. We switched all of our vehicles and we have several. Twice a year I switch winter vehicles to summer. Switch two vehicles from full coverage to comp only and vice versa. We insure our TV and Oliver with them. When we get done traveling end of July, I will put them both on Comp only for a couple of months until we travel again in October. This saves us quite a bit. Yes, in my head too, everything is too expensive these days! Like you wrote the 80s or at least the 90s.