jd1923
-
Posts
3,617 -
Joined
-
Last visited
-
Days Won
277
Everything posted by jd1923
-

Barker VIP3000 Stabilizer Jack Slipping
jd1923 replied to jd1923's topic in Mechanical & Technical Tips
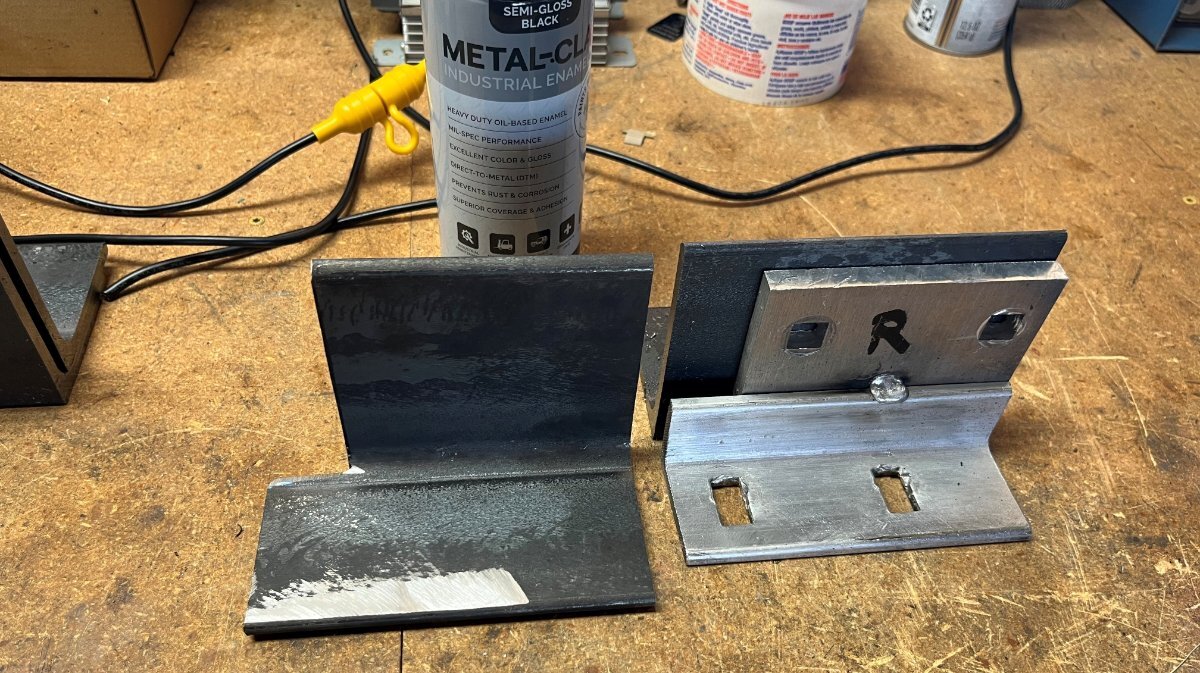
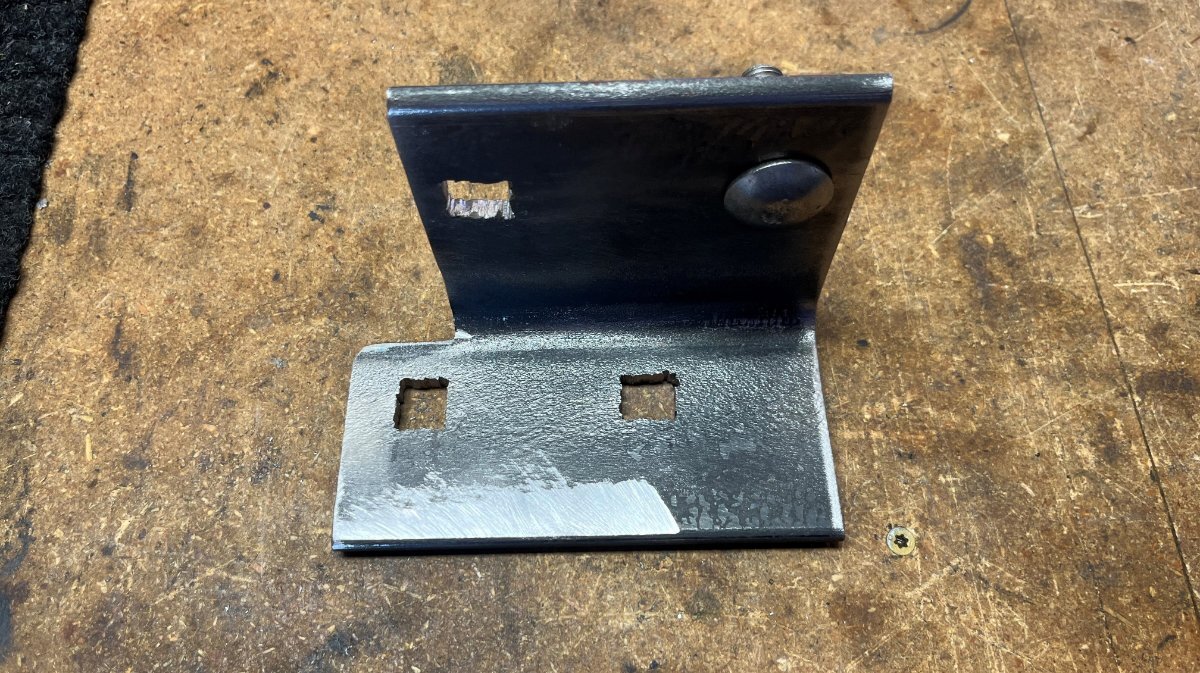
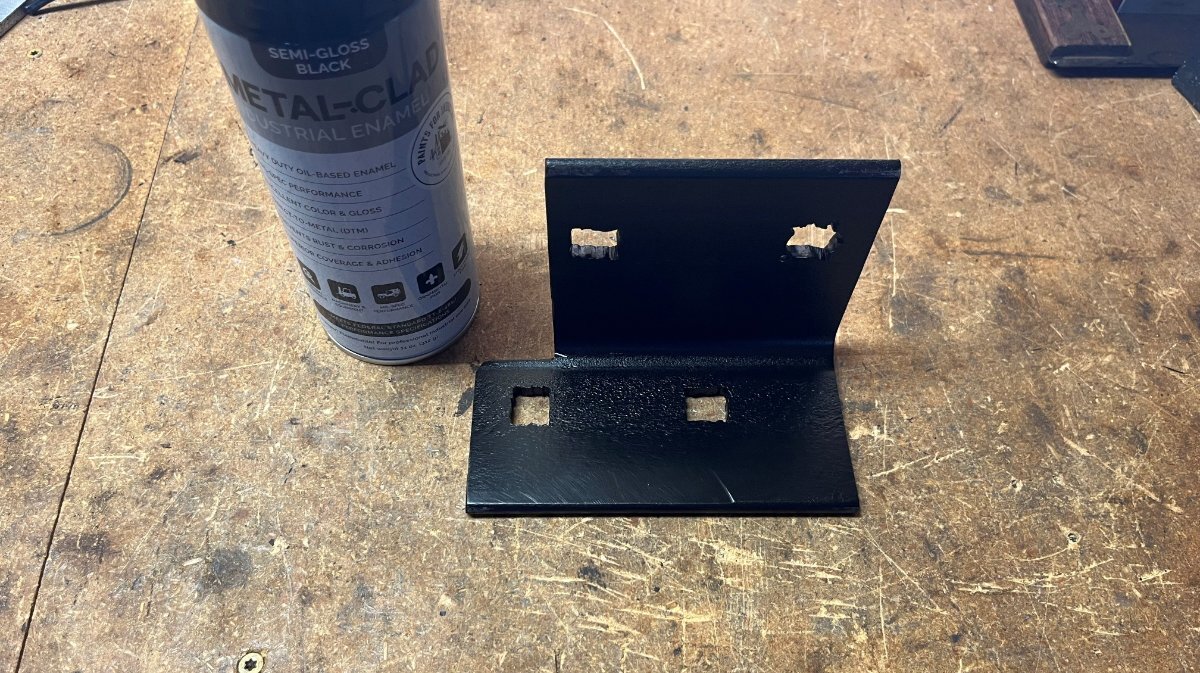
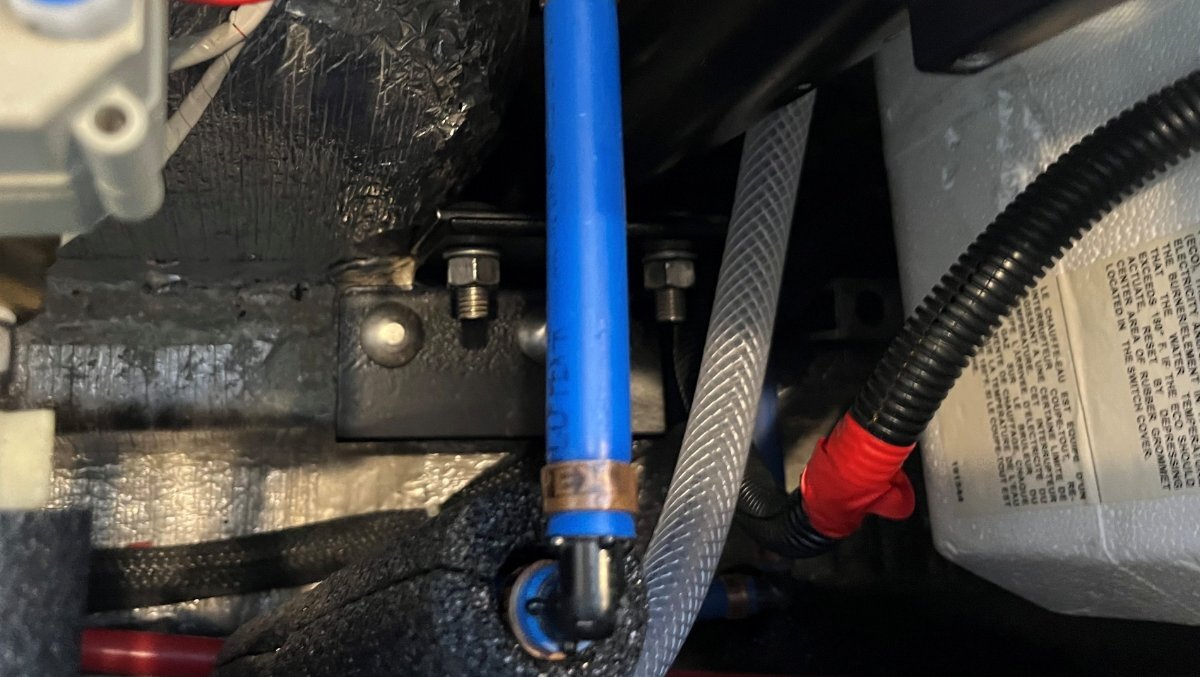
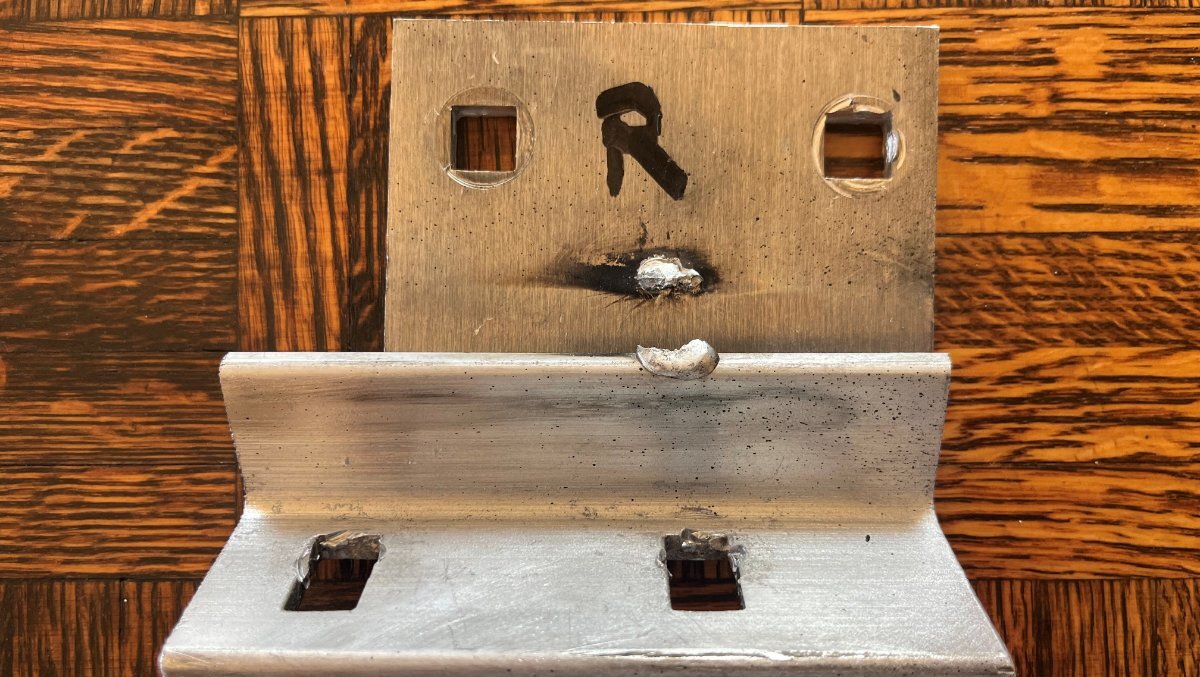
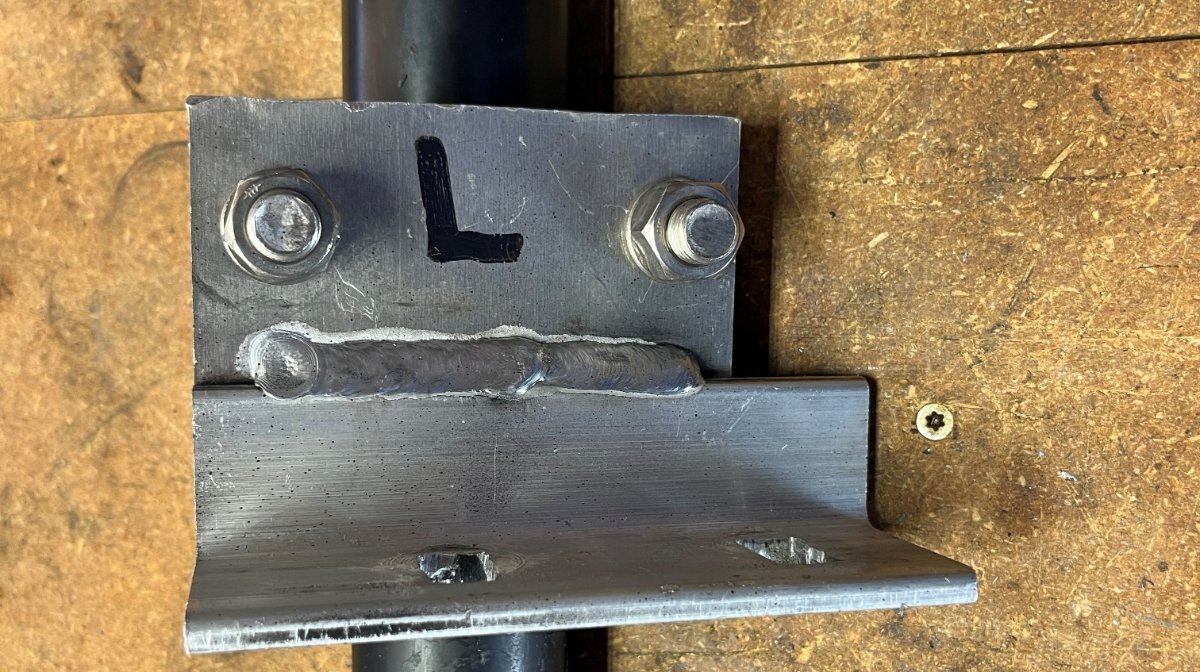
I could have had the aluminum brackets re-welded, but then I thought of a way I could fix this myself if I had the right 1/4" steel angle iron. OTT uses two pieces fitted together since they're easier to fit in place during installation. One piece would require the holes to be drilled in precise locations. Getting 4 squared offset holes to align exactly is no easy feat! 🤣 Solid steel must be stronger than 2 pieces of aluminum welded together. I went to Prescott Steel & Welding and they had the steel I needed and also referred me to a good welder that also works with aluminum. For $15 They cut me two 3x4" angle iron 5 1/2" long and another $10 for this Direct-to-Metal paint which is amazing! One coat, covers in seconds, no drips. Wish I knew of this paint in all my years of auto restoration! Must have taken me 2 1/2 hours total to fab this bracket. Being L-shaped there is no way to trace the original part, so measure and measure again and hope for the best! I drilled the 1/2" holes and cut the corners with a jigsaw. My first hole was not so clean, thinking I could drill 1/8" holes in the 4 corners (it didn't work). I purchased two brackets, but after I realized the other side had full welds, I just made one saving the 2 hours it would have taken me to make a second bracket. Both sides are done and tested. I still have the wheels up in the air on the side with the new bracket! 🤣 If the weld had not failed this rebuild project would have been done last Friday when Barker delivered the new heads. Beds are in and Chris is making the beds! We'll leave to Colorado by the weekend, a few days later than plan, but all the better! 😎
-
Barker VIP3000 Stabilizer Jack Slipping
jd1923 replied to jd1923's topic in Mechanical & Technical Tips
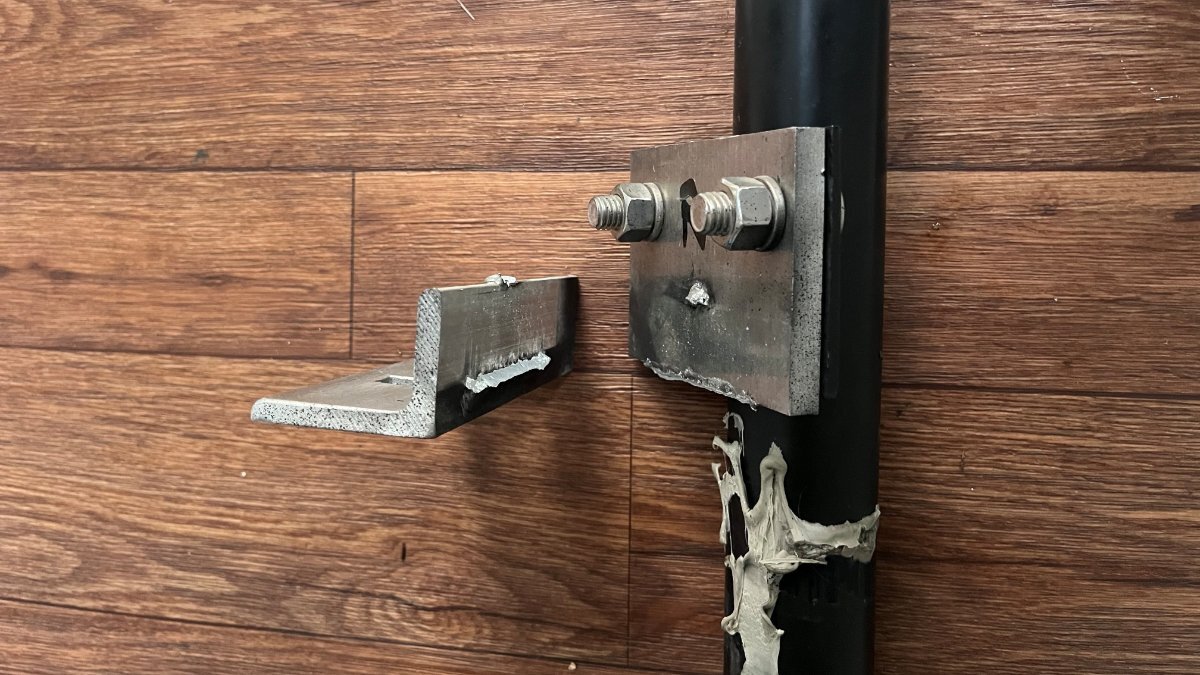
So, here's where this project went a little of course... Next step was to test the jack. Something happened that I could not imagine. It started lifting the hull, wheels not yet fully off the ground and BANG! The jack and hull dropped, OMG! 🫢 I asked Chris to come out so she could operate the button as I watched the jack. As soon as she pushed to lift the hull, I observed the outer post lift up into the hull. The outer should remain fixed, welded and bolted to the frame. I thought, the weld must have broke (it did)! I figured that when remounting the alignment would be slightly different and this could put new stress on the weld. I didn't pay much attention to the welds when it was out since they had lasted 10 years. I talked to a couple of Oliver Elders, first was Ken @mountainoliver who told me that years back some Oliver owners found out that OTT did not finish the welding job properly. Then a conversation with Steve @ScubaRx confirmed this fact! I wrote a Service Ticket and Mike at OTT responded promptly. He was thinking it was a Barker issue, but after our call I realized there was nothing OTT could do except perhaps pay for me to hire a local welder. IMHO, this was certainly an OTT installation issue. The installation procedure is to bolt the two aluminum blocks into position, tack weld them when in position, then remove the assembly to complete weld along both upper and lower surfaces. Turns out they forgot to finish the job on the curbside but did the full weld on the streetside (pics of both below). Next time y'all have your beds off and basement doors open, take a flashlight to inspect yours to confirm you have a full weld on top. Your top weld should look like my 3rd picture. If it only has a tack weld like the 2nd picture you need to remove the bracket (the jack can stay in place if you like) and have it fully welded properly. Thank goodness this happened while home AND that when it failed it did not damage the fiberglass under the bed. On this side we have 1/2" between the top of the motor head and the fixed fiberglass. When it failed it merely pushed the basement cover and bed up and down a couple inches.
-
Barker VIP3000 Stabilizer Jack Slipping
jd1923 replied to jd1923's topic in Mechanical & Technical Tips
Will do. Though keep in mind if the white one gets bad, I have two brand new black tops from the reman heads I bought! 🤣 -
Barker VIP3000 Stabilizer Jack Slipping
jd1923 replied to jd1923's topic in Mechanical & Technical Tips
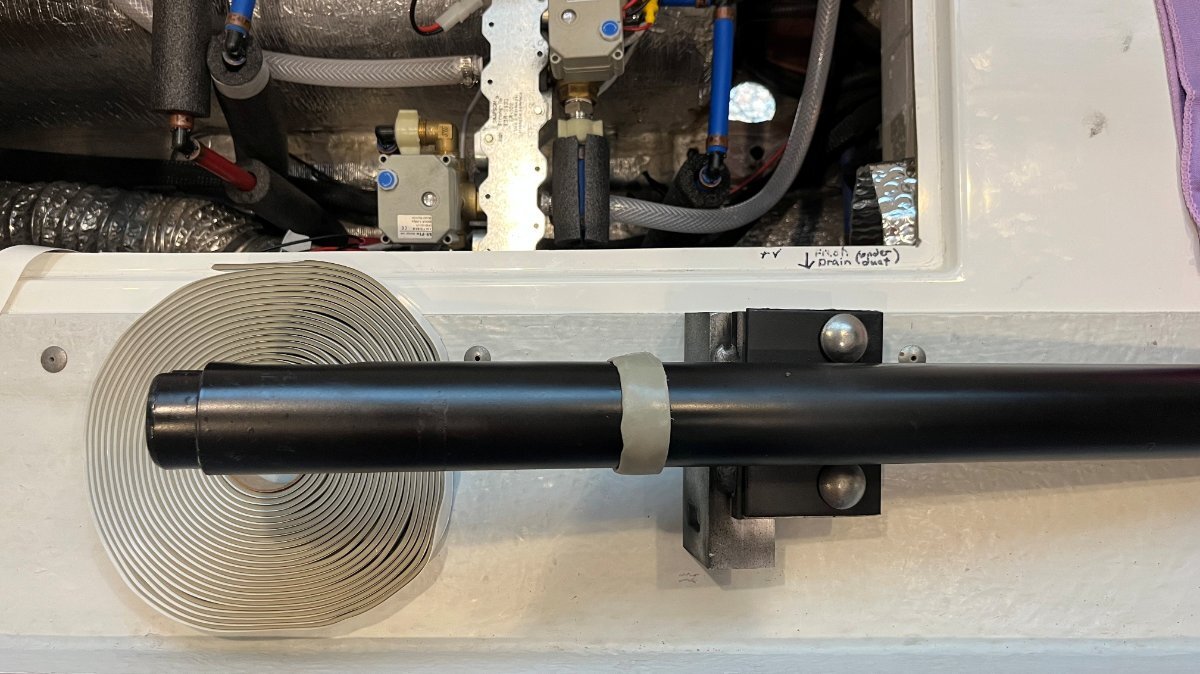
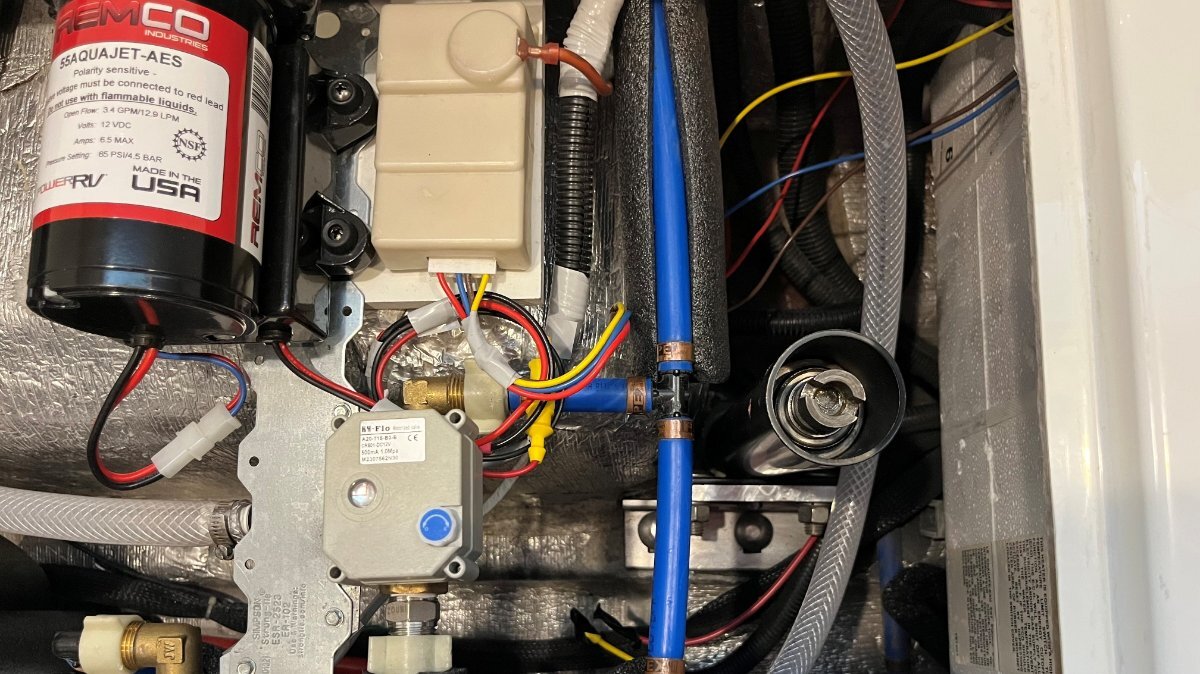
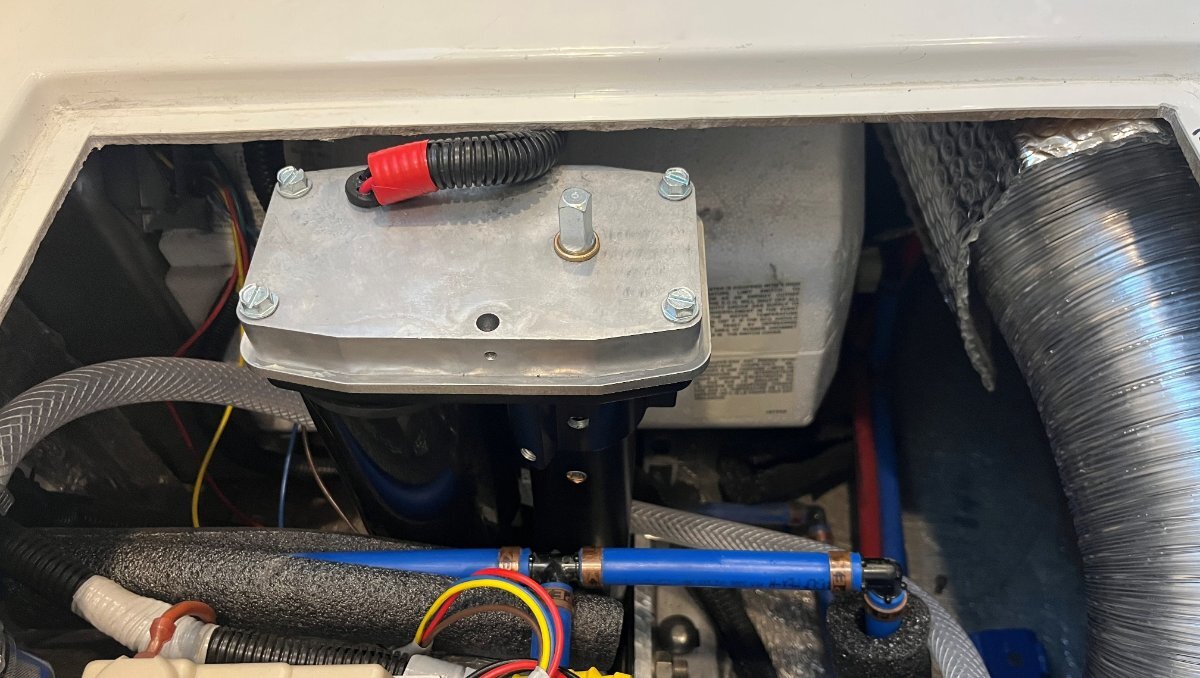
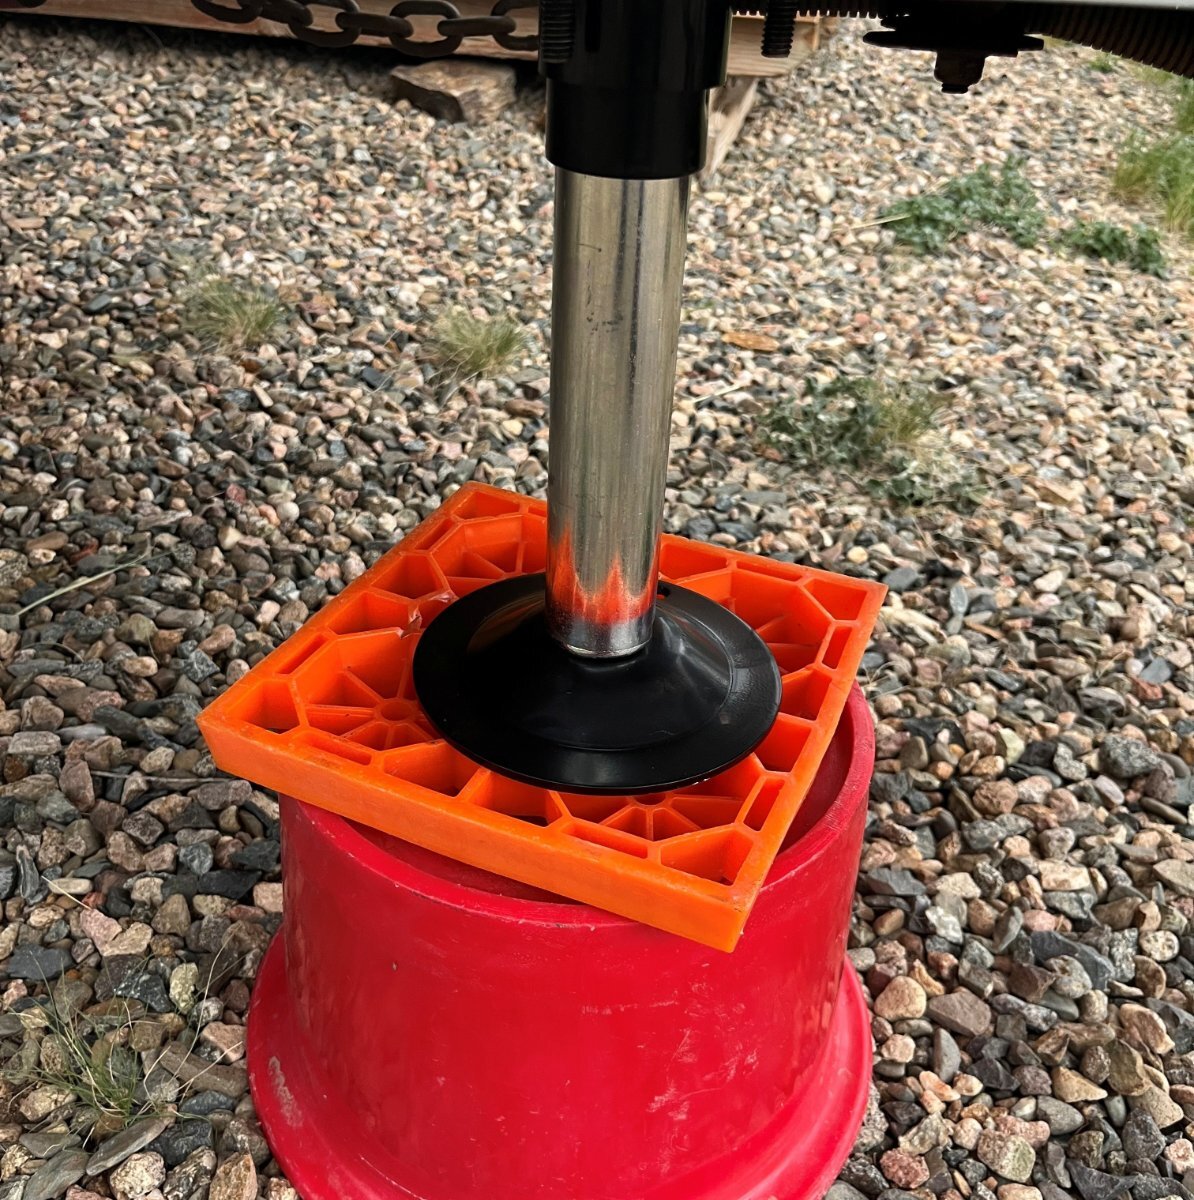
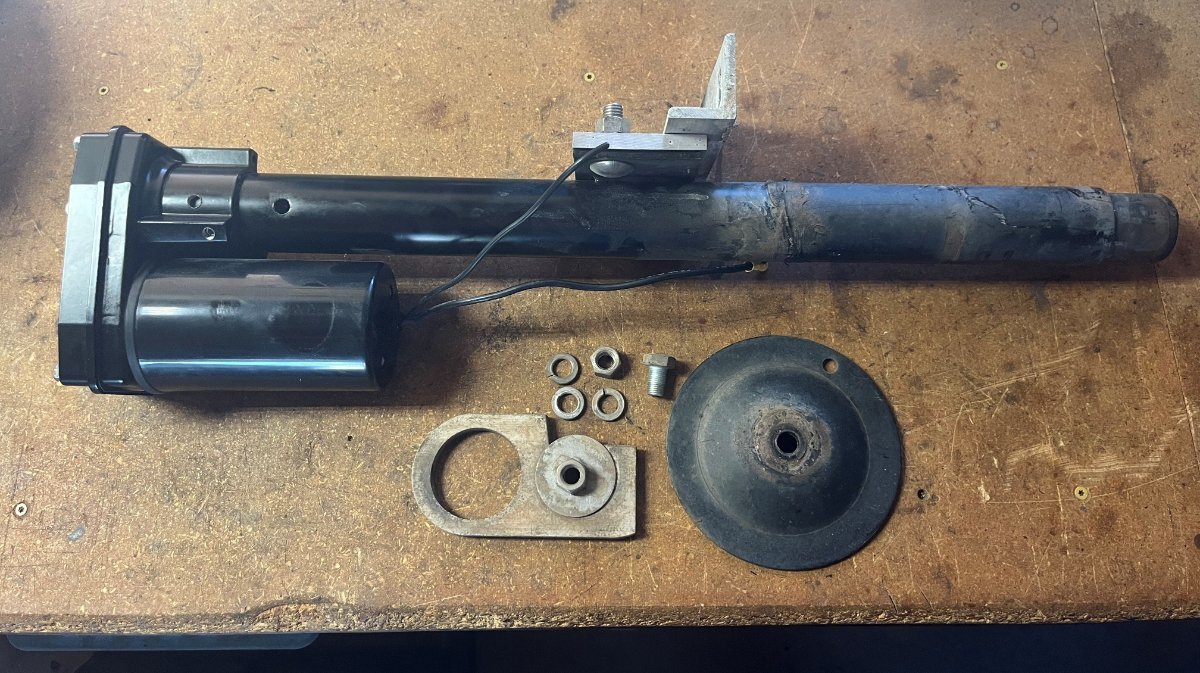
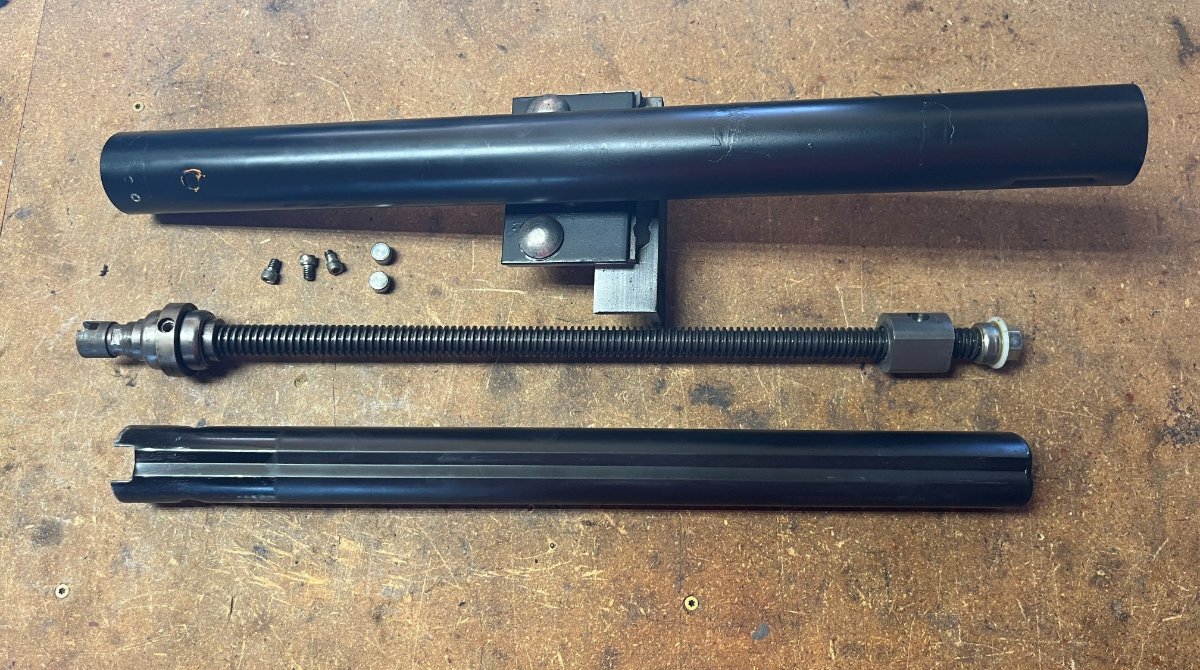
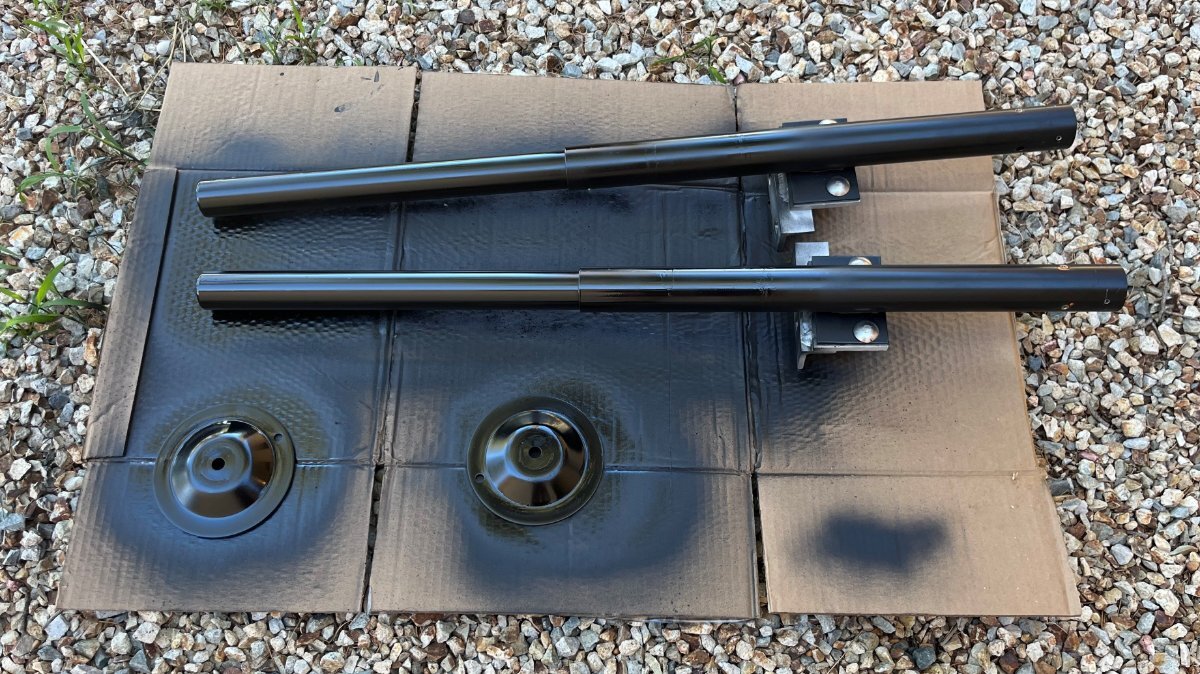
New motor heads, rebuilt post assemblies, all parts cleaned and painted and I'm ready for assembly! It's not easy to get the posts out and back in. To get them out, I removed the motor heads first, removed the long mounting bolts and used a hydraulic jack to break the old caulk bead pushing the post up. You could do this with the stabilizer jack itself if the motor heads clear the fiberglass of your bed platforms. Ours has 1/2" clearance on one side and only 1/8" on the other. OTT could cut the basement opening 1" further to the rear so that we have proper clearance, but it is what it is! 🤣 Put new butyl on the posts where the old markings showed the correct position. One is likely enough, but I ended up using two strips of 3/4" butyl on each post. Afterwards you can pushe the excess butyl down aring the post. You really have to cock the post on an outward angle to get it past a mounted support on the frame. Then get underneath to mount the nuts on the long carriage bolts. The aluminum bracket should be pushed in to support the post. Some thread locker on the bolt mounting the foot and all done in working these steps, now looking pretty good! The reman motor heads are standard VIP 3000 heads, meaning they are wired through the top vs. at the motor bottoms. Cut off the heavy gauge wire on both sides top and bottom as these are not used. The two lighter gauge wired, red and black are what is wired. Before crimping make sure the switch runs the motor in the proper direction. If it's running the wrong way swap the wires. I need to add 1 ft lengths of 12 AWG wire to reach the tops.
-
Barker VIP3000 Stabilizer Jack Slipping
jd1923 replied to jd1923's topic in Mechanical & Technical Tips
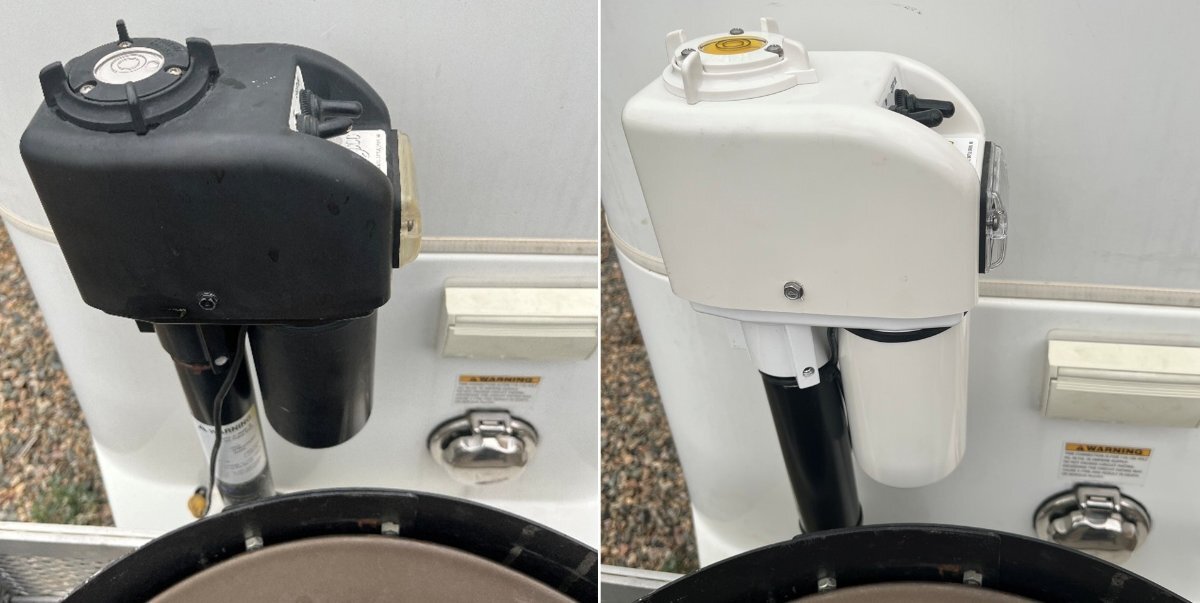
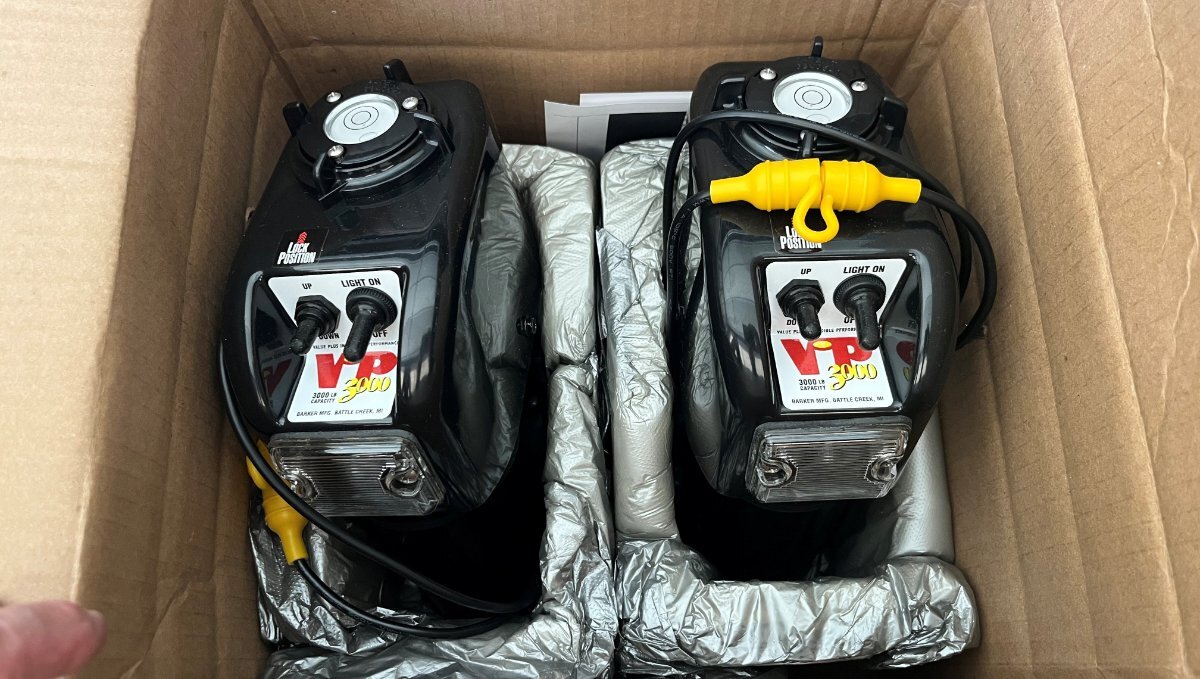
While I was online searching for VIP 3000 motors, I ran across an eBay auction. The listing was for a new-in-box VIP 3000 30826 (in WHITE)! Some of you know, I do have good luck in finding deals when it comes to my projects! 🤣 The eBay auction was for $250 plus tax and shipping but it also had the "Make an Offer" option. I offered $200 and he took it. Was $258.60 OTD? These are $500+ retail!
-
Barker VIP3000 Stabilizer Jack Slipping
jd1923 replied to jd1923's topic in Mechanical & Technical Tips
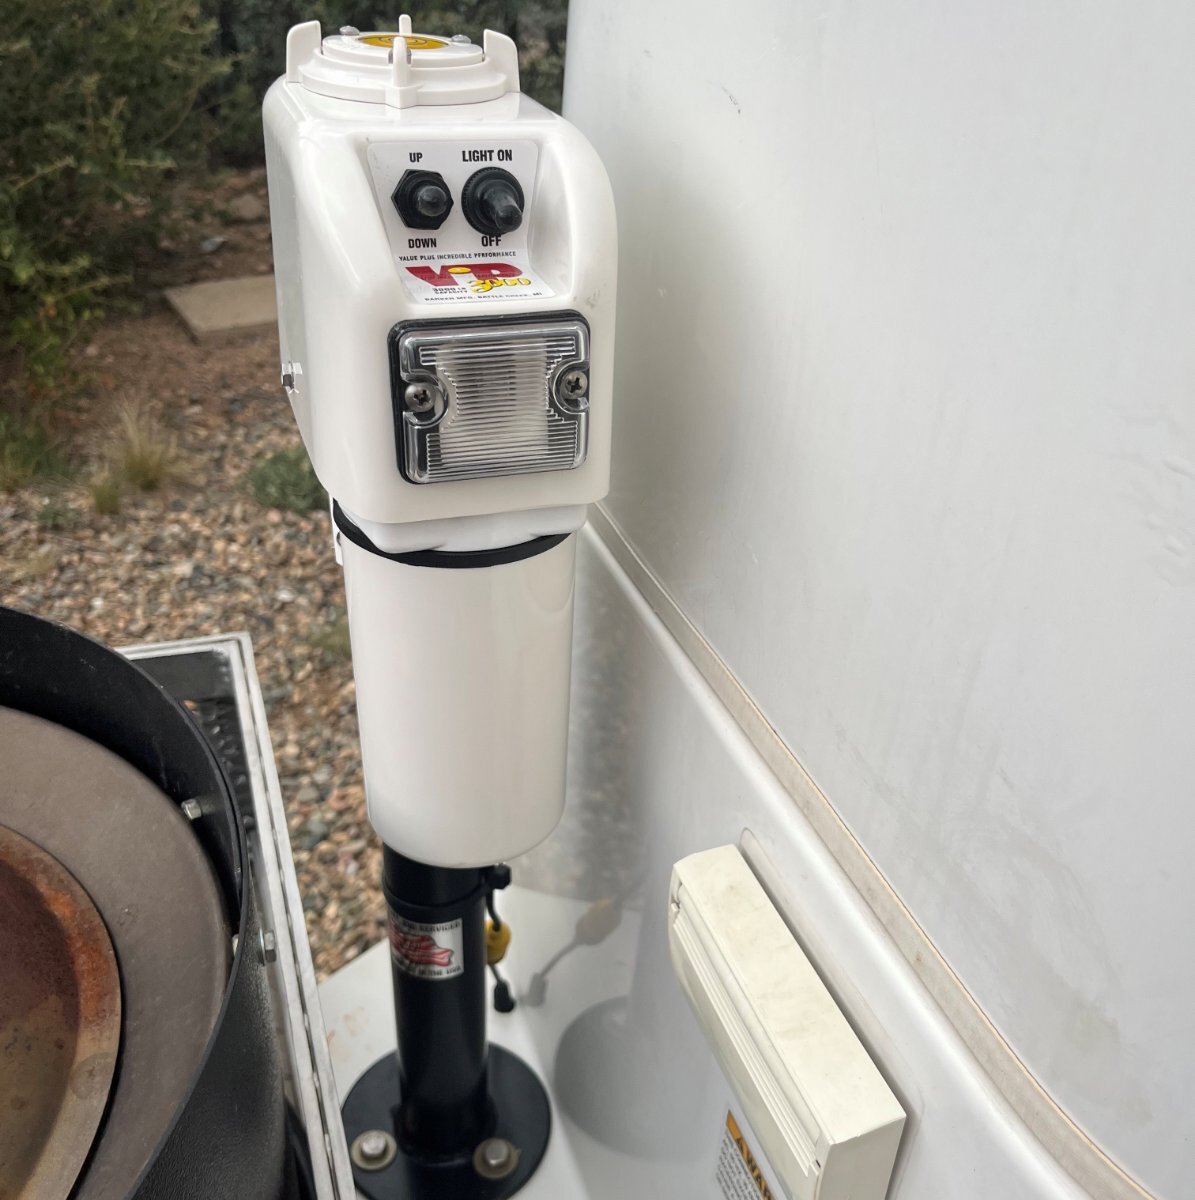
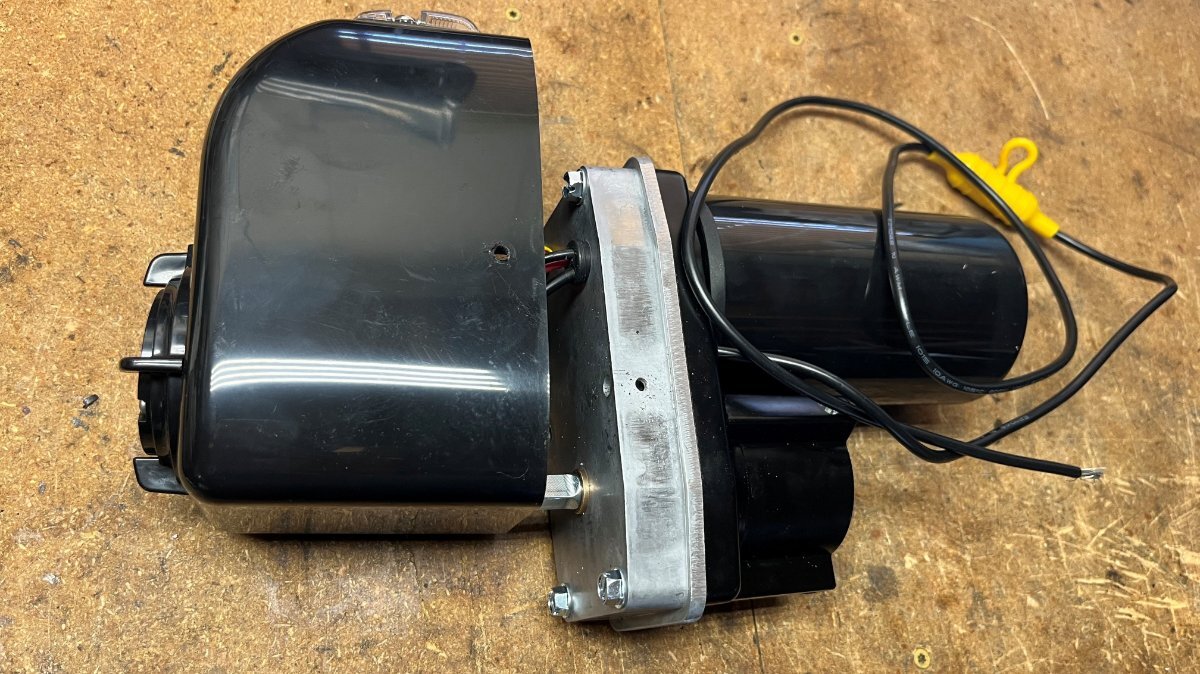
The failure on the rear curbside jack started with a clicking noise, the jack slipping not lifting and I could hear the motor slowing too. The worm-drive gear is connected to the motor, so the motor needed to be replaced. I figured I would rebuild both sides with new parts. Looking online it's near impossible to find these motors. I had the part number provided in the Barker VIP 3000 installation manual. I called Barker to see if they could provide an online retailer. A few minutes on the phone with Donna at Barker and she informed me that they sell remanufactured motor heads for only $75! I found some online listings at $150 to over $200 for the motor alone (but TG they on back-order)! I ordered two heads over the phone with shipping $185 total. Look at these beauties! Need a need front motor head? Call Barker! Three Allen screws, plug in power to the fuse and you're done in 5-min! Do you pay somebody to work RV service for you, like servicing jacks? You can replace the head for less money, new gears nicely greased, the switches are all new, shiny plastic casing - nice!
-
Barker VIP3000 Stabilizer Jack Slipping
jd1923 replied to jd1923's topic in Mechanical & Technical Tips
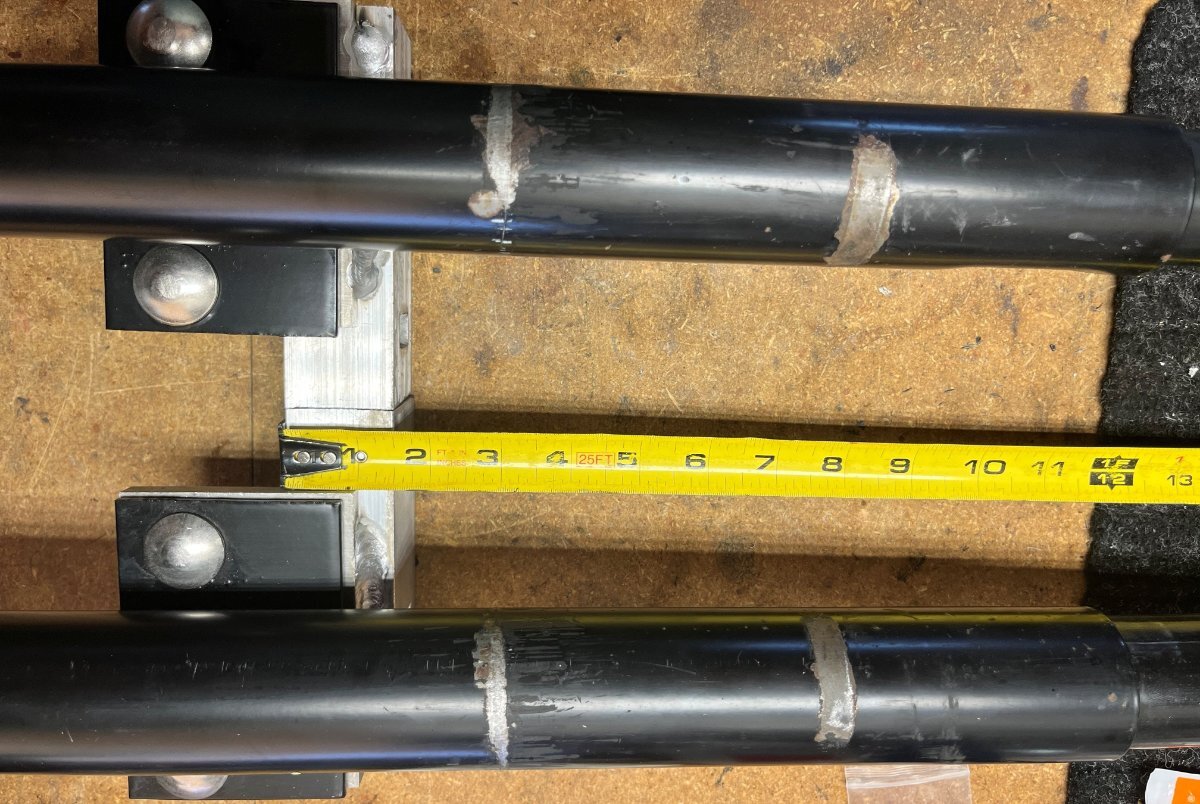
Then plan was to leave on our camping trip at the start of this week. One failed stabilizer jack put our trip on hold. I will finalize all repairs today, so we're now planning to leave to SW Colorado in a couple days. Good news is I have completely rebuilt, or replaced, all three (3) stabilizer jacks. Our 10-year-old hull now has new axles and full suspension and now all new jacks, besides all the new electrical systems, plumbing, etc. Our hull is now far better than a new one! 🤣 I will go through everything in the next few posts. Barker sells remanufactured jack heads for only $75 which I will explain fully, and many of you may want to consider this exceptional deal! Step one is removal of the rear stabilizer jacks. Using a 3/4" deep socket and impact tool if available, remove the jack foot and the nuts from the two long carriage bolts. Notice the markings on the posts where they contact the hull and support bracket below. I've seen postings here and on other forums about servicing the jacks. Never have I seen anything about servicing the posts. The post on the front jack, the standard Barker VIP 3000 jack cannot be serviced. The top on the jack is sealed, pressed into place. However, the OTT custom Barker rear jacks can be serviced. There are 3 Allen keys to remove motor head of the jack. You want to do that first. There are 3 more 1/4-20 Allen screws that hold the top of the screw drive to the upper/outer post. Once the top of lower post is revealed there are two steel pucks that hold it into position (see pics). Clean all parts and grease with Mobilith 460: https://www.amazon.com/dp/B07CTJ97SV?ref=fed_asin_title
-
There are always some that say you can't do stuff when often you can. I would search the GM/Chevrolet and Duramax forums. Also, Dill tech support may know something.
-
I for one, miss your contributions to our Forum! 😂
-
Ken, hopefully this picture was taken during work in process. I'm sure you must have closed off and sealed the opening around the drain pipe. It almost looks large enough for an Arizona Pack Rat! Don't let the cute picture fool you, they are monsters of collection and destruction! 🤣 Regardless, this opening is certainly large enough for field mice and many kinds of insects! I pushed in a large bead of dum-dum (butyl) around mine.
-
I fully agree with your statement. I'm also interested in these but have no experience. Bluetooth, do they have an app to read tire PSI and temps?
-
Inverter freedoms 2000 is not turning on
jd1923 replied to Skipster's topic in Welcome to the Oliver Forums
I'm thinking a good tech at Xantrex should get you up and running... But, if it turns out you need to replace the unit and want to swap with the same model, I would do this. This eBay Seller with decent feedback is an RV parts & salvage co, this item is open box, "guaranteed to work." https://www.ebay.com/itm/267389119450?_skw=xantrex+freedom+xc+pro The labor is simple, since the model is identical. Just disconnect your shore power and batteries, and solar switch OFF. Then swap wires from your original unit to the new one. $650 plus tax vs. $1,800 plus tax and labor! 🤣 -
We’re staying with the OEM Scandvik faucet, at least for some time. This company is most reasonable for replacement parts! 🤣
-
Inverter freedoms 2000 is not turning on
jd1923 replied to Skipster's topic in Welcome to the Oliver Forums
Yes, call them! I purchased a brand new 3KW Victron Multiplus II for $1,100. Don’t spend this money on a 2KW Xantrex! Your model used in working condition on eBay is likely about $300. -
Yes, and given a water leak, they ask for help, and it’s another few days…
-
Just “Oliver!” Sometimes we’ll say it the way Eva Gabor did in Green Acres!
-
Inverter freedoms 2000 is not turning on
jd1923 replied to Skipster's topic in Welcome to the Oliver Forums
I read in your other post that unplugging and plugging the inverter makes a noise. This and your test shows you have power to the inverter. The noise means it’s doing something internal. Time to get in the phone with Xantrex Tech Support. You have power in but nothing out. They will have tests for you to do and next steps. Your issue must be the inverter is not powered on or something else internal to the inverter. Good work so far! Keep us posted. -
Changing tires in the wild - lessons learned
jd1923 replied to John and Jodi's topic in General Discussion
Stainless Steel (SS) lug nuts are limited. I've never seen them used for custom wheels. I'm not sure whether our wheels require 'acorn' or 'acorn bulge' shaped lugs. Thinking they are 1/2" x 20 and I would also measure the length of the stud extending beyond the wheel before ordering. Does anybody have these specs? Given verification of measurements, something like this may work. They're expensive by the time you buy 6 sets (24 pcs). McGard is a good brand I've used before. These are labeled "Made in USA" so don't buy a cheap bulk set that are made in China instead! https://www.amazon.com/McGard-64010-Chrome-Bulge-Style/dp/B000COMX9K/?th=1 -
Changing tires in the wild - lessons learned
jd1923 replied to John and Jodi's topic in General Discussion
Use a 12-point socket vs. the 6-point which is generally recommended for automotive work. The 12-point will remove easier. It is about the stainless-wrapped lugs. I’ll replace ours with solid chromed steel lugs someday. -
To each their own... 🤣 Yeah, yank it out. The OEM model has absolutely no value! 😎
-
Xantrex Inverter Issues? Try a Hard Reboot
jd1923 replied to Rivernerd's topic in Mechanical & Technical Tips
My replies are and will be added to the other thread, and there are more relevant pics there... I was hoping this would have been corrected... -
Inverter freedoms 2000 is not turning on
jd1923 replied to Skipster's topic in Welcome to the Oliver Forums
Having these pictures is great! It may make all the difference in us helping you. Your test light should have an alligator clip on one end, clip it to the negative bus which is the one you have pictured 3 times with all yellow wires. You then want to touch both sides of the SMP 200A breaker shown in your 4th picture. I’m pretty sure this is the breaker between your batteries and inverter. If the breaker is closed (on) and in working order, there should be power on both terminals (test light ON). If you have power on the battery side and not on the other, you need a new breaker and you’ve found your issue. Let us know on this test for next steps if necessary. -
Xantrex Inverter Issues? Try a Hard Reboot
jd1923 replied to Rivernerd's topic in Mechanical & Technical Tips
@Skipster has two threads going on the same subject. There’s more viable info on the other thread, albeit it’s in the wrong forum folder. -
Inverter freedoms 2000 is not turning on
jd1923 replied to Skipster's topic in Welcome to the Oliver Forums
Are all your 12V circuits working? e.g. lights, stabilizer jacks, etc. Attach some pictures here, of the inverter, inverter panel or on/off switch, wiring into the inverter and devices near the inverter. Do you have a multimeter, or test light? @ADKCamper gave you a good checklist for testing. The gurus are here. Post pictures and get a meter or simple test light at an auto parts store. It is likely simple.. -
When your Oliver is perfectly level, which side is the water leaking from? "Under the shower?" Do you mean in the wet bath? The water lines are in the bathroom vanity. The front cover with the opening and towel bars must be removed. Outdoor shower? Access the water lines under the streetside bed. Ours was leaking once when I left the outdoor shower faucets on. Only the valve on the shower head was holding the water. Check first that these faucets are OFF.