
jd1923
-
Posts
3,186 -
Joined
-
Last visited
-
Days Won
235
Everything posted by jd1923
-

Pebble Flow trailer and Rivian in the wild
jd1923 replied to taylor.coyote's topic in General Discussion
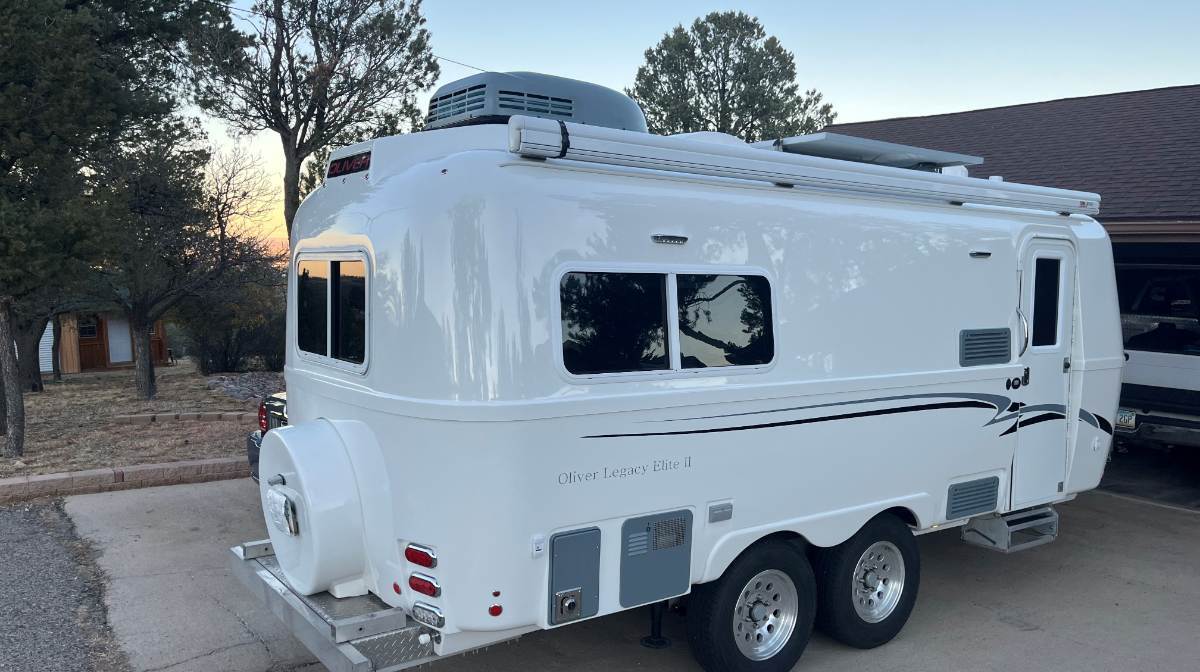
EV trucks don't go where we camp, 100+ miles from a charging station, and that is one ugly trailer. Keep your diesel truck and Oliver and we'll keep ours too! 😎 -
Greenland Turbro 13.5k Inverter AC / Heatpump install.
jd1923 replied to CRM's topic in Ollie Modifications
Yes Steve, you got me! It's the Furrion Chill Cube! 12VDC units are not practical given wiring requirements. Too tall for some, but extremely quiet and very efficient, with the interior air handler almost flush to the ceiling for more head room! Perhaps it's too tall and ugly for some of us, but I relish in ugly given superior functionality! For example, I mounted a rather large Parsec Husky cell antenna on my truck, love it's utility! Those with pretty trucks, big wheels and tires would not go there, but we have 5G on highways most of the time! 😎 Hey, what's that on top of you truck? A question I hear every other time I'm filling the tank! -
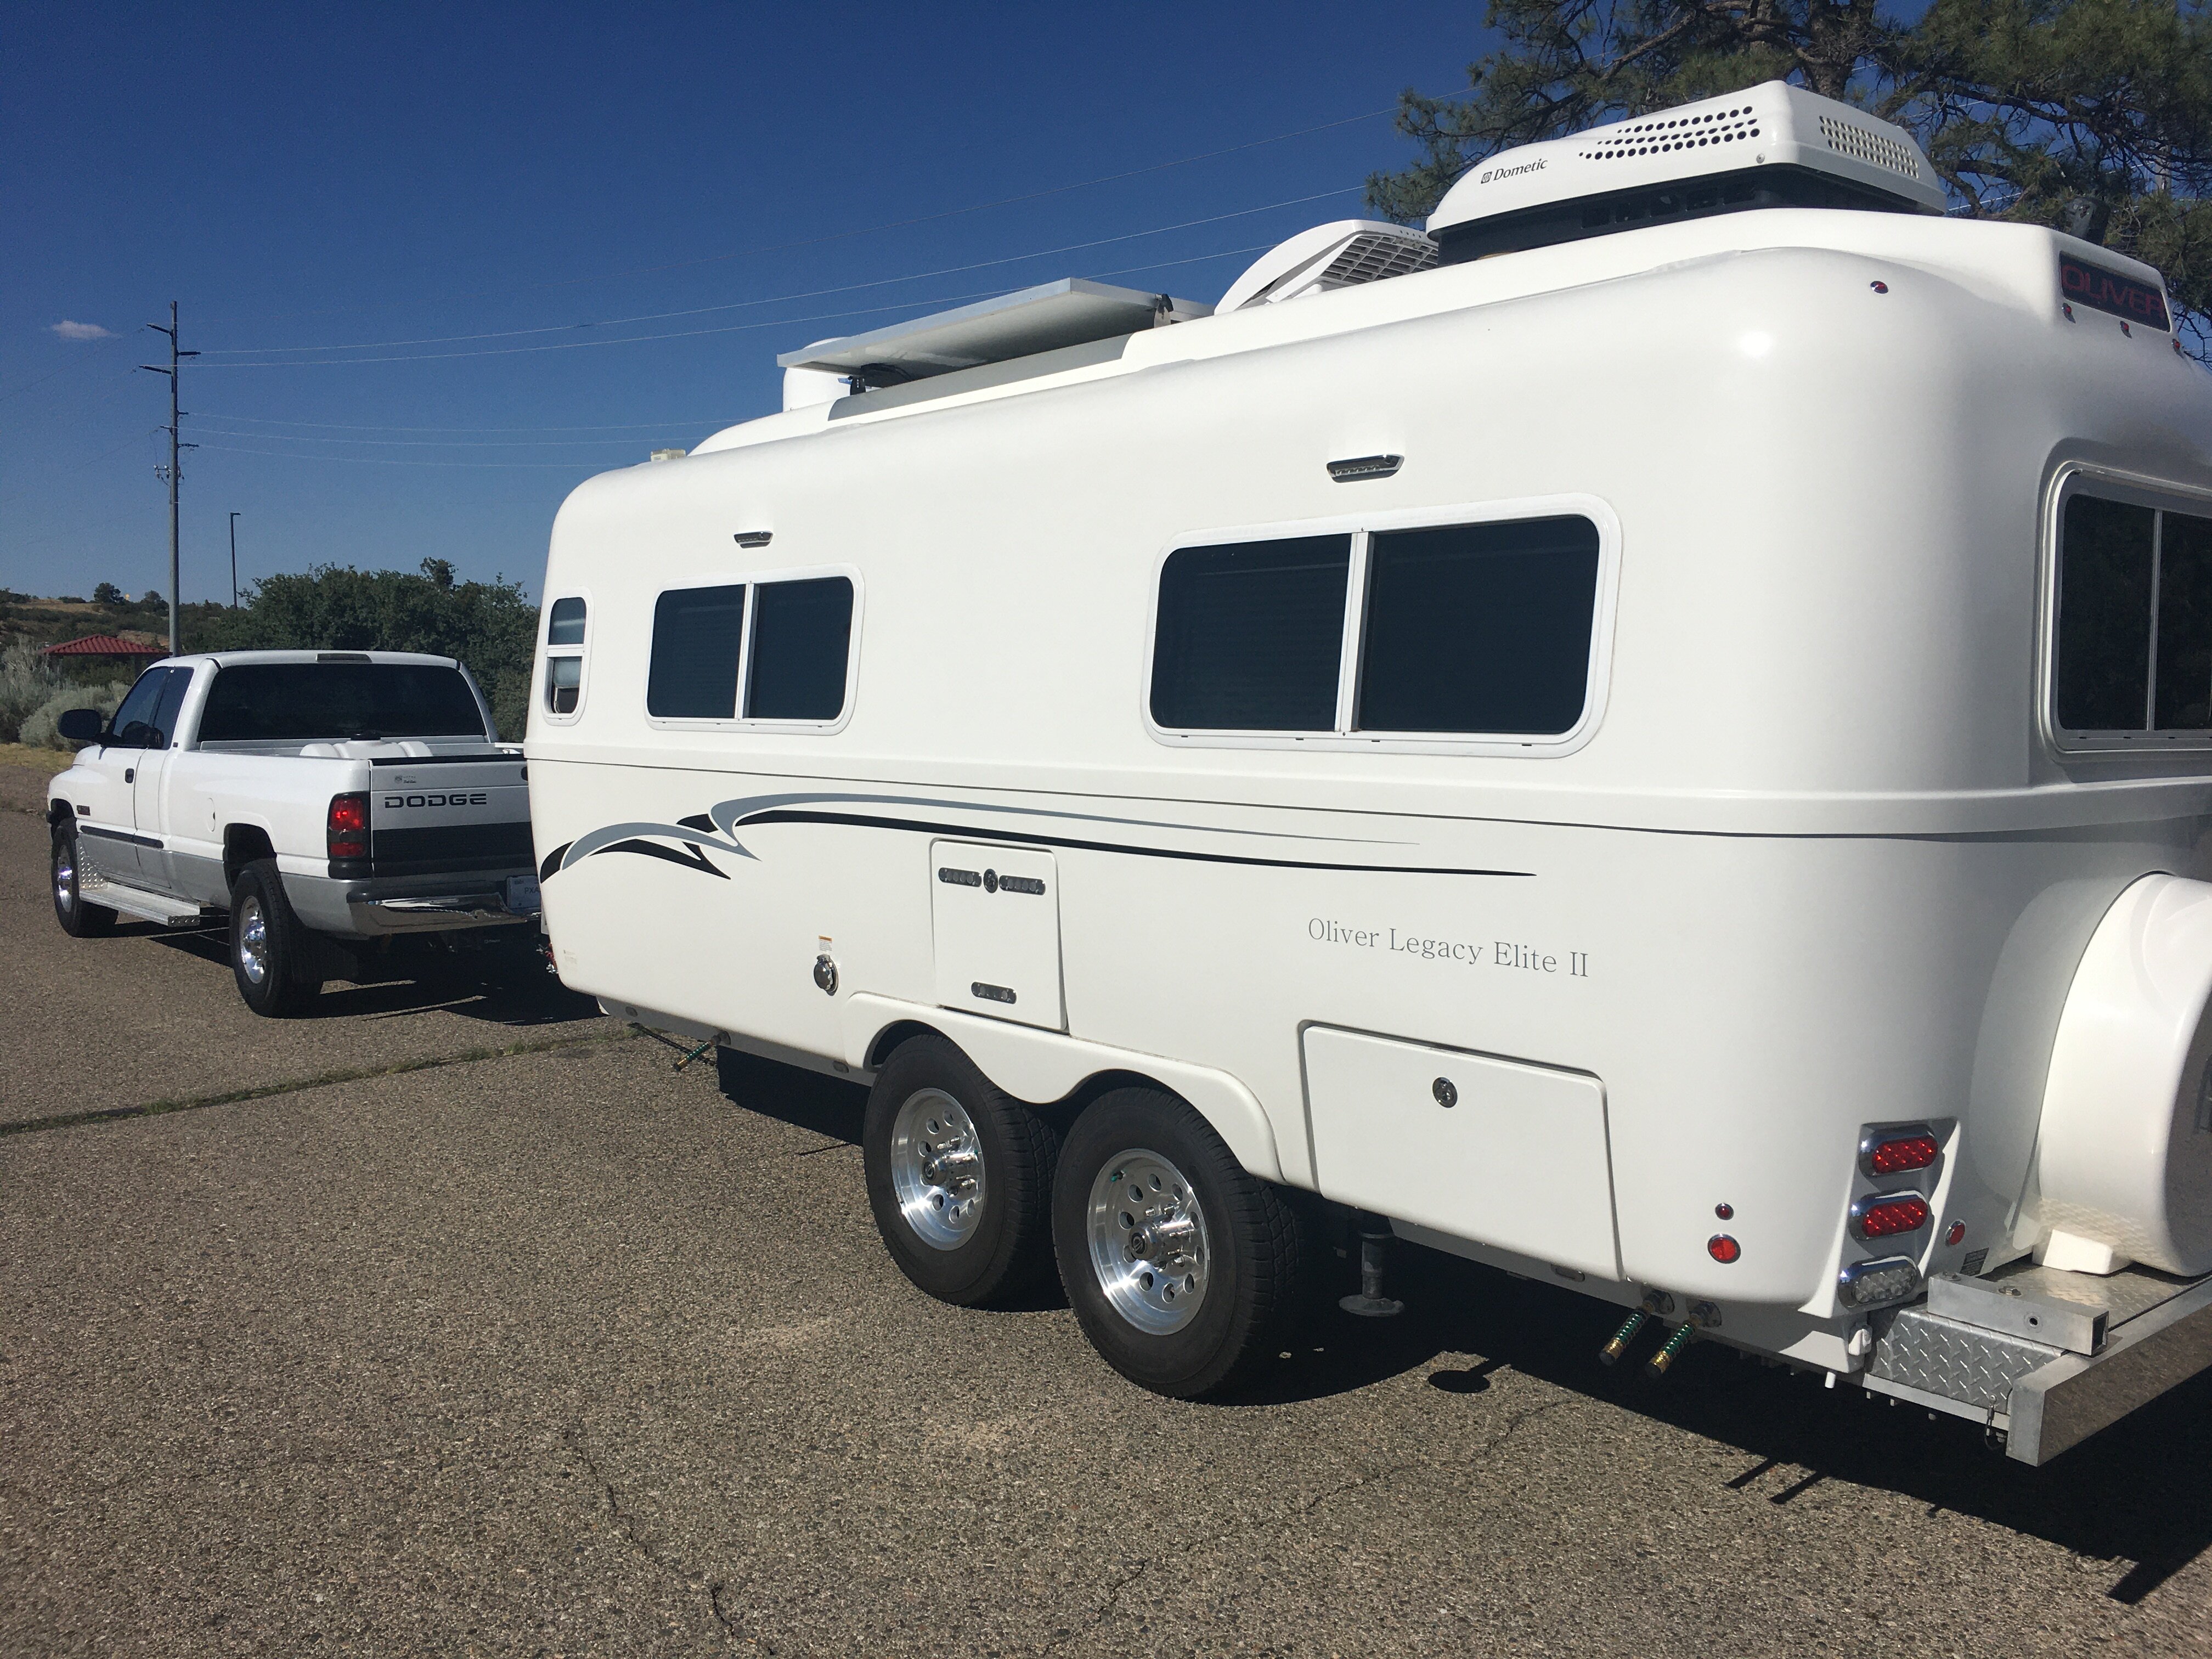
When I see these pics, it makes me sick thinking how easy it would be during assembly to use some decent rigid or semi-rigid quality air ducting! I've replaced ours as far as I can reach, the originals were full of holes everywhere along the bottoms. 🙃
-
Took me a few outings to learn this. At a campsite, I level using the LevelMatePRO and keep the nose up 1/2" or more. This allows you to utilize a greater % of the fresh tank before the water pump takes air. When dumping tanks I raise the front +2". Why is it that at 2 out of 3 dump stations the nose is down? And then I drive in the other direction and it's the same thing! The other thing I've learned is the gray tank being on the right/curbside, drain pipe exiting to the streetside, it often will not fully empty if that side is down. I will raise the curbside jack so that it's +1" at least to fully empty the gray water.

-
Certainly! We always travel with our fresh tank full whenever we leave home or leave campgrounds with good fresh water, thus allowing us to boondock the next few days. And we tow down steep mountain descents and on washboard dirt roads! We often tow back home with gray and black tanks near full, and fresh half full, since the RV dealer near home has a free dump station. We keep our Oliver bathroom and kitchen functional 100% of the time! Chris will NOT use a public bathroom during our Oliver travels. We like to have what we need to be off hookups for 7-10 days. We certainly have enough electric. We carry an extra 35 gal fresh water in the truck bed. We find the limiting factor is the gray tank fills first (as soon as we shower). Good thing out west it's legal to dump gray in BLM and FS lands (drain gradually when >500 ft from other campers and water sources). 90% of Arizona is 500 ft from a water source! Yes, fill up and tow your Oliver tanks full, NP! 😎
-
Greenland Turbro 13.5k Inverter AC / Heatpump install.
jd1923 replied to CRM's topic in Ollie Modifications
That's one of those Chinese things I was referring too! They will ignore what they don't want to answer. 🙃 Excellent electronics work @CRM! If I save my unit I'll ask more of the details. If my repair becomes not worth doing, I now have another brand in mind. It wouldn't be for everyone but it's very interesting. 😎 I'll write a post on it soon... -
Greenland Turbro 13.5k Inverter AC / Heatpump install.
jd1923 replied to CRM's topic in Ollie Modifications
We’d like to know more about your mod to reduce air noise in the cabin, thanks! -
Greenland Turbro 13.5k Inverter AC / Heatpump install.
jd1923 replied to CRM's topic in Ollie Modifications
In 3 weeks we're heading to the Q and then points SE of Tucson. Thinking of SE Colorado again, when I have time off mid March through mid April, weather depending. Won't be needing A/C for these trips! It could be an easy repair but it's never easy working on top of the Oliver. I won't be walking around up there like some might. Just getting the cover off is not just 4 screws like the Dometic P2 cover. There are 9 screws in all directions. Not easy reaching over on the awning side either. I'd hate to pull the whole unit down for repair, but that may be the way to go. I could diagnose, repair and bench test in my garage/workshop. I had made a custom wiring job for the 120VAC connection. OTT had cut the 12/2 Romex quite short wired to a single-gang junction box. The junction box would not fit above the Turbro Fixing Plate. I had to die-cut a new opening on the close side of the Turbro control box to wire this connection directly. It will also be a pain taking that down, and given success rewiring it again. Short wires make for difficult wiring. Then there is the risk that besides the broken evaporator fan something else could be wrong. A new A/C unit for $100 +/- in parts and a few hours labor... ? -
@David and Gail Yesterday I had written the first paragraph of my previous reply incorrectly. It is now correctly stated. JD
-
Yes David, this is your axle label. It shows D52 for 5200 LB axles which are the better HD axles (12" vs. 10" brakes). It lists Capacity at 3500 LBS which means mounted to the axles are two 1750 LB rated leaf springs. As @John Dorrer has stated from data he has collected which is a good sample since he regularly monitors our OTT Forum AND the Oliver Facebook page. Yours on your very new hull should and could be fine. Inspect them before and after long trips. When the leaf springs continue to appear nicely arced, they are good. If you observe a flattening of the main spring at either end, then replace ASAP with Alcan Springs. Ours lasted 10 years and were still good. I only replaced mine wanting the best for our next 10 years! 😎
-
Greenland Turbro 13.5k Inverter AC / Heatpump install.
jd1923 replied to CRM's topic in Ollie Modifications
I’m surprised, thank you! Maybe I get lucky… Bought from Turbro direct. These manufacturers seem to rarely want their defective products back. That’s why they wanted me to do their testing! How will they ever determine cause to improve their design and build processes? -
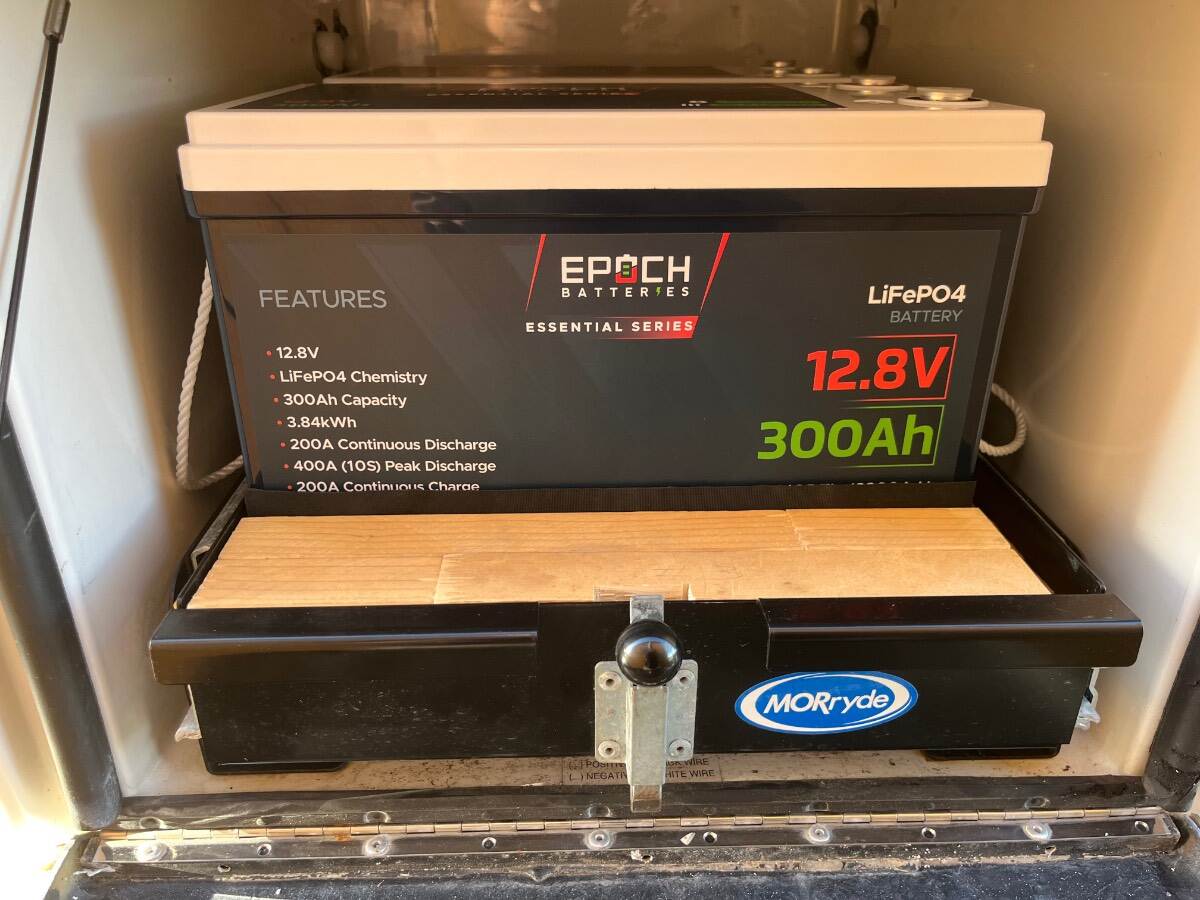
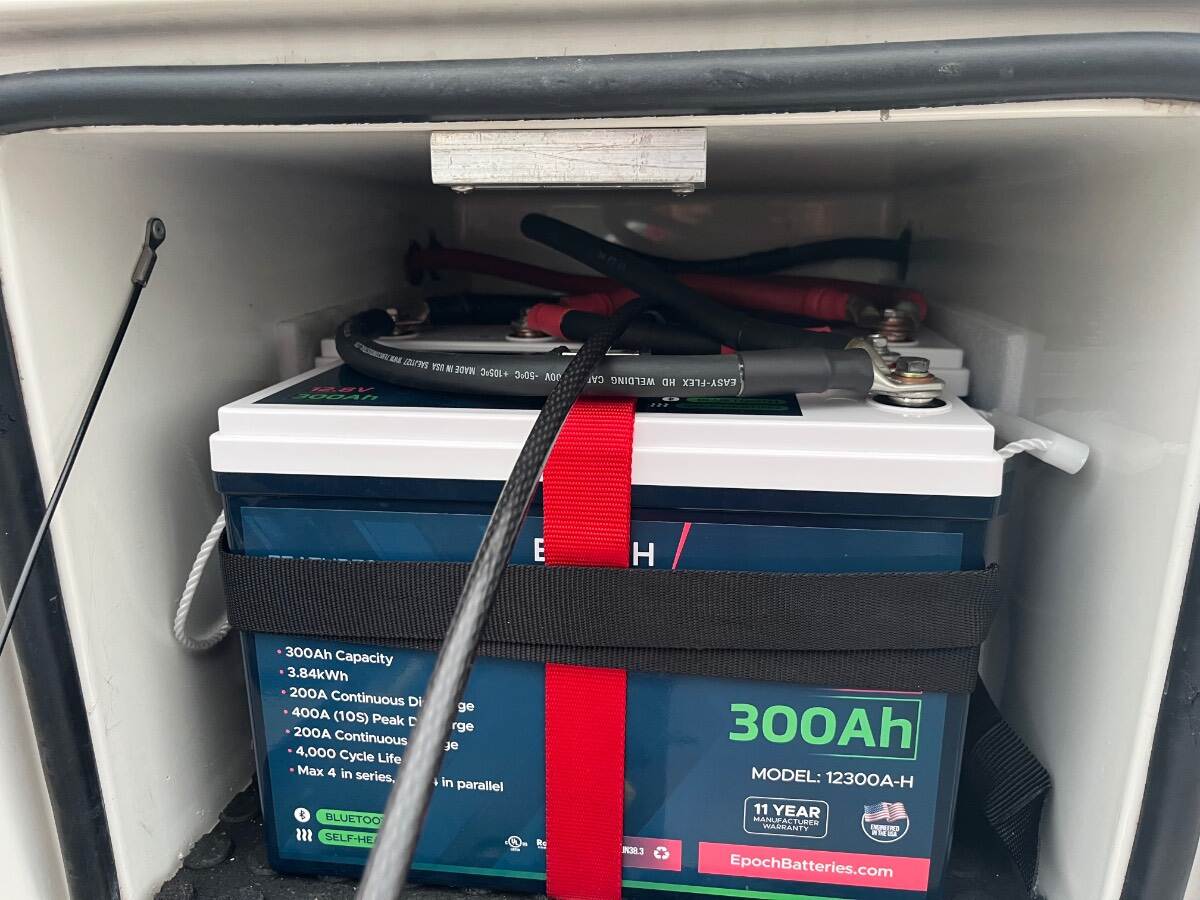
The Pro Series is a dual purpose Starter/Deep Cycle battery. Useful life of the battery might be short-term. Check warranty. Essentials have 4000 duty cycles.
-
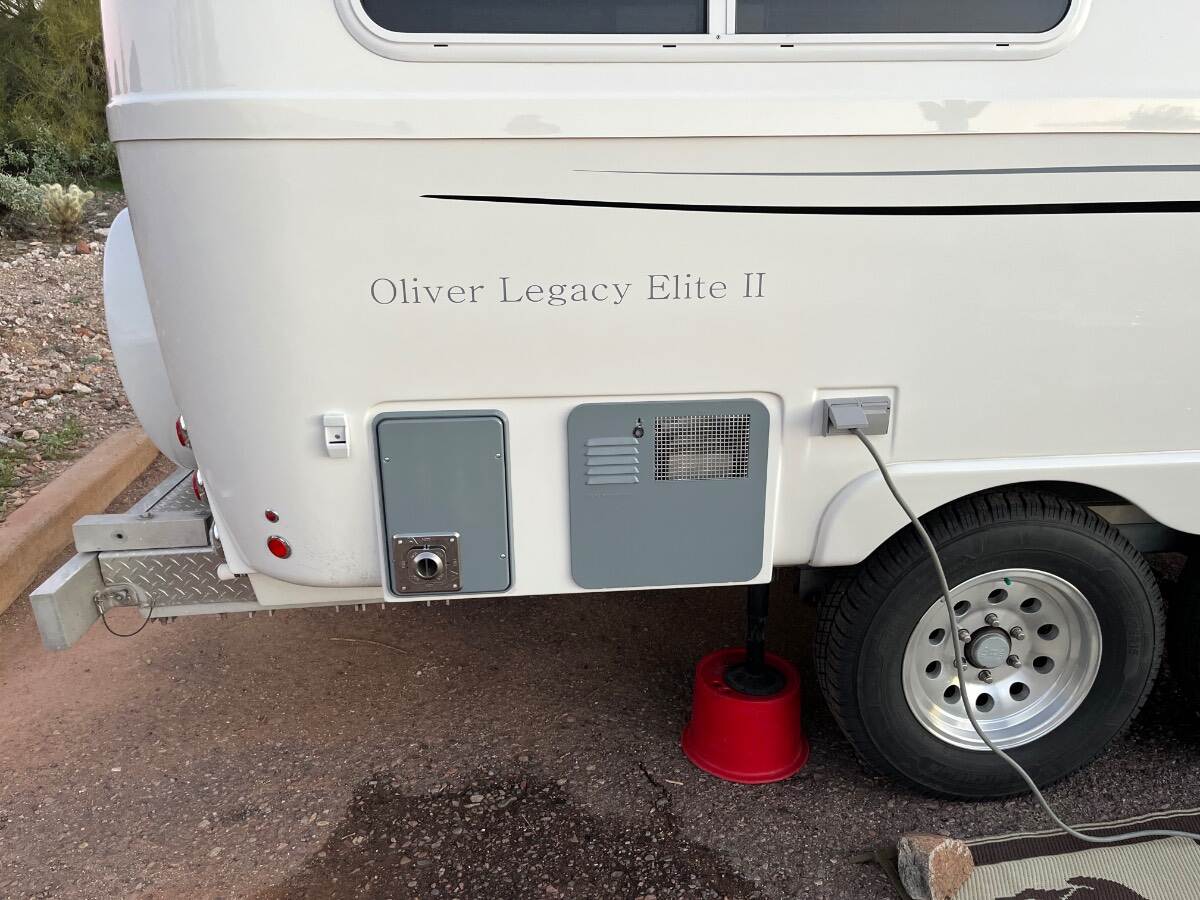
Yes, you want self-heating. Good news is the Essentials series is also self heating with a self-managing BMS. The Elite Series which is a bit more expensive includes Victron Comms (can be wired directly) some upgraded internals and has a higher waterproof rating (can be submerged in 1m of water). The Essentials Series has everything most consumers need. I just added a 3rd 300, 15% off on the Black Friday sale. They run sales every other month from 10-15% off. I buy from Renewable Outdoors out of Colorado, free shipping and the do not charge for out-of-state sales tax. https://renewableoutdoors.com/collections/multi-use-batteries/products/epoch-batteries-12v-300ah-heated-bluetooth-lifepo4-battery-epoch-essentials
-
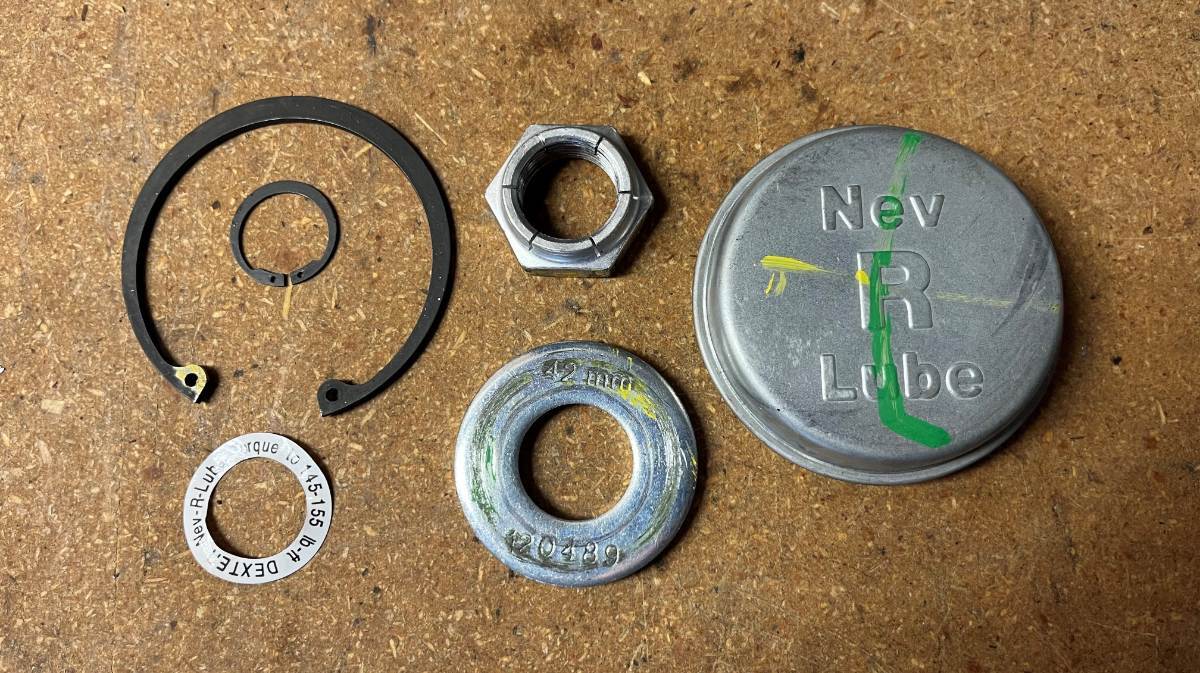
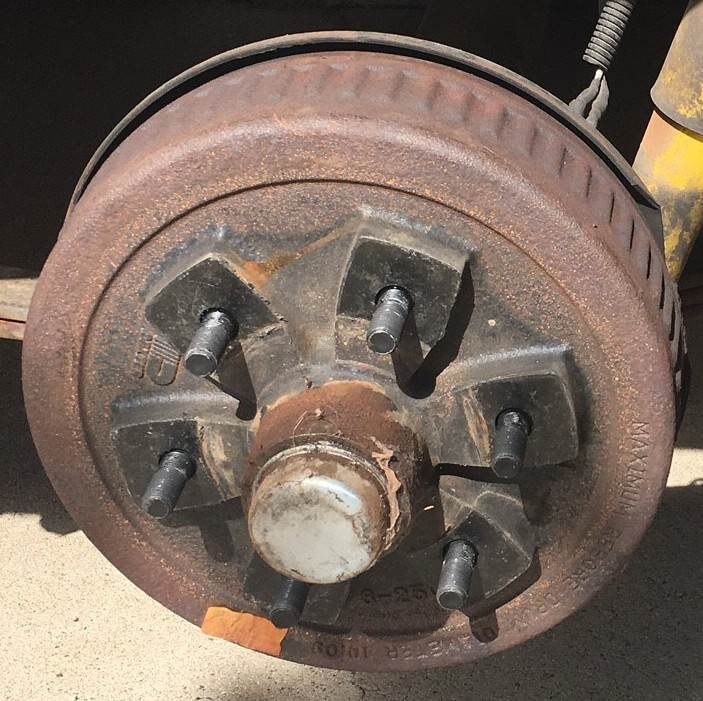
Hub Caps coming off
jd1923 replied to Mark Meadows's topic in How to Join and Use Oliver Travel Trailer Forums
The true "dust cap" is the cap pressed into the hub of the brake drums (as pictured). Yes, the outer center caps can help in deep mud but are more for cosmetics.
-
Greenland Turbro 13.5k Inverter AC / Heatpump install.
jd1923 replied to CRM's topic in Ollie Modifications
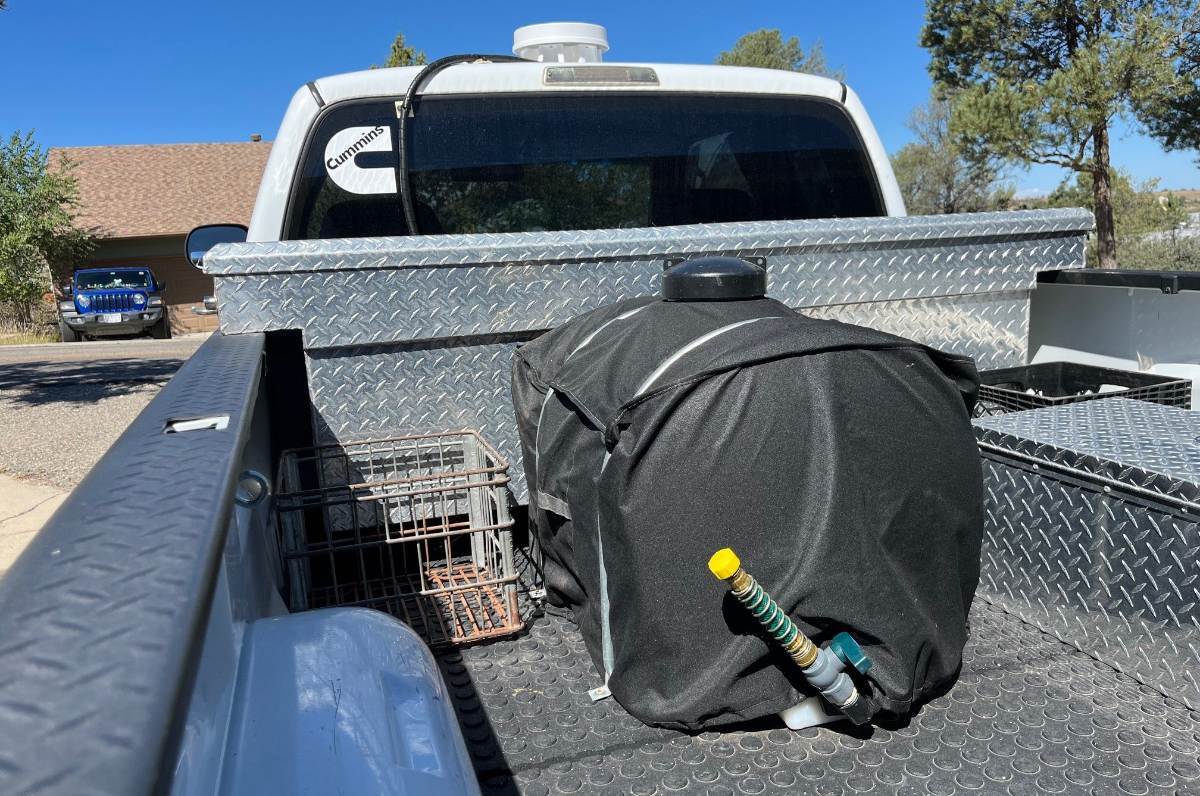
So, I have a bit of bad news on my Turbro purchase... I finished the installation 2 weeks ago. Adam and I, standing on top of the scaffolding, lifted the relatively heavy unit into place. We placed it on a bath towel so as not to scratch the new ceramic coating, and it slid nicely into place from the rear side of the Oliver. He stayed up top and I went inside. I pulled the towel down through the 14x14” opening and it only took a wiggle to line up the unit and bolt up the Fixing plate. I didn't yet mount the Air Deflector Panel because I wanted to first hear it run w/o the panel in place. When it powered up it started in the default Auto mode and was relatively quiet. It was not hot nor too cold in the cabin, so I believe it was just in fan mode. The fan control on the remote; low, medium and high settings did not change the fan speed. I put it into heat mode and turned the thermostat up high. It took a minute or so to kick in and when it did, the noise was terrible (listen to the video). Switched it from fan to heat modes and the noise returned three times. I was bummed and powered it down. I had been in contact with Turbro Support prior to purchase of the unit, so I thought to reply again to “Mason” the CS Rep. I reported my case and enclosed the video recording of the noise. He replied the next day, “The video has been received and forwarded to our manufacturer for further investigation.” Twice he wrote “the manufacturer” like Turbro Support was a 3rd party CS org. I spent a week with Turbro Support, sending one email a day, since I would only get one reply a day, always early AM! I came to realize that Turbro Support must be based in China. The differences in time zones made for the once-a-day communication. Also, I could feel the Chinese culture in the wording of these emails, having worked with Chinese for years at Motorola. Close to a week later, I was getting fed up! Each day they asked for more information. After their “further investigation” email they wrote “It sounds like there may be an issue with the indoor blower wheel.” They asked me to runs some tests, like I’m supposed to be their field engineer! The next time I powered up the unit, the noise got even worse and soon plastic fins and bits from the blower wheel spit out of it and all over the back of the Oliver! It took Turbro Support a full 6 days to finally state they would replace the unit! I had originally purchased the black model to save $100 thinking I would paint it gray to match other trim I had painted. Then over Black Friday, they priced both white and black models down to $949 (previously the white was $1,099, the black $999 with promo codes). I had asked them to replace mine with a white unit to just barely compensate for my troubles. I made this request on day 2 and finally on day 6 he wrote. “Please kindly know that we can only ship the replacement unit in the same color.” I was livid, and in reply I wrote: “After all you have put me through, you should satisfy the WHITE color request. Please REFUND my money to the original form of payment. I don’t feel I can trust the product quality and Turbro Support is too difficult.” (All quotations are exact copies from our emails). 24 hours later, their reply was, “We've issued a refund for your prior order…” So Chinese, no consideration of others in business! So, I have this albatross sitting on top of our Oliver. A good friend of mine suggested I should source a blower wheel and for the cost of it I’d have a new A/C. First off, the part is likely not available. RV A/C units are not considered serviceable. Secondly, why did the fan run OK but not so after the heat pump was turned on? I believe there may be a primary issue with this unit, still unknown. @CRM if you ever make it out west, you can pickup this Turbro for spare parts if you like! In the new year, I’m back to considering other A/C options. It’s good I have our furnace working on a simple Honeywell heat-only thermostat. Turbro AC Noise Recording.MOV
-
One Epoch Essentials 460 Ah will fit in the tray, but two will not fit even without the sliding tray (too wide). You’re better off with two 300s, for more power, redundancy, etc. Yes, it’s a bit more money than one 460. It would also allow you to go to three someday for a total 900 Ah! 😎
-
Hub Caps coming off
jd1923 replied to Mark Meadows's topic in How to Join and Use Oliver Travel Trailer Forums
Price hard to believe! Mike asked $150 plus shipping to send me a new DOT label for our hull! Ours is faded, hard to read. I had to reply no thank you, close ticket. My thinking is it should have been a no cost item! @Mark Meadows I have a deal for you! Just PM me with your shipping address and I'll send you mine, no cost. I have 4 good used and 2 brand new. If you want the full chrome centers, NP just let me know but shipping would be a little more. Mine living in the SW all look better than yours. Next time, perhaps add sealant like @topgun2 suggested. Mine were on for years NP, so perhaps yours are brushing on something. Or maybe you just take them off as I did. I'm thinking I can hammer the Nev-R-Lub bearing caps to remove the embossing, smooth the surface. Then mount some really cool emblems. The Oliver emblems are boring and these tall centers were designed for the old-style conical bearings that stuck so far out. -
Wow, no, have not ever seen another Oliver around town. They must not be on the forum or they would have seen my many posts with my signature. Thanks Craig!
-
Hub Caps coming off
jd1923 replied to Mark Meadows's topic in How to Join and Use Oliver Travel Trailer Forums
Hello @Mark Meadows, Just search for “trailer center caps” on Amazon, eBay or anywhere. They are all aftermarket, no diff OEM except costing more. https://a.co/d/3c9VPWV If you need Oliver center emblems go to them. Many of us go no without center caps at all. Then with an infrared temp gun you can read hub and bearing temps. You might say it even looks better without. I have a full set with Oliver emblems, very good condition if you like! 😎
-
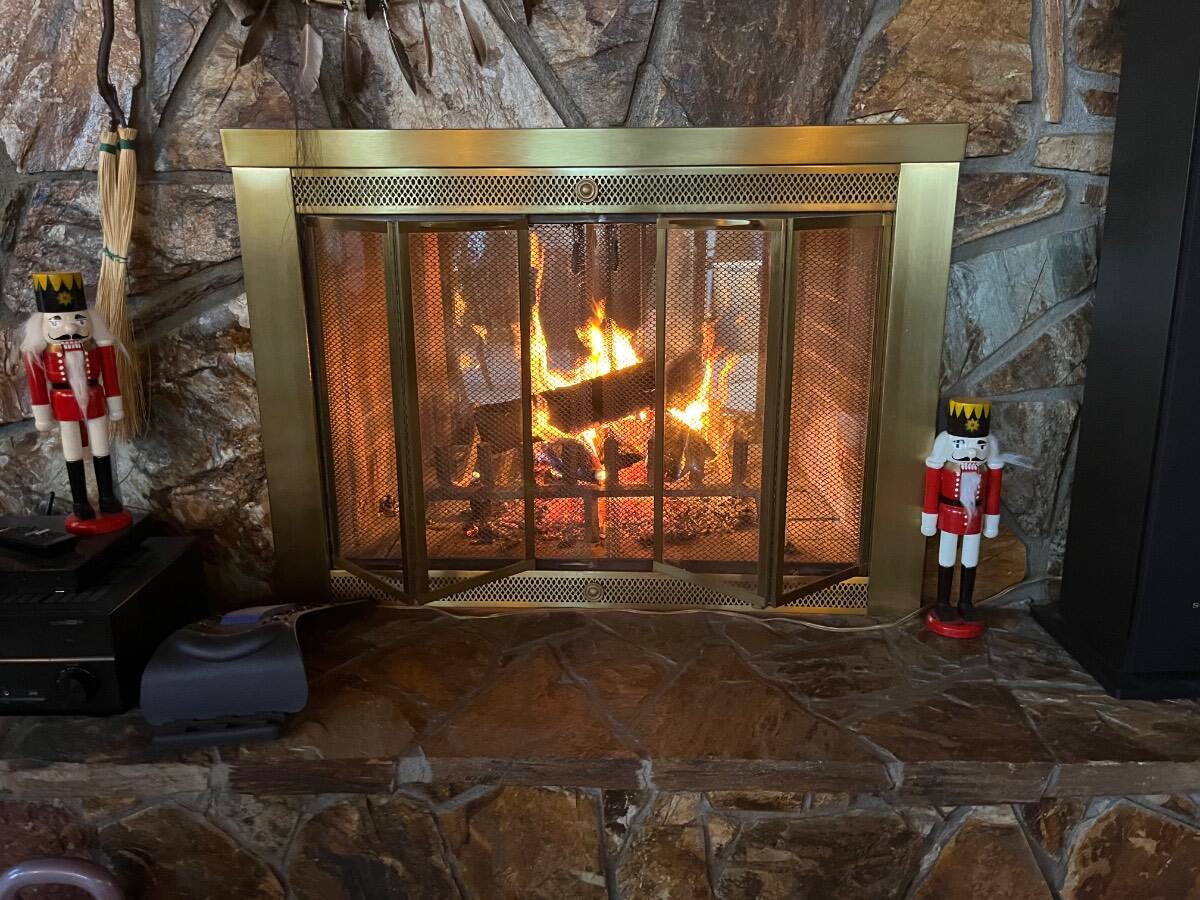
Stay warm, y’all
-
Yes John, just call me Prescott's ambassador to the Oliver Community! I also know the best camping sites in the Prescott National Forest. Pictures to follow of Town Square on Christmas Eve. =>
-
After a hard nights work, Santa's Reindeer came to visit us in our backyard this morning! One Buck and near a dozen Doe!
-
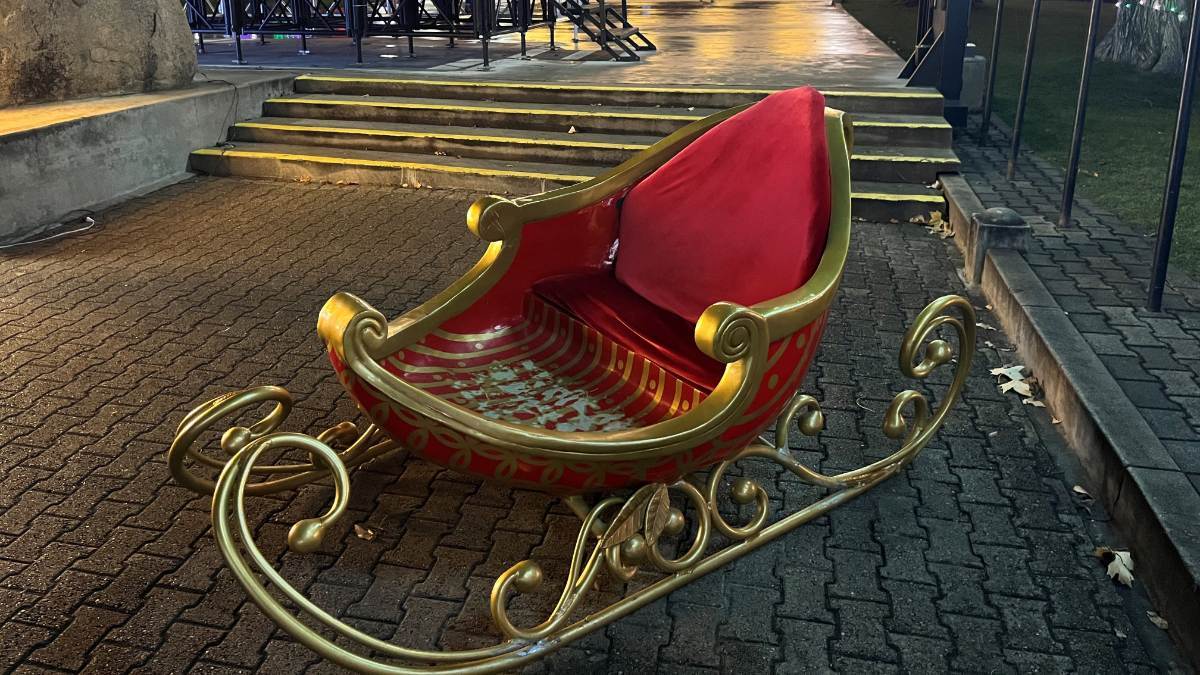
We have a tradition to see the city lights after dinner on Christmas Eve! In Prescott we have a crazy neighbor who ALWAYS dresses their house up BIG! Three yards of decorations and they broadcast Christmas music on FM to hear in your car while you take in the views. Always a line of visitors every night from Thanksgiving to New Years! Too bad the couple in the Prescott Christmas City video did not know of this place! 🤣
-
First time being part of a Christmas ornament! 🤣 Merry Christmas to all!
-
I’ve literally returns several hundred items… They still love me though since we’ve purchased several thousands of items! 🤣