Leaderboard


Popular Content
Showing content with the highest reputation on 05/14/2018 in Posts
-
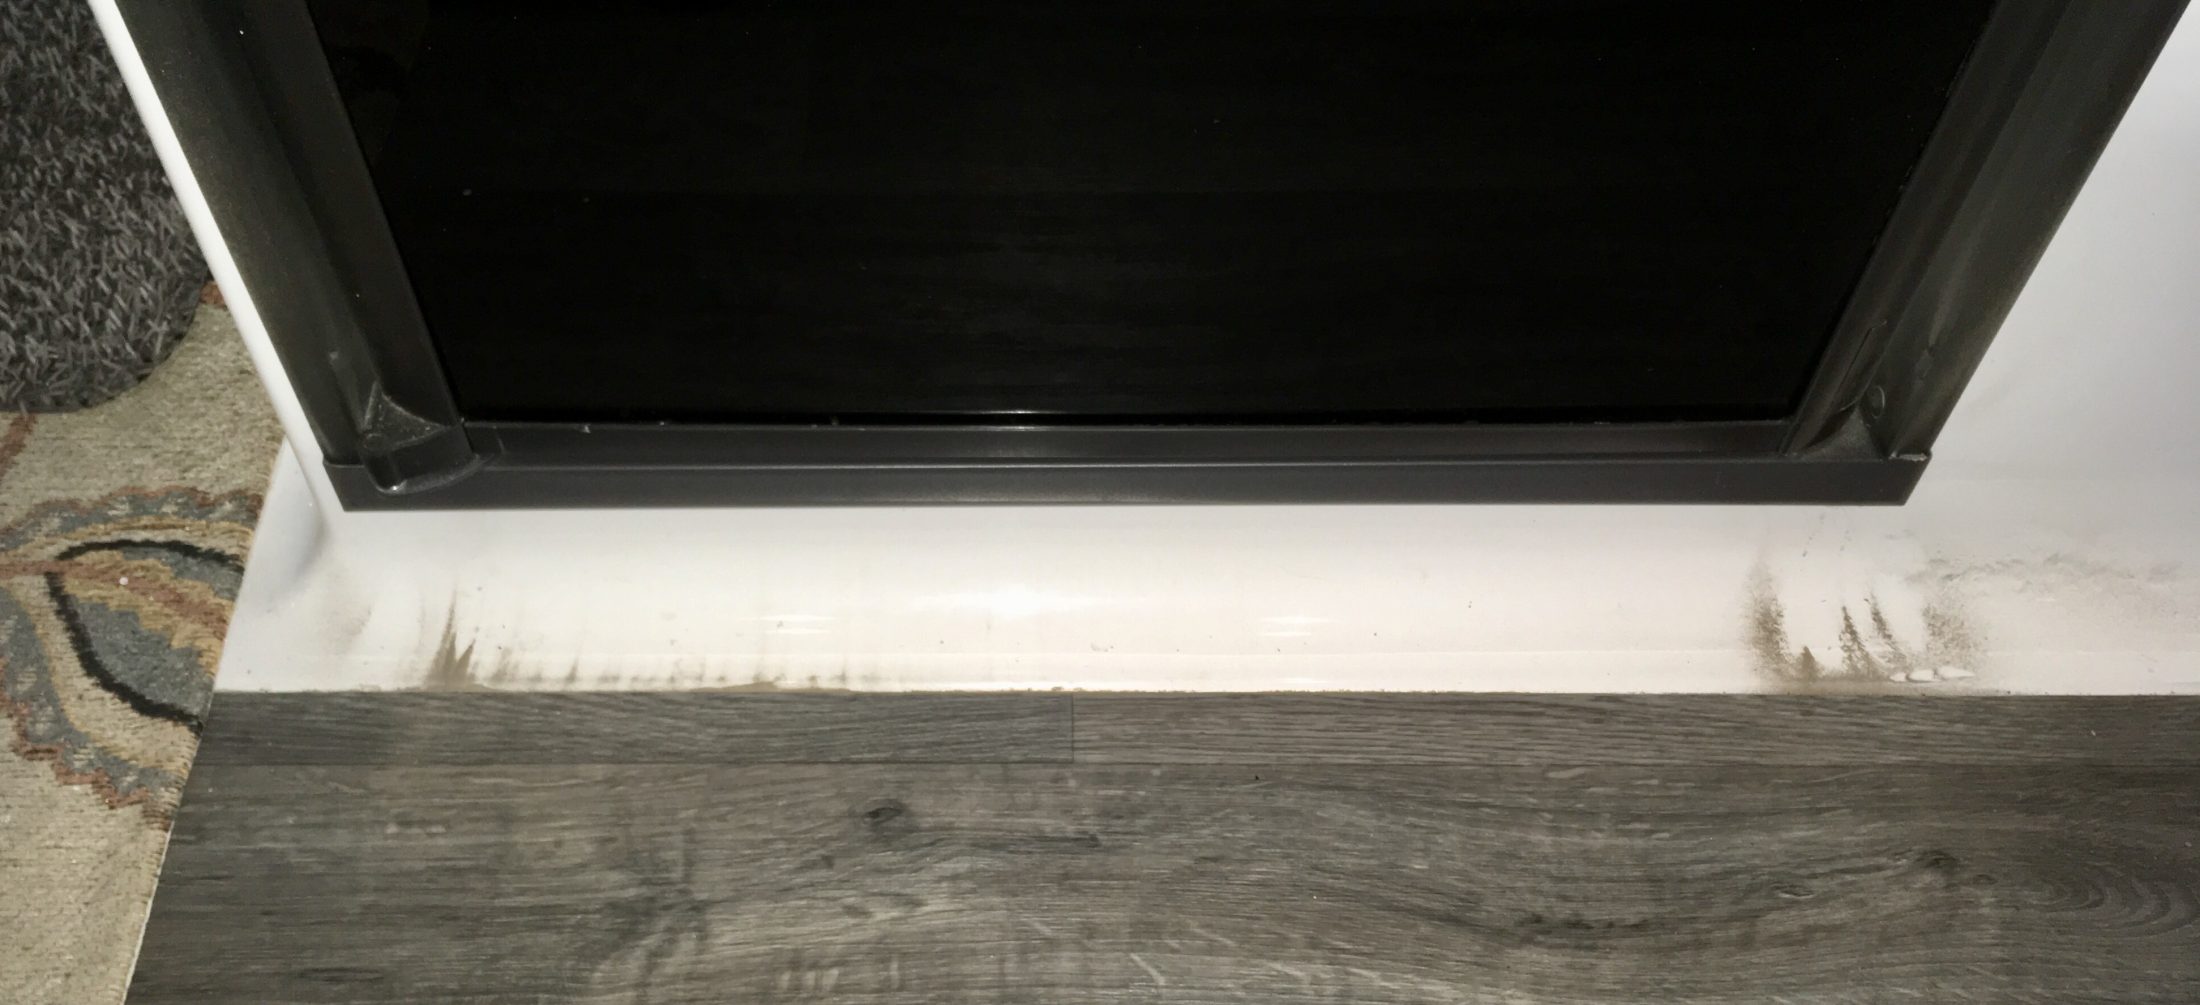
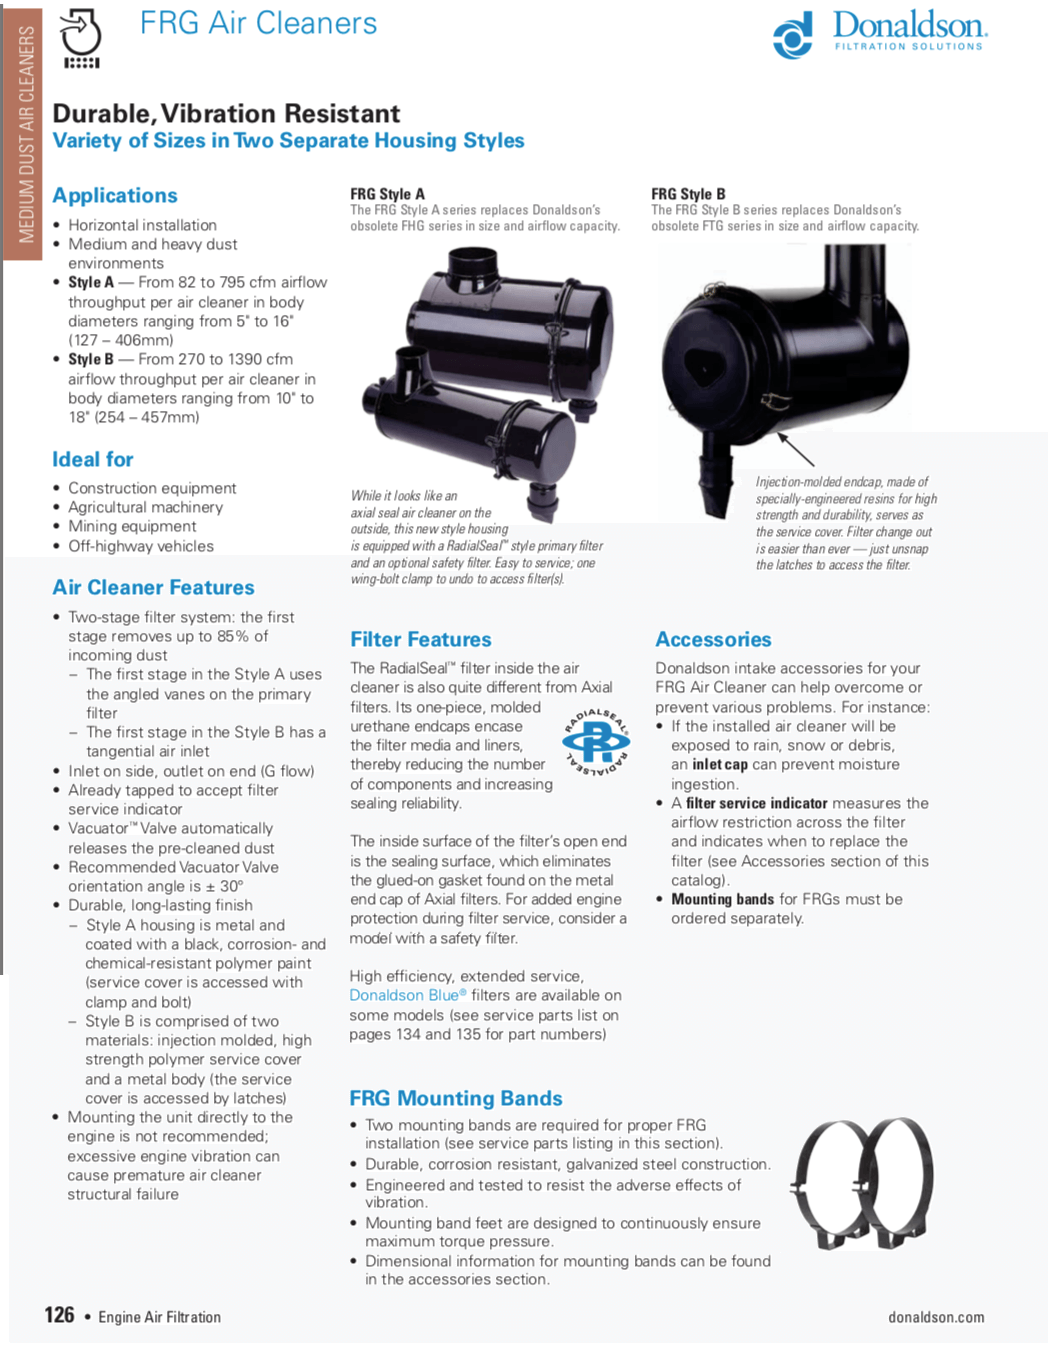
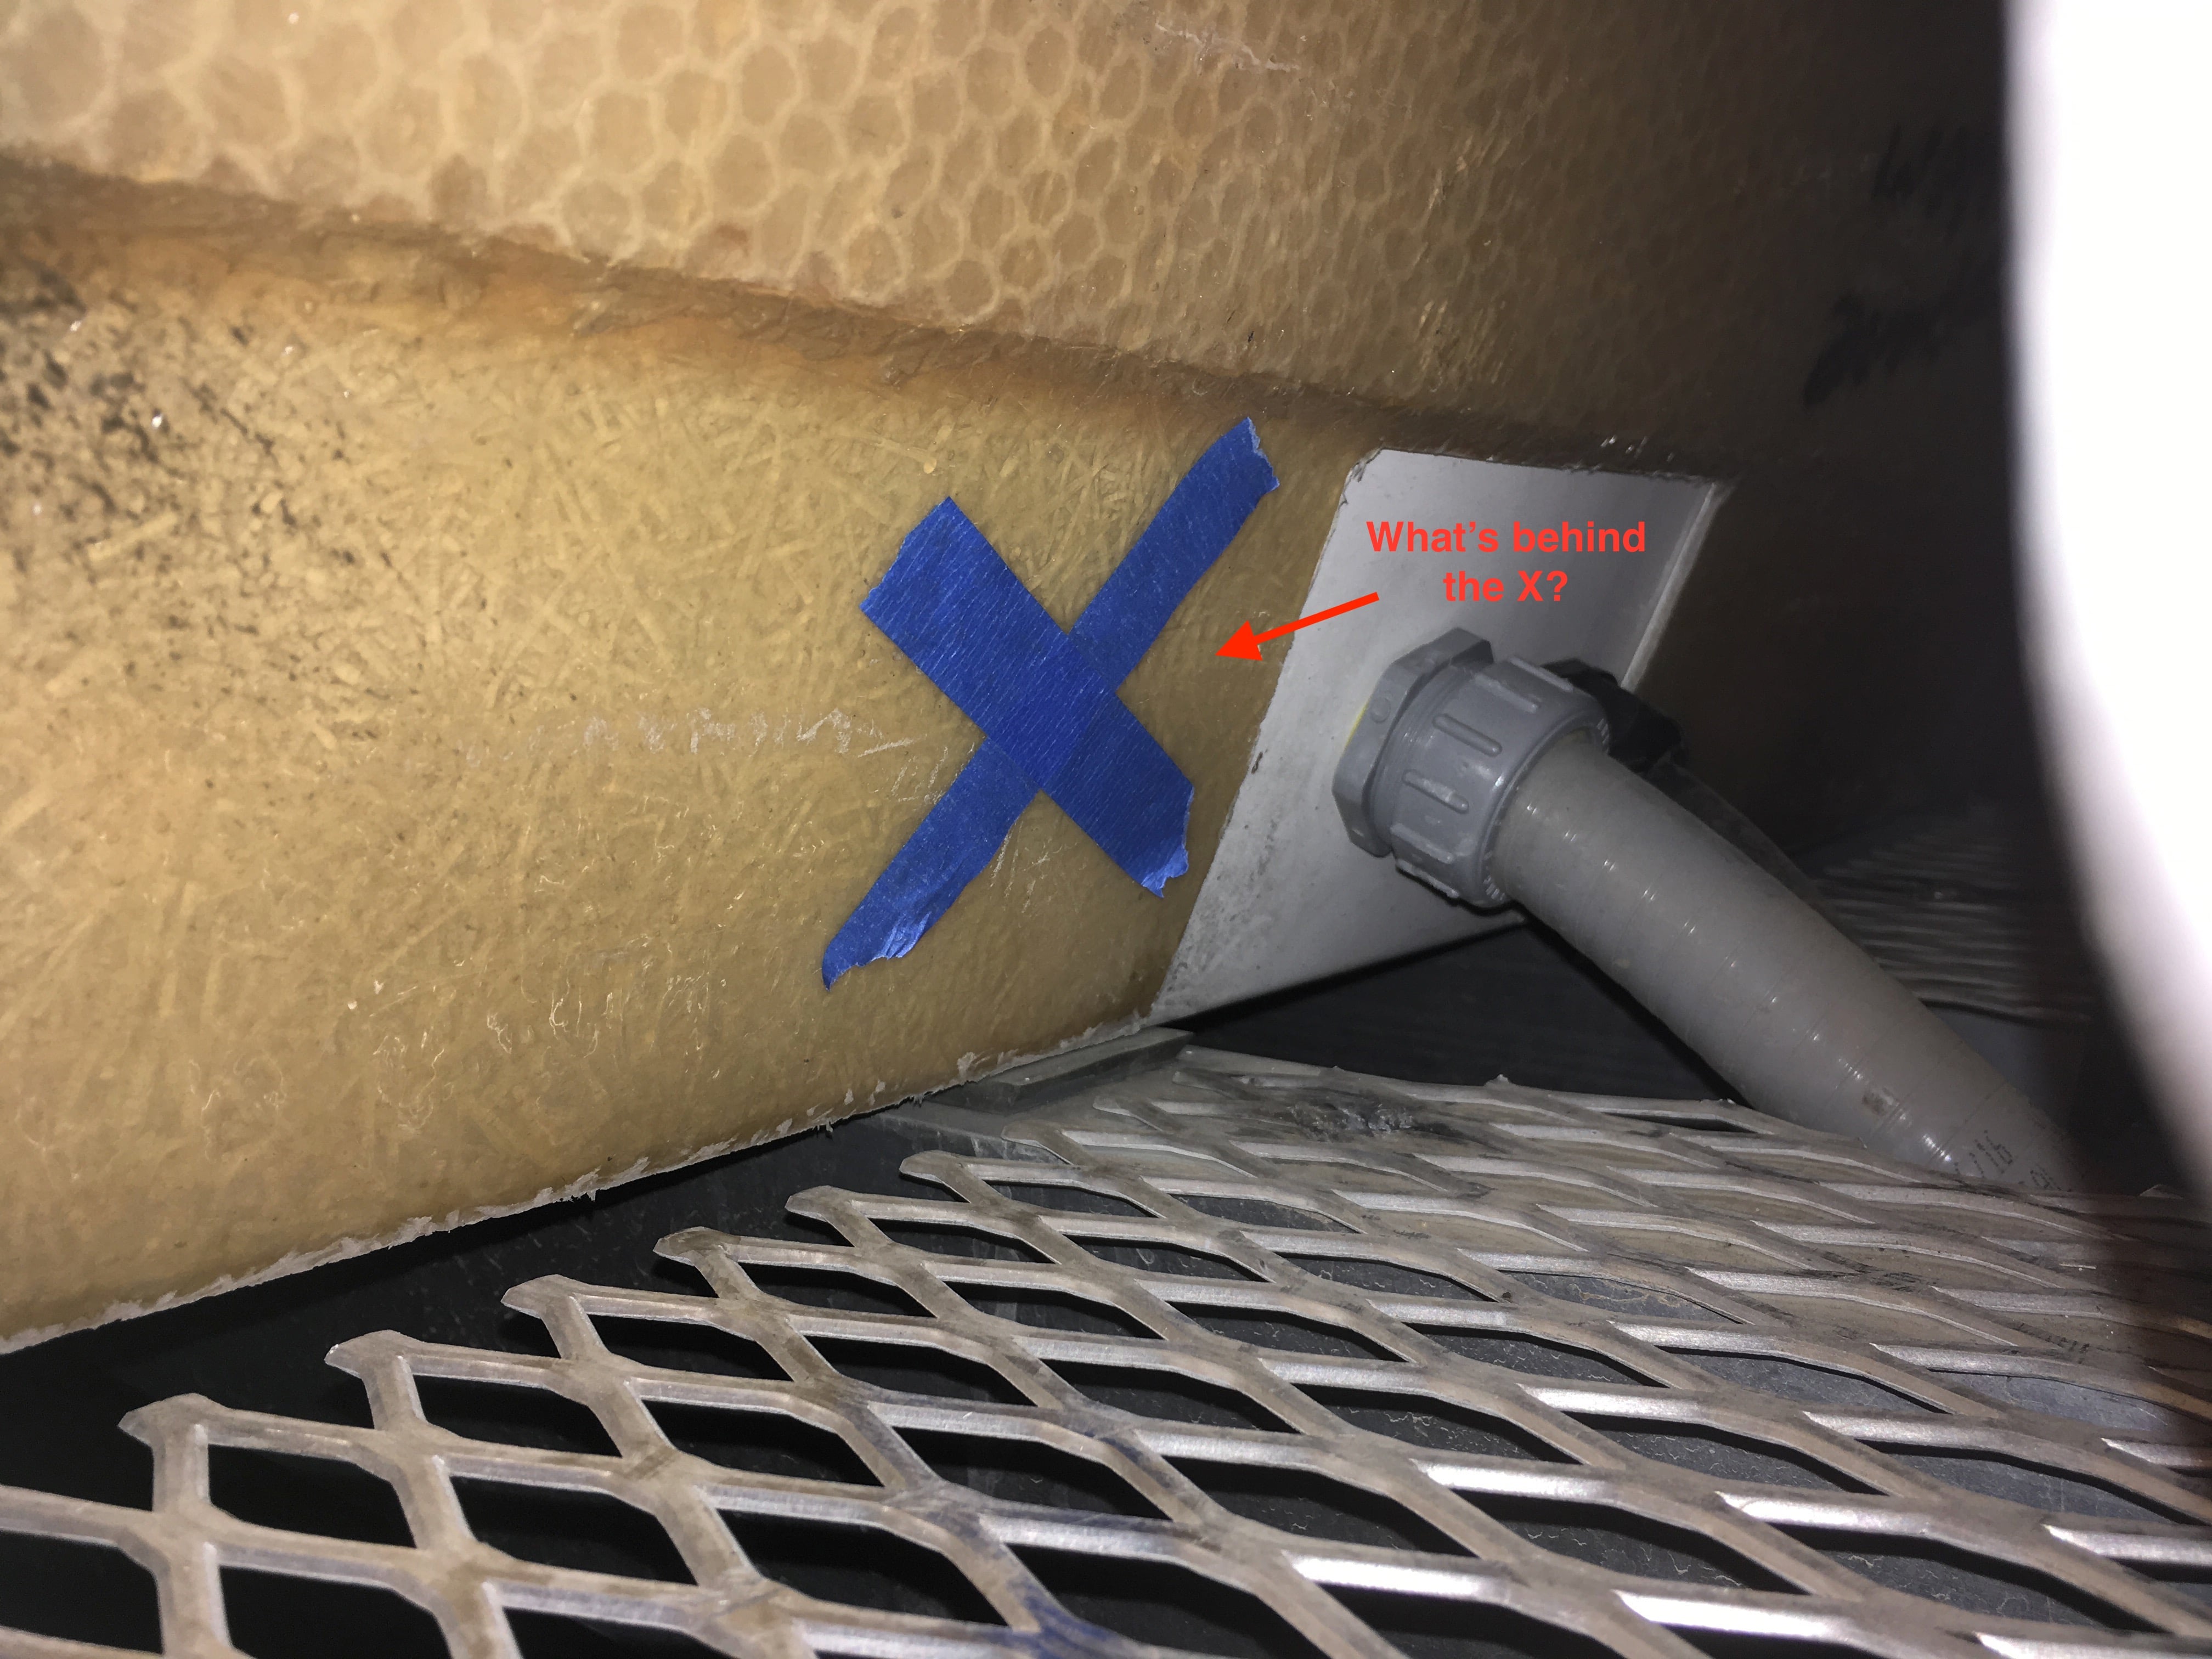
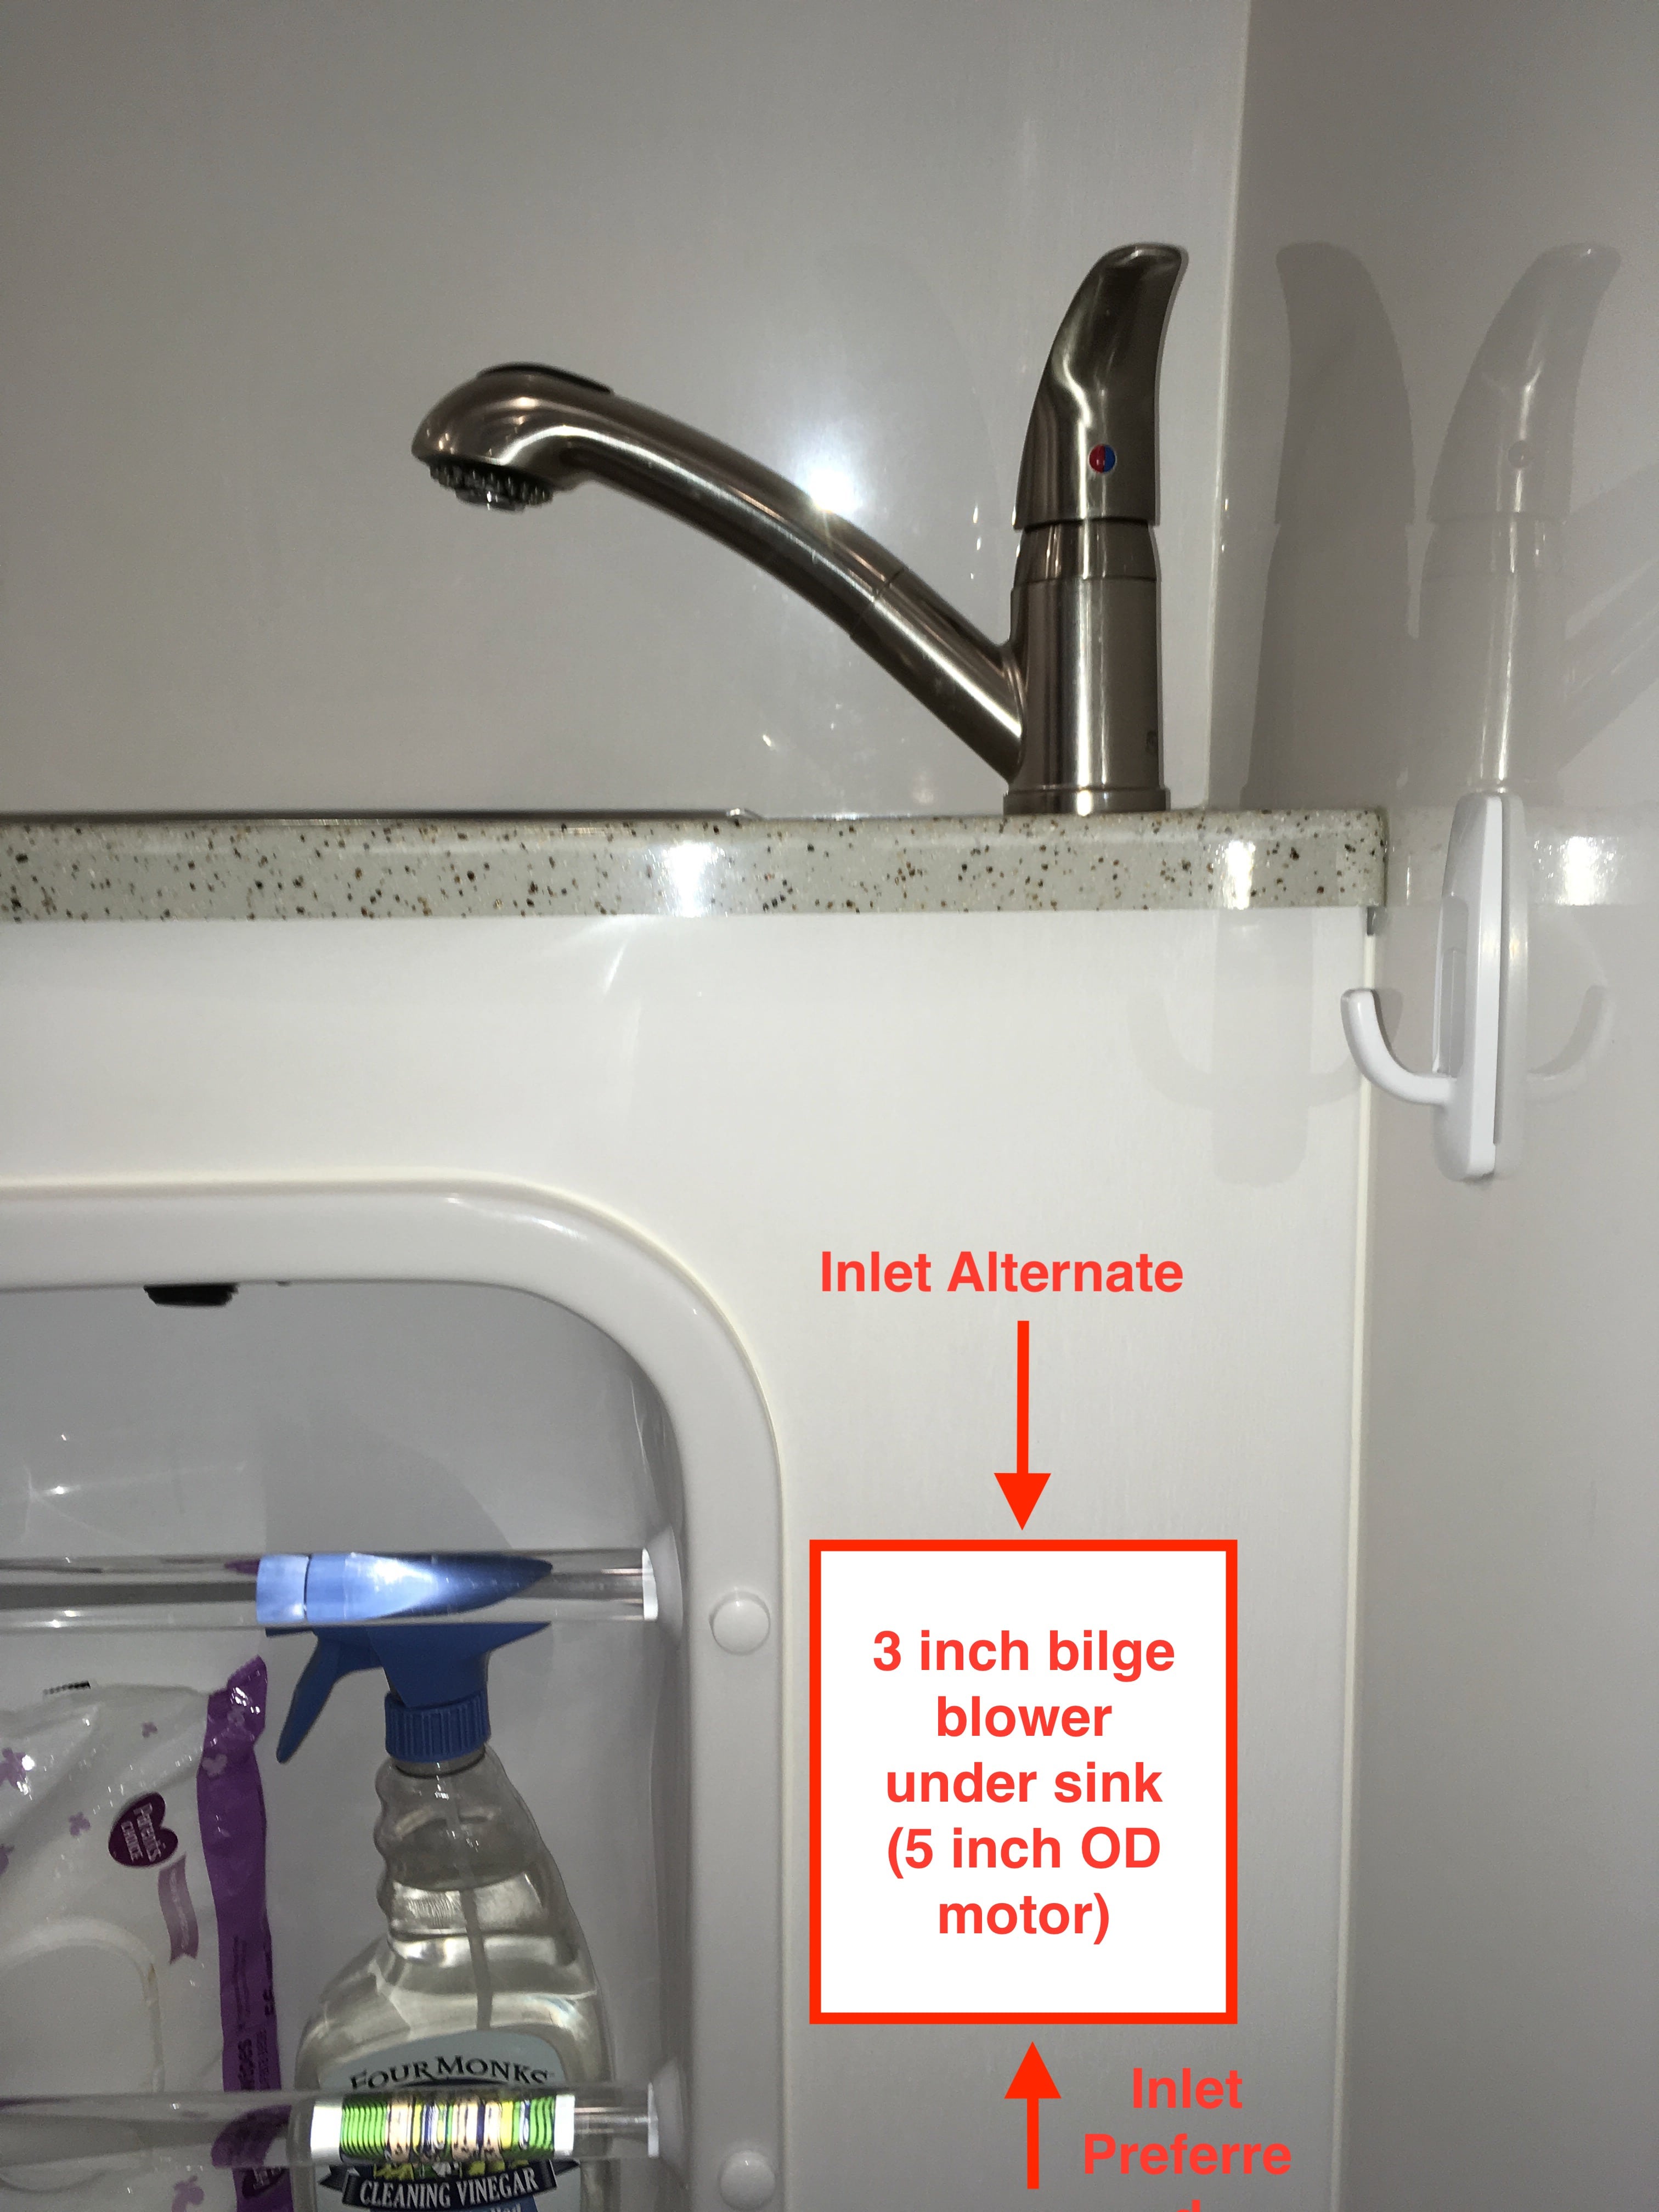
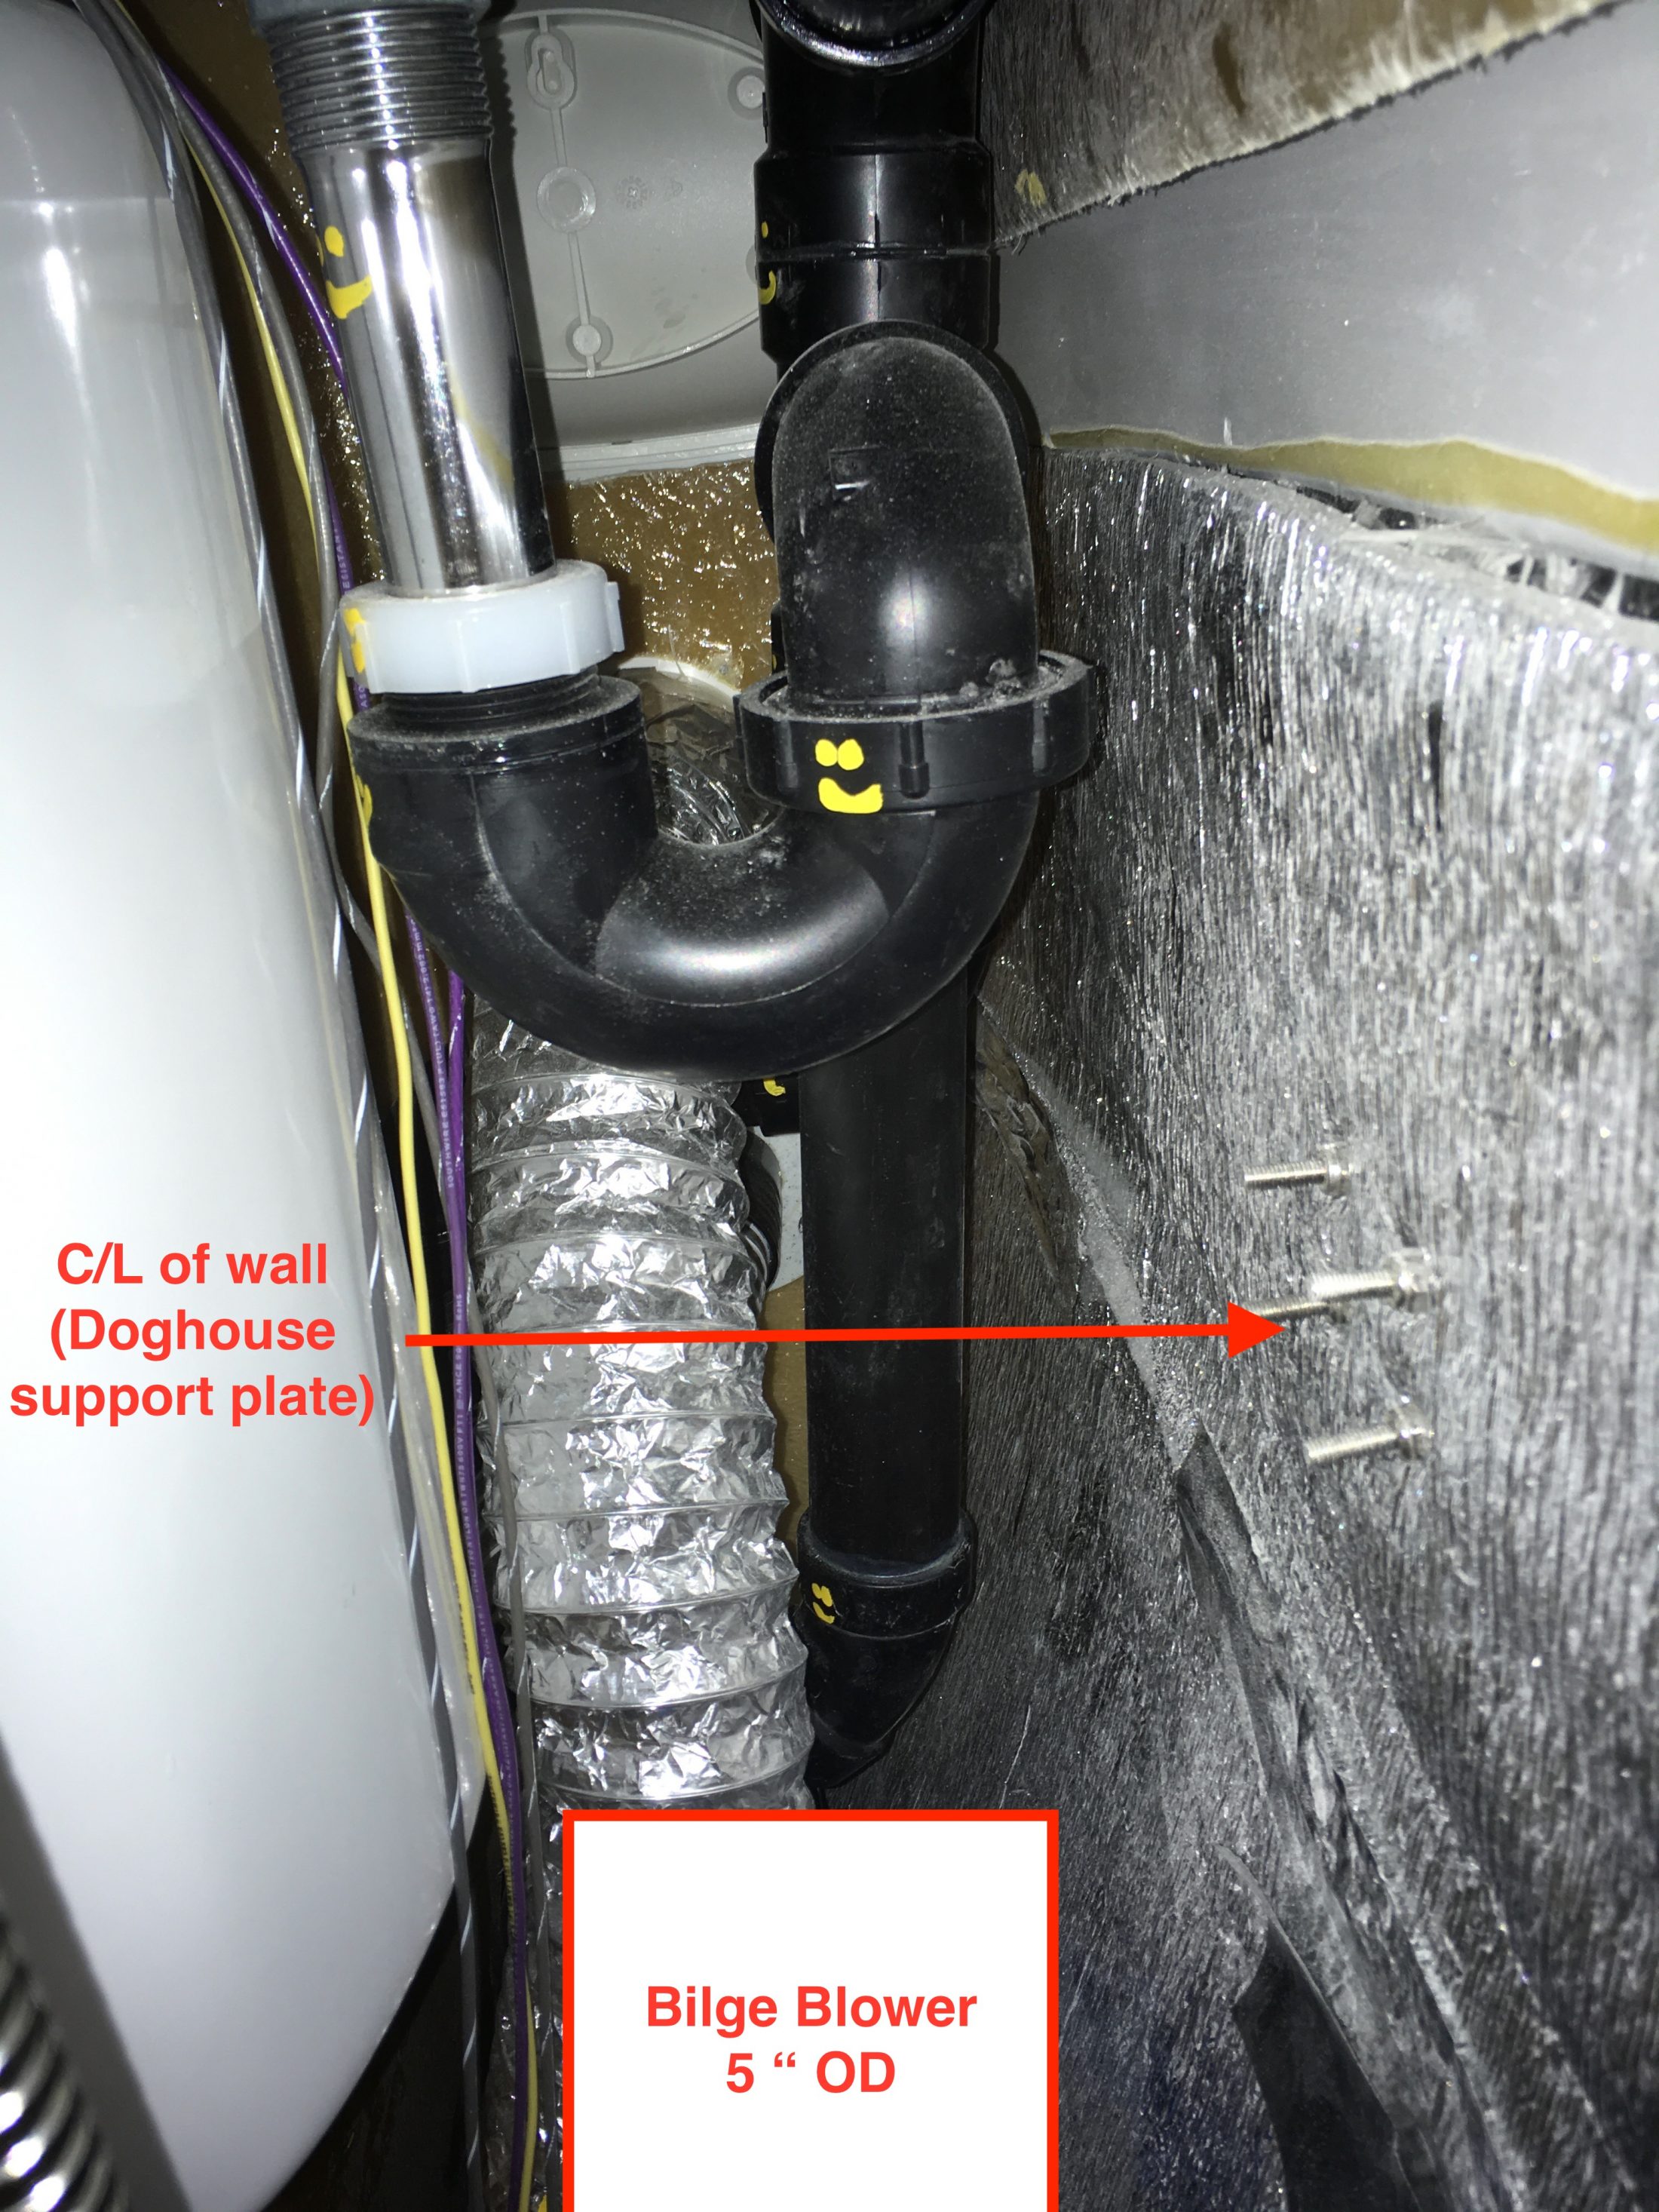
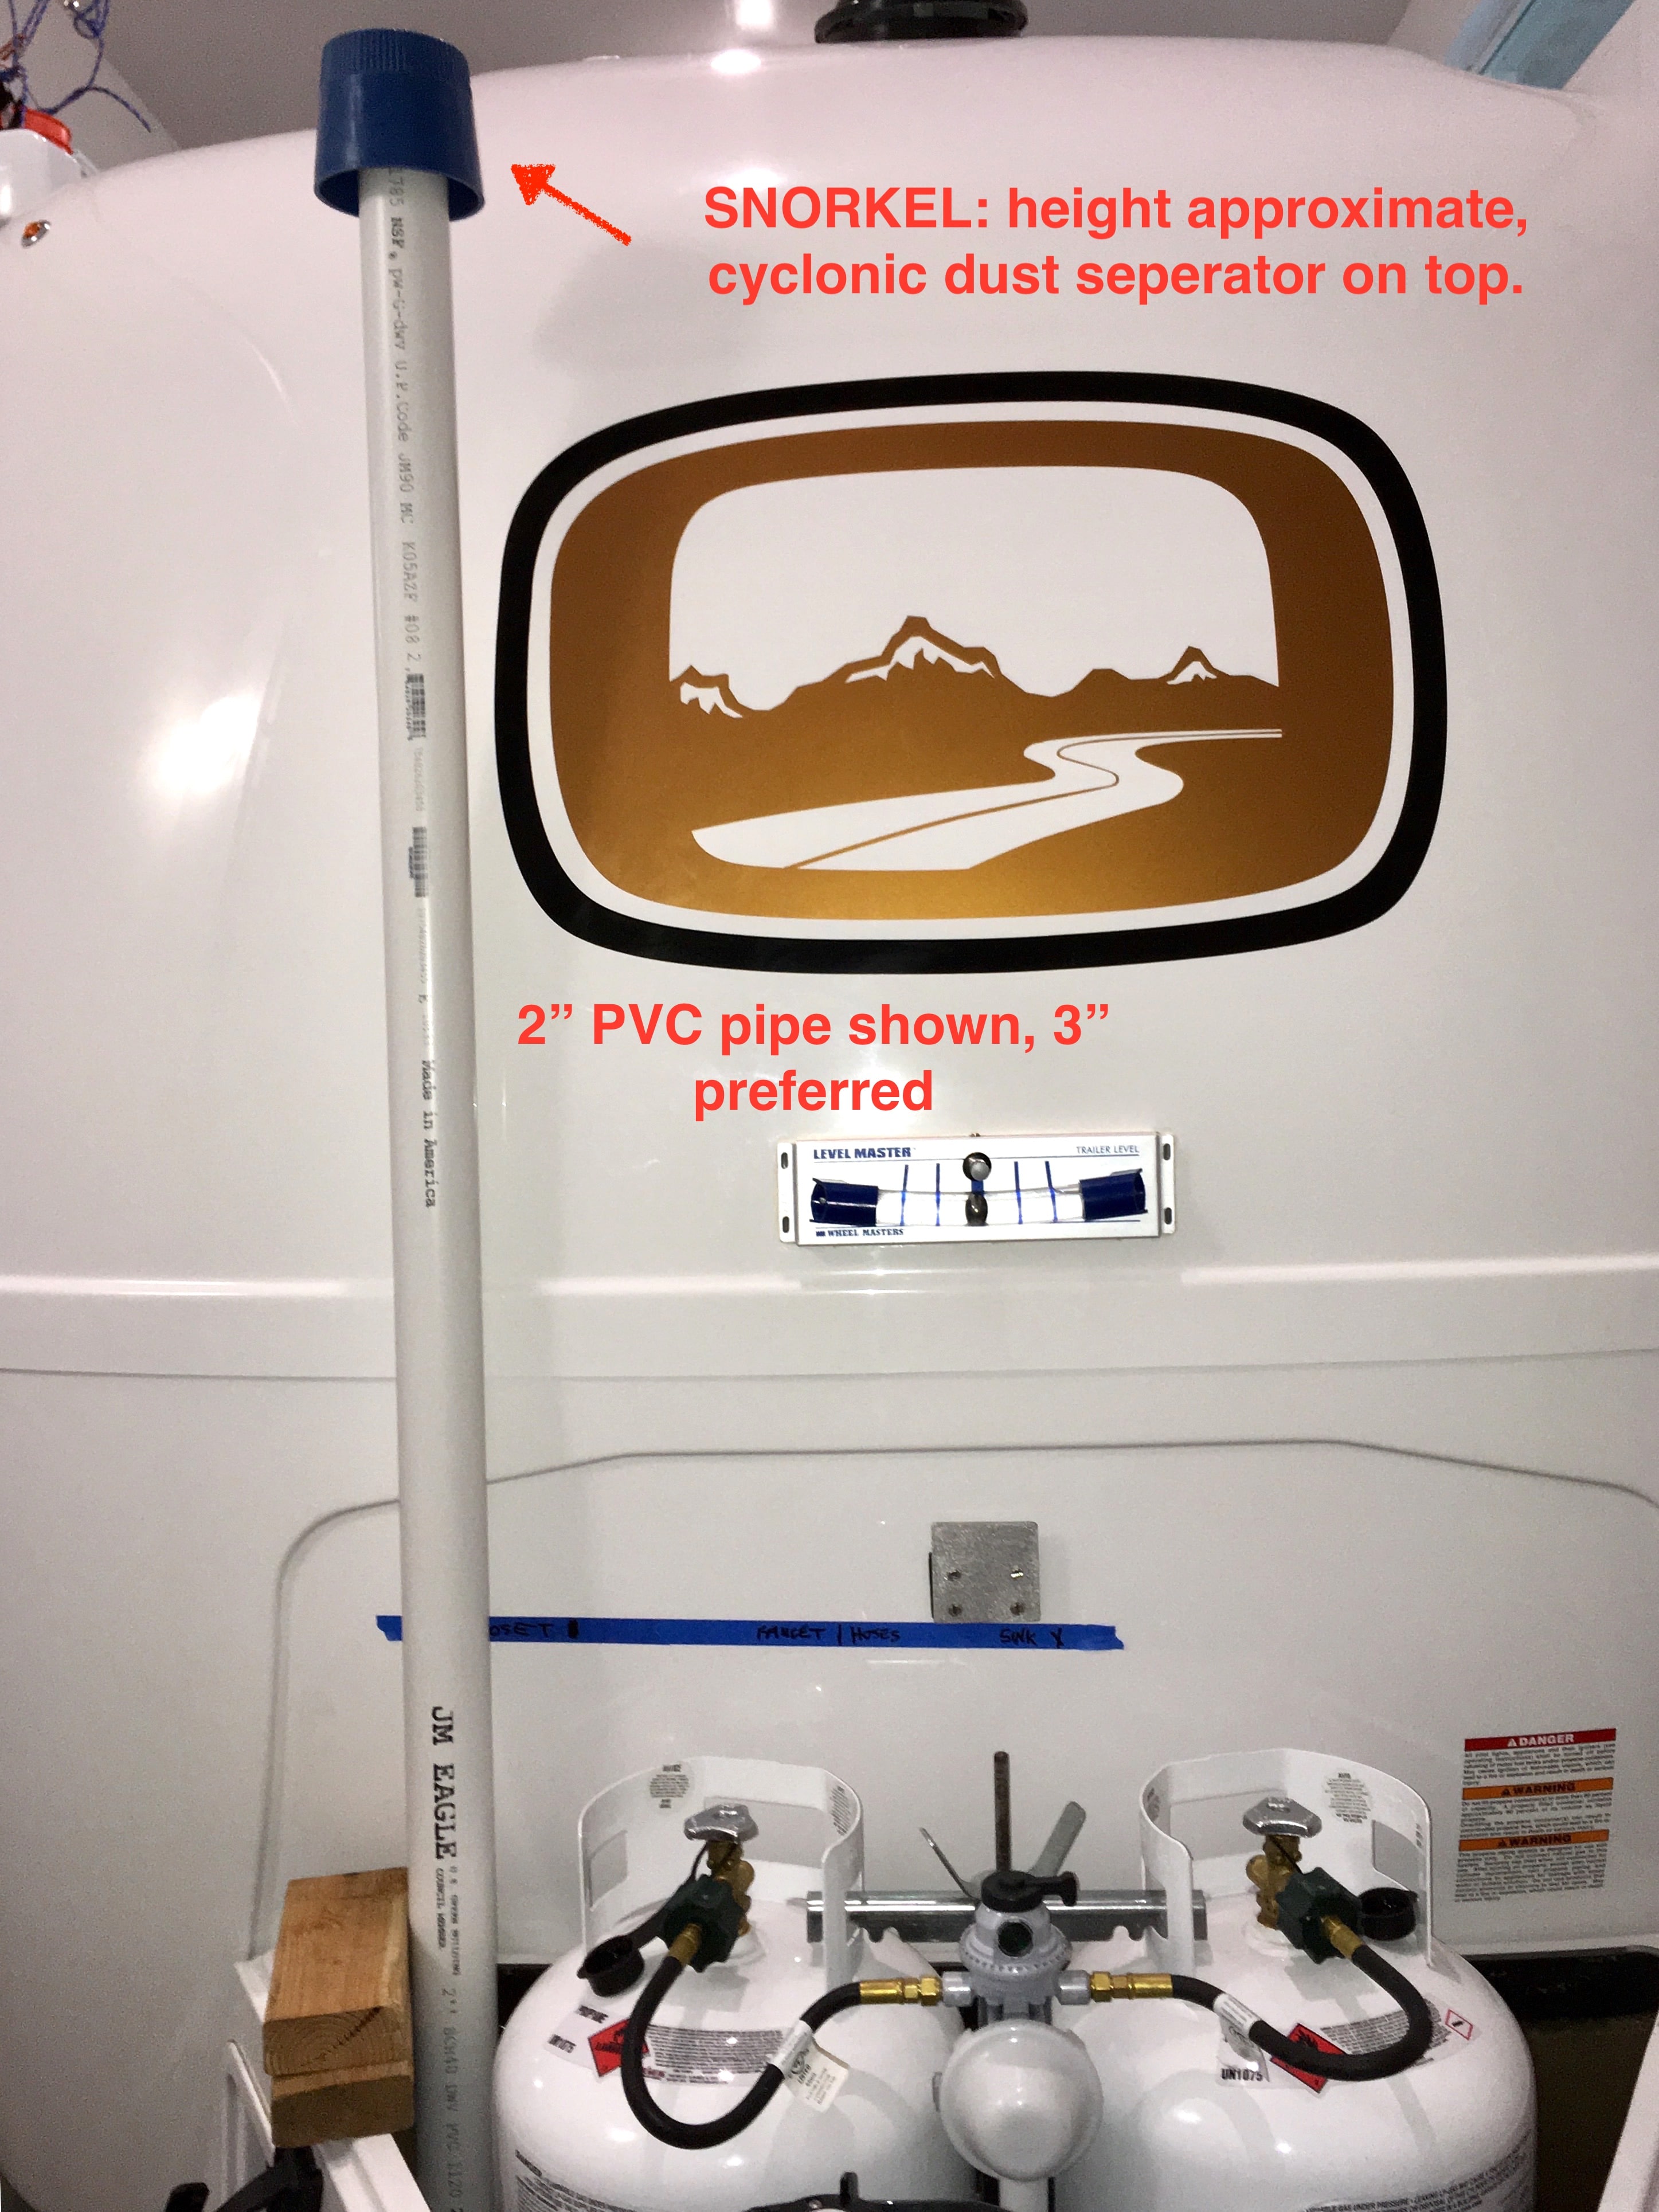
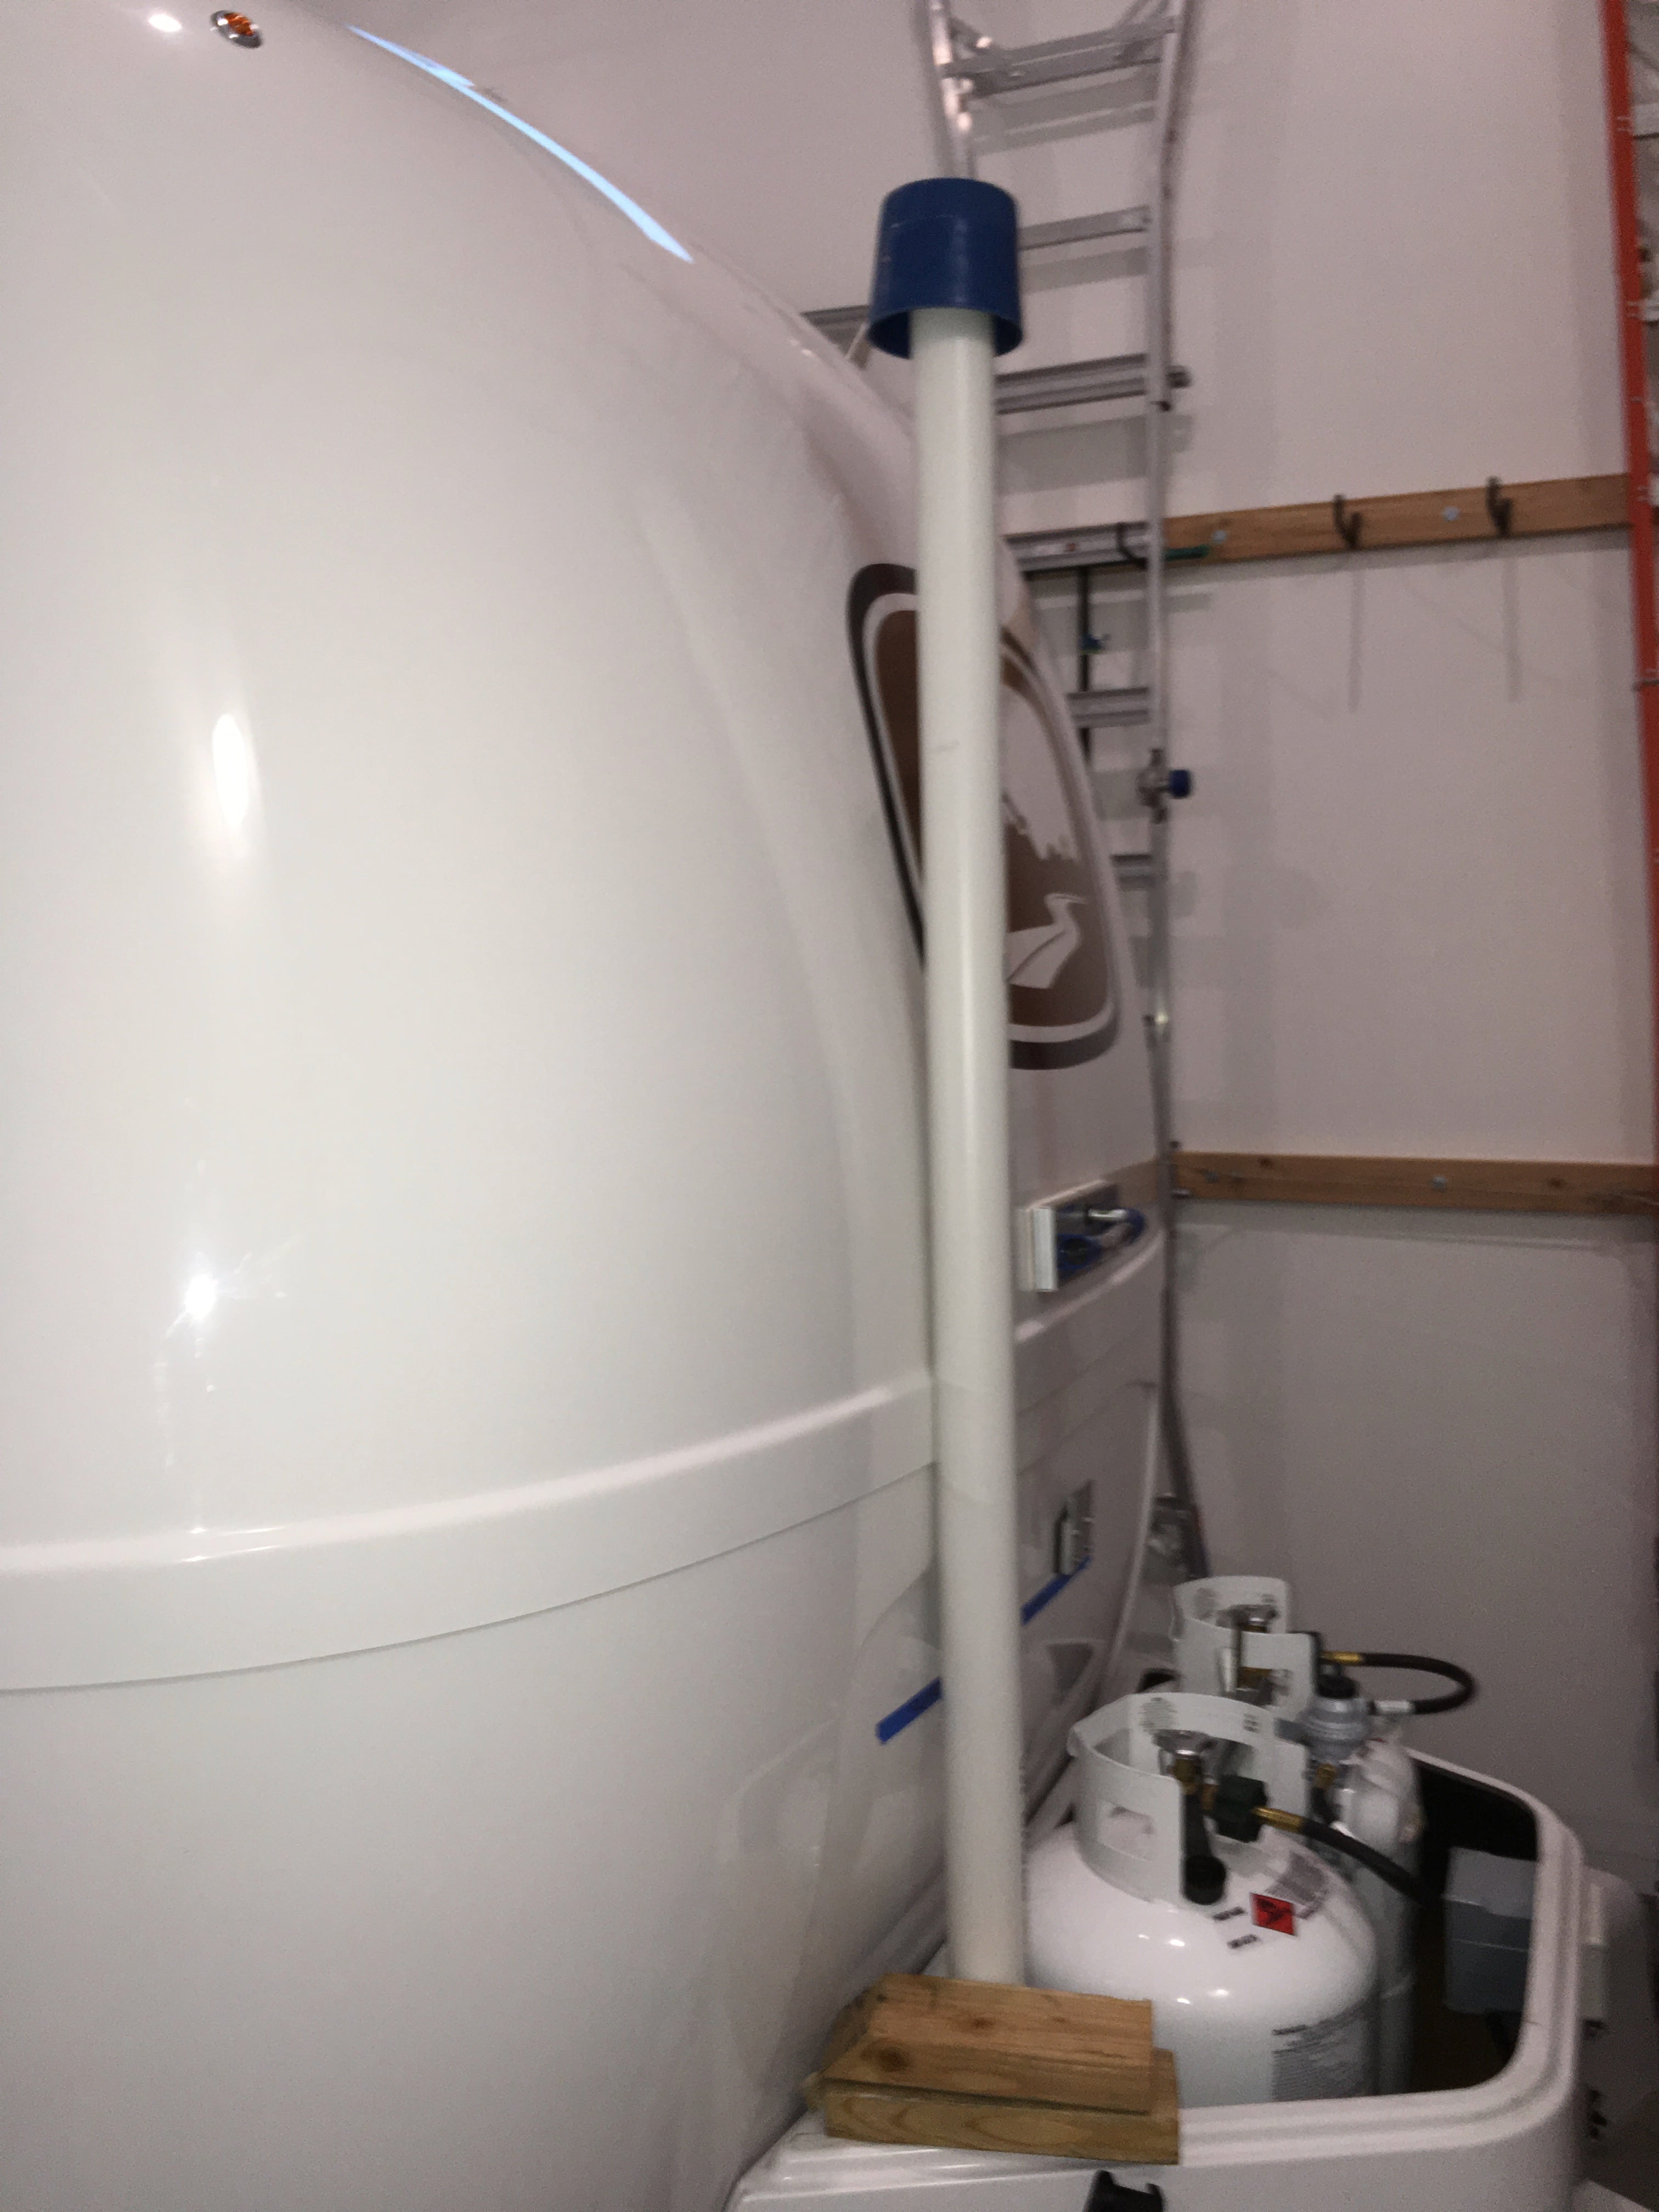
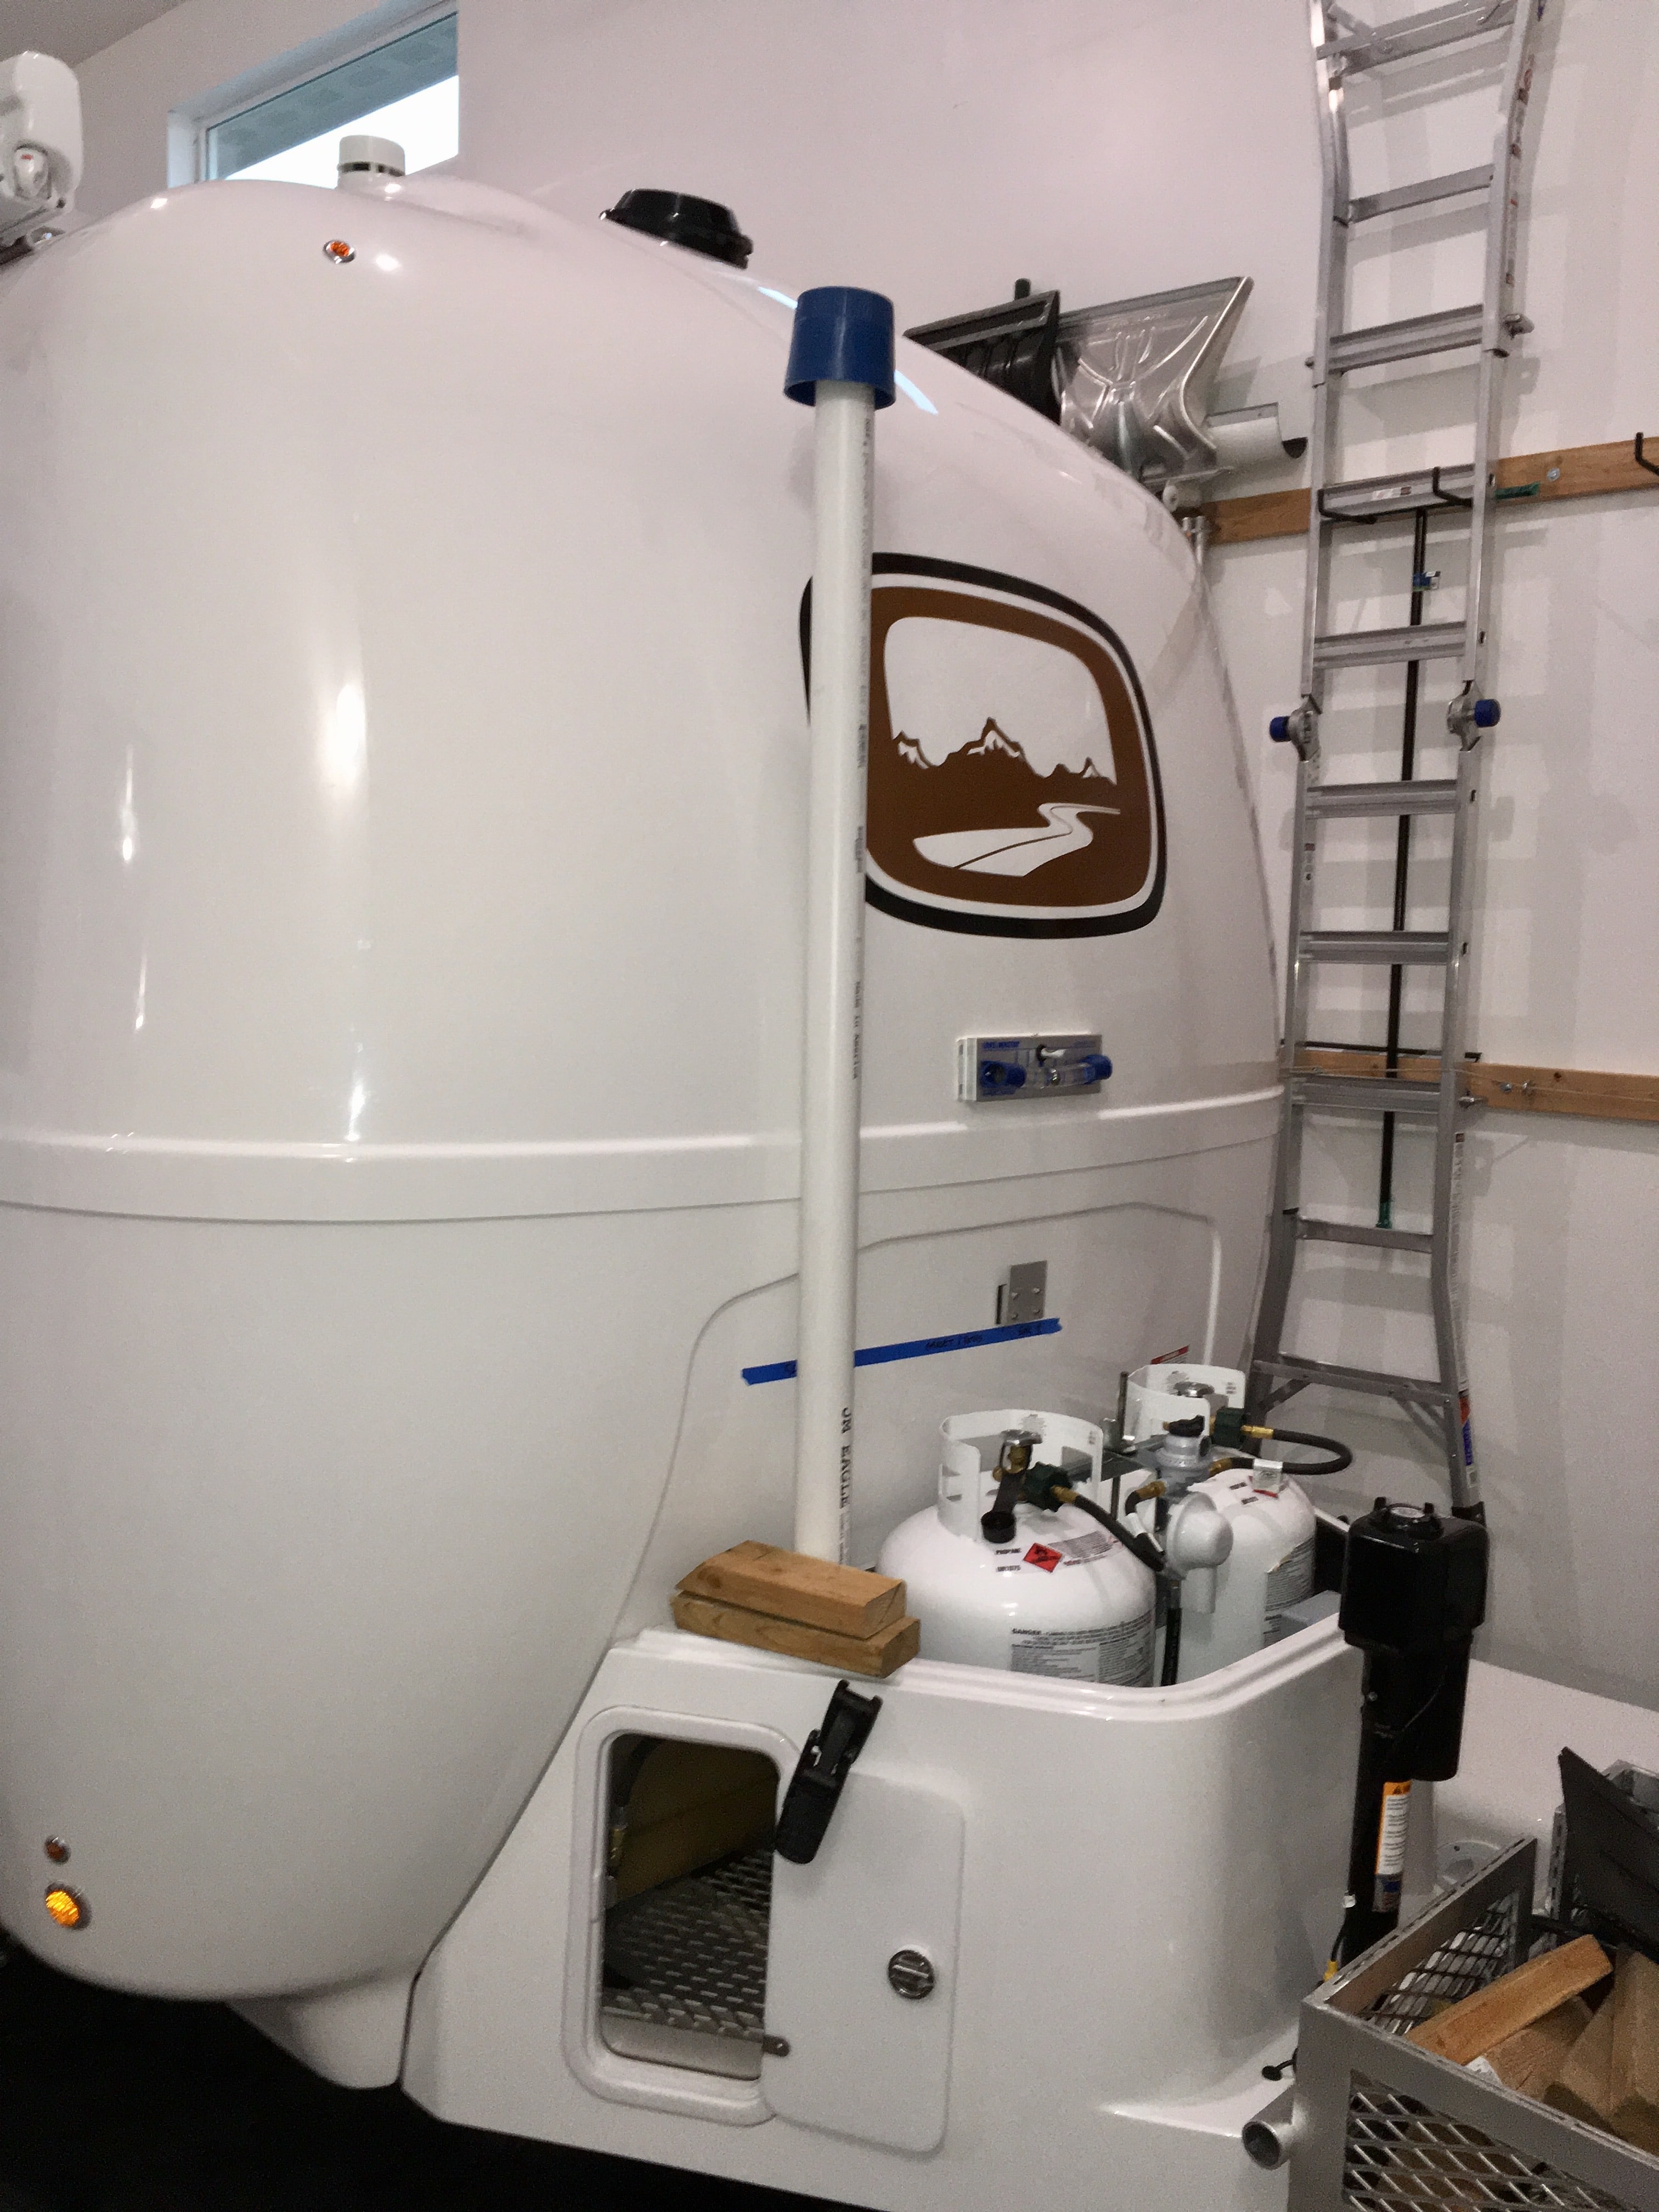
Teaser: I am sure dust is leaking into lots of places I haven't seen yet, like all the scupper drains and the roof vent. For sure I see it around the door seal near the hinges and the bottom, the aft outside storage door near the shower, and I am getting serious leakage under the fridge ... but that one is most probably a bad seal behind the flanges of the unit that I can fix: The Aussies do this all the time to deal with "bull dust". The basic idea is that you add positive pressure (clean, highly filtered air) to the cabin, shut all vents and openings, and the air leaks out any places dust would normally enter. As tight as the ollie is, it would not take a lot of airflow to be effective - 100 cfm should be more than plenty.: [attachment file=Aussi Dust syatem.JPG] I mocked up a system on Mouse and think I could duplicate that one for less than $300, using a smaller filter assembly. [attachment file=Donaldson FRG filter screen cap 03.png] That unit will fit behind the street side propane bottle, I already have side access doors. It will be easy to remove the end cap for filter replacement, and the dirt purge valve will point down to exit around the frame members. Excuse the poor graphics: [attachment file=IMG_4920 Labled.jpg] The inlet can go into the cabin here, I think. Does anyone know what is behind the X? I am almost, sort-of, sure that it is clear under the bathroom vanity. [attachment file=IMG_4916 Labled.jpg] An inexpensive 3 inch bilge blower will fit here: [attachment file=IMG_4838 Labled.jpg] Because there is lots of room on the faucet side of that cavity: [attachment file=IMG_4841 Labled.jpg] Getting the pipe in would be simpler if the X location were available, if not it could be brought in from higher up but that would complicate the plumbing. Power is there at the water pump switch (the fan motor draws less than 4 amps) and I could add another waterproof switch. Air entering the vanity would diffuse throughout the floor and enter the cabin through the heater grill and other openings. The inlet pipe from the air filter would go straight up between the two bottles, 90 degree elbow to the street side and then 90 degree elbow up to a snorkel tube: [attachment file=IMG_4927 Labled.jpg] If you wanted a totally stealth installation you could elbow down and install a washable pleated filter but that would be maintenance intensive, and the air under the doghouse is not too clean. Here is the snorkel: [attachment file=IMG_4933 Labled.jpg] Side view, it would fit pretty close to the front hull seam. You would have to notch the doghouse cover to clear it.: Thoughts? Am I insane? I think it would look totally cool..... John Davies Spokane WA
 3 points
 -
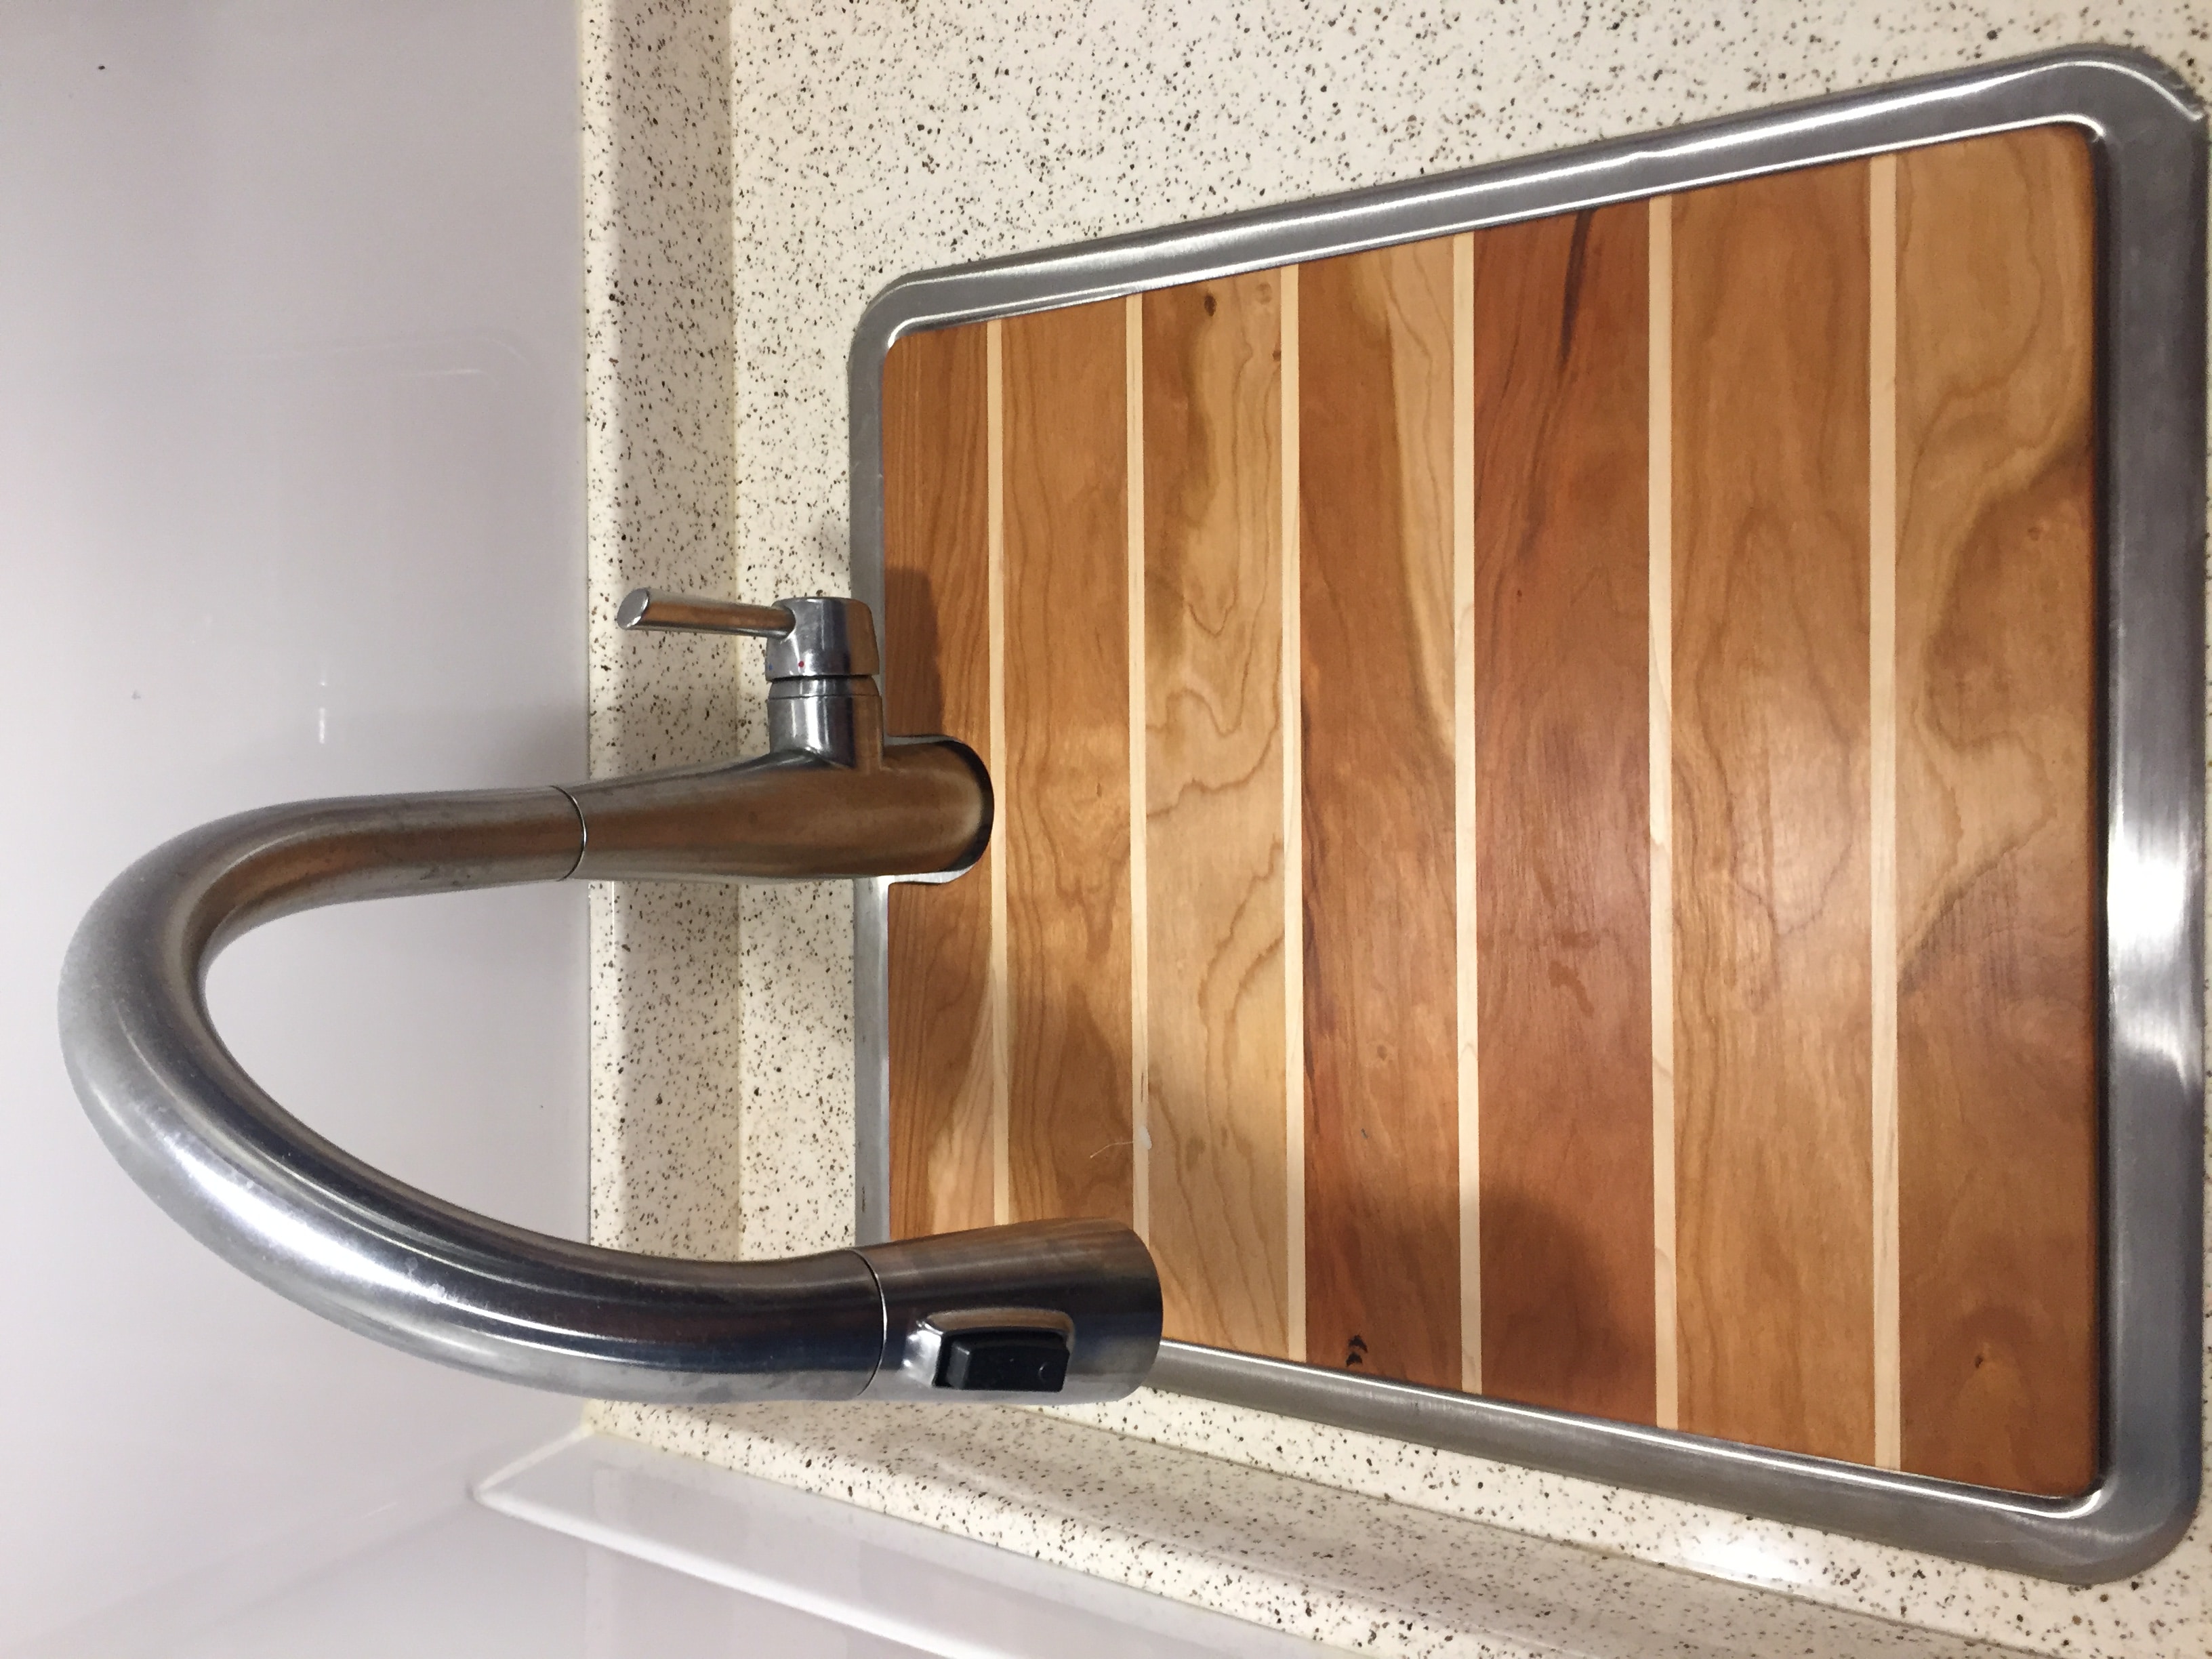
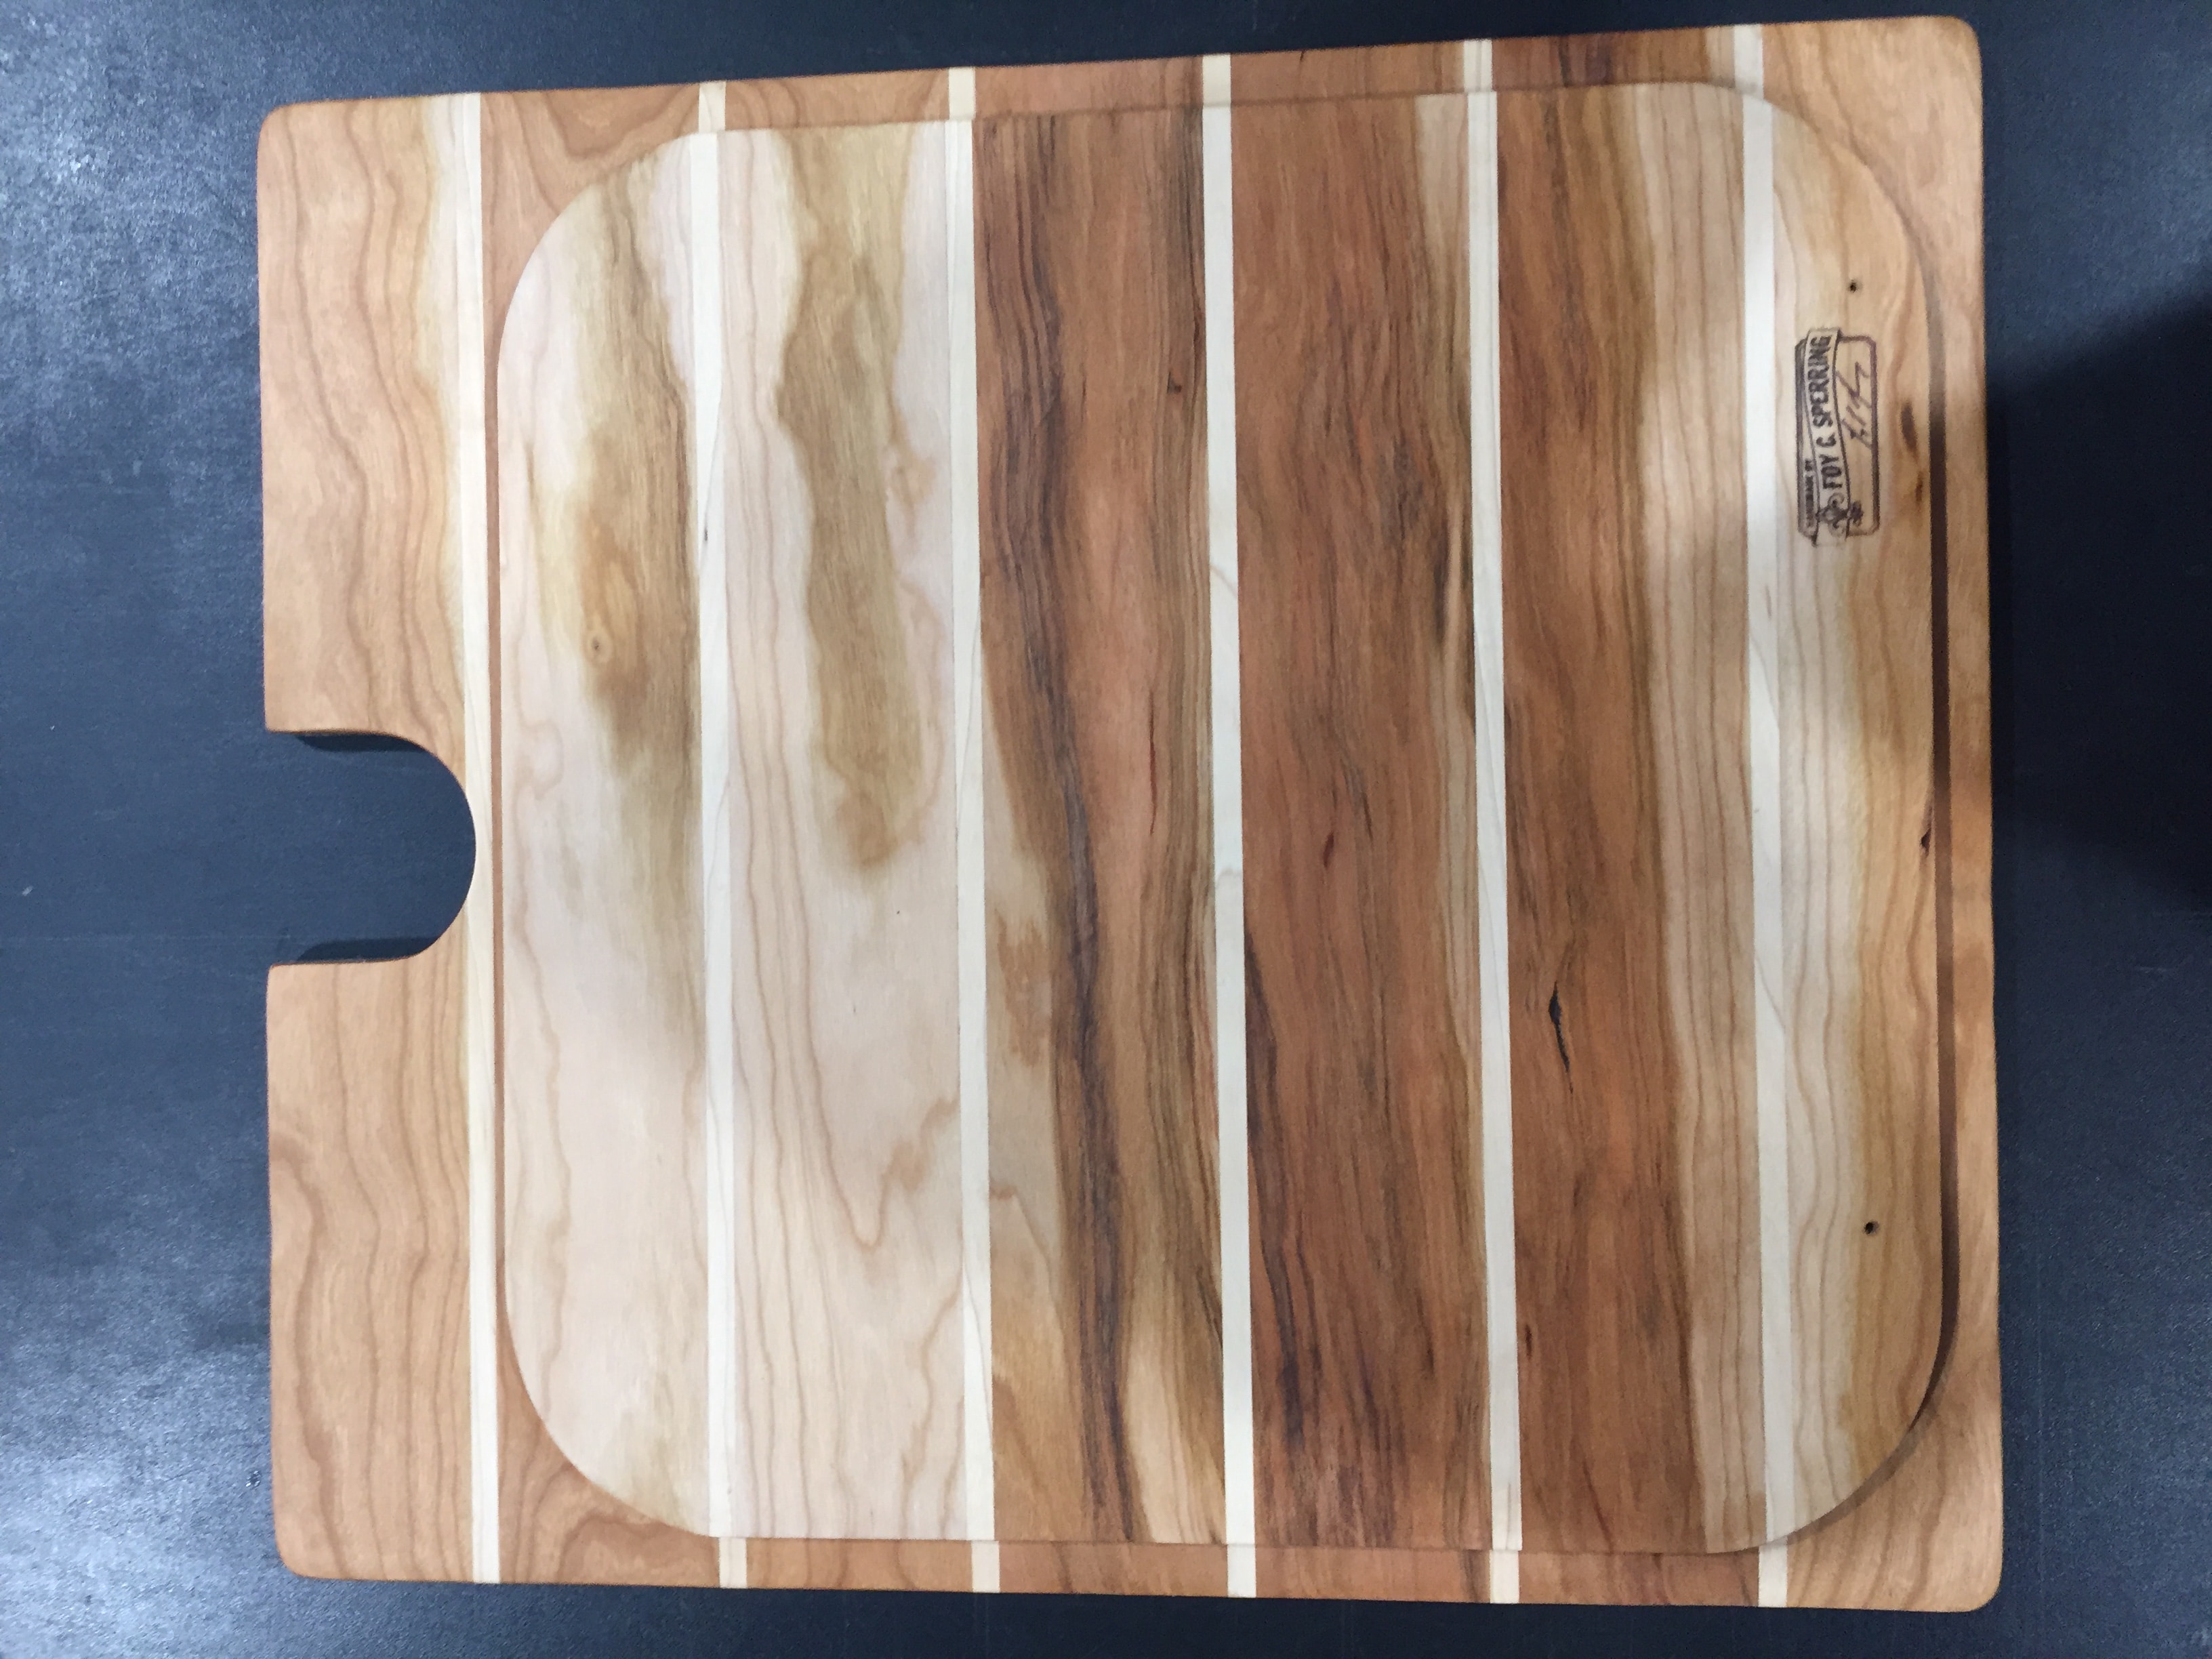
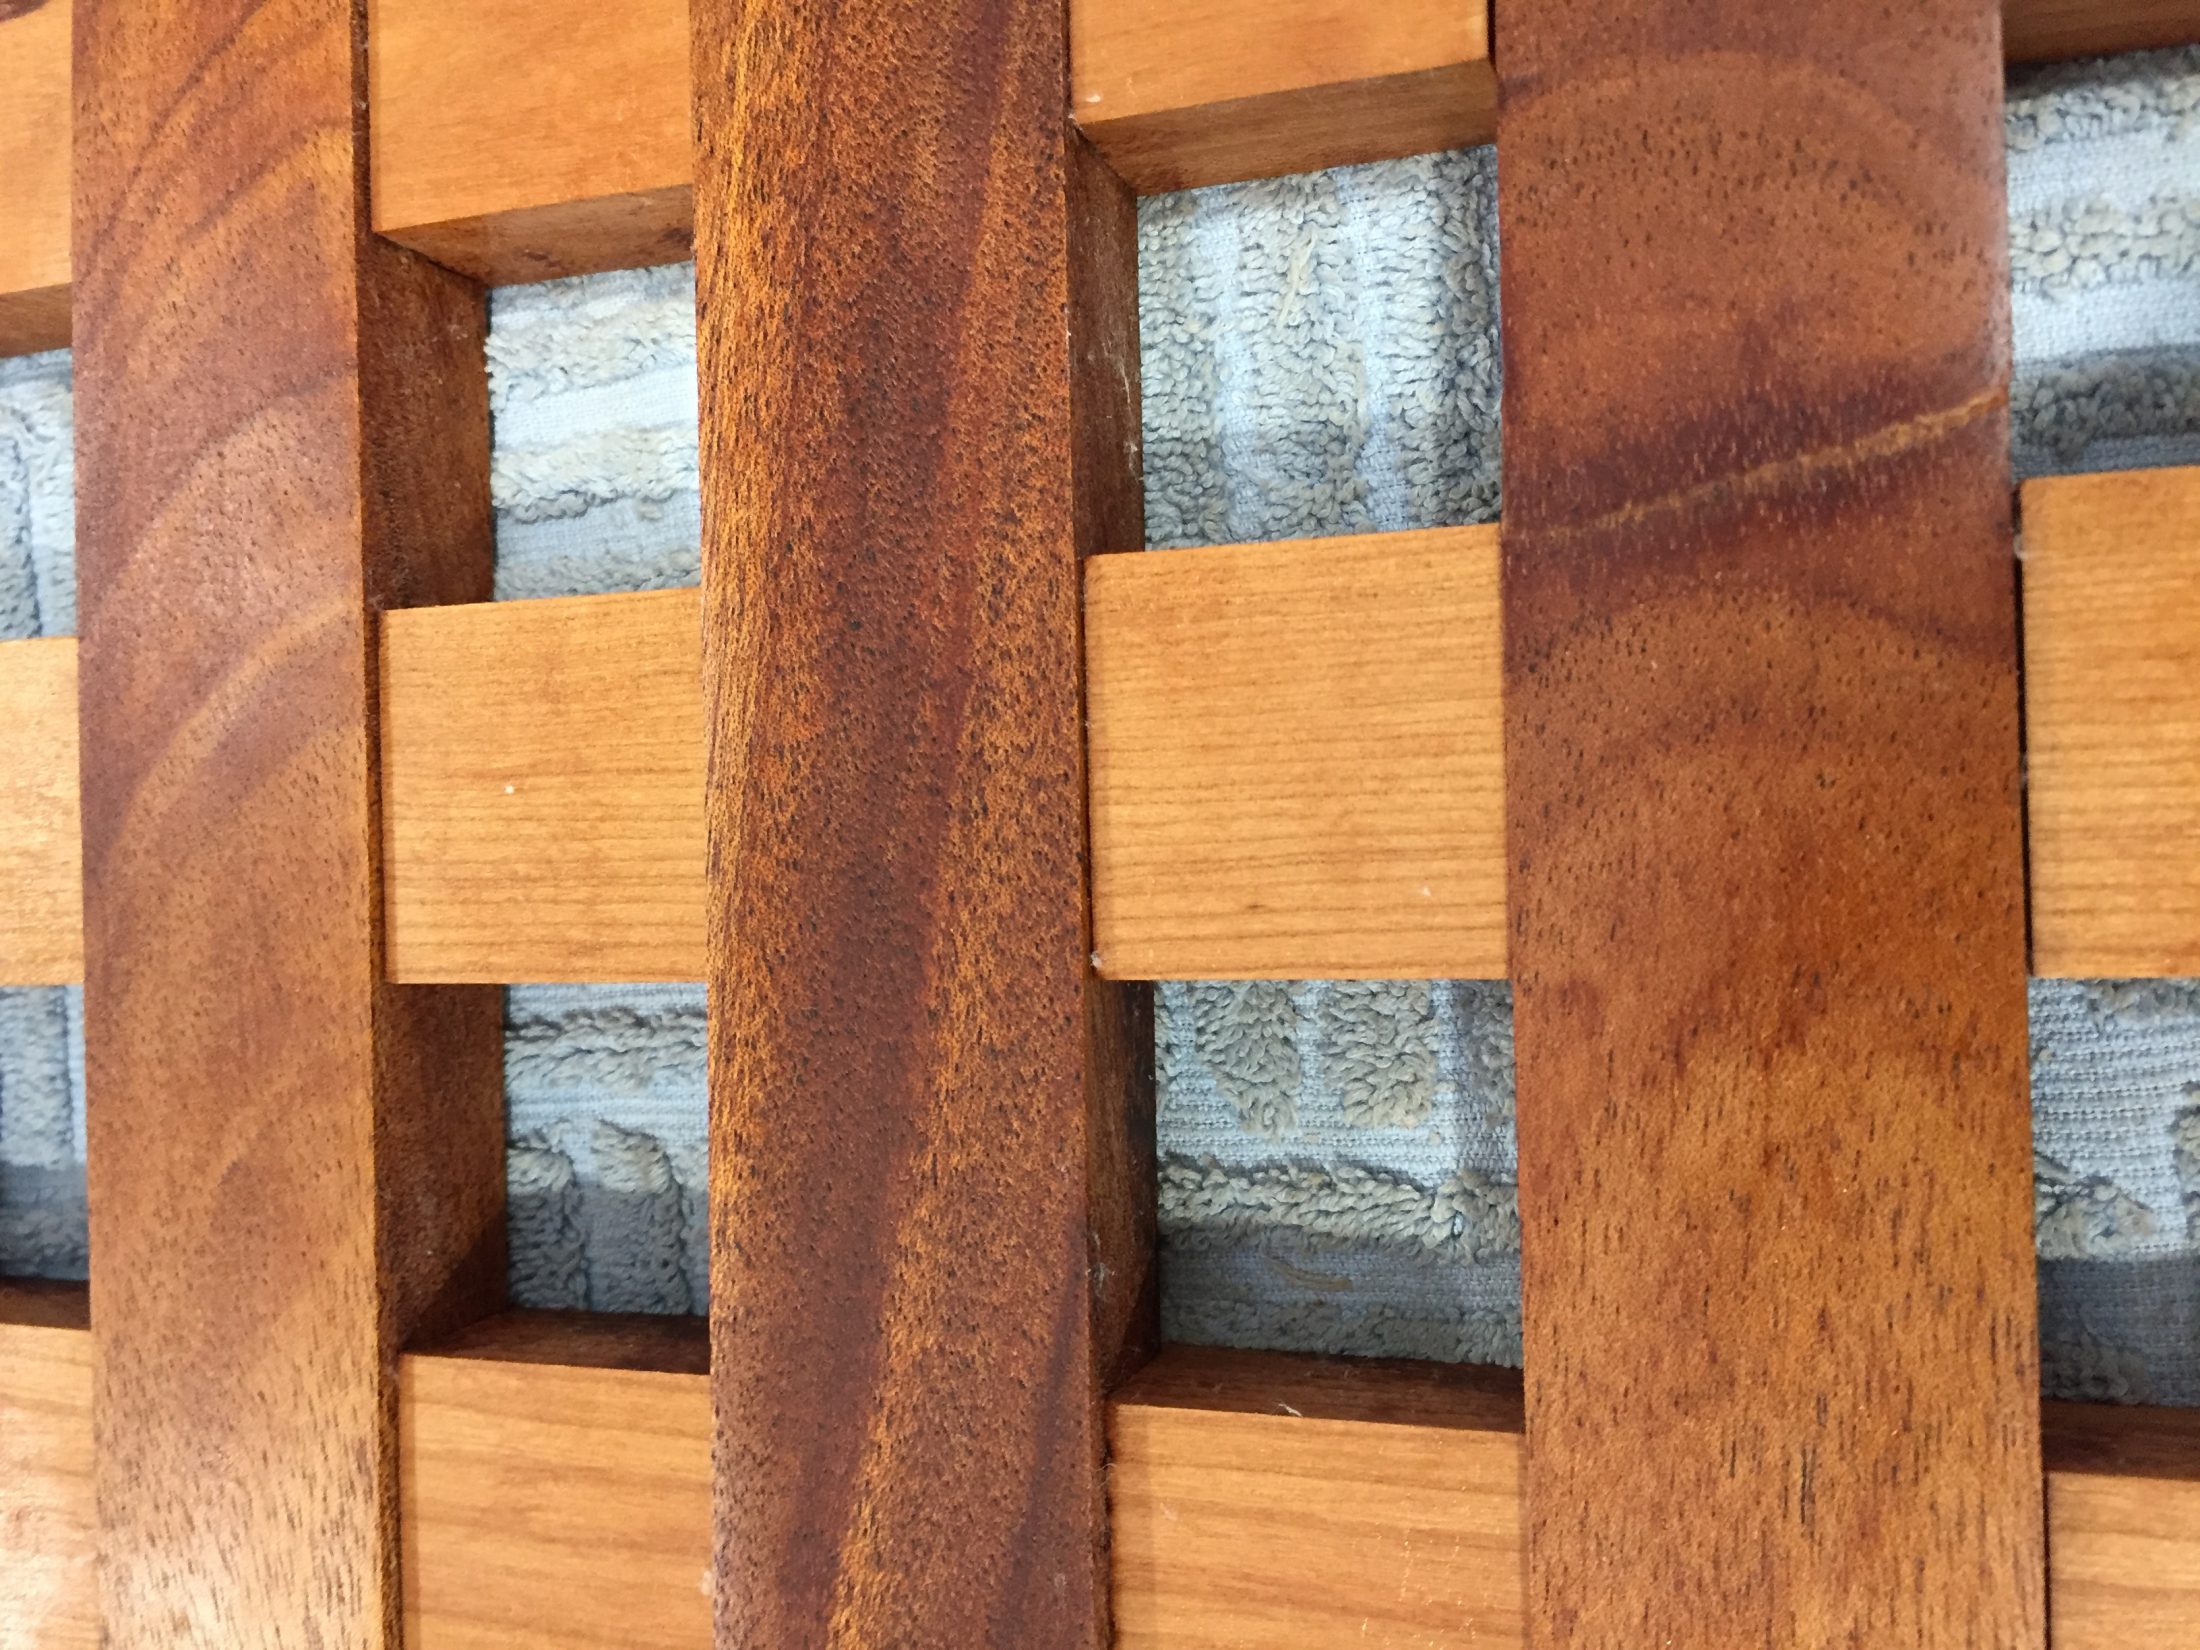
Thanks for all the interest in my woodworking! I have enough requests to keep me busy for the next month. I may open this back up but for now, I am taking NO more orders. It was wonderful to get to know some many Oliver Owner's at the Rally and many of you have asked about our cutting board & shower mat. Lots of you have asked about getting one or both for your trailers. So, this week, I will begin milling the wood to make more. While I have a few confirmed requests, I will open this up to any and all. If you would like one please, let me know as this will be my last run as all good things come to an end. Contact me at 516 635-5656 or 48ocean@gmail.com. Cutting boards are made to your specific sink size. They are American Cherry and Rock Maple done in a ship decking pattern (pictures below.) They are designed to stay in place when traveling and can be used on both sides. Cost $50 plus UPS charges to ship to your address. Shower mats are designed to fit both Elite I and II showers. They are made of American Cherry and Honduras Mahogany in a criss-cross pattern. The construction uses shiplap joinery and brass screws with no glue for long life. Silicone feet keep them off the shower floor and allow water to drain. Cost $150 plus UPS charges to ship to your address. Please note: These are wood and as such will need a little care from time to time. Cutting boards should be cleaned and dried after each use and a coat of plain mineral oil applied once a month to keep up their glow. Shower mats should be stood up after use to dry and a coat of plain mineral oil once a month or sooner if you shower in your trailer often. Happy trails, Foy
2 points
-
We want this to be easy, simple and enjoyable. For all of you that have express interest in an Oliver Micro-Rally at Jacksonville, FL Kathryn Abbey Hanna Park, I would like to set the dates of Oct 8, 2018 through Oct 12. 2018. If you can make the dates wonderful. If not, we will miss you but, know your family and we will get together soon. We are booked in campsite 014. As we get closer I will plan some fun things and of course great food! The park has a 1.5-mile public beach and is located at Mayport in the Jacksonville Beaches area. It consists of 447 acres of mature coastal hammock and old growth live oak. You can reserve and pick your site at the following link: https://web1.vermontsystems.com/wbwsc/fljacksonwt.wsc/search.html?module=RN&display=Graphical&primarycode=Hanna%20Campsites&SessionID=cfea104fe01c880b2e96e976ccacd2f5832efe4312591ff513c264593b1d3275c86927914772f2bbcf1cabc4e2fcead08dcd73c441f43c8543d3b3659c3fc6e0 Facts about Hanna: Address - 500 Wonderwood Drive Jacksonville, FL 32233 (904) 249-4700 or hannapark@coj.net RV camping per night = 33.90 including tax Over 200 campsites NOTE: All payments for camping reservations are final and non-refundable Fresh Water - A 60-acre lake and open to fishing, kayaks, pedal boats and canoes The Beach - 1.5 miles of sandy beach with multiple access points Pets are permitted Amenities: - electric and water hookups, dump station, restroom facilities with showers, 24-hour security, Camp Store, Kayak and Mountain Bike Rentals Check in 1:00pm Checkout: 12:00pm HannaCamping2.pdf2 points
-
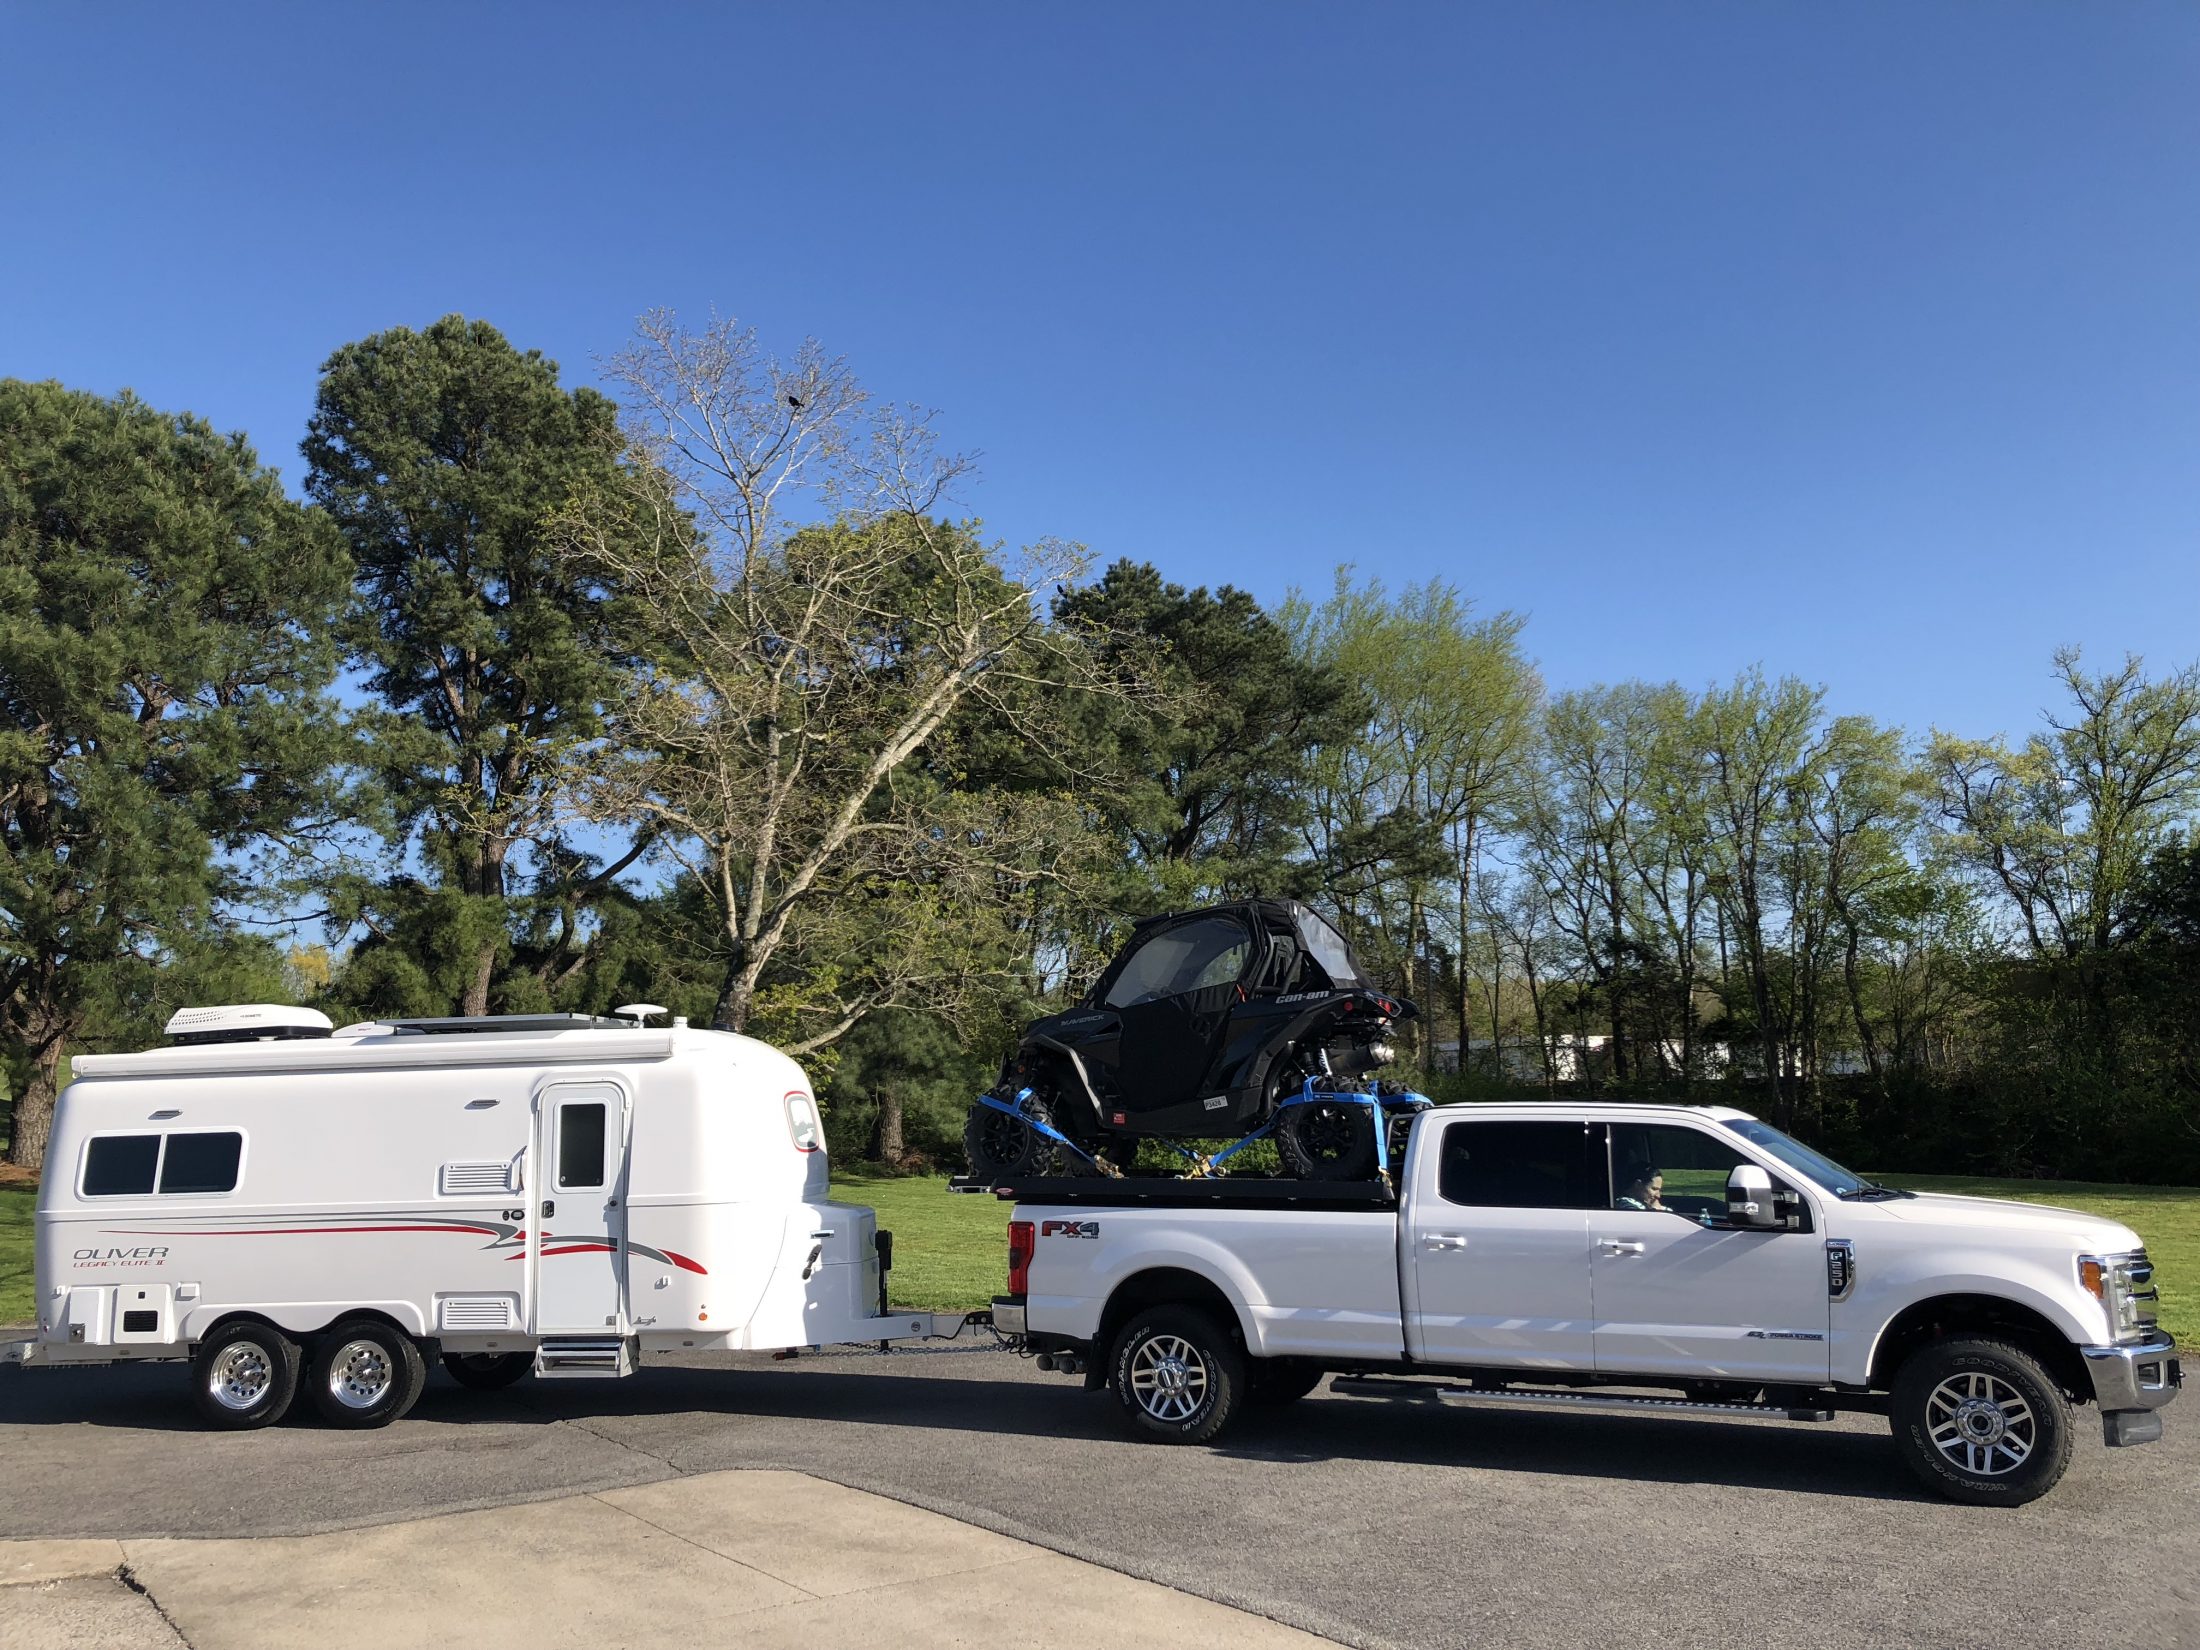
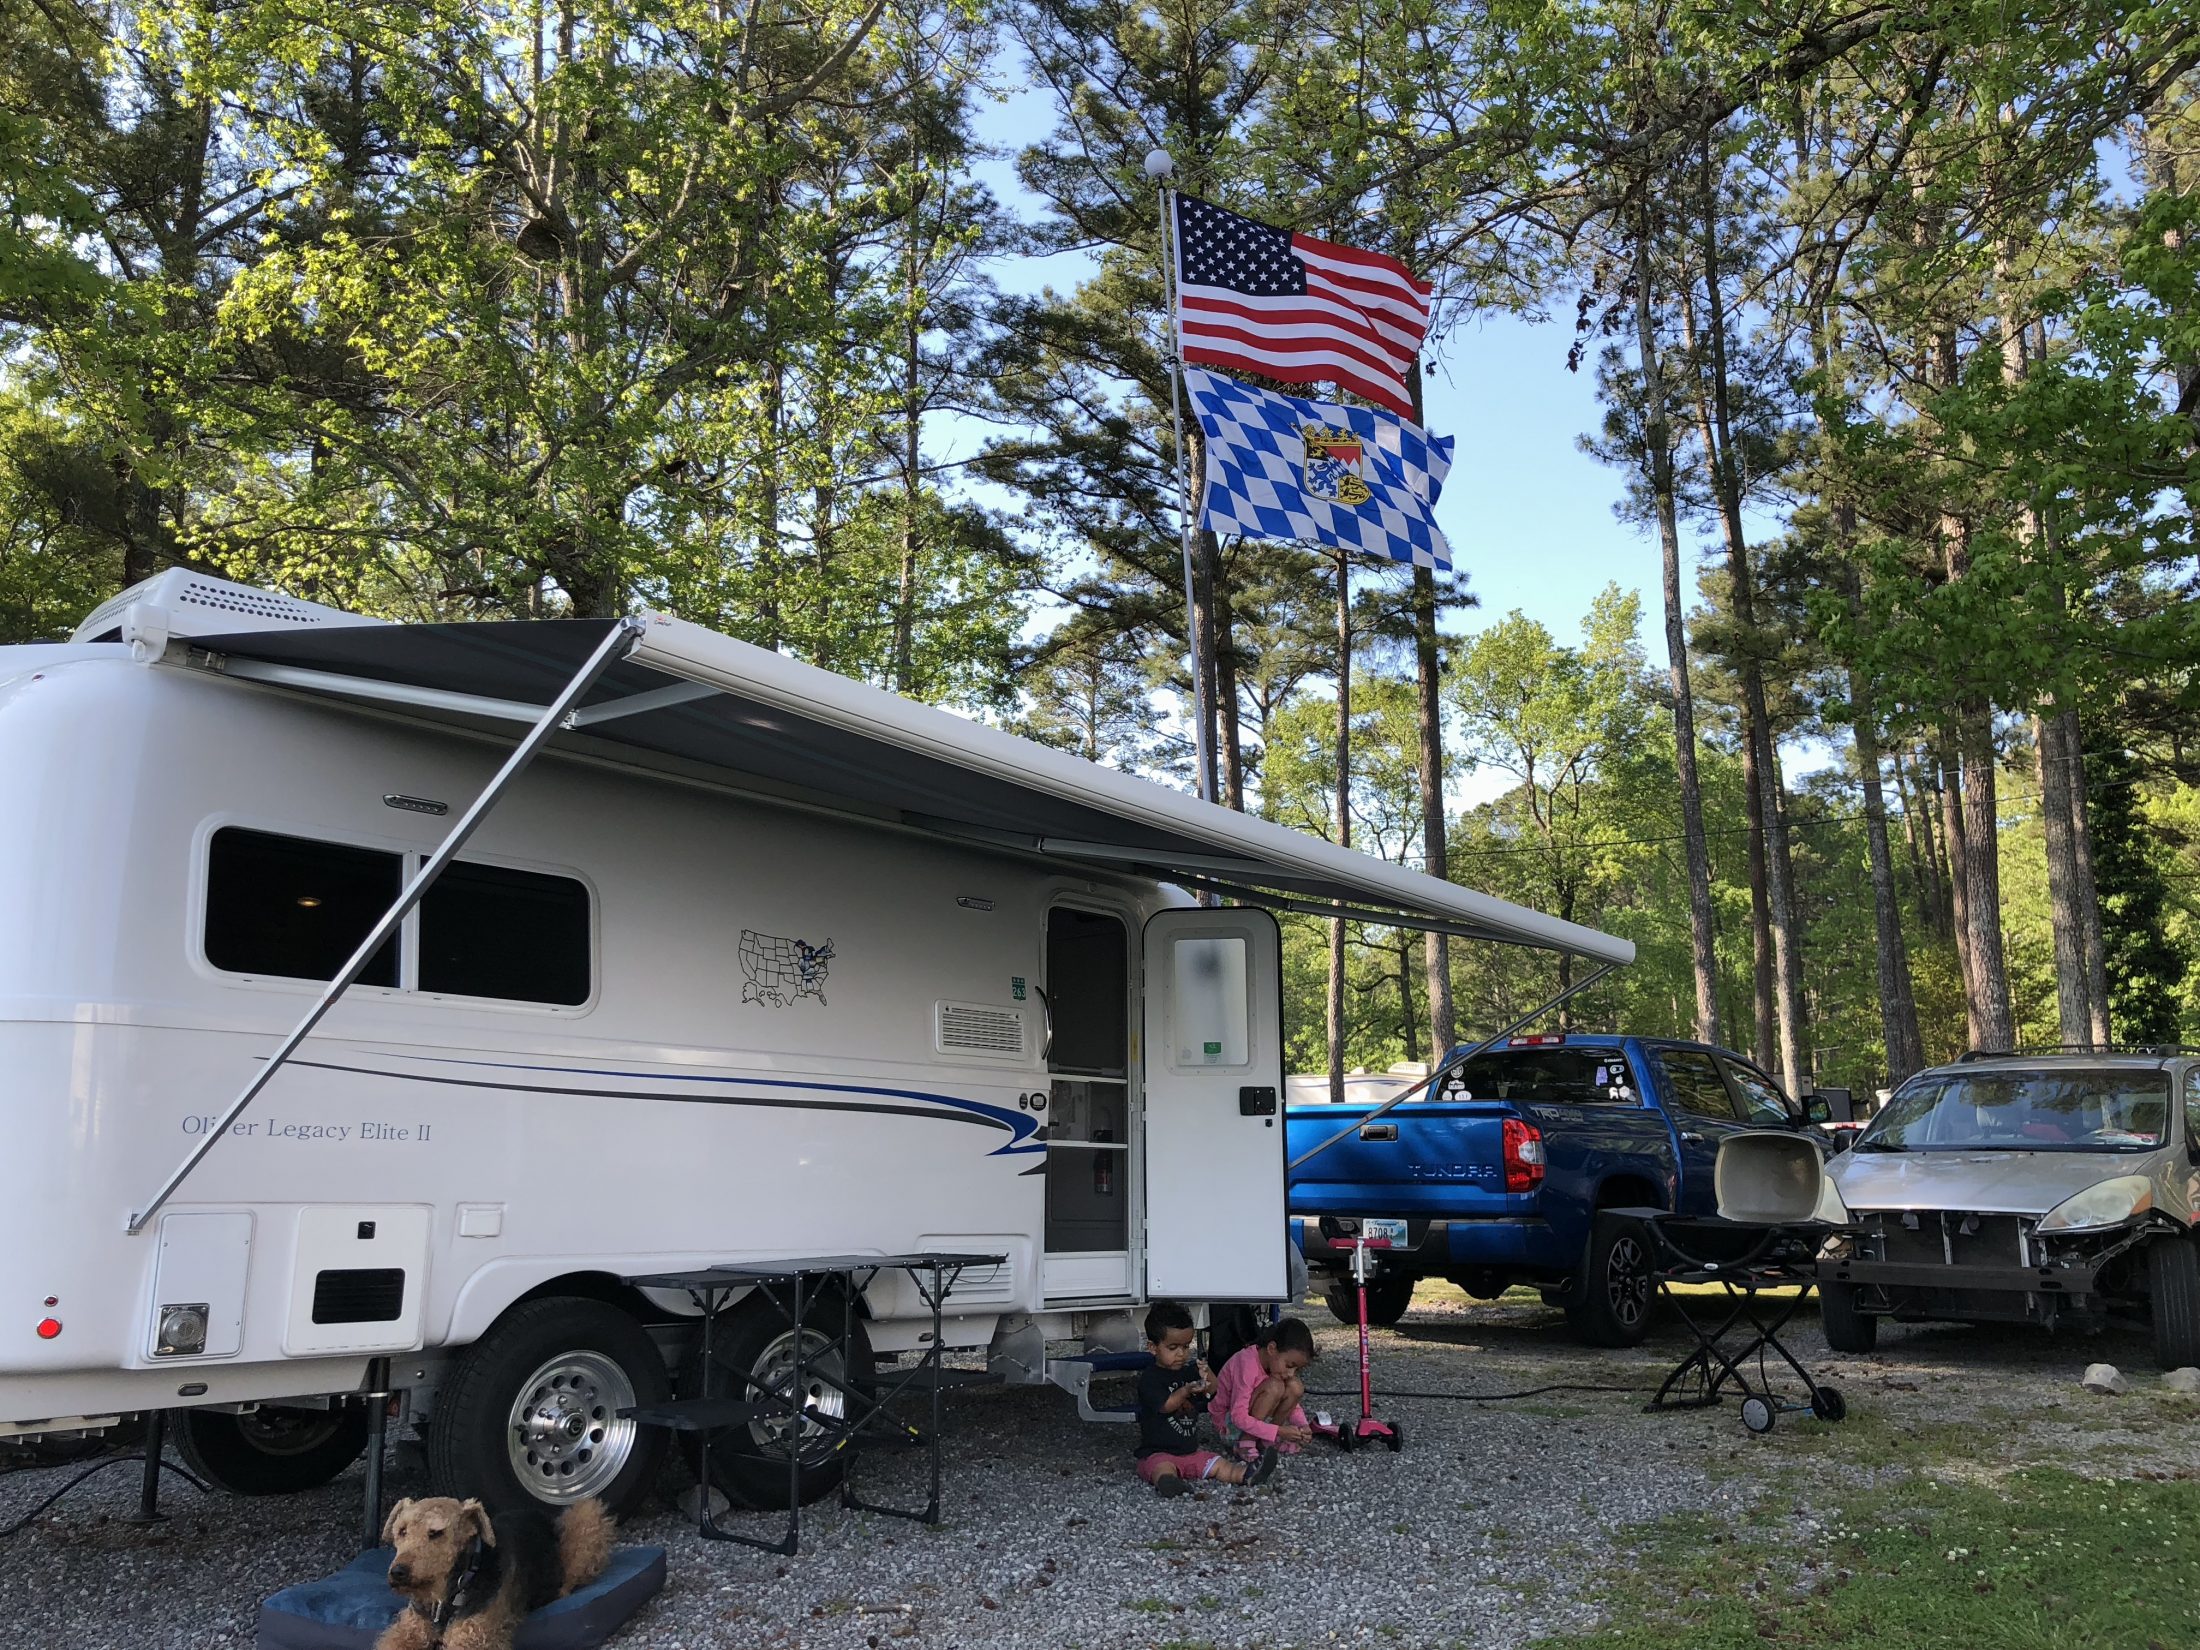
It's official! After five 12-hour days of driving, my wife and I picked up our Ollie on the 19th. It was an excellent experience! I can tell you that these guys are there for the customer, and bent over backwards during the orientation. They made it quick, easy and painless (somewhat). The F250 has extra large eyelets for the break away chains and would not accommodate the hooks. Phil offered to drive me to the nearest hardware store to square it away, but It was only a mile down the road and they had another couple scheduled for delivery that day as well. It's the small things that prove this company was the right choice. The wife and I have been slowly making our way back to Alaska, and the last week has been awesome. We have done a little of everything so far (boondocking, two RV parks and two national parks). We just left Palo Duro Texas State Park and it was an excellent spot to spend two nights. We just arrived in Moab, and are planning to spend 6 days or so here prior to heading to Salt Lake. The Ollie is superior in every manner and it's so nice to see a well researched plan work out. I have researched every item I have purchased for this lifestyle and it has come together well. From my TV, to the bed deck, to the Ollie it's been a great week/trip. If anyone is on the fence about this travel trailer, don't be. You get what you pay for. Daily I find some small detail that I'm impressed with. I'll say the biggest impression is in the docile towing mannerisms. It is truly a joy to pull. I have many miles towing...both overloaded, underloaded, underpowered, etc., and this trailer makes it easy. I see the bigger guys and the fifth wheels in rush hour traffic and smile knowing I made the right choice. Anyways, sorry for the long post, I'm just excited! -Alex
1 point
-
All, Foy posted the following on the Oliver Owners Facebook page: "Oliver Owner’s in GA and FL. We would like to propose a Micro-Rally in October at Hanna Park on the beach in Jacksonville,FL. Comment if interested!" https://www.facebook.com/groups/OllieOwners/ Please reply if you are interested. Dates haven't been selected yet. As the post is updated, I'll do my best to relay information to the forum.1 point
-
John, I love the detailed work that you do. I have nothing to contribute other than to say thank you. I may not ever install a positive pressure system but I agree with Foy and Mirna, stuff like this enriches the community and I appreciate it.1 point
-
Well, I do love projects. Thanks for the kind words. I am truly a little worried about poorly sealed circuit boards, in the outside areas mostly, but also inside the hull. Normal dust is not a real issue. But the red rock dust in most of southern Utah is .... it is up to a few percent iron oxide, and it becomes conductive when moist. If an unsealed board or electrical connexion (which most are in RV appliances) gets heavily coated in red dust, and then is exposed to moisture, it can cause corrosion and board or connector failure. I have experienced this directly after a 4wd vacation in Canyonlands. Inside the trailer, the completely exposed boards for the water heater, water tank level monitors, inverter, etc etc, as well as every single wire connection and unsealed switch are at risk. Besides this special concern about “Moab corrosion”, regular dust inside is a general nuisance and an eyesore. Why not just keep it out? I like a clean interior.... The outside components are still at risk tho. I would really like to hear from long time owners if they have dealt with dust inside the trailer, and how they did it. I realize that only a few ever get off pavement, and fewer still are like me who might drive for three or more hours on really dusty ones. BTW, I did consider cracking the roof vent and running the fan on high in reverse, but that would bring in unfiltered air. You could add a filter under the fan, but changing it would dump dust all over you and the interior. Keeping the filter mechanism outside is best. Also, I had been thinking about this since well before I ordered Mouse. I started a thread 15 months ago and got minimal response... John Davies Spokane WA1 point
-
I had a chance to see both the cutting board and shower mat, they are high quality & wonderfully crafted!1 point
-
I am leaving for three days and when I return I will definitely try that idea out. In the meantime, I will shut the water supply off to the trailer until I get back.1 point
-
I wonder if you might remove the cartridge and see if there is a small piece of something keeping it from sealing. When you reassemble snug that brass ring up a little tighter. I haven’t had any experience with the ceramic cartridges but I have fixed a leaky Delta ball and socket type faucet this way.1 point
-
I finally found a pdf file online that shows all the pieces. It appears the little half blue/half red vinyl button on the handle pries off and you can take the assembly apart to replace the "Ceramic Disc Cartridge". The Dura faucet is guaranteed to not leak so they will send out a new replacement Ceramic Disc Cartridge under warranty. I just might get out of trouble here yet. Thanks. Link below (scroll down page to installation sheet at bottom). https://www.amazon.com/dp/B00XV3F4L8/?coliid=IY8NTI5H3BA1Z&colid=8J5Y57AUK30T&psc=1&ref_=lv_ov_lig_dp_it1 point
-
The proposed meeting that was to take place at the Rally never happened. However, a number of things along this line are presently being discussed. I'll update when I can. Bill1 point
-
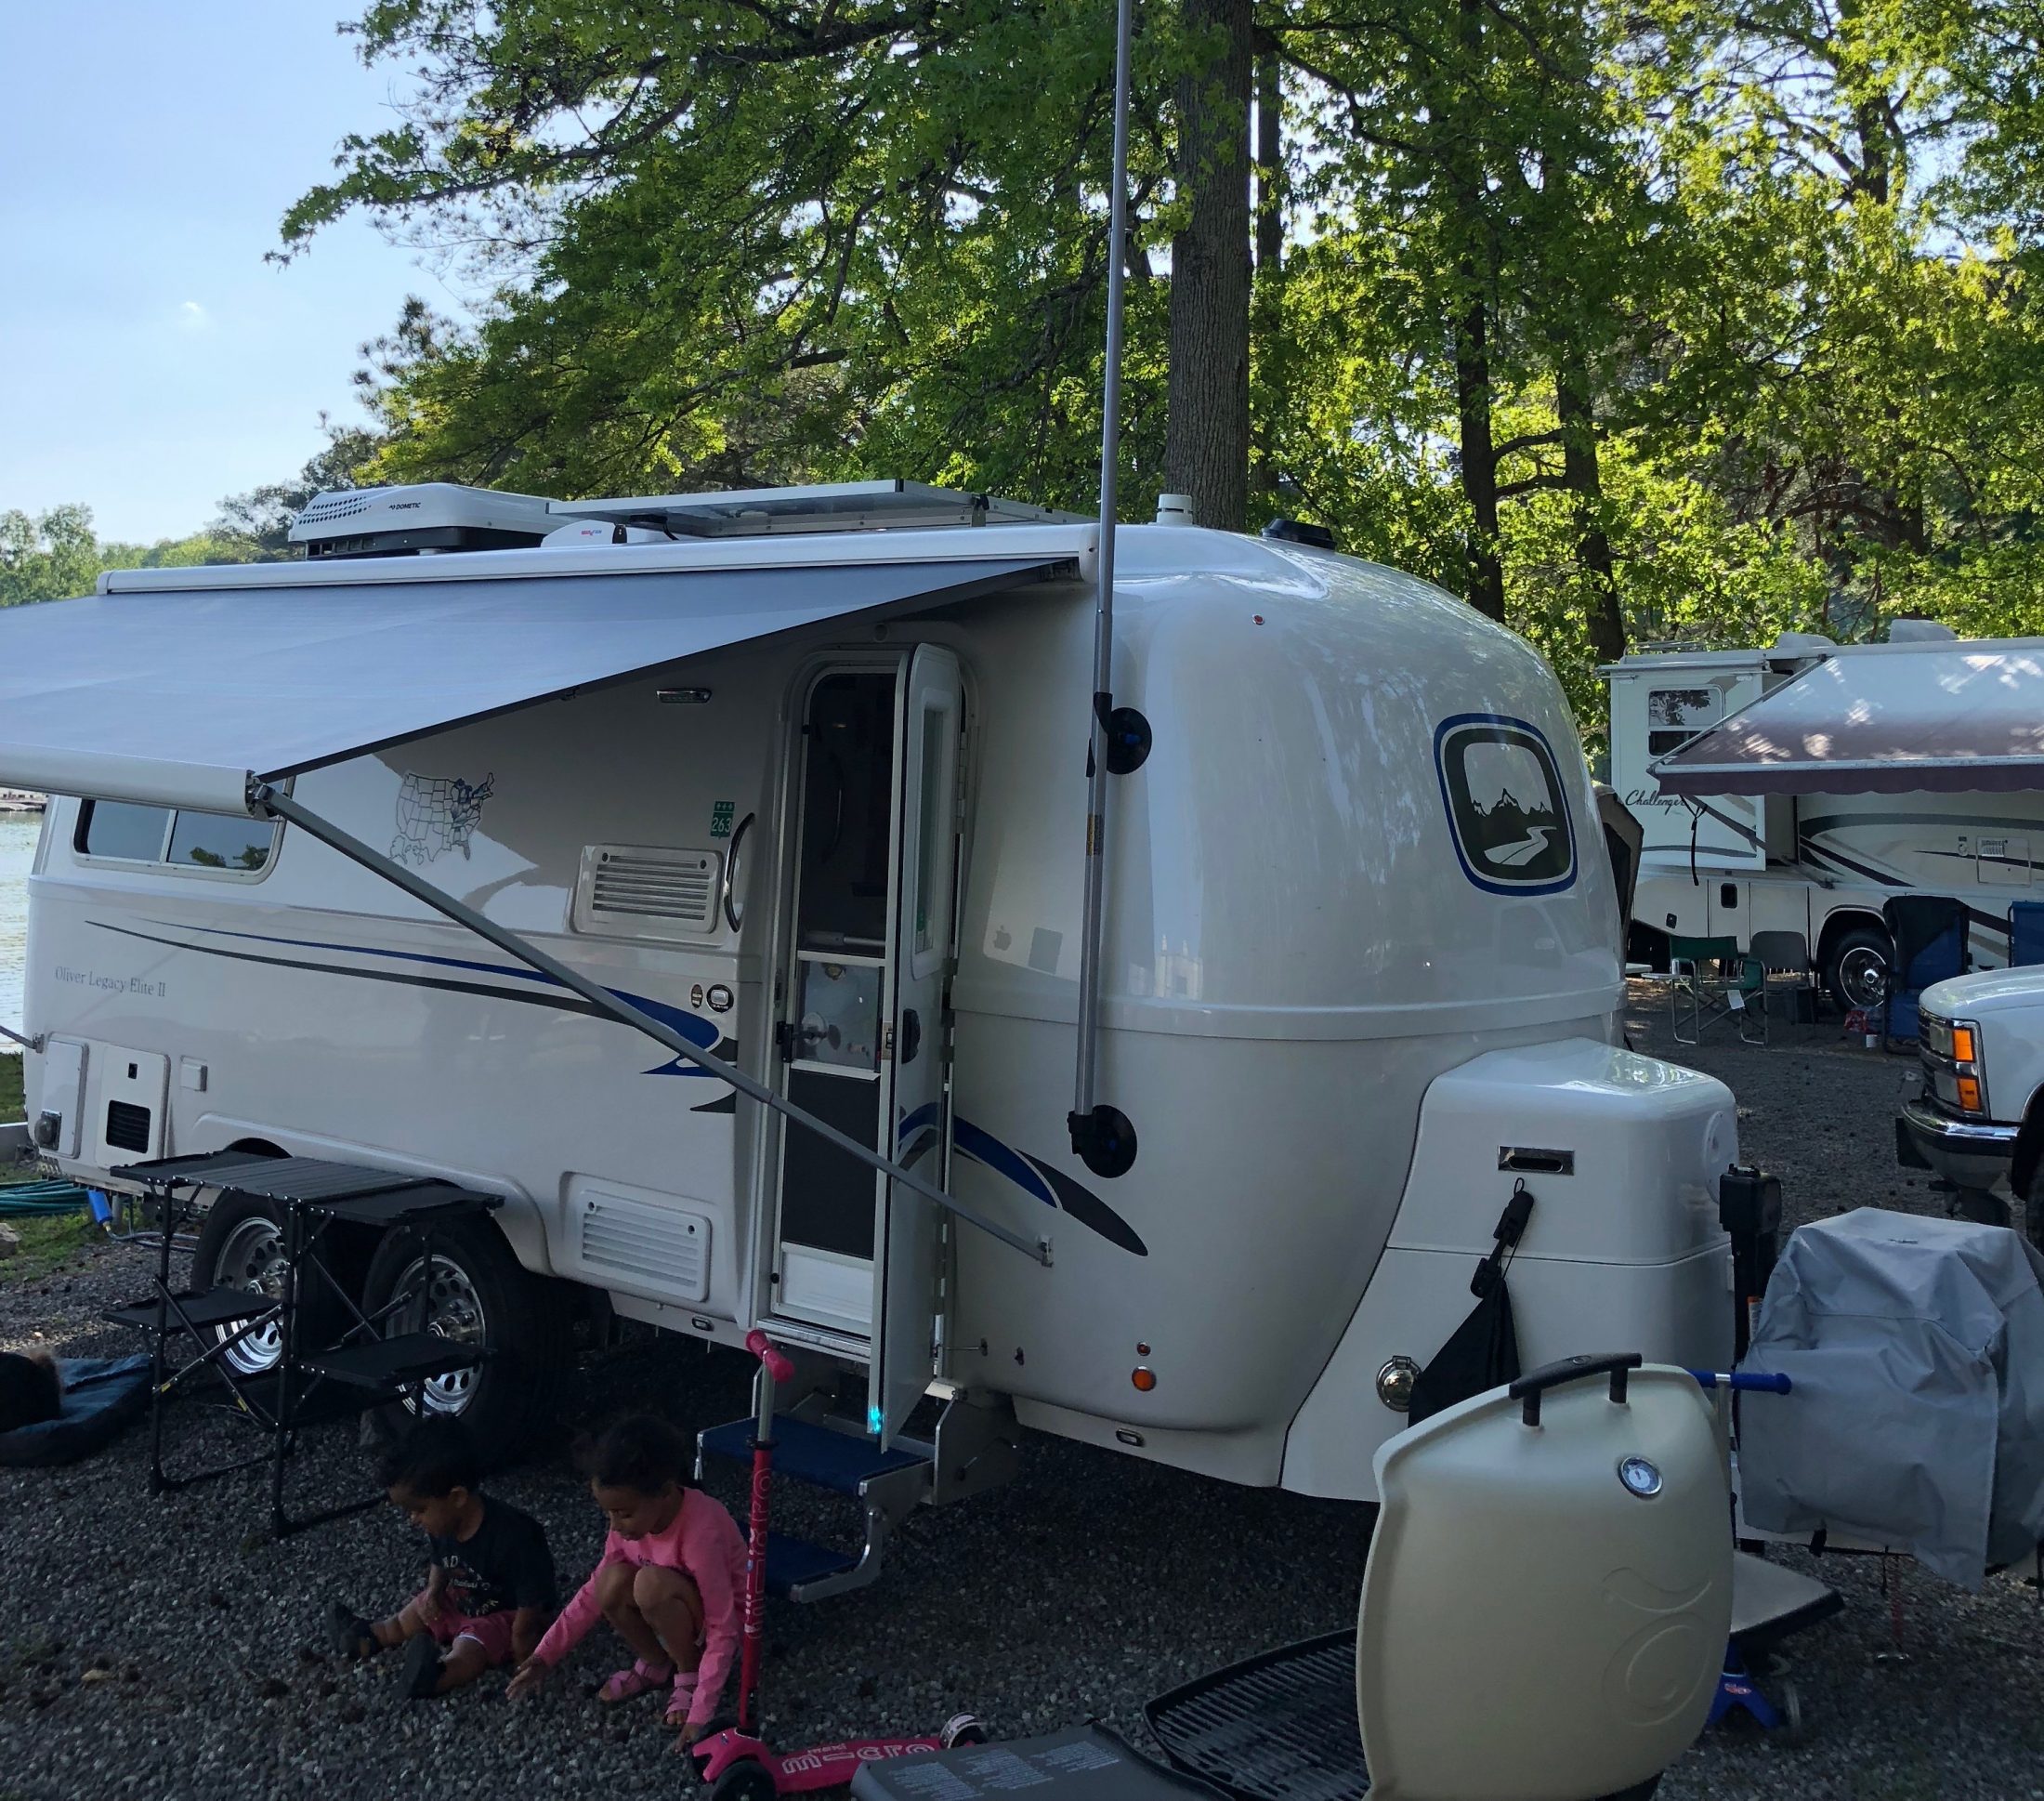
Used the Flag pole setup this past weekend and it worked great! Got it here: http://www.flagpolebuddy.com
1 point
-
Ursula and I can hardly add to the great compliments and comments above. Our first Oliver Owners Rally was everything we expected and more. Coy, you are the bomb! Your support team (all mentioned above) was phenomenal as well. Our thanks and gratitude to you and all the great people we met who made our memories so good! Cheers to Rally 2019!1 point
-
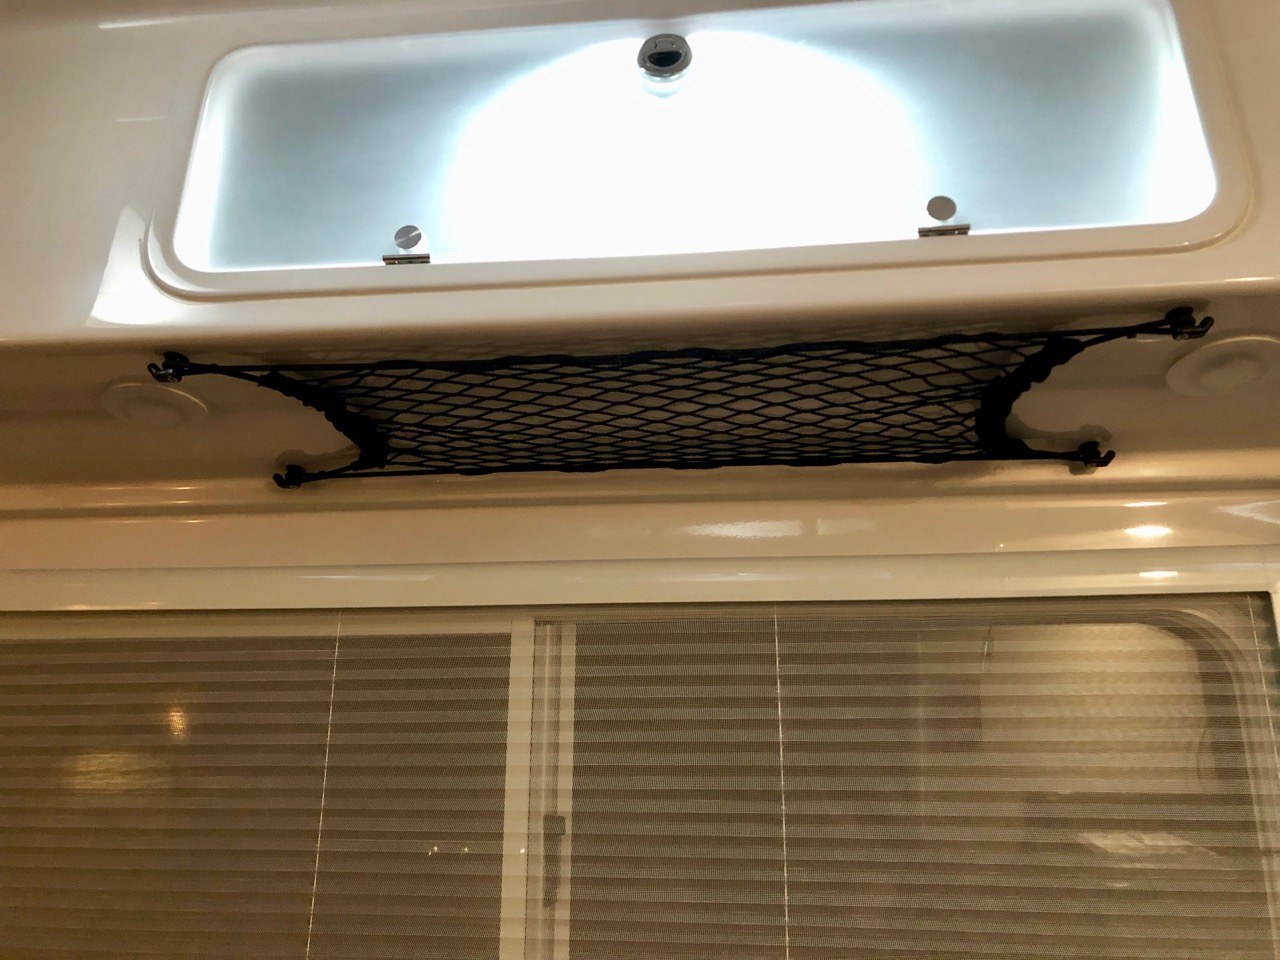
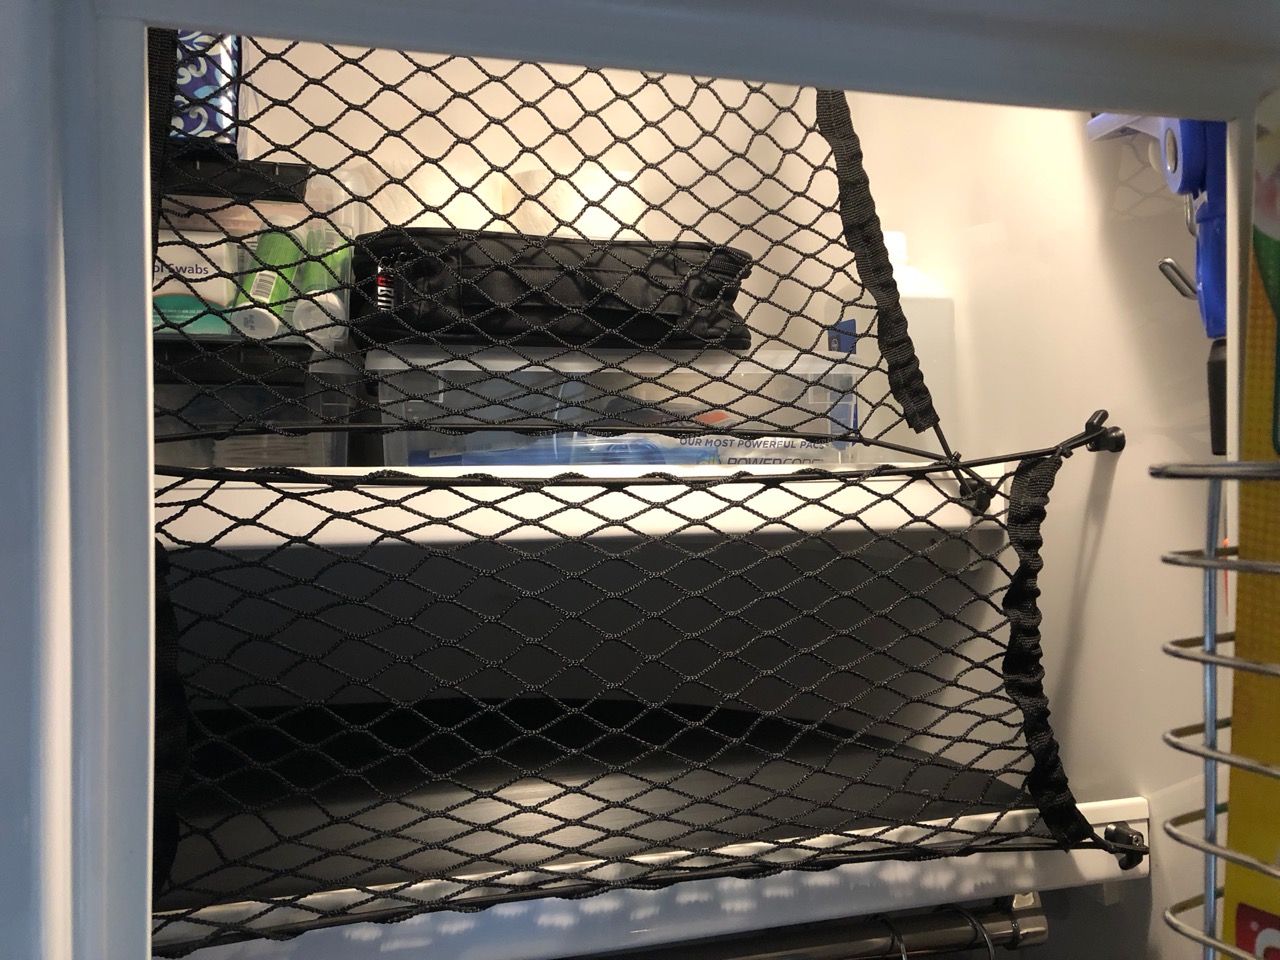
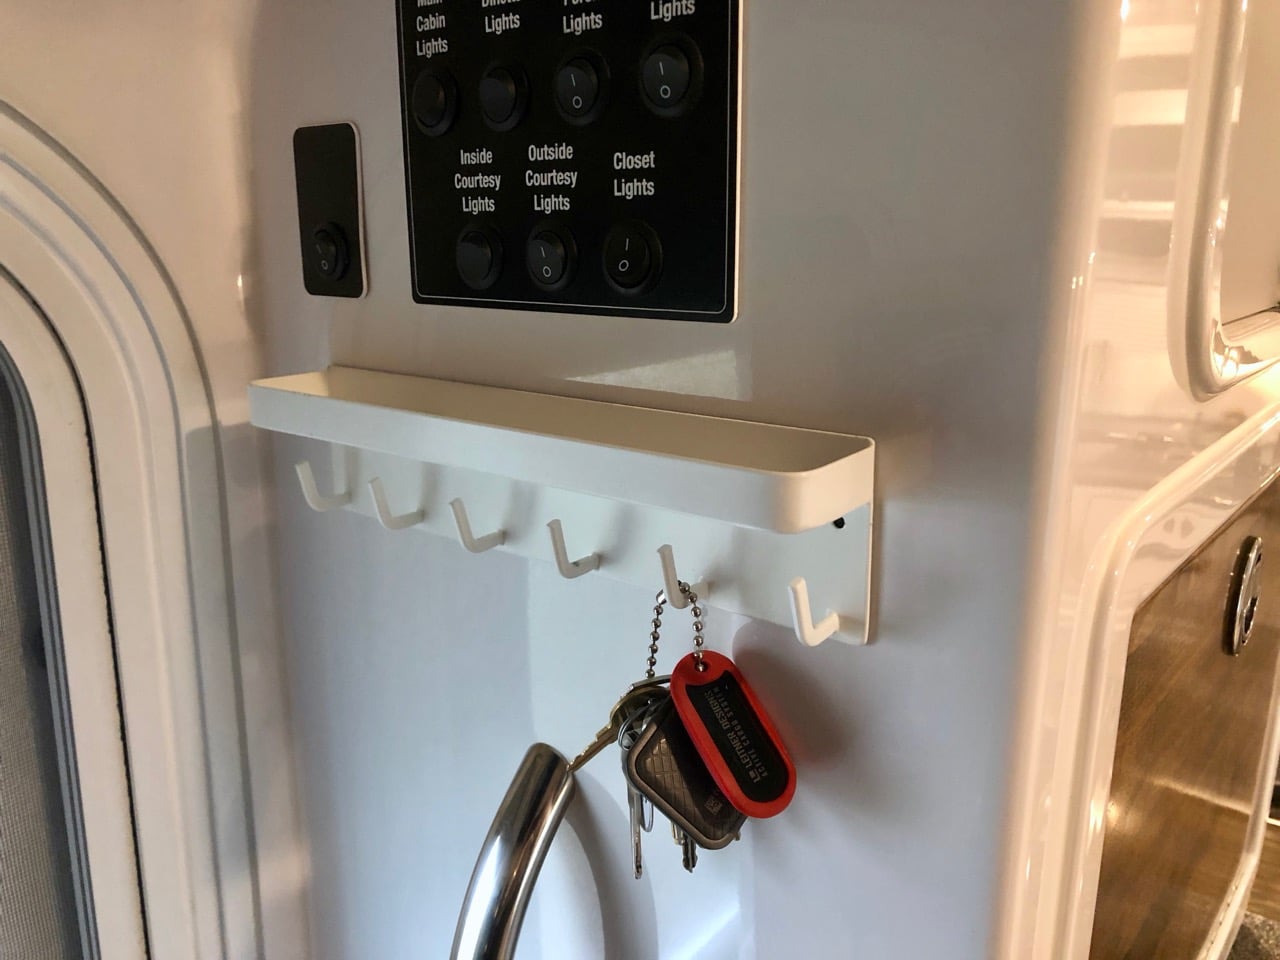
Someone asked about the cargo nets we installed. I bought several of these and two of these. They're a bit expensive for nets, but they're well made, and most importantly, the only ones I could find in those sizes. The smaller ones we have over the front door, over each bed, and then we also use two in the closet to hold in stuff on the shelves and one in the attic. One of the long ones I put under the street side bed to stash shoes, and the other went under the attic - that one we use the least. The one over the door gets hats and gloves and is the perfect solution for us for that stuff. The ones over the beds get down jackets or maybe a sweatshirt and also gets overflow clothes storage from the cabinets above. Under the attic is mainly a spot for day to day stuff that get's brought into the trailer, like maps and brochures. I just like having a place for all of that stuff so it doesn't go onto the beds or countertops. With such a small space to live in, I find that if there's a place for stuff within reach, then you'll use it and things stay pretty neat. We also bought a couple of these to go on the sides of the nightstand. They're great for stashing the phones while they charge. A few other organizing things we really like - This key holder is great by the door. We usually keep a flashlight on the shelf. These baskets for plastic wrap and stuff have really worked out well for us. I glued strips of 1x2 PVC to the door with 4200 and then screwed the baskets into that. Most everything we store goes into these stackable plastic buckets. They're small enough to fit places and to be able to see everything in them while still being large enough to hold stuff. I wish I could find some a little smaller that would fit more efficiently into the upper cabinets. Also, I noticed on this last trip that one of the handles had snapped so time will tell if these are rugged enough to last. For basement storage, I found that the rectangular milk crates fit perfectly and really keep the basement organized. In the very back, we have spare parts in several of the plastic boxes above, but in front of those you can slide one of these crates sideways, which will fill the back section of the basement and be flush to the corner of bed wall, and then two more will slide in lengthways to fill the front section of the basement efficiently. One crate gets water hookups, one gets electrical, and the one in the back gets water filters and things we don't pull out often. The plastic boxes are accessible from the interior hatch that we had installed under the nightstand. Being able to just pull out the two crates in the front when we have hookups and working from them really beats sorting through stuff in the basement. Our grey water hose and propane hoses go in the bumper. Chocks and blocks go in the bed of the truck, along with the grill, stove, fire bowl, and chairs.
1 point
-
The manufacturer of the on-board jacks does NOT recommend using the jacks to lift the weight of the trailer even as a temporary use for changing a tire. New model trailers have an extended steel sub-frame assembly that provides ample room for a jack point either in front or behind the tire that needs to be changed. Older models may not have enough room on the steel sub-frame to use a lifting jack(scissor jack or bottle jack). If this is the case you will simply locate the main frame rail point closest to the tire that needs to be lifted and use a lift pad that will help to distribute the weight. Owner’s manuals may state different things as changes occur every year in the RV industry. There are several reasons why these changes might occur from year to year or even in the middle of a production cycle. Sometimes new industry standards/codes are introduced and changes have to occur to meet these new standards. Sometimes components are discontinued and replaced with a new model that may not work just like the previous model. Sometimes companies simply make a decision change within the company to market their product differently. These are just a few of the reasons that change happens and why your owner’s manuals may be different. Product information is provided by the manufacturer of the component and is available online in the Oliver University section. Oliver strives to provide accurate information to every customer. The product information on components not manufactured by Oliver is dependent on the manufacturer or supplier supplying us with the correct information and as such may not always be 100% accurate.1 point
-
Bill, We started in Colorado Springs then went to RMNP (Grand Lake side) mostly on I-70. Then we went to Black Canyon on I-70 and Hwy 50 through Montrose. From Black Canyon we went to Mesa Verde down Hwy 550 through Ouray and Silverton to Durango. This road is not for the faint of heart. Some parts over the passes are very narrow with no guardrail. We encountered all kinds of weather, sunshine and t-shirts, rain and sweatshirts, sleet and snow - all in a very short time. There was a moderate amount of traffic and the speeds are slow. Very scenic. We enjoyed the drive and would do it again. Pulling the trailer posed no issues. Mike1 point
-
June 21, 2008 - The Outlaw Oliver Elite Looking Forward Twin Bed Interior Leaving the Factory March 16, 2014 - The Outlaw Oliver Elite II Tali inside the new Twin Bed Model Steve and the Fur Crew1 point


-
Recent Achievements
-


")


")


")


