Leaderboard


Popular Content
Showing content with the highest reputation on 05/19/2018 in all areas
-
If noticed some members on the forum have colored maps in their signatures. You may be asking yourself "How do you do that?". Start by visiting this website: http://visitedstatesmap.com Select the states you have visited and choose the size you wish and click DRAW MAP. *Please be considerate to others views on the forums by keeping the image around medium size* Next you will be taken to a new page and underneath the map where it says "Copy and Paste Image URL:" Copy the url, for example mine is: http://visitedstatesmap.com/image/xlg.jpg - this is not your map unless you have been to zero states. This is an example. Now go to your forum Signature to edit and put in the url: It should now look like: If you need help please discuss below. Credits: @SeaDawg, @KarenLukens
 1 point
 -
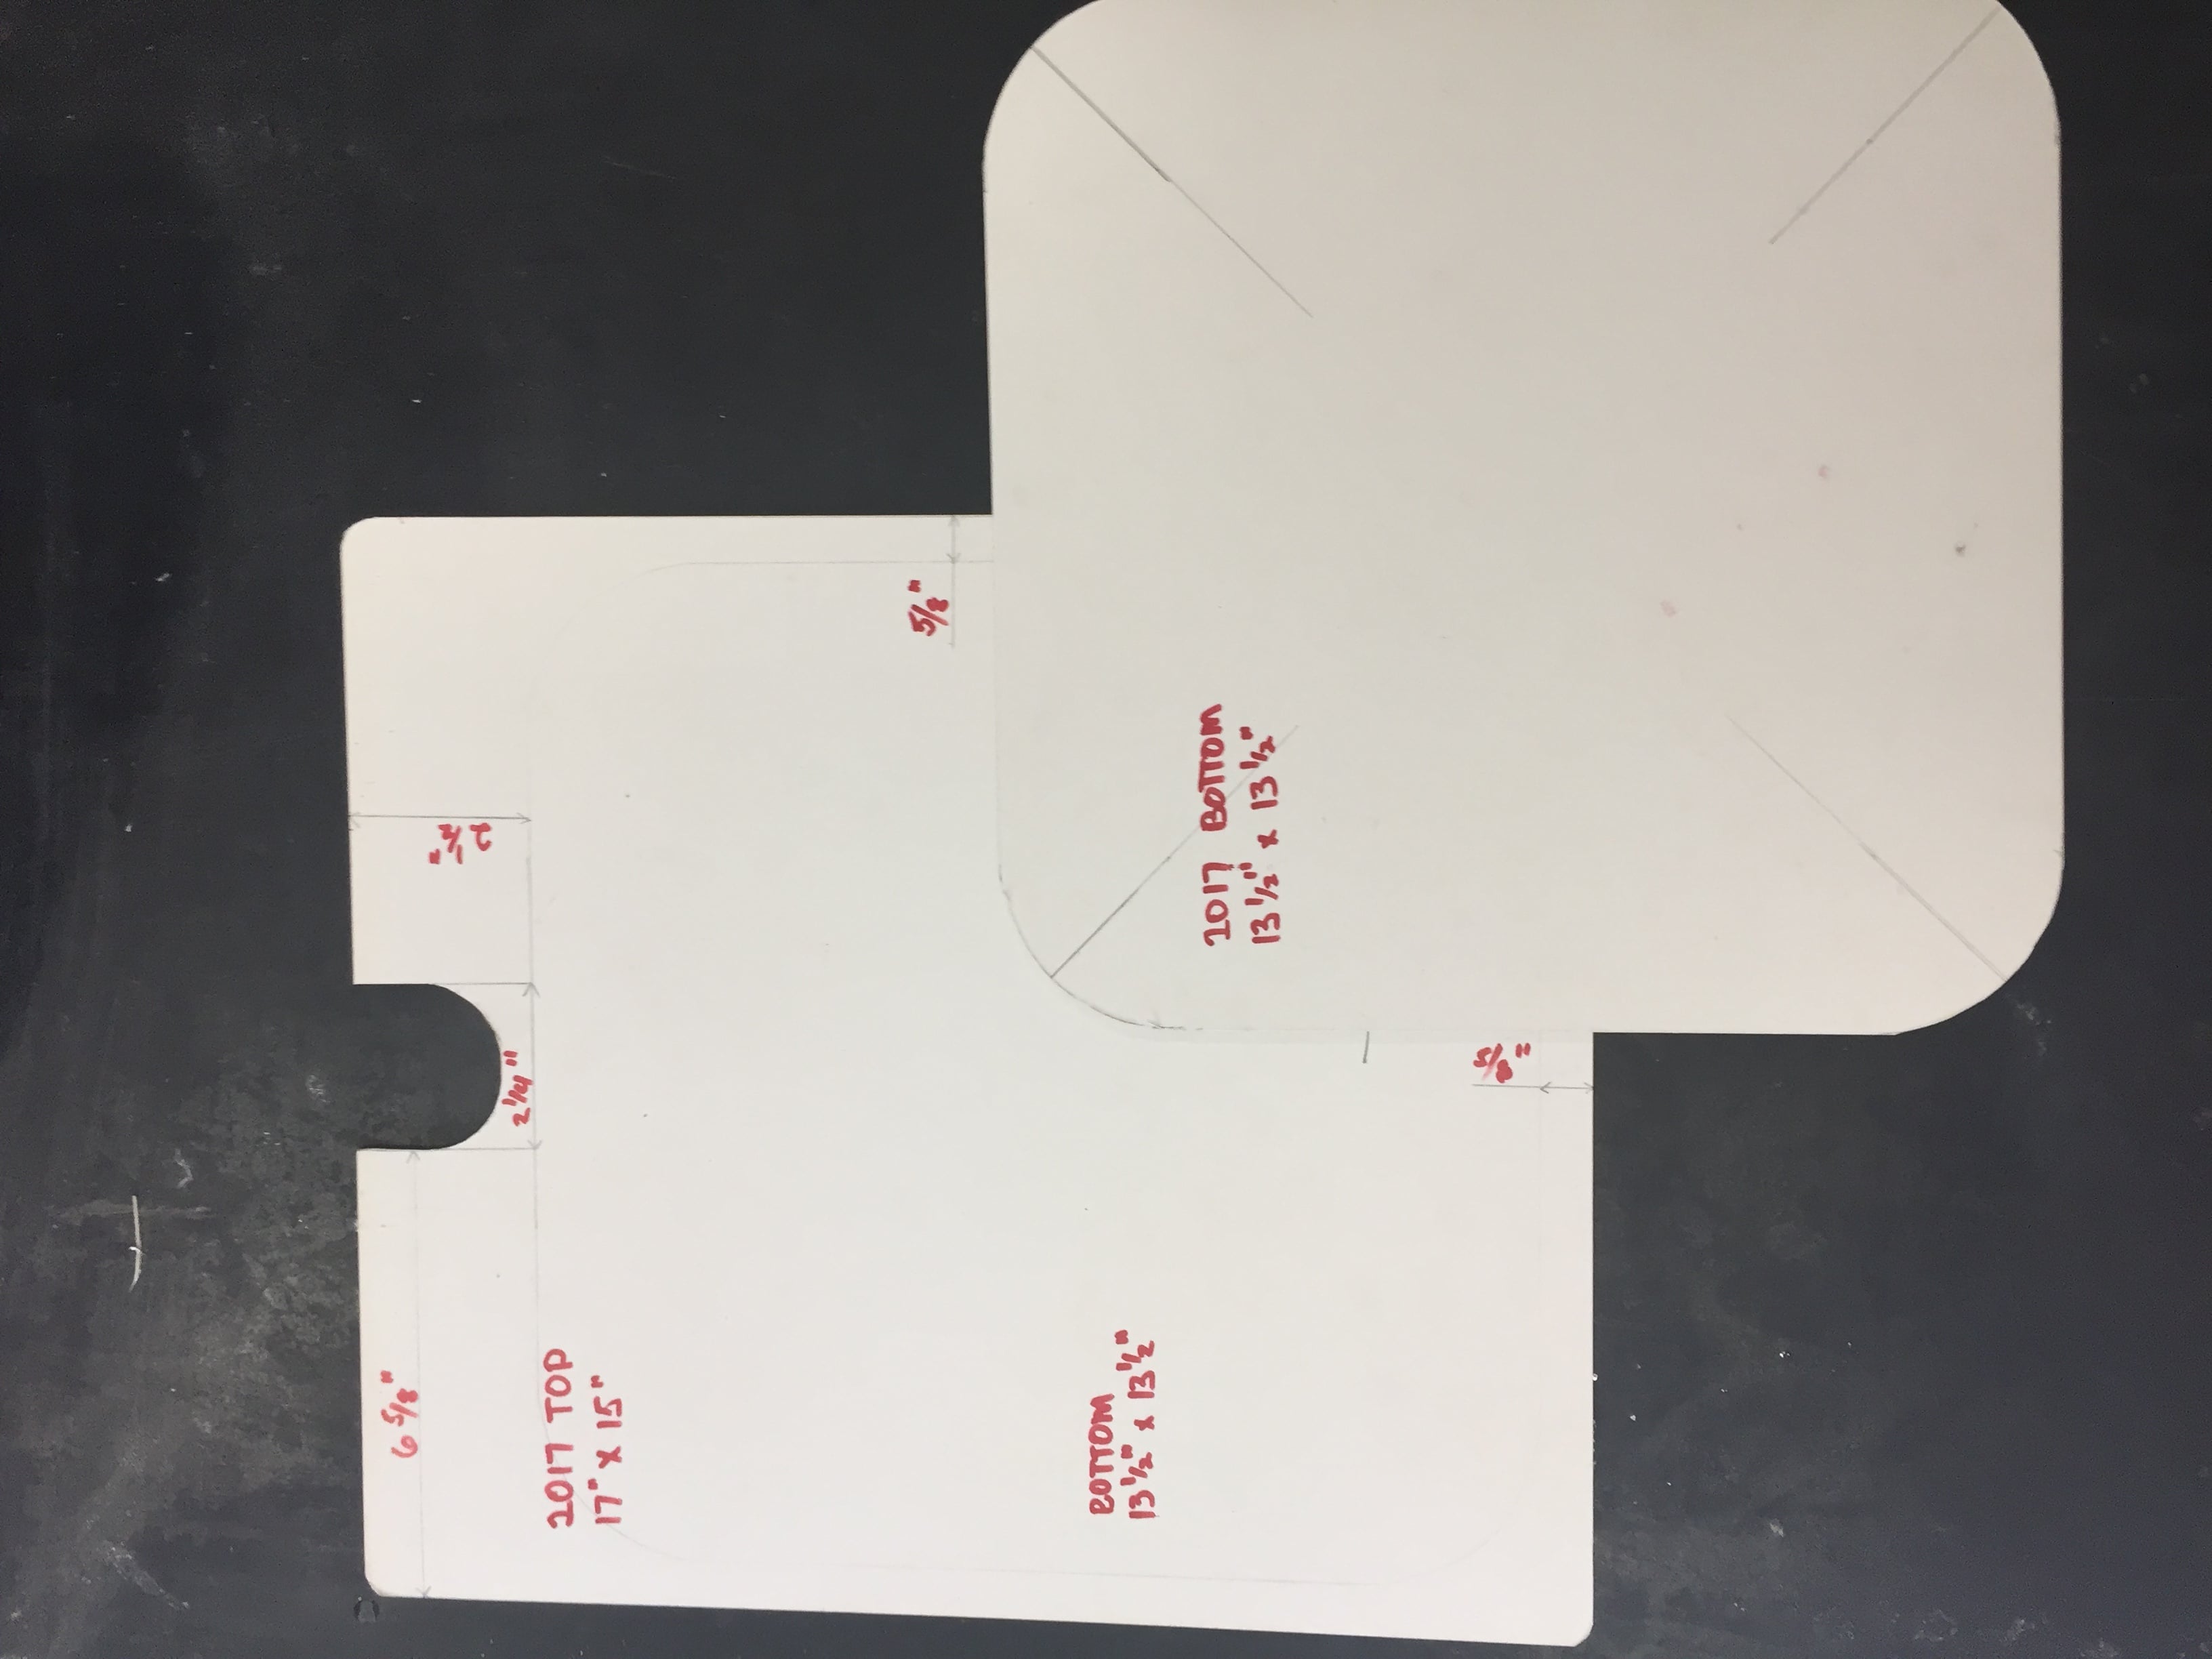
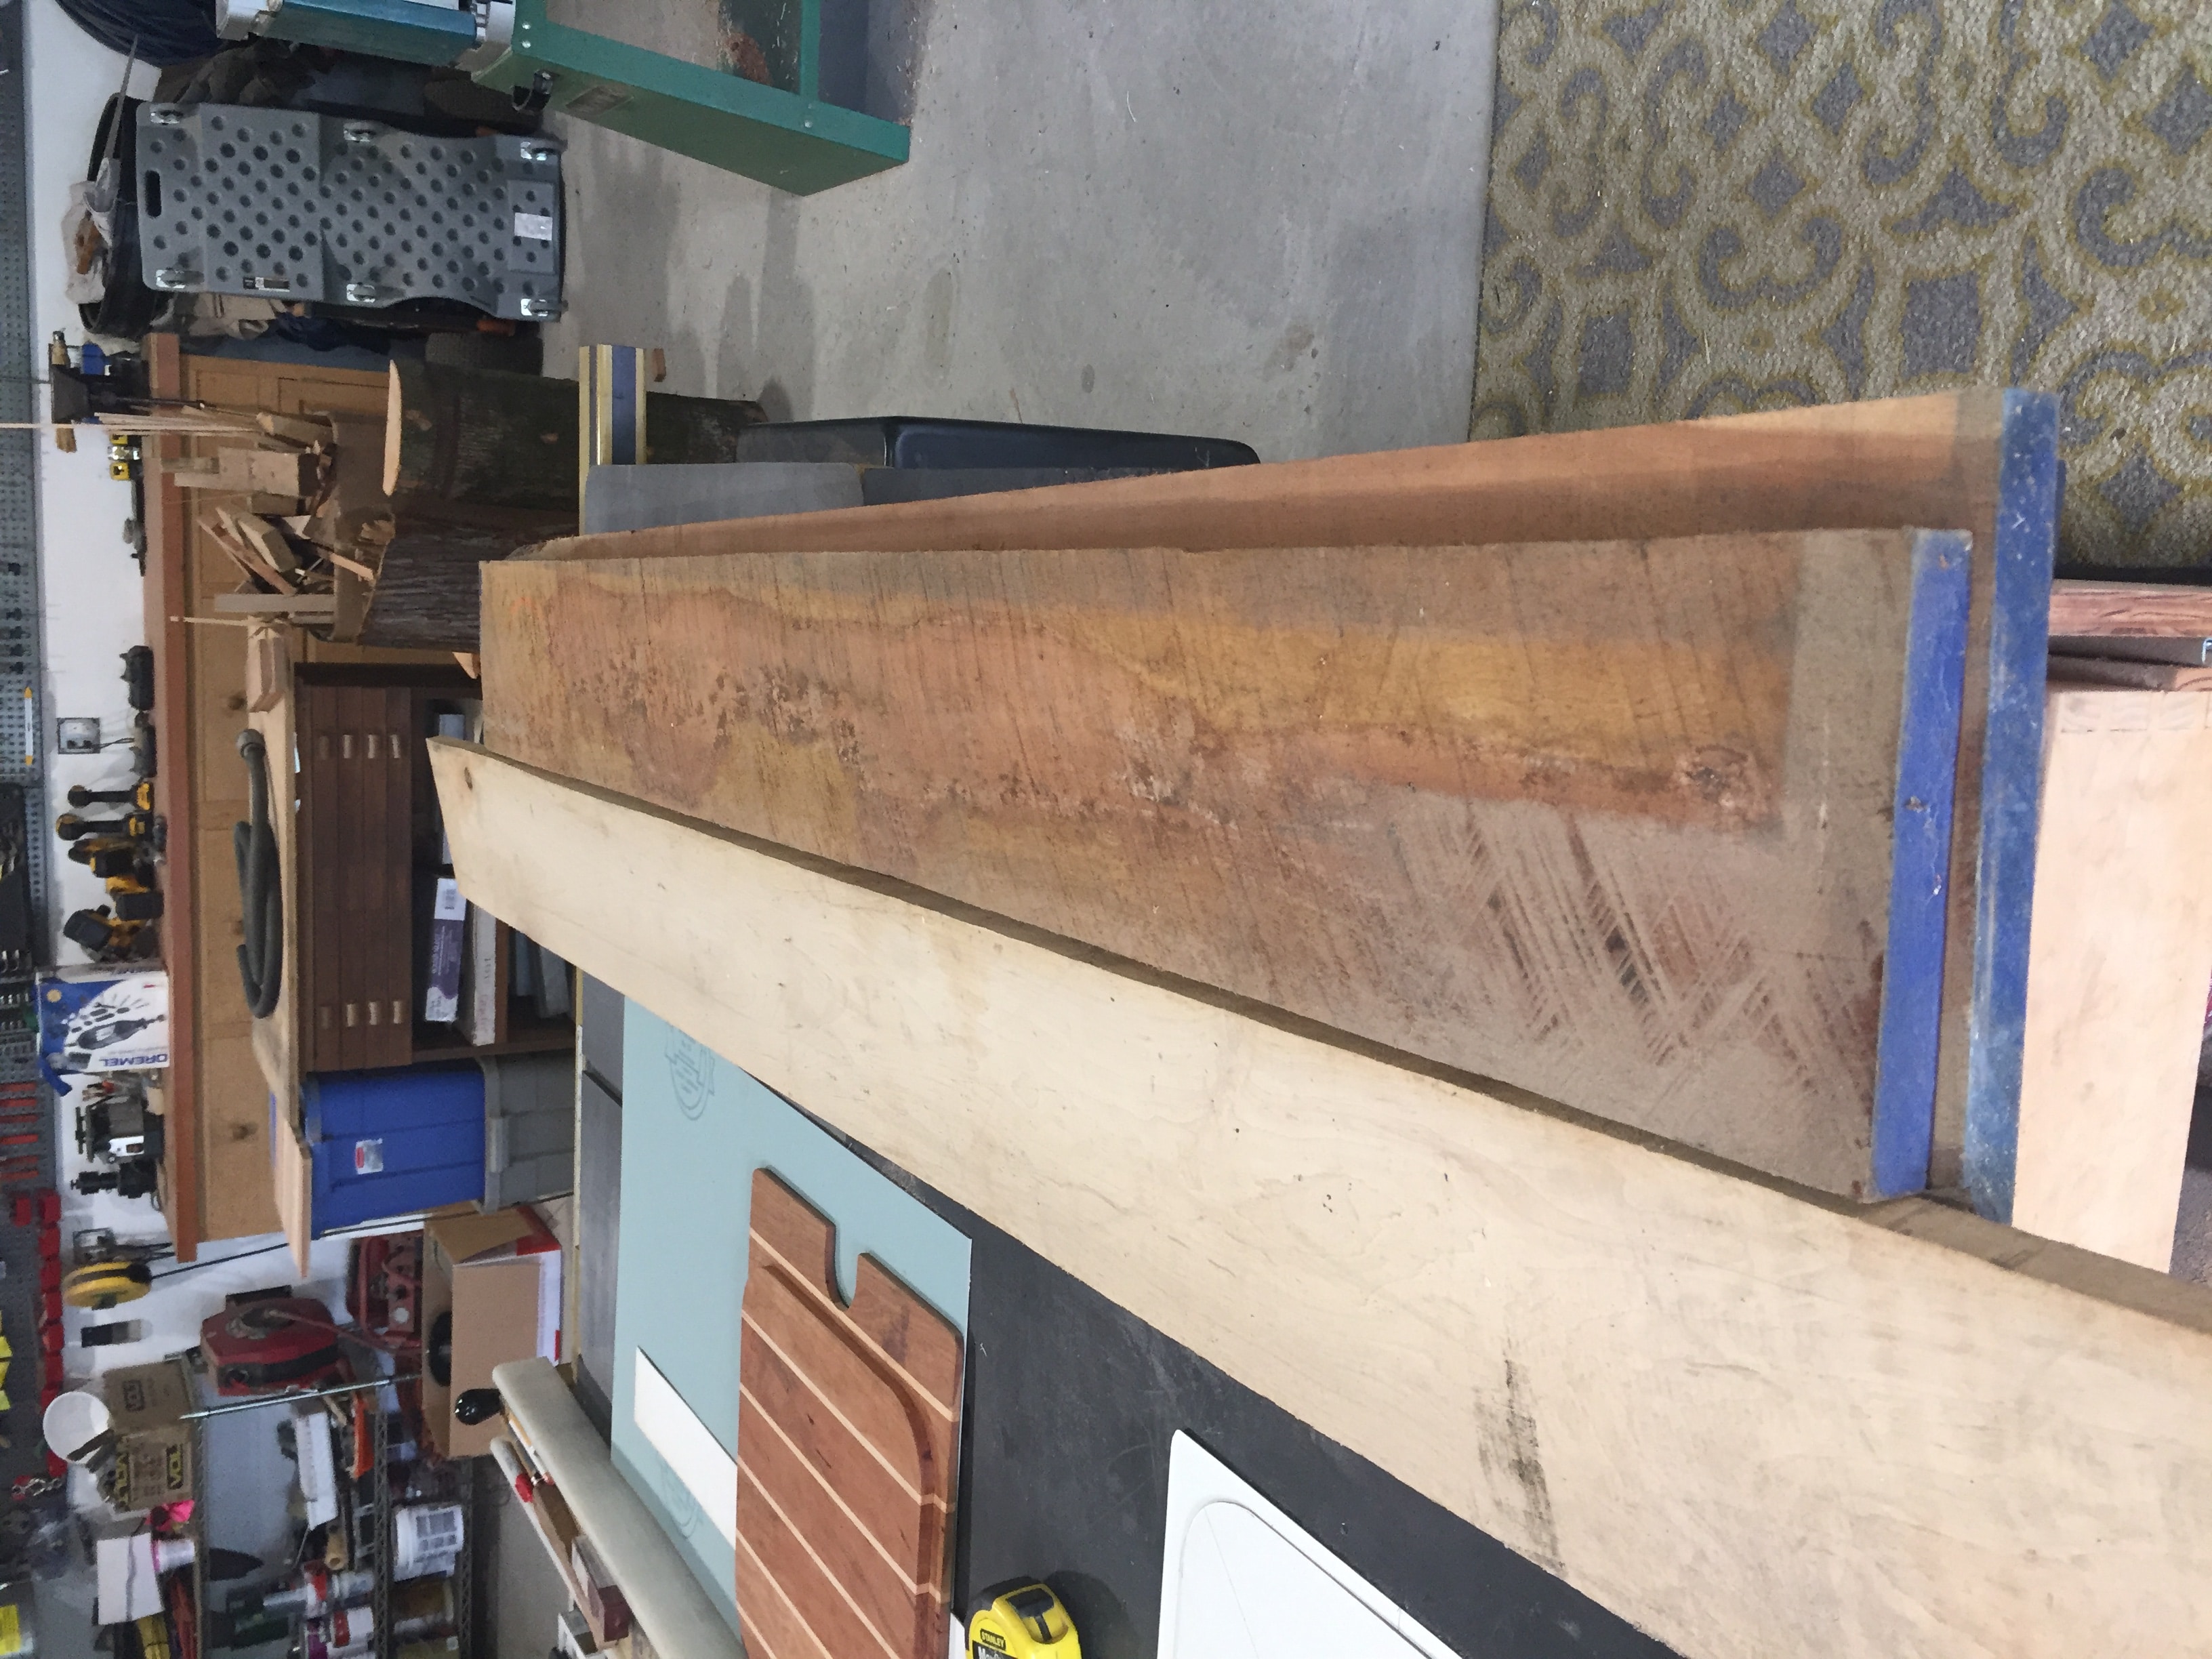
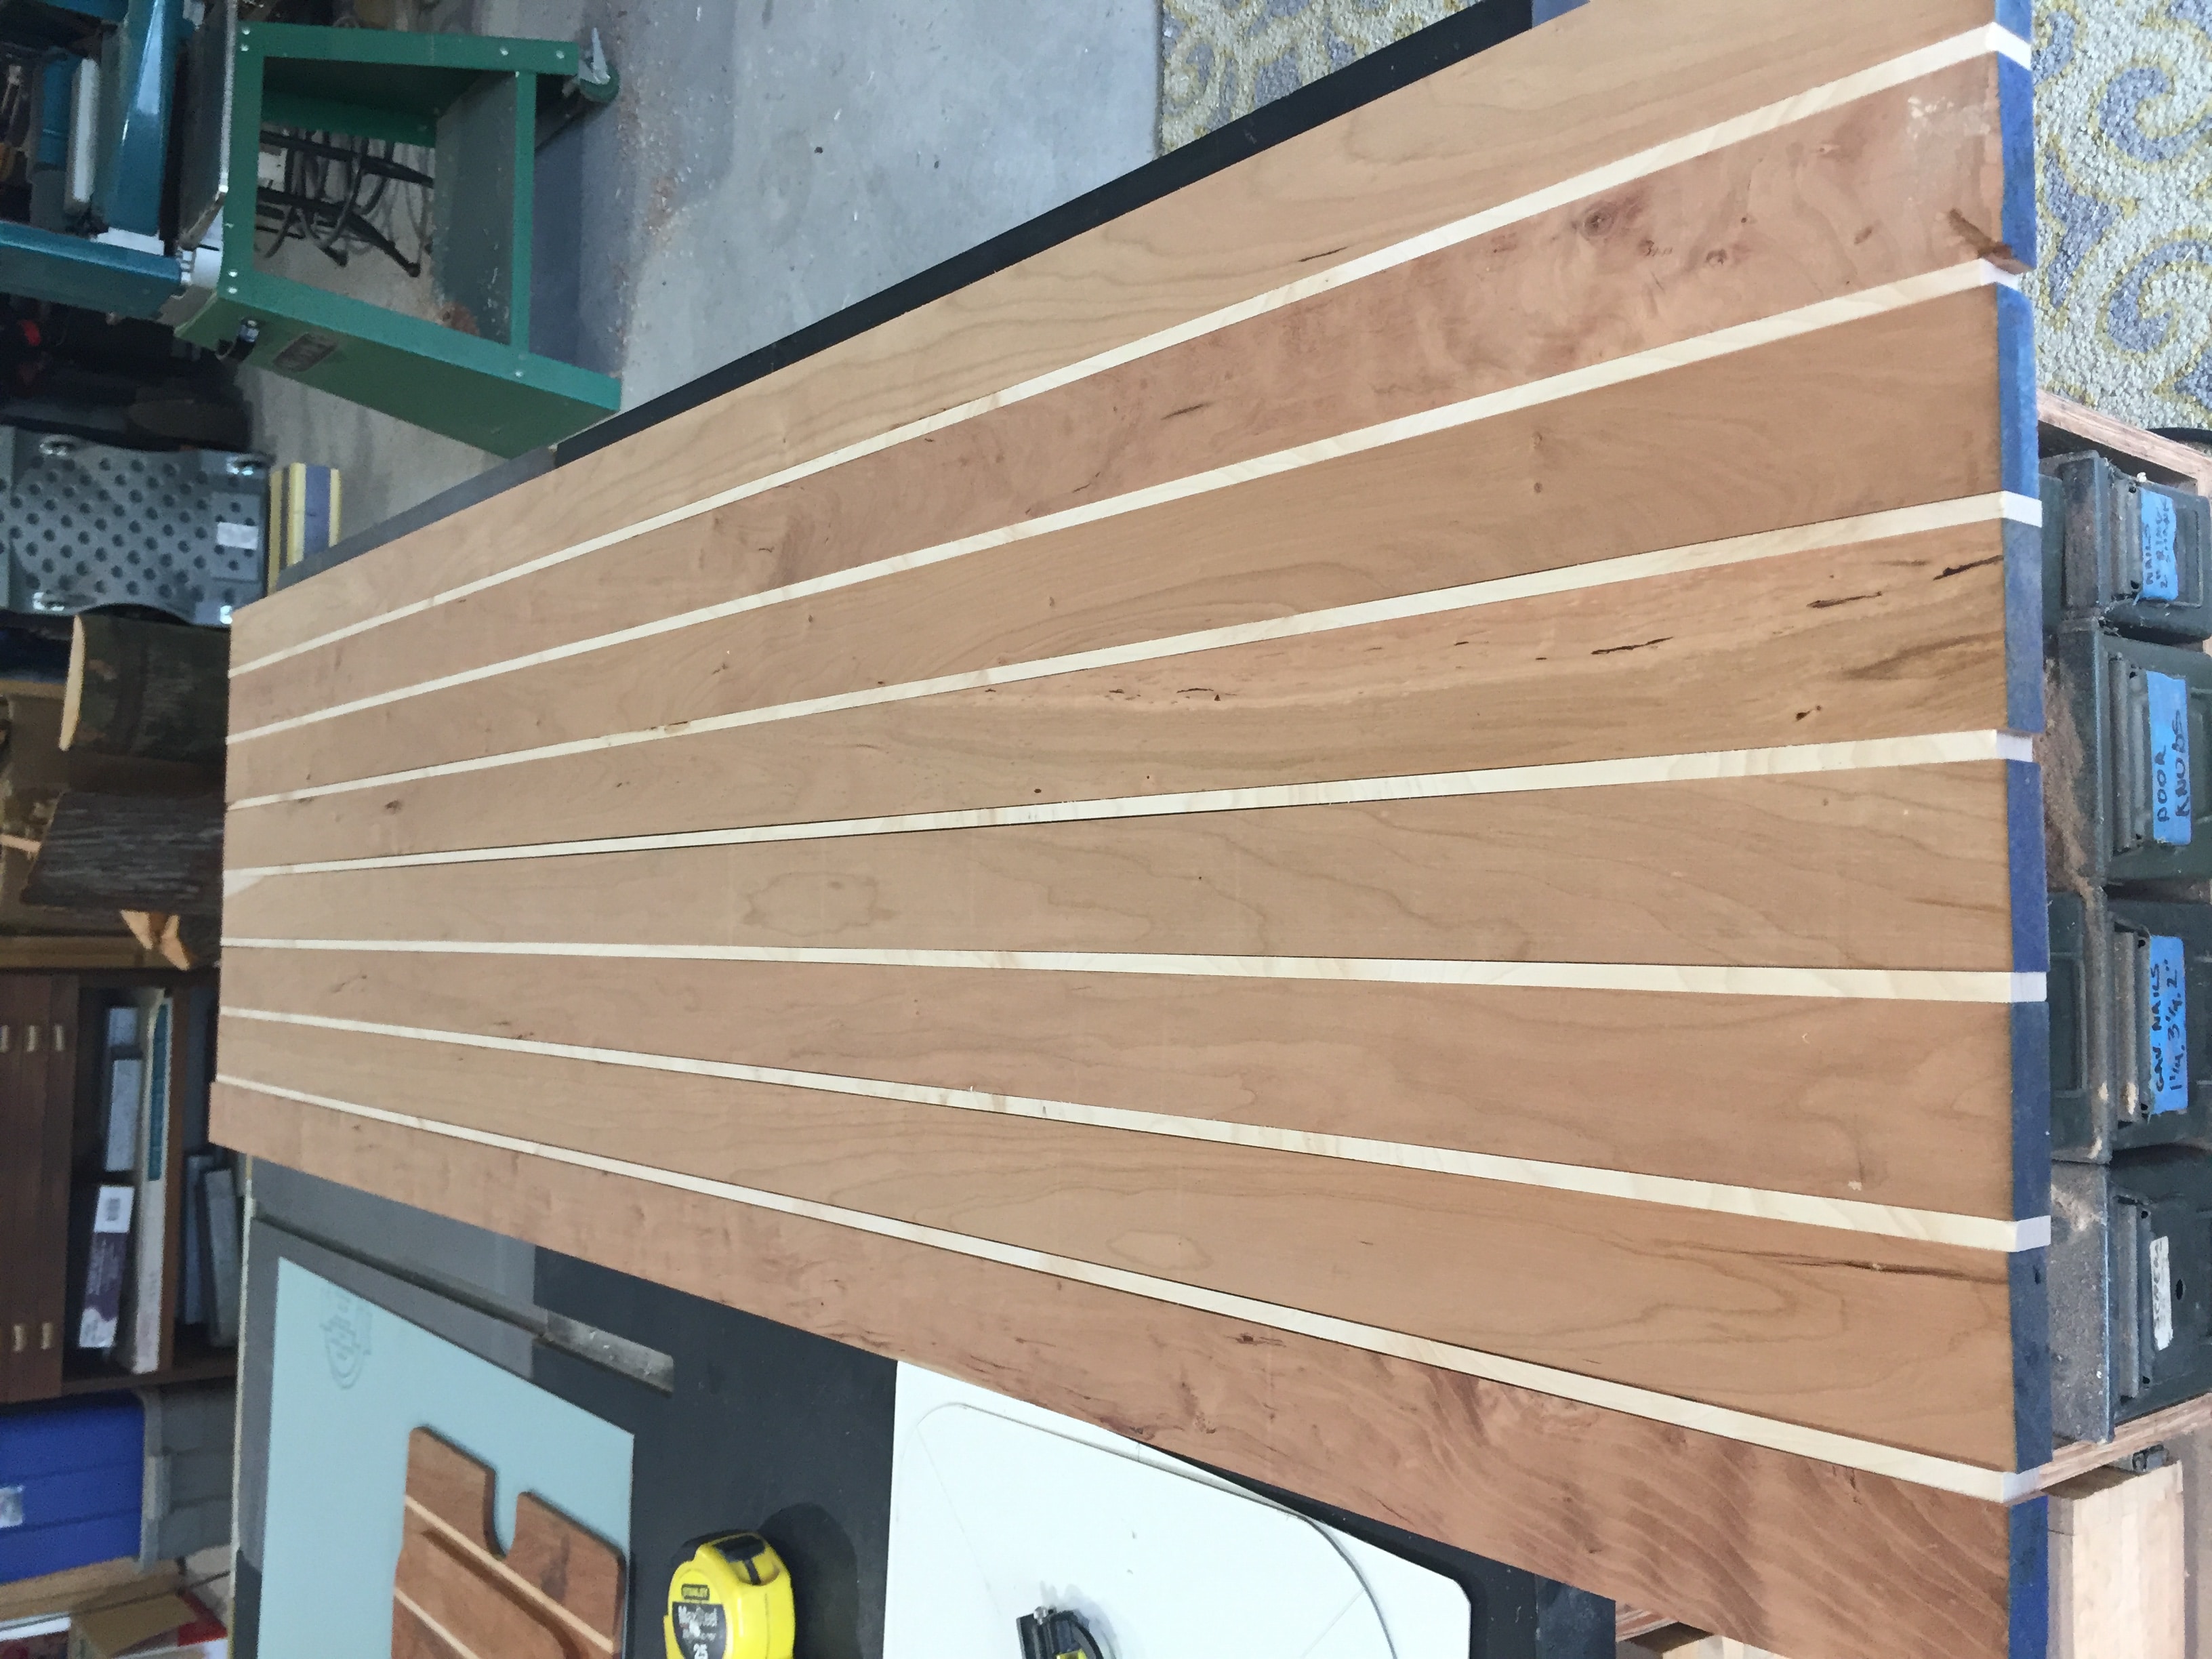
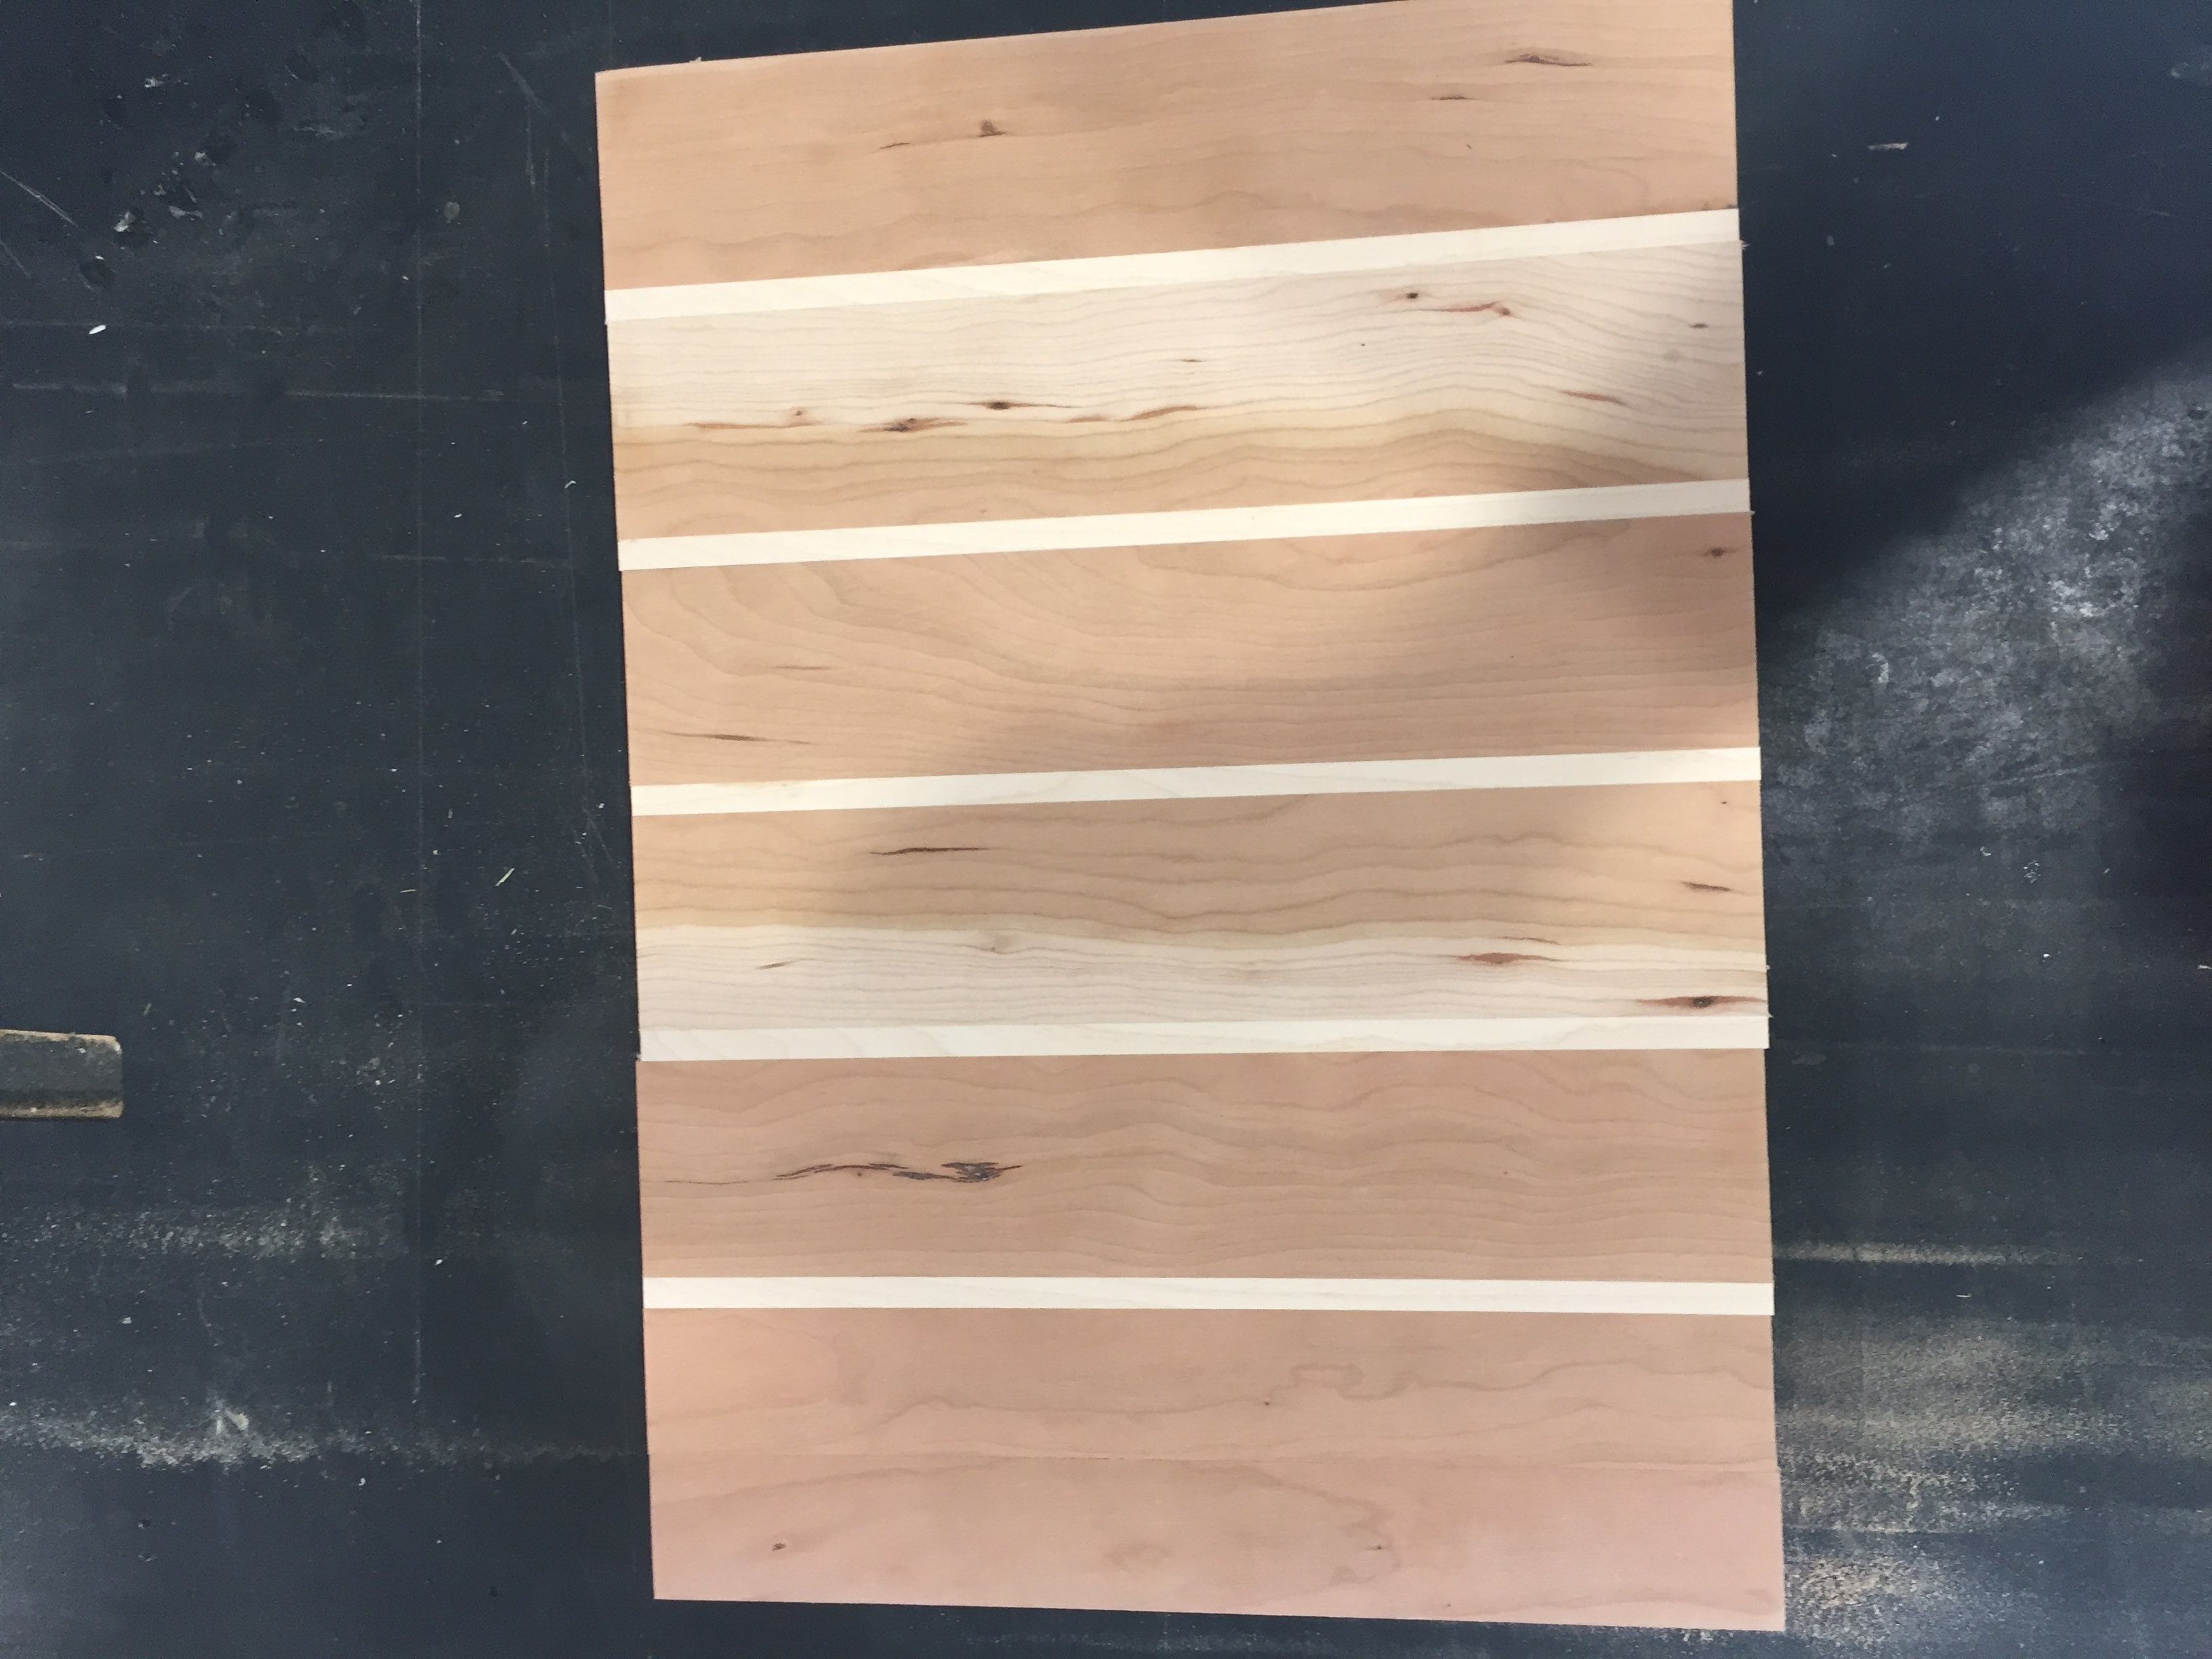
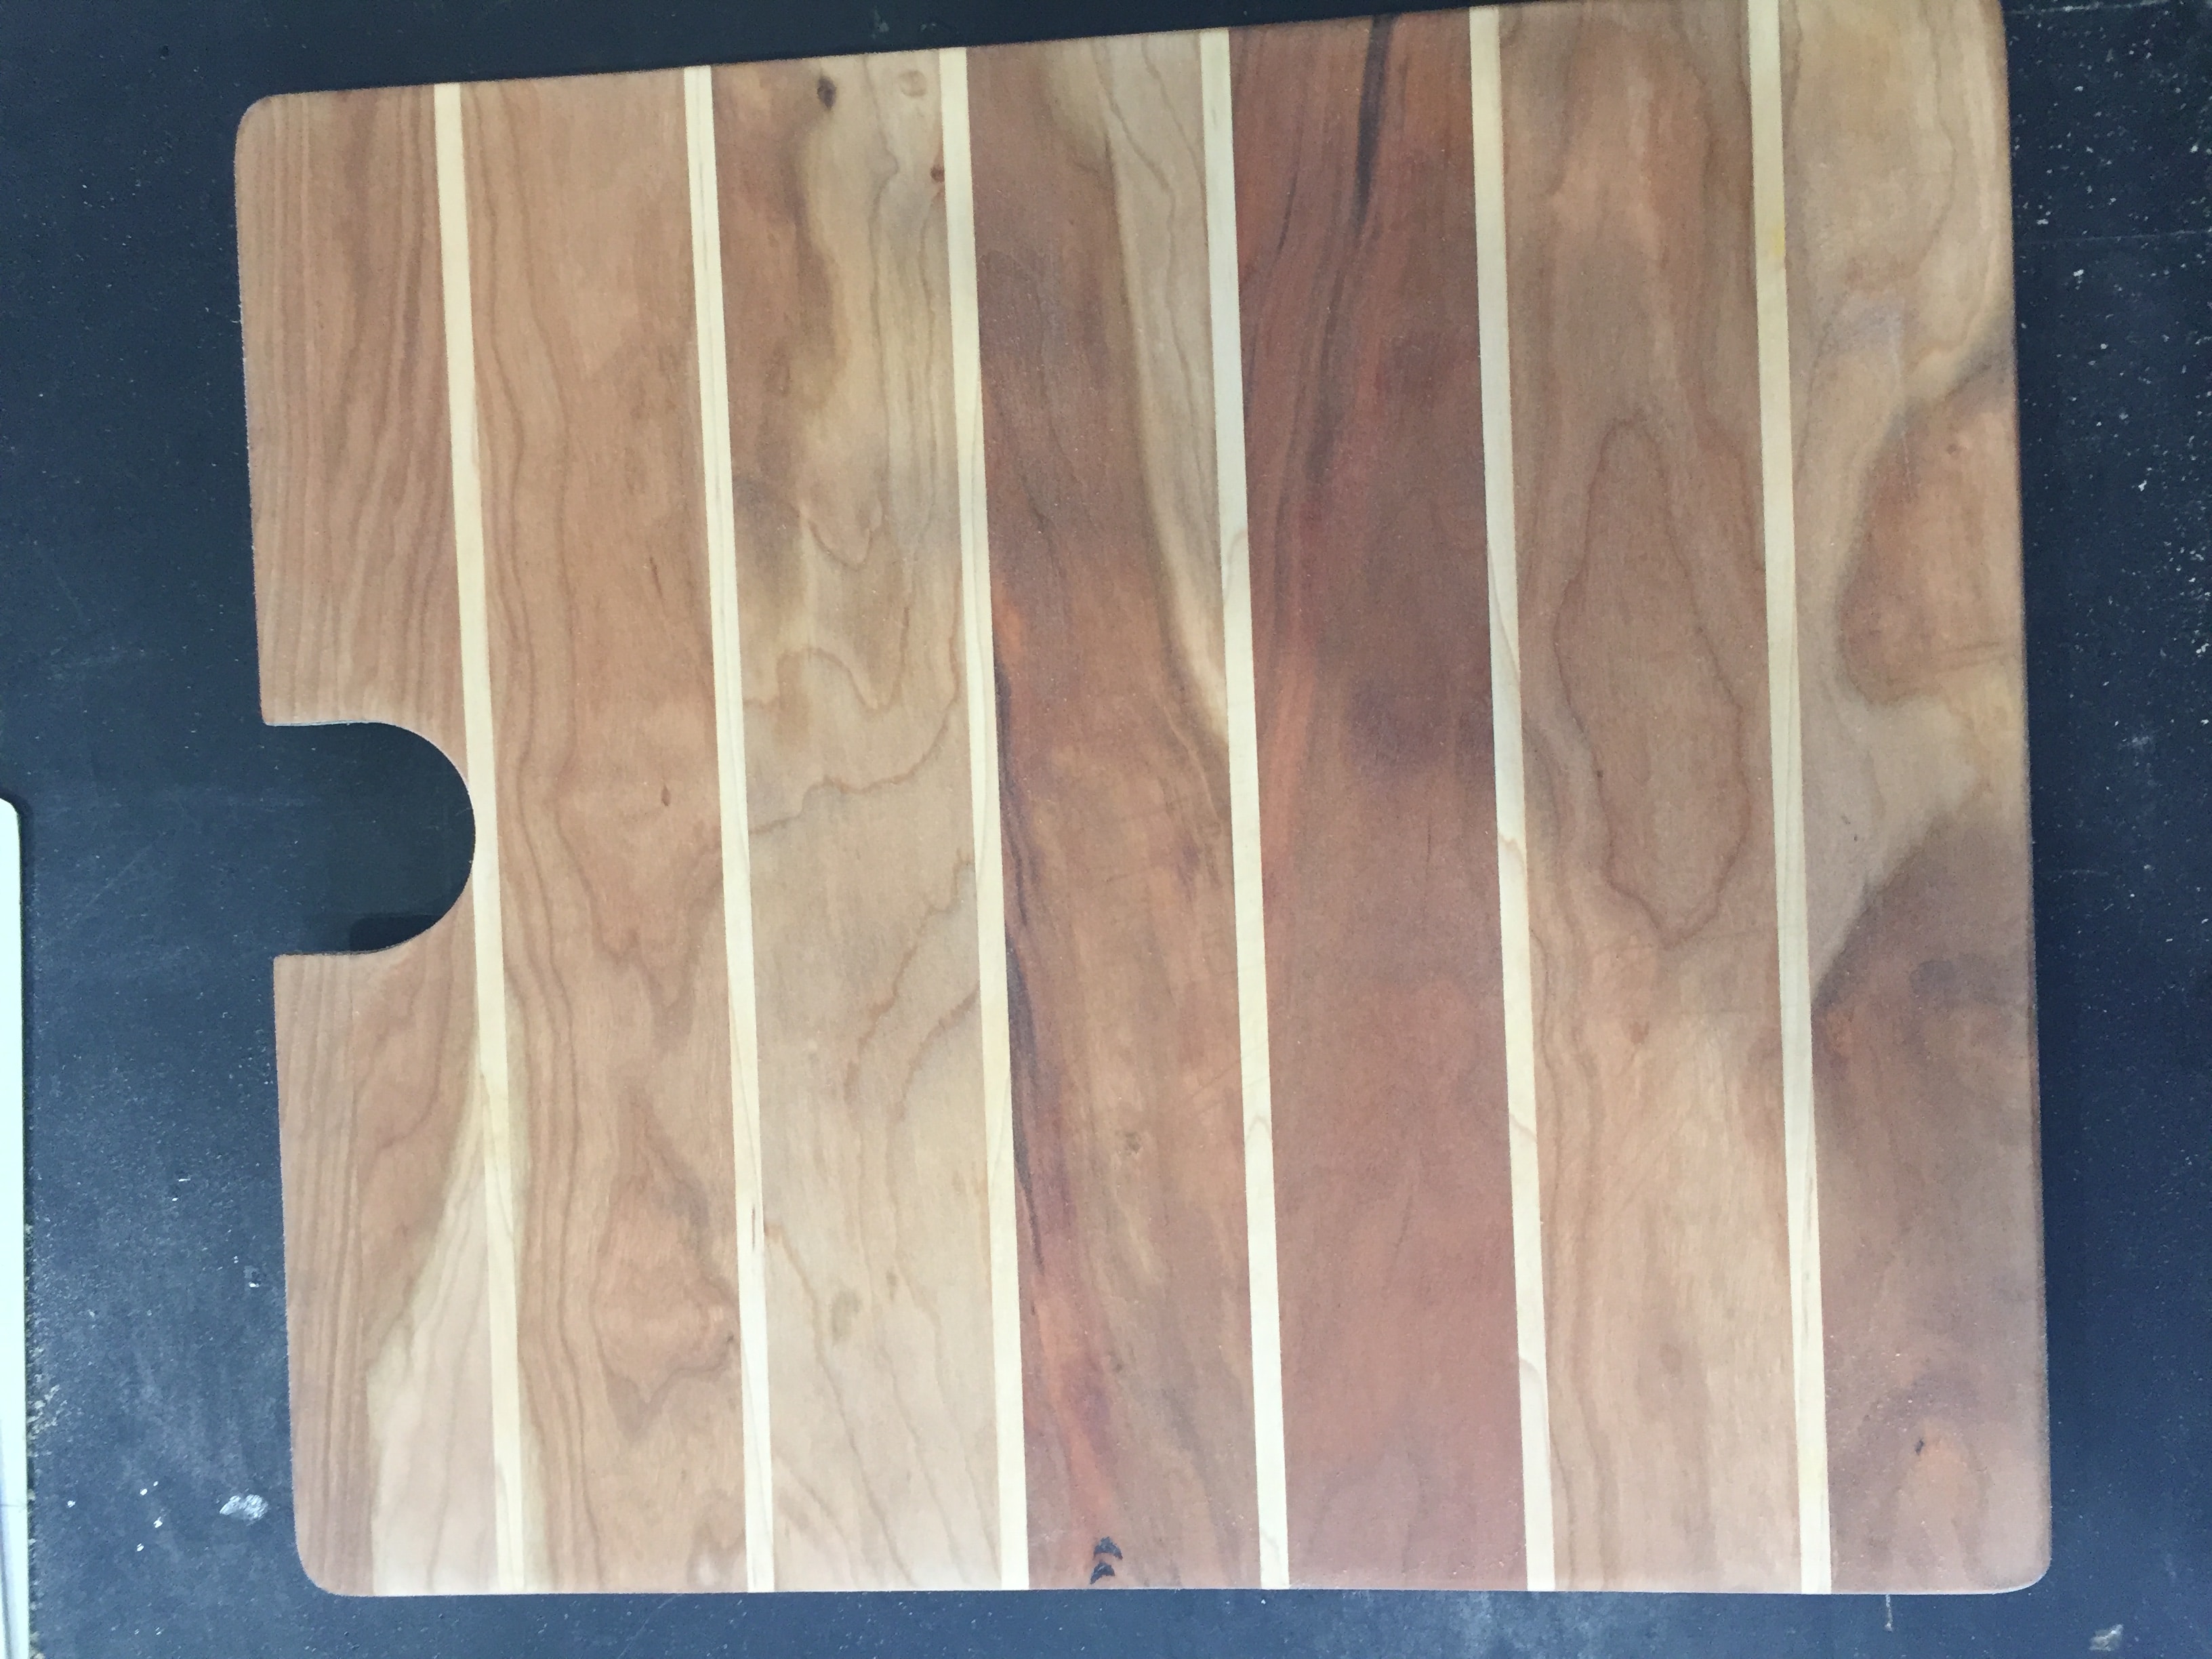
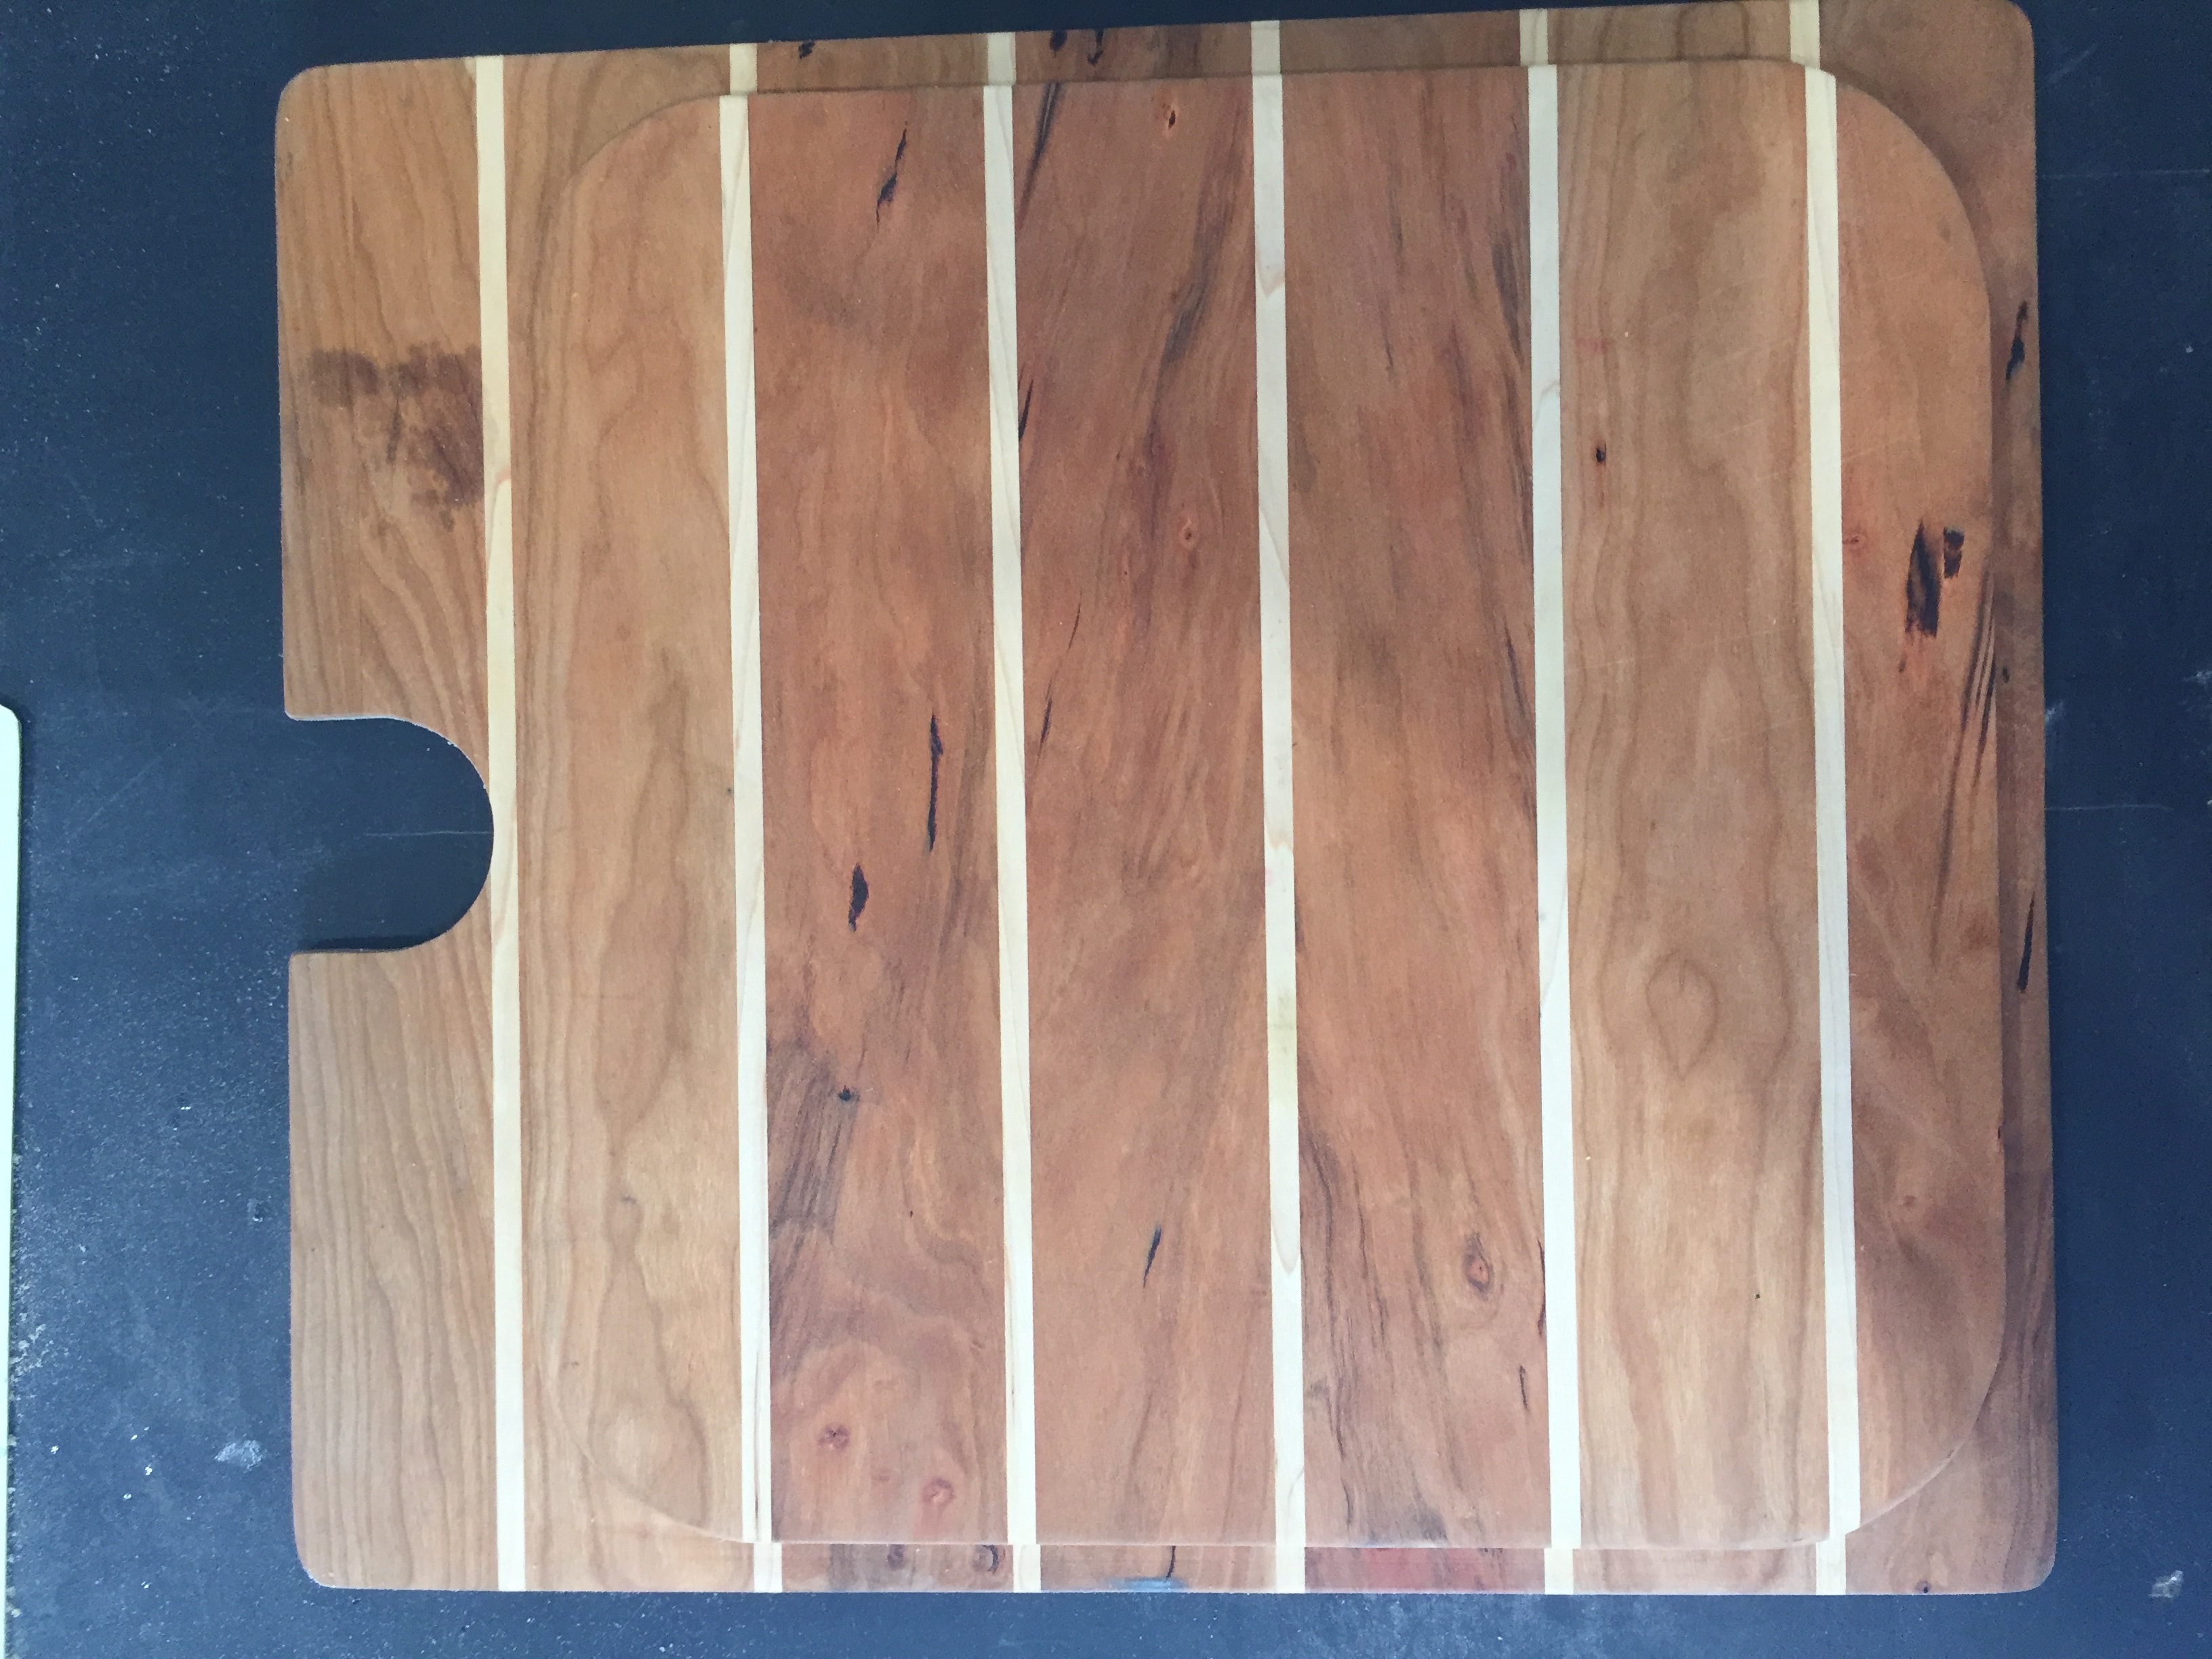
For those of you interested in my craft of making cutting board, I though I would do a quick overview of the process. It all starts with templates for the sink, in this case 2017 Elite II. A top cardboard template that is cut to the finished size, faucet location/cut-out and corner details are establish. I second template is made for the bottom which is use to hold the cutting board in place by dropping down into the sink bowl. Once these are checked for fit, I can make as many as I need knowing they will all be the same. Rough saw 1 1/4” thick Cherry and Maple are select and measured for total board feet need to build all the cutting boards. The board are then milled on the jointer to establish a flat bottom side and then passed through the planer for a perfectly flat board. The final thickness is 7/8”. These are then ripped down on the table saw – Cherry to 2 1/3” and the Maple to 1/4”. [attachment file=IMG_0859.JPG] With all the milling done the boards are then arranged in the ship decking pattern and glued together with food safe, water proof glue. These large panels are then cut to rough size cutting boards. Using the top template the corners are rounded and faucet location are cut on the bandsaw. The final size is cut on the table saw for last minute adjustments. The bottom template is then use to mark the bowl location and the wood is removed from around the edges at the router table. This allows the cutting board to sit inside the sink and not move. Last step is sanding and more sanding and more sanding. 80, 120, 220 and 320 grit sandpaper are used. The final step is a coat of mineral oil and they are done. It takes about 3 days to make a run of 4 cutting boards. Some people have ask why I do this? And think I am a bit crazy. It's not for the money for the wood alone cost what I charge. It is for the love of working with wood and created something I can share with others who value my craft. Over the next few week I will begin shipping these board to their new Oliver Owners. I hope they enjoy them as much as I did making them.
1 point
-
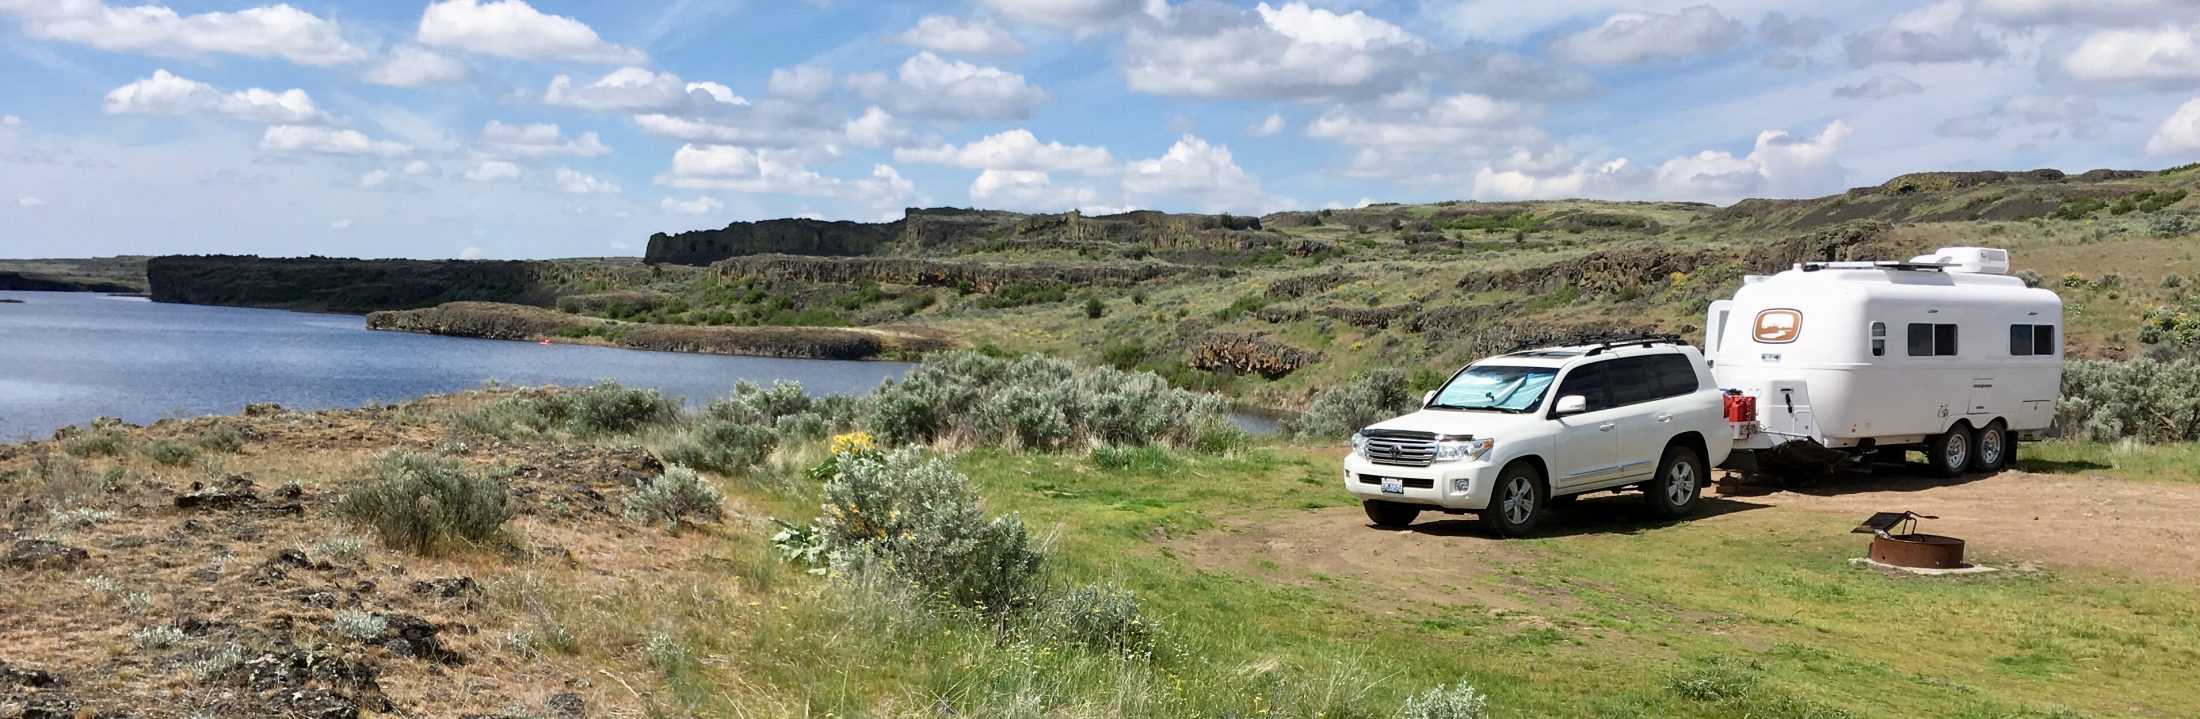
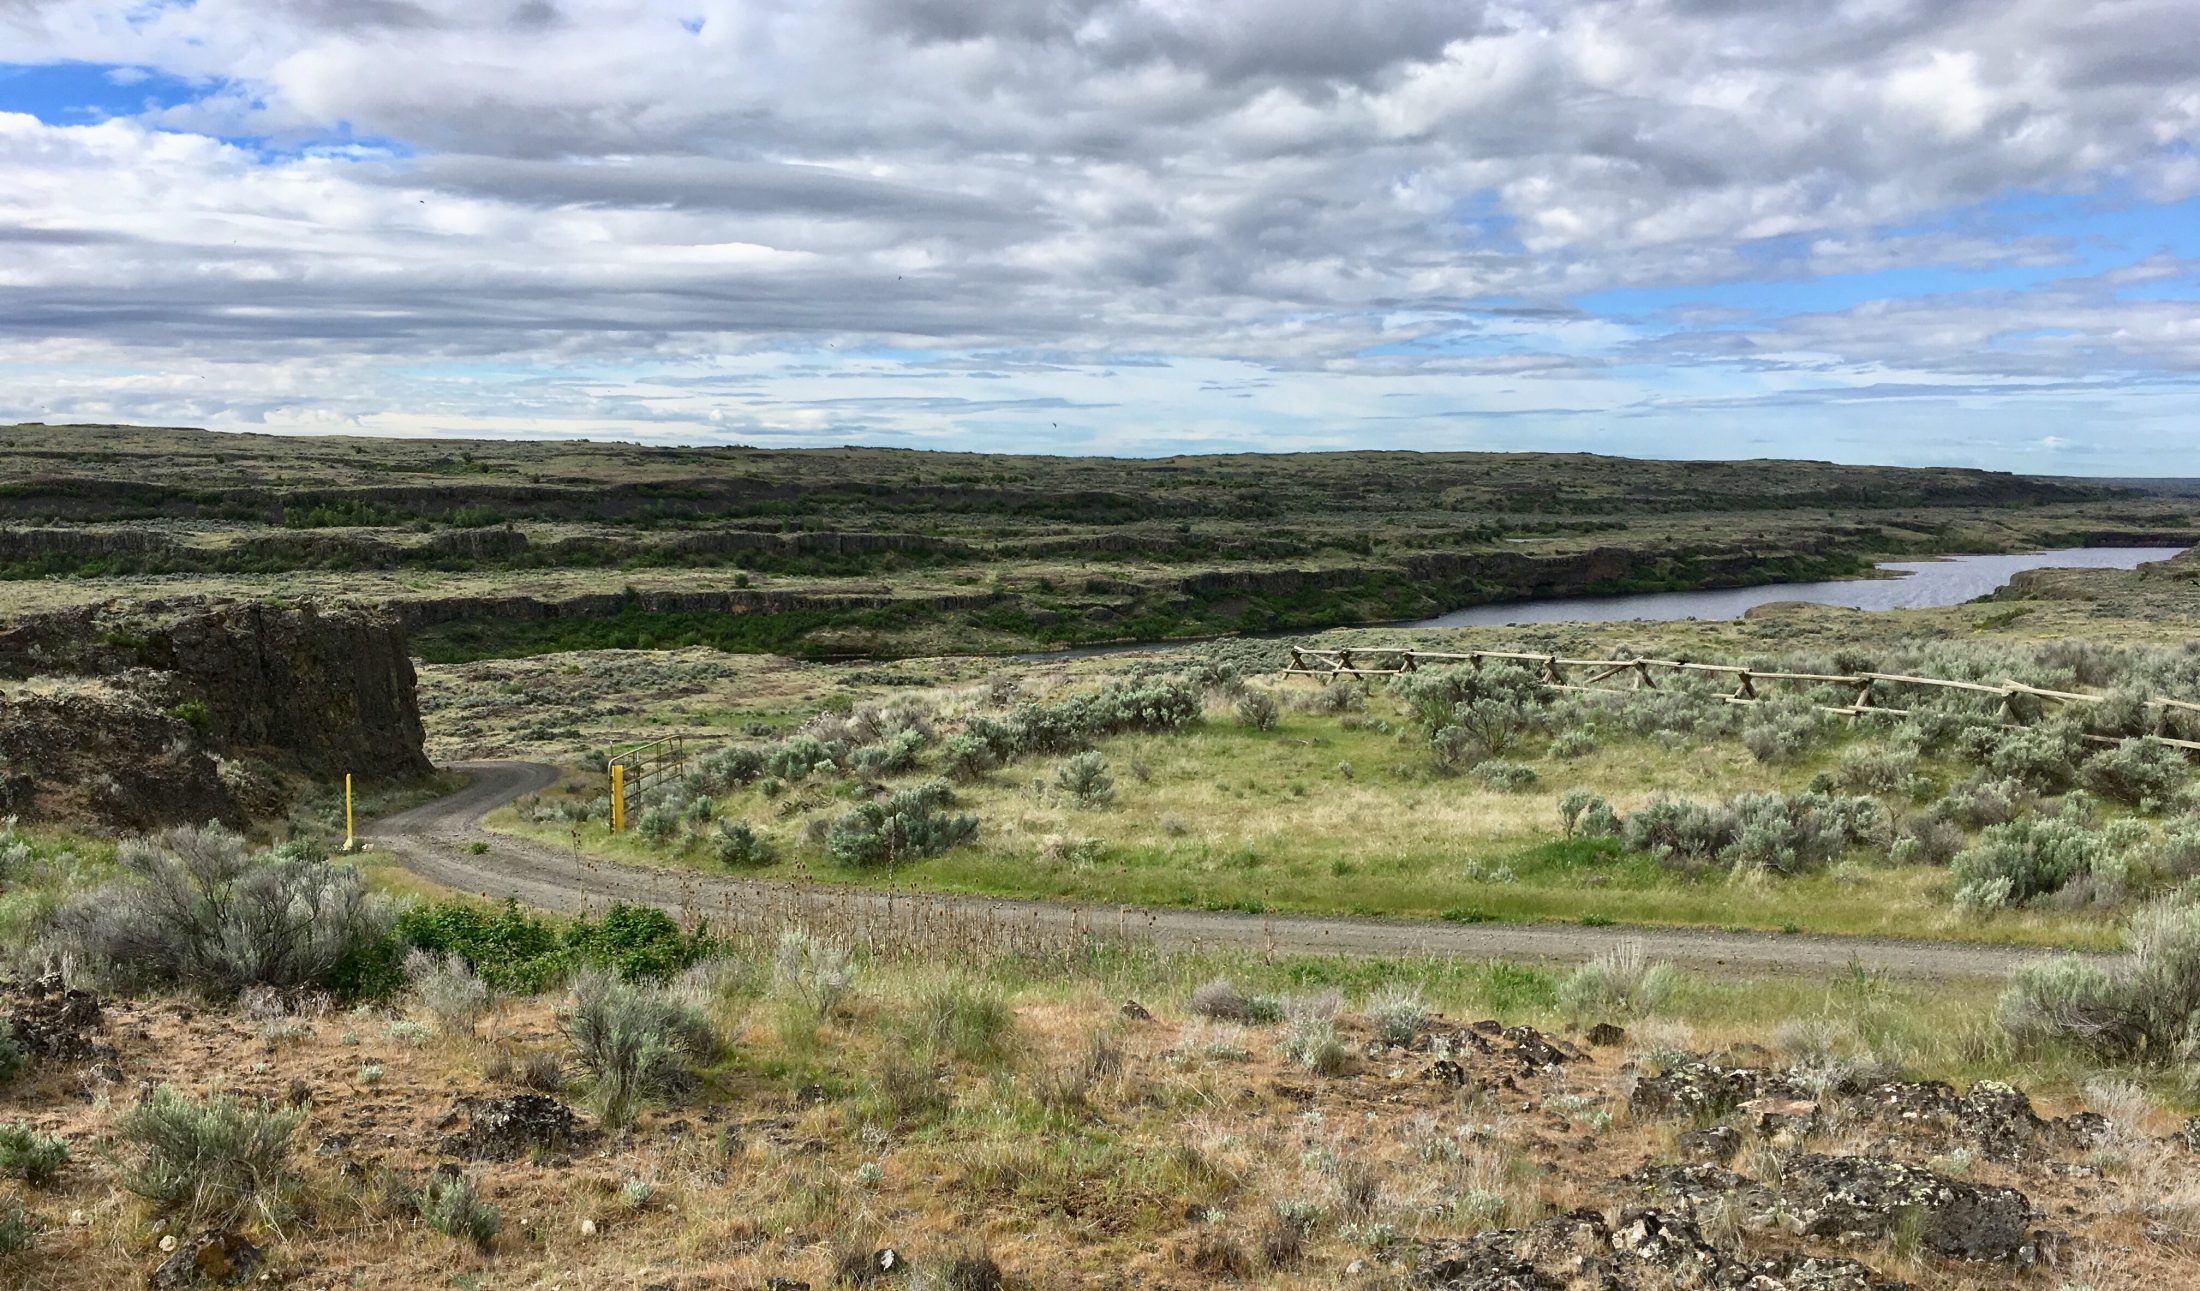
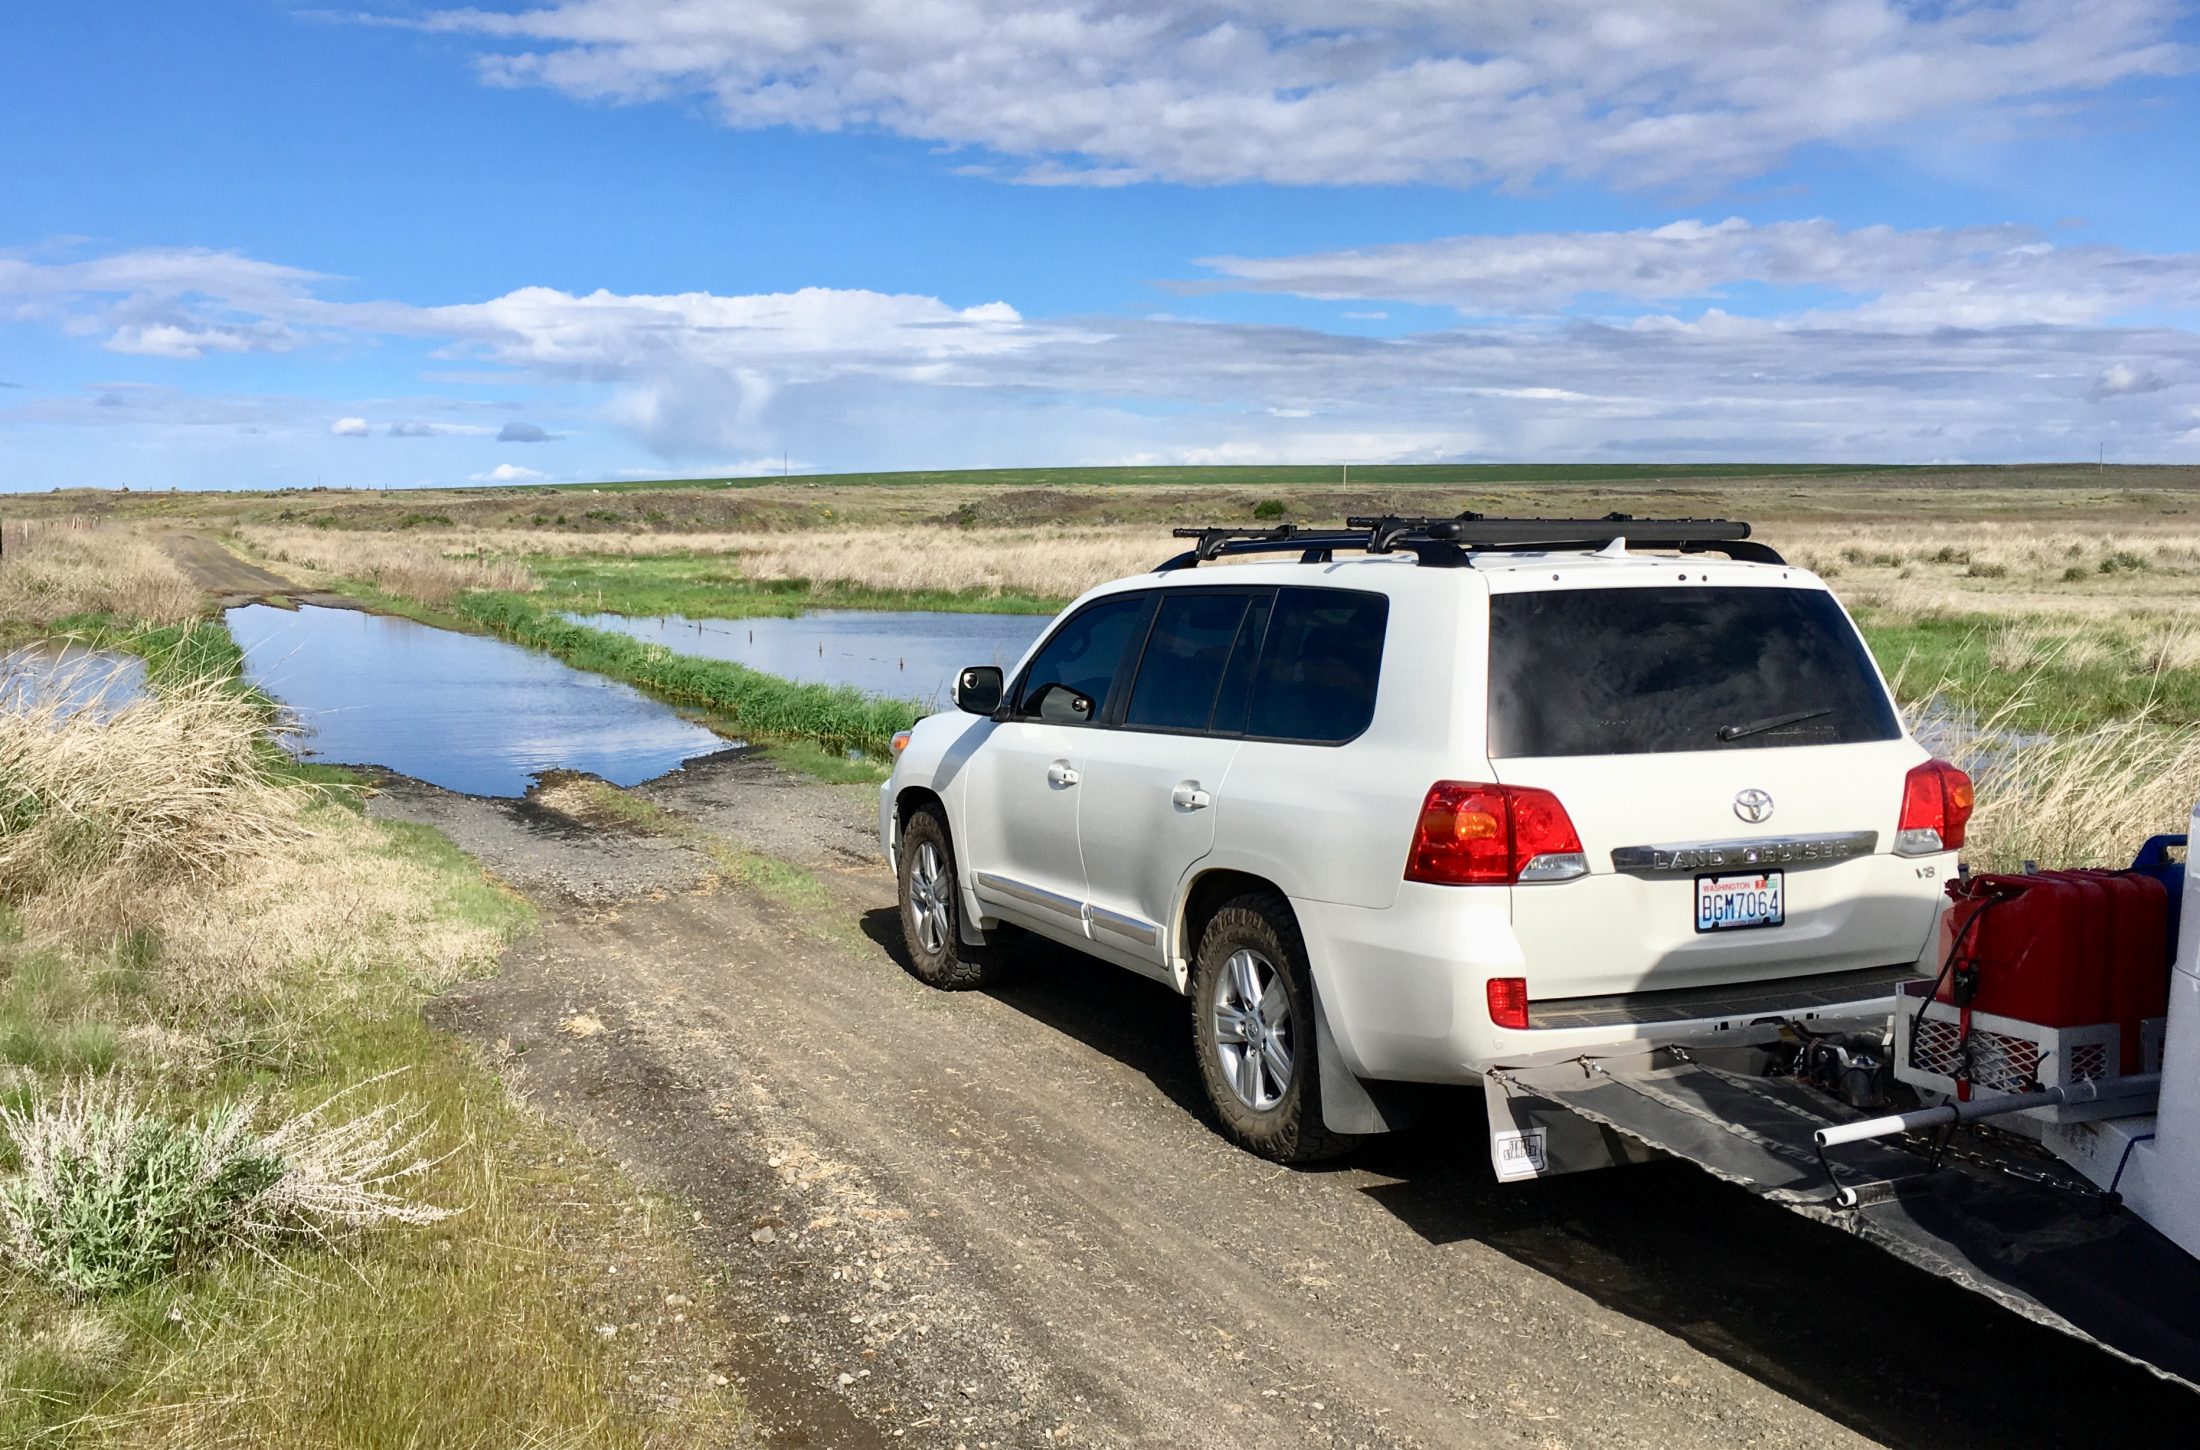
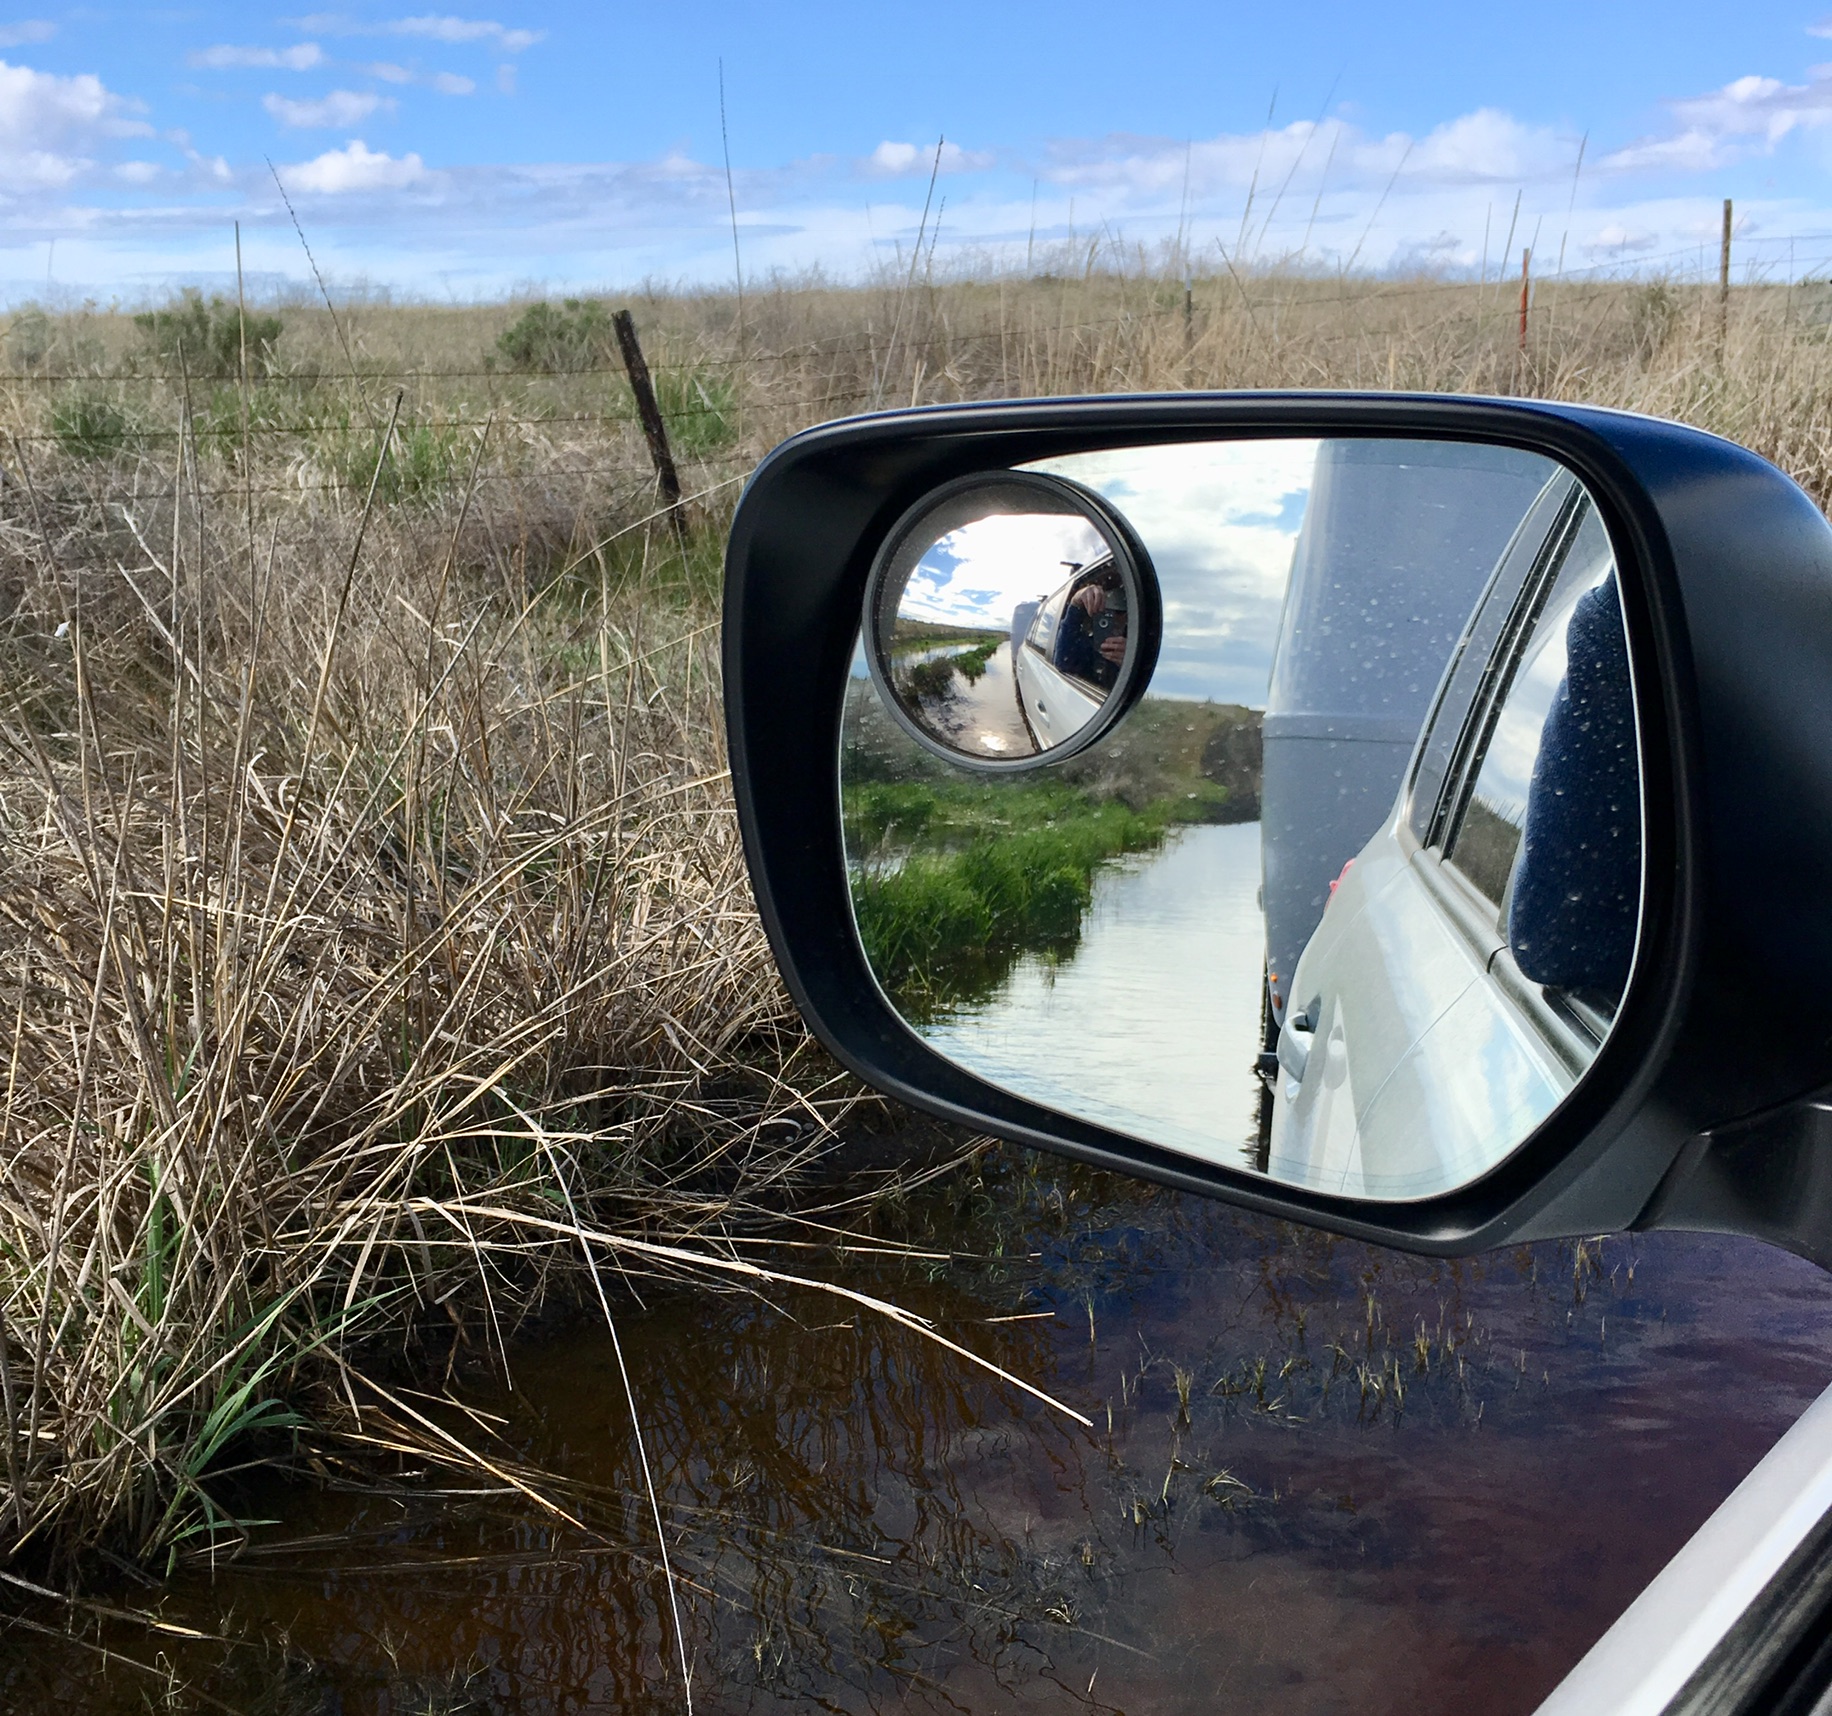
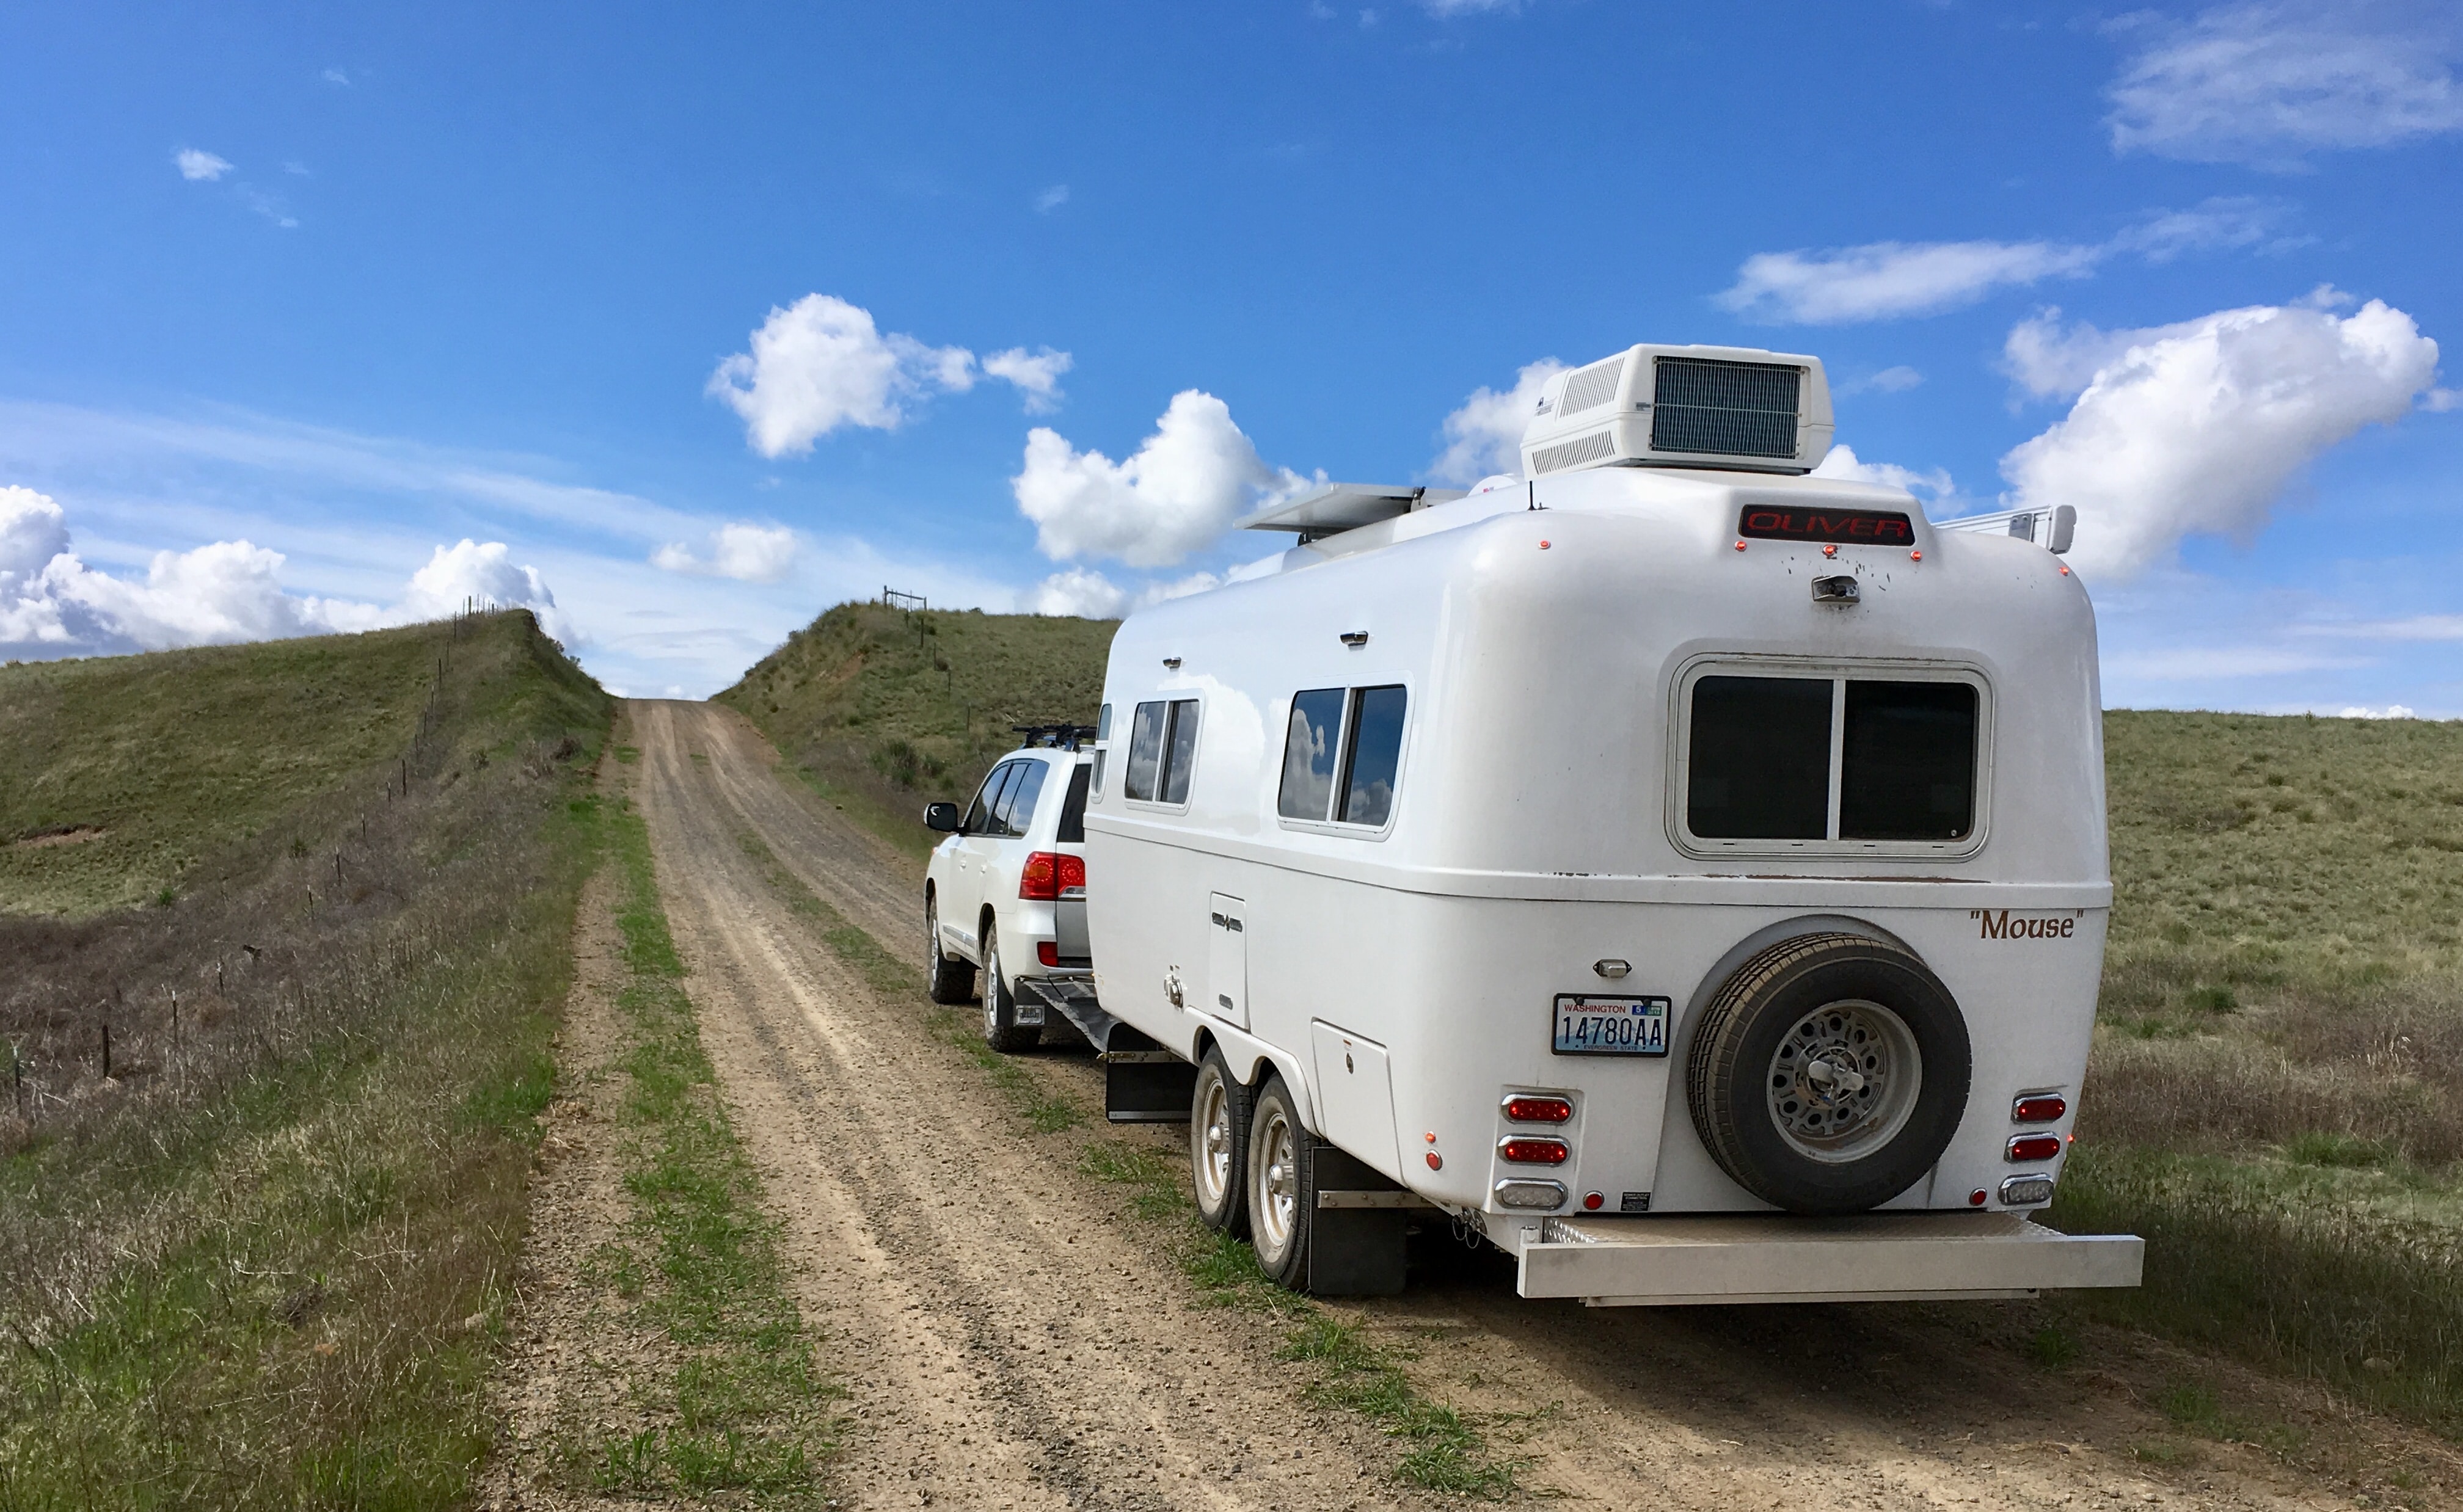
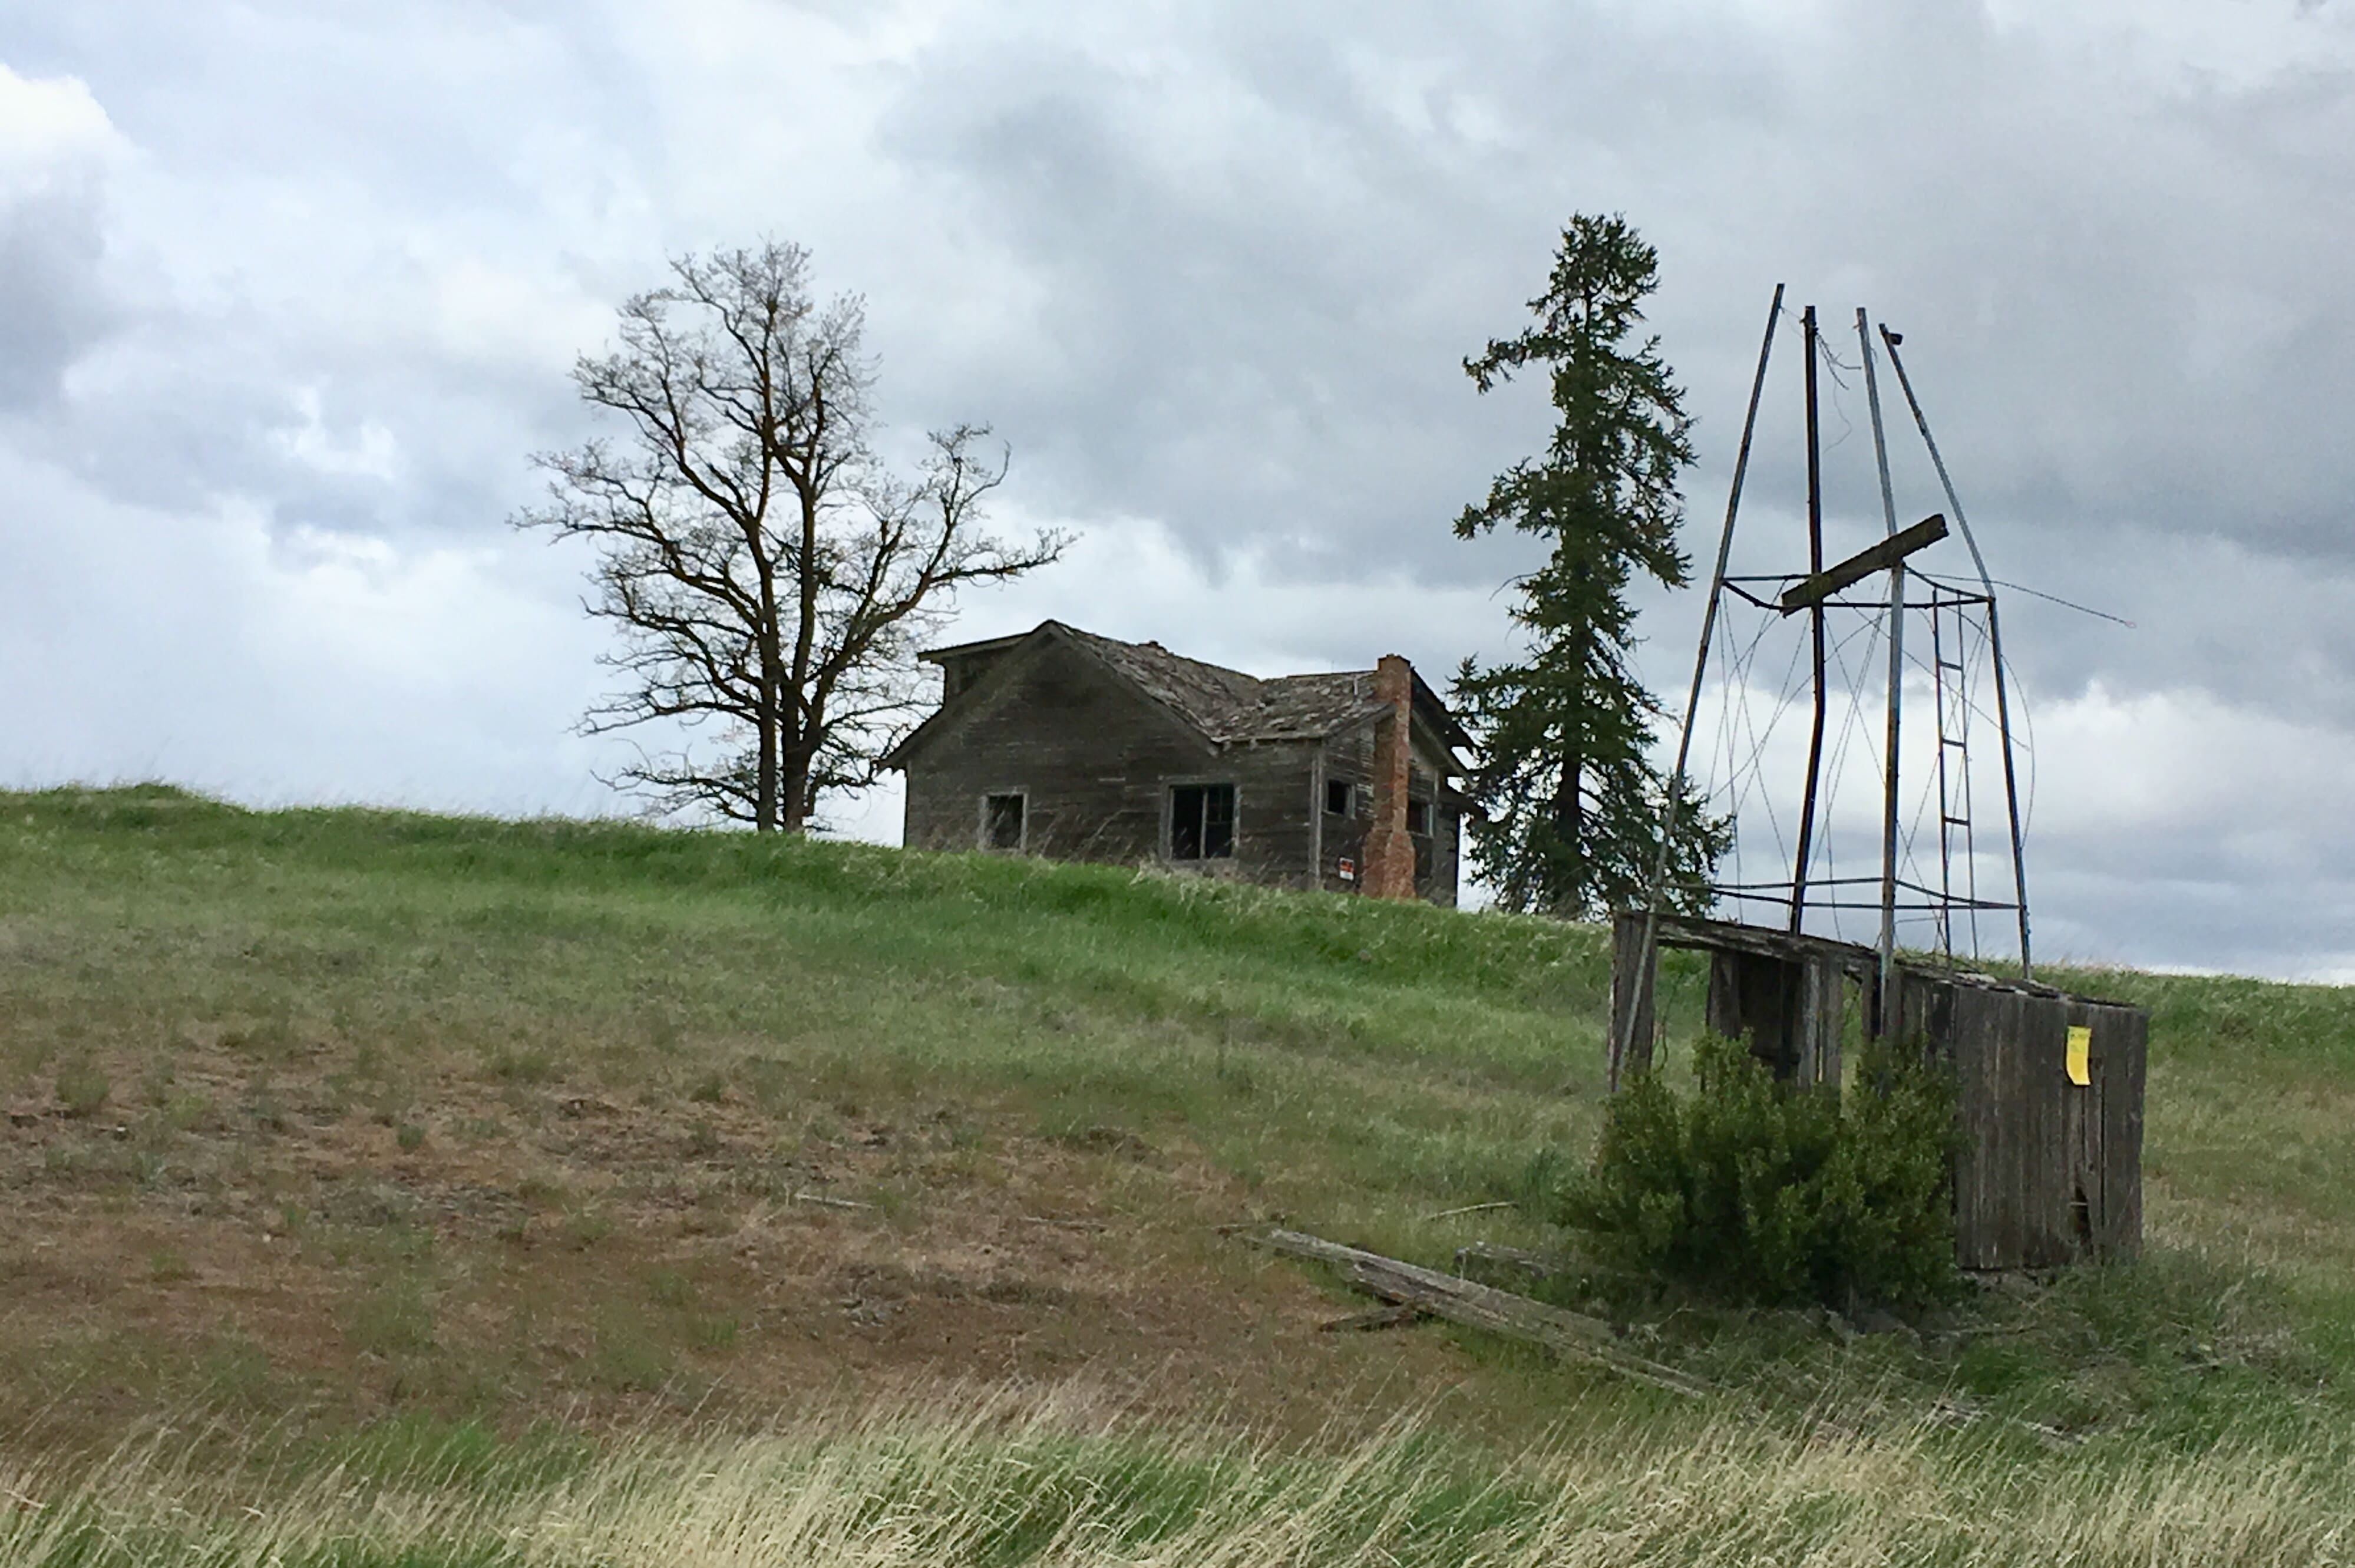
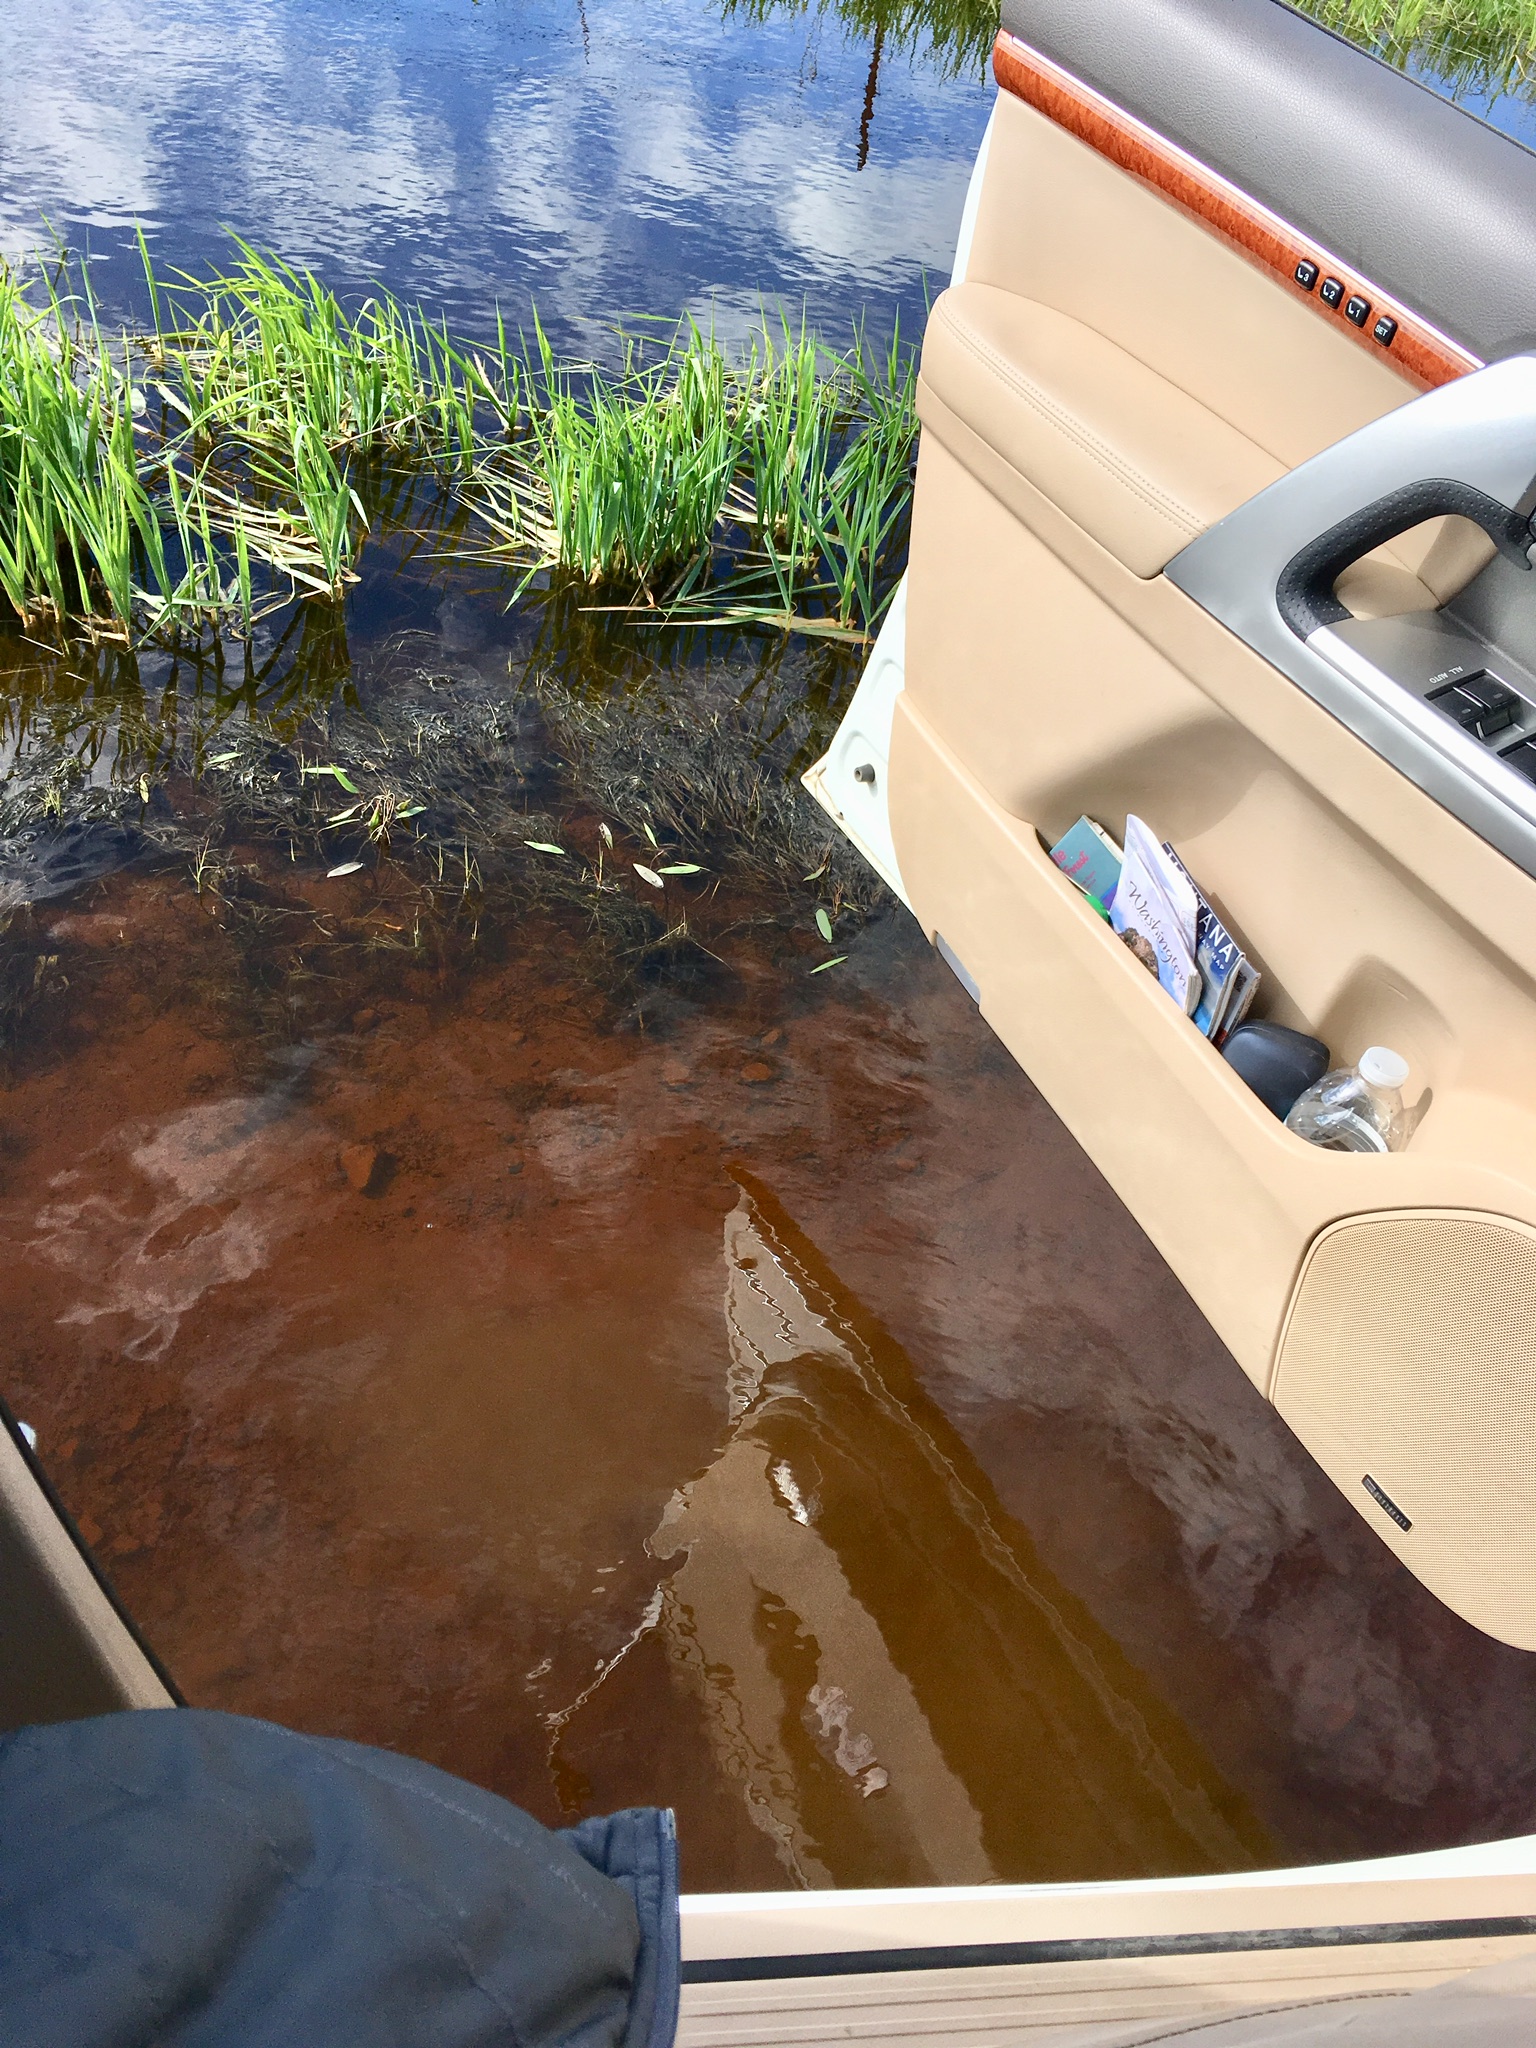
This is BLM land, no facilities, with a rough, steep dirt road leading to dispersed sites on two small Channelled Scabland lakes. Twin Lakes Recreation Area is between Odessa and Harrington WA,in the very middle of the state. https://news.nationalgeographic.com/2017/03/channeled-scablands/ When you are alone and the bugs are out, you have lots of time to mess around with a camera, making time lapse videos: [attachment file=133808] John Davies Spokane WA
1 point
-
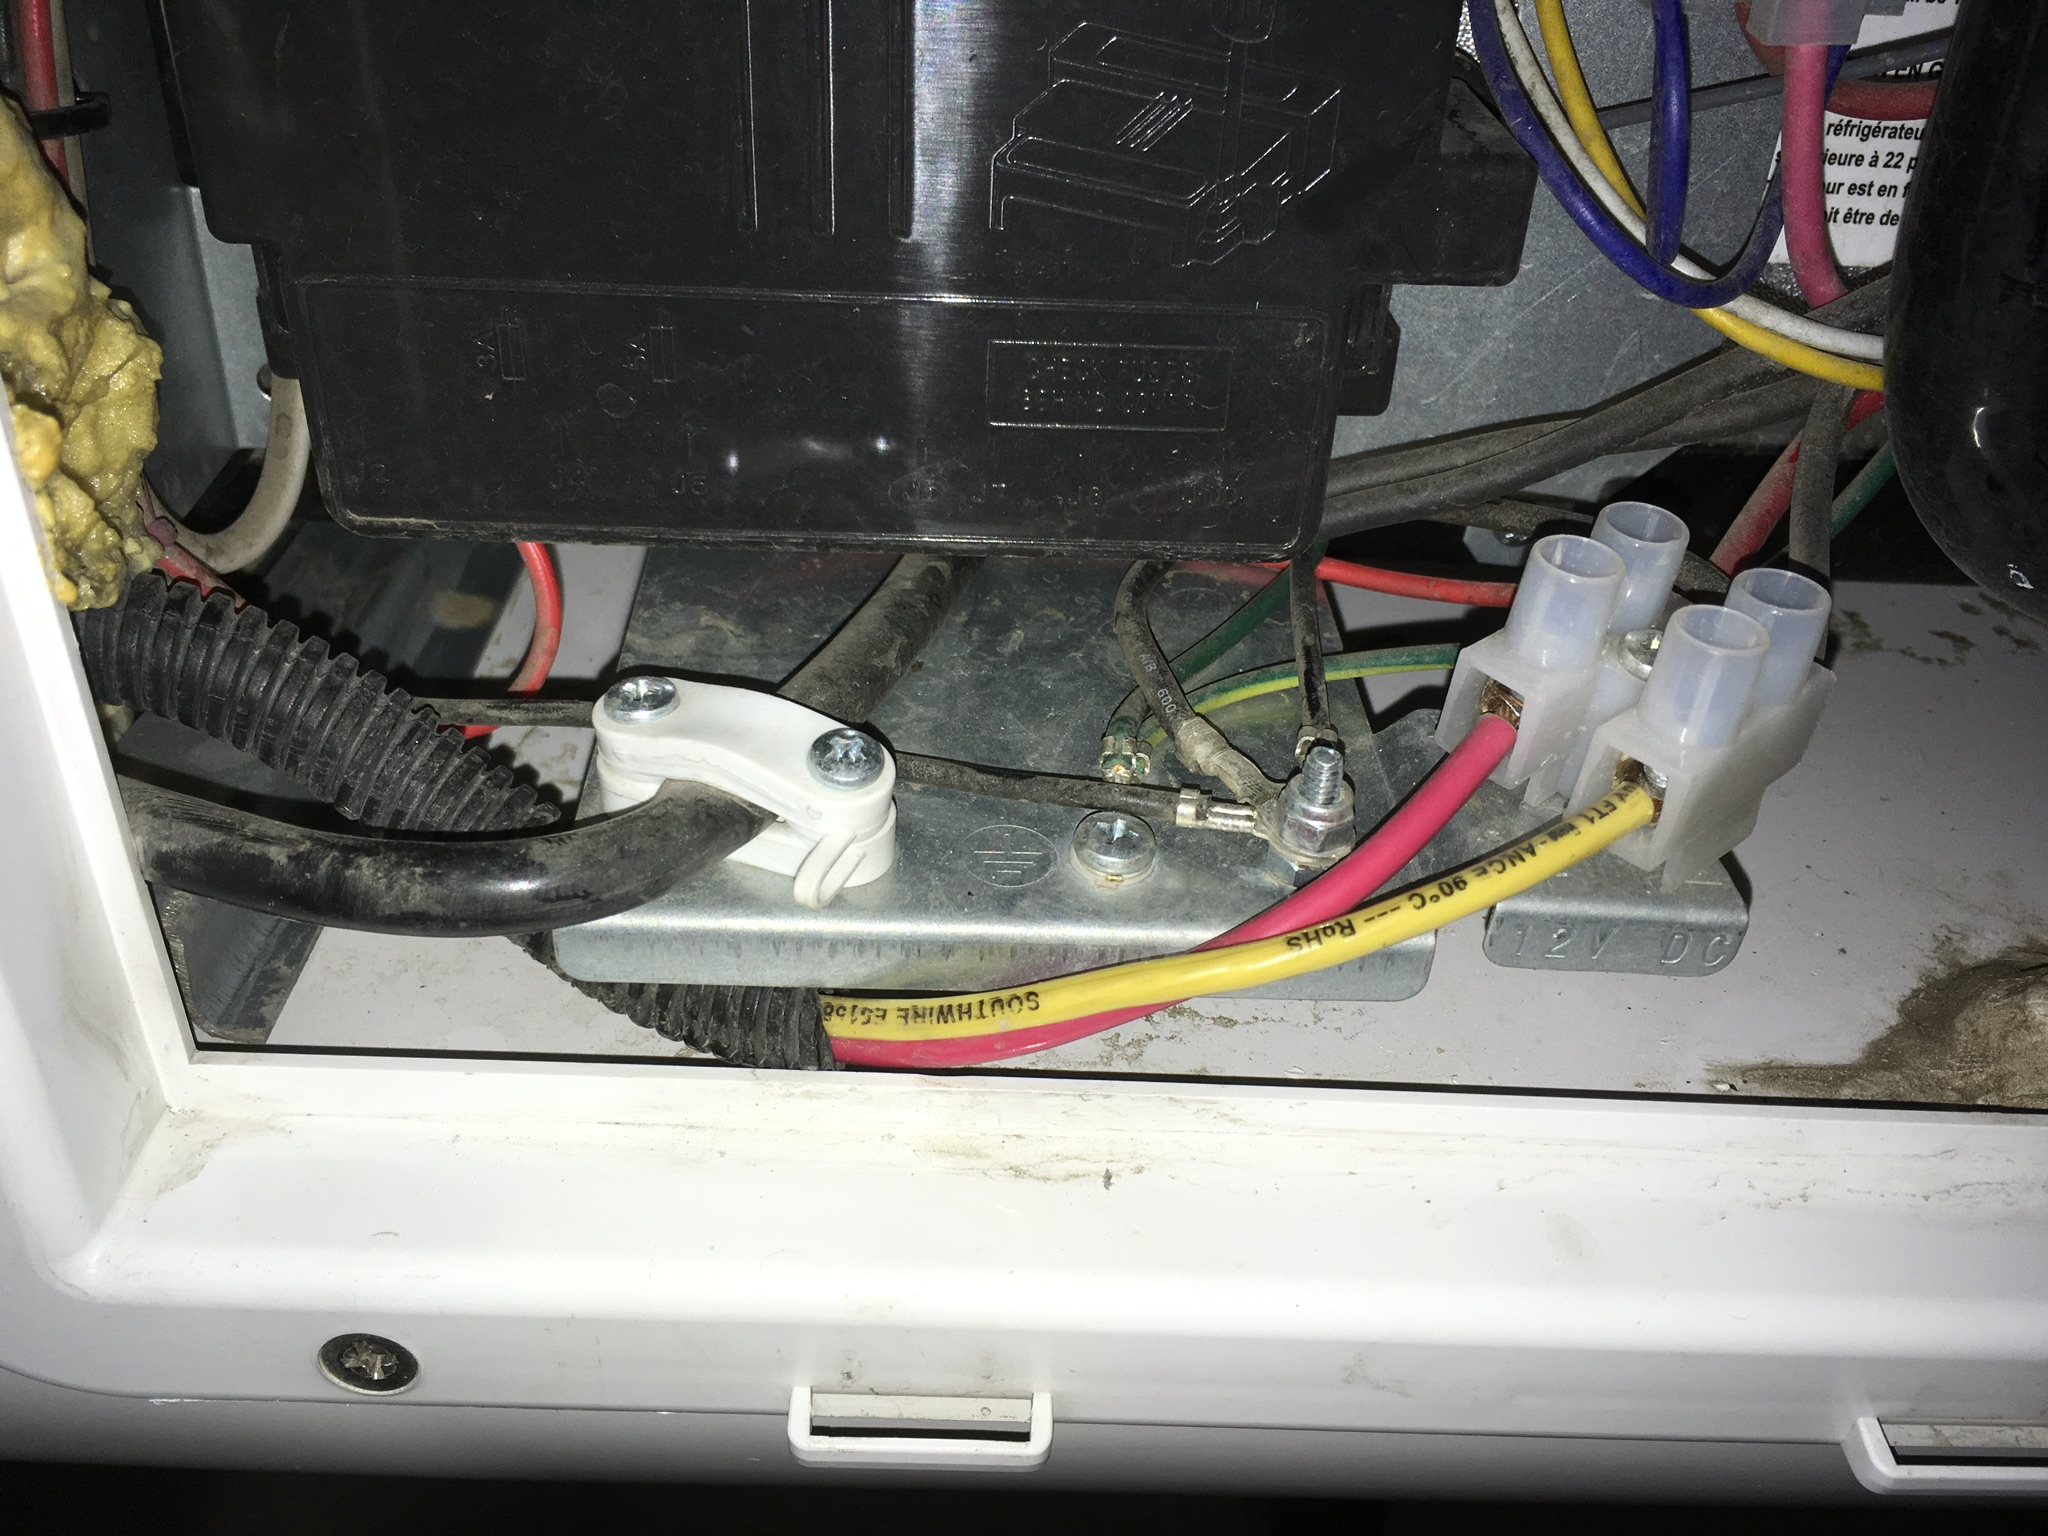
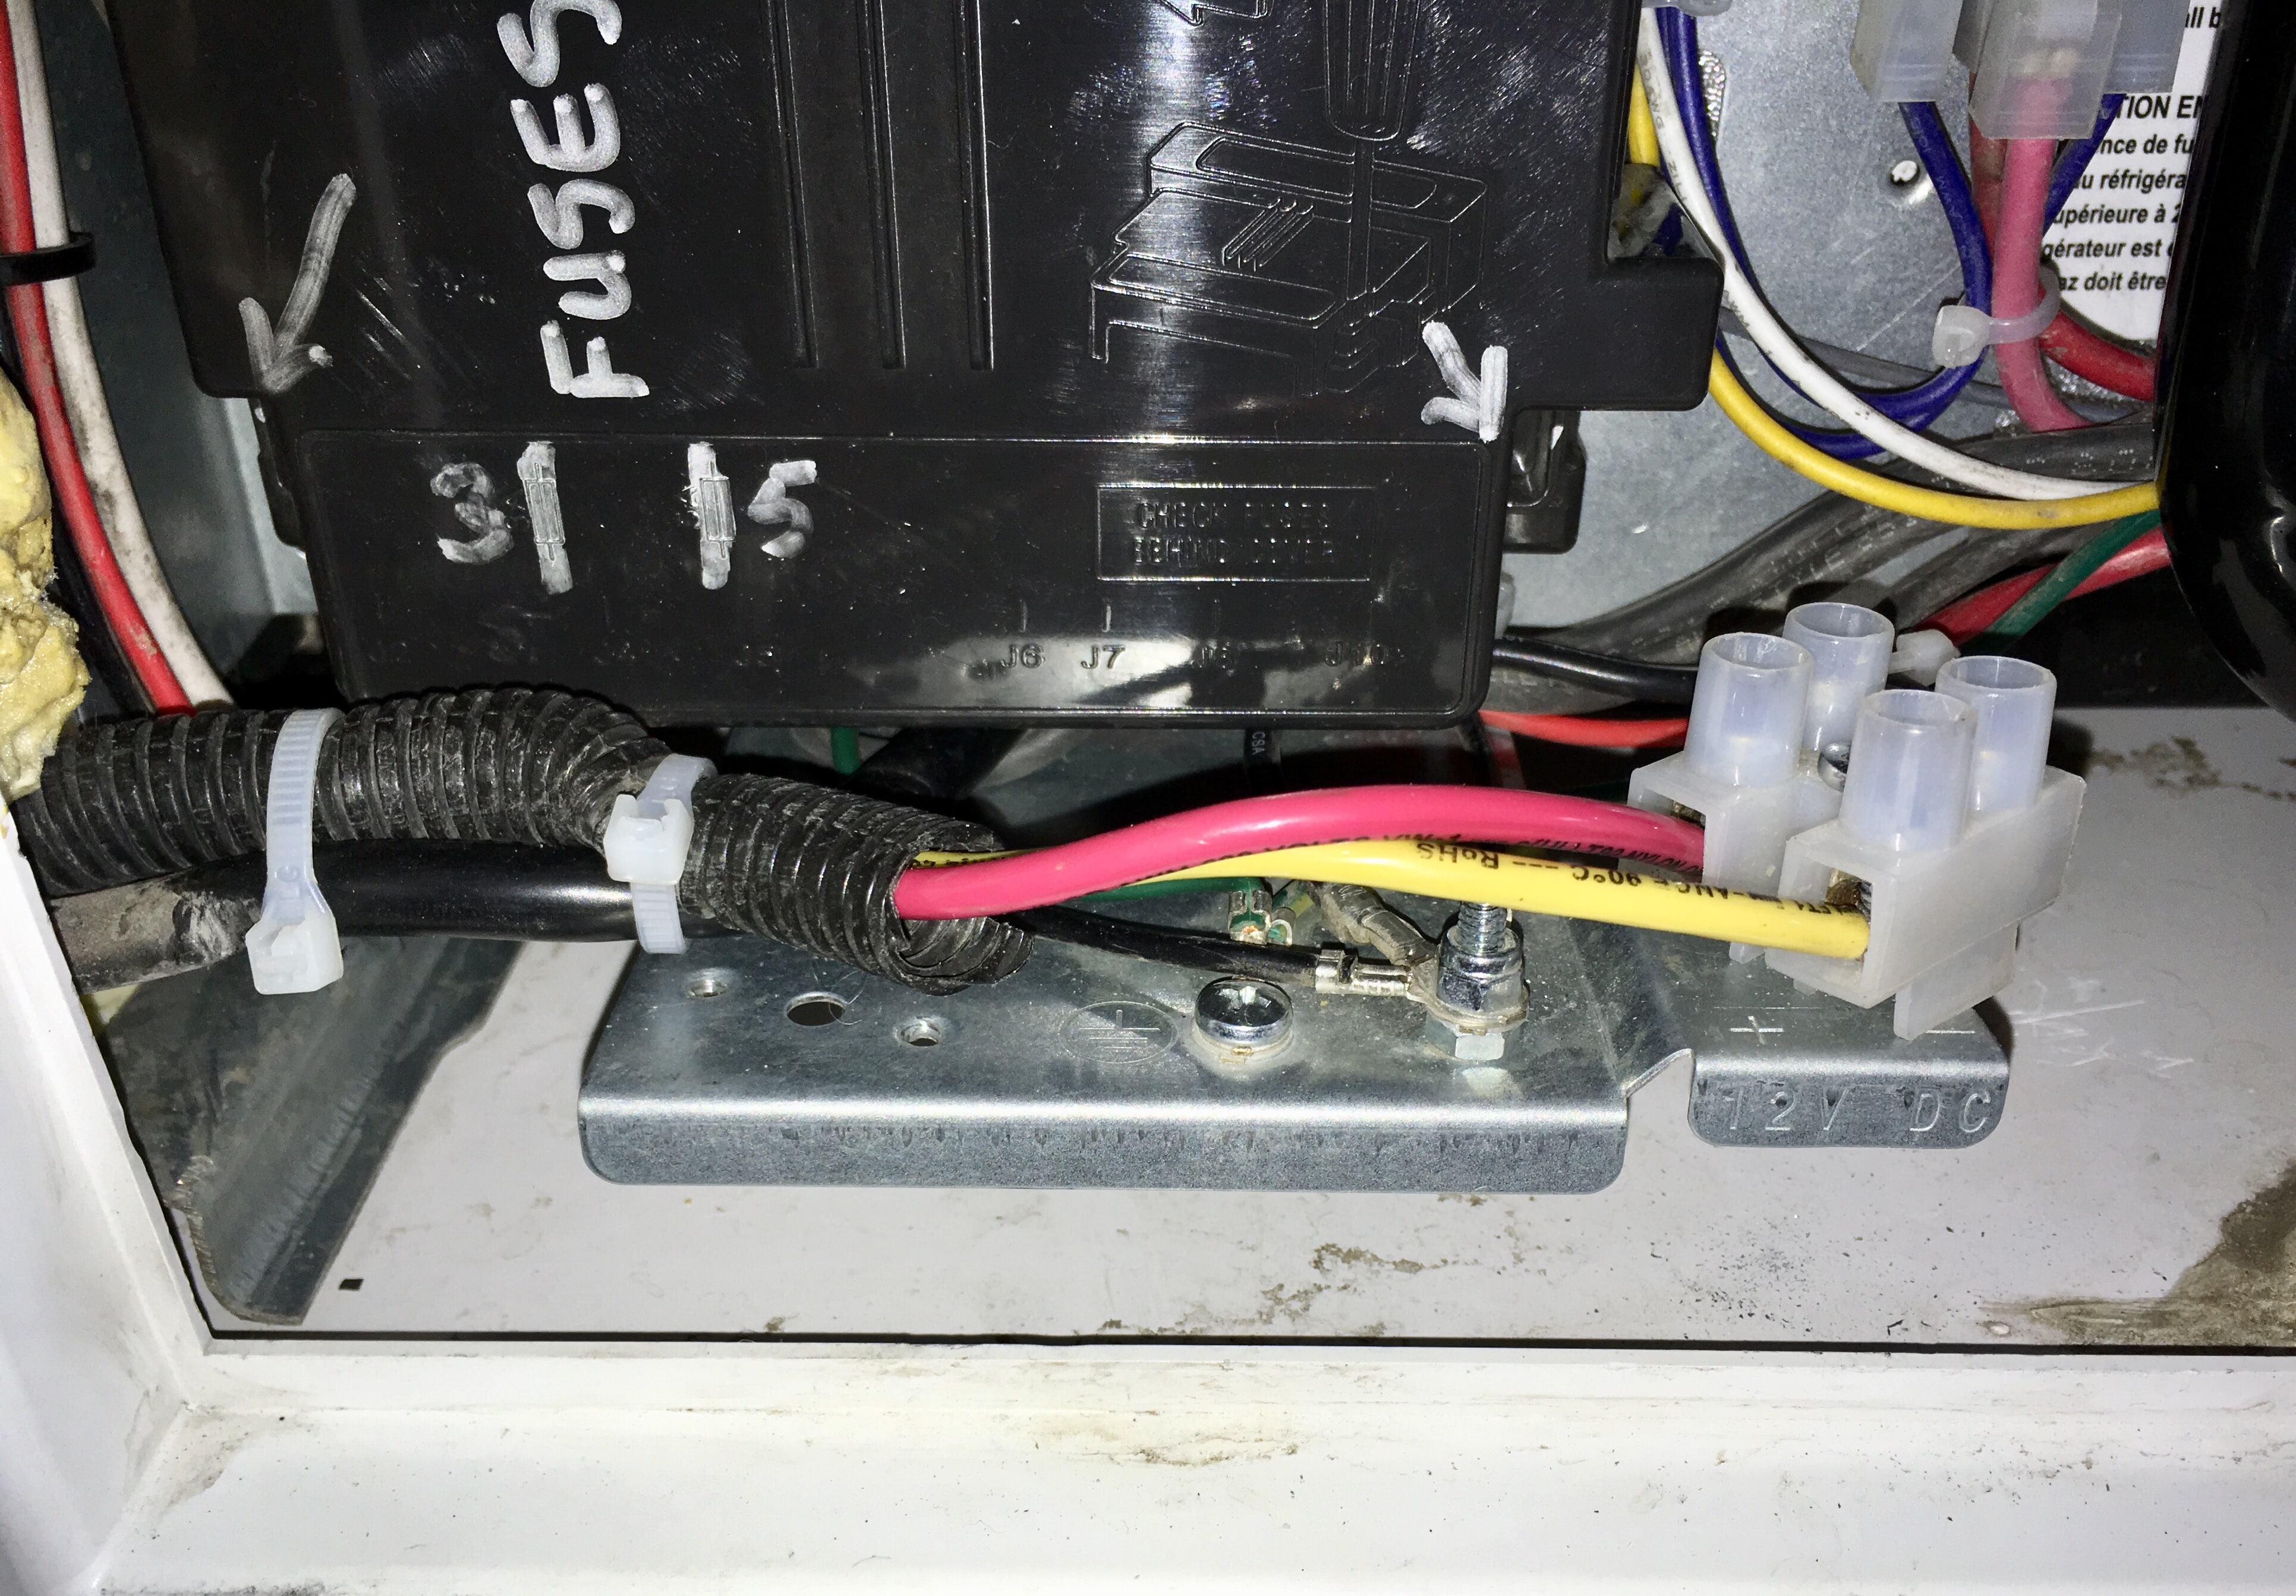
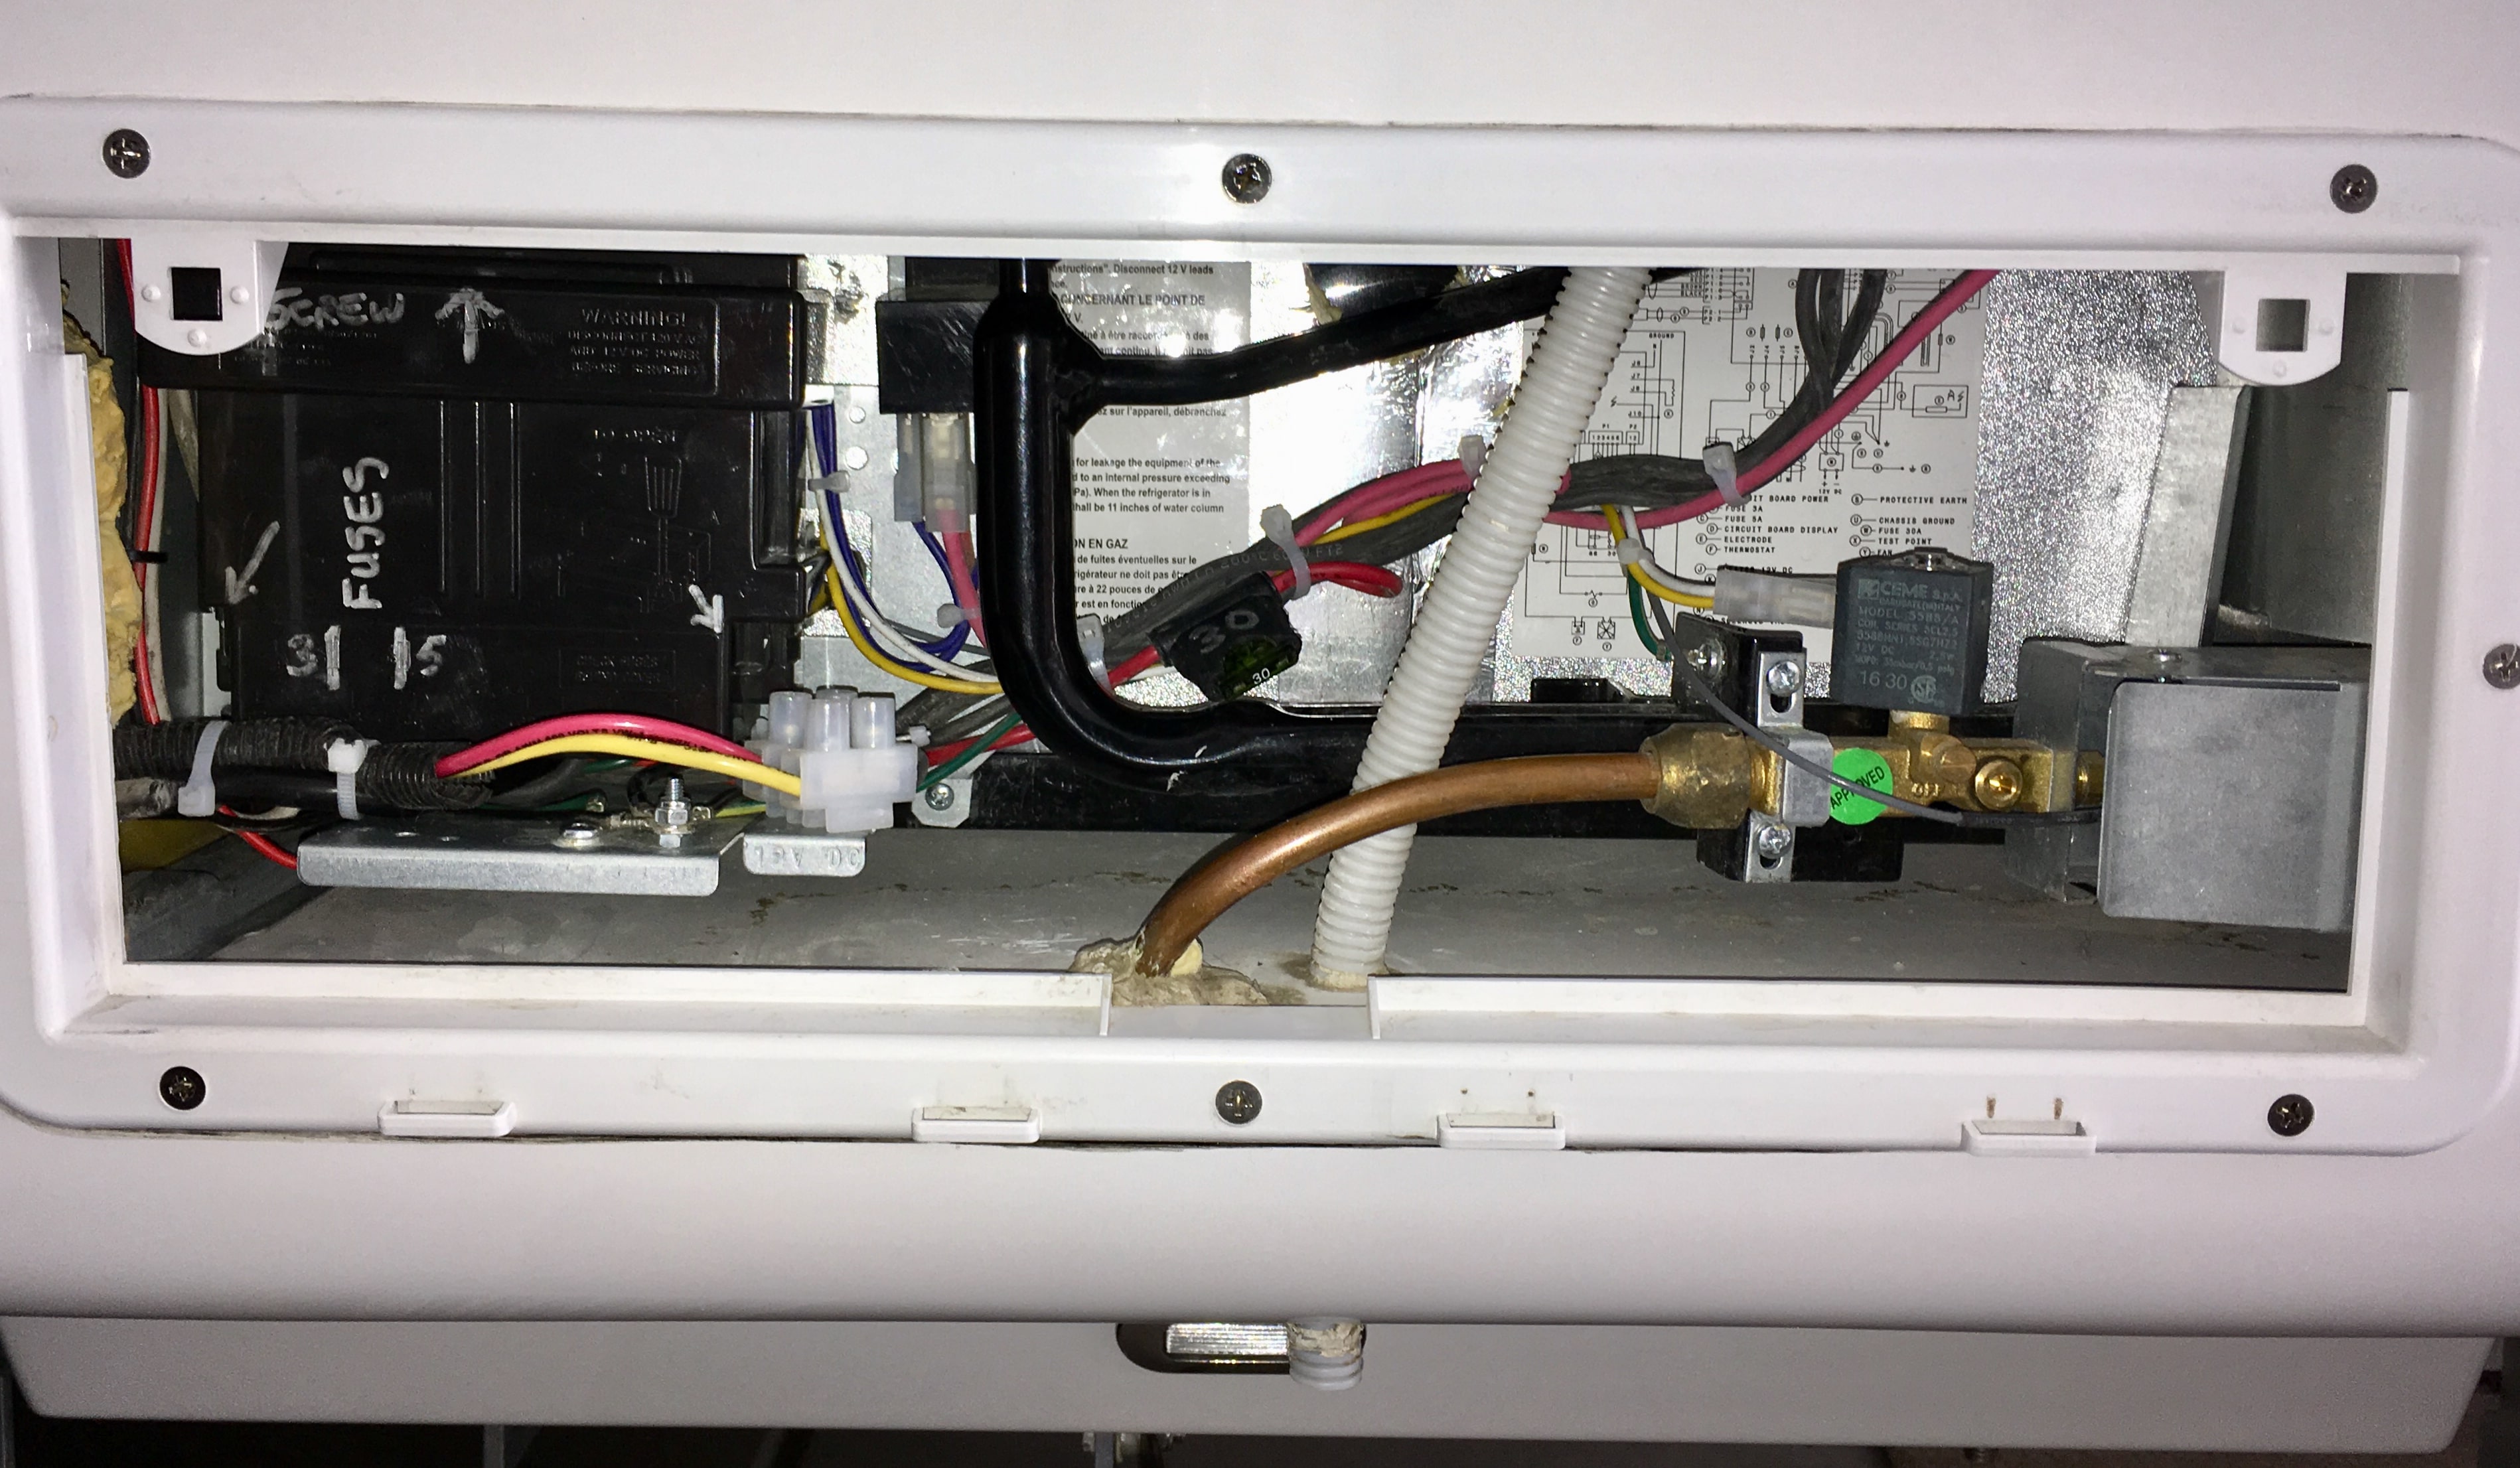
Noticed this in tidying up the wiring in my lower compartment: The fat red and yellow wires are the 12 volt power and ground for the fridge. The white block is a terminal block to join them to the wires coming out of the control board. I did not like to see them chafing on the steel bracket. Remove the 20a fuse for the fridge (under the dinette) and turn off 110vac before messing around in there! Unscrew and discard the white plastic cable clamp on the left, reposition the wires as shown and secure with cable ties. Make sure the wires are clear of the ground stud sticking up nearby. Check the tightness of the screws in the terminal block, one of mine was a little loose. I also looked inside the control box and secured the other wires to make them neater and so they cannot flop around. Check yours, and clean out the dust while you are in there. Remove the 30amp blade fuse from the holder on the red wire, dead center in the above pic. Clean any corrosion and reinstall the fuse with a coating of dielectric grease on the contacts. Secure it with the fuse angled down, to keep out water! This fuse holder really should be a sealed unit, there is no excuse for exposed electrical connections in a completely open outside compartment! Question: I am thinking of a simple way to block off this compartment for travel on dirt roads, to keep electronics and coils clean. How about a heavy trash bag filled with enough styrofoam peanuts to fit snugly in the cavity, around all the various components? The vented cover should hold it tightly in place. Obviously the fridge and propane would be switched off. Thanks. John Davies Spokane WA
1 point
-
I still can’t follow these directions. Here’s what my signature looks like. What am I doing wrong? Don Thompson Elite II Twin Bed Hull #126 VW Touareg TDI States I've visited with my Ollie [img{]{img-url-here}[}/img]-Remove the "{"&"}"http://visitedstatesmap.com/image/ALCOGAILIAKSMNMSMOMTNENMNCOKSCSDTNTXUTWIWYmed.jpg1 point
-
This is not about clearing the AC drain, but what I use under my knees while working on the roof. I'm sure this is overkill, but for protection of Ollie's roof and my knees at my weight of 215lbs, made two knee pads for working on Ollie's roof. Laminated two memory foam seat cushions together sandwiching a PVC cutting board in the center using adhesive to hold everything together for each knee pad. Used so far for waxing, antenna, AC, and roof vent work.1 point
-
Thanks for making us a set too and installing at the rally! Makes the door much stronger.1 point
-
Thank you for making us a set and installing our screen door bar at the rally! It really does make the door sturdier ?.1 point
-
Toojennifer - All of the newer Olivers come from the factory with the "white" shades. Bill1 point


-
Recent Achievements
-
")


")


")


