Leaderboard



Popular Content
Showing content with the highest reputation on 09/10/2018 in all areas
-
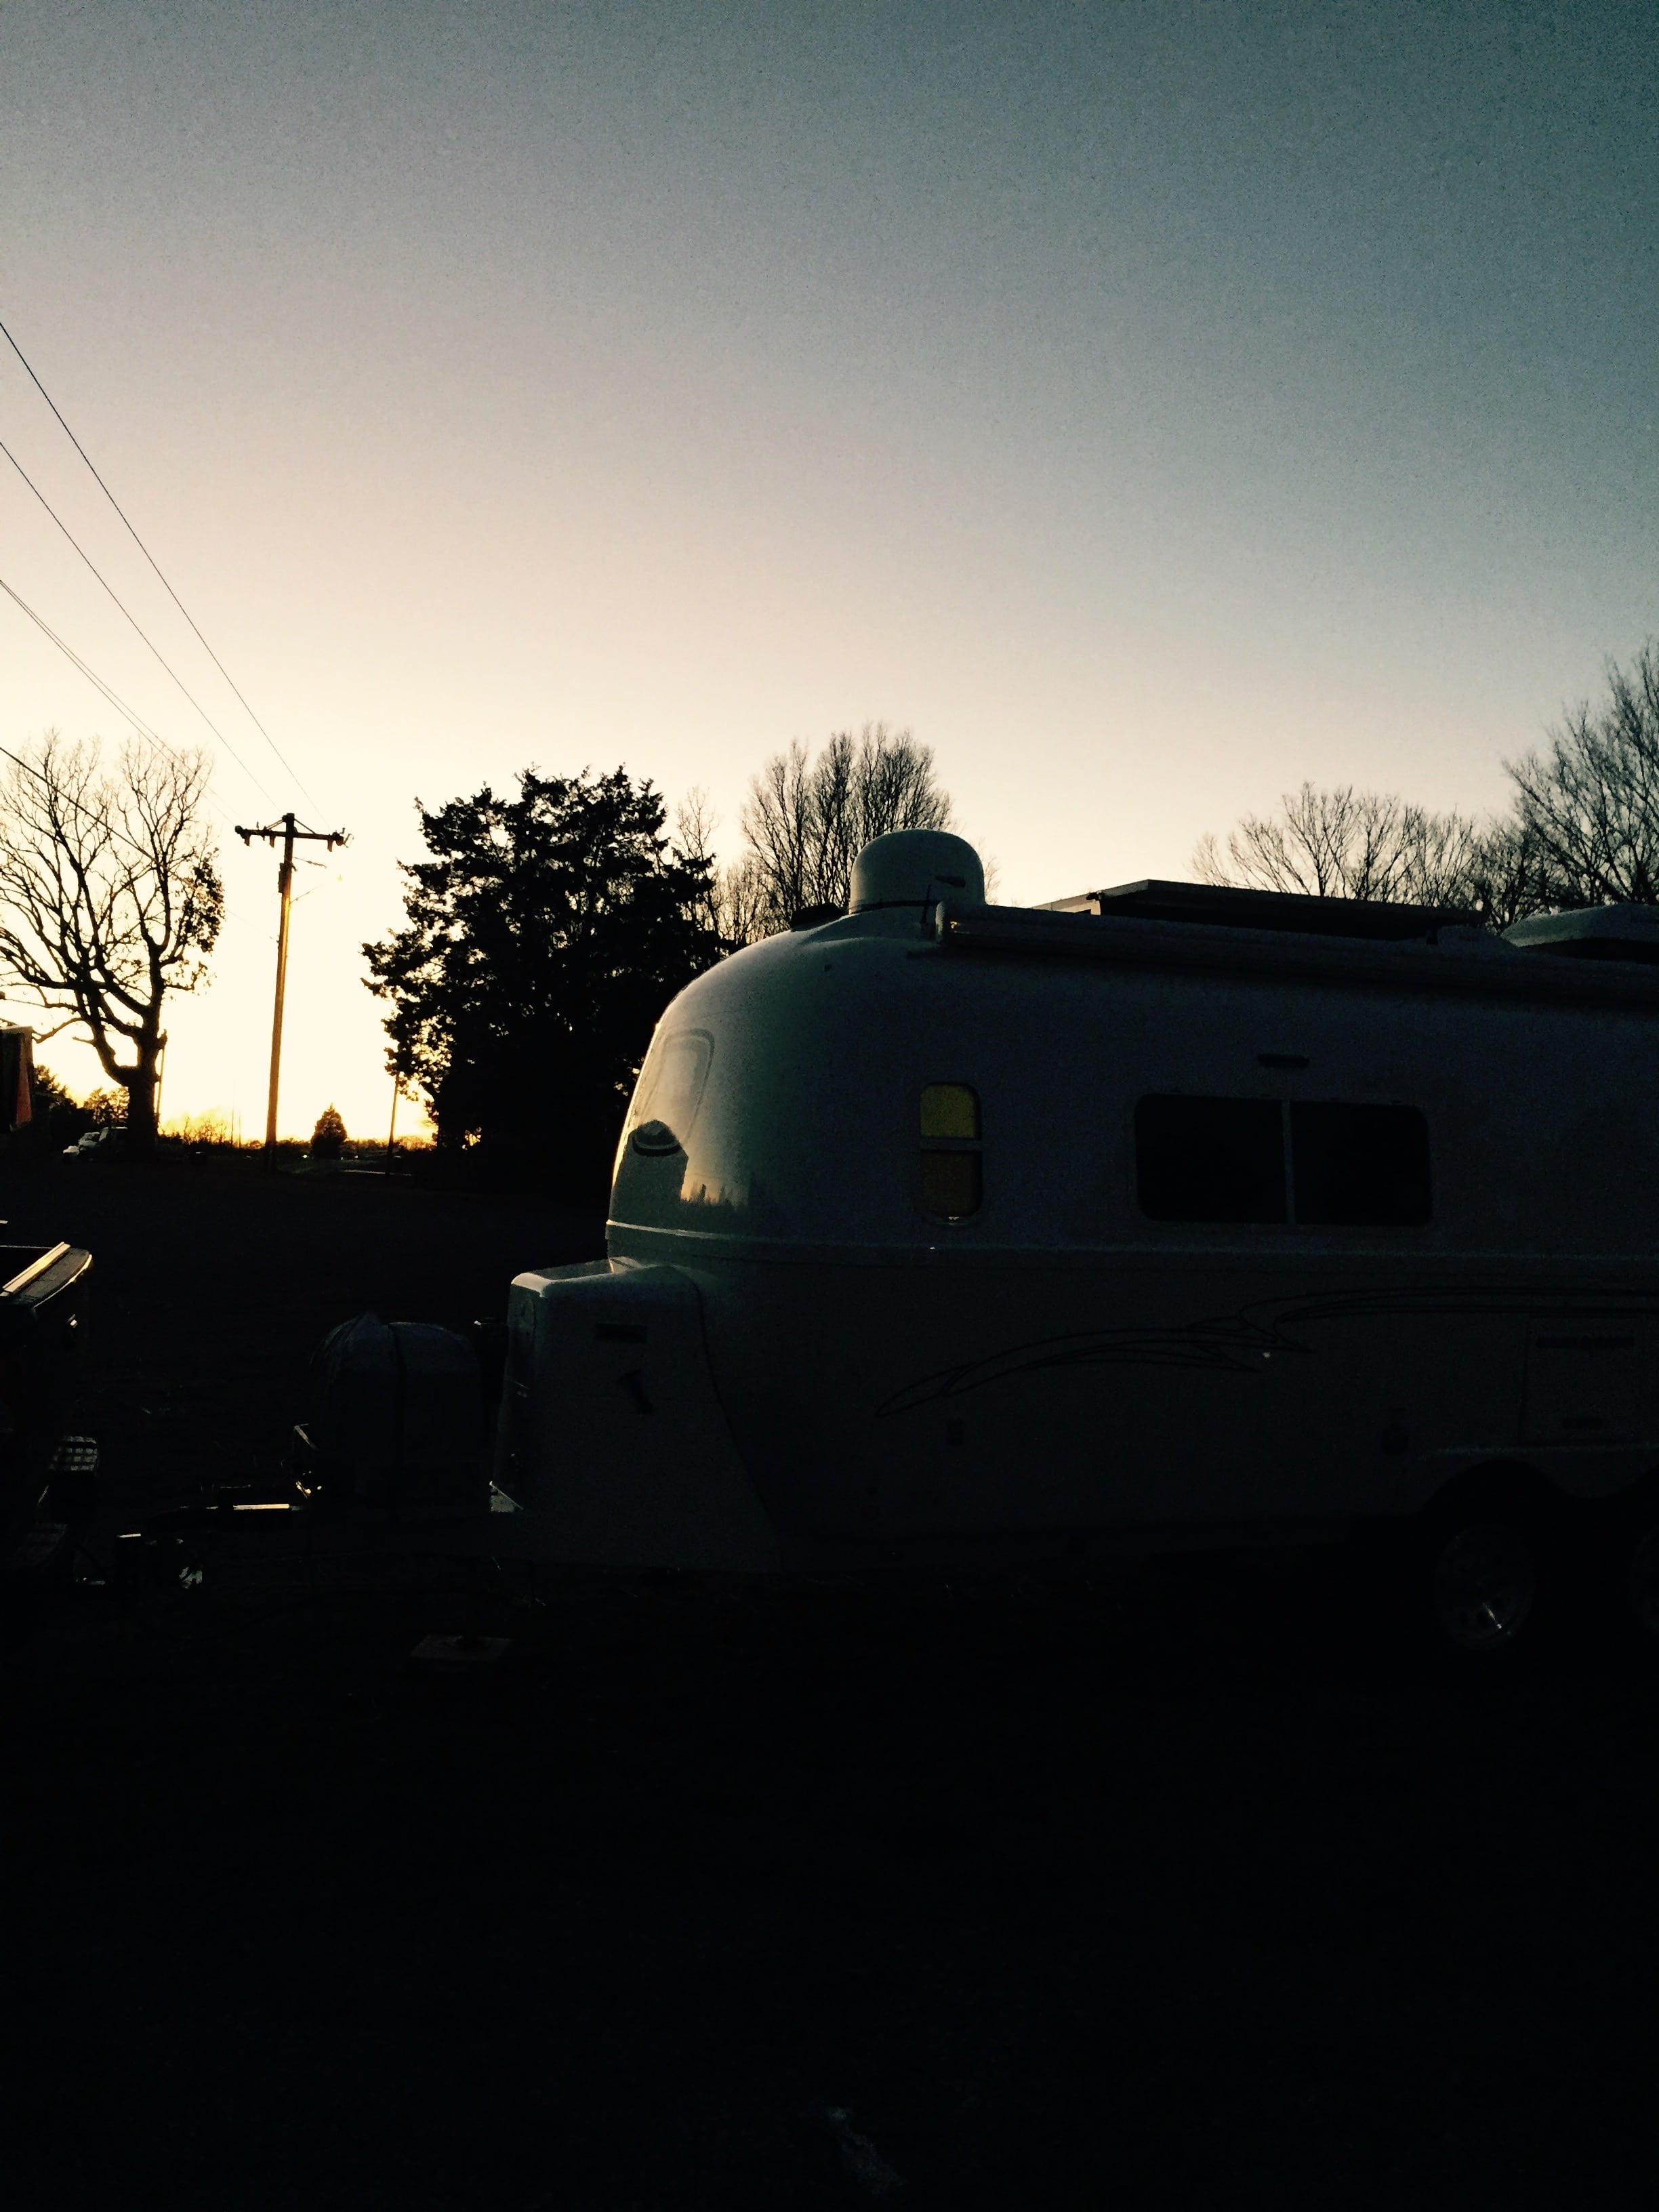
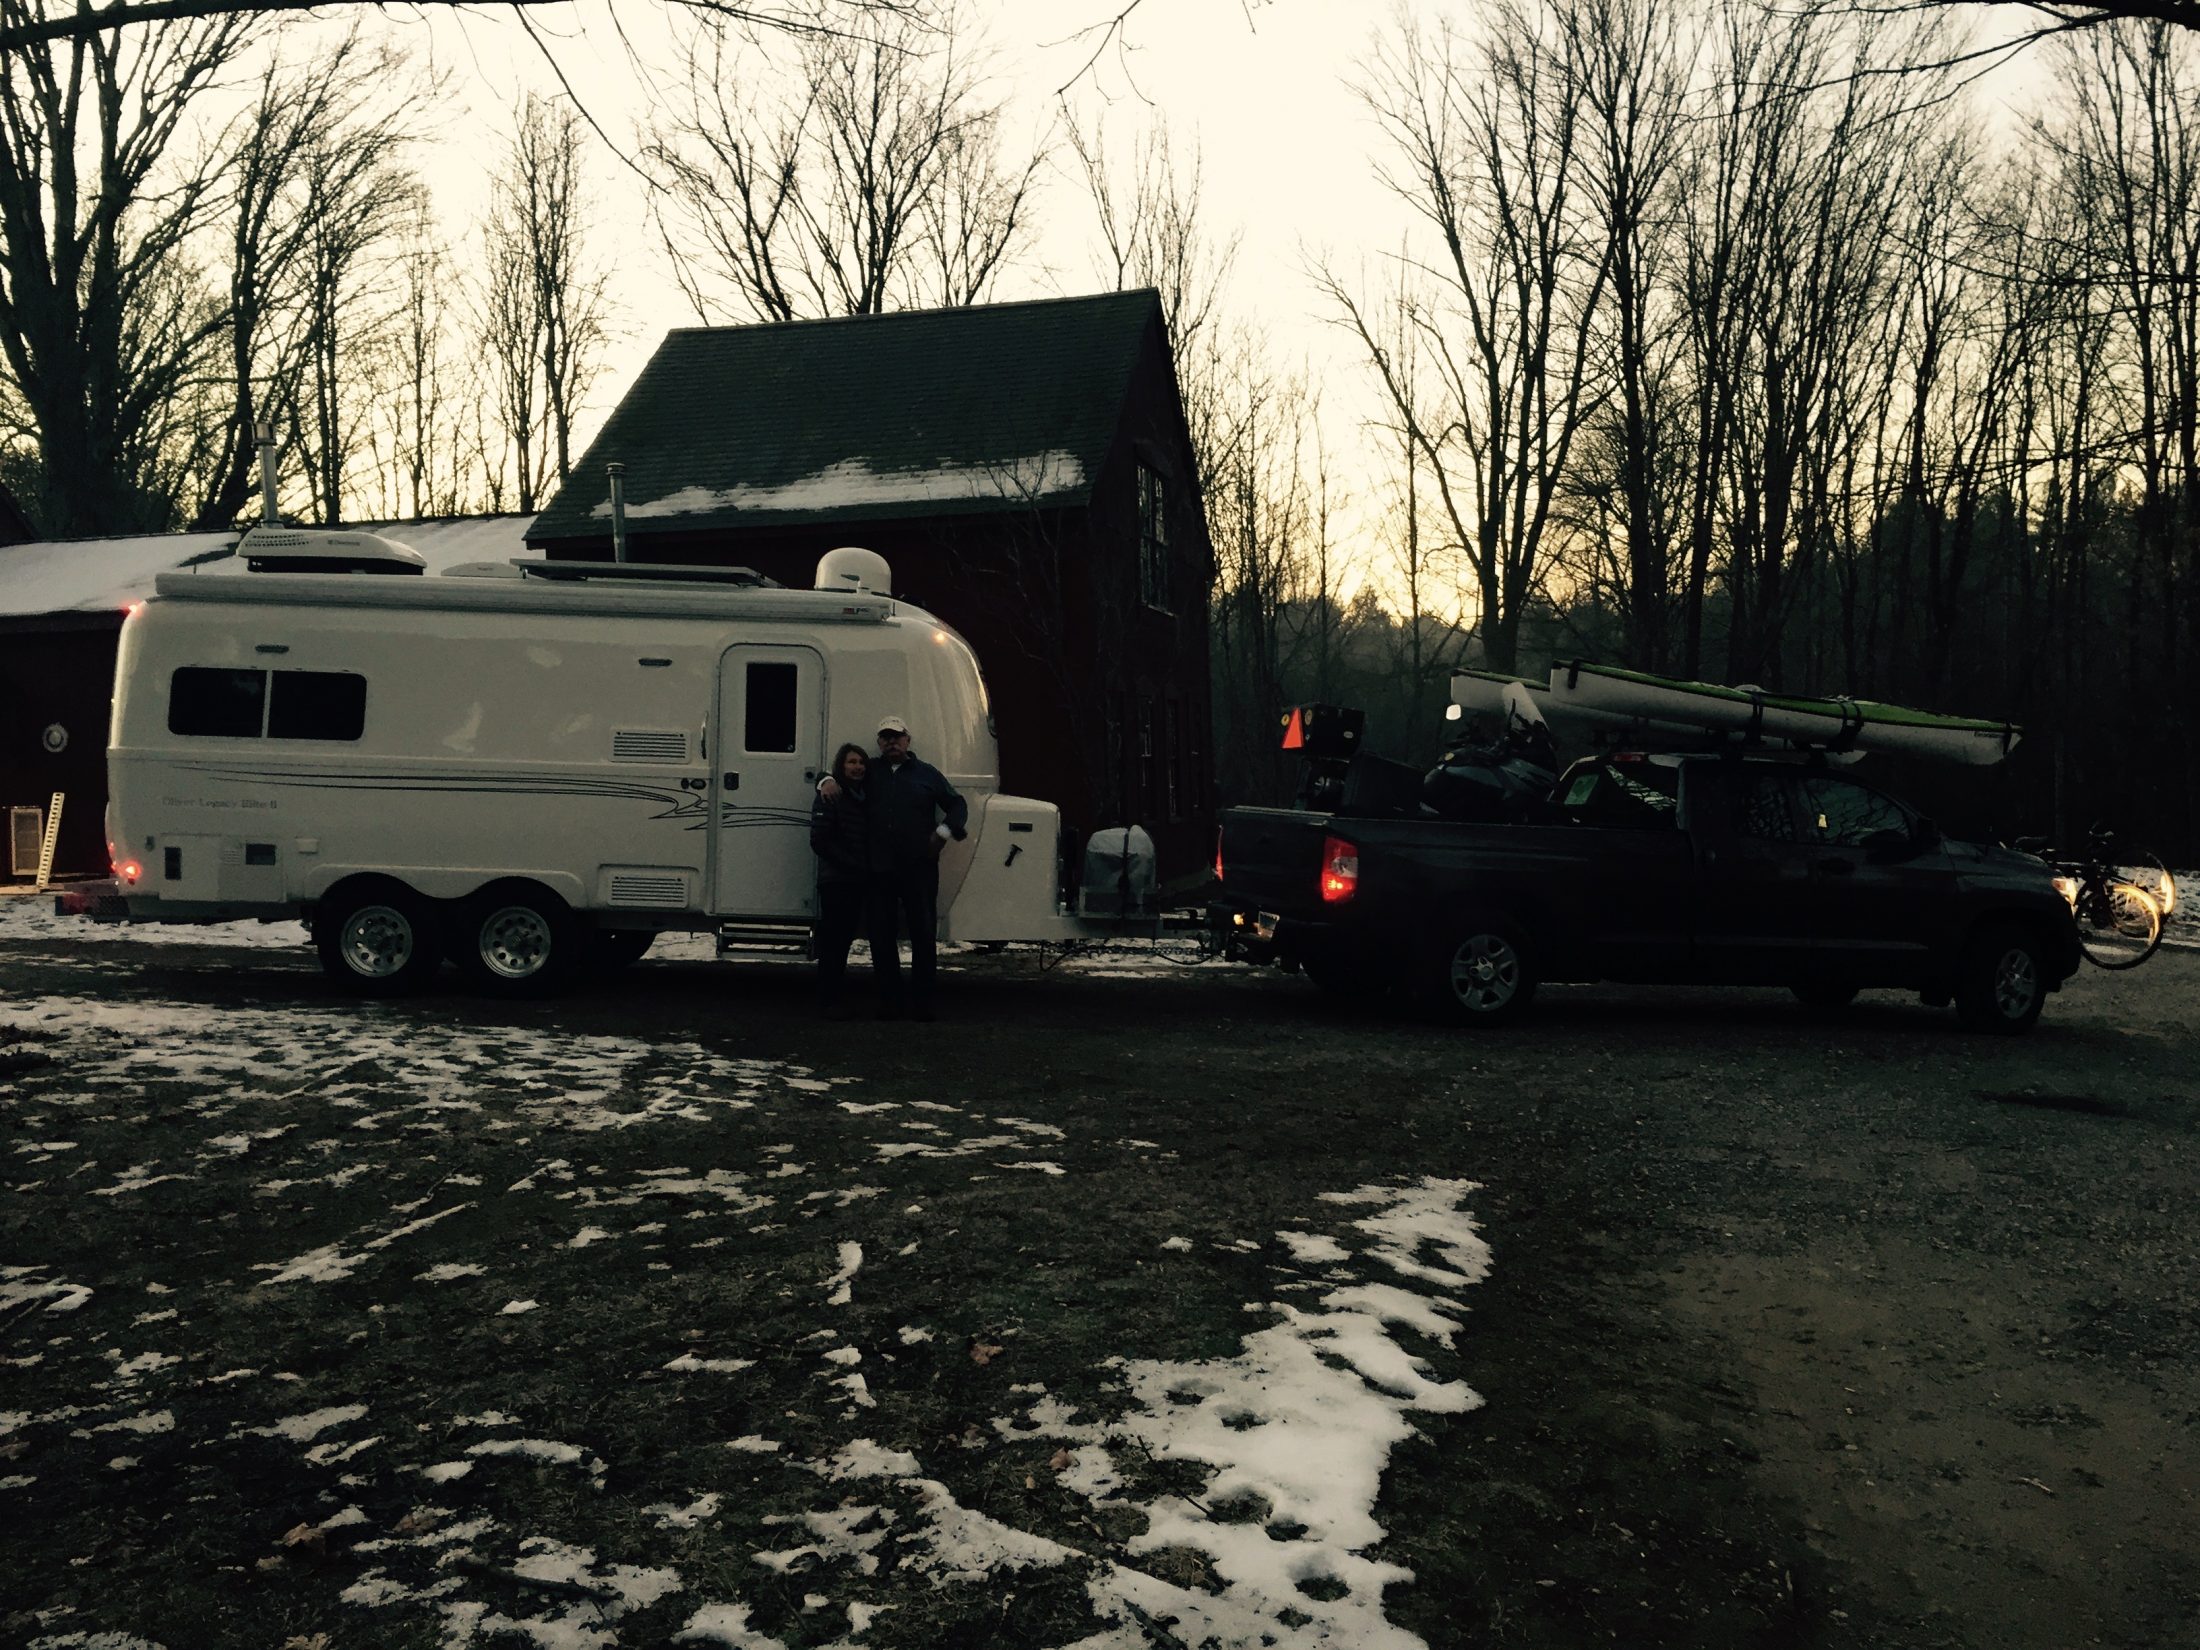
We picked up on Dec 16, 2015 and returned to CT, after a stay over at the Campground down the road from the Factory. We had water on board and were ready to camp, which we did on the way home. We kept the trailer cabin at 60 degrees with the propane heater for two weeks through Christmas and then headed south after New Years. We returned to Hohenwald to have some minor things corrected, and experienced some very cold temps in TN. One night in the Showroom parking lot it went to 9 degrees. That was our pickup experience, one that proved Our Oliver to be a "Four Season Camper" for sure. Attached are pictures of us leaving CT on our first trip south in our new Oliver and another of a 9 degree sunrise in Hohenwald. Thanks for the memories. Enjoy your new Oliver.
 2 points
 -
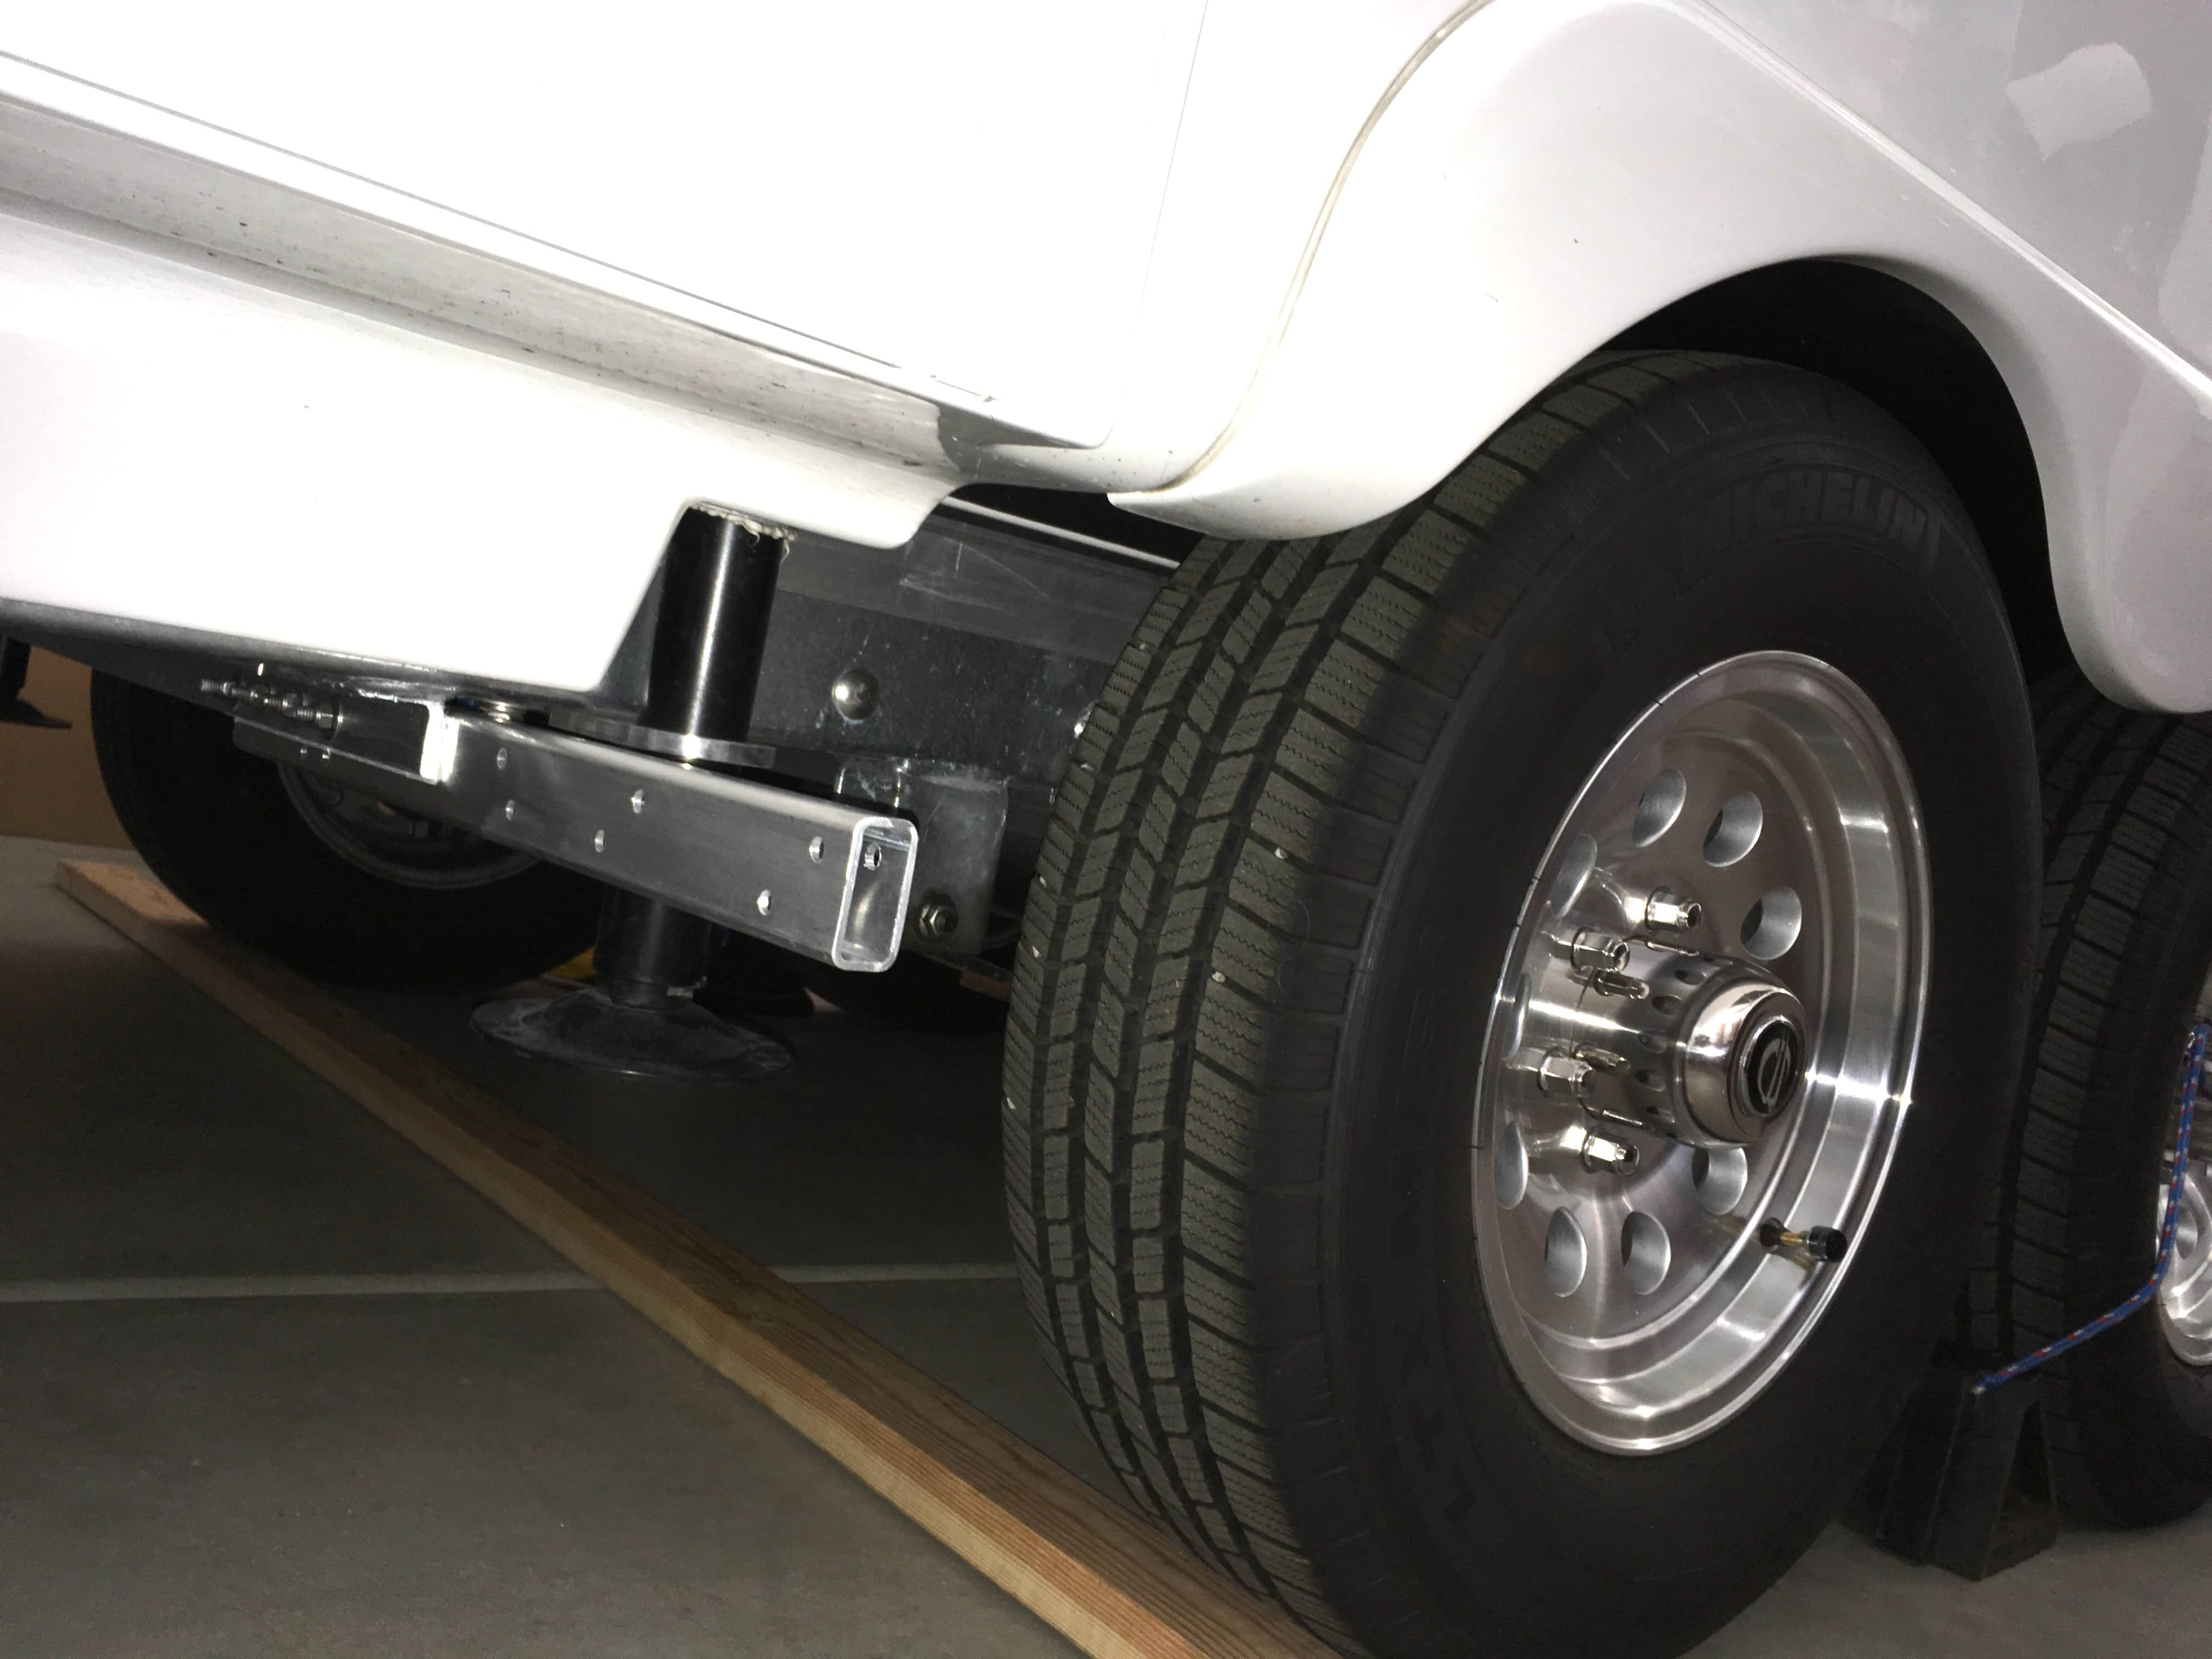
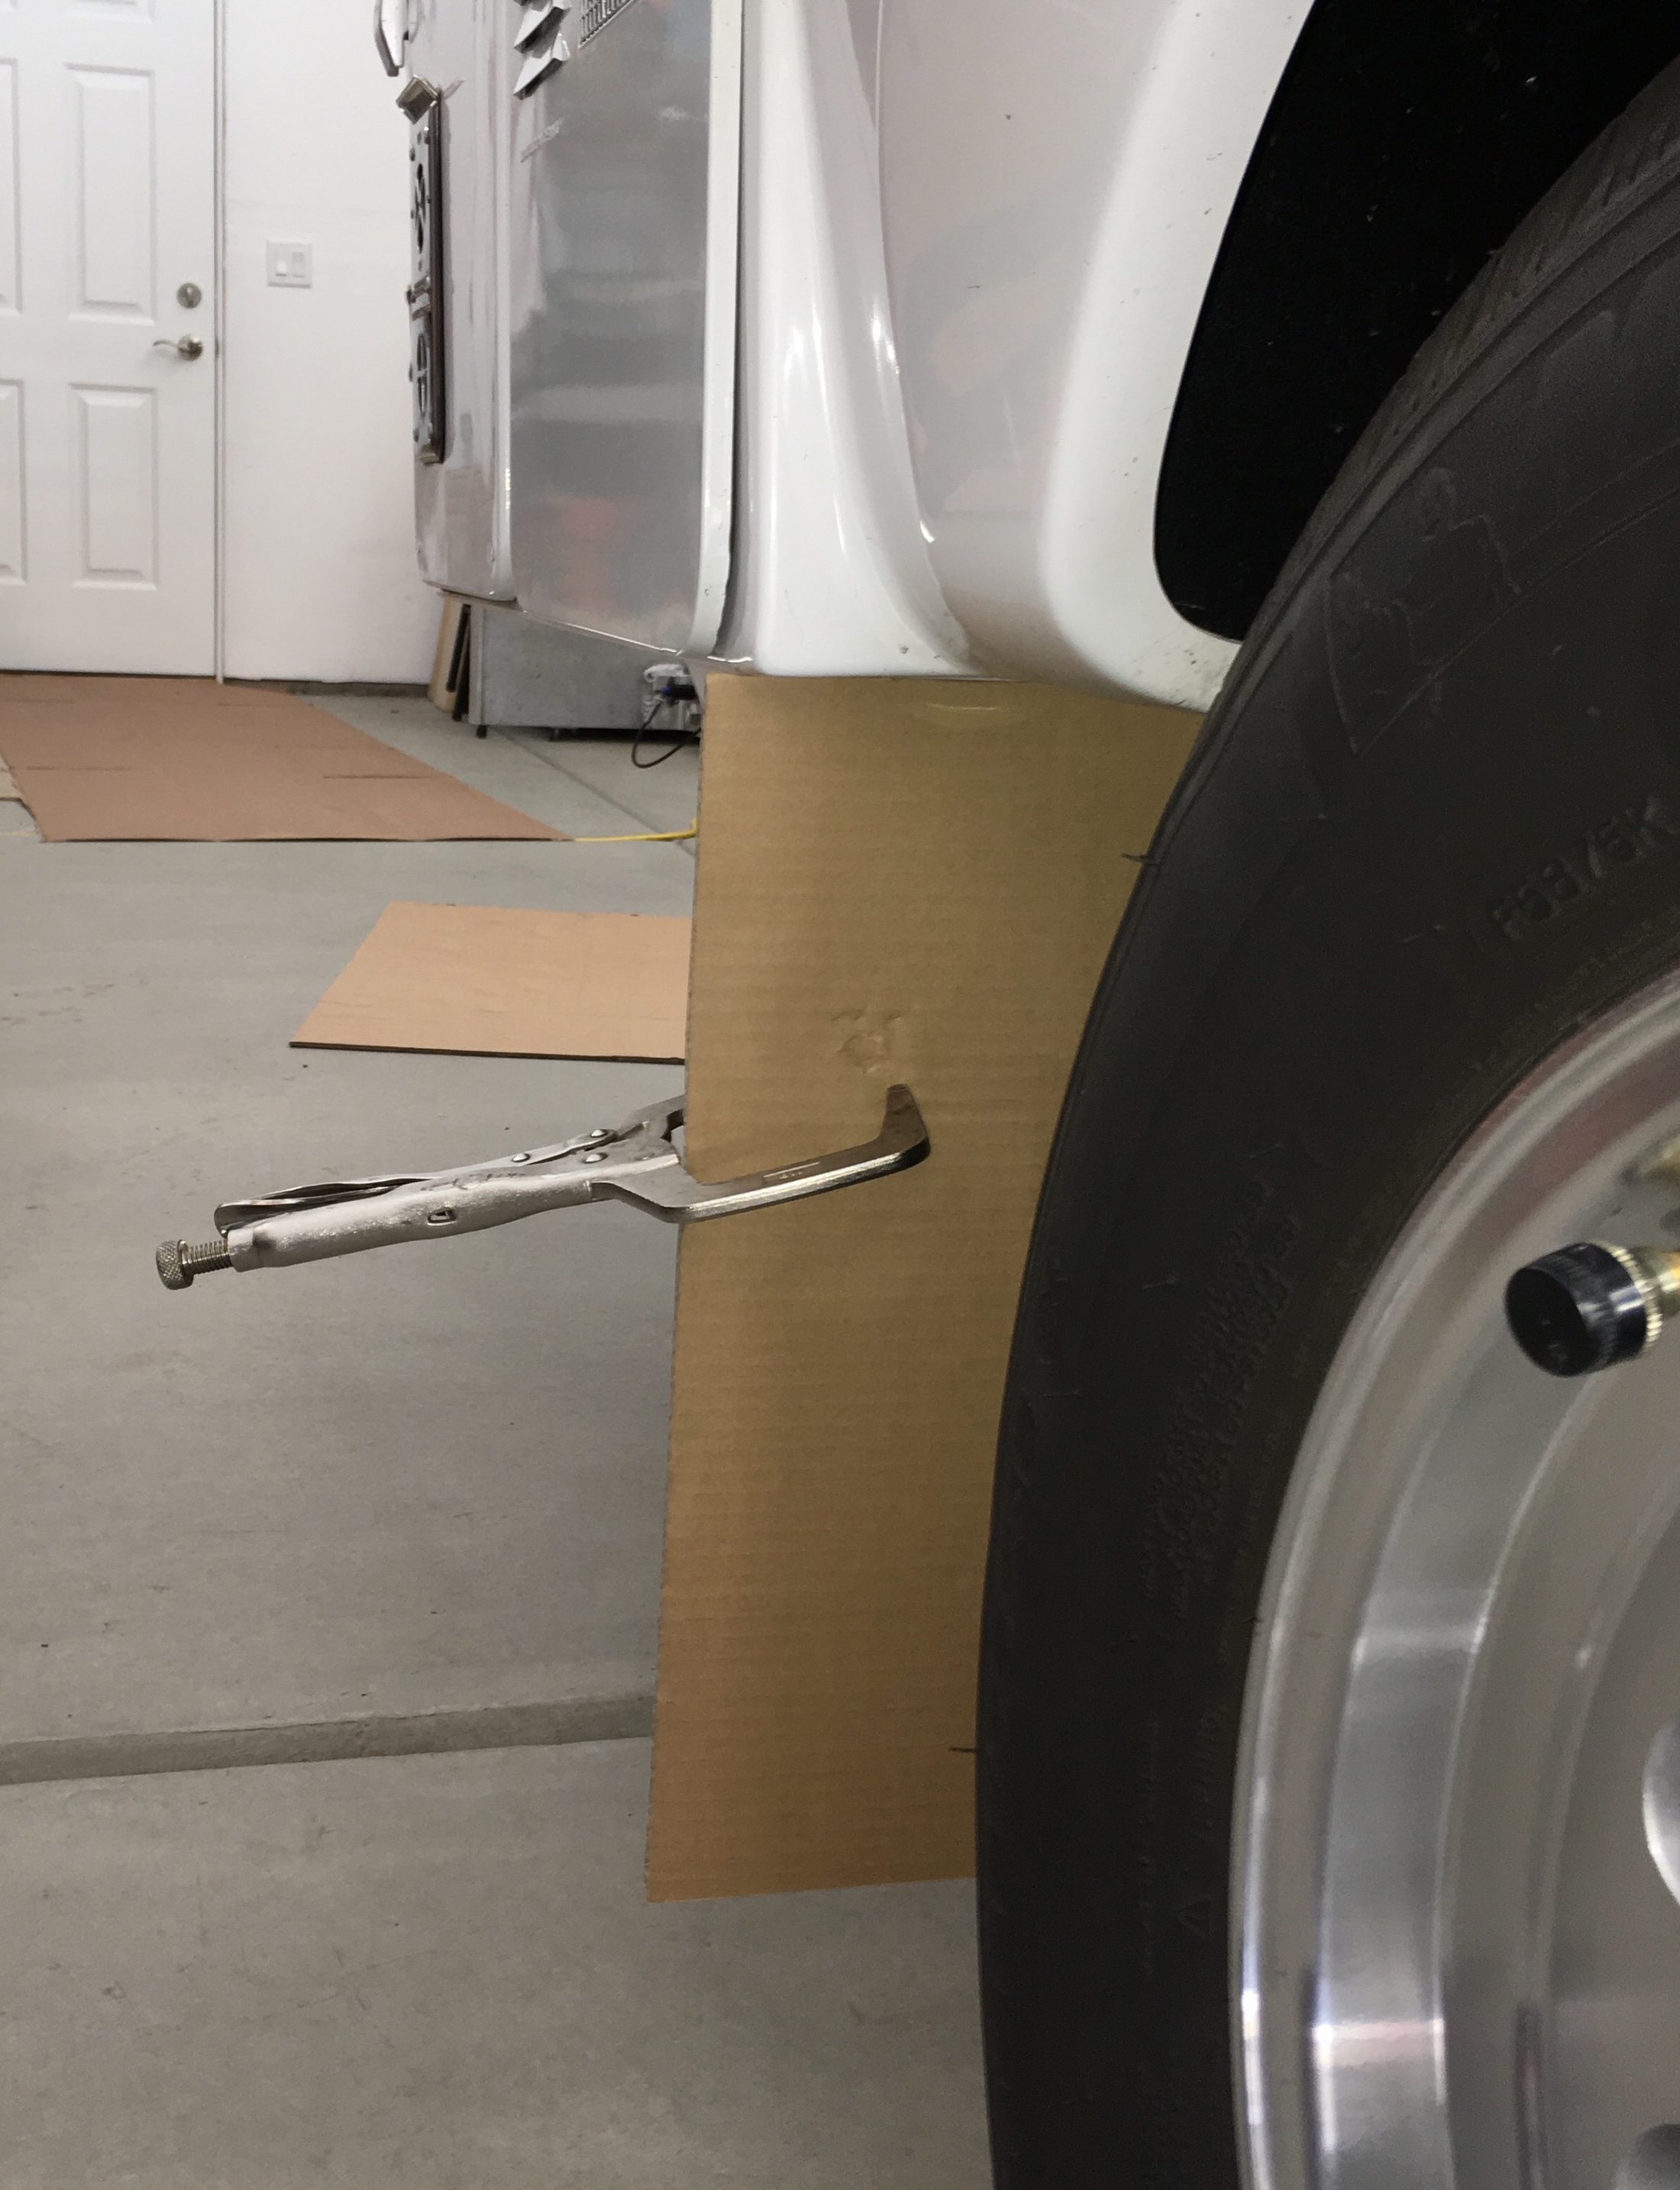
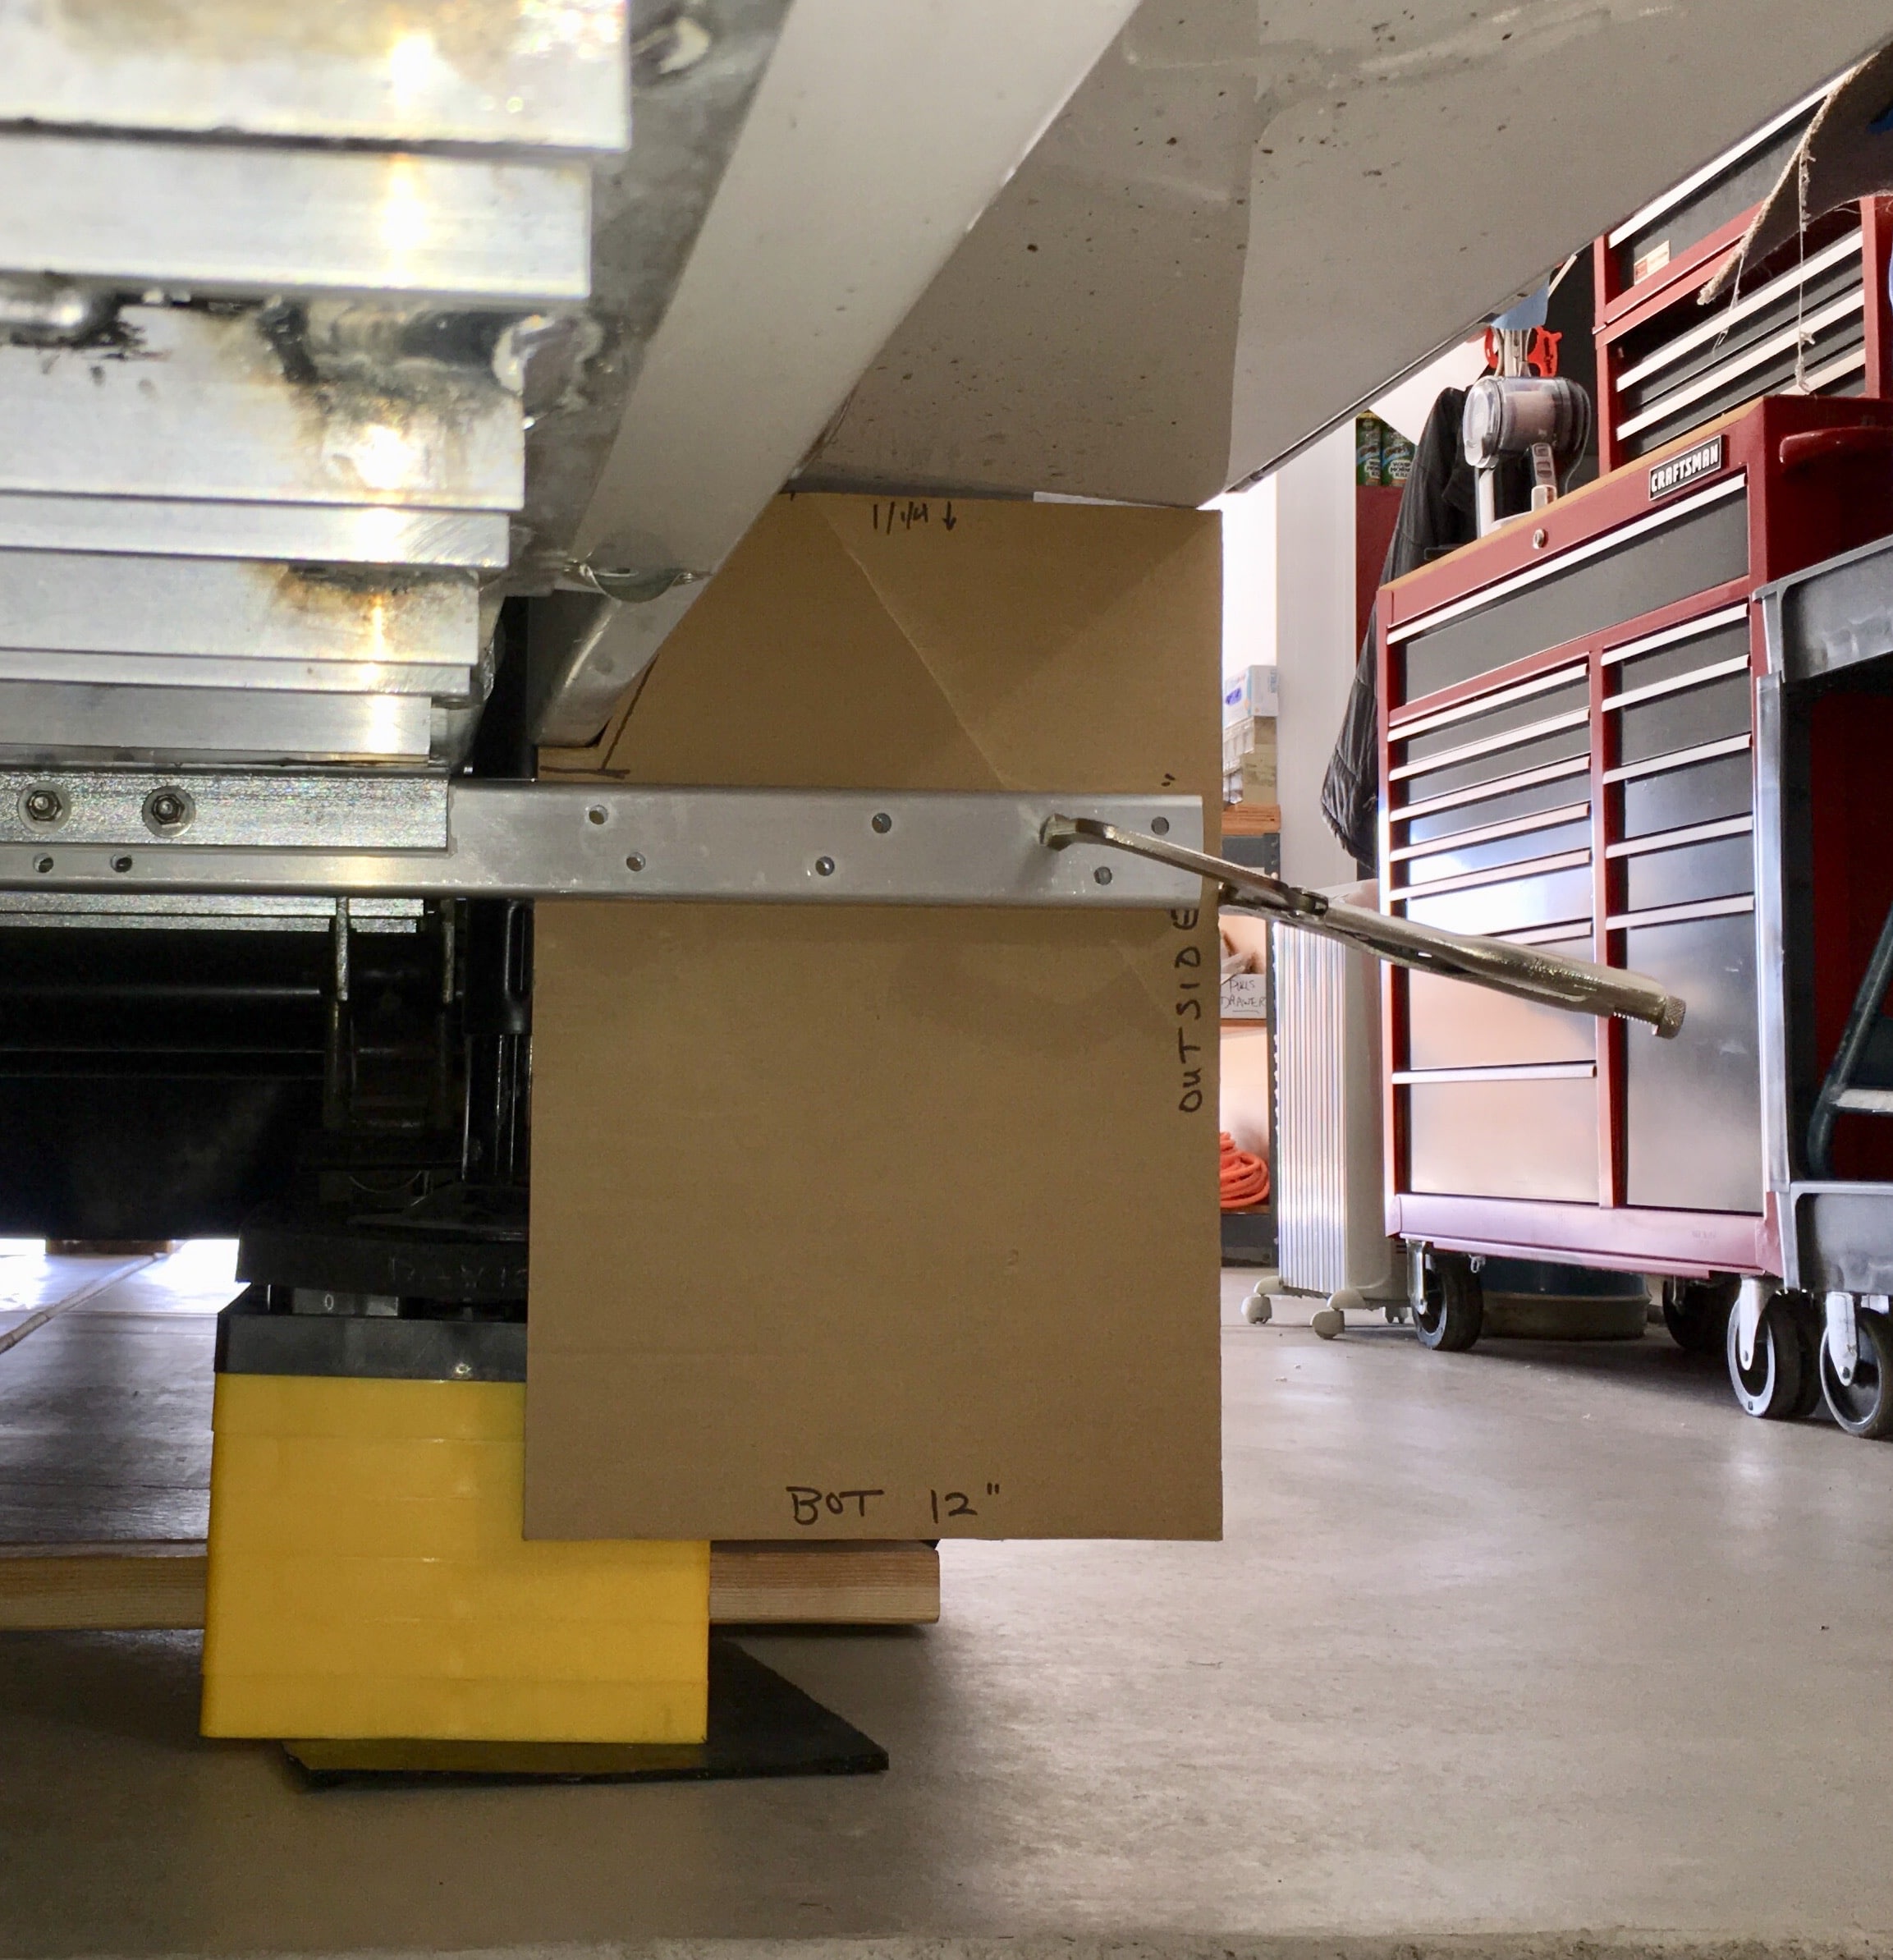
This thread won't have much How To info, mostly pictures. The two aluminum arms were installed using the same methods described in this thread - refer to that if you have questions. ... http://olivertraveltrailers.com/topic/how-to-stone-stomper-gravel-guard/ Note: The steel subframe should be electrically isolated from the aluminum arms as much as practical. I used stainless hardware and bedded the two parts in a thick layer of 3M 4000 Adhesive Sealant. The flaps are universal ones, 12 inch by 18 inch, that I found at a local ranch supply for $18. The size was perfect, all I had to do was notch the inside to clear the hull. They are this same brand but the embossed pattern is a little different: ... https://smile.amazon.com/dp/B0002MA68M/?coliid=I1N0SYMJAAHKPN&colid=1X5H11EH41351&psc=0&ref_=lv_ov_lig_dp_it I mocked up a flap using cardboard to mark the cutout.
1 point
-
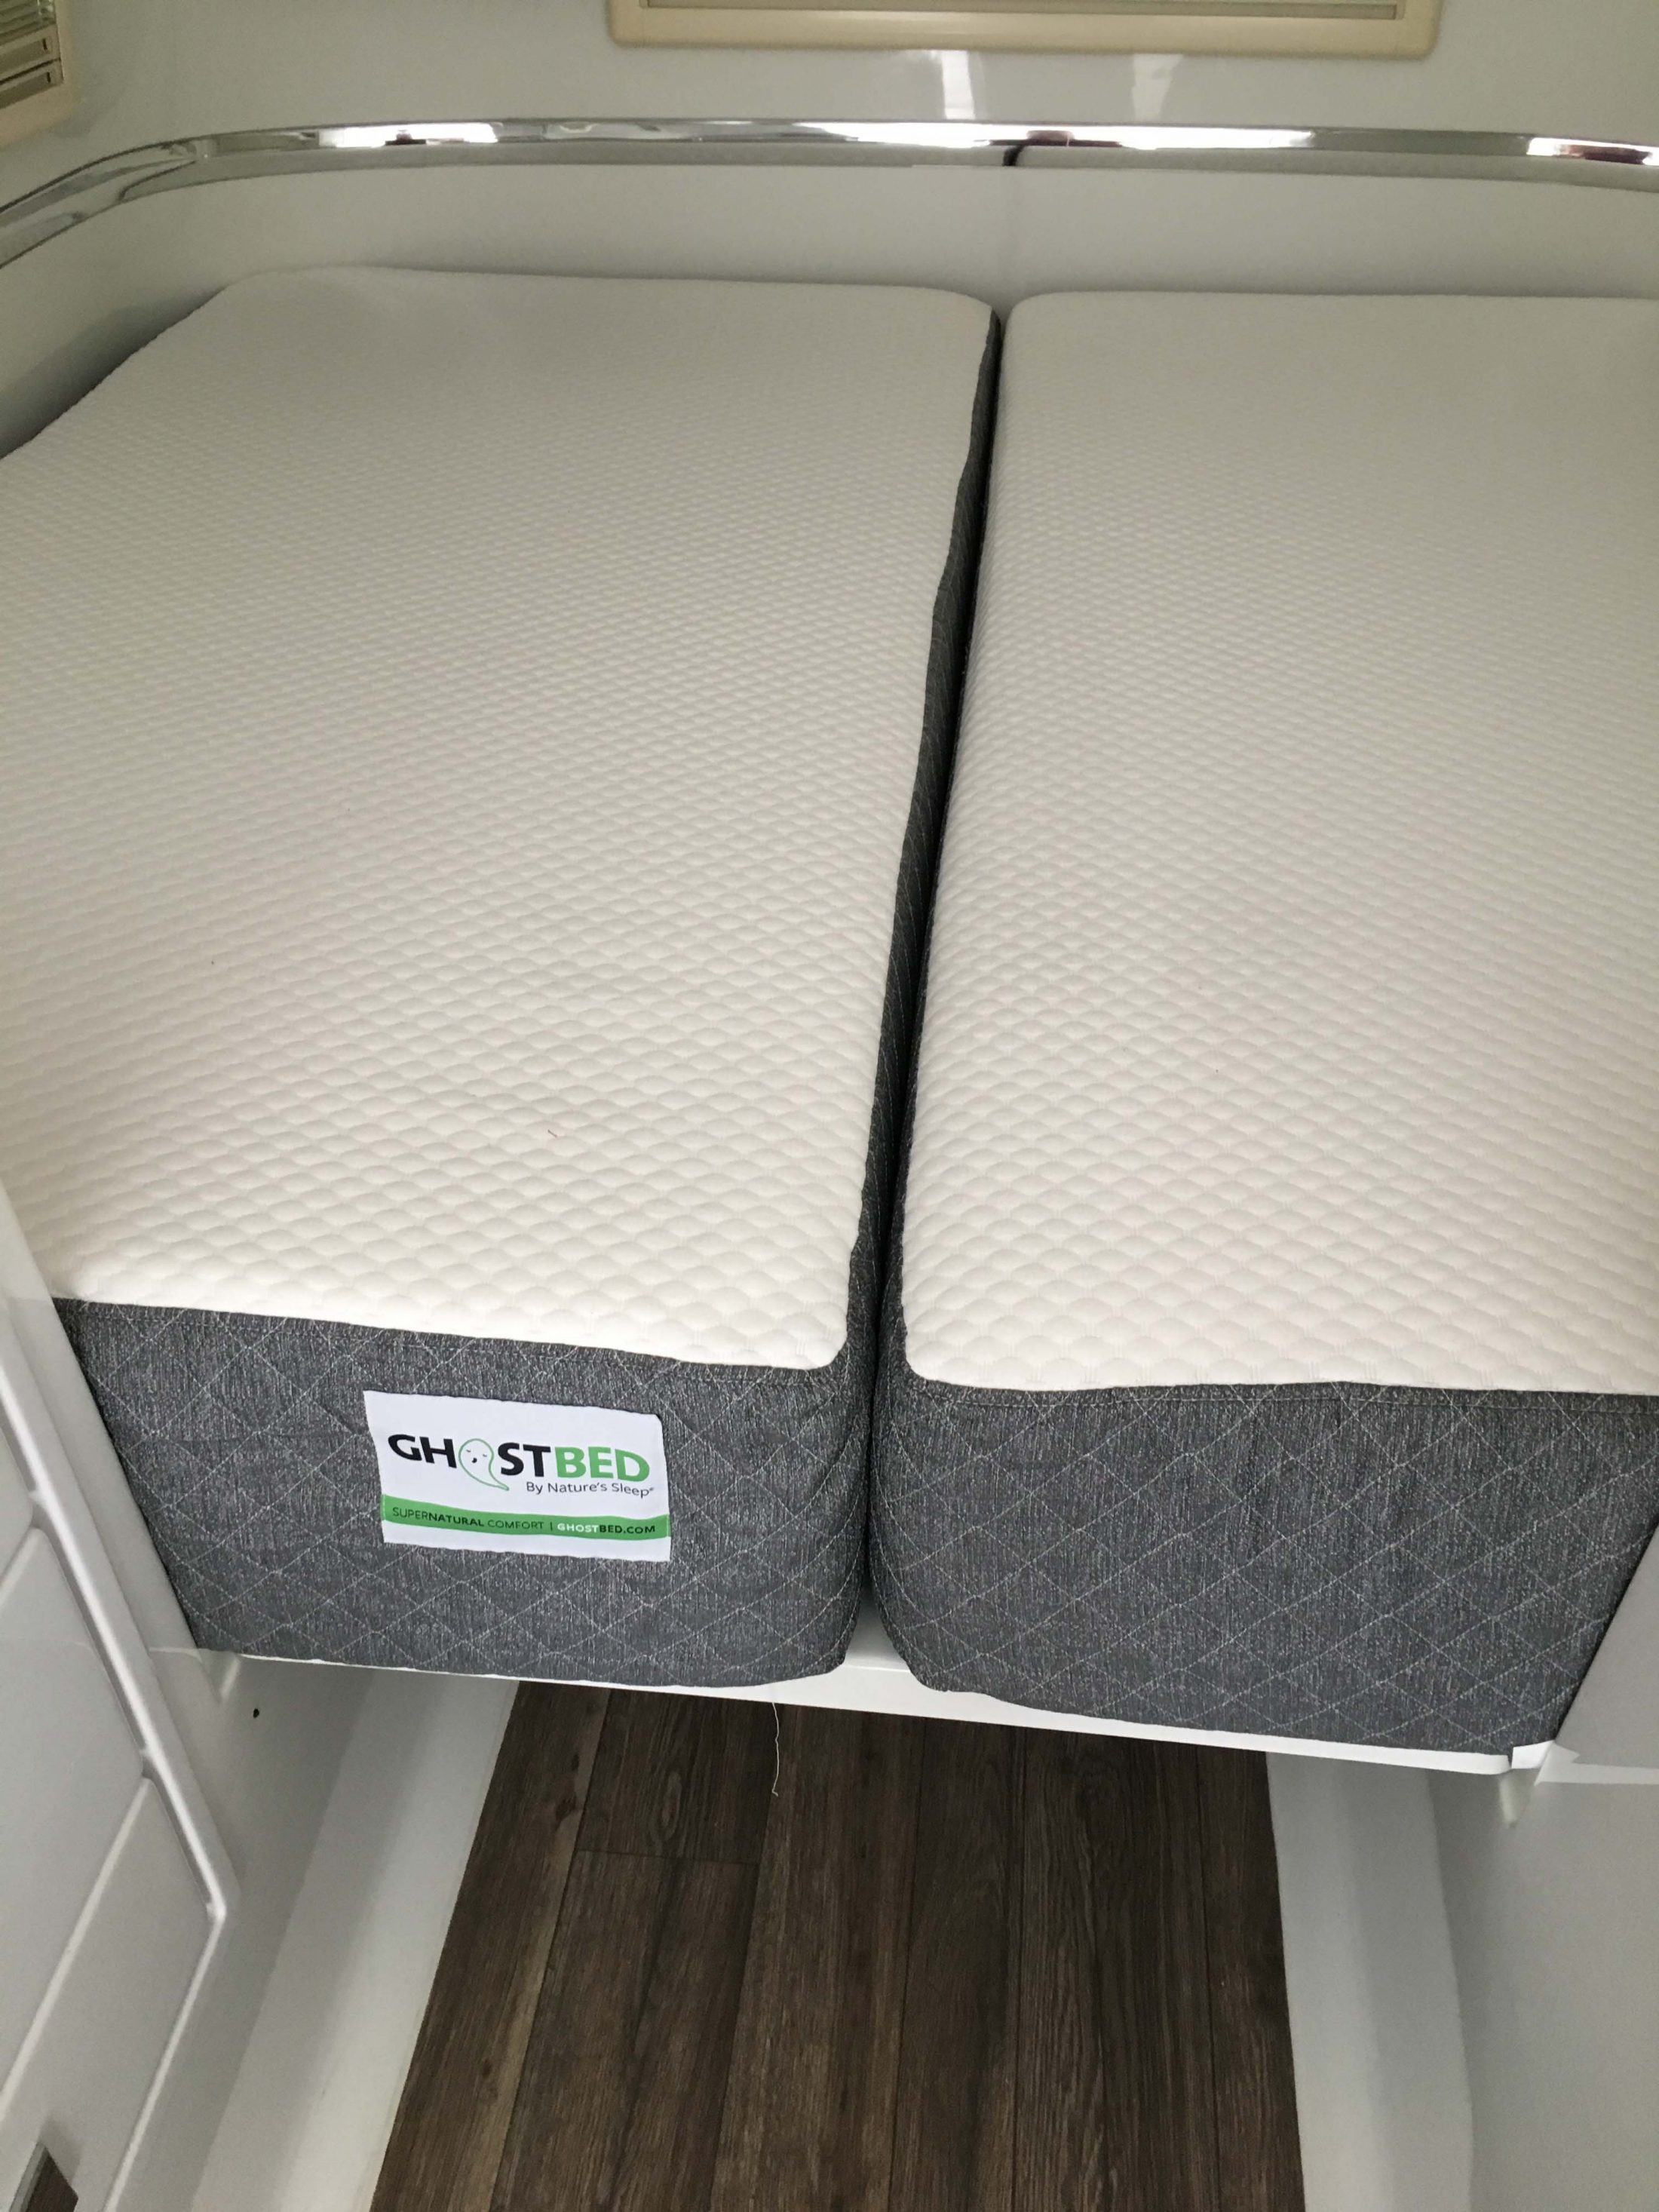
Hello all, Been a member for a decent chunk of time on the forums and I had some questions early on but the answers were pretty slim at the start. So I have had my Oliver for a couple years and we always leave the bed setup. My wife and I spend the majority of the time outside and find the little dinette plenty if we are inside. Early on I was looking for a sleep number type bed but kept running into issues be it a Queen size short and then you have space along the mattress that was left empty or you stuff pads in or a regular size mattress turned size ways but jammed in. At any rate I found the perfect mattress for the location and its very comfortable. We ordered two Ghost Bed Twin size. Ghost bed gives you 100 days to try out the mattress. We placed them inside the house and tried them out and found them comfortable. The attached images show them in place. It is a tight fit and the corner of each mattress at the curve in the back is pushed in slightly but not enough to cause a issue. I will be writing a different post in the modification section to show you how I handled access to the fresh water drain while the mattresses are in place. On a side note the mattress being two twins sit tight in place so they don't move around and also if you had to move them to get access its as easy as stripping the sheets off and lifting one side and placing it on the other. UPDATE Hello for some reason Im not able to reply to my own topic so I am doing this through edit mode. I have my bed setup as a permanent bed. My hull is 087# My cushions for the bed area are stored in my house. The reason I went to a Ghost bed is I have a bad back. What comes from the factory will make me sore after one night of sleep. The mattress I ordered was a Twin standard because the XL is too long to fit into the space without modification. These mattresses I originally thought I would have to slightly modify by cutting corners but as it turns out they as a pair fit in fairly snug with only slightly bending the corners. I also looked at other twins on the market (Bed in a box aka. online beds) and none seemed to have the same measurements. Most would be too large or require more modifications like cutting them. At any rate my update for this is the camping trips I have had so far after the mattresses have been some of the best trips I have had in years. Previous to my oliver I had a Toyhauler that had a full size sleep number queen bed and that was great. That being said I would highly recommend avoid toy haulers because man from year one I typically had to pay 1k to 3k a year in repairs. Turns out that back wall missing sure causes issues with the entire thing flexing more. Anyway we love our Oliver and the only thing I would recommend would be Oliver to rethink their black/grey water system. I have owned TTs and RVs and the Oliver sadly has been the most difficult to deal with when it comes to draining. The rest were as simple as pulling the handle and it drained. With the Oliver if you do not raise the tongue height you never fully drain it. At least thats my experience. Sorry off on a tangent. Anyway at the end of the day some of us keep our beds down full time for ease of use. And the mattress I purchased Im thrilled with.
1 point
-
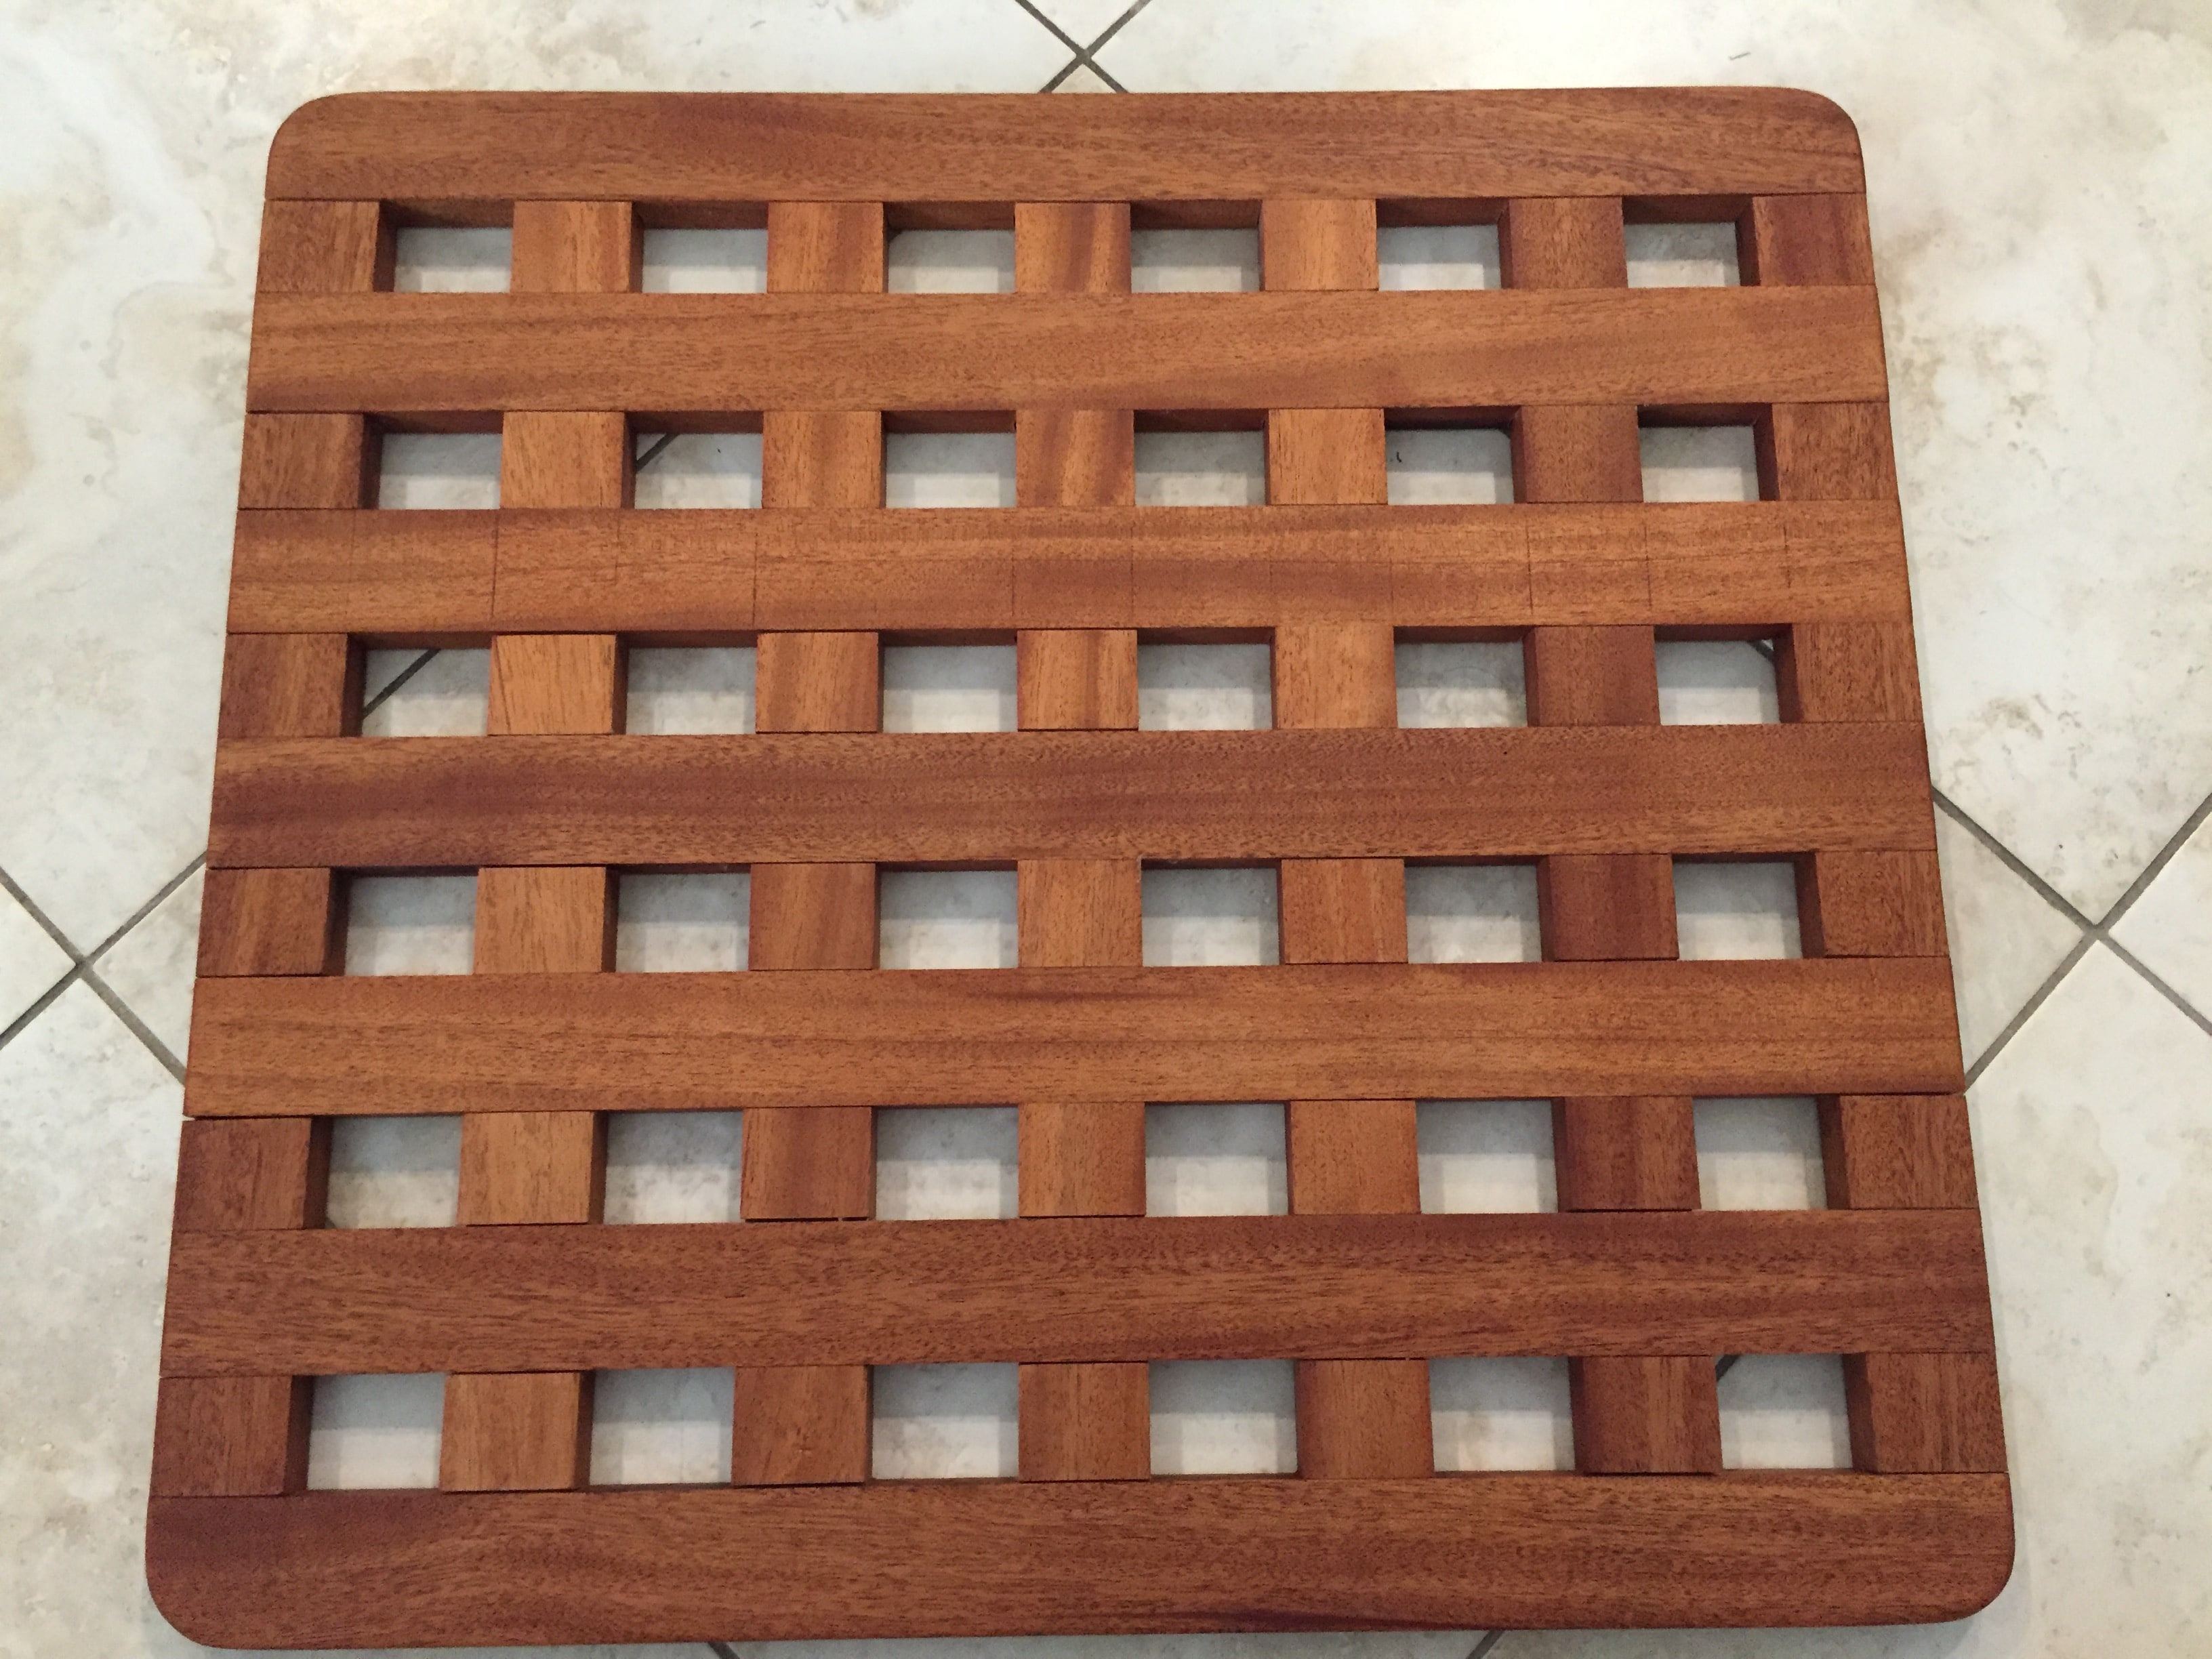
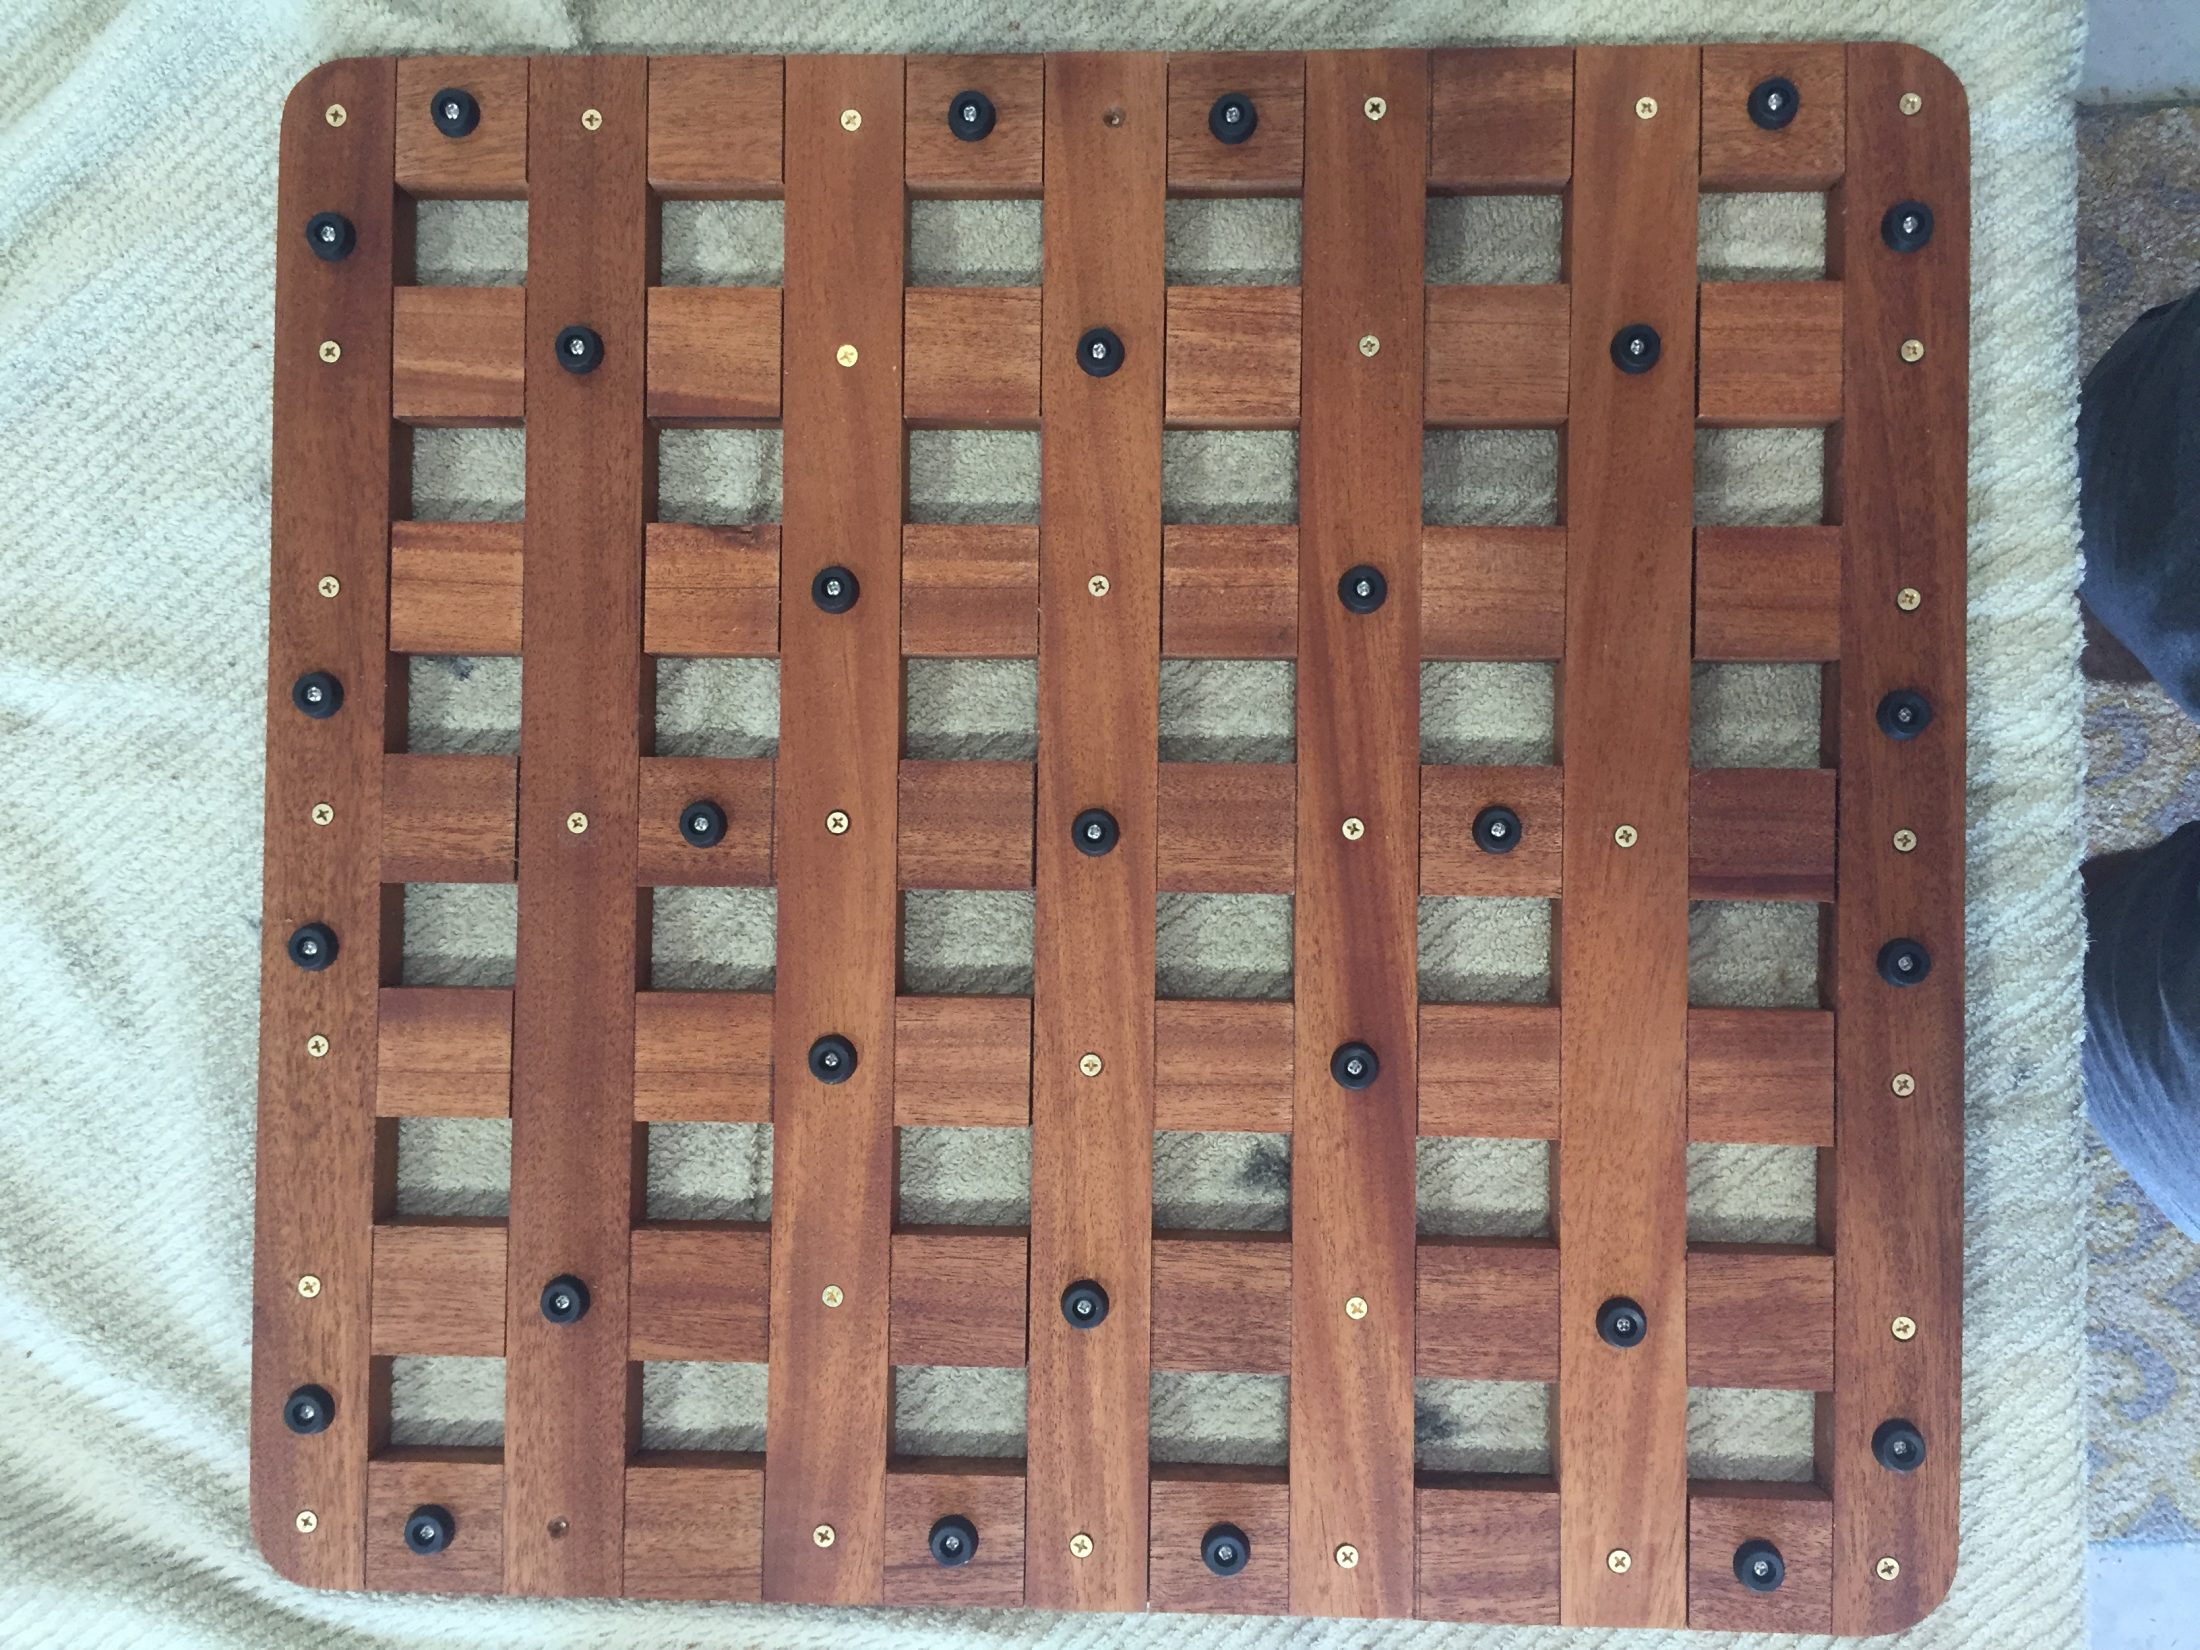
I have a number of owners who have asked me to craft shower mats for them therefore, I going to open this up for everyone. My shower mats are made from Honduran mahogany in a crosshatch pattern. Designed and assembled using over 40 precision shiplap joints with brass screws and no glue, making them lightweight and very strong. They fit your Oliver shower floor perfectly, stay put during travel and will last for year to come. The crosshatch pattern drains away water quickly and keeps you from standing in water. Their rubber feet protect your shower pan and provide a non-slip grip. Cost $185 plus UPS charges to ship to your address. If you would like one, please contact me at cell 516 635-5656 or email 48ocean@gmail.com Please note: These are wood and as such will need a little care from time to time. After each shower, simply tilt the mat up toward your closet wall and let it dry. Every few months scrub them with a soft bristle brush let dry complete and apply a light coat of mineral oil.
1 point
-
I just discovered a new app that lists boondocking sites called iOverlander. They have apps for iPhone and for Android. They also have a website: http://ioverlander.com1 point
-
The original owner of my unit, had a February delivery and was going to Pennsylvania with it, he was delayed almost week because of an ice storm where the factory parking lots were impassible. Just be prepared to be flexible with your timeframes and travel plans. On the other hand, the Farmers Almanac says it’s supposed to be a milder winter.1 point
-
We've never had an lp monitor, other than lifting the tank, or running a hand down the side to try to gauge the difference in temp.. We run one tank till it's gone, switch over, and fill the empty. Luckily, the primary tank has rarely emptied in the middle of a winter temp night. After camping with our trailer for awhile, we got a feel for how much propane we used in varying weather. The ability to carry two tanks, for us, is very useful. We tend to use tractor supply and other places that charge by the pound or gallon for a fill. We don't have to wait for empty to fill a tank. For us, it's not quite like running out of gas in the truck. We always have that second lp tank... ready to go. Sherry1 point
-
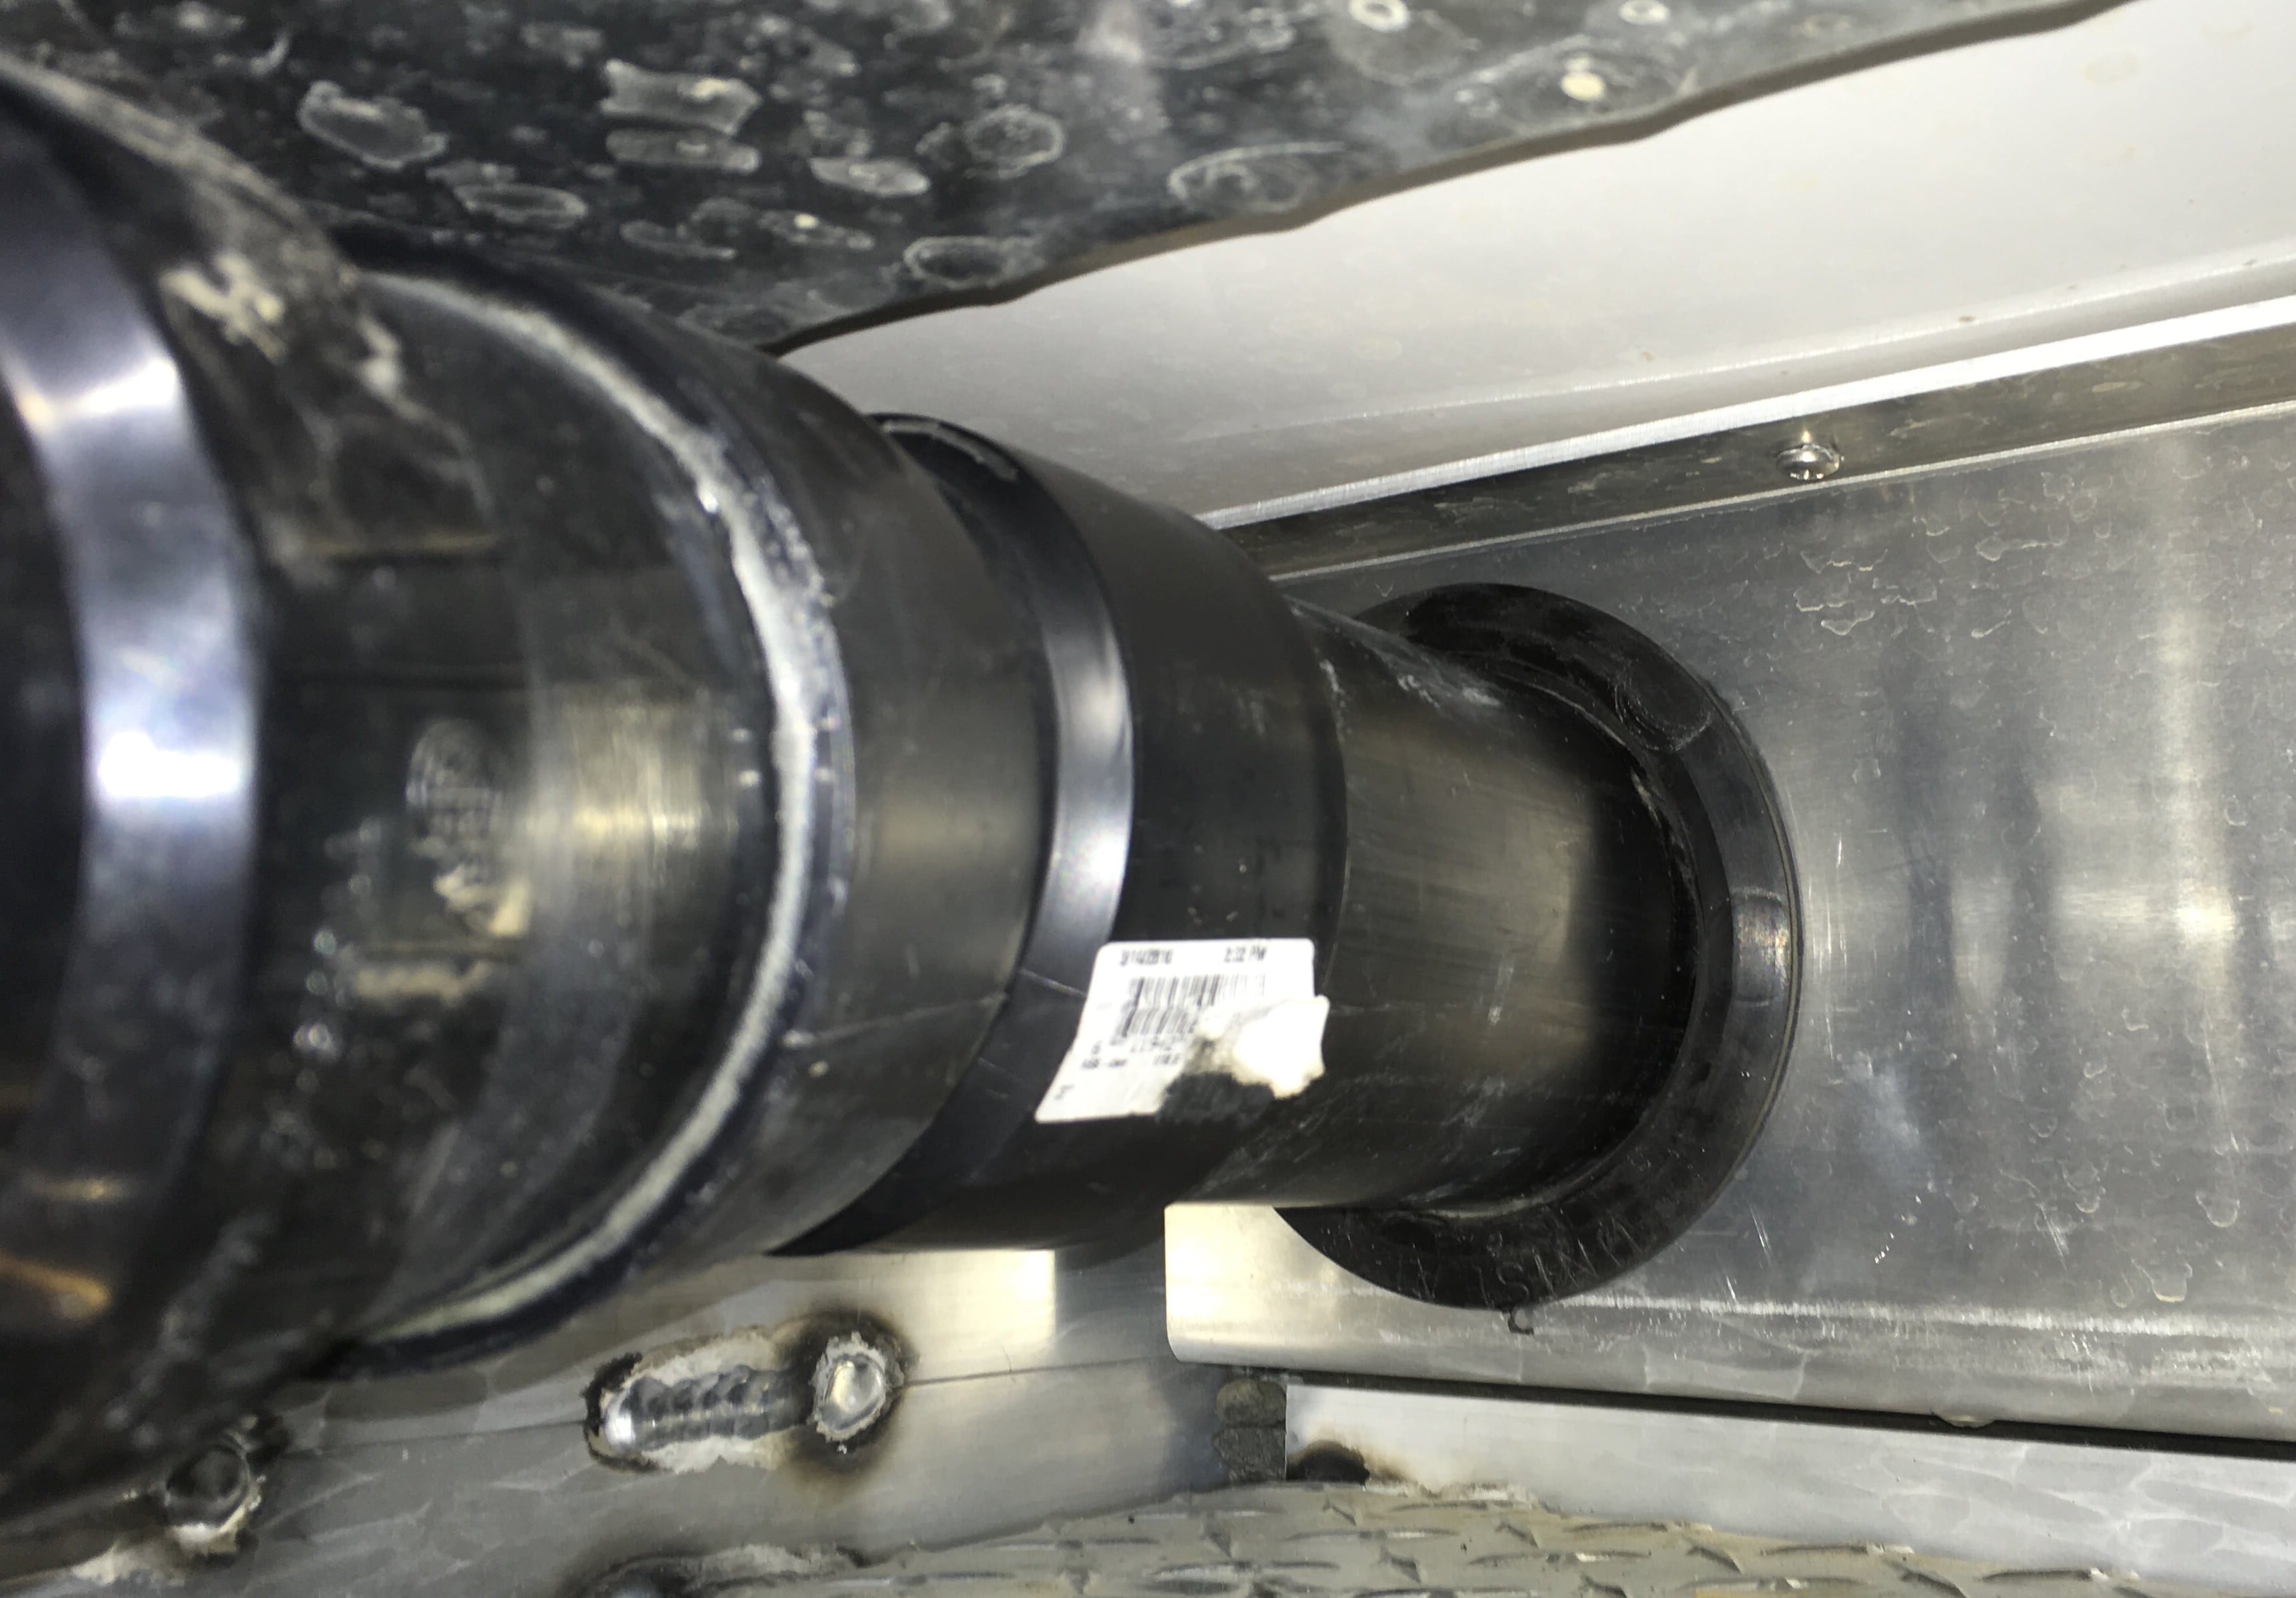
This really embarrasses me because it took 18 months to finally figure out what was going on. The waste pipe has always flopped around and it never occurred to me to get on my knees with a strong flashlight for a close look. I discovered that at the very front (dark) end of the hose compartment is a 5” hole where the 3” pipe exits the trailer. There is supposed to be a big flanged plastic grommet inserted into the hole to seal it. Mine was two inches back on the pipe. It had never been pushed into place. I drove it into position with a wood stick and a big mallet. The last little bit at the 6:00 position was tough, but I wedged a 2x4 under the pipe and finally got the last 30 degrees of grommet to snap firmly into place. Now the pipe does not move, nor will huge amounts of road dust enter there. If your pipe moves at all, check the grommet. It should look like this, fully seated all around. You can feel with a finger if there is a gap anywhere: Fixing it should RADICALLY slow down the nuisance dust buildup in my interior compartment: I will vacuum the dust out once more to see if it is stopped for good. This is what typically comes out of that rear compartment after dusty roads: John Davies Spokane WA
1 point
-
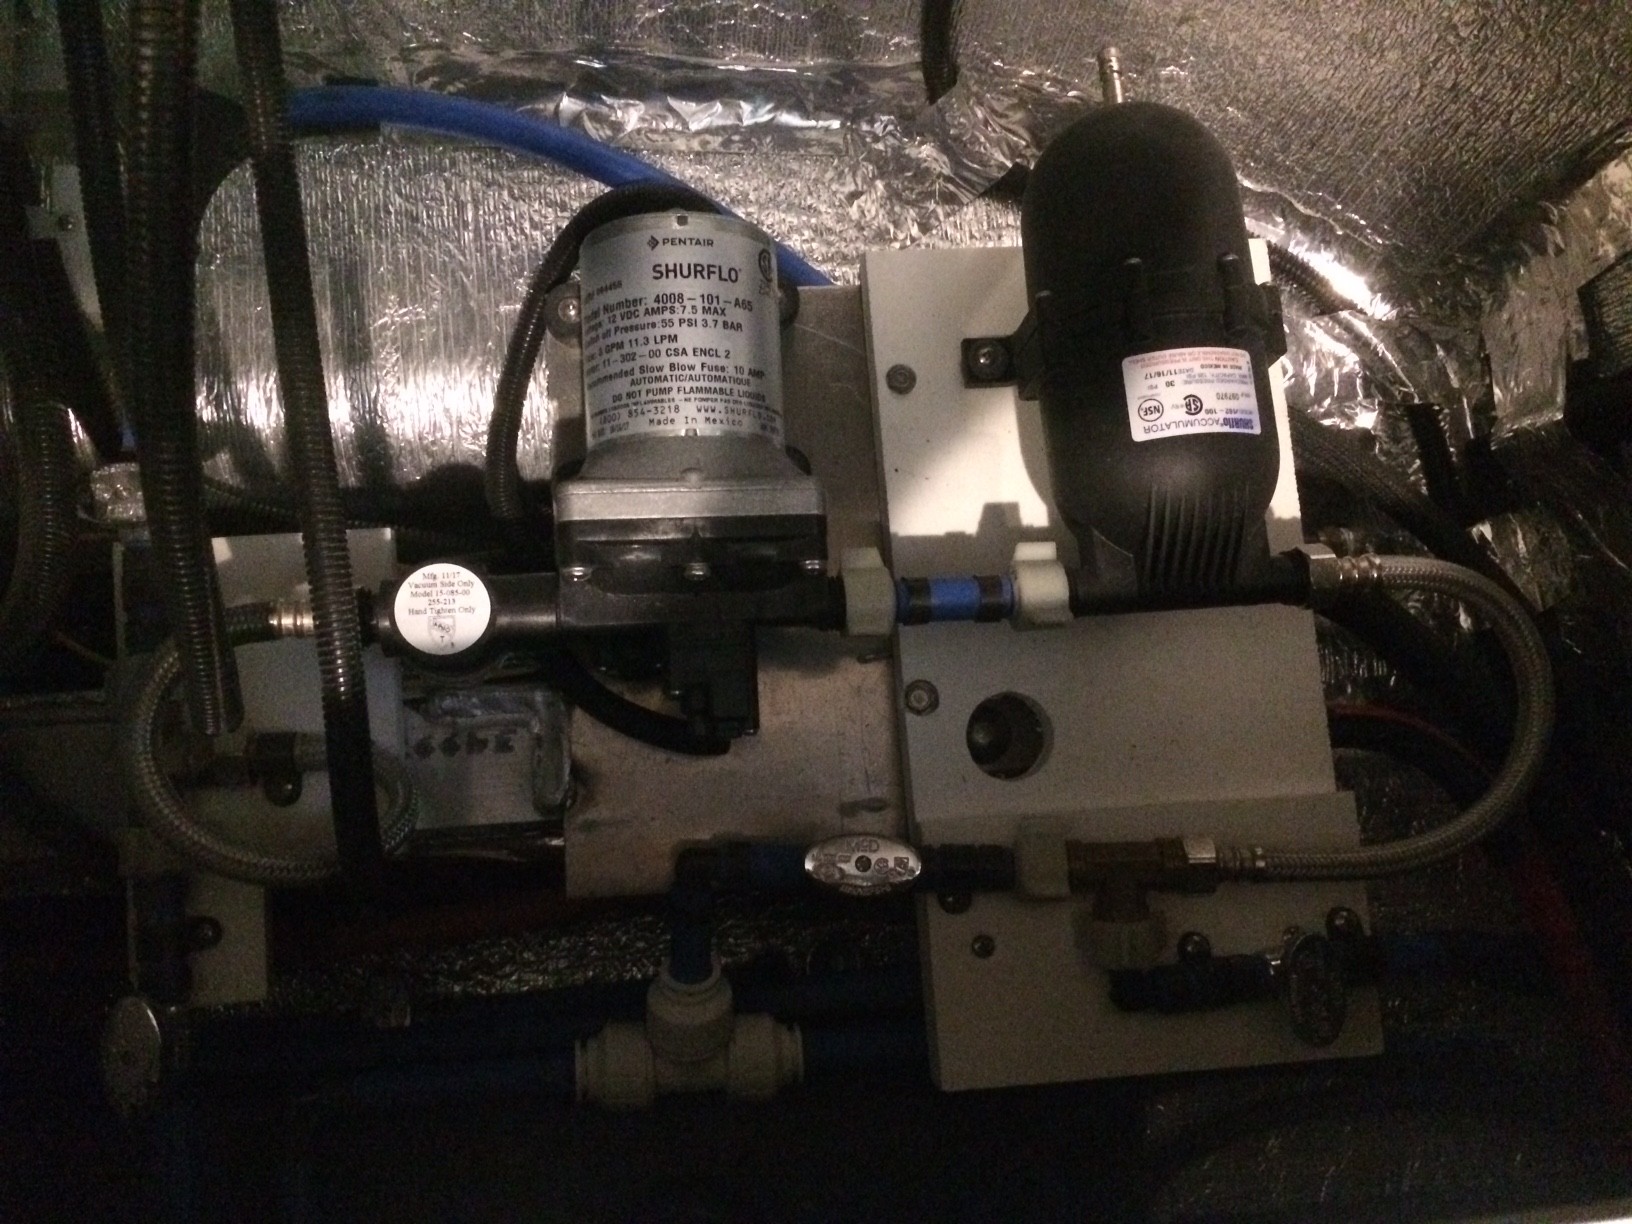
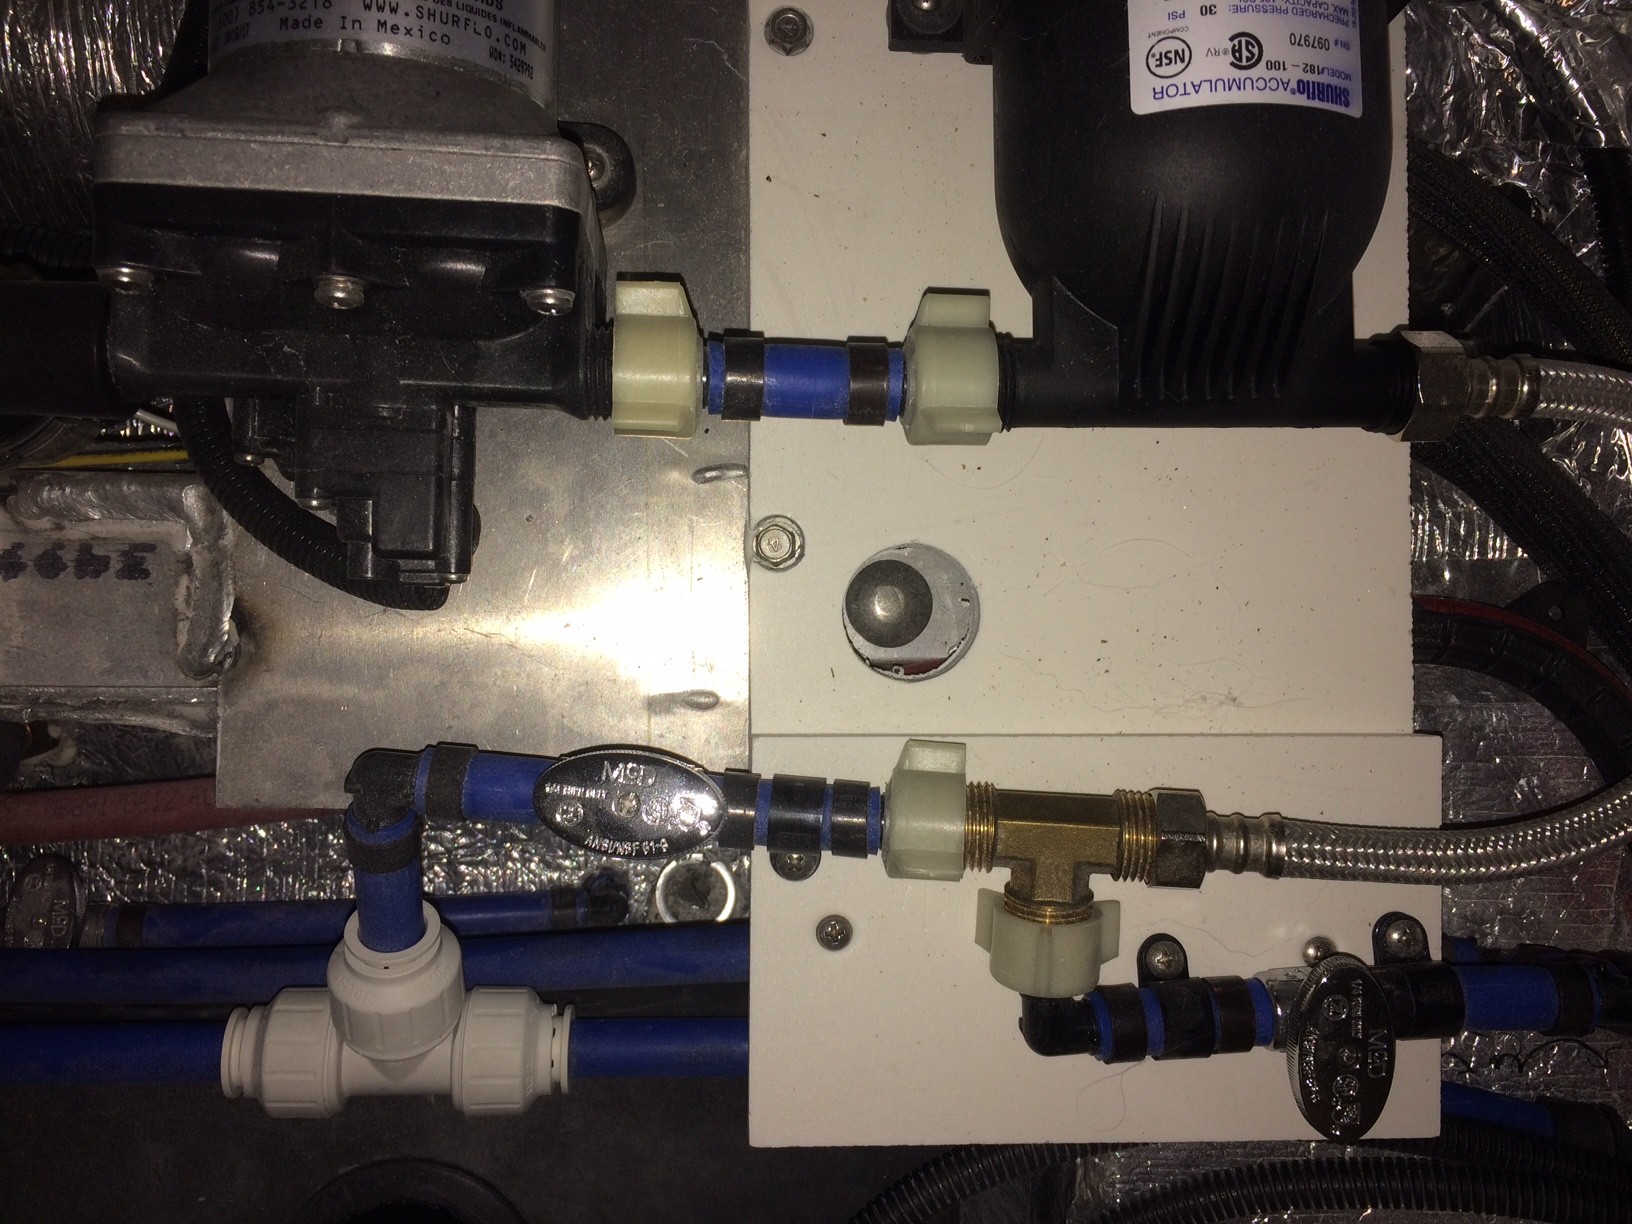
Jason sent me a replacement pump. I decided to perform the job yesterday. How hard could it be? Videos and tutorials claim it is a thirty minute job. I always take more time when involved in my first mechanical foray. The unknown always provides a bit more anxiety than I am comfortable with, even when knowing I am capable of performing most repairs when it comes to owning a home. But this home is on wheels and less than a hundred square feet. Being confined to working within a tight space never thrills me. This job was no exception. But the new pump works, and so far there is no filling of the fresh water tank while hooked to city water connection. However, there were three points I discovered while replacing this pump: The four nuts and bolts used to fasten the pump to the makeshift metal plate need to be replaced with something like wing nuts so you can actually get to them with your fingers. Tools just don’t work too well with this poor design. Impossible to get the existing washer and nut back on and in one case one nut was lost. It took me another half hour to find a proper nut in the can that holds my spares. A most disagreeable introduction to a poor design. I was not aware that I would need instead of the typical wire nut tie a crimping style with tool to match. For the time being I installed the pump with the wire nuts I had and ordered from amazon what I need to complete the job properly. The flexible protective sheath of course would not fit over the wires due to what I did and that too will have to be done over. Replacement pumps cost about $70. The model Oliver sent me was a SHURFLO 4008-101-A65, 3.0 GPM RV Water Pump Revolution, 12V. According to Shurflo the exact same pump is also a 4008-101-E65 which is a brand new pump, whereas the A65 actually could be a used and rebuilt aftermarket. I bled enough for one day due to the sharp metal and less than admirable design. It seems the fabricators were more concerned with the initial installation instead of ease of operation if and when the pump might fail. And while speaking the other day to a man who has been living on a schooner for the last few years he informed me that this will not be the last water pump I replace. He also advised that everyday I will be working on something or other having to do with our new RV. It is the nature of the beast.
1 point
-
I have recent firsthand experience at this, as we just fixed a leak at the black tank valve today! We keep the waste hose hooked in, as suggested above, and are now so glad we did, as it made dealing with the leak so much easier. Our experience is like Reed’s - there was clearly liquid in the hose, but we were able to hold it upright, open the end, and put the 90 degree attachment in place, and place it in the sewer opening without any problem with liquid coming out before we were ready. We’ve done it three times now with no problem. Hopefully won’t have to be doing it again -fingers crossed that the leak is fixed, as it really stinks up the bumper area!1 point
-
Yes you can, but you will need to fabricate the trailer receiver yourself, or have one made. The former Oliver bike rack platform was mounted to the top rear frame with two bolts on each side. I had designed (in my head) a fixture/platform that mounted similarly, and had a 2" receiver center mounted for just this need. However, I ended up using my Thule rack in a permanent mount on the discontinued Oliver platform. There are a few things to consider, one is mounting it so the spare can be accessed with out removing the rack or platform, and the other is load - given the design, you must ensure it will handle the load.1 point
-
Leigh, The propane level monitor is not hooked up on any of our Olivers, I don’t think. I use a Truma Levelcheck to determine the level of liquid propane in my tanks. https://shop.truma.net/products/truma-levelcheck Bill1 point
-
Isn't there a LAW that comes into effect just as soon as you throw out or donate that "thing" that you have not used in ten years, you suddenly have a real need for it? Both my wife and I came from families that had very limited means. Because we take care of our things they tend to last a very loooong time - we both are still wearing some of the same cloths that we had in high school! We actually get enjoyment from finding new uses for things that no longer can be used for the original function. However, at some point, enough is enough! We have just got to start getting rid of "stuff"! But, the Velcro on our finger tips makes it so hard to do. Bill1 point
-
So, I've been working on the stuff, off and on, since we got back. Definitely, no more than two sets of sheets. Two towels each. Amazingly, my kitchen gear isn't that bad. I'm keeping several days of flatware, just because I hate eating with plastic forks. But, I'm going to divide dinner ware in half. When we have company, most people have their own dishes, or we us compostable paper... One fry pan, one pot, one lid. Two cutting boards, three good knives. A few cooking utensils. One thermometer. So far, I have "archived" two big bins to the crawlspace. Working on more. One under seat storage bin is full of manuals. At home, I have tossed most of them, as everything is available online. Since signal is often hard to get where we love to camp, I guess we'll keep them. But I will cull the manuals for gear we have discarded. At home, the new year's week is my purge week. I hope I can do as well on the camper this year. I feel like every year, we carry too much stuff that we didn't touch the last year, just in case. At home, what I don't touch in a year usually goes to the salvation army. Should it be different? Im not sure on a few items. Sherry1 point













-
Recent Achievements
-