Leaderboard


Popular Content
Showing content with the highest reputation on 10/06/2018 in all areas
-
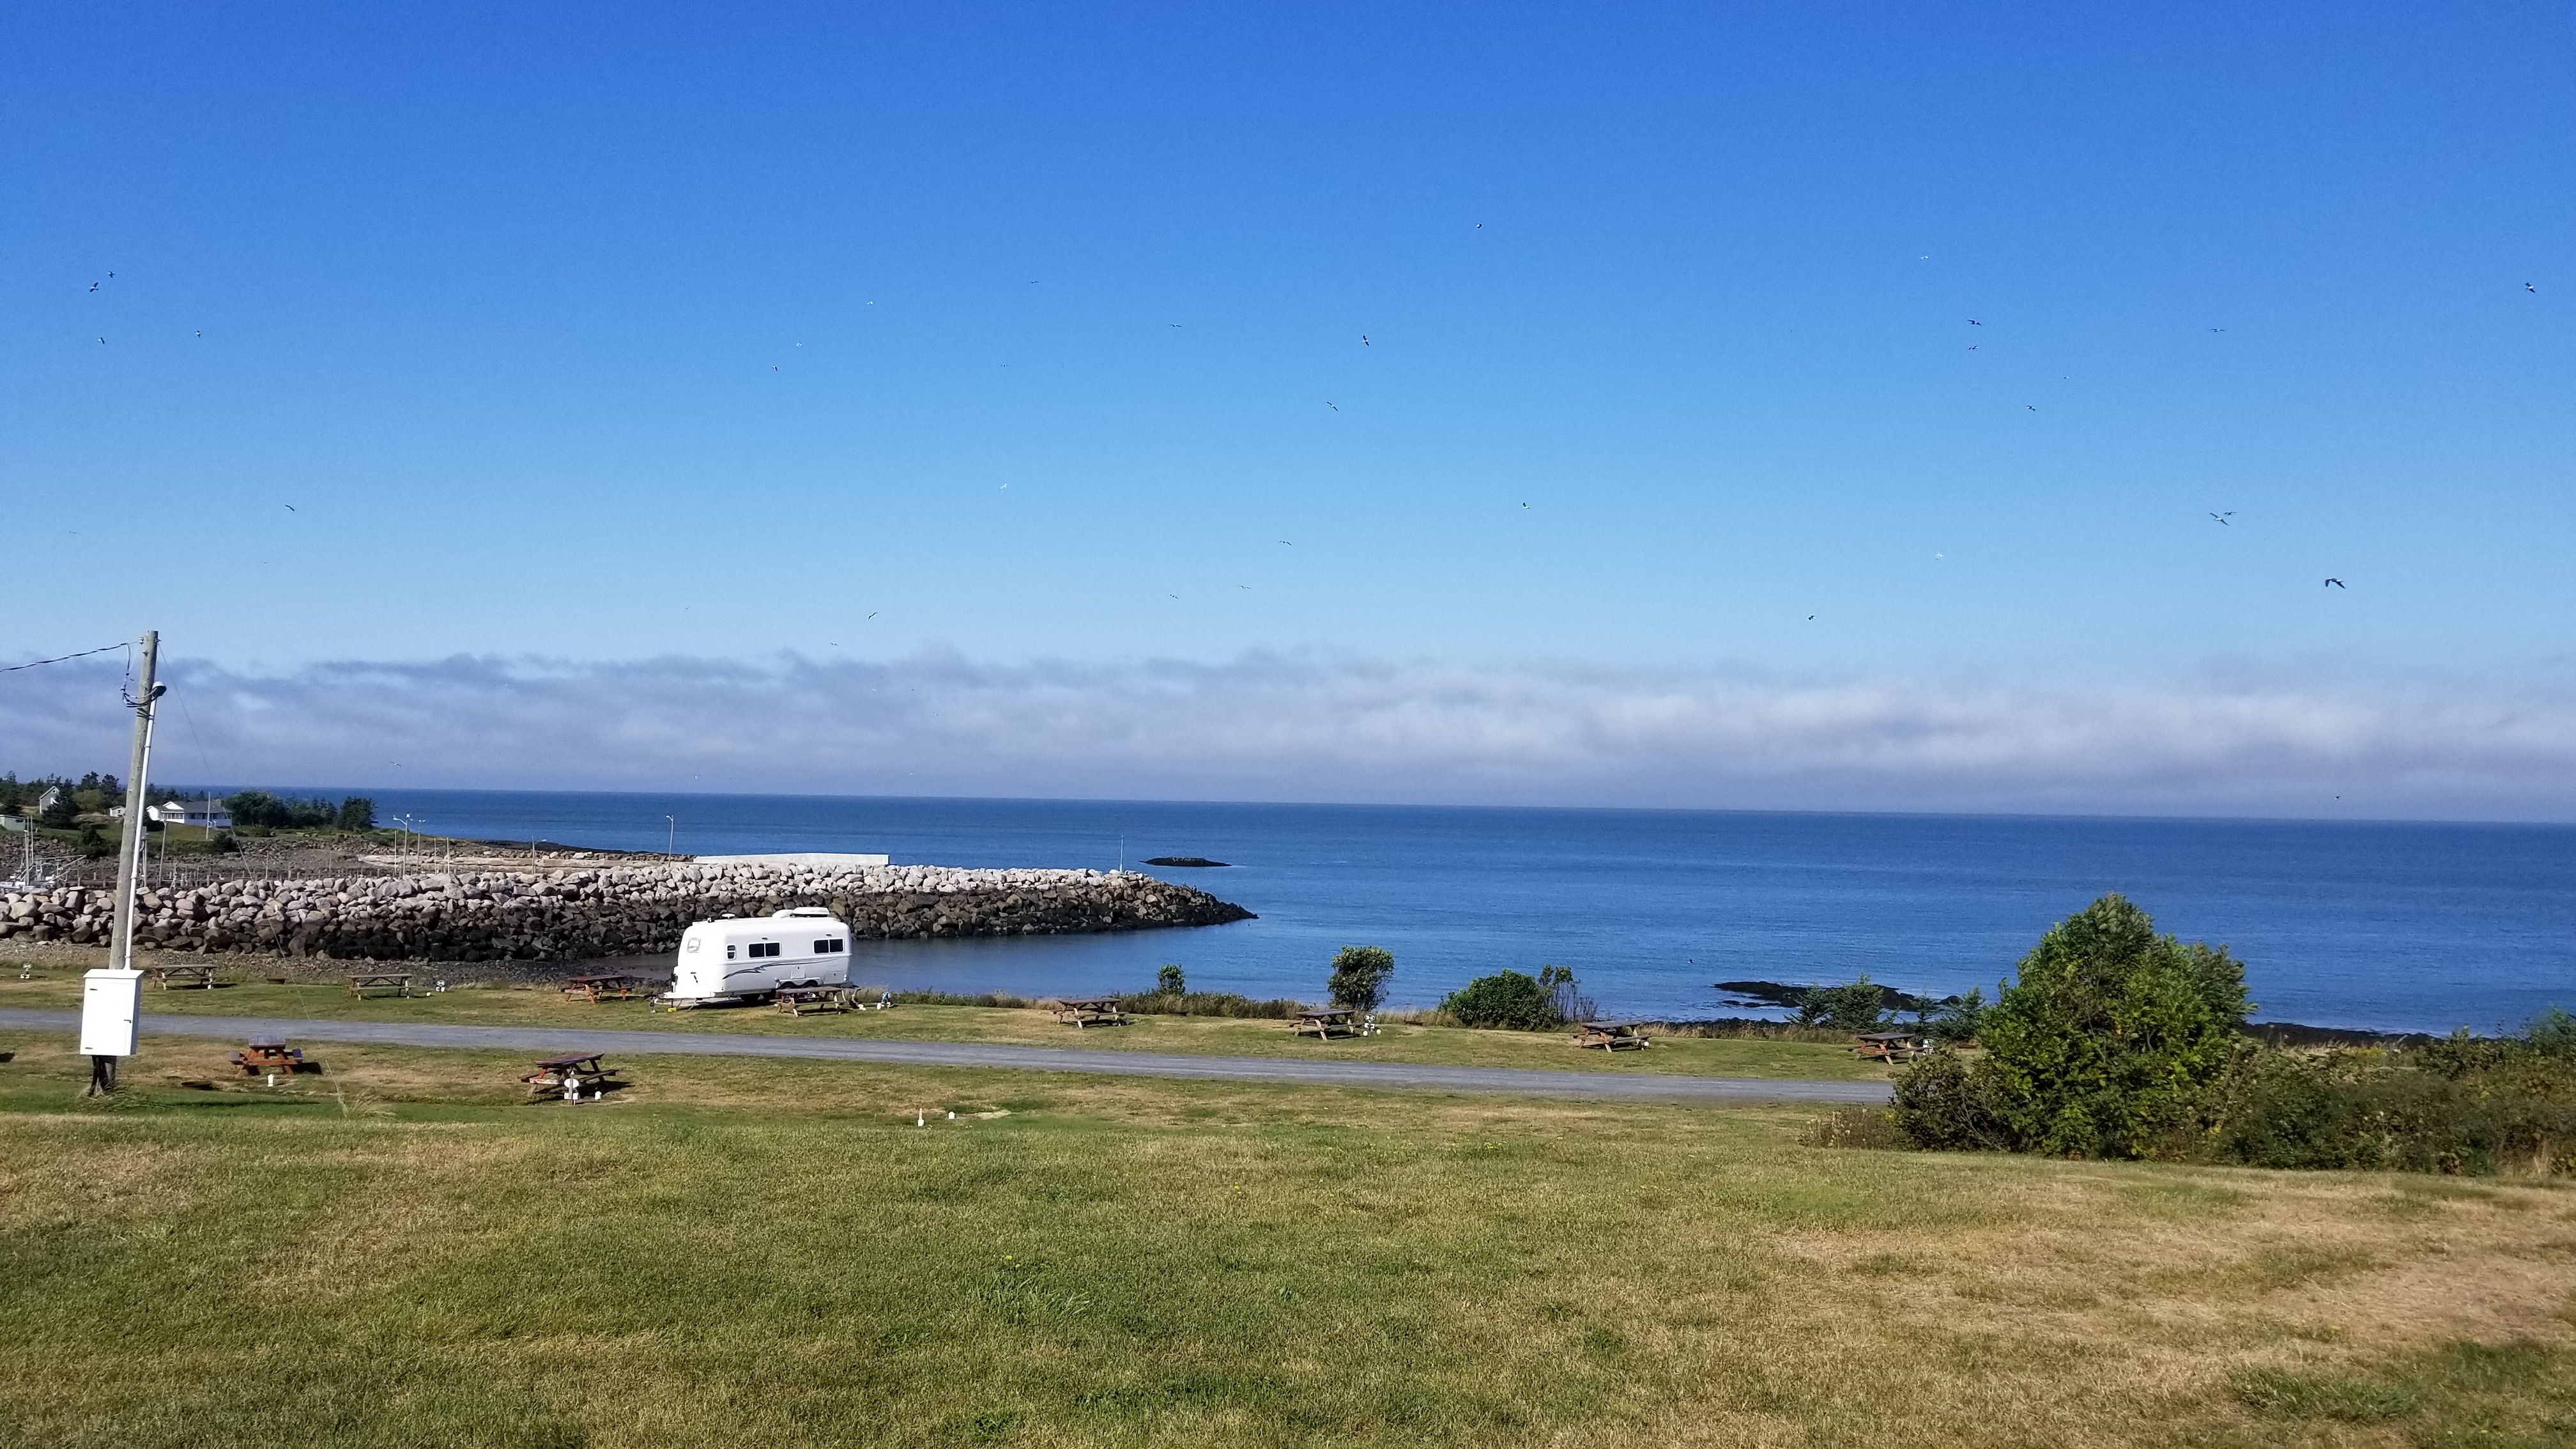
Parkers Cove, Nova Scotia
 2 points
 -
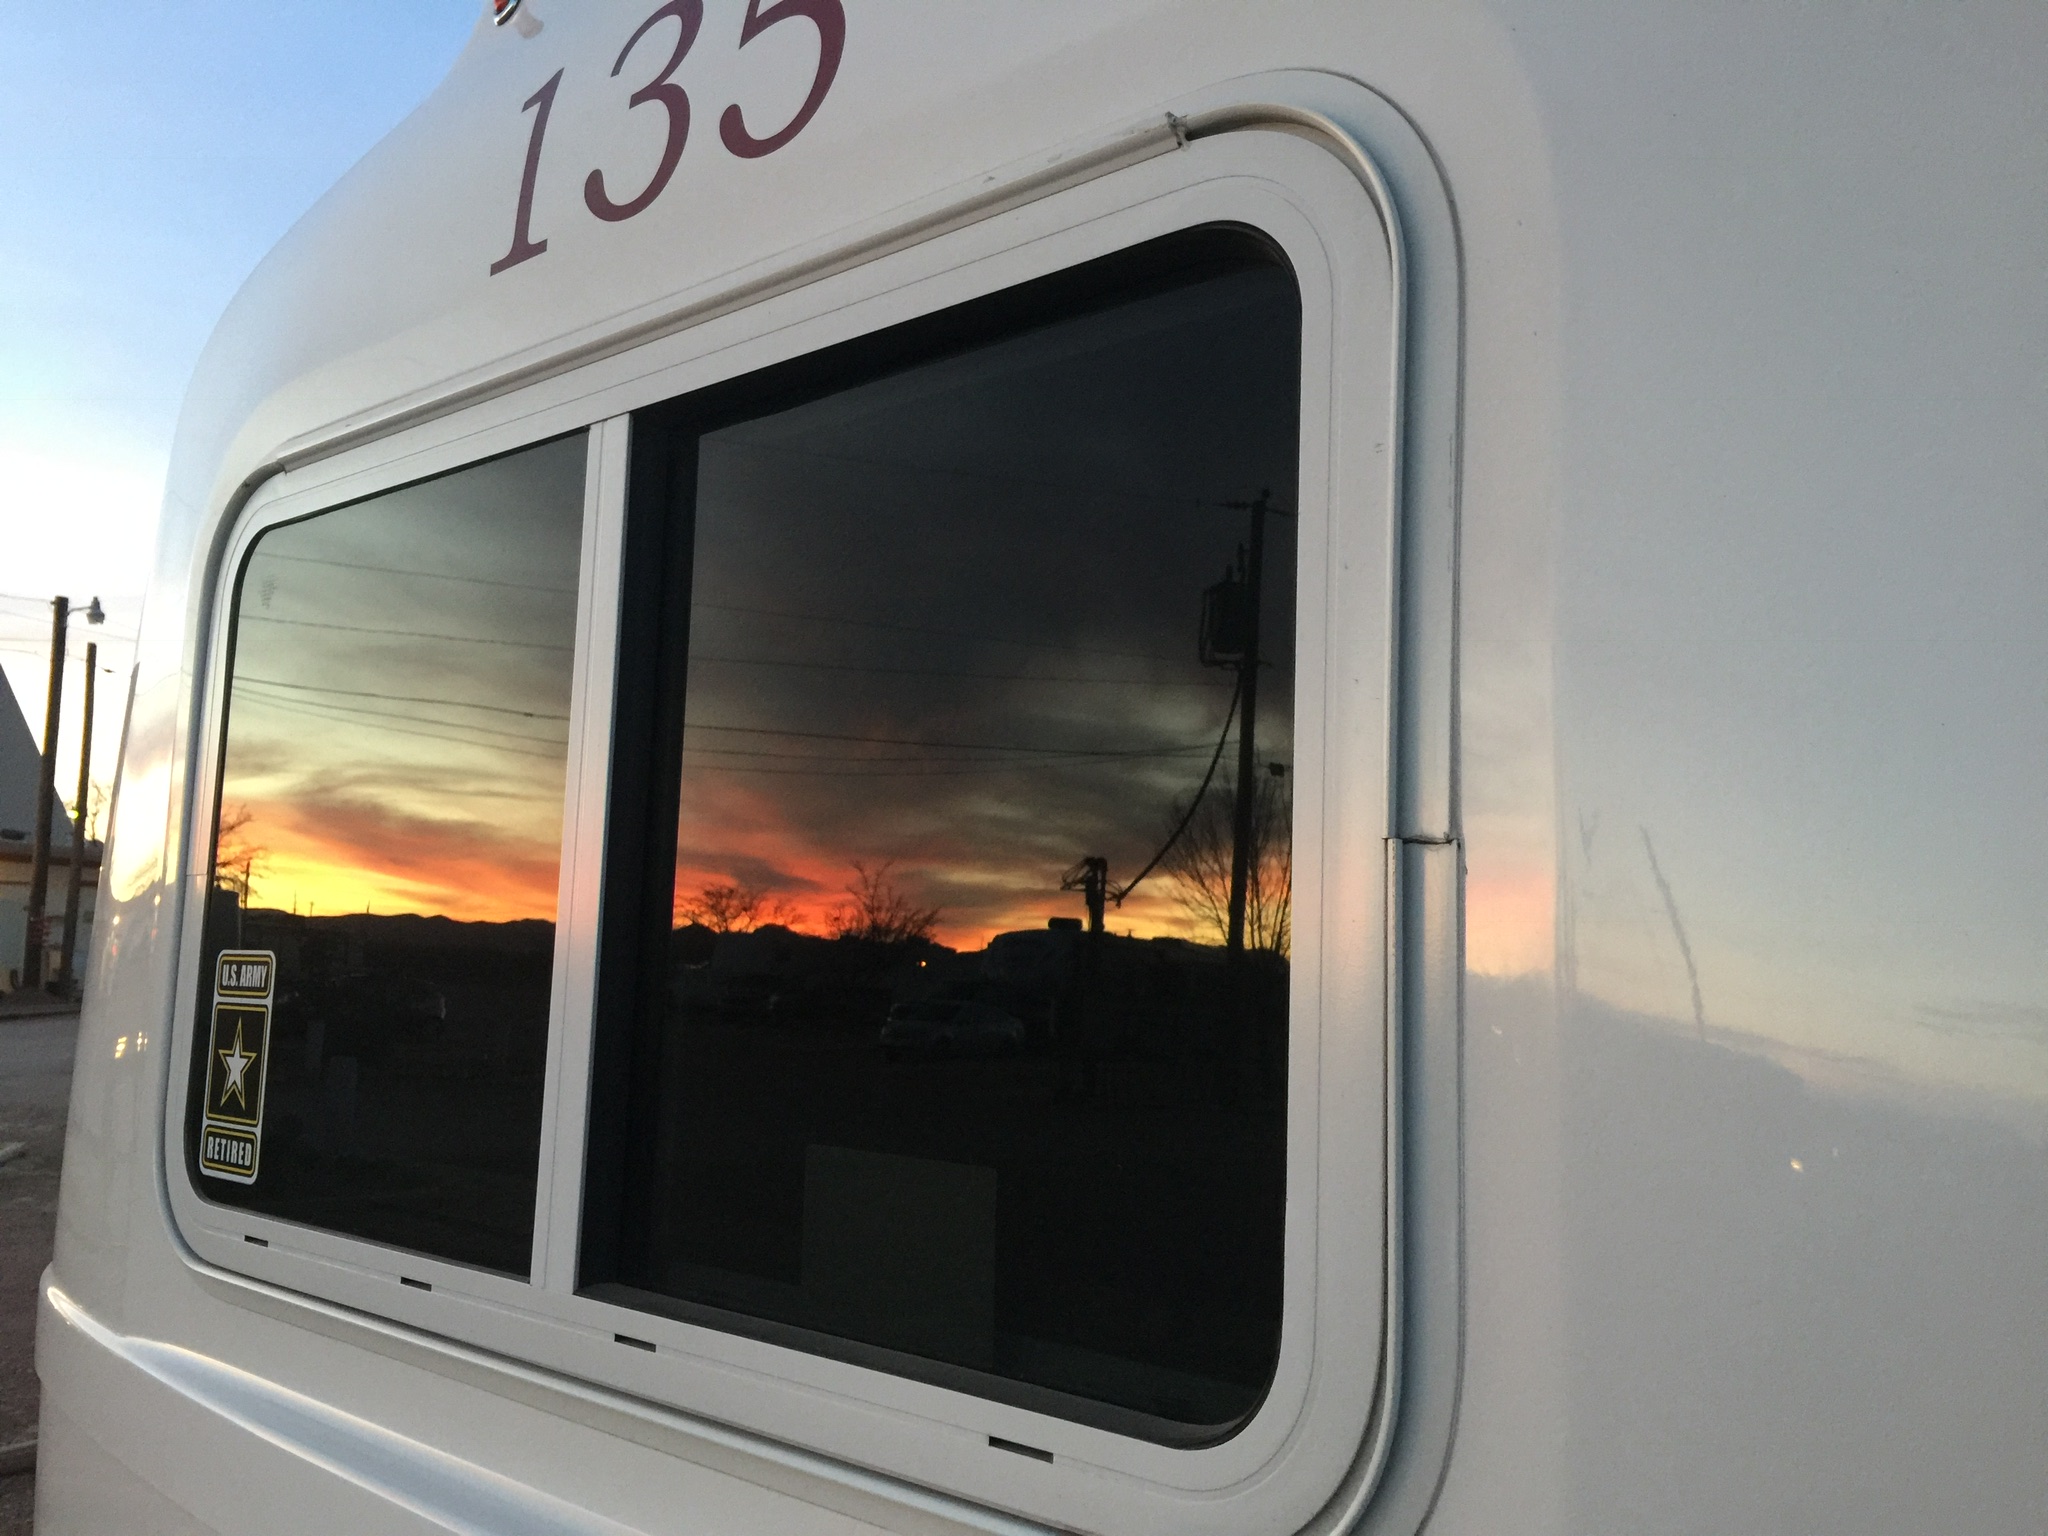
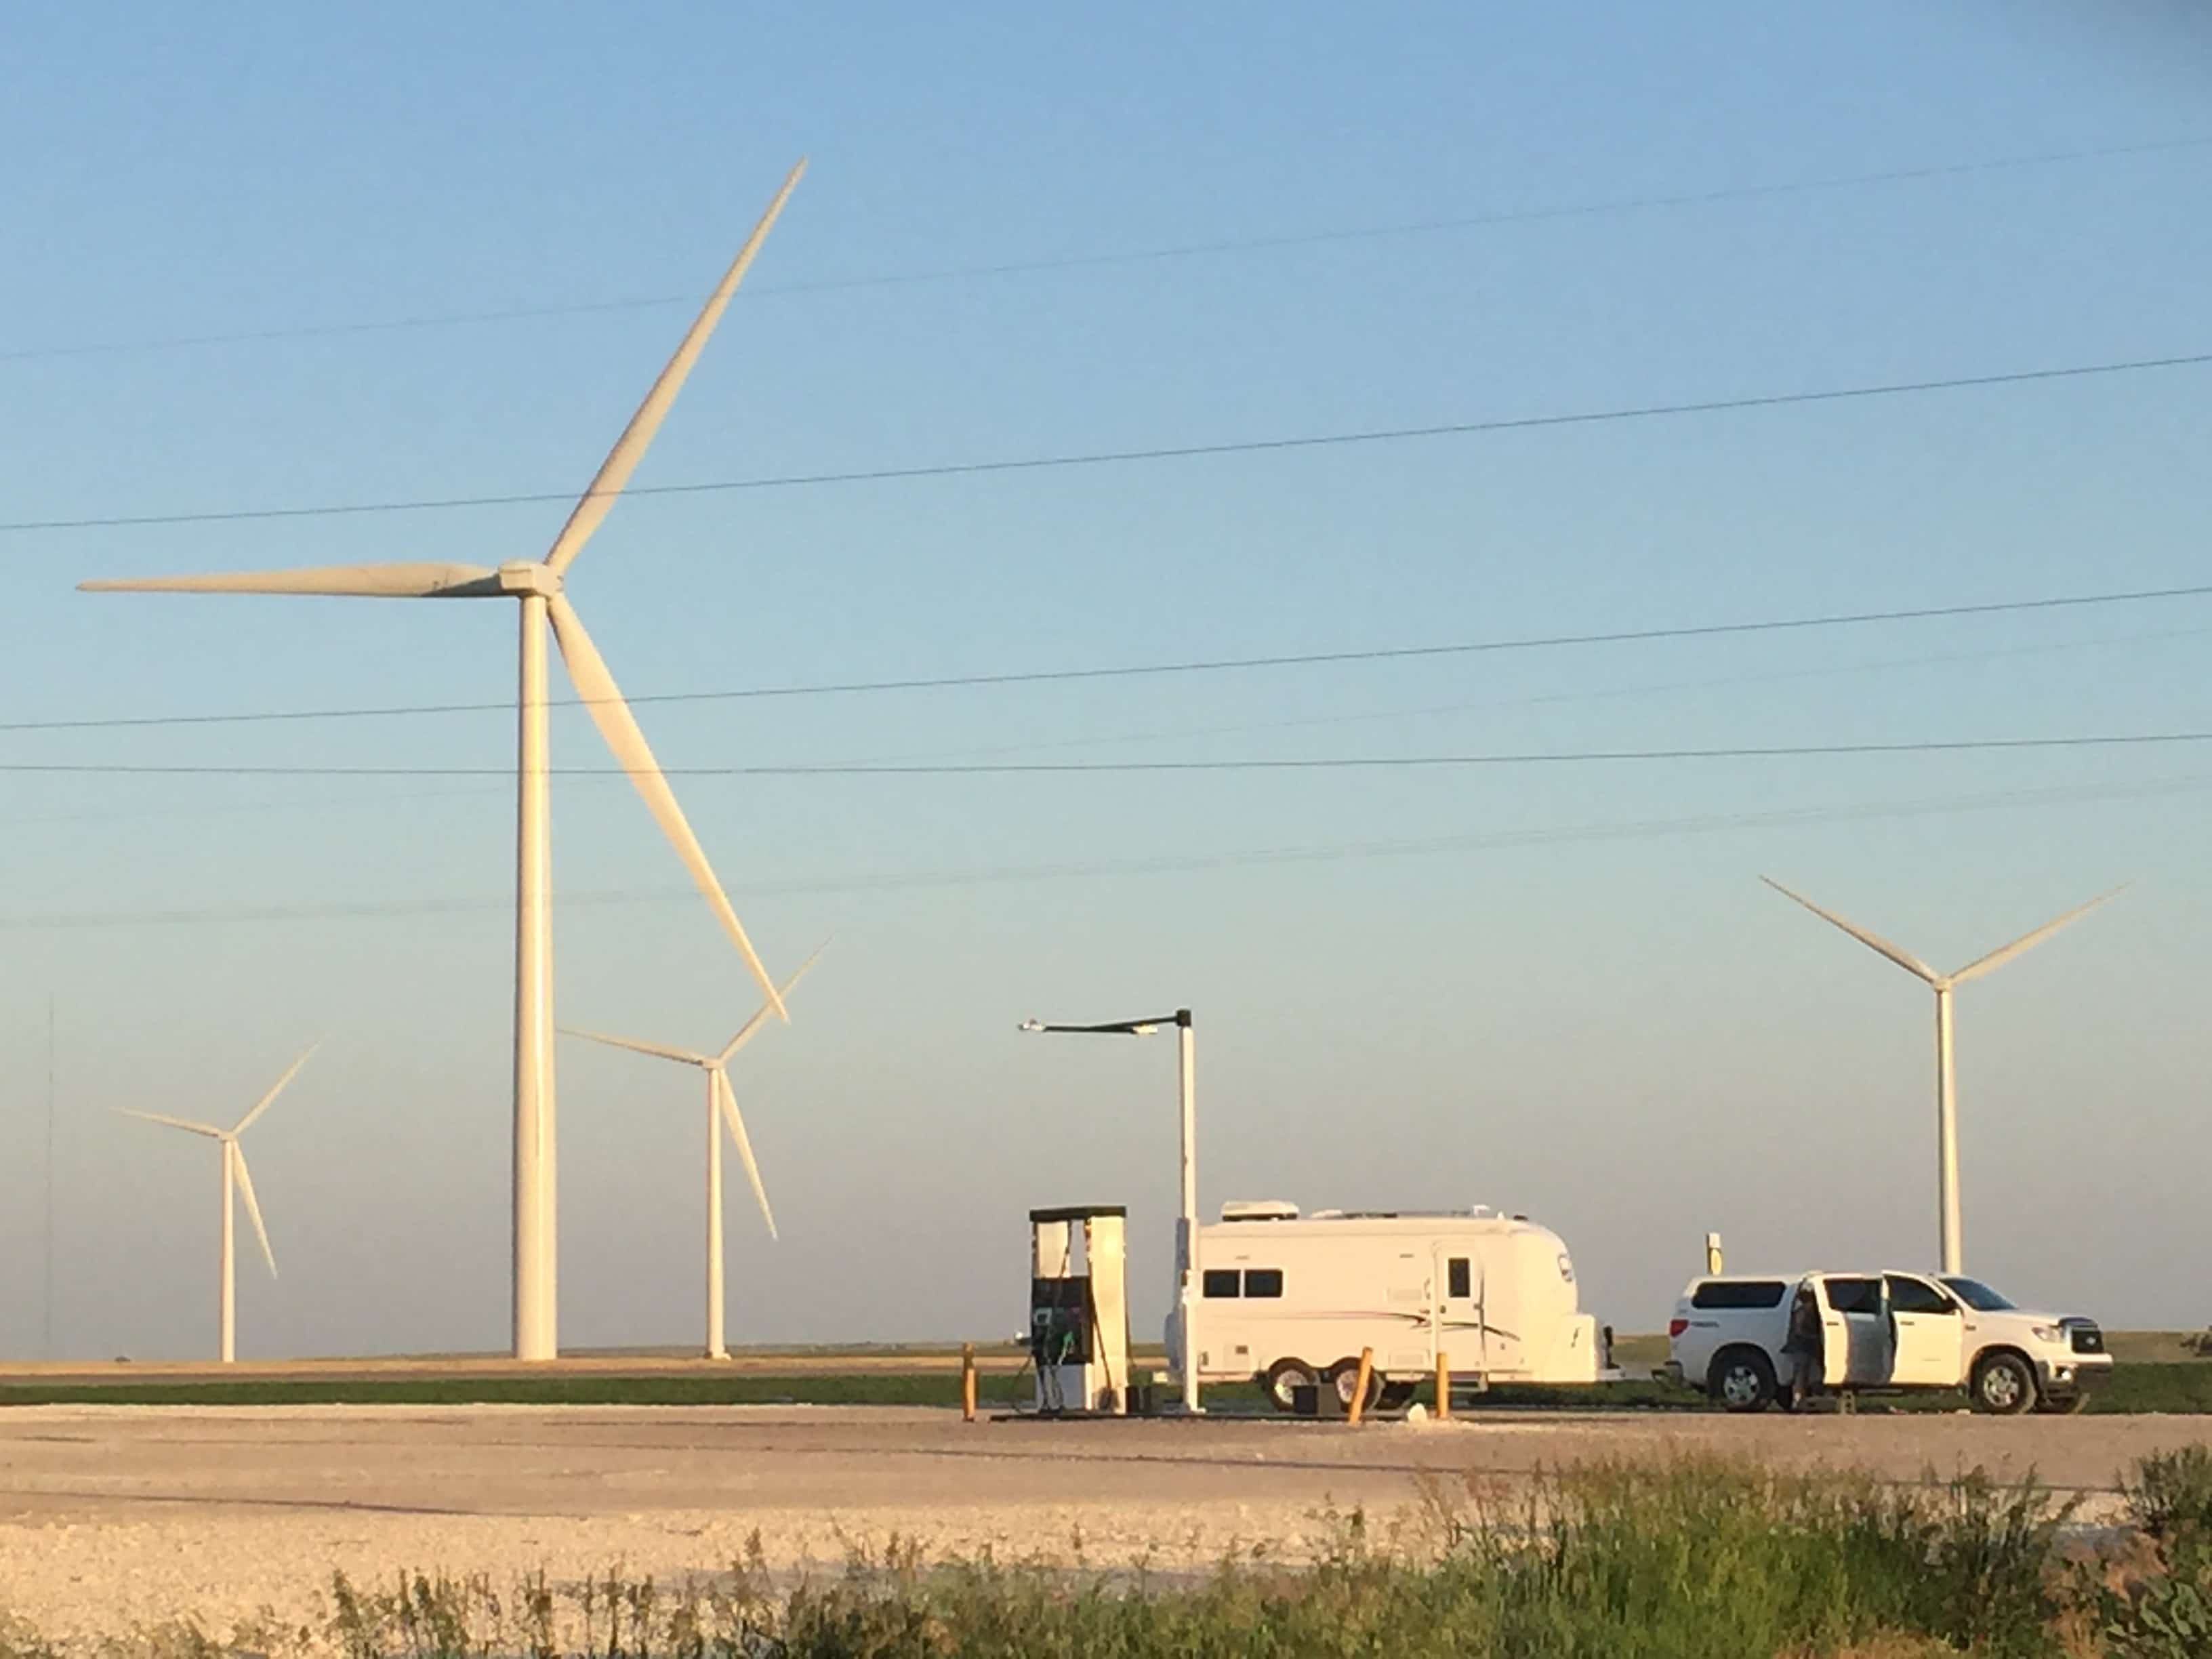
West Texas sunset.
2 points
-
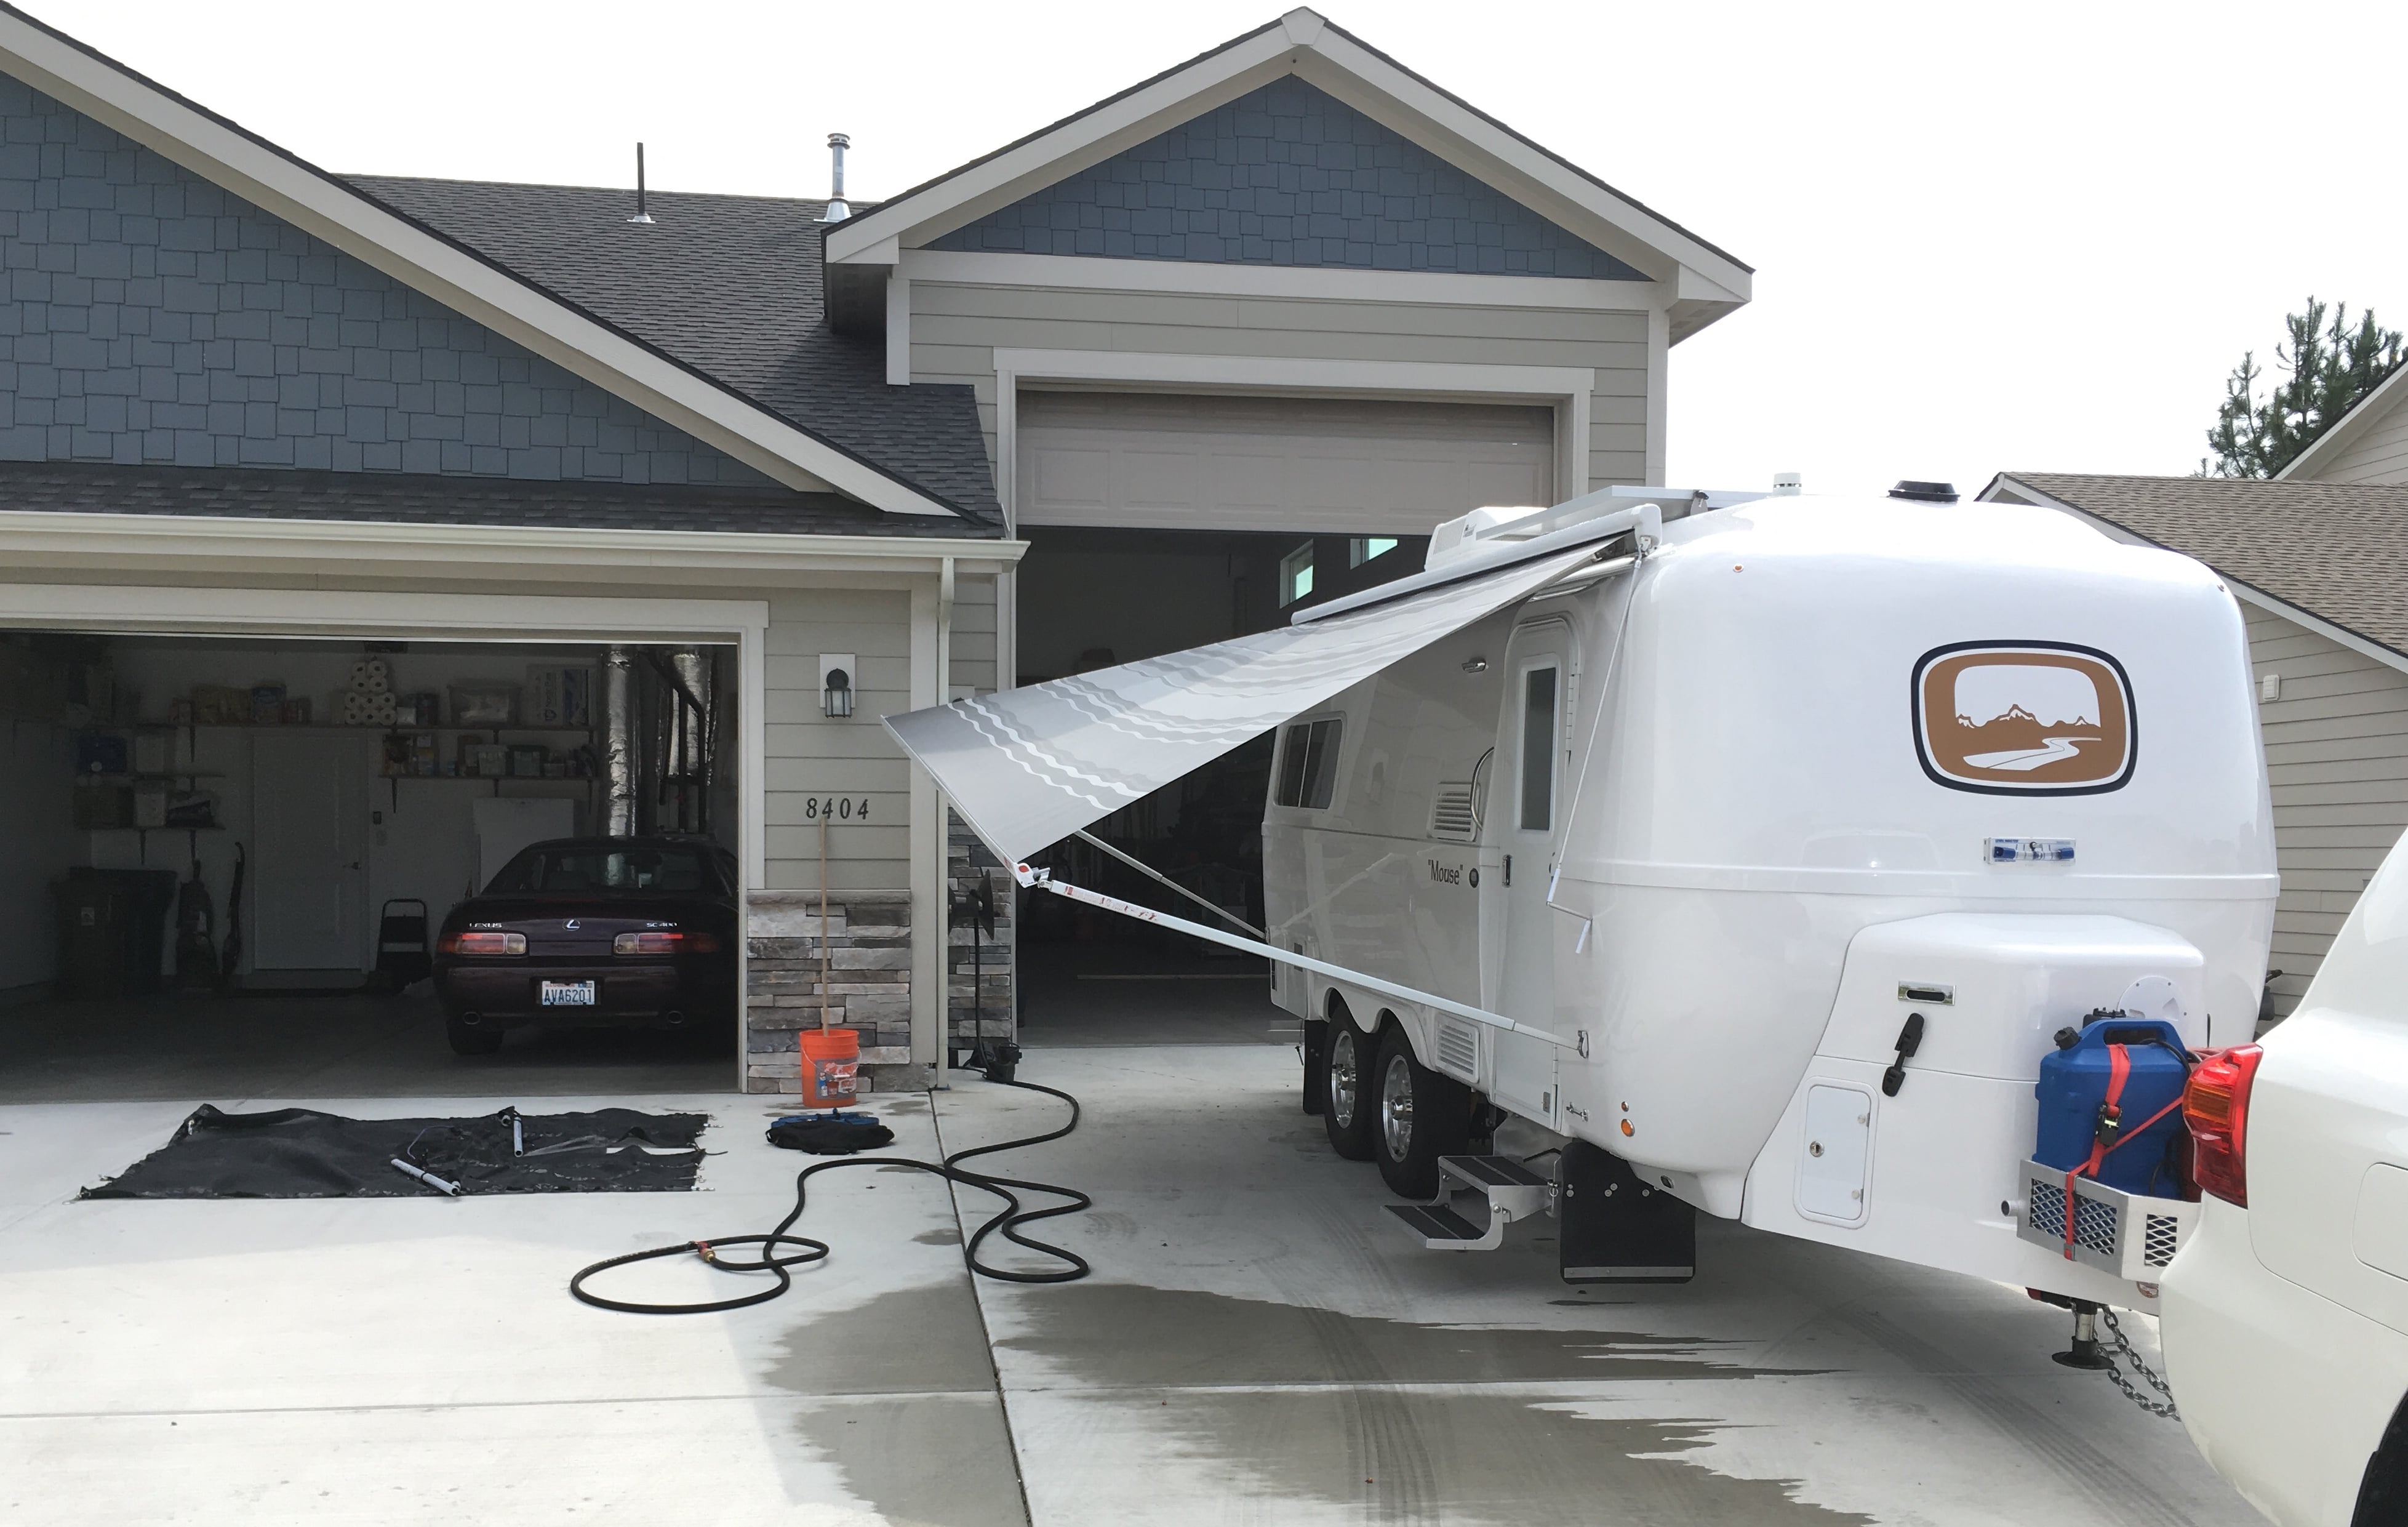
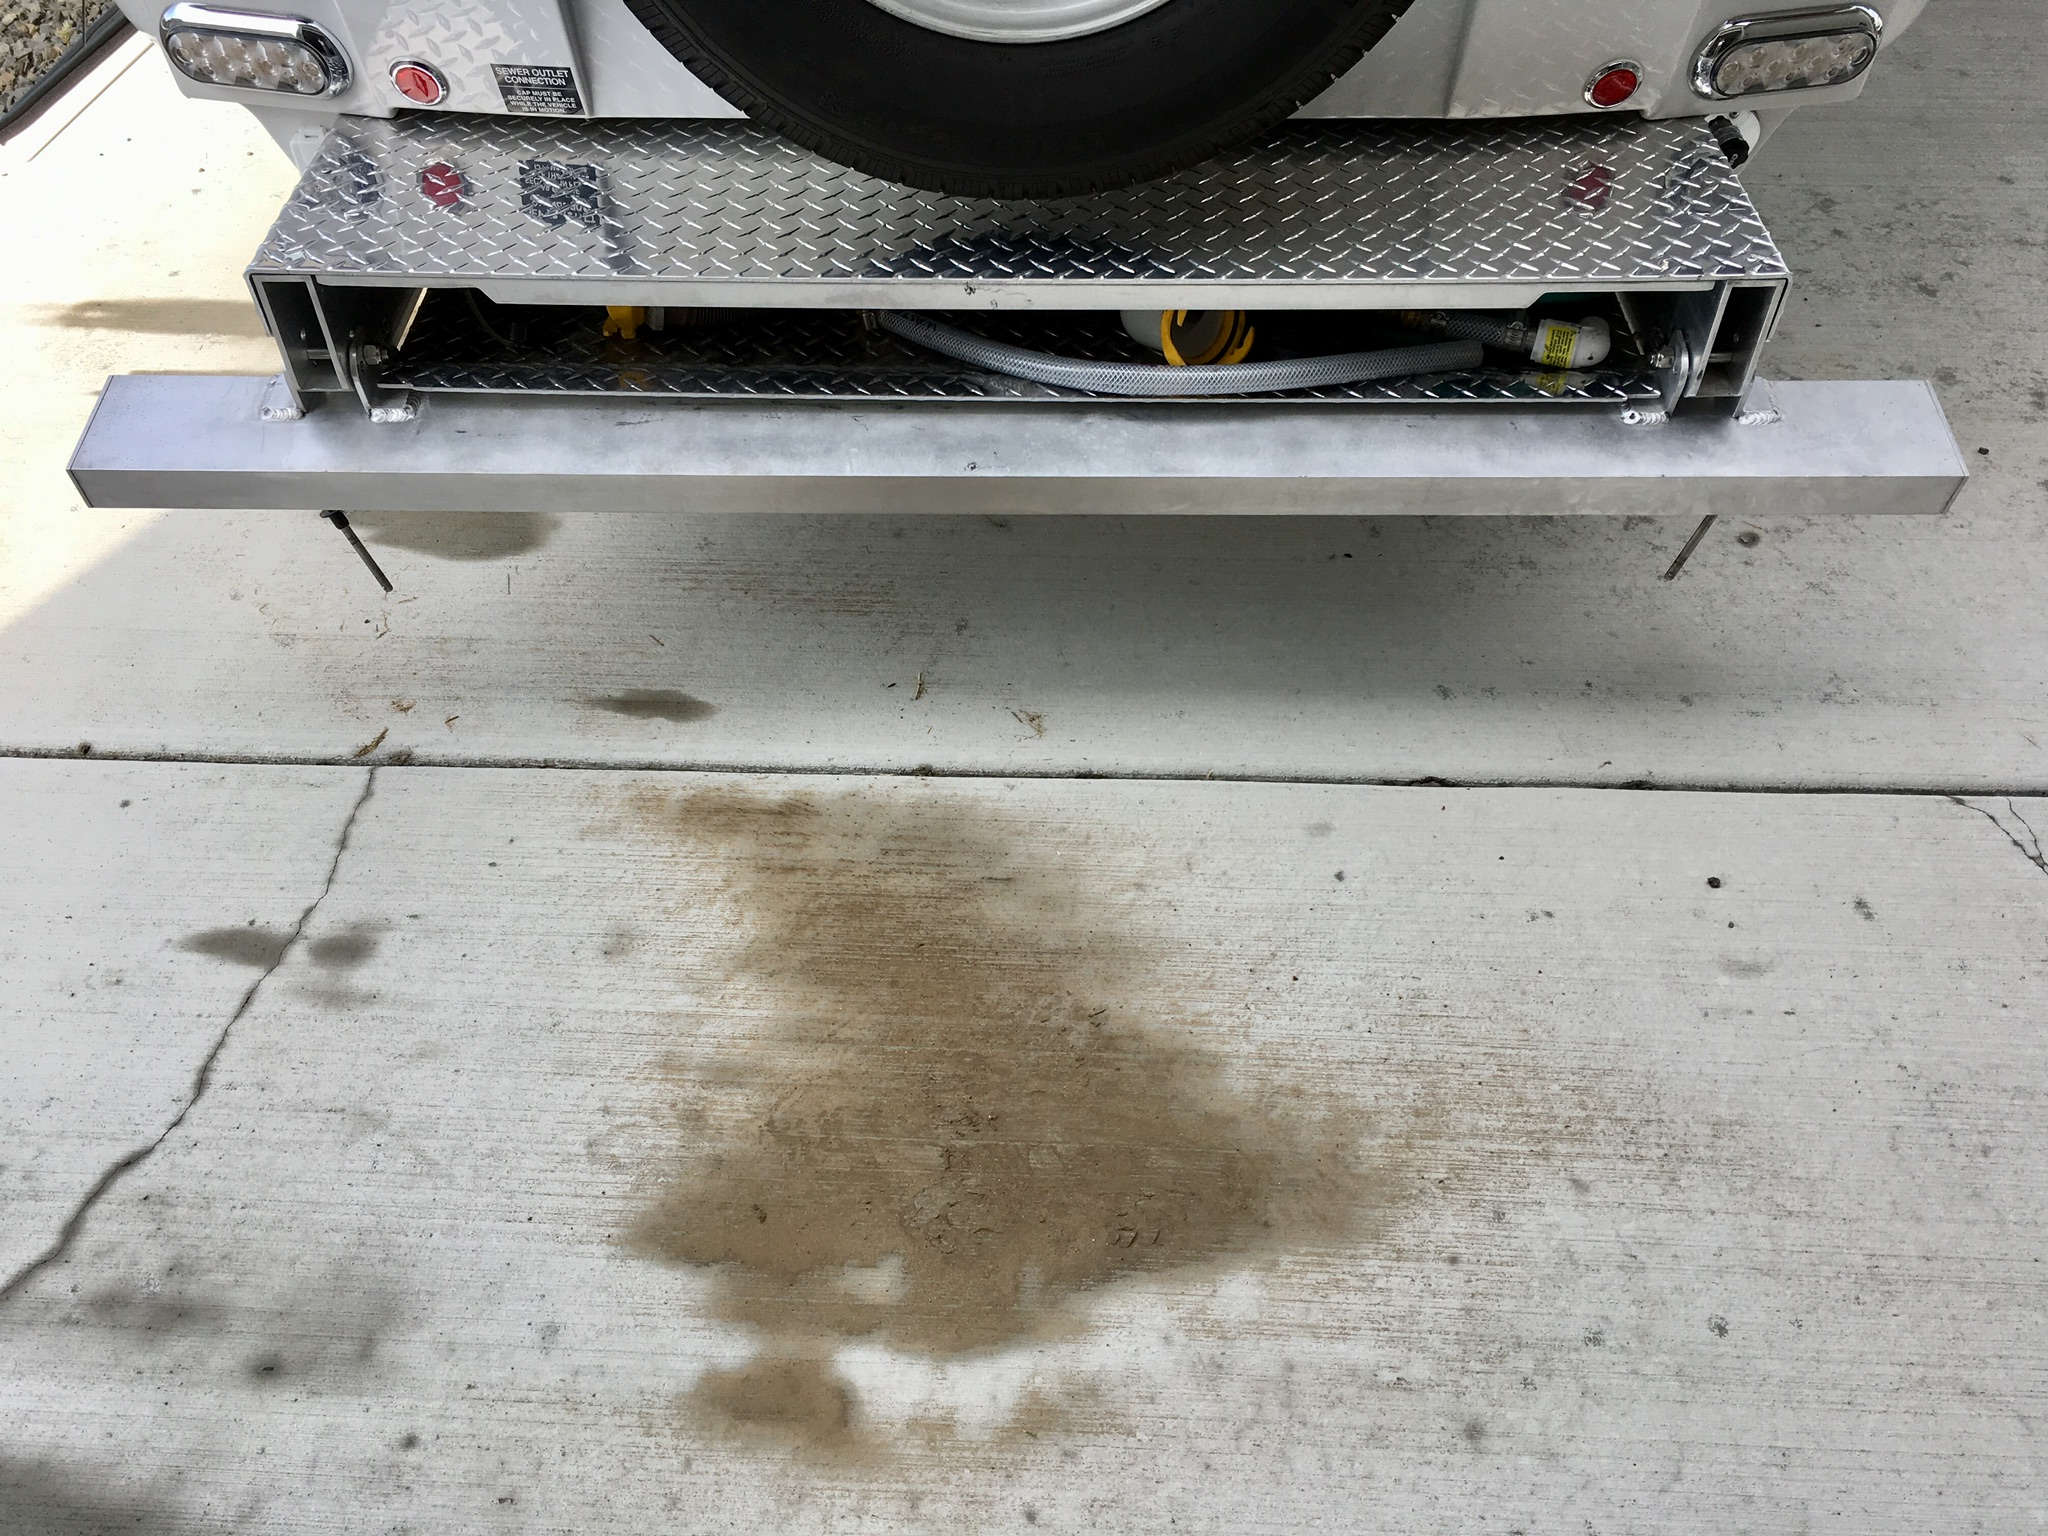
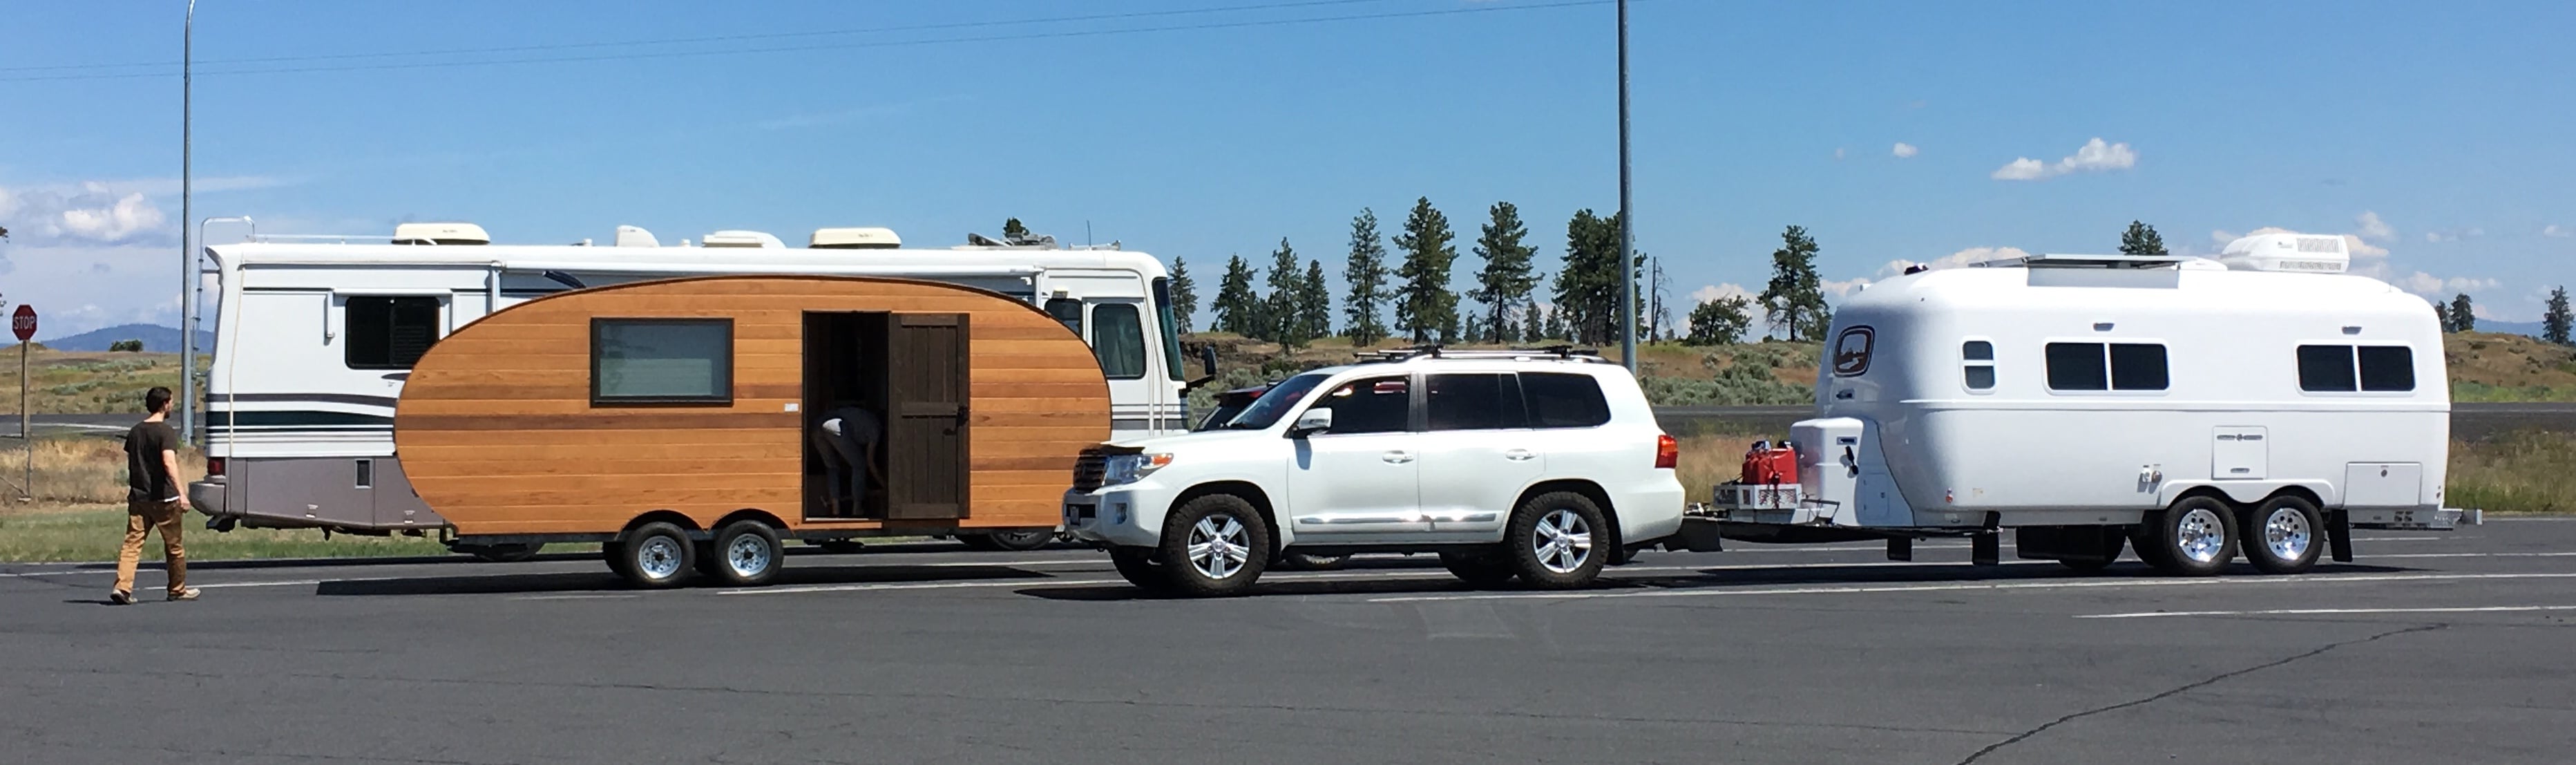
I hope we can continue to post feel-good pictures of our Olivers here. No special subjects, just pics you want to share with the forum. You can post links to your videos too. I have started a collection of time lapse videos, some of which include “Mouse” in the foreground. My YouTube videos: .... https://m.youtube.com/my_videos?disable_polymer=true&csn=4GZbW-OHFMr2-gOLmJrwAw I washed the Ollie today after towing 3600 miles, the RejeX did great and the bugs came off with minimal labor. I used a gas leaf blower for the frst time, to blow off the water. It did great. I followed up with an easy wipe down with cotton rags and the trailer is shiny again.... I emptied the rear bumper bay and this is what the pressure washer drove out: I wish there were an effective way to seal that space off from the dust. Here is a Homegrown wood trailer (Kirkland Washington builder) we spotted at a rest stop. Post your random Ollie pics please. John Davies Spokane WA
1 point
-
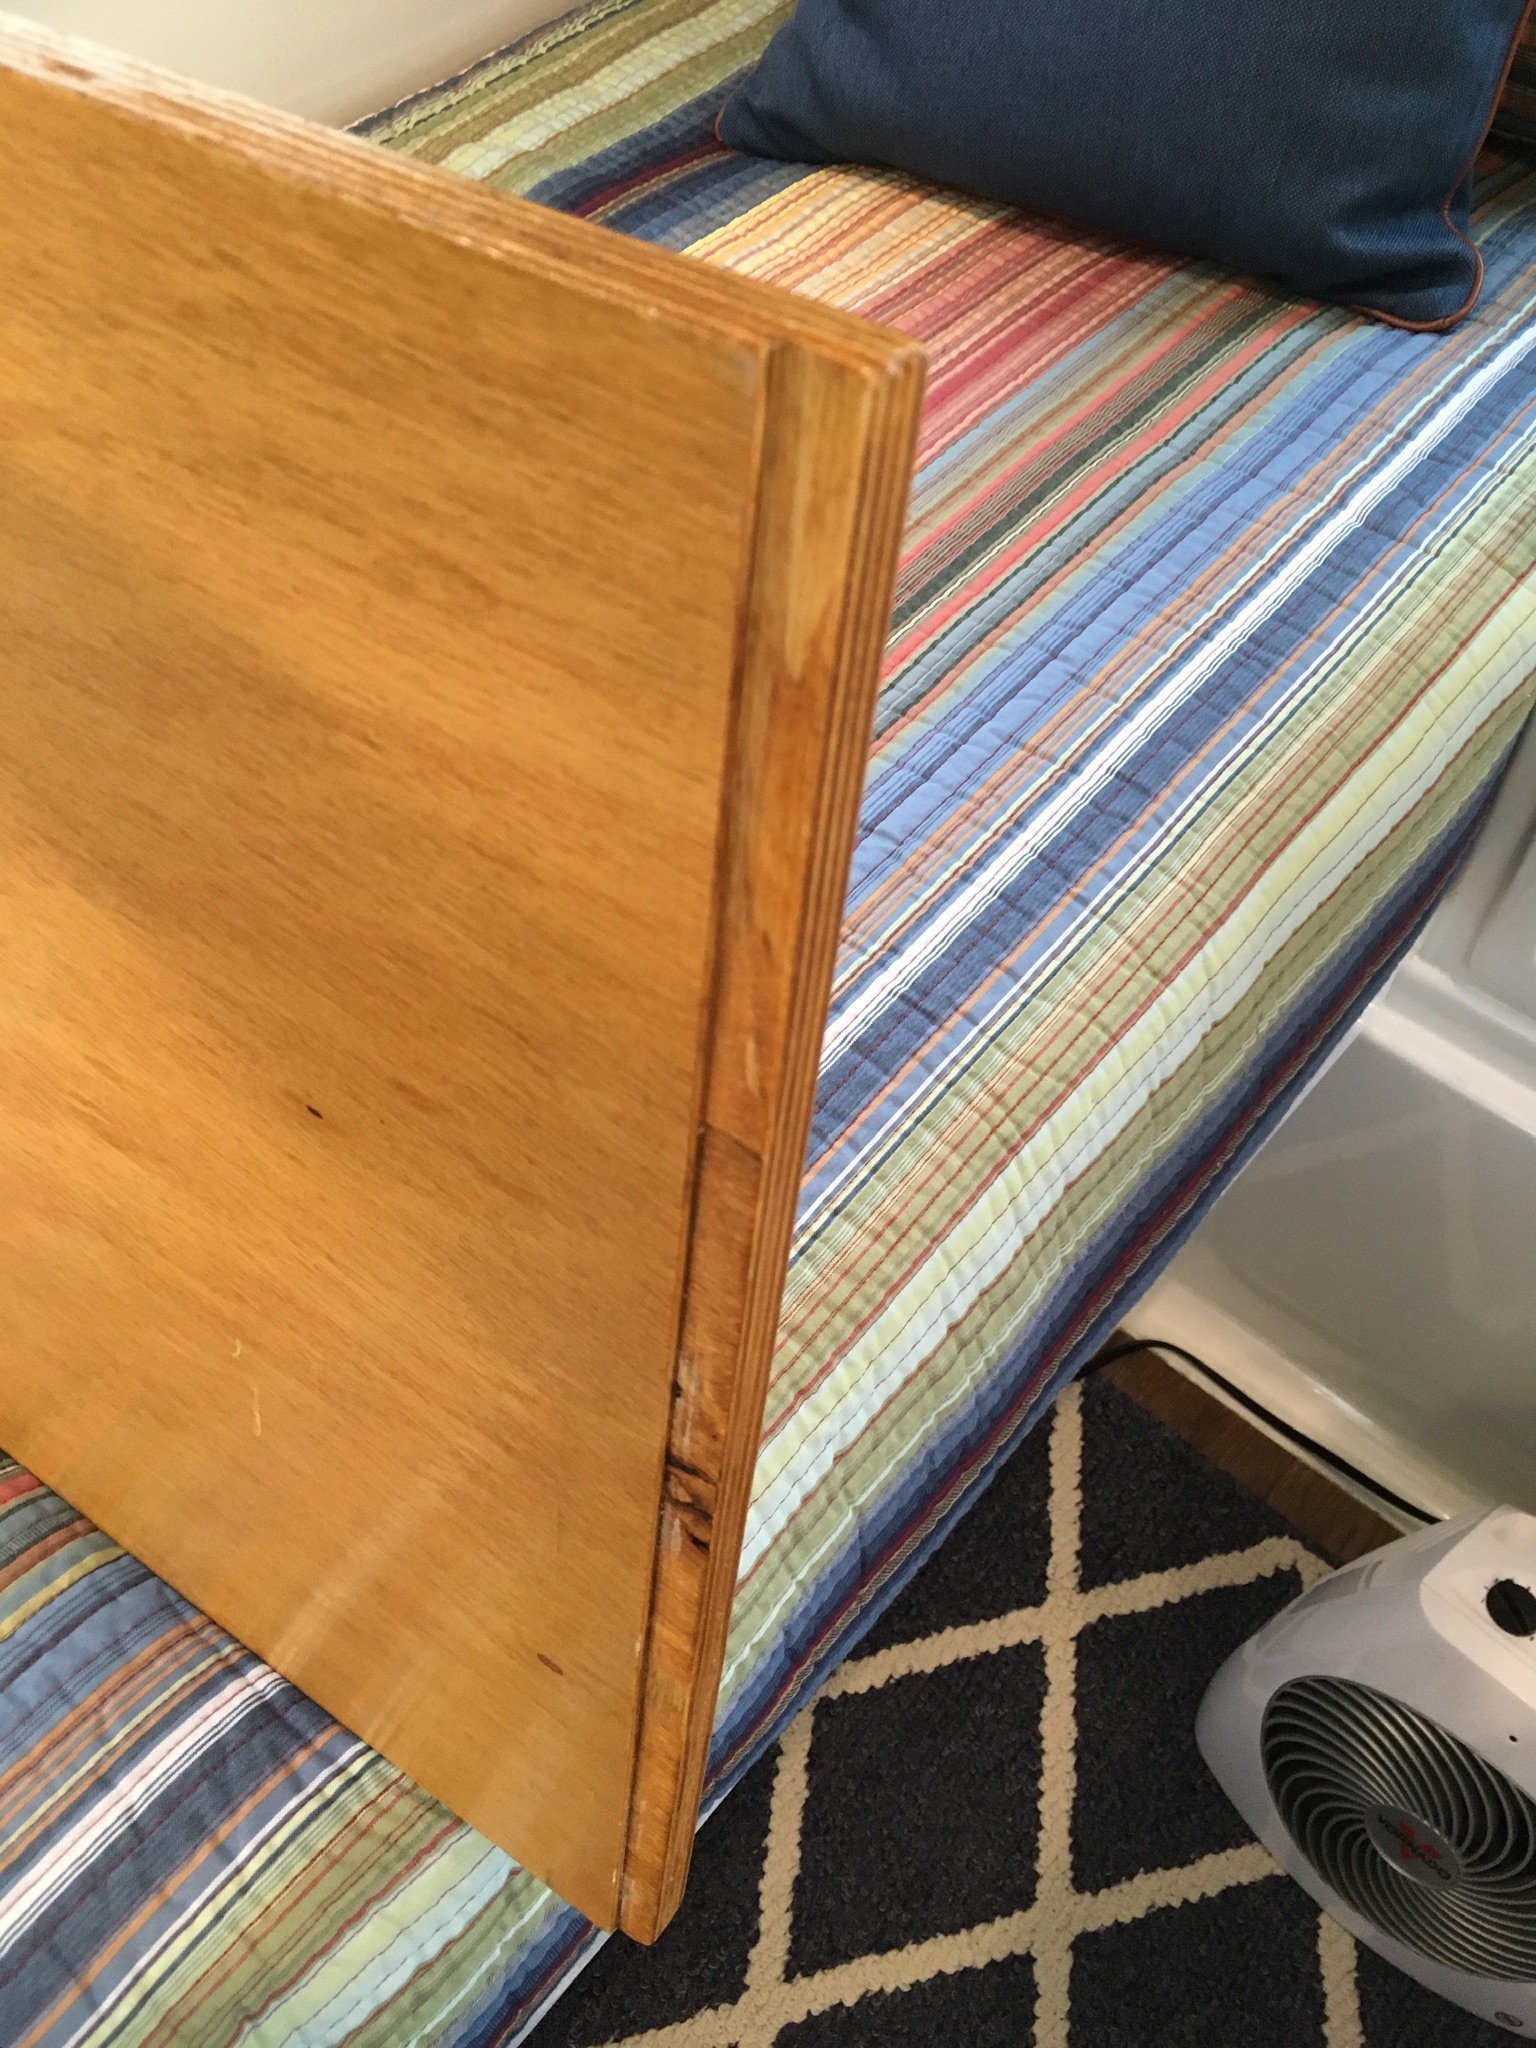
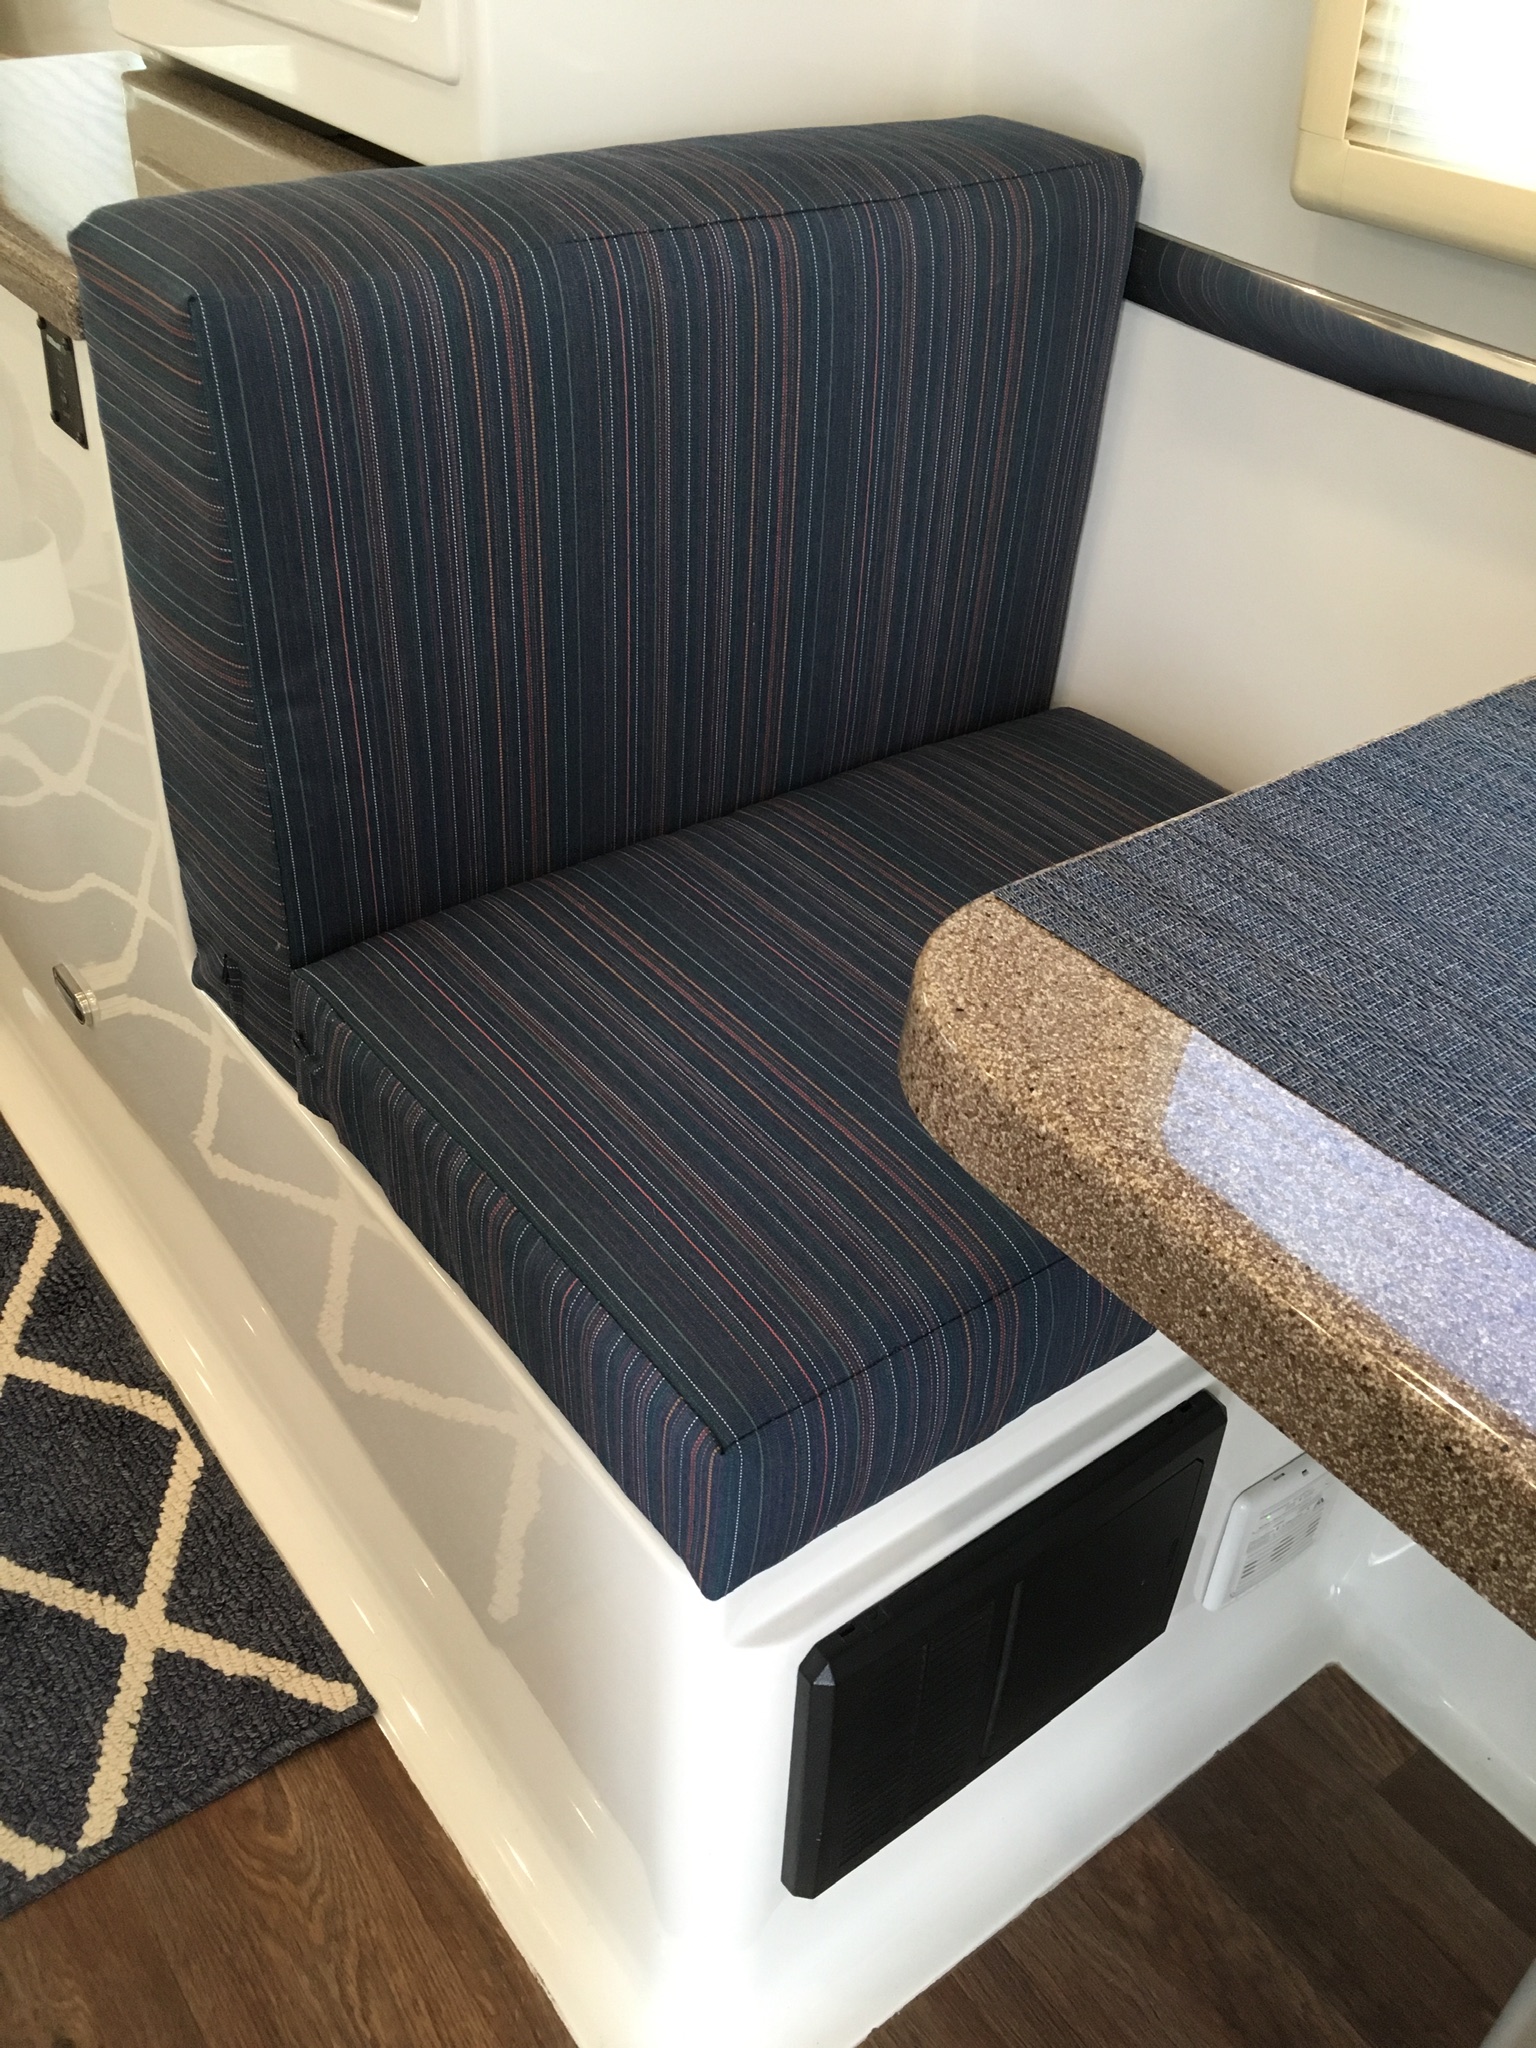
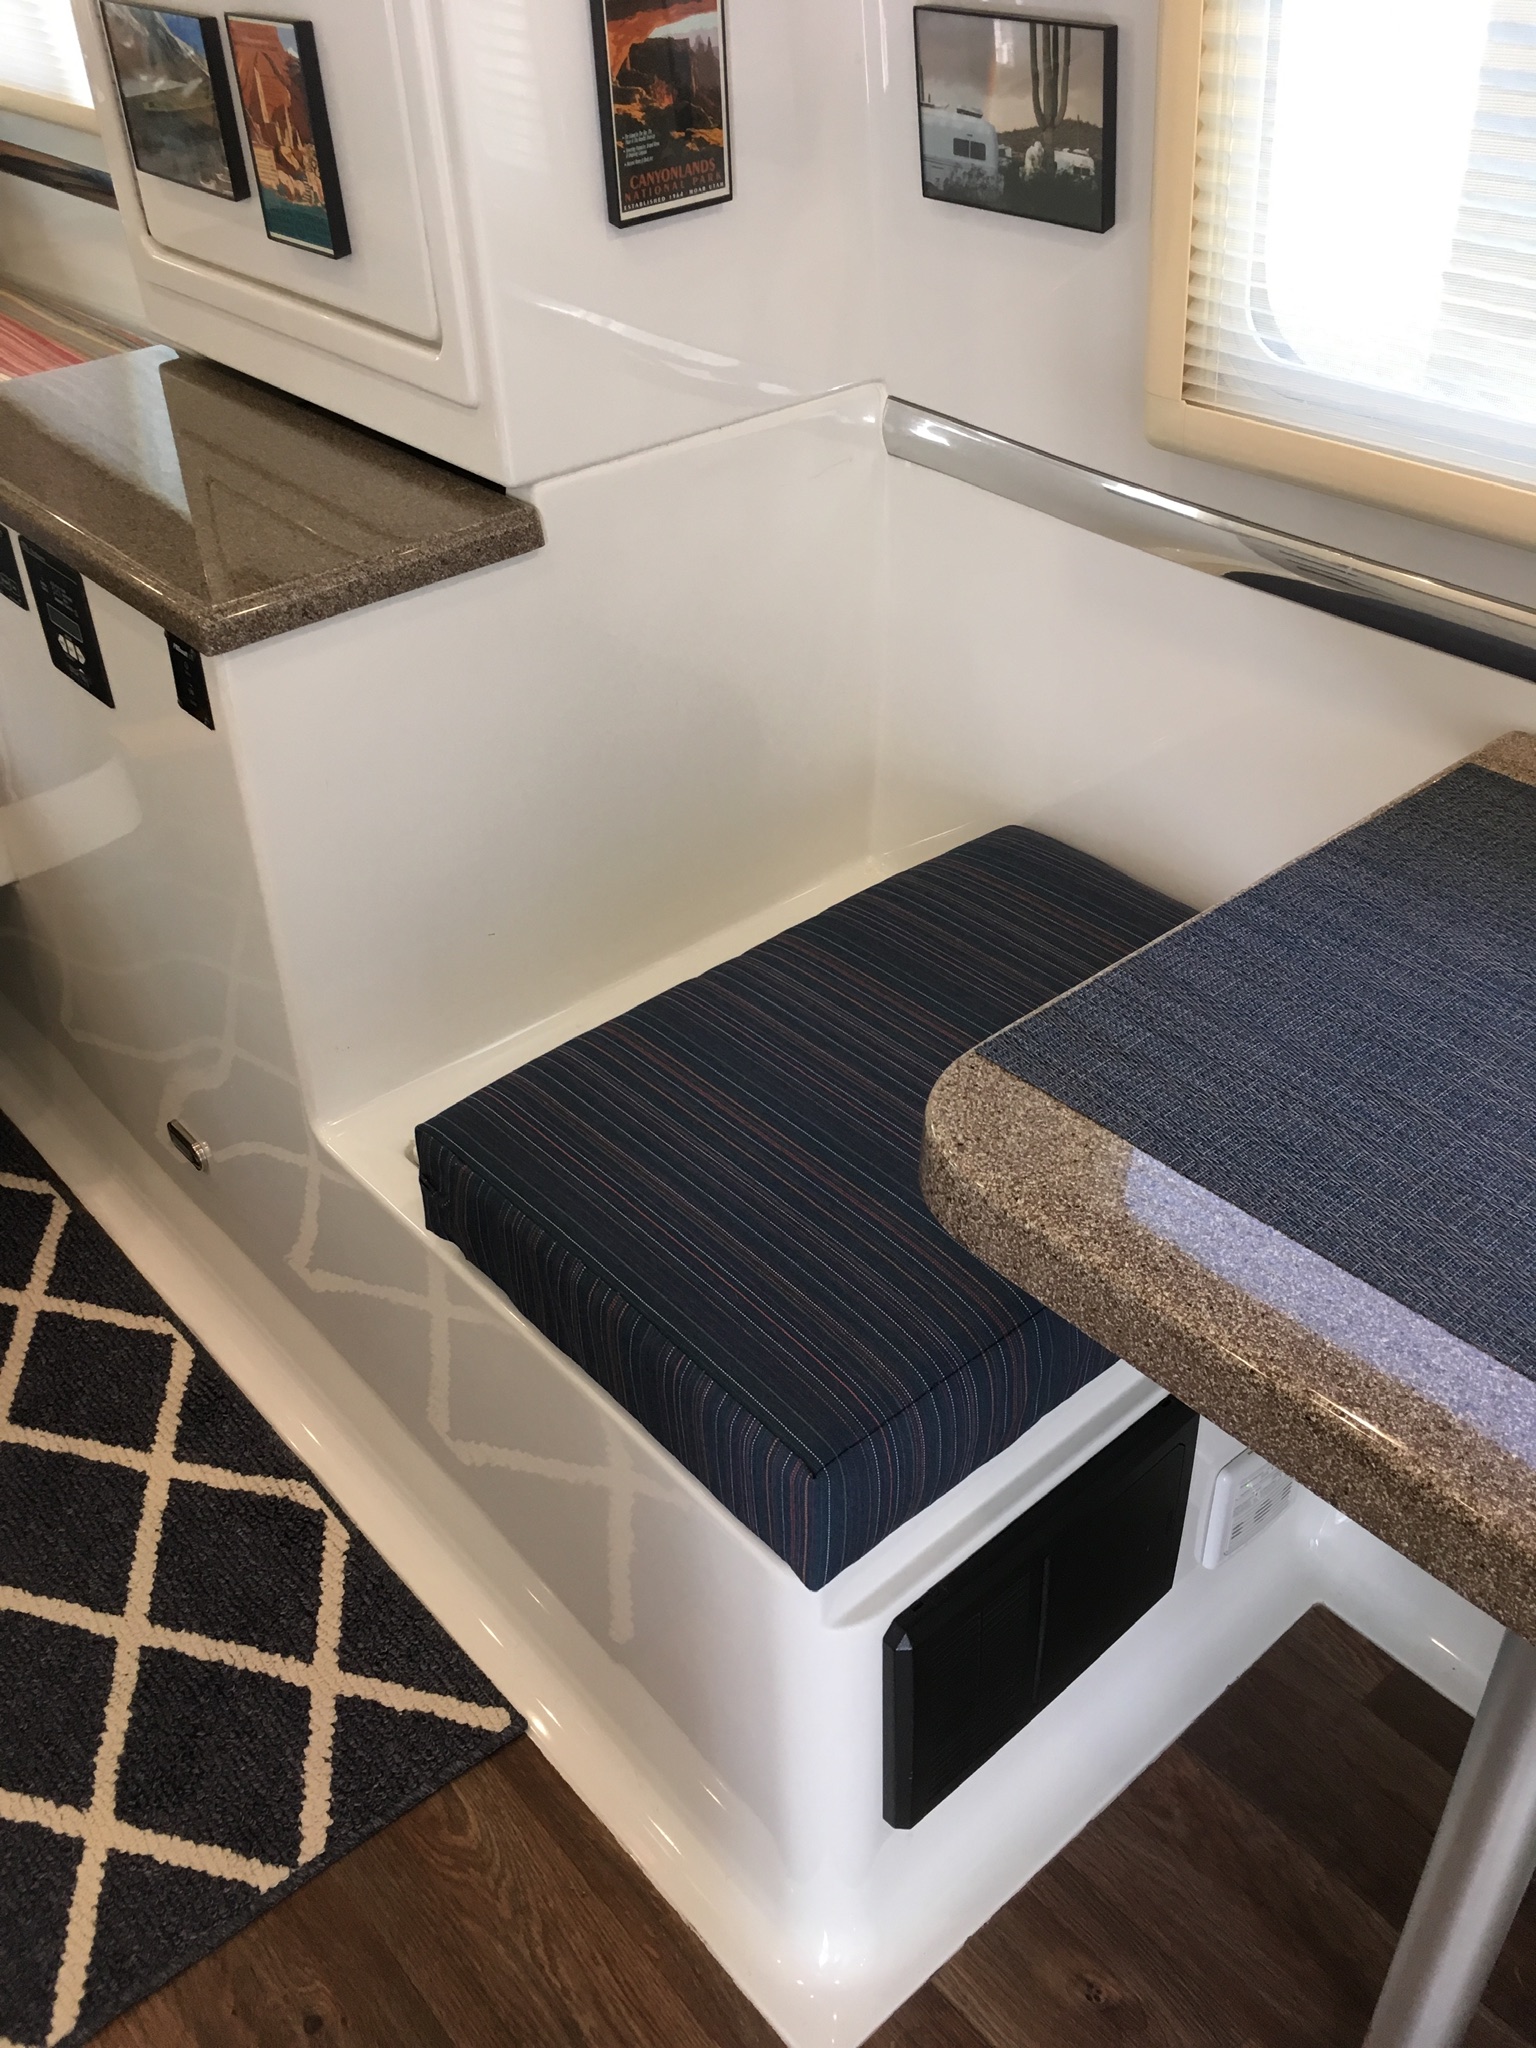
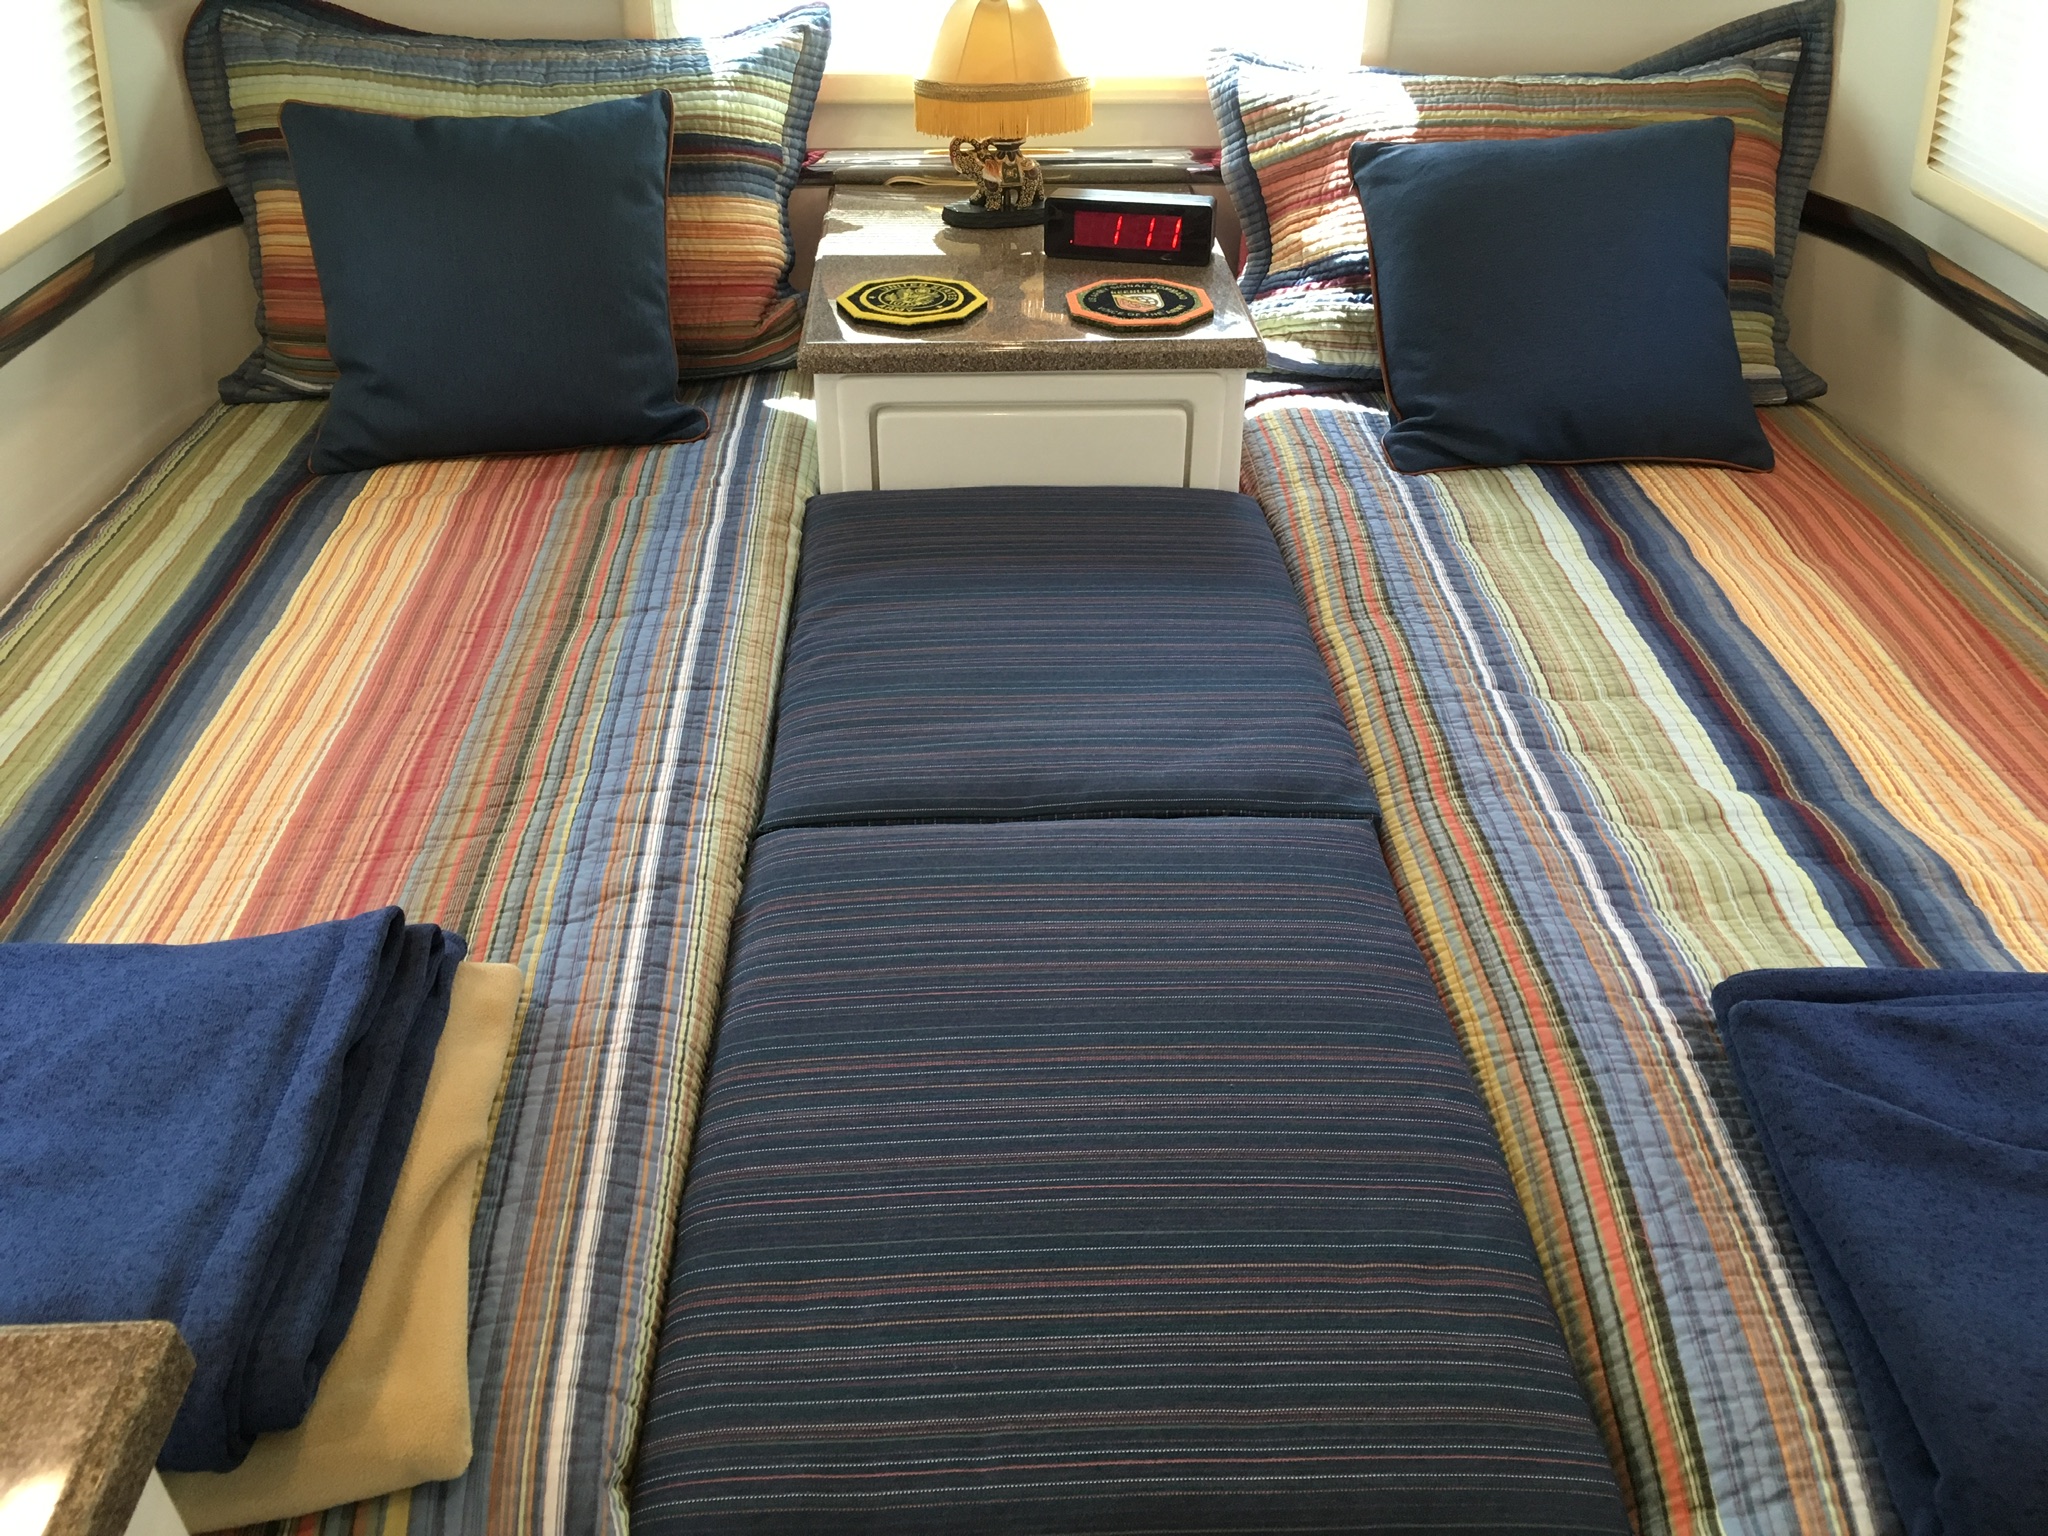
We have the twin bed version of the LEII. After the first year we realized that we were so used to sleeping together that it would be nice to be able to occasionally convert the twin beds to a double bed. I made some plywood pieces to span the gap between the twin beds and we bought some foam to sit on the plywood and create a double bed. We went with this for a year+. The problem was storing the foam when we were in the twin bed mode. So, we measured and discussed and this is what we came up with to eliminate the extra foam. We are leaving tomorrow for a month or so to go up to South Dakota so we’ll see how it works. Here is the gap between the twin beds. It measures 18” X 51”. It’s actually 50” from the nightstand to where the curve starts on the bed frames. Here is the same gap with the plywood. There are three pieces measuring 19” X 17”. It’s 3/4” plywood. The plywood stores easily under the mattresses when not in use. I cut a 1/2” X 1/8” recess on the short side of the plywood so that when placed on the fiberglass mattress frame is locks in place and won’t slide. In order to eliminate the extra foam that required a place to store we reconfigured the dinette cushions. We had new cushions made that included a larger back cushion that measures 25” X 19” and is 6” thick. In the dinette it sits on the fiberglass, not the bottom cushion. The new bottom cushion is smaller, 25” X 17” and butts up against the back cushion. The larger back cushions sit on the plywood when in double bed mode. Here are the new dinette cushions. Notice the back cushion does not sit on the bottom cushion. Here’s a shot with the cushion removed to make the double bed. Here are the cushions on the plywood. We were a little concerned that the dinette seats wouldn’t be as comfortable with the thicker back, but sitting in the driveway the last few days it seems okay. Also, we wondered if the bottom cushion would stay put without the back cushion sitting on top of it. We’ll see how it works out this next month on the road. Mike
1 point
-
That sure is one heck of a curve you're going around. Didn't know that they had those in Florida! See you two/three/four on Monday! Bill1 point
-
I don't have the Truma, but I can suggest that you clean it internally (chemically de-scale it) before you winterize and drain it. Deposits that are left to harden over the winter will be harder to remove in the Spring. Do you have the inside control panel? I sure hope so.... How do you like the unit so far? John Davies Spokane WA1 point
-
Check to see if you have the bypass kit installed - look for a set of valves on the water lines going into the unit. (Mine does, but at the time, Oliver was experimenting, so I don’t know if other trailers have it - I assume they do.) If you do have the kit, follow the directions in the manual for the Comfort model with the bypass kit, which just involves turning three valves before winterizing. Basically, all you’re doing is shutting the valves to the water heater so that when you winterize the rest of the plumbing, you don’t get antifreeze into the Truma. Then drain the Truma like Oliver showed you.1 point
-
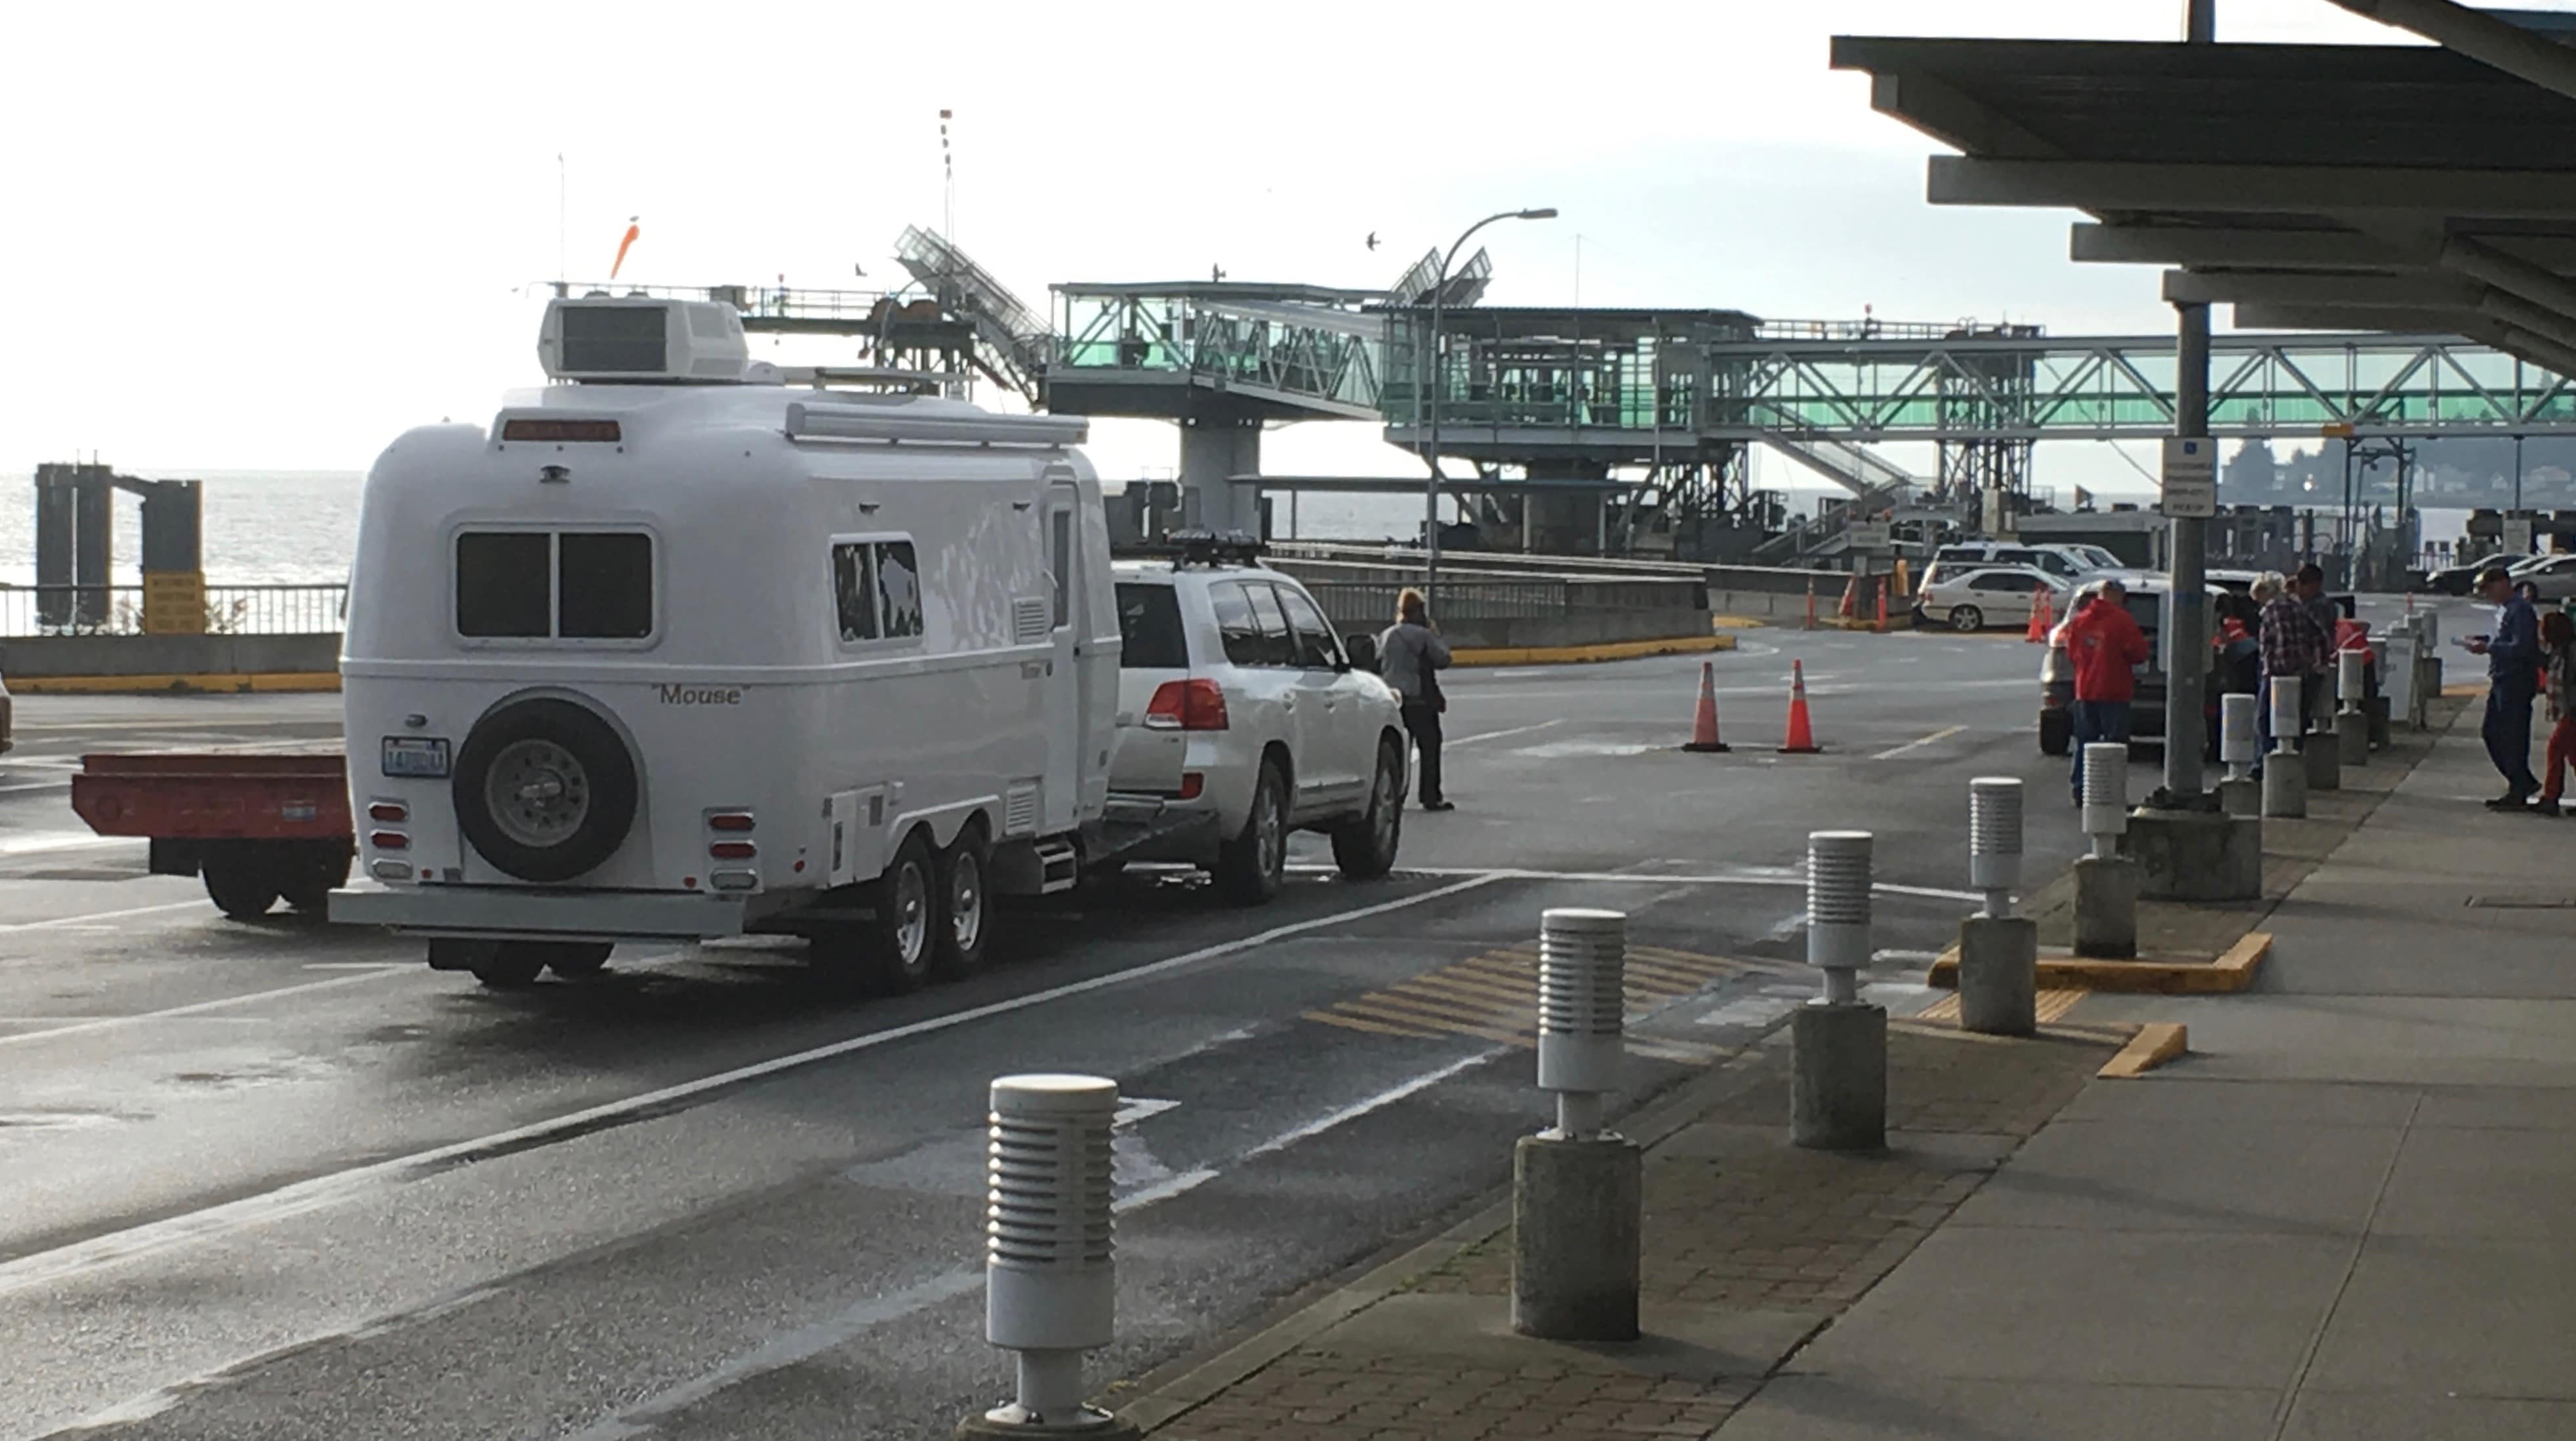
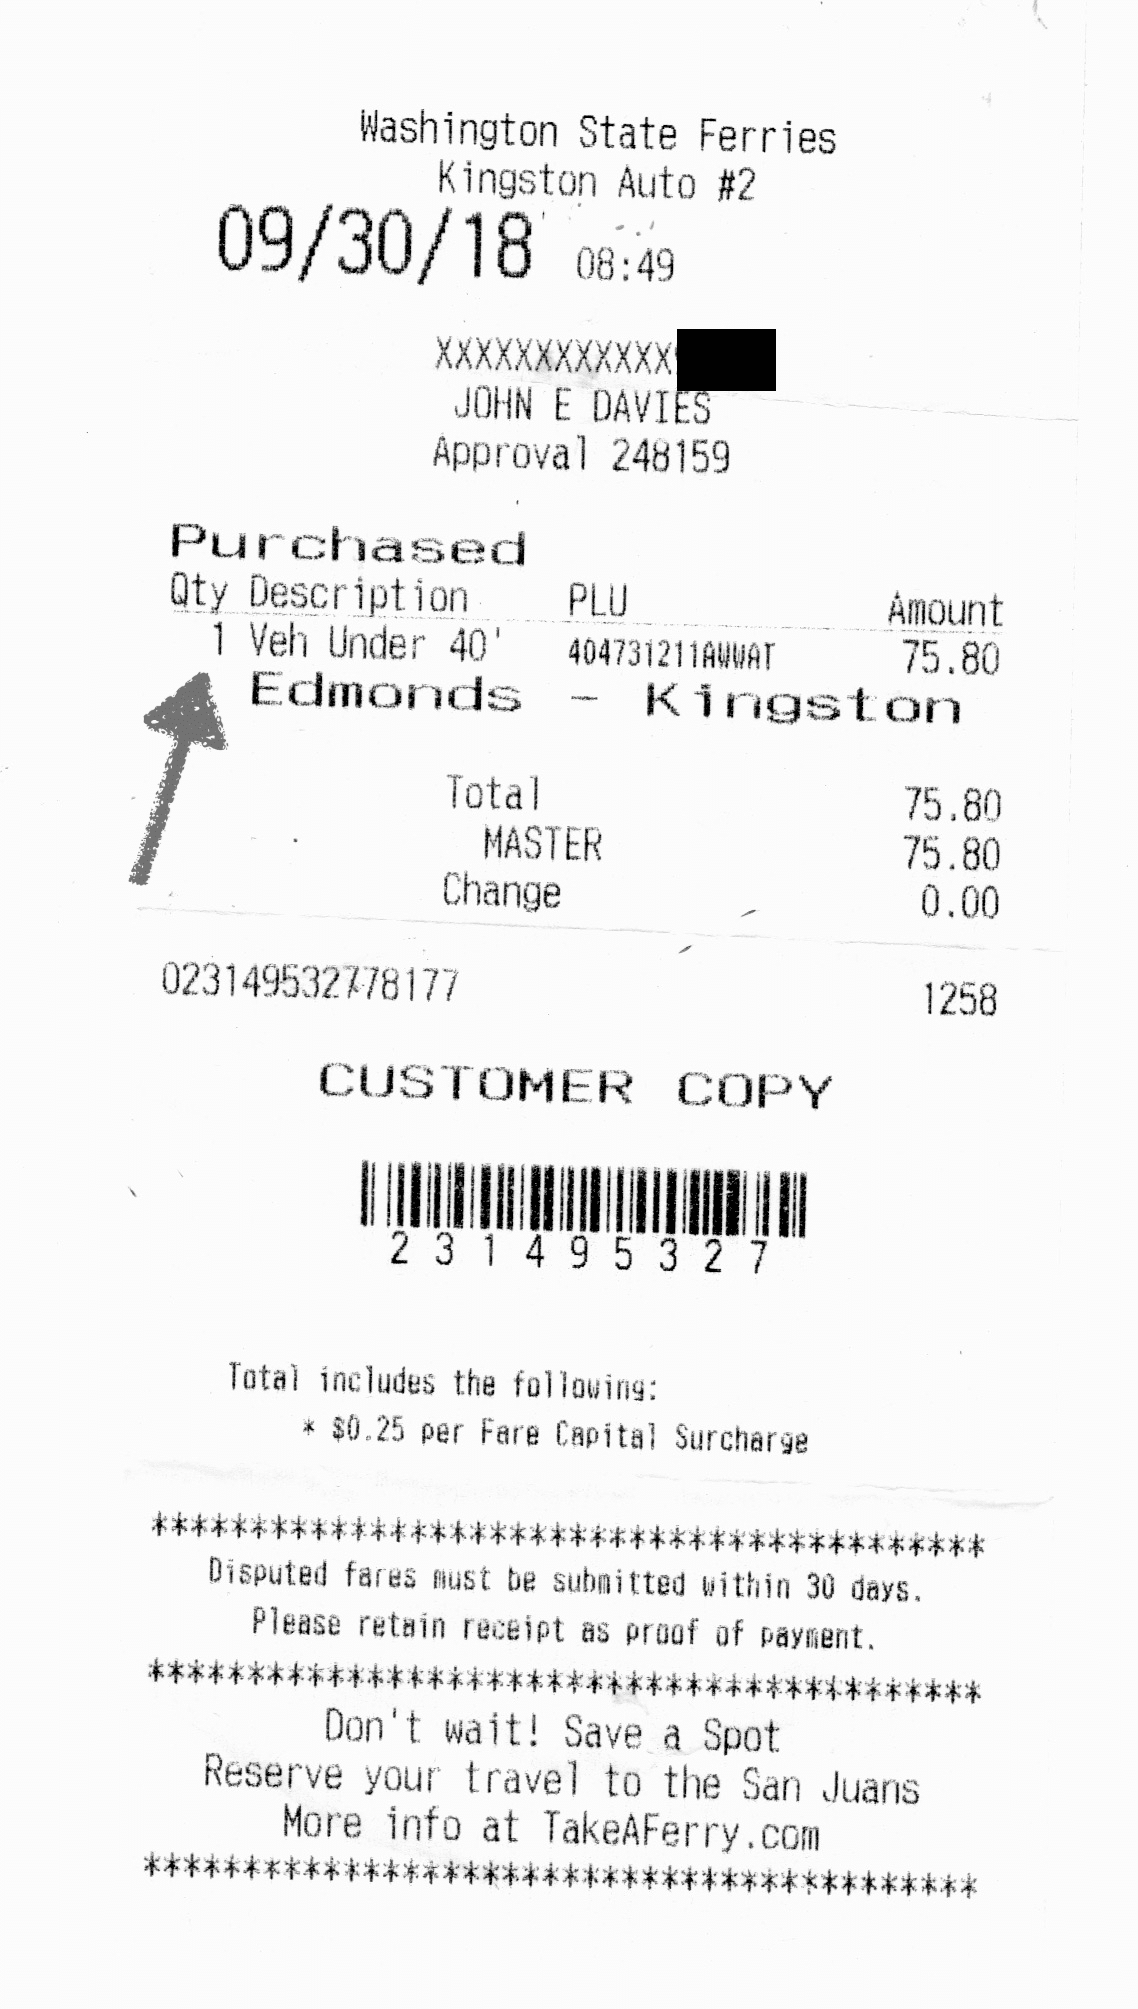
Queued up last week at the Kingston WA ferry dock, before crossing to the Seattle area: The ticket taker took a single glance out his window, saw white fiberglass and wrote up the fair as "Under 40 ft" [attachment file=Oliver Ferry ticket.png] which saved us the price of a fast food meal... I don't know if he noticed that the Ollie was longer than "normal" as we passed by. [attachment file=Ferry Fares.png] I was hoping we could park at the extreme front end of the ship (it is not called the bow because the ships sail in both directions) so I could take some cool pics, but Mouse was buried deep inside. Taking the ferry is fun, saves about 90 minutes driving and 60 miles of gas in heavy traffic, and makes for a great way to get to or from the Olympic Peninsula and the National Park/ Pacific ocean beaches area. [attachment file=wsf route map.pdf] It is EXTREMELY IMPORTANT that you time your passage so that you are not at peak rush time. We intentionally chose mid-morning on a Sunday, and there was zero waiting traffic to cross east to Seattle. Late in the afternoon would have been a different story.... If you don't study the schedule, you may end up waiting for several hours in a miles long line of RVs and day tourists. It can be very frustrating if you don't plan well. John Davies Spokane WA wsf-route-map.pdf
1 point
-
First thing would be to check for a leak at the pump. Before hooking up to city water, remove the clear plastic filter housing and place a shallow dish under it. Then when you hook up, you can see if water is leaking through the pump. If not, then you can move on to the valves. Definitely possible for a valve to not close all the way.1 point
-
On my unit, 2018 #365, it is located under the driver's side rear dinette. Just aft of the battery box and pantry. Vertically on the bulkhead. The wires are located to the front of the trailer.1 point
-
Spike - On my EII it is located on the port (left) side, access hatch on right (bed area) as you face the window. The ground connection will be on the forward facing end towards the bottom. A flashlight comes in handy., you can see it very plainly.1 point
-
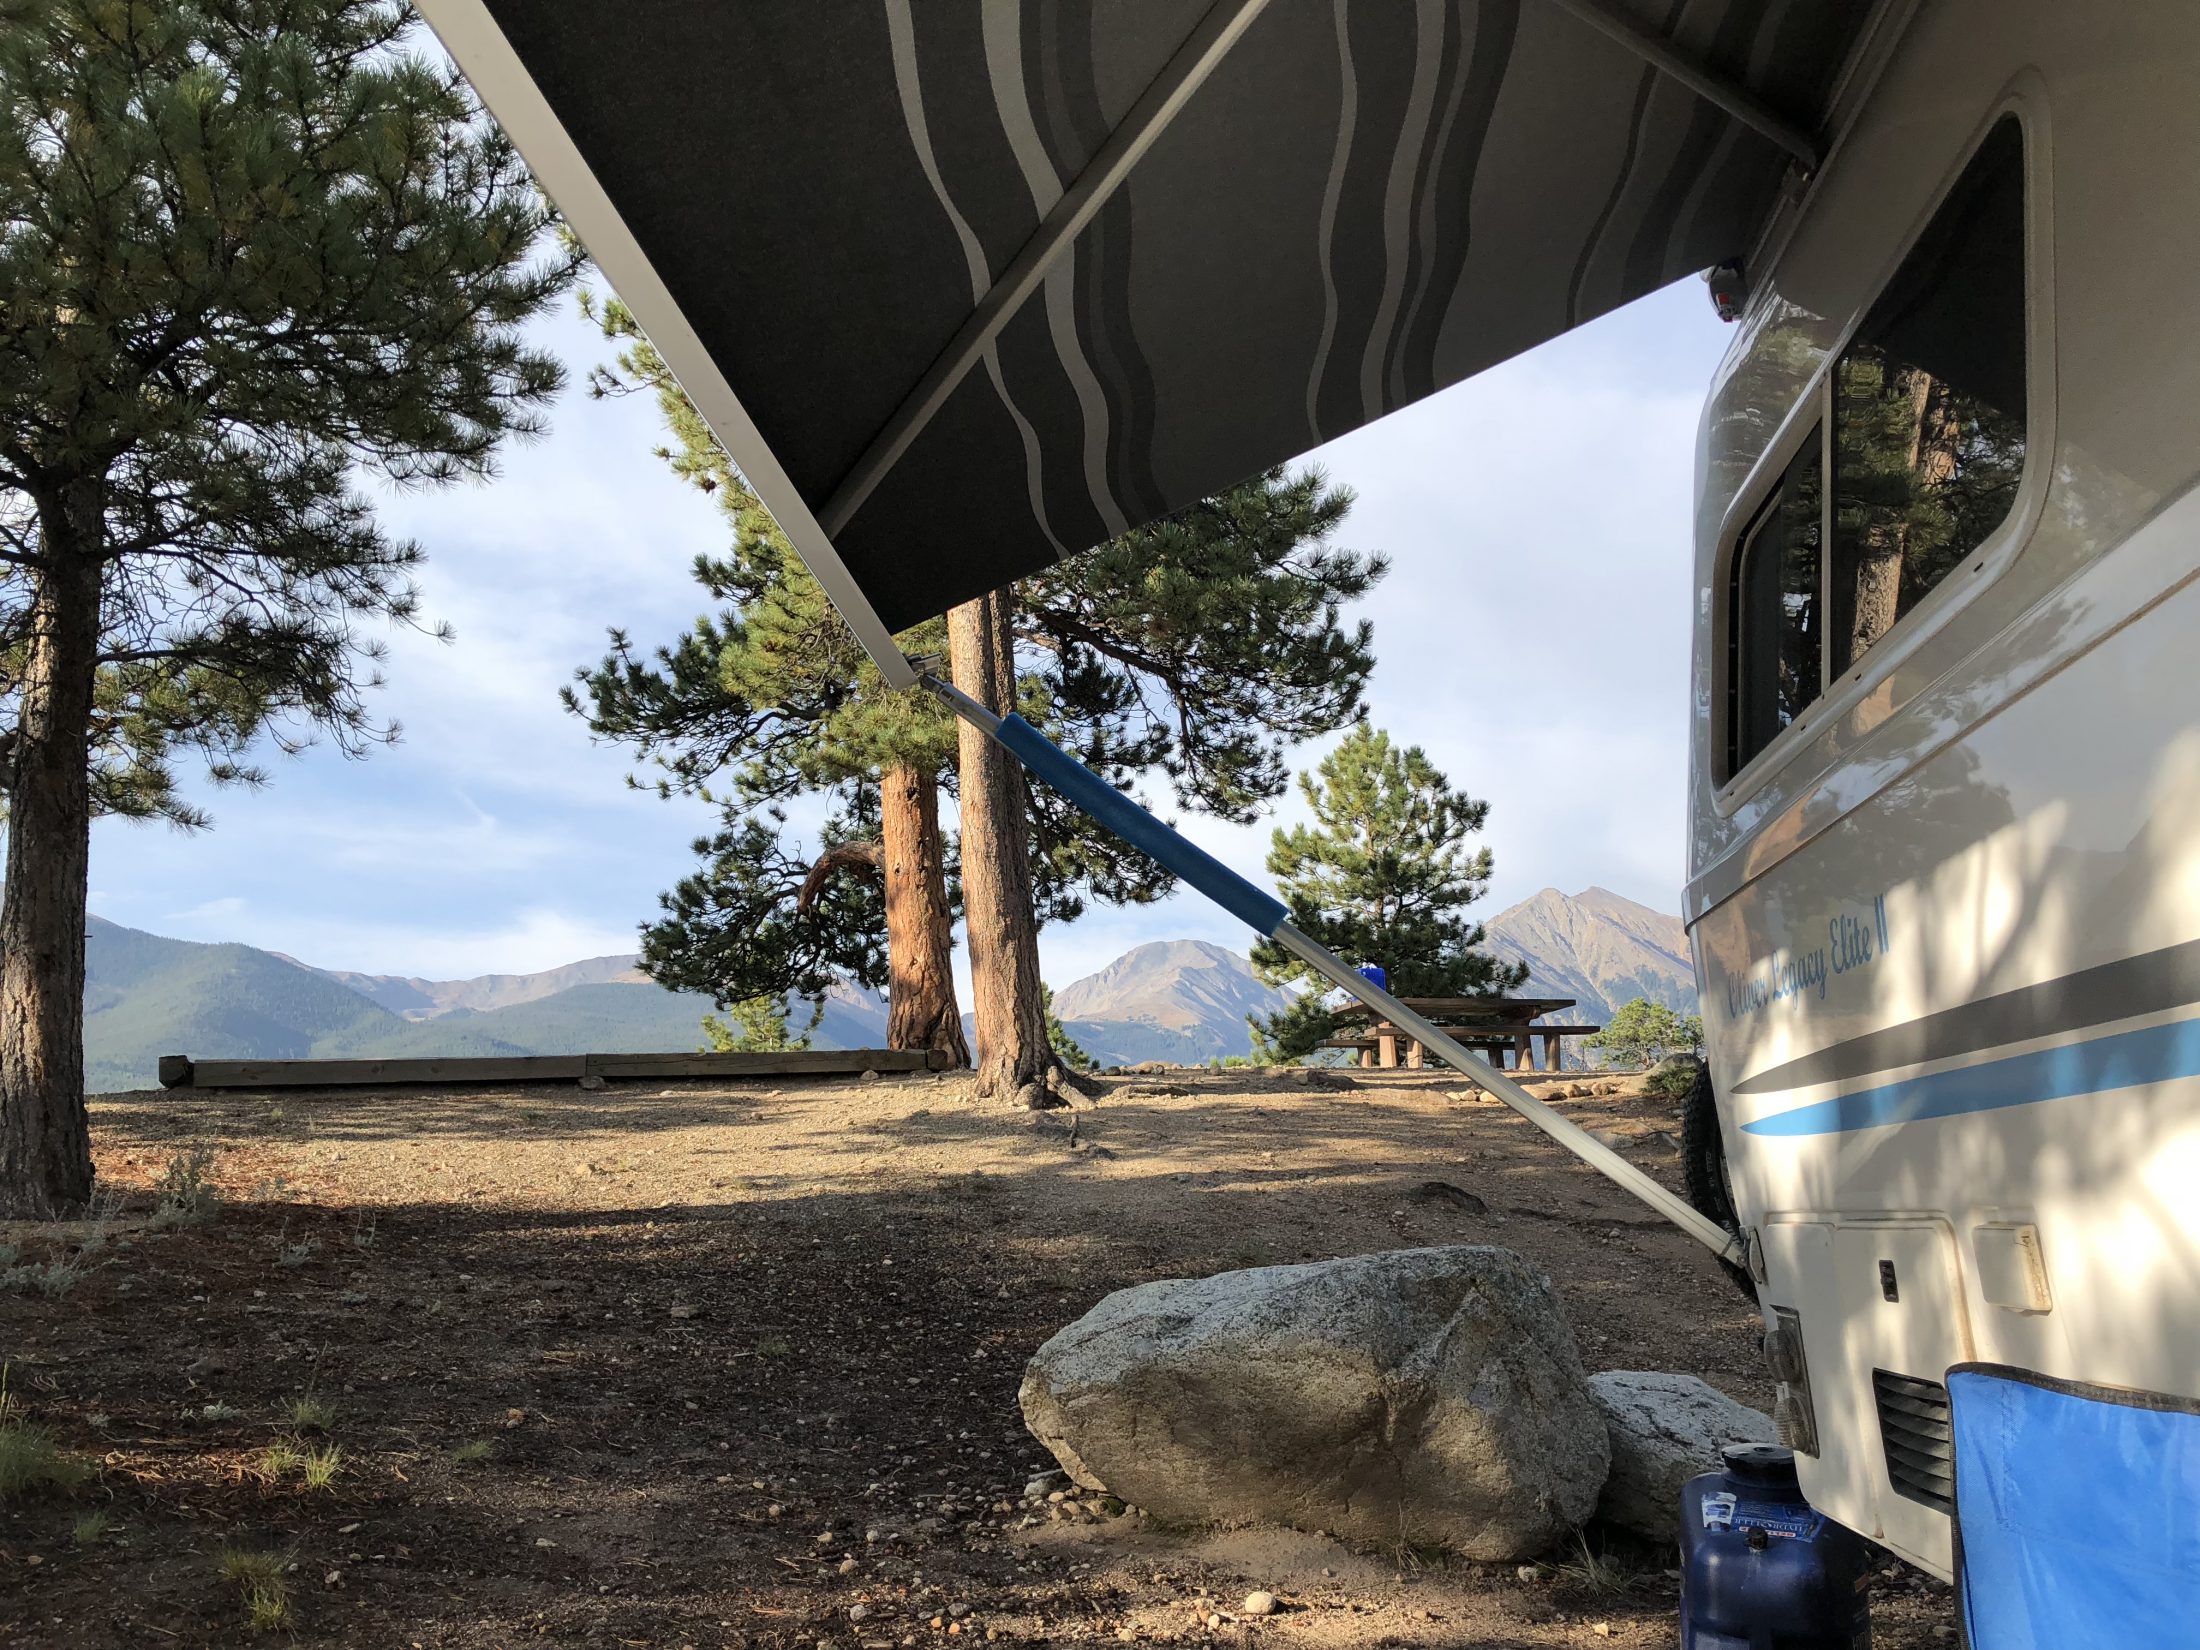
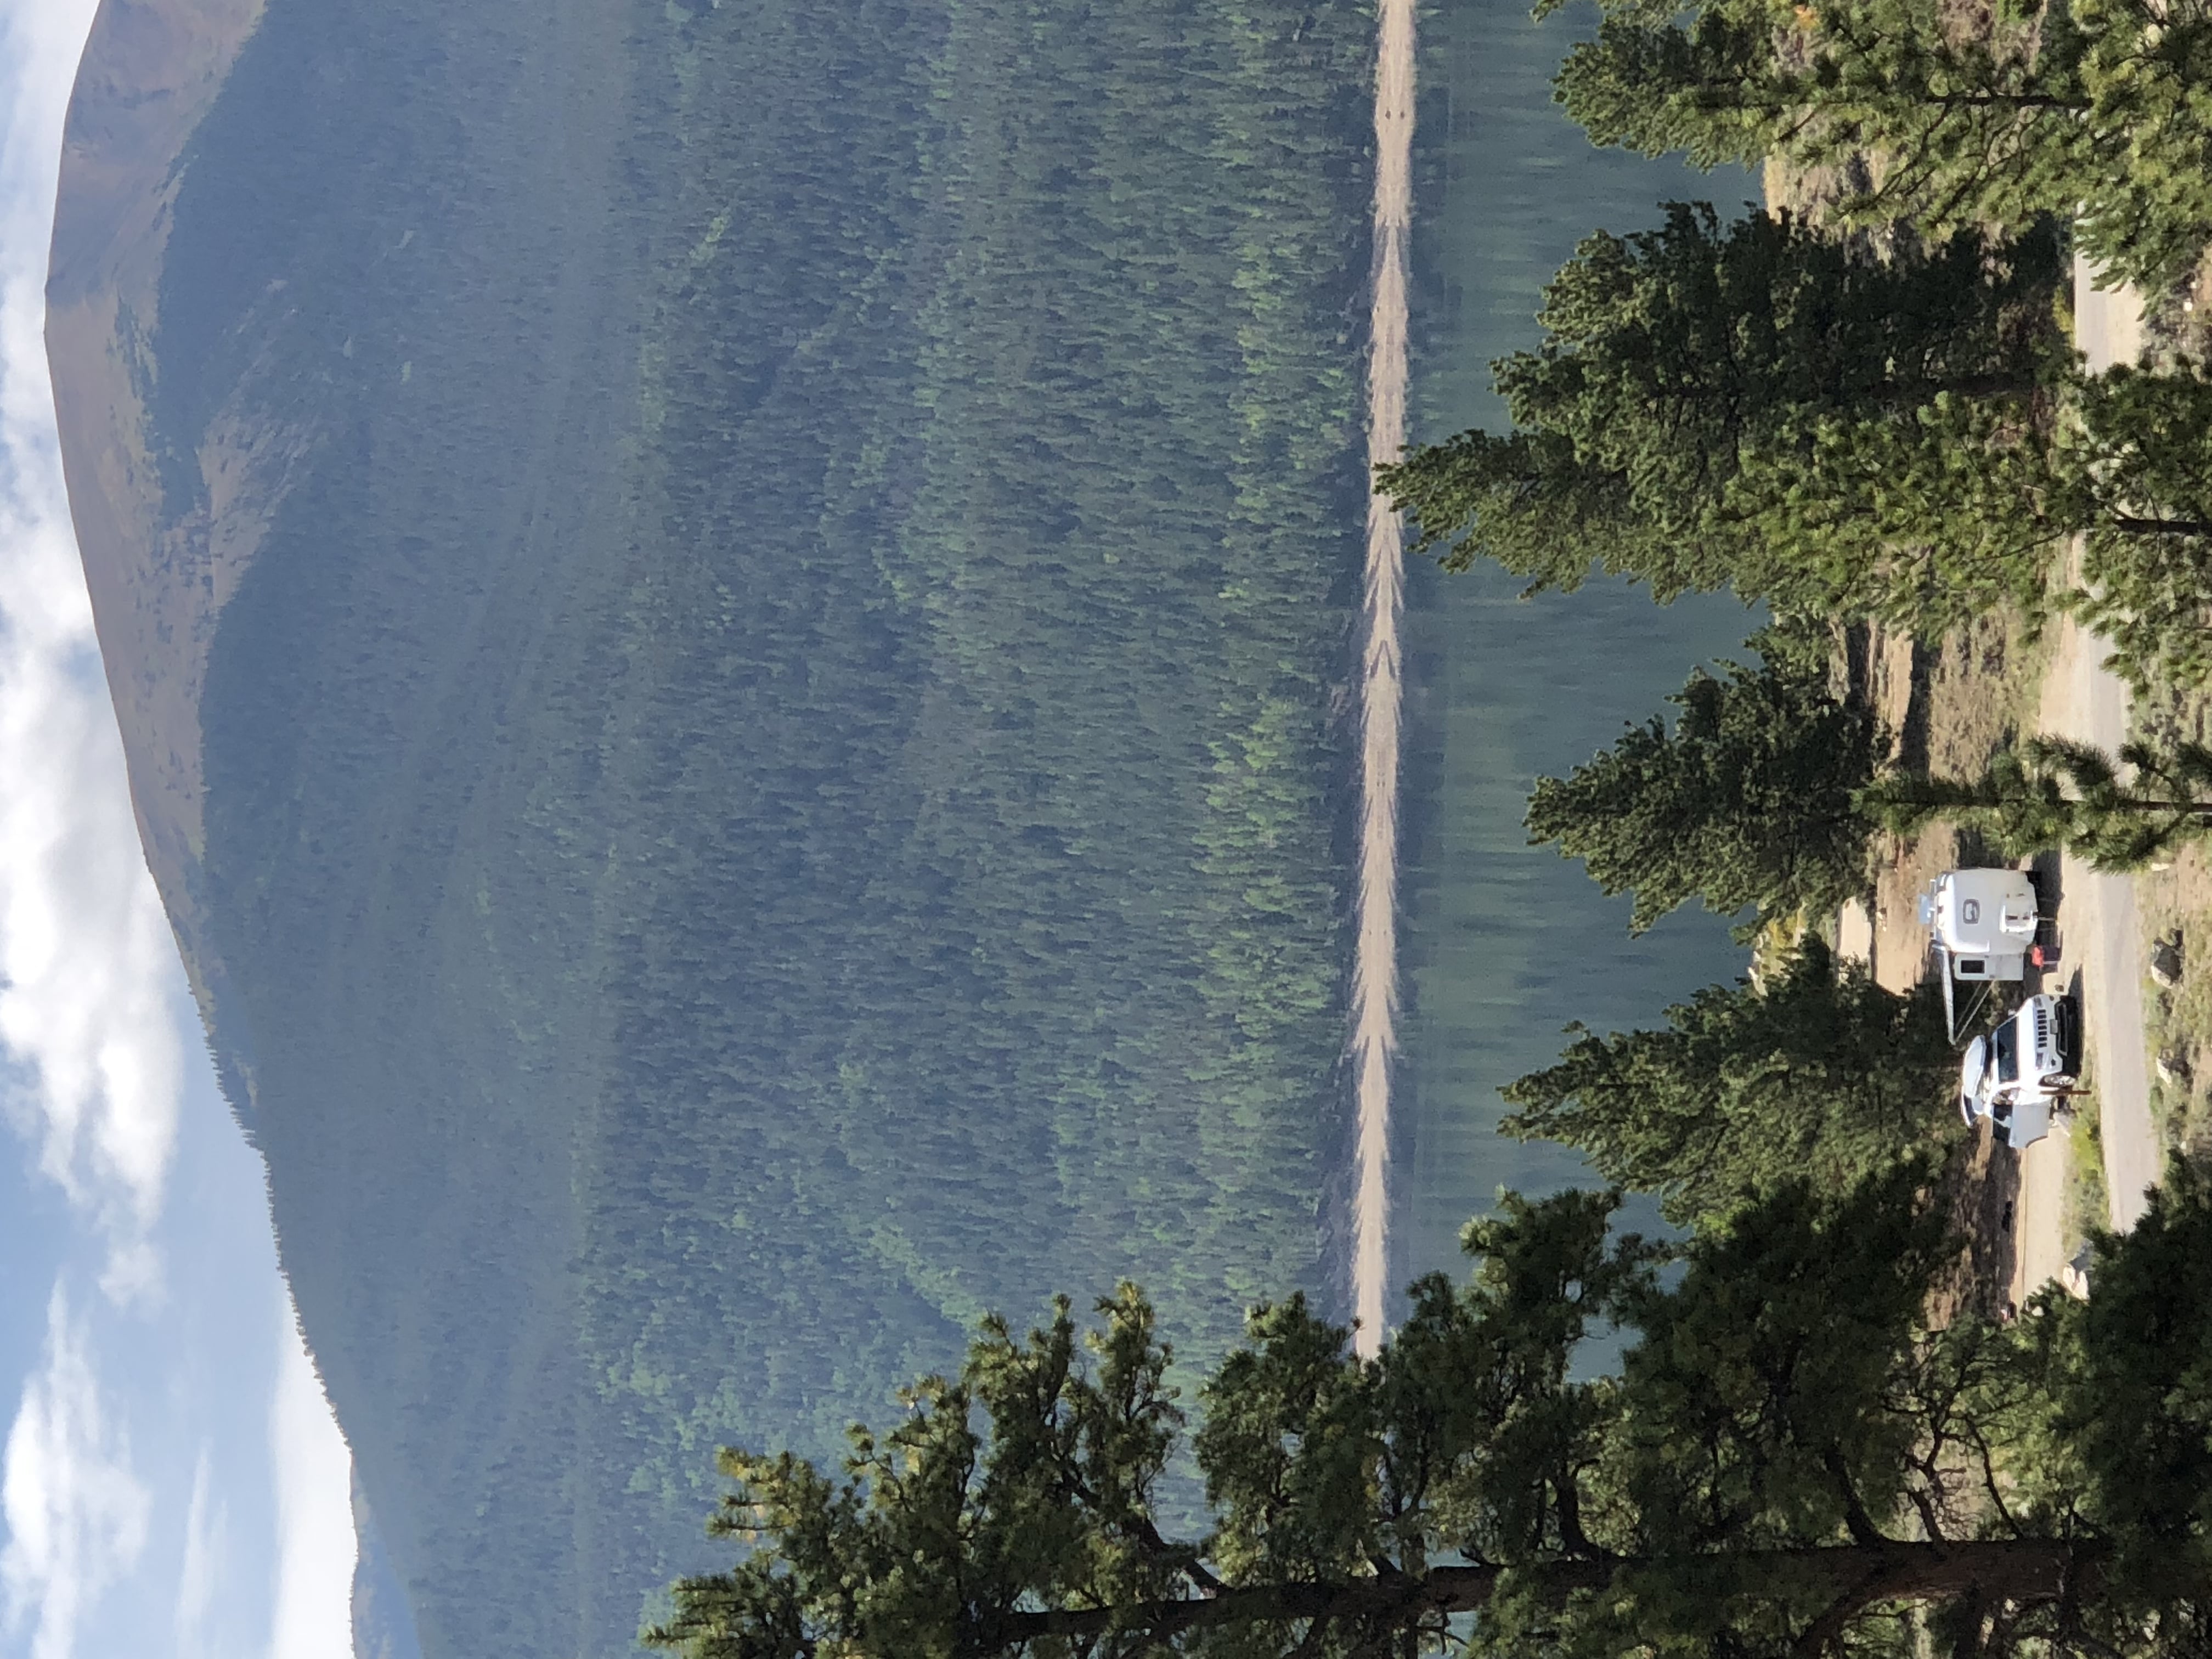
Pulled into Whitestar Campground on Twin Lakes in Colorado yesterday afternoon without a reservation and snagged a great campsite. When we walked up to our picnic table to check out view, imagaine our surprise, another Oliver!
1 point
-
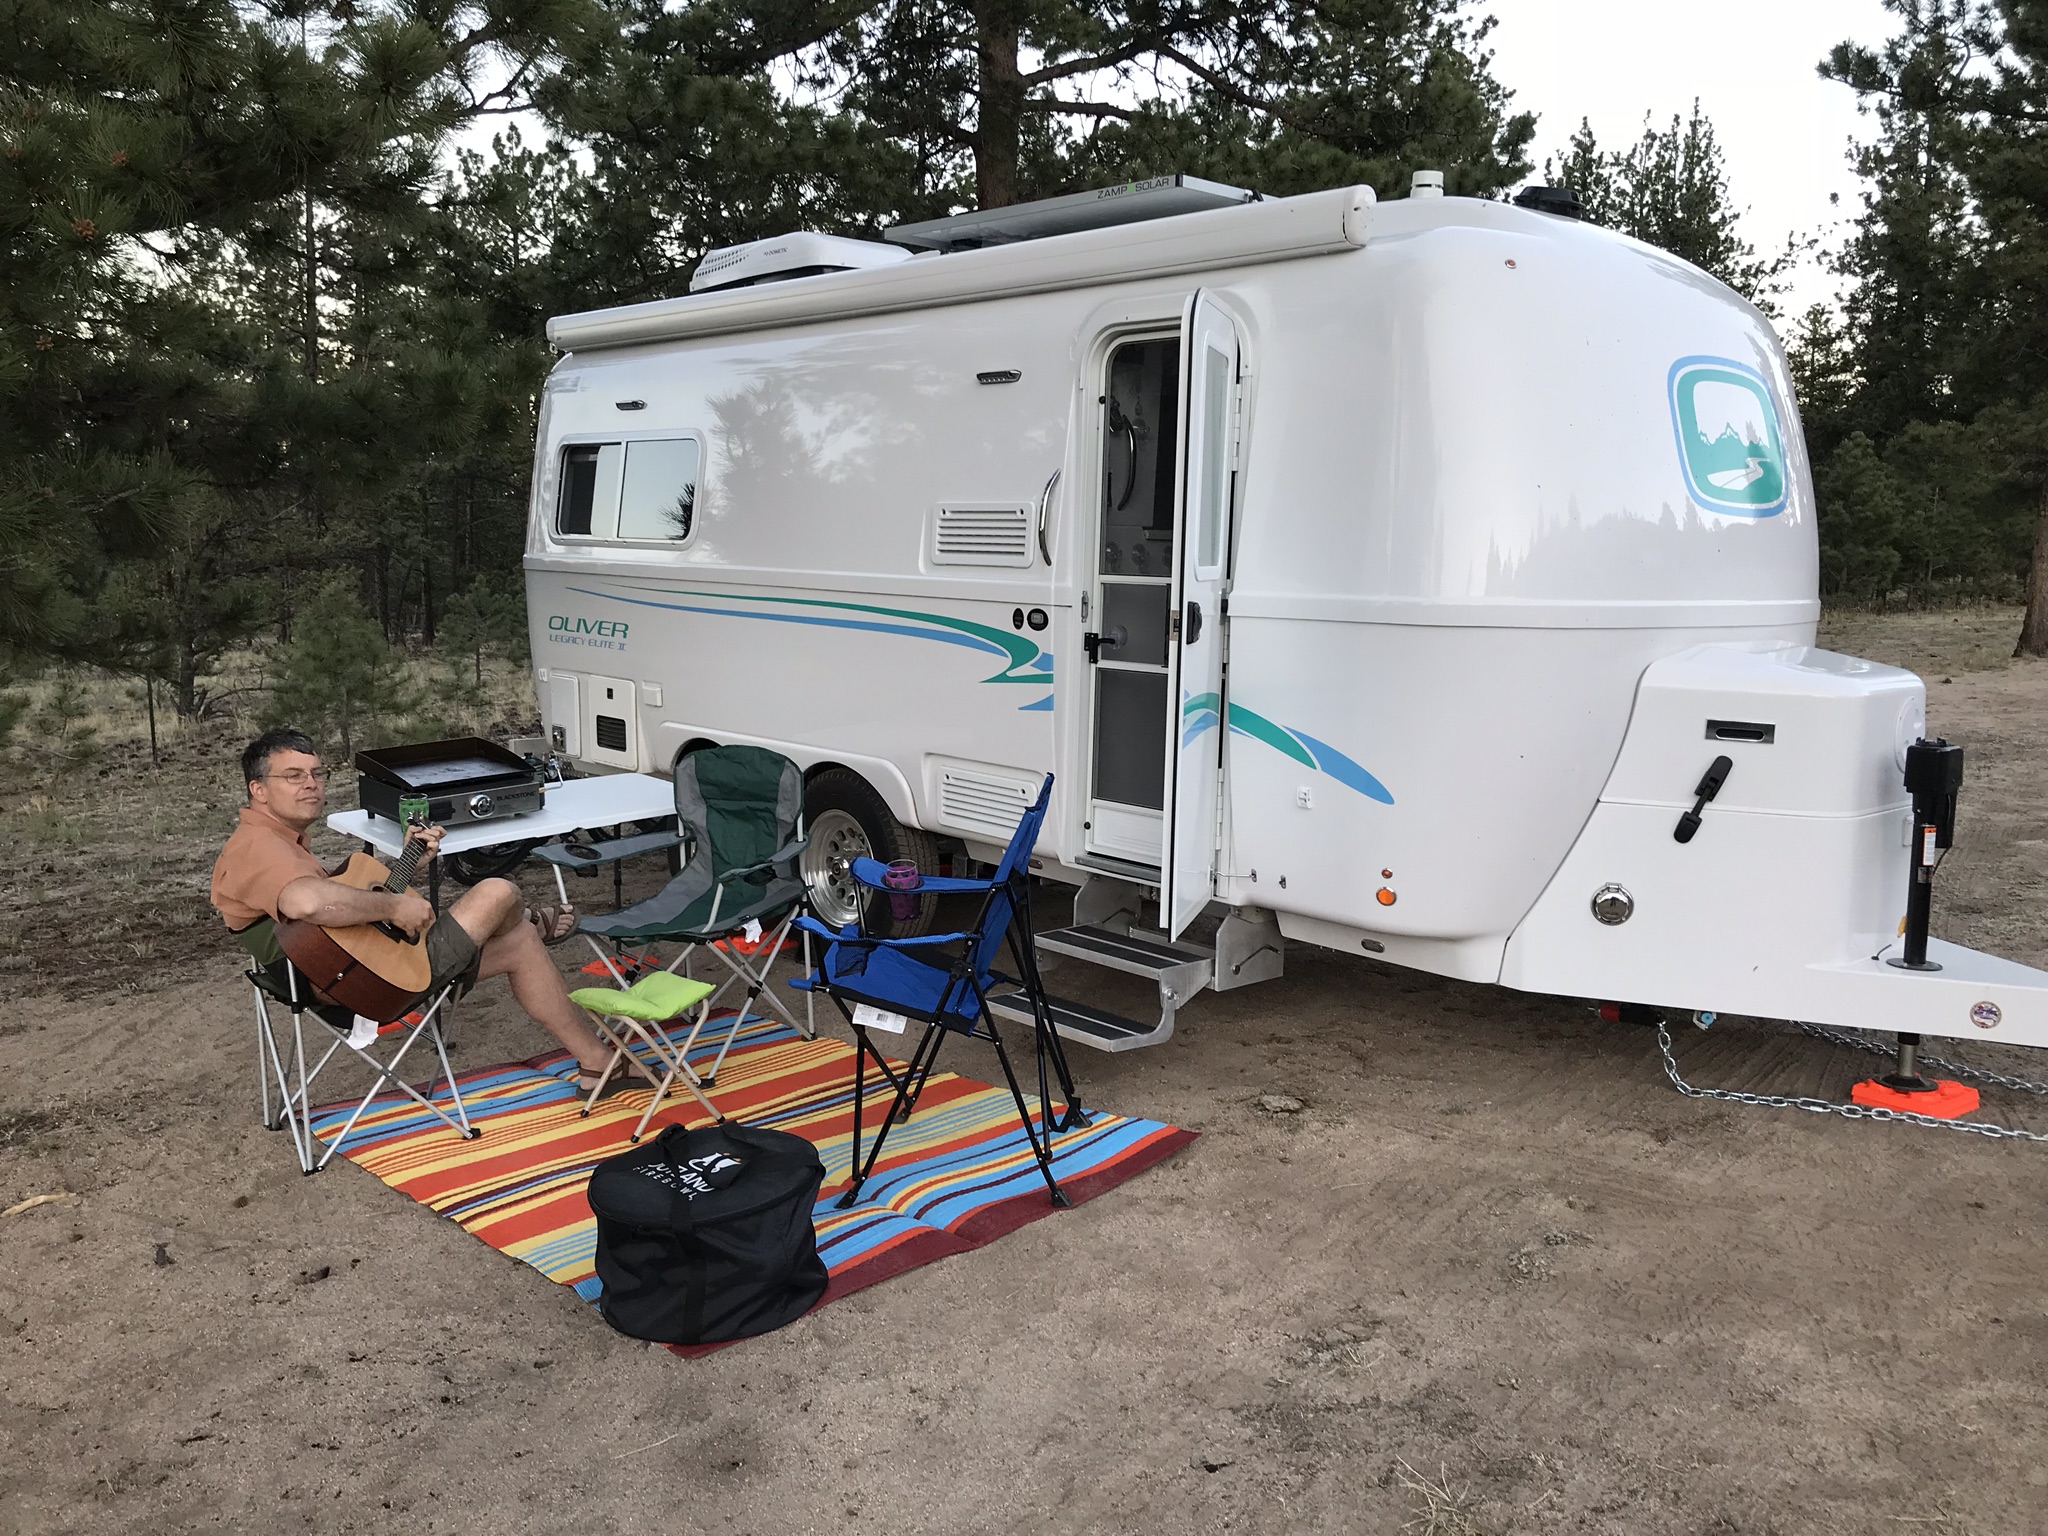
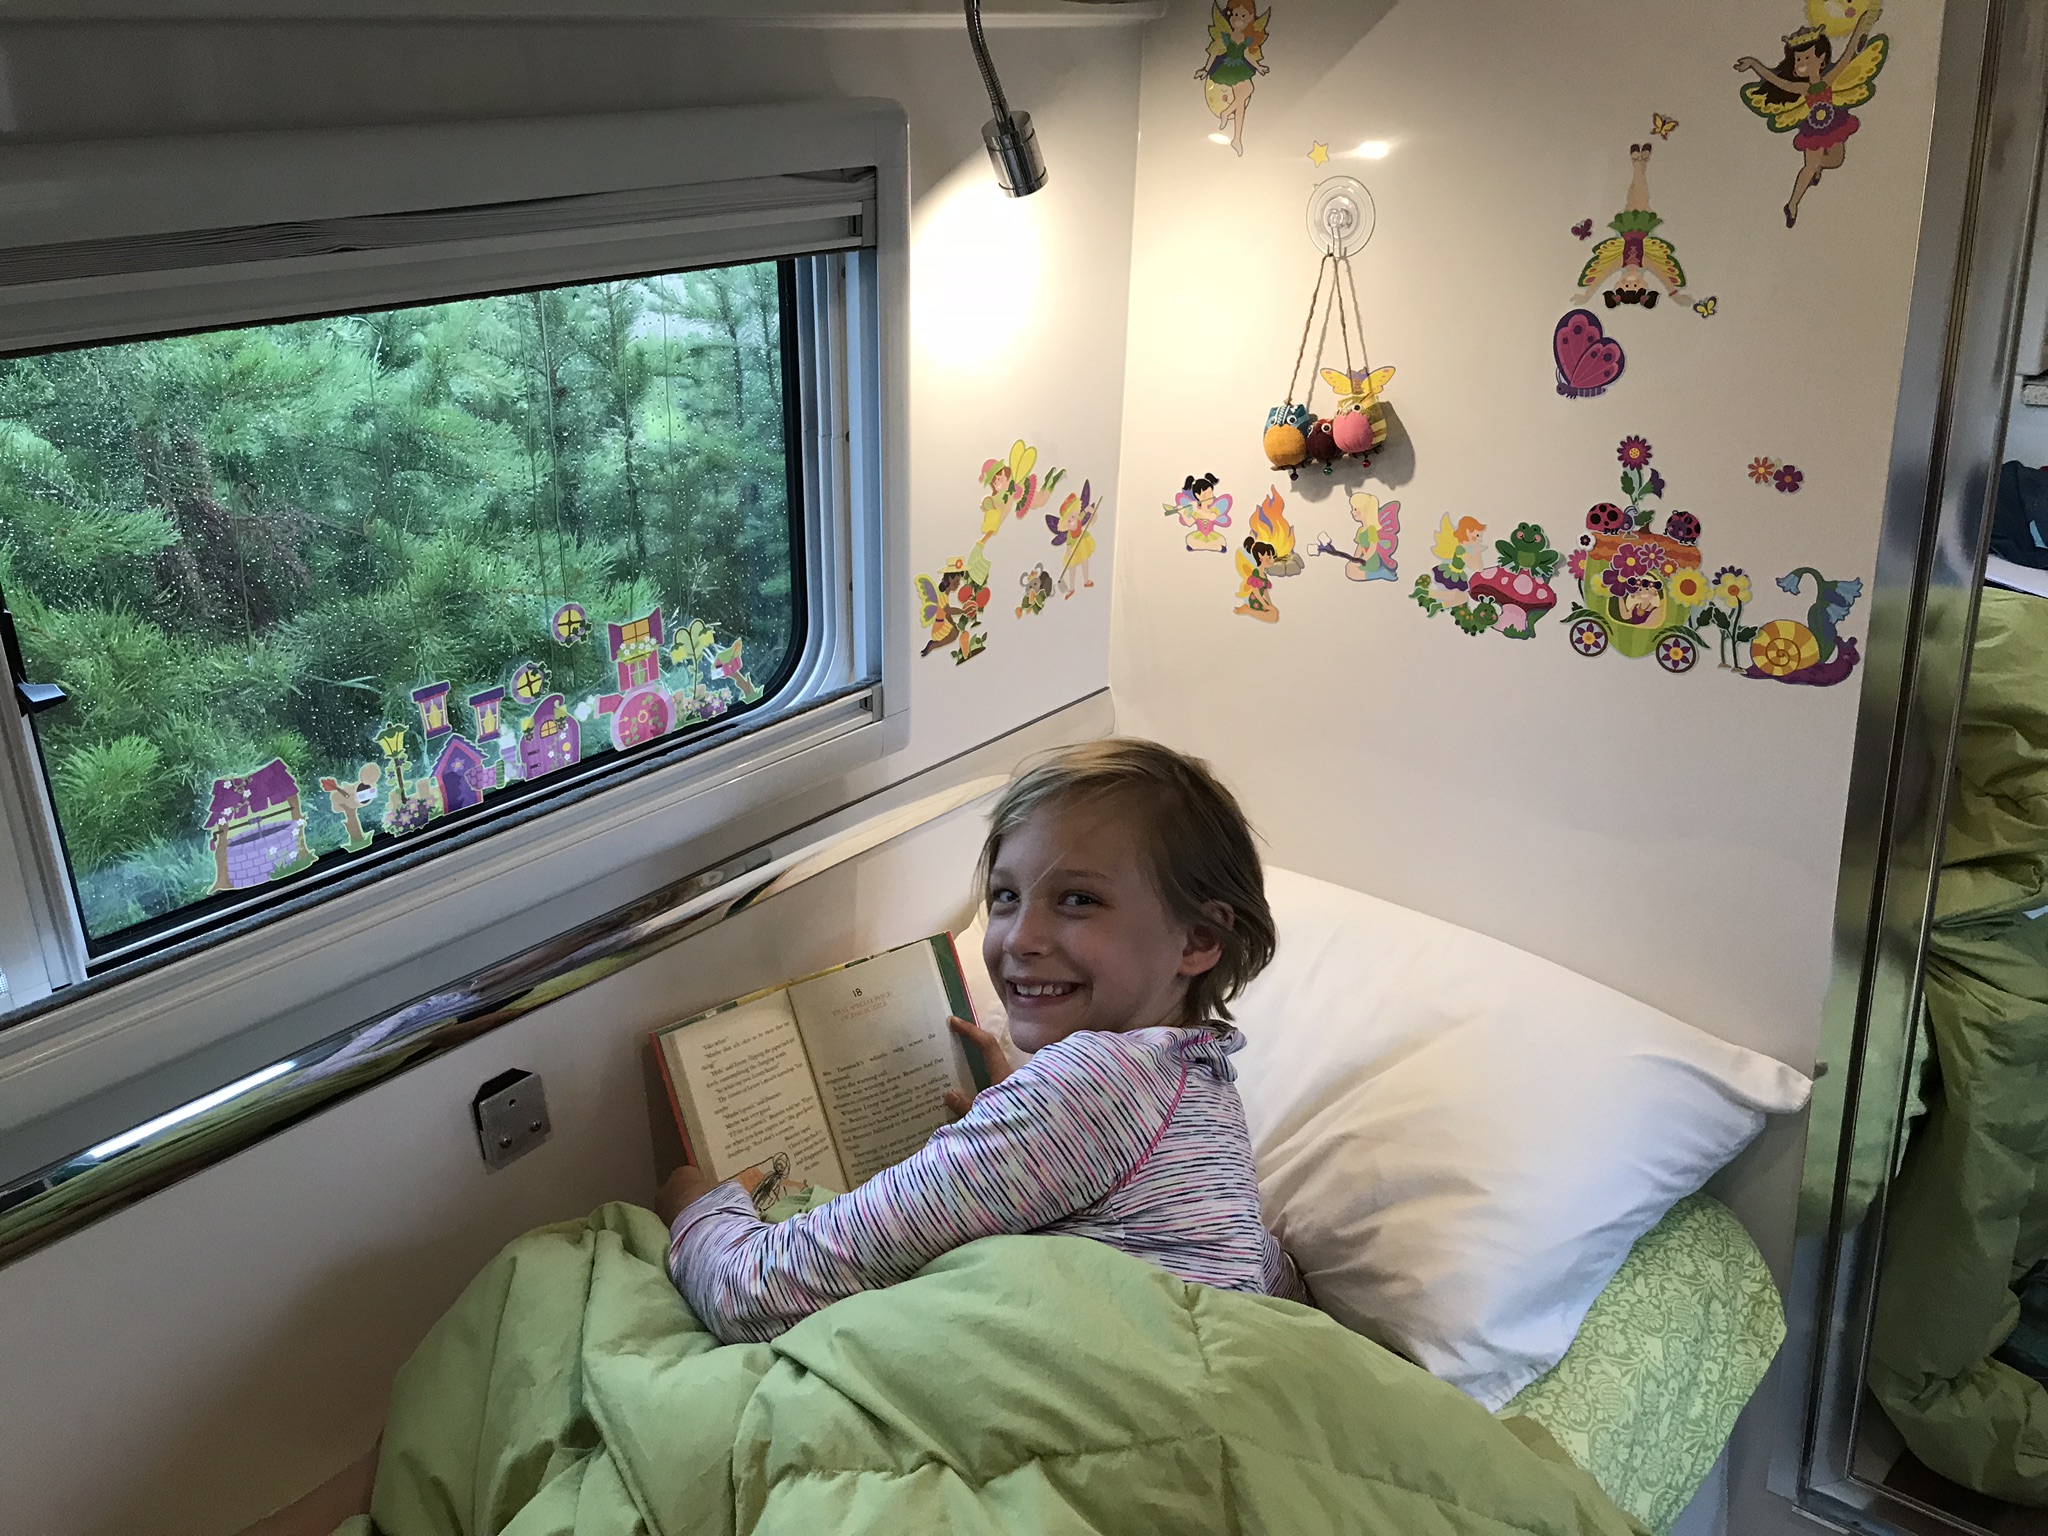
We’ve only had a few adventures so far, but here’s a couple pictures. One is boondocking near Salida, CO. The other is my daughter reading during a rainy afternoon at Arapaho Bay CG- you can see that she has really made her little corner her own!
1 point


-
Recent Achievements
-
")


")


")


