Leaderboard
Popular Content
Showing content with the highest reputation on 05/12/2019 in all areas
-
tl;dr - absolutely buy this, and depending on how you use your kitchen sink, maybe buy this. When we started looking at campers/trailers one of my requirements was that we should be able to go for a full week without refilling our water supply, using an estimated 7 gallons of water per day for both my wife and me, which included a daily shower for each of us. That was ~50 gallons, so we knew we couldn't get that with the Ollie, but were hoping that with some diligence and an extra 12 gallons carried in the truck that we could stretch a calculated 6 days into 7. That never happened, and of course we actually slid the other direction, getting more like 5 days - 3.5 from the trailer tank and another 1.5 from the extra water. I think if we really ran the tanks dry that we'd have gotten 6 full days but we never had a situation to really test that, mostly since we'd start to get nervous around the 20% mark and would go find water. Then last year I replaced the kitchen faucet, and the new one had an aerator that really had no flow restriction at all. It was rated at 2.5 gallons/minute vs 1.5 for the standard Delta faucet Oliver uses. And it also has a short little lever that made it hard to adjust to a small stream to save water. We could do it, but it was a pain. I realized last month though that the faucet would take a standard sized aerator, so I decided to buy a few to test them out. The ones I got were better, but made my cool kitchen faucet seem average, and I couldn't have that. But a little internet sleuthing led me to The Mikado. It restricts the flow to an amazing 0.35 gallons per minute and has the coolest spiral spray pattern you've ever seen. At only 0.35 gpm, I imagine you'd get pretty frustrated if you wanted to fill a glass of water; but we use bottled water and only use the kitchen faucet to do dishes and wash hands, so that low of a flow rate actually works out perfectly for us. We lost the ability to switch between two different sprays, but we never used that feature anyway. With that success, I decided to take on the shower. The highest rated low flow shower head I could find is the High Sierra. It's not a looker by any means - it's downright ugly. But it seemed like anyone who's ever rated shower heads has placed them at the top of their list, and it has a flow rate of only 1.5 gpm vs Oliver's 2.2, so I put my aesthetic sense to the side and ordered it. In its favor, it feels great in the hand - very heavy and solid, and it also has a trickle feature like the faucets Oliver used to use, which is great for keeping the water warm while sudsing up. Not in its favor is that I found it nearly impossible to connect to the hose from Oliver's faucet. I ended up having to order an oddball adapter and then modifying that to make it work. (It would have been easier just to have swapped out the entire faucet, which is what I'd recommend anyone else do.) But even with the adapter, it does slide back into the faucet just like the original, so apart from being a pain to make work, it does work just the same. But I have to say that this shower head is truly amazing. It has a surprisingly forceful stream that feels as if it's using twice as much water as before, if not more. It works so well that I didn't believe it was only using 1.5 gpm and had to test it myself - which made me even more surprised since I actually got a little less. I'm not exaggerating when I say that this really transformed the shower, and I highly recommend it to everyone, whether you're trying to save water or not. But it is ugly. After both of those mods, I thought I'd see if lowering the water pressure would make any difference, and found that 40 psi was about the point that I started to notice some drop off in the shower output. The sink stayed the same regardless what I set the pressure at. In fact it will actually run for a good while with the pump off, just from residual pressure in the pipes. So I've set both the pump and my external pressure regulator to 40 now, which I suppose helps my plumbing and maybe makes some dent in water usage though I doubt much. The result? 8 full days this past trip with both of us taking showers each day, split roughly 5/3 for the Ollie's tank and the extra gallons in the truck. So 2+ extra days of water while at the same time improving the quality of the water at both the sink and the shower and being able to lower the water pressure. Really A+ results. I don't know how often we'll actually need a full week's worth of water, but on this last trip it worked out well for us since only once were we someplace that we could actually hook up the trailer to a hose, which meant a lot fewer trips to get water. Also it means a little less stress and obsessing over water use, which is a good thing. By the way, the replacement aerator may work with the stock faucet, but I'm embarrassed to say that somehow I've lost mine* so I can't check. *Along with the sink. How do you lose a sink?6 points
-
1. I use a 1/2" drive with 6" extension. The extension lets you get the wrench out past the sidewall of the tire. A shorter extension may work but I'd have to check. You want at least 150 lb-ft limit. If you got the socket / lug nut wrench that came with my Ollie, you can use the appropriate sized socket in the kit with the 6 inch extension. There are 3 basic types: 1.) Manual with a dial (least accurate and least precise). Accuracy is important to ensure you are getting the right load on a given lug. Precision is important to ensure the loads are consistent from lug to lug. 2.) Pur mechanical. On these you set the target torque value (make sure you are reading the scale for lb-ft!) As you tighten the bolt you will feel a very distinct "click" when the torque value is reached. 3.) Mechanical electrical have digital readouts. I have type 2 and it works fine. Get a good case to put it in. It is important to protect it from being damaged or knock out of calibration. 2. See attached PDF. Oliver publishes these values. They may be different for different configurations. The site may have some other values. 3. After a wheel change I torque at 20/ 50 and 100 miles. Yes I do stop, get out with my torque wrench and check the lug nuts. I also check when I start out on a trip and usually before I leave the campground for the next site. I don't check every stop however try to do a walk around the trailer and truck at every stop which includes a good look at the lug nuts to see if any are backing off. I have discovered loose lug nuts on my truck by looking. 4. See PDF. I'm sure there are more though. I check the spare tire nut occasionally and the wing nut hold down the propane tanks. I probably should check the jack bolts once or twice a year. 5. Don't use lubricants on the lugs. If you ever have to use liquid wrench or such to get a rusty lug nut off, the lug nut must be thoroughly cleaned of lubricant. If lubricant is on the lug when the torque is set you will over-torque the lug. The torque values are based on the amount of friction between the threads of the nut and the lug. If lubricant is added the friction becomes significantly reduced to reach the torque value. The bolt "yields" or stretches and becomes much weaker. If you over torque a lug, it should be replaced. Not that expensive considering the amount of damage a failure can cause. Hope that helps, - Randy Olliver-LE2-Torque-Specs.pdf5 points
-
Regarding torque wrenches, I have always been reminded to return a torque wrench to zero for storage. See item 9 in the following attachment. https://www1.snapon.com/display/231/ToolNews/TechRefs/2008/TorqueWrench08.pdf3 points
-
That is a safe un-assumption. I appreciate it when folks giving advice don't assume I know more than I do. I did happen to have learned this earlier, but I thank you, Randy, for the detailed help. I feel more confident and torqued up to handle the whole torquing thing. I bet others are appreciative of the advice offered by you and others that might help them avoid a mishap similar to vector's.3 points
-
It does look like the nuts were all loose. But then there was a severe impact that bent the wheel. That actually looks like a very good wheel, in that it bent rather than just break. Maybe they are forged.3 points
-
3 points
-
Our Dill TPMS has internal mounted sensors and this is our 3rd Dill system on 3 different brand trailers. Our tire Temps usually run 25-30 degrees above the ambient air temperture. Most of the time on warm days they run in the mid 120's. I have seen them go to 130 on extremely hot and sunny days. The high temp warning on the Dill system is preset at 176 degrees. Our Casita, Escape and Oliver have all run about the same tire temperatures with 3 differant Dill systems.2 points
-
Well, my situation 'is this: I was exactly 200 miles away from the Oliver facility in Hohenwald, between Jackson and Cape Girardeau, Missouri when the event transpired. One hub''s lug bolts sheered off (possible over tightening), I think this wheel came off first., I felt a jolt here, and that makes sense. ~1 to 4 miles later, the other hub's lug bolts appeared to have not been tightened or loosened up possibly, and those lug nuts came off lug bolts, followed by the wheel at 70mph on I-55. I thought i hit a pot hole, but further thought, I think it was highly probable that that was a wheel that came off (the sheered bolts), because i recovered the single wheel that appears to have had the lug nuts work their way off (as has been analyzed by a few mechanics already). I've never lost a wheel before. I am very happy that no one was hurt, and that I calmly and brought the trailer to a stop on the far edge of the shoulder without any additional damage to the trailer or another vehicle (the hitch performed very well), since the left wheels were off, it could have been potentially pulled (it was leaning left). The Mo State Trooper gave me an adaboy for how i' parked it square on the shoulder's edge..which was nice. The tow truck did a good job of minimizing damage as they put it on the flatbed..which had to be done. it's currently in storage on a lot in that area. I want to get this resolved one way or another very quickly. I have an upcoming vacation and i have a lot of deadlines at work in the next couple weeks. Hopefully, it will go smoothly, but if not I'll deal with it best I can. I appreciate all of the positive and insightful comments ya'all have made here. I enjoy being a part of the Oliver Community and enjoy this Forum as well as the FB page. Thank you. Vector.2 points
-
Vector, Happy to hear no one was hurt! Talking about torque wrenches, have not thought about this since retirement (tried to forget about ISO) :) . We were certified to ISO standards in our rebuild/manufacturing facility. All of our torque wrenches and many measuring devices had to be checked and/or re-calibrated on set dates. If a torque wrench was dropped, it was not allowed to be used until it was checked and/or re-calibrated. Something RnA mentioned earlier. We had several grade 8 bolt failures in the field due to torquing nut/bolt assemblies to dry torque values with oil on the bolt threads. After finding this, we educated everyone in the facility on proper torque methods and followed up annually with this type of training.2 points
-
Spike, No success with the pdf right now. Here's what Jason Posted a couple of years ago. Same as what is on the pdf. """""""""""""""""""""""""""""""""""""""""""""""""""""""""""""""""""""""""""""""""""""""" March 10, 2017 at 12:34 pm #46879 JEssaryKeymaster@essary17 TORQUE SPECS WHEEL LUG NUTS STAGE 1: 90 LBS STAGE 2: 110 LBS STAGE 3: 120 LBS BULLDOG COUPLER: 80 LBS AXLE/U-BOLTS: 70 LBS SHACKLE BOLTS: 40 LBS ---------------- Jason Essary Service Manager Oliver Travel Trailer Sales, Inc. 866-205-2621 """"""""""""""""""""""""""""""""""""""""""""""""" For lug nuts, go around each with torque wrench set to stage 1, then do all nuts to stage 2 and finally do all nuts to stage 3. For periodic checks I just use stage 3. The reason to tighten incrementally is to not warp the wheel. - Randy2 points
-
Precision Instruments ½” You can get a more expensive digital one that will be more precise, provided it’s handled with kit gloves and calibrated regularly. Great if you’re building Porsche engines. The PI is more than accurate enough, super easy to set and use, and most importantly can bump around in the back of your truck for years without losing any of that accuracy.2 points
-
2 points
-
**Bulldog Hitch**: One thing I want to point out on the positive-side of all this is the brilliance of the Bull Dog Hitch. I love that design, it's functionality and it's strength. The BD Hitch remained in place, holding onto my hitch of the Nissan Titan XD...i didn't have any trailer sway just "trailer lean" :) and trailer sparks (my great regret is I didn't see those sparks in the pitch black night, that would have been oddly cool). I attribute the lack of sway to good trailer design, my truck's anti-sway tech and that hitch...because it didn't come off and then rely on the safety cables. I'd camped with a fellow OTT man Don Thompson at th e Amber Falls winery, and that morning, we both put a good splotch of lithium grease on each of our hitch balls and hitch receiver (inside, around the spring, etc.) to prevent corrosion, extend longevity, improve functionality. I recommend everyone to do that..take those disposable gloves as that grease is sticky and will stain. So, whomever made the call for the BD Hitch, Bravo. I do think that, among other items, is a product difference-maker, comparative advantage for Oliver.over their competition.2 points
-
Exterior solar plug pictures: This is a very nice and compact 20 Amp exterior plug. It has solder connections to gold (I think) terminals. Comes with screws, gasket and chain. I posted a link to it in an earlier post. The male end fits a #12 exterior extension cord and has a strain relief nut. The plug has a twist-lock design and will not fall out. It also keeps the connection dry while plugged in. https://www.amazon.com/CNLINKO-Industrial-Connector-Receptacles-Waterproof/dp/B0795464LP/ref=pd_ybh_a_26?_encoding=UTF8&psc=1&refRID=9EBPJGFS22DYCSBDBBGV2 points
-
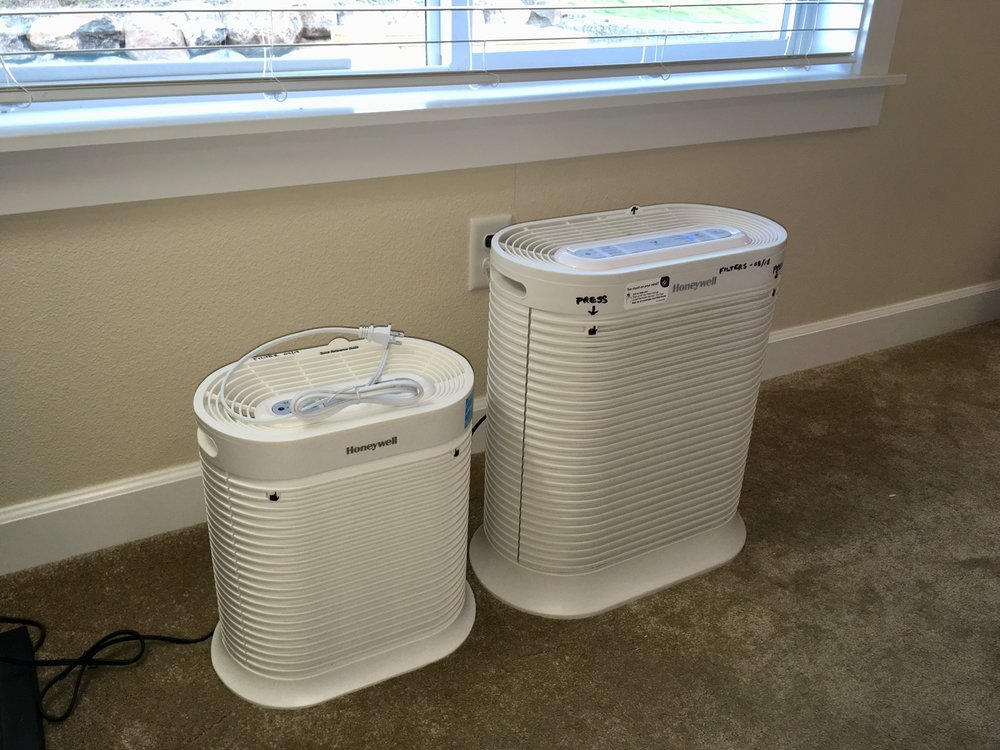
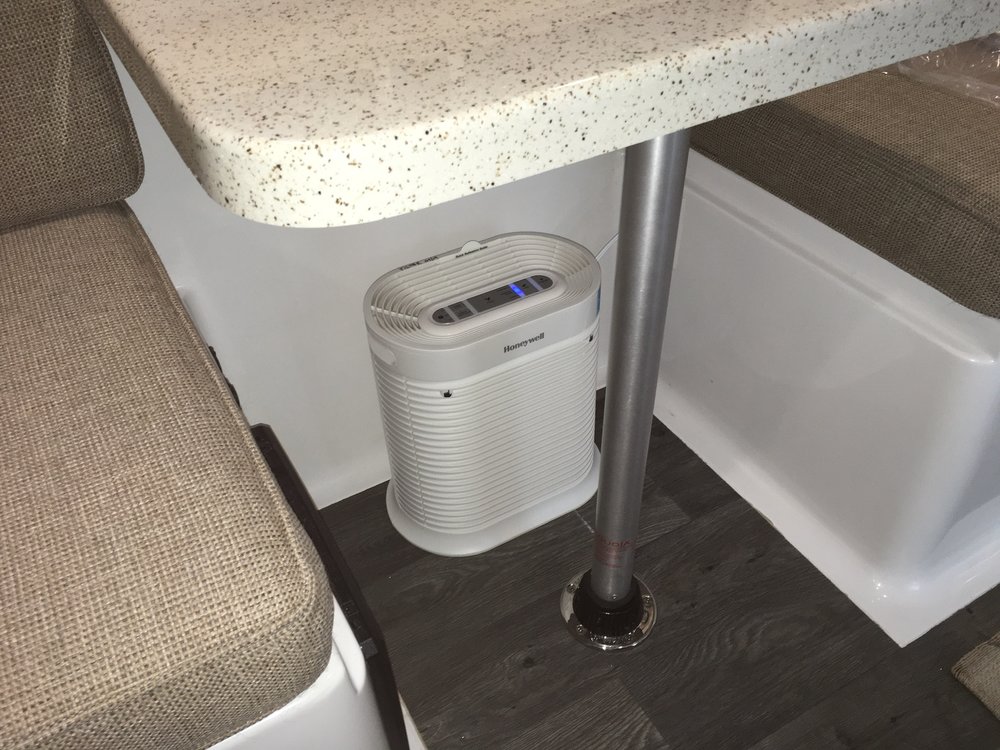
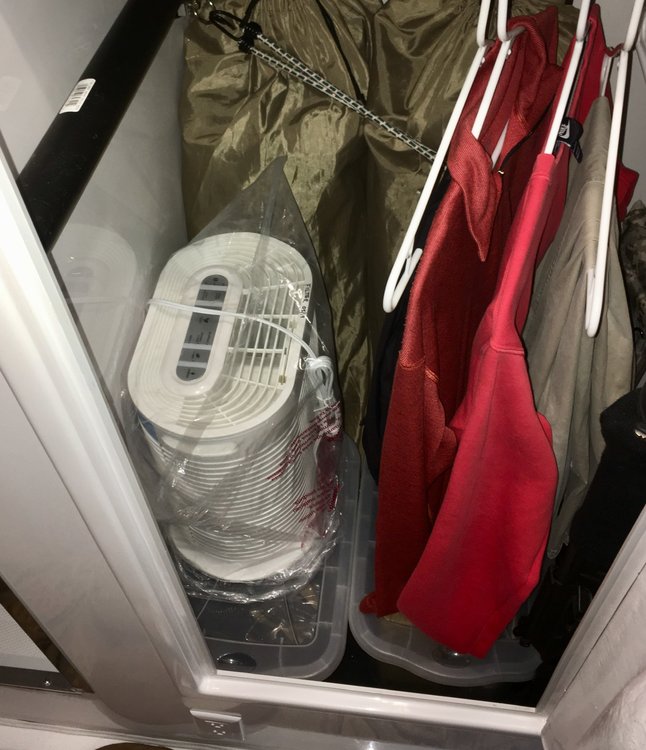
https://www.amazon.com/gp/product/B00BWYO2PM/ref=ppx_yo_dt_b_asin_title_o00_s00?ie=UTF8&psc=1 I have been using the middle sized (200 series) unit for several years in my 225 sq ft bedroom and it has been excellent. It traps a ton of particulates and with the bedroom door closed it makes the room much fresher feeling. For an allergy sufferer it is a godsend. I also use a HEPA filter element in my HVAC system but it can only do so much.... this gives me a “clean room” to stay in if the pollen or smoke is bad. I have used it in the Ollie but it is really too big for that small space. I had to leave it on the floor under the table and pack the area with soft duffles so it would not move during travel. I just received the small one, it will work much better in the smaller volume of the trailer. It uses a single pair of filters instead of two pairs. The small one is a much better fit: And I have space in the closet for it to travel in. It is just a little too wide to fit in an overhead compartment. The medium one draws a maximum of 0.85 amps at 120 volts, the small one draws 0.5 amps, so there will be a measurable energy savings when running off the inverter and batteries. Plus it is a little quieter. There are four speeds. On Low it uses hardly any power, so I don’t worry about leaving it running all the time. OEM filters are expensive, I use the way cheaper generics with no problem. I do vacuum the foam pre-filter often to remove the accumulated dust and I blow out the HEPA filter with low pressure compressed air to extend its life. The units have a filter minder to tell you if the airflow is restricted. Air is drawn in the front and exits out the top, so you can place it tight against a wall, no worries. I really like this design. I researched all the other manufacturers and models and decided on this one for a lot of reasons. The only thing I DON’T like is the easy open filter door (press in two places and it pops free at the top). This isn’t a great feature for a unit that will travel and be handled often. You have to be aware of this and check it sometimes to make sure the door is closed, otherwise.... highly recommended. For those of you camping in the West during wildfire season, this would be very helpful to make the nasty air breathable if you get caught downwind. This is an accessory that you don’t think about, but after using it I would not want to travel without one. Cool fire pic: https://www.theverge.com/2018/11/21/18107016/wildfire-smoke-weather-scientists-complex-nasa-noaa-firex John Davies Spokane WA1 point
-
It has its own small antenna and on our first system I did get some false alarms so installed the supplied antenna that is run under the vehicle and up into the cab. Having to mount the sensors, rebalance the wheels and run the antenna it is more work but a very nice system when installed although not for everybody because of the work involved. They say batteries are 5 plus years but I have never had one go dead.1 point
-
Thanks Townesw. Great info sheet from a great tool manufacturer. Per their sheet you should store the tool at “the lowest setting”. I don’t know if any go as low as zero. I store mine at the lowest setting on the wrench of 20lb-ft. - Randy1 point
-
Spike, You probably already know this but I won't ASSUME you do. Tighten the lug nuts by going back and forth from one side of the wheel to the other (tightening the next lug across the axle). Do not tighten in circular order around the wheel. - Randy1 point
-
I had my Ollie serviced when Lanham did and we camped together at the winery the first night out. I have a TPMS system and I was carrying 55 psi in all four tires (cold pressure) when I dropped the camper off for service in Hohenwald and the tire pressure was the same when I picked it up. I think they used to put 80 psi in the tires, but that may have just been when they delivered a new Oliver.1 point
-
Nan - A "tow package" normally includes an integrated brake controller, additional oil cooler and/or transmission cooler, a larger gas tank, perhaps integrated on-board software that can control sway, extended blind spot monitoring for the additional length of what is being towed, a frame mounted hitch and perhaps additional items. I'm not exactly sure what a "tow hitch" is supposed to mean. I'd certainly ask for a much better explanation of exactly what items are included. Bill1 point
-
1 point
-
Vector, If you can get to the trailer before they work on it you may want to check the torque on the other side. Not definitive that left and right would have been the same or that the wheels were not subject to lateral loads that could have altered the loading on the lugs. It could prove useful though. I would start around 70 lb-ft and try each lug to see if you get movement. Then just add 10 lb-ft each cycle until max. - Randy1 point
-
Wow. Sounds like you handled the situation perfectly. PM me if I can help. We could bring you some parts, if nothing else. I'm not sure what wheels you have, but my Oliver had very weak wheels and I broke one. So I upgraded to aluminum star wheels with a 3200 lb rating. Your idea of steel sounds good. They will bend and not break. As far as axles go, if you change yours, get the 5200 lb axles that Oliver used for a short time. They are much stronger than the 3500 lb axles and the brakes are bigger. In your case, riding on a 12" drum, instead of a 10" drum, might have made a difference. Plus the brakes are stronger and will last longer. Keep us updated and good luck.1 point
-
1, Well, i feel a different pressure in the back, immediately look at my Left Trailer mirrior,..i see the trailer is leaning weirdly left...i assumed a blowout. 2. I use my mirrors and my camera to look for anyone near my rig, I see I have a room to maneuver. i calmly and a low angle bring hit the brakes, but not stomp them and bring it to the right shoulder...i made a an effort to get the right tires on the right edge of the shoulder...there wasn't a lot of extra space. and turns out there was steep 10 foot drop off right off the shoulder that I couldn't see in the dark.. no moon and overcast it was very dark. The frame under the bumper ( i'm hoping just some bolts) might have absorbed the friction...but it was dark w/ semis. The hubs were rolling, ...i don't know if i'll need just new hubs of the axle was affected. I would say big props to the frame and the bull dog hitch..it stayed on very nicely. The bulldog hitch is a great element of the OTT. BTW, another benefit of steel wheels, which are heavier, is that they bring the center of gravity lower, and thus, make the rig more stable..i'm not seeing any reasons to not switch to steel. Addendum: I was cruising the speed limit, getting passed a lot. I'm very safety-oriented driver, but somethings are out of your control. The aluminum wheel is textbook broken, cracked and tore...which frankly, isn't impressive. I'm 95% sure that I will replace them with steel, assuming the frame is not-cracked or compromised. I assume others hit that pothole, but I didn't see anyone else lose a wheel. I am weirdly physically sore from the ordeal, adrenal rush i guess. I will say, that if this happens, focus on getting the rig to the far right shoulder as calmly as possible. I was actually holding a bottle of water to take a swig, and didn't realize until hours later that i had dropped it immediately to focus on pulling the trailer over. And hit the hazard lights. Know where your hazard light button is. Oh yeah, and a shout-out to the Missouri Highway Patrol..they were really terrific. I am grateful for their courteous and professional assistance. The tow-truck guy did a great job also (a recommend from a friend) and minimized (from what I could tell in the pitch black/flashlight light).1 point
-
Yukon - Here's the Oliver warranty on your hull: Limited Lifetime Warranty to the original purchaser on the fiberglass body being free of defects in material and workmanship under normal use. Bill1 point
-
In previous discussions about tire pressure recommendations, it seemed the pressures listed in the charts were the minimum allowable pressure, not the recommended pressures. That Michelin chart just seems to be the recommended pressures and I could not find where it said "minimum". For instance, it shows 35 PSI as recommended for 1500 lbs on a single for the 225/75r16 E. This would be 6,000 PSI total. Fine for most Oliver LE2s. But to me, that is way too low and is what I use off road to smooth out the ride in the desert at low speeds. I'm sure it would run hot on the highway. I have run most miles starting out at 60 PSI cold. This isn't rock hard, but runs cool. At 50 PSI I can feel the tires are warmer under the same conditions. Still OK, but generating more heat. That means a little more rolling resistance too. With sustained high speeds in the summer out west, the tires run hot. I don't like the idea of making them even hotter from lower pressure. Starting out at 80 PSI and then going higher from driving on hot pavement at speed, seems like it would be harder on the trailer suspension and on the tires. I don't have a TPMS for the trailer, but if I picked up a nail, 60 PSI would give me more time to spot it at the next gas stop, than 40 PSI would.1 point
-
Recent Achievements

