Leaderboard


Popular Content
Showing content with the highest reputation on 05/20/2019 in all areas
-
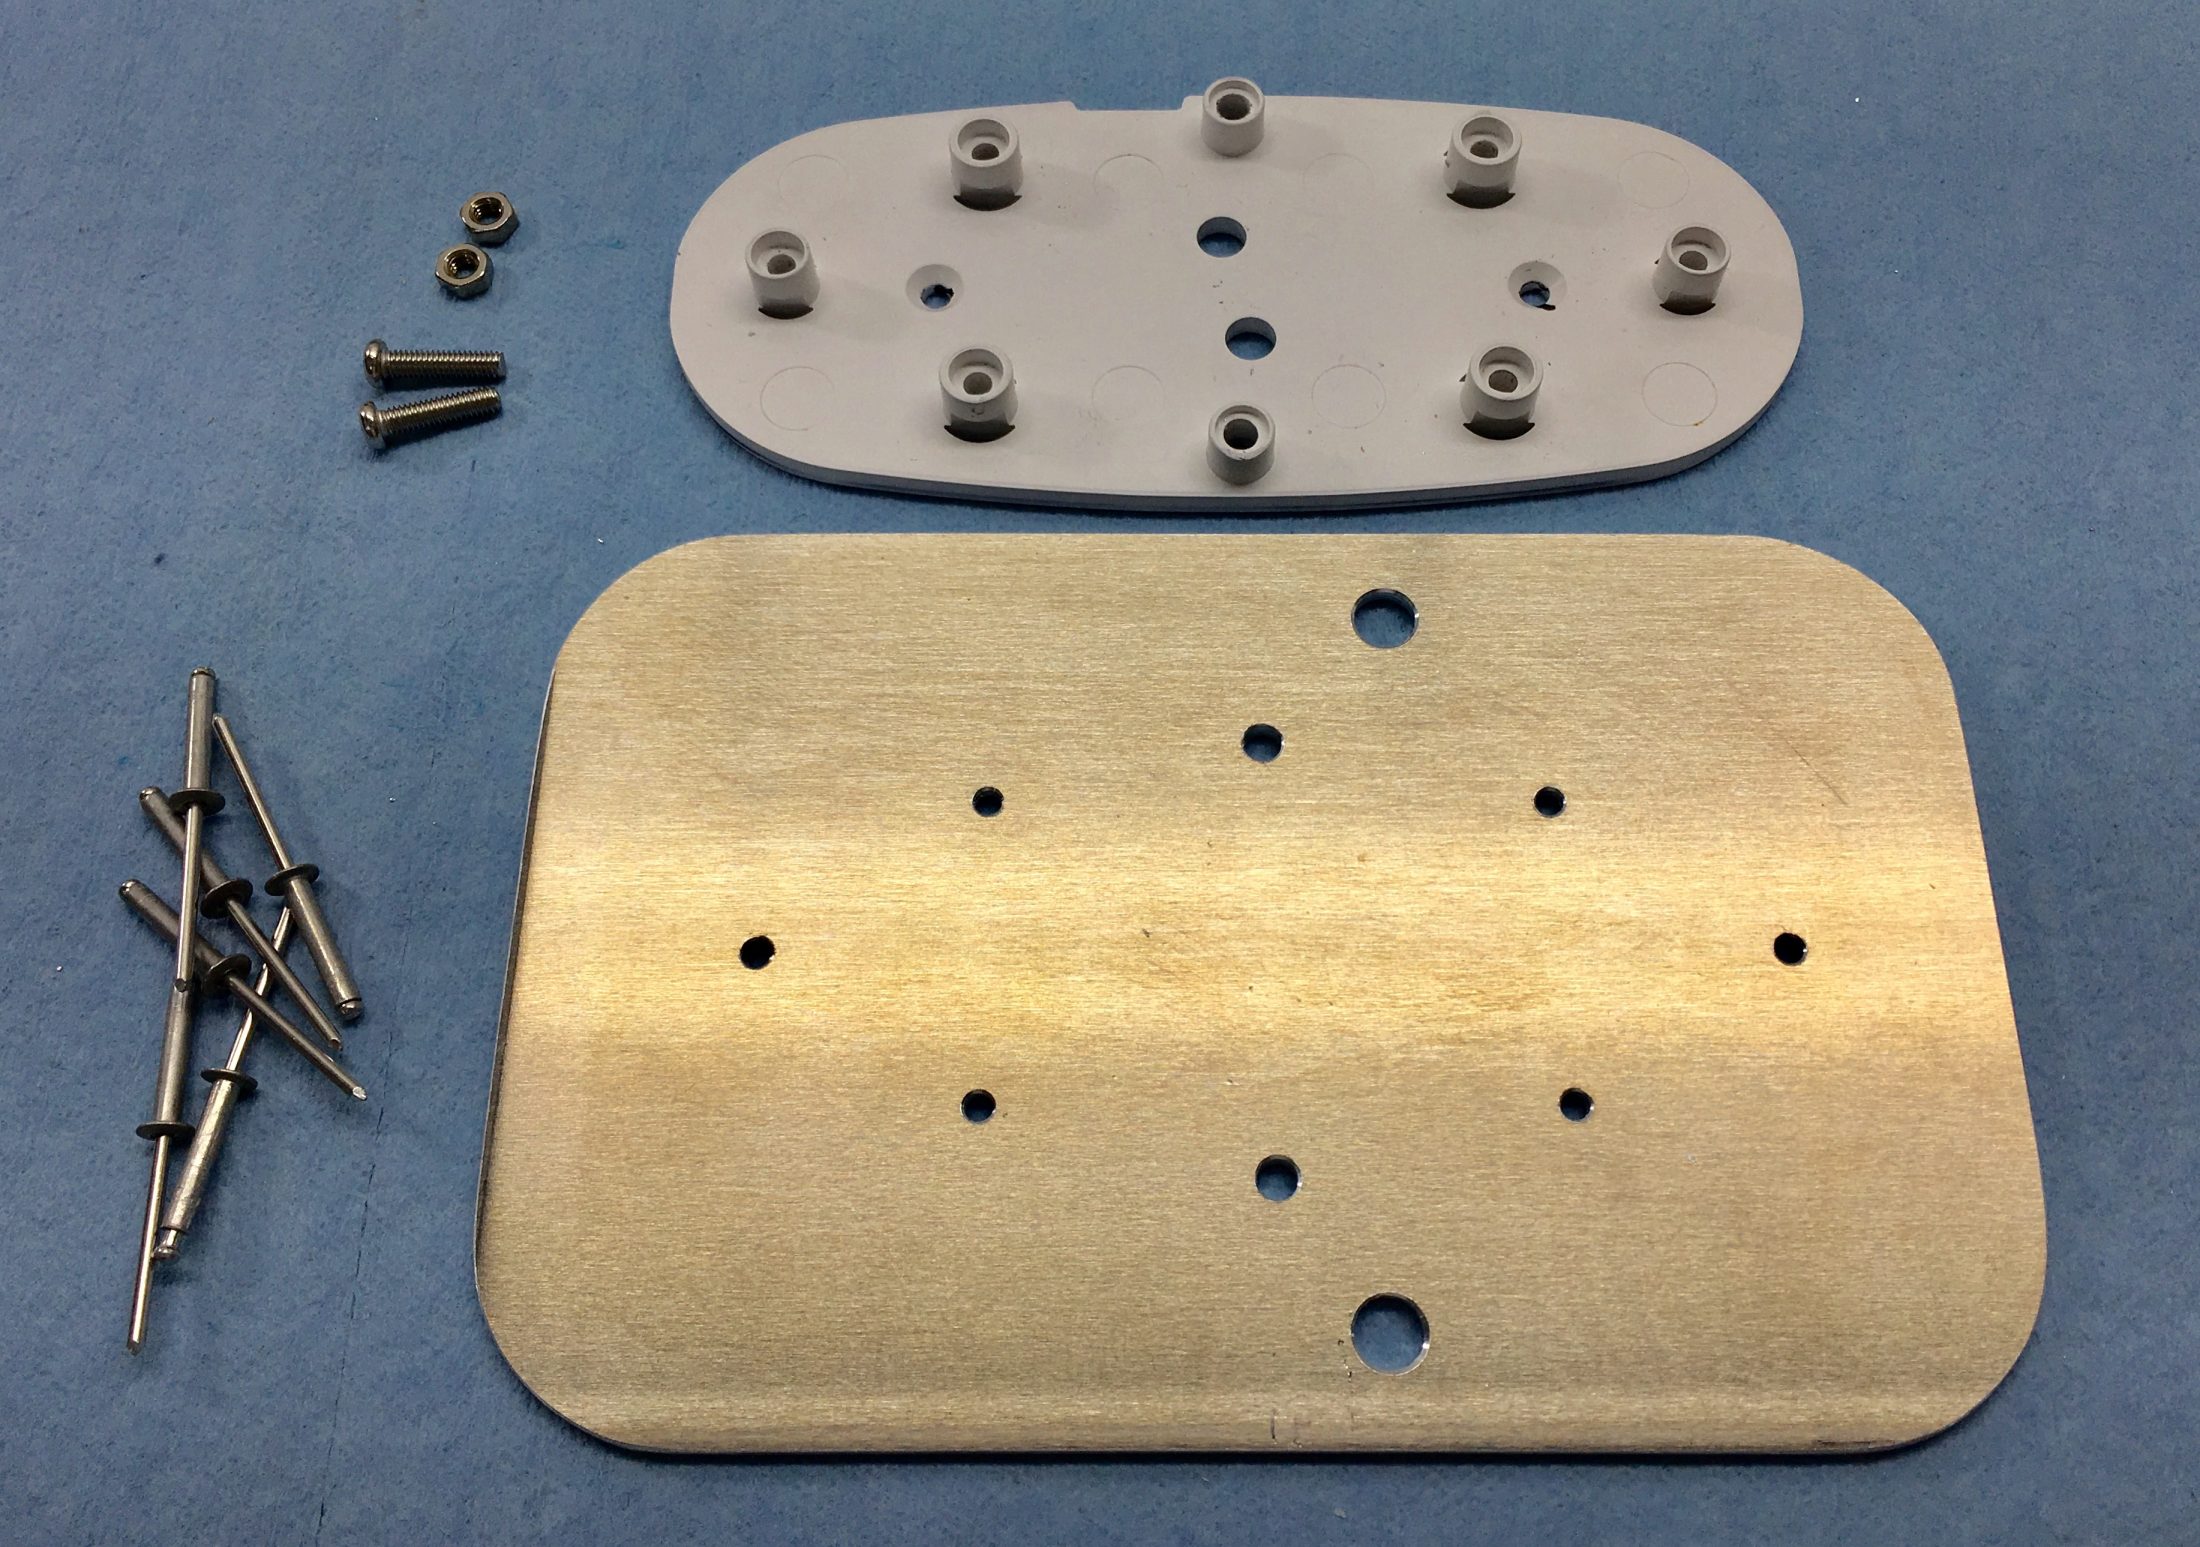
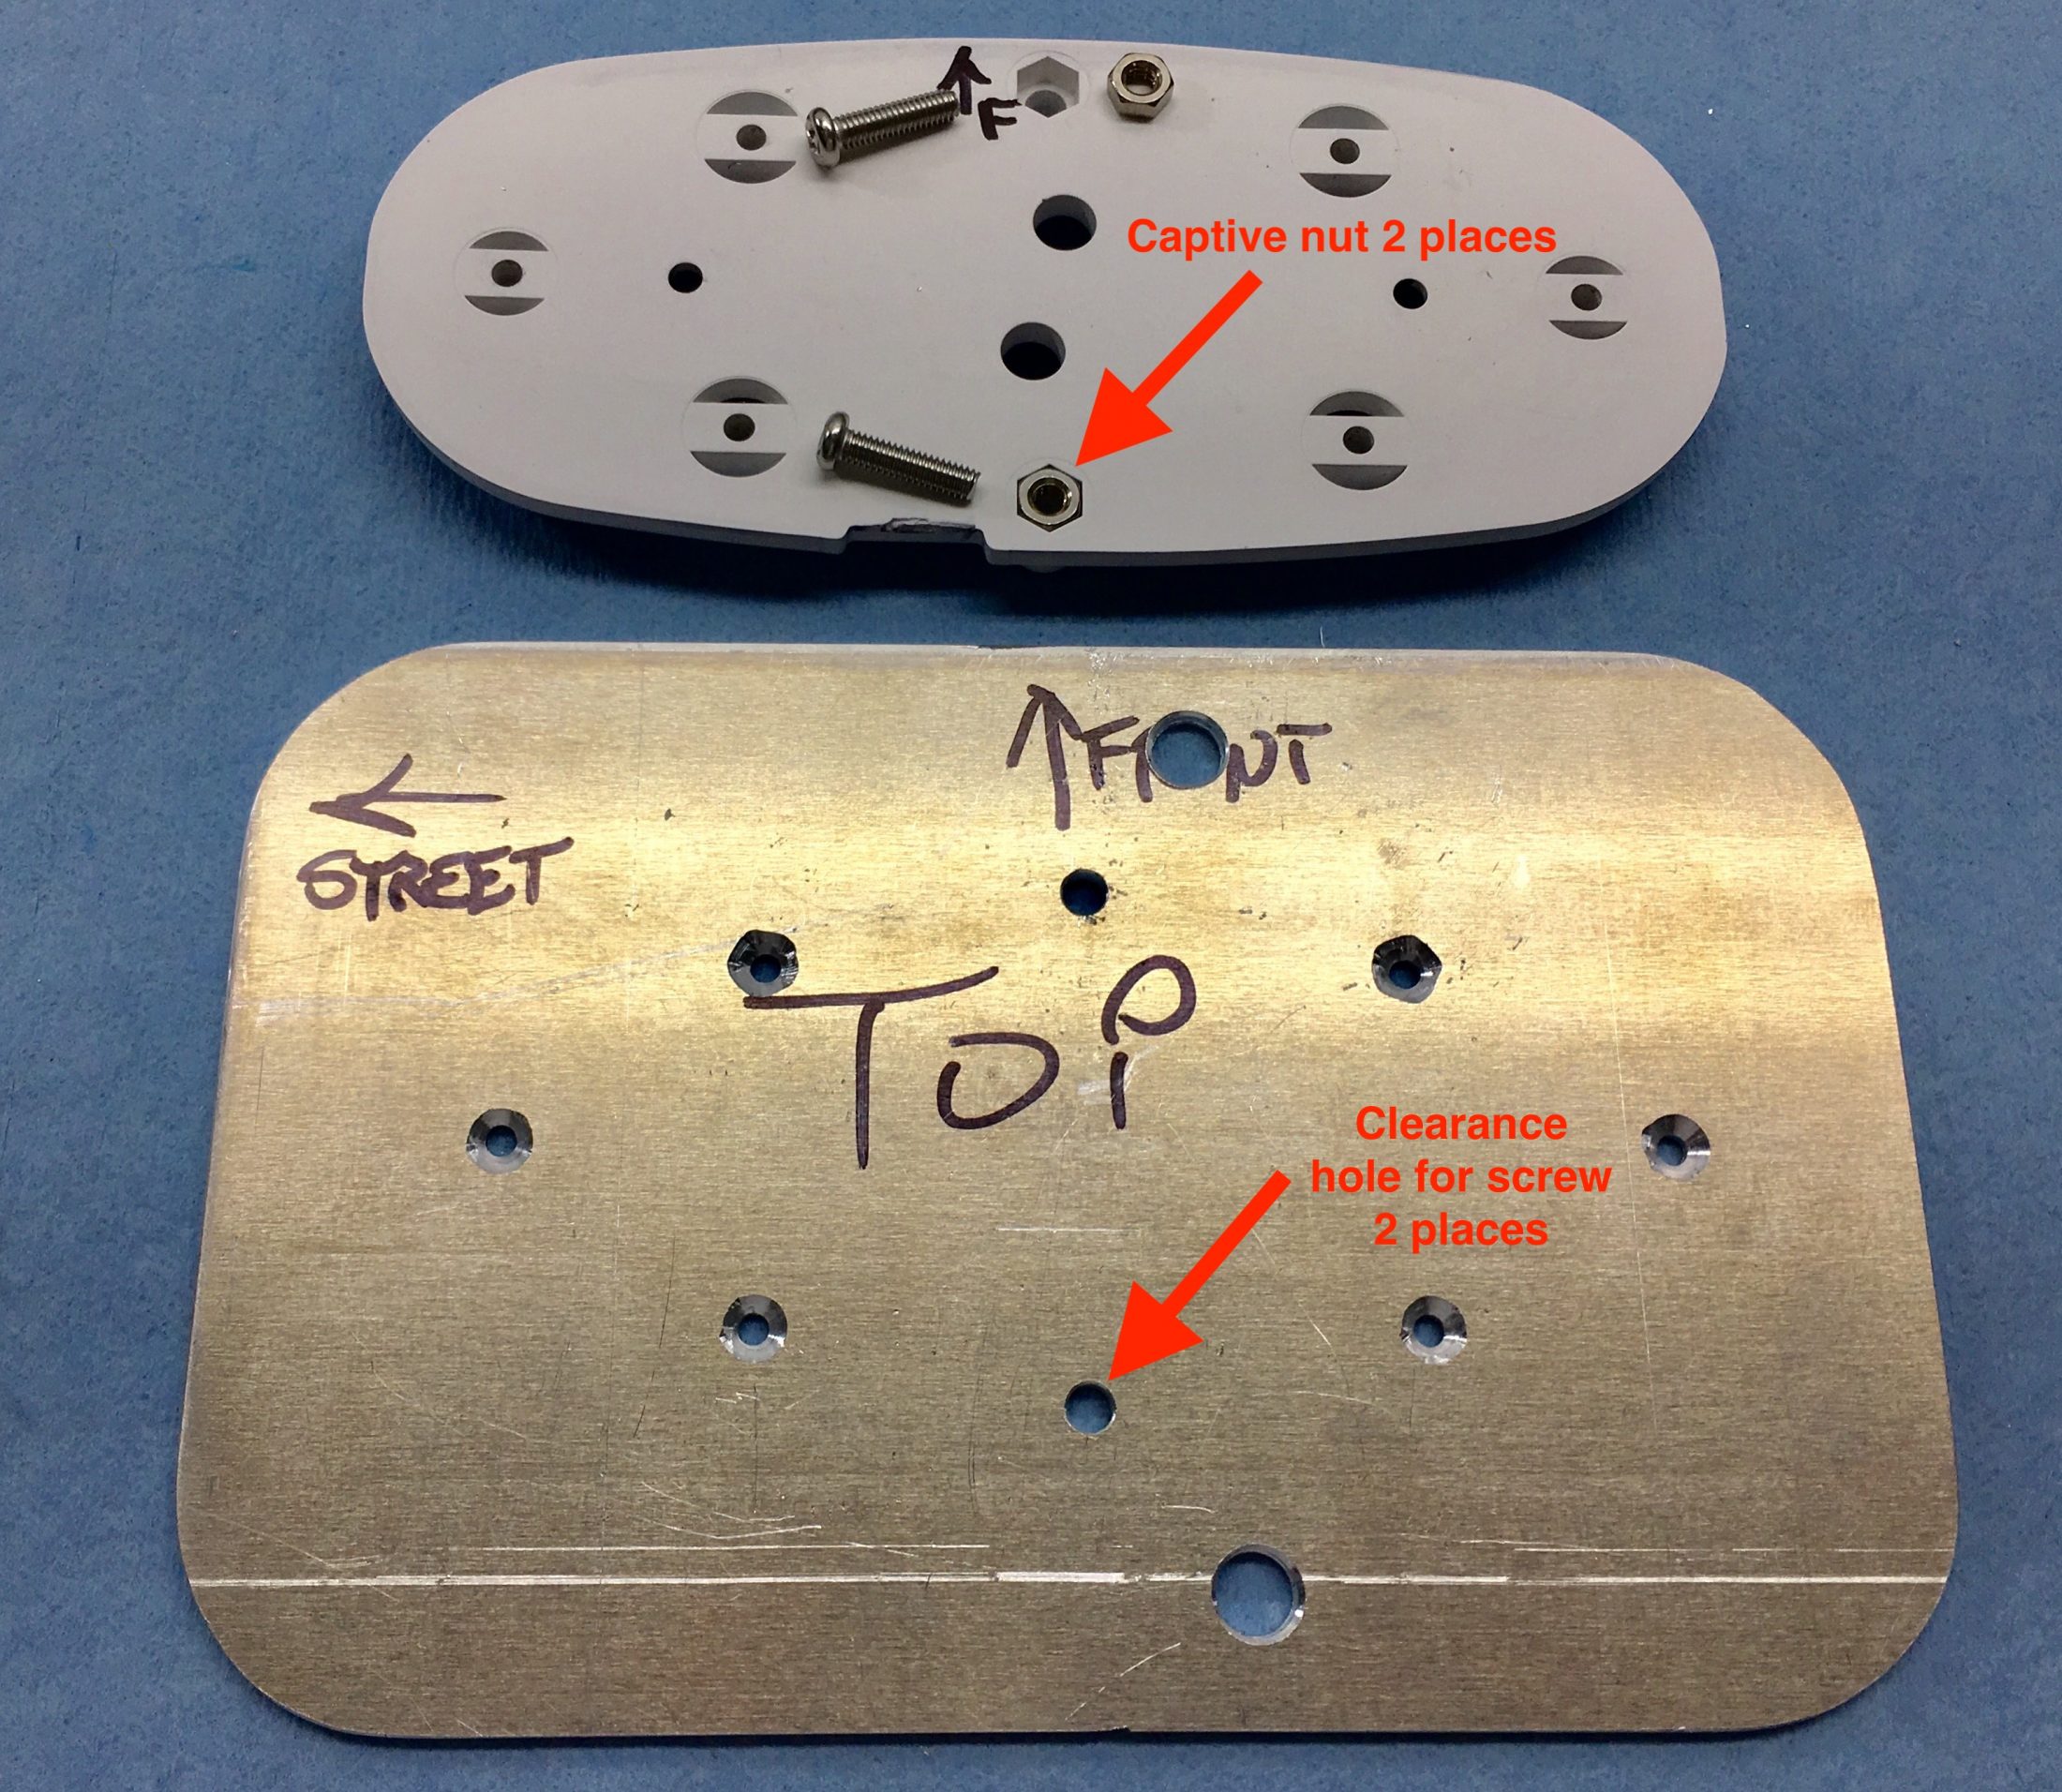
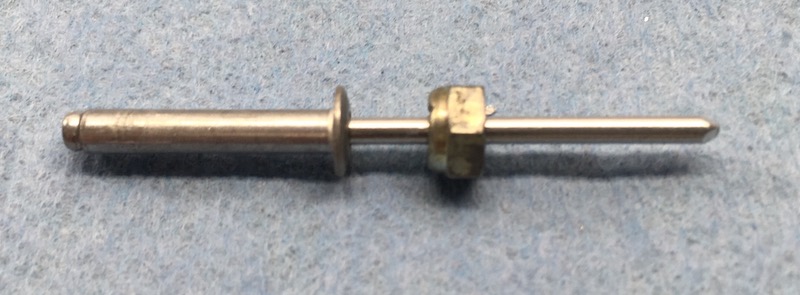
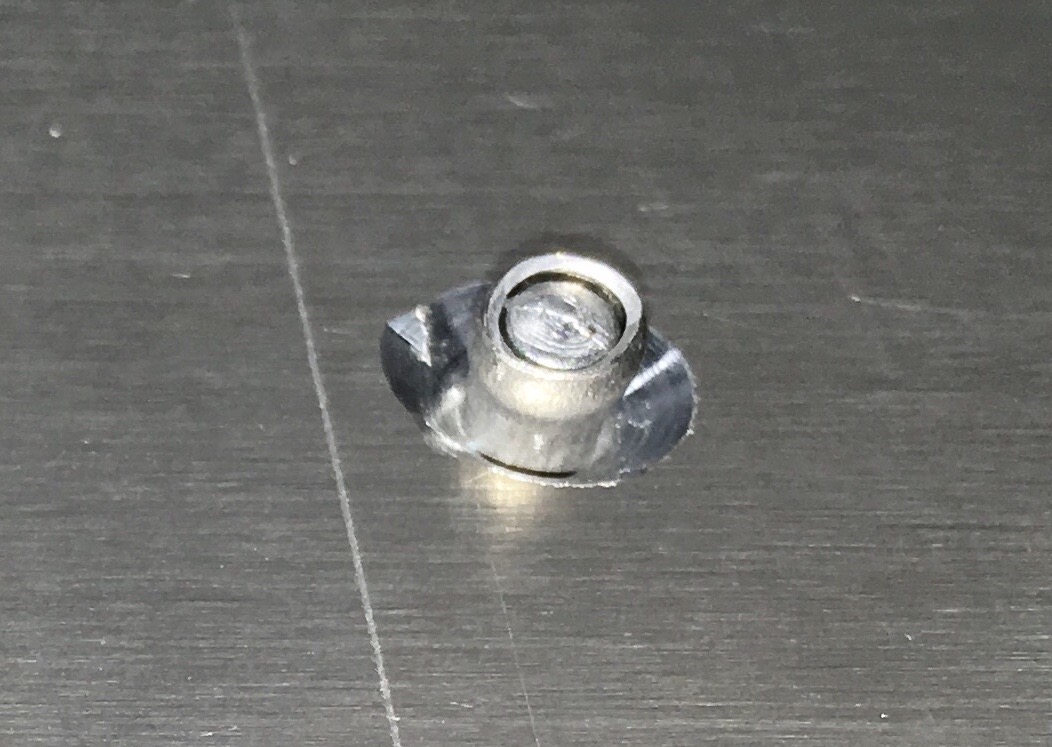
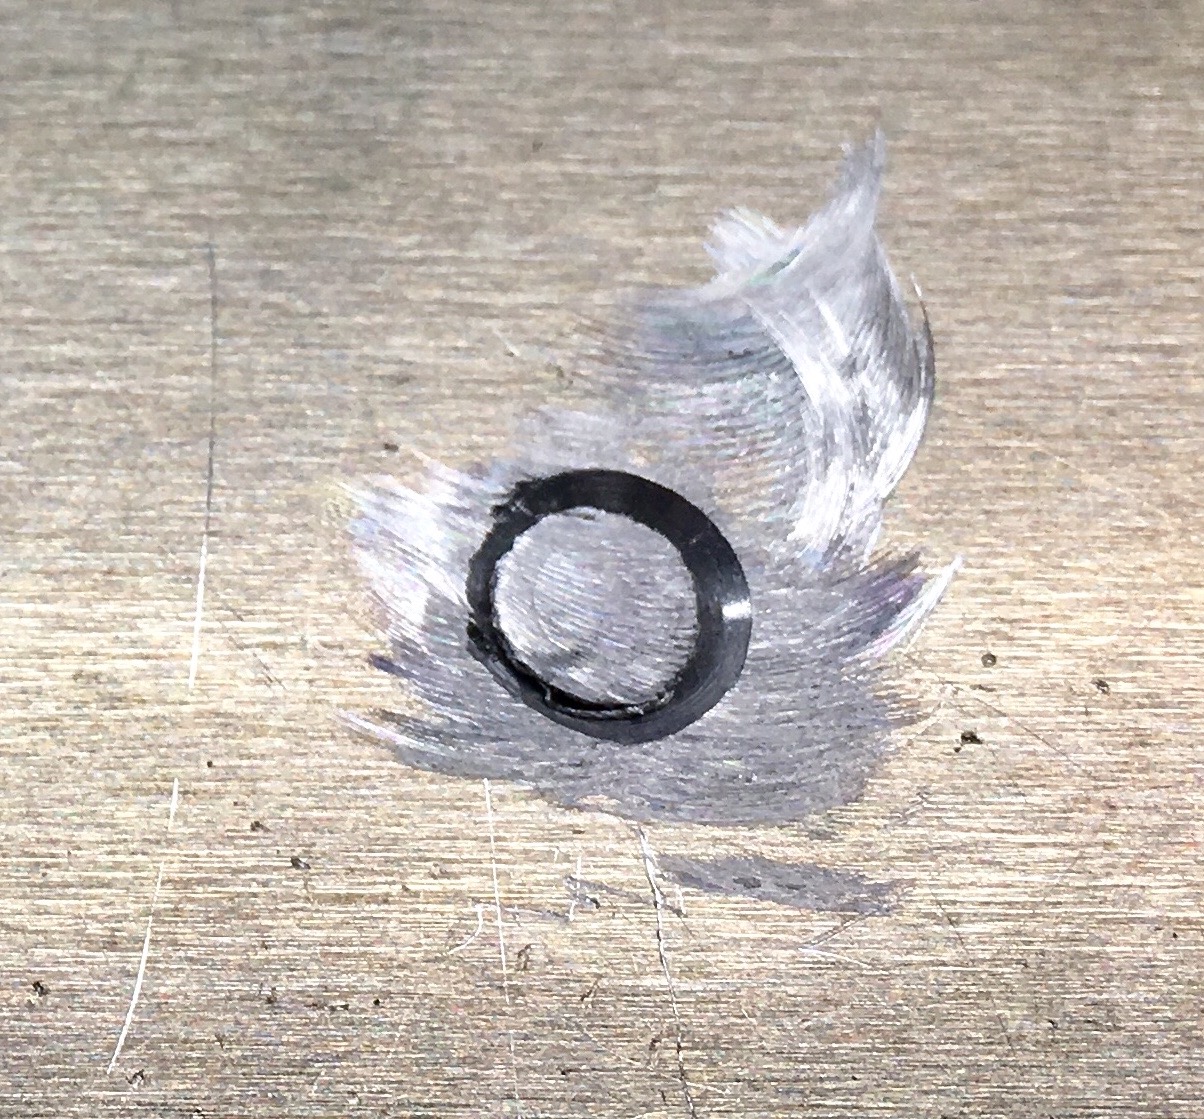
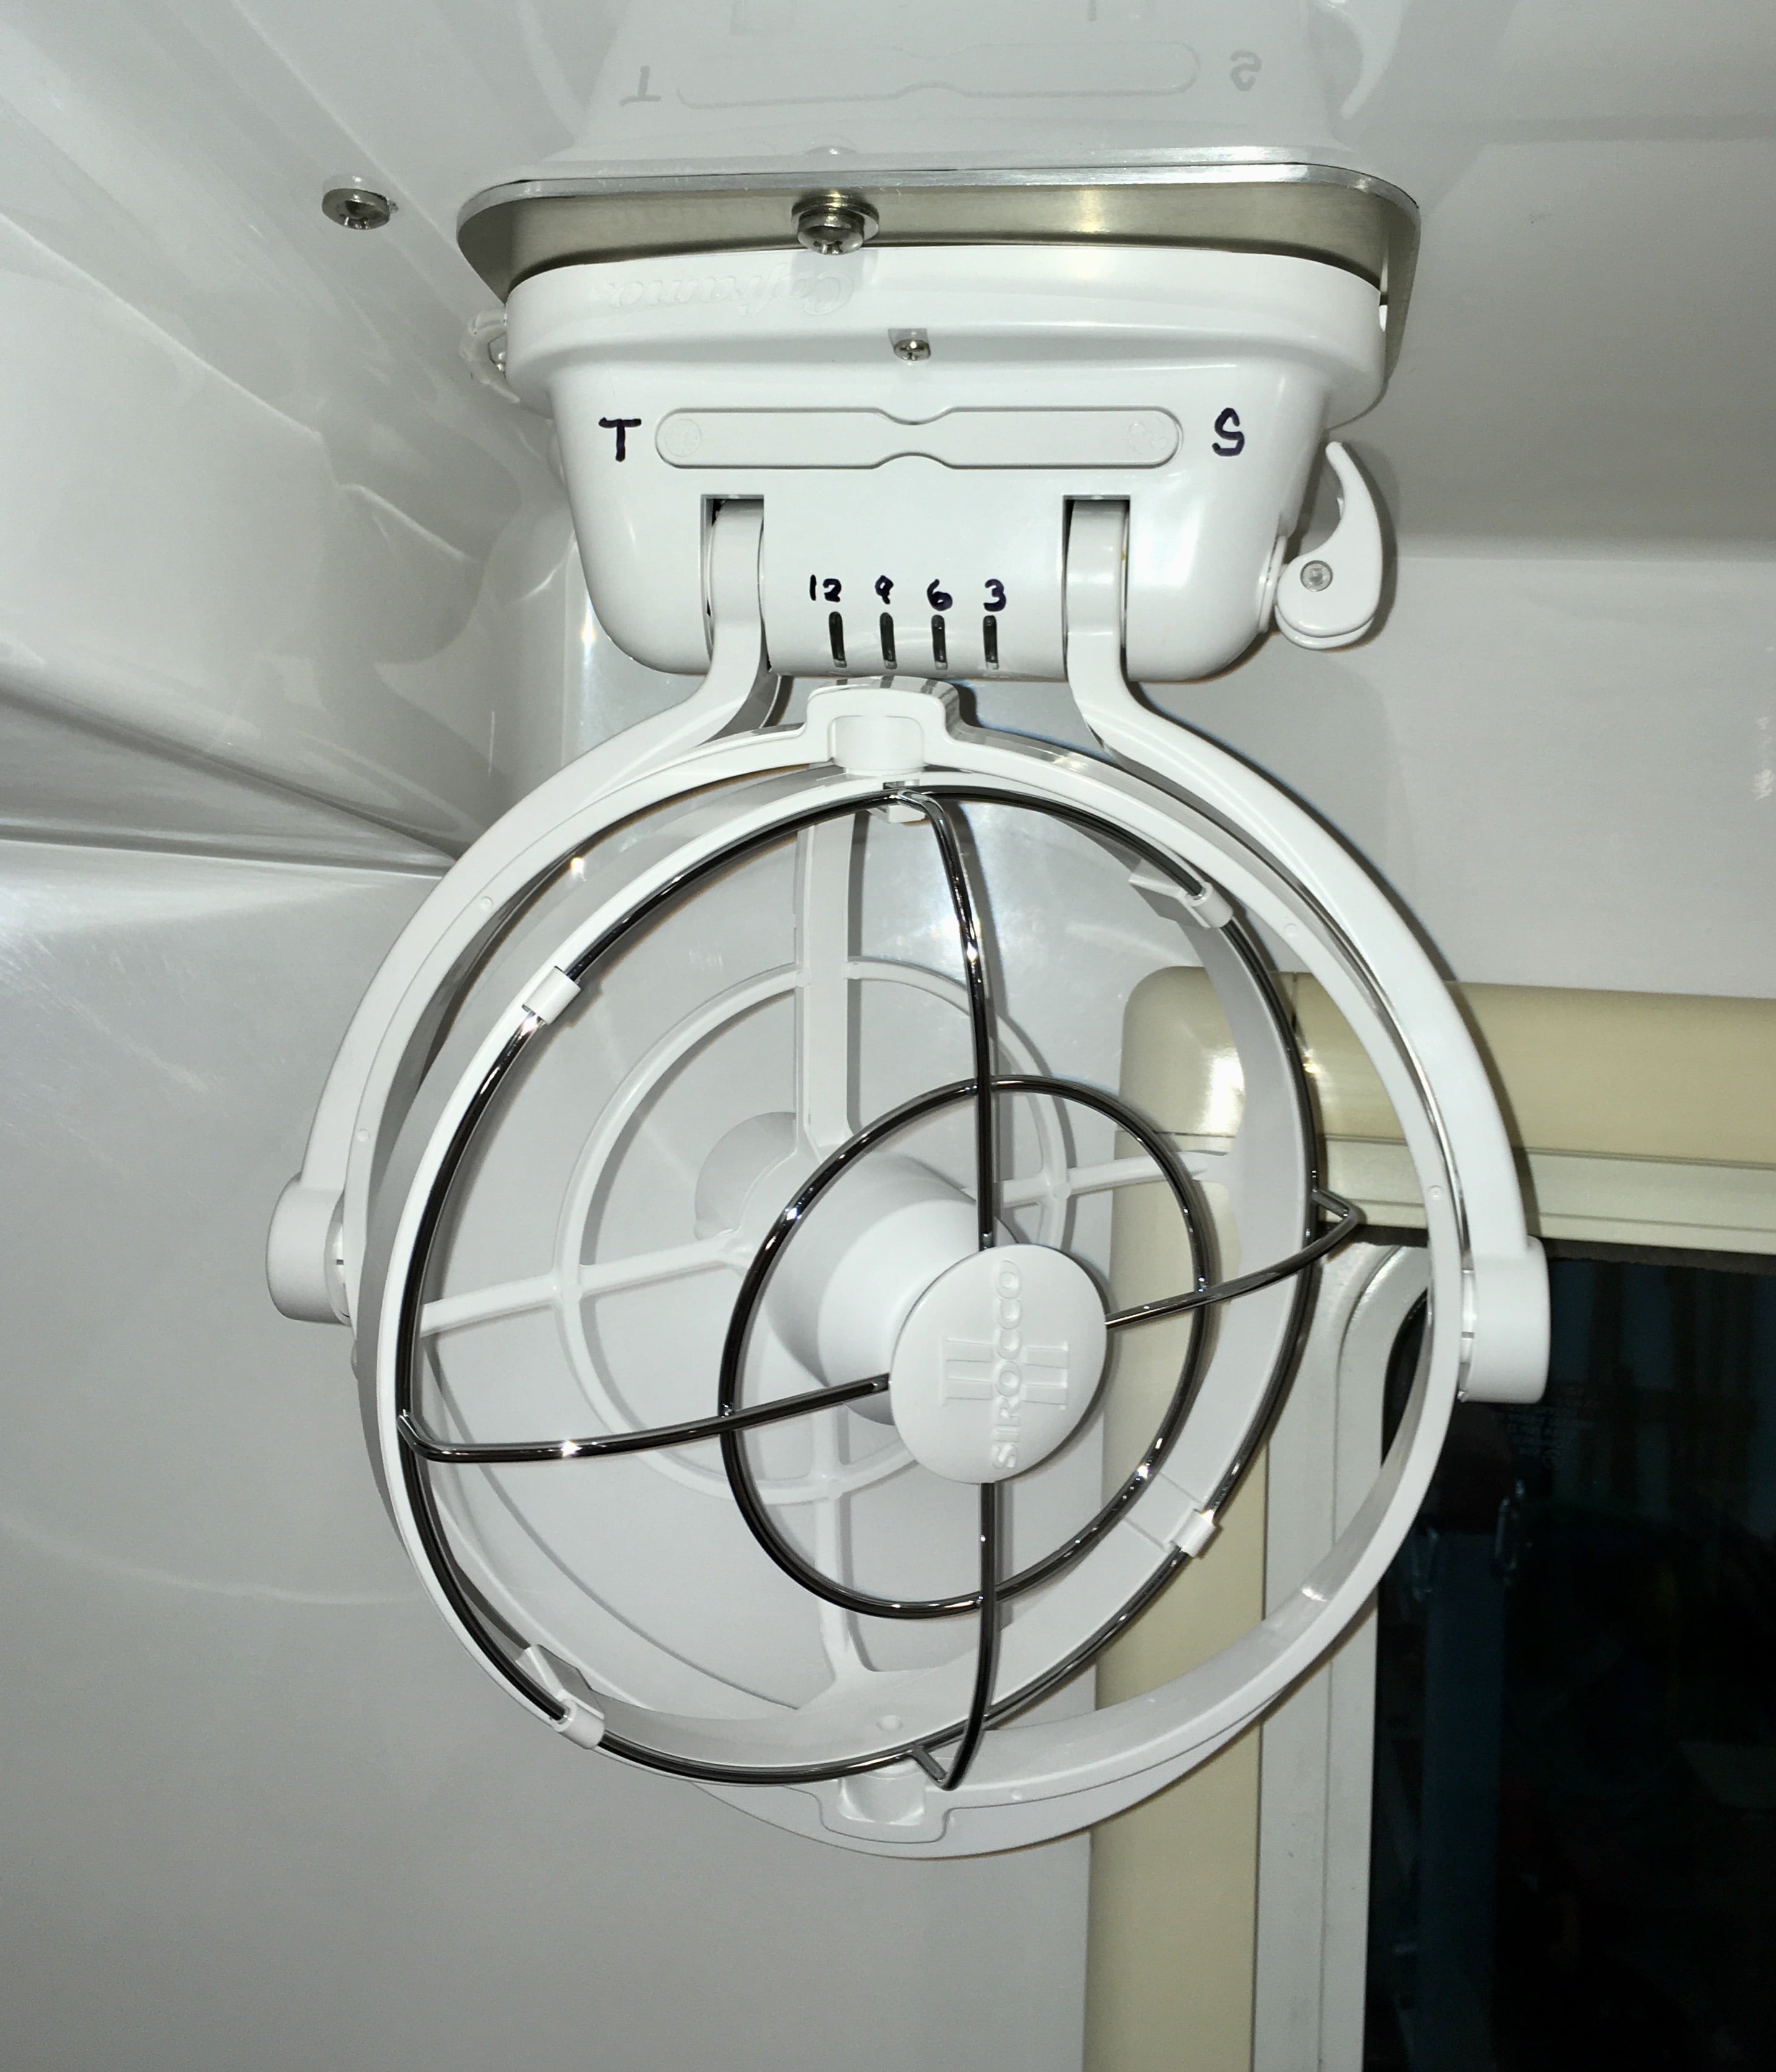
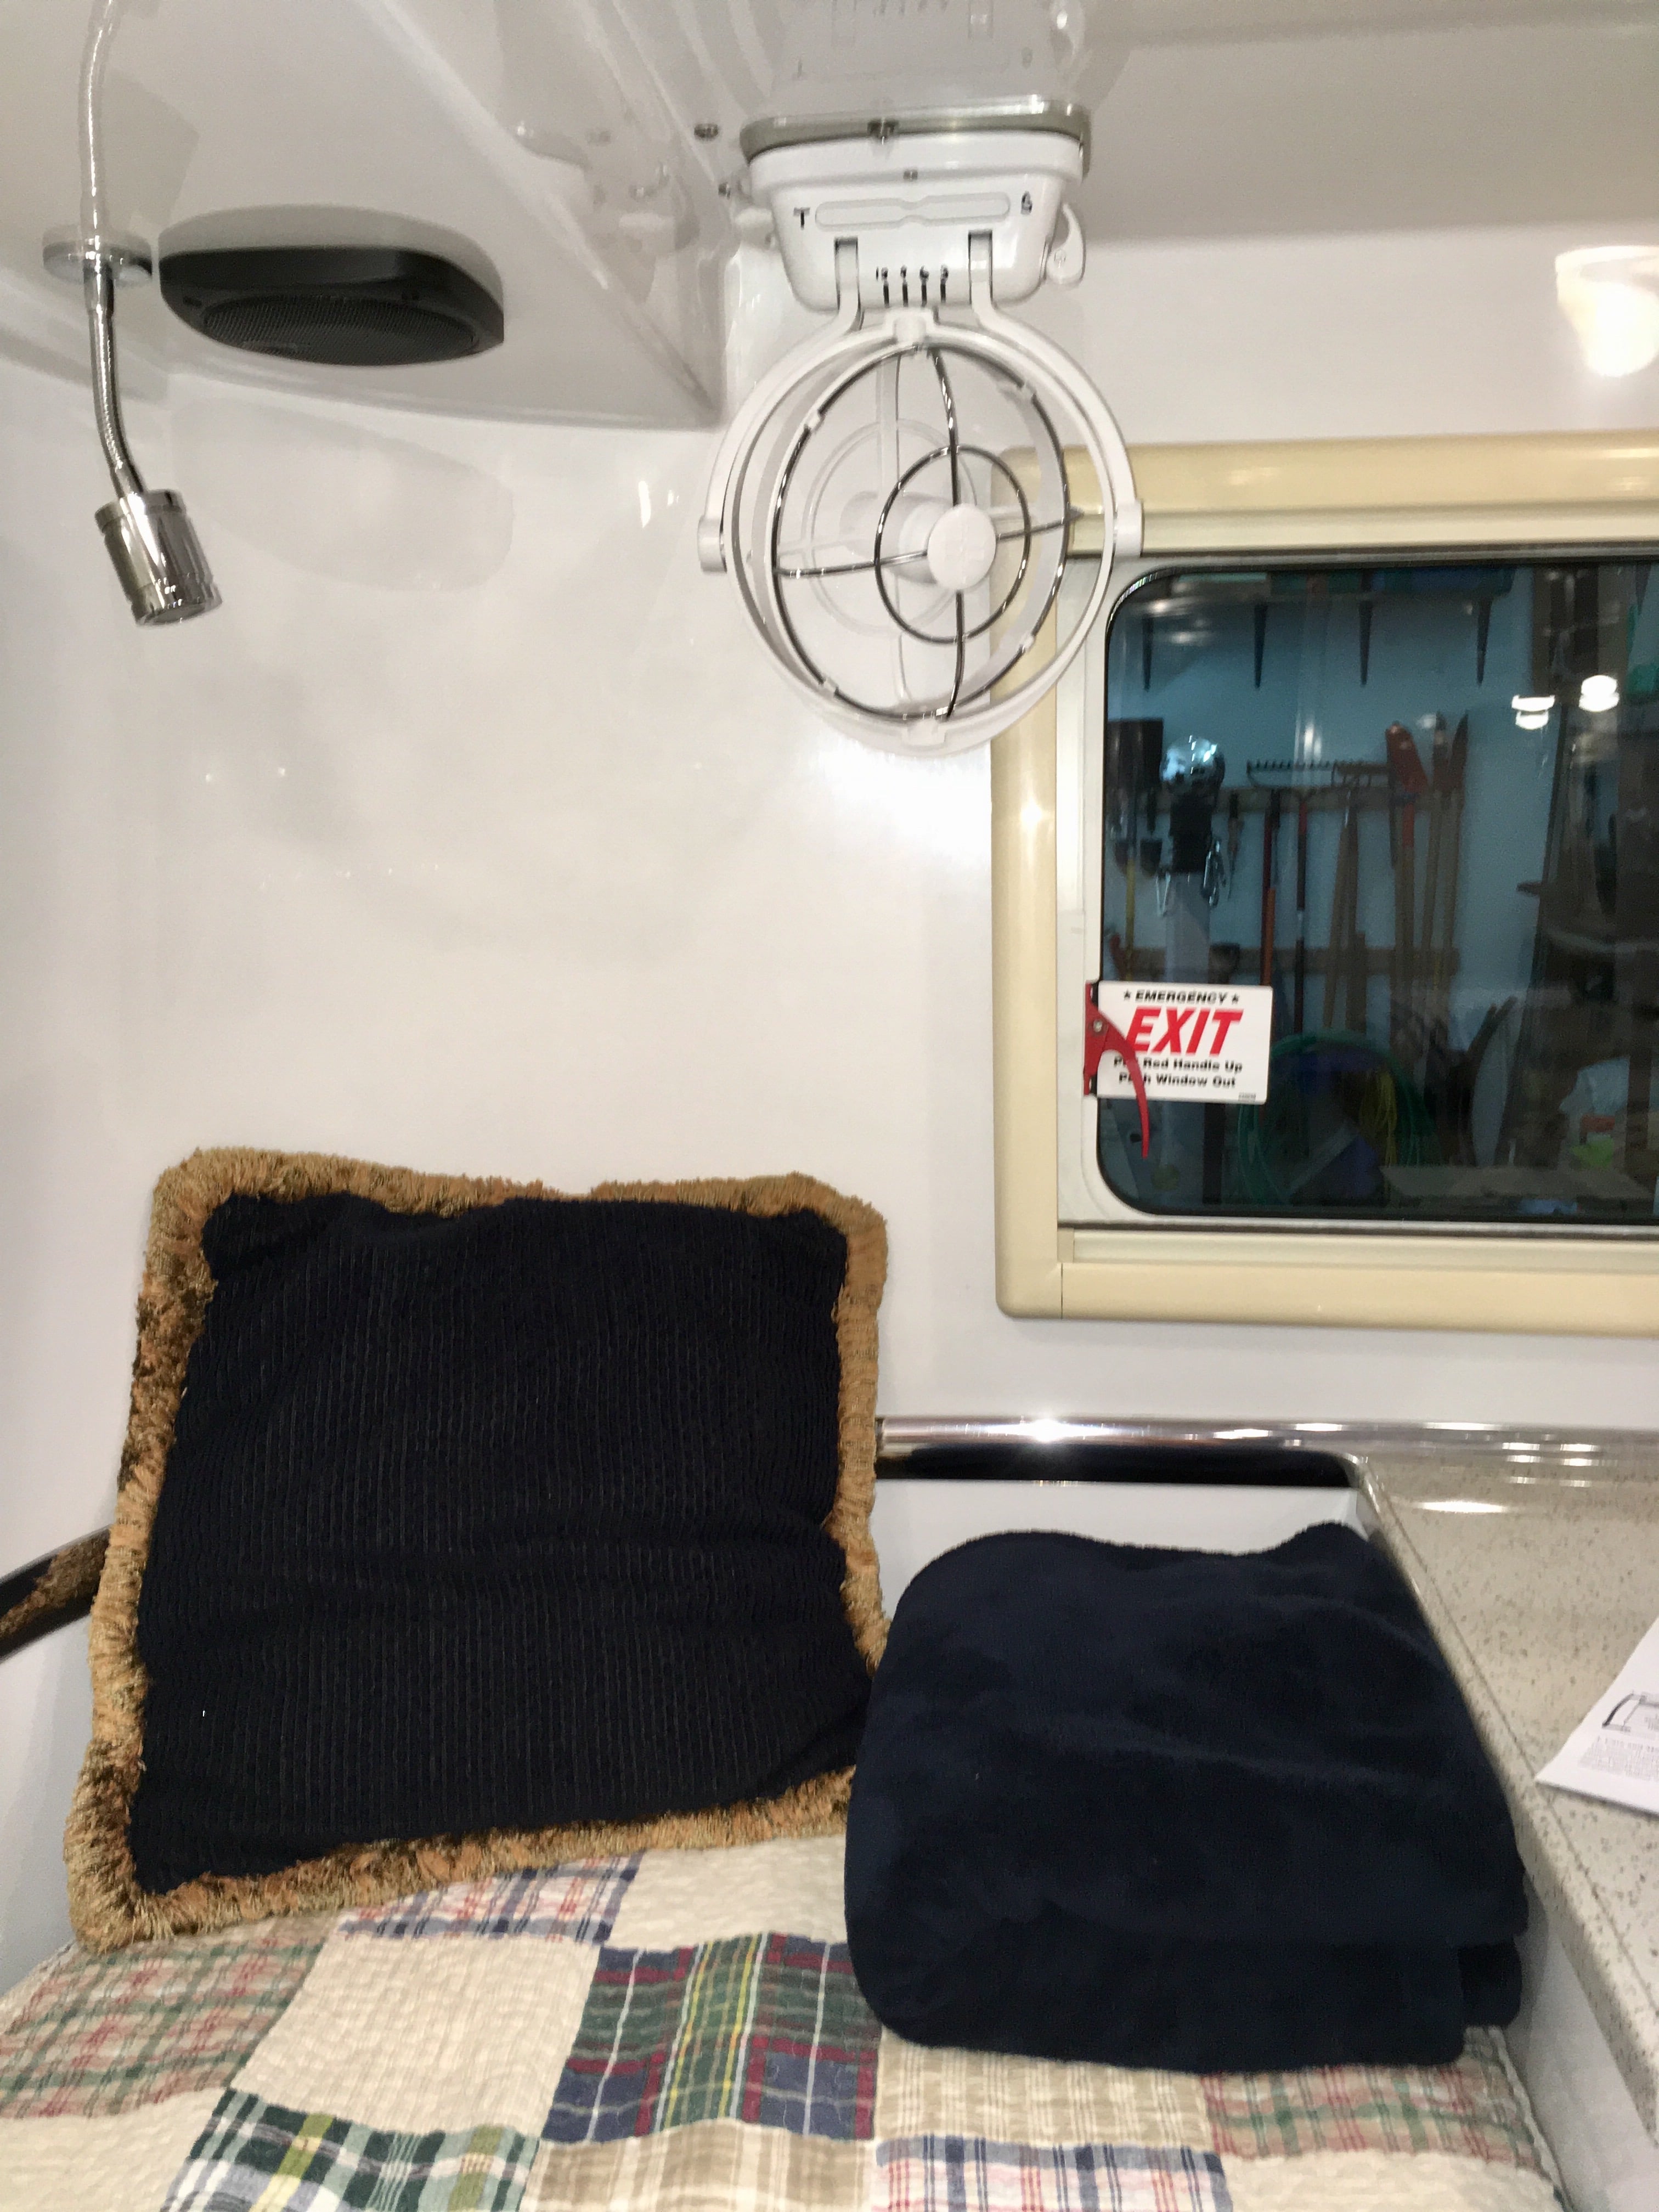
I had been using a 120 volt desk top Vornado fan (which was very effective, though a little bulky) but I wanted a built-in one that used less power and did not require continually running the inverter. This is the well regarded Caframo Sirocco II, made in Canada. The price varies a little, I bought it when it got down to $100. https://smile.amazon.com/gp/product/B01LDY4TE4/ref=ppx_yo_dt_b_asin_title_o04_s00?ie=UTF8&psc=1 It has three speeds and a "time delay off" function. Amp draw from the small DC motor is very minimal: Low: 0.12 amp, Medium: 0.22 amp, High: 0.35 amp (at 12 volts). Max airflow is 140 cubic feet per minute on High. That is not nearly as much as the Vornado on Low, but it is plenty adequate. I had already removed the fixed TV and mount from the back curbside corner, so I mounted the fan there. Since there were already 4 big holes, plugged by the original screws, I did not want to drill any extras. I made a plate out of 6061-T6 1/8" thick aluminum plate, attached the fan mounting plate to that with rivets, and bolted the plate to the bottom of the cabinet using two of those big screws.A future owner could remove the fan without leaving behind any extra cavities... and the location is good for sleepers and does not get in the way when folded up. The fan mounting bracket is designed to mount to a flat surface, then you slide the fan sideways onto the plastic studs and secure it with two long machine screws. I used common long 1/8" diameter aluminum pop rivets. Because each rivet head was down inside a cavity, I added a teeny nut to the shank before pulling it. The back side of each rivet hole was countersunk most of the way through the material: I used a small flat pin punch in the vise and a bigger one on top of the tail to drive it into the countersunk part: And ground each tail flush using a little Dremel grinder with a sanding disc: By grinding the tails flush, they would not damage the nice gelcoat of the overhead cabinet. Here is the assembly screwed in place: John Davies Spokane WA
 1 point
 -
John, agree, it was great to see everyone and meet new owners. Nice sunset pic! After our truck discussion last night I took one too, what a sight.
1 point
-
Bruce Norton did a very nice exterior awning on his Oliver. Unfortunately I do not have pictures or contact info for him. However, I do know that if you can find a way of contacting him, he will be more than happy to tell you what he knows. Bill1 point
-
For people at the rally who asked for links to these items - Small Cargo Net (over each bed, dinette, door, and the two in the closet) Large Cargo Net (below the street side bed and under the attic) Map Pockets (by the front door and each side of the nightstand) Towel Bars (24" on the closet side, 18" on the dinette side) 1 ½" Stainless Mushroom Fitting (for running power cord into the attic) Deck Plate and Key (covers the hole on the spare tire cover) Recessed Anchors (for the bungees that hold the drawers in place) Shower Curtain Rod - Tubing (need 3 feet), Round Base (dinette wall), Lifeline Base and Clevis Slide (front wall) Shower Head (please read the separate thread on this since it's not a straight swap for the current one) Lagun Table Mount and Folding Table Top (I think I bought both from the UK store but it may be cheaper to order them separately. Be sure to check out the other style tops that they have, most of which are available in multiple sizes.) Folding Shelf Brackets (search for the counter extension thread to see how I had to modify them) Shower Door Magnet Luminoodles (pantry and access port lighting) Hopefully that's it. Thanks to all who came by - great to meet everyone. If I forgot anything, please let me know.1 point
-
Calculations on paper never equate to the real world. There are a lot of hard-to-quantify errors and losses involved in converting sun to battery to inverter to air conditioner to comfortable occupants. Many steps, many sets of losses - battery condition, monitor error, compressor start-up surges, resistance losses through wires and connections .... no way you can get what you think you should get. Sometimes close has to be good enough. Thanks for doing the experiment. Your results are impressive anyway. I will take my cookie now. John Davies Spokane WA1 point
-
Thanks to everyone who came to the rally! We really enjoyed seeing the trailers and putting faces to the names. Made some new friends and had a very nice time. Lots of fun and interesting conversations. Guntersville S.P. is a very nice place. It's fun to just hang out in such a friendly and easy going setting. Kinda sad to see everyone pulling out this morning, but we're all off on the next adventure. Hope to see you next year. Take care, Raspy John and Liye Roemer, and Gogo
1 point
-
I am familiar with Little House Customs. Larry is no longer doing installations. He is still providing some of products for Casita customization for DIY. I can reach out for recommendations once I have measurements. Think there another person who picked up some of his customizations installations.1 point
-
Nice objective test, Overland. So, with 100% battery power to begin with, it appears you were able to achieve about 2.5 to 3.0 hours of inverter powered A/C usage given your conditions at the rally, right? What was the lowest DC voltage level you allowed your system to see?1 point
-
Reed got his awnings from Little House Customs, so they’re identical to what many Casita owners have. I think I’ve seen one other Ollie with them, and perhaps there are others.1 point
-
As long as it can get a solid grip on the fastener (reviews are negative), it probably wouldn’t affect the torque reading. The biggest issues are: Since it is a 3/8” drive, the maximum torque it can handle is likely far below what would be useable. Certainly not in the 80-120 Ft Lb. range. Because of this limitation, the only fasteners it might be capable of are the spring shackle nuts. But you’ll need a 3/8”-1/2” square drive adapter to use it with your torque wrench. Since the maximum size fastener is 3/4”, you’re still going to need some larger sockets anyway. Bottom line is save your money.1 point
-
I bought two of the same fan sometime this winter. They are currently sitting out in the camper. Occasionally I hold them up to the wall, try different mounting spots/orientations, and then try to work up the gumption to drill new holes into the fiberglass. Still hasn’t happened. Your location is one of my prime choices. Seeing the base mounted perpendicular to the side wall makes sense. You can easily see the controls and LEDs in that orientation. My plan was to mount it with through bolts using the two counter sunk holes provided and a backing plate on the other side. Your six rivets are not part of the factory mounting suggestion, but should be good insurance against coming loose while the trailer bounces down the road. I wonder which is worse for loosening mounted fixtures like this fan, pounding waves in a boat, or bumpy roads? Thanks for the ideas. Ken1 point
-
Reed “karenlukens” with Hull 200 had a small street side small awning installed at a Casita shop, I think he was very happy with it. I can’t find that thread. He has not been active in a long while, you can try sending him a Message if that works for you. My messaging is broken.... here is his page. http://olivertraveltrailers.com/my-profile/karenlukens/?profiletab=forums EDIT.... I found a couple of pics here. .... http://olivertraveltrailers.com/topic/reed-karens-blog/page/6/ But again, I can’t find the thread where he discussed it. John Davies Spokane WA
1 point
-
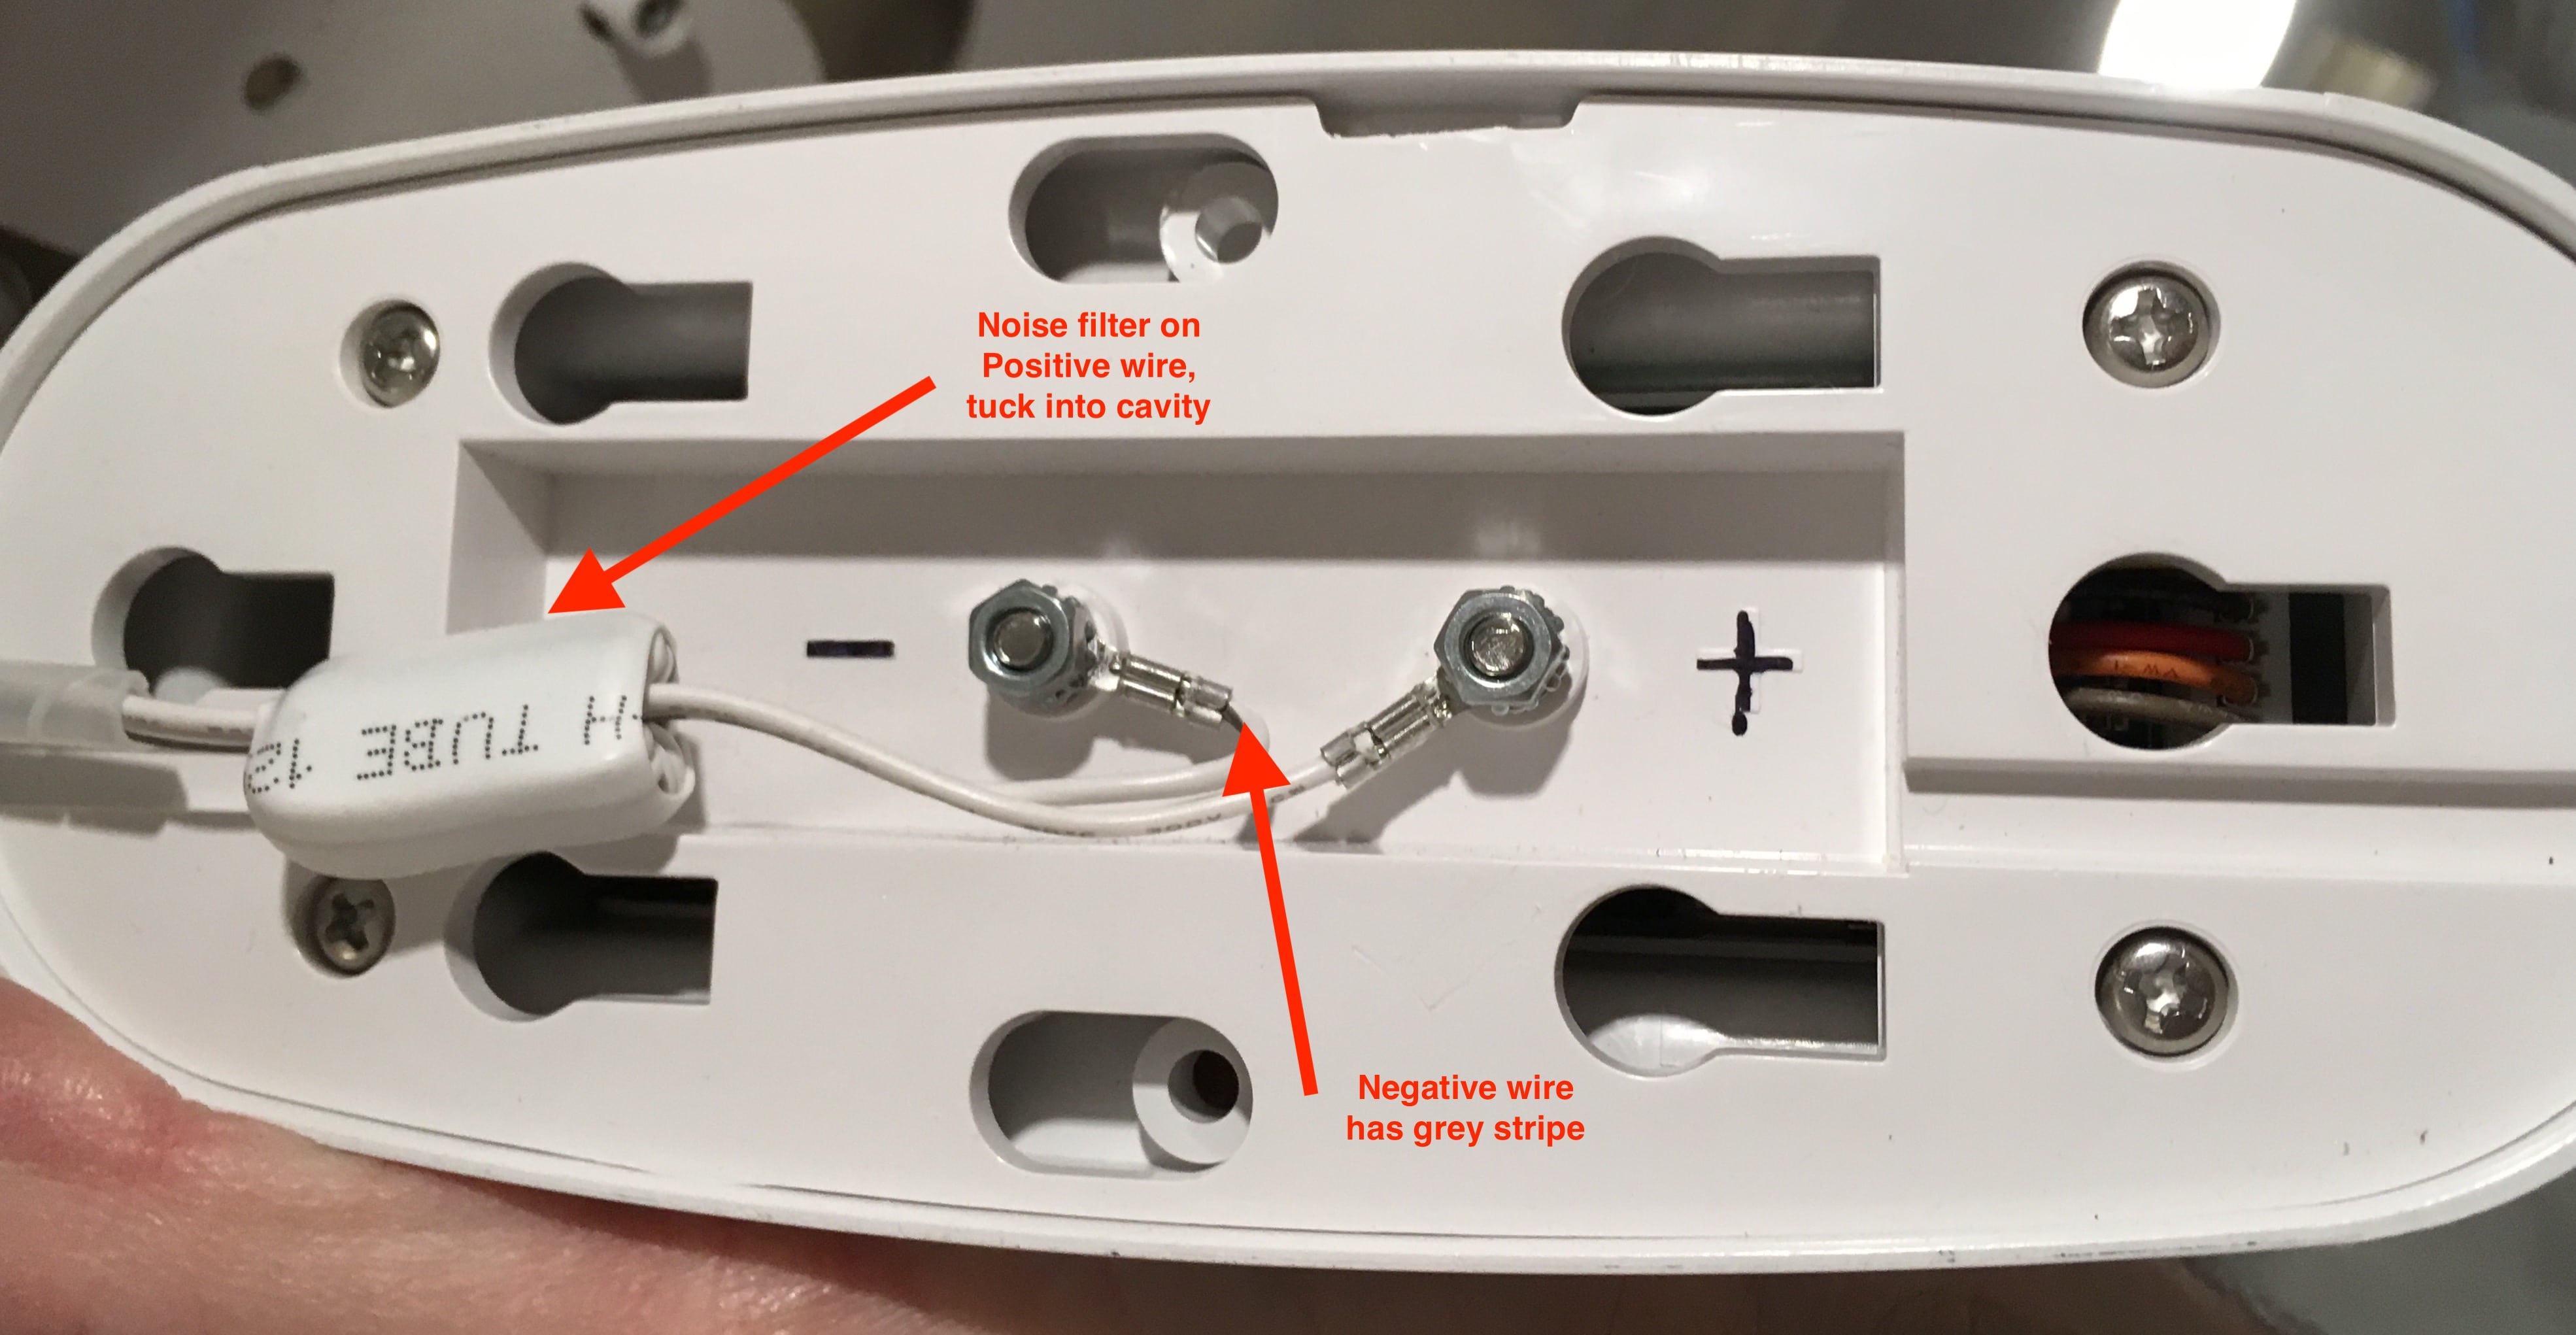
Attach the supplied wire harness and electronic noise filter. I ran into a problem here; one of the nuts would not go onto a stud. After a couple of minutes of fumbling and some bad words I realized that it had no internal threads. So I went down to Ace Hardware and found a couple of new ones: size M4-.7. These are really fine thread and may be hard to find locally if you are unlucky enough to need any. Here is the hookup: The wires run out the side slot then up through the TV cable hole into the overhead. I used a white spiral wrap protective sleeve on the two wires and secured them to the cabinet with a short "service loop" using a stick-on wire mount. I spliced into a power and ground wire that supplied the 12 volt round receptacle there, adding a 3 amp mini blade inline fuse in the power wire. I then added some labels with a black Sharpie so I would know what was what: The gimbaled mount allows you to swivel the airflow in any direction. If I want to crack open the rear window for ventilation the fan will draw that air into the cabin. For working around the bed you can fold it up and out of the way. Nifty. John Davies Spokane WA
1 point
-
I really can't thank Jason enough. We took our rig in for annual service and ended up getting a flat tire on the TV while in the process of getting the brakes on the Oliver to work properly. It was at the end of the day, after dark, in March COLD, when as luck would have it we got the loss of tire pressure alarm. We were inside the gates at the Oliver Factory and Jason helped change the tire. In truth he did most of the work. The next day before we got on the road to head back to South Carolina my wife and I went back to thank Jason and to tell his boss how much what he did ment to us. A really great group.1 point


-
Recent Achievements
-


")
