Leaderboard


Popular Content
Showing content with the highest reputation on 07/23/2019 in all areas
-
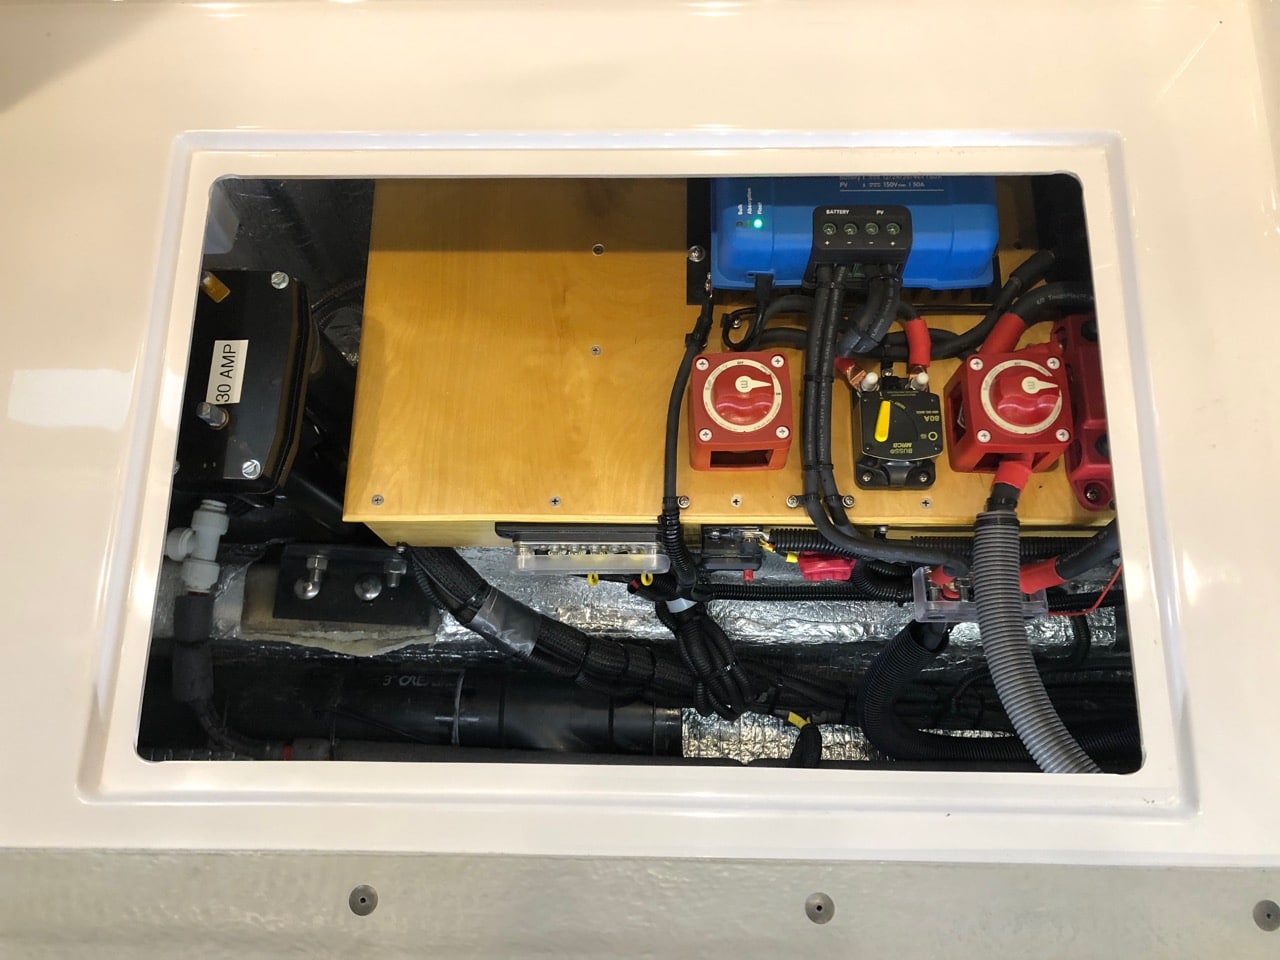
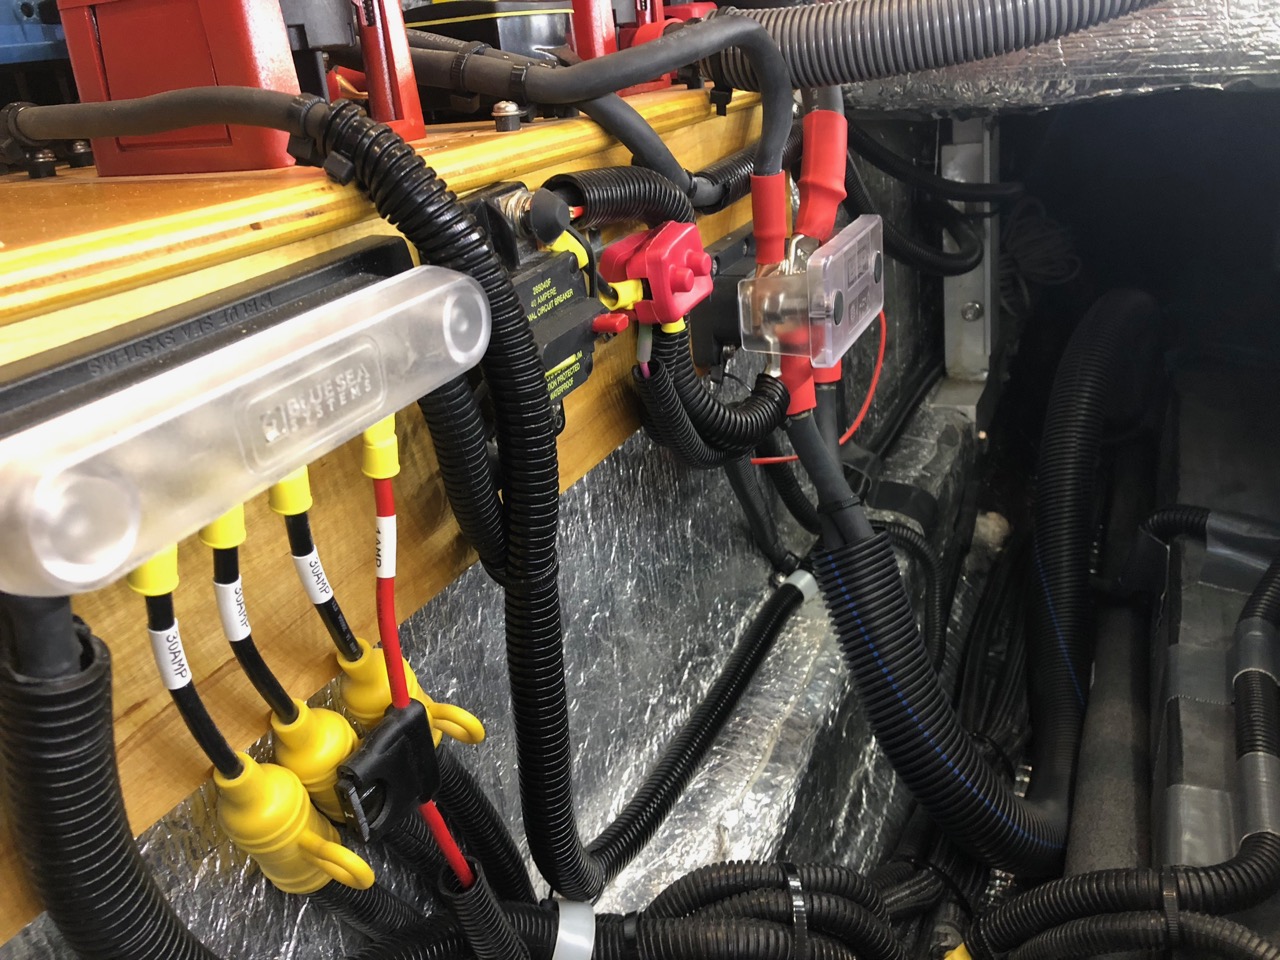
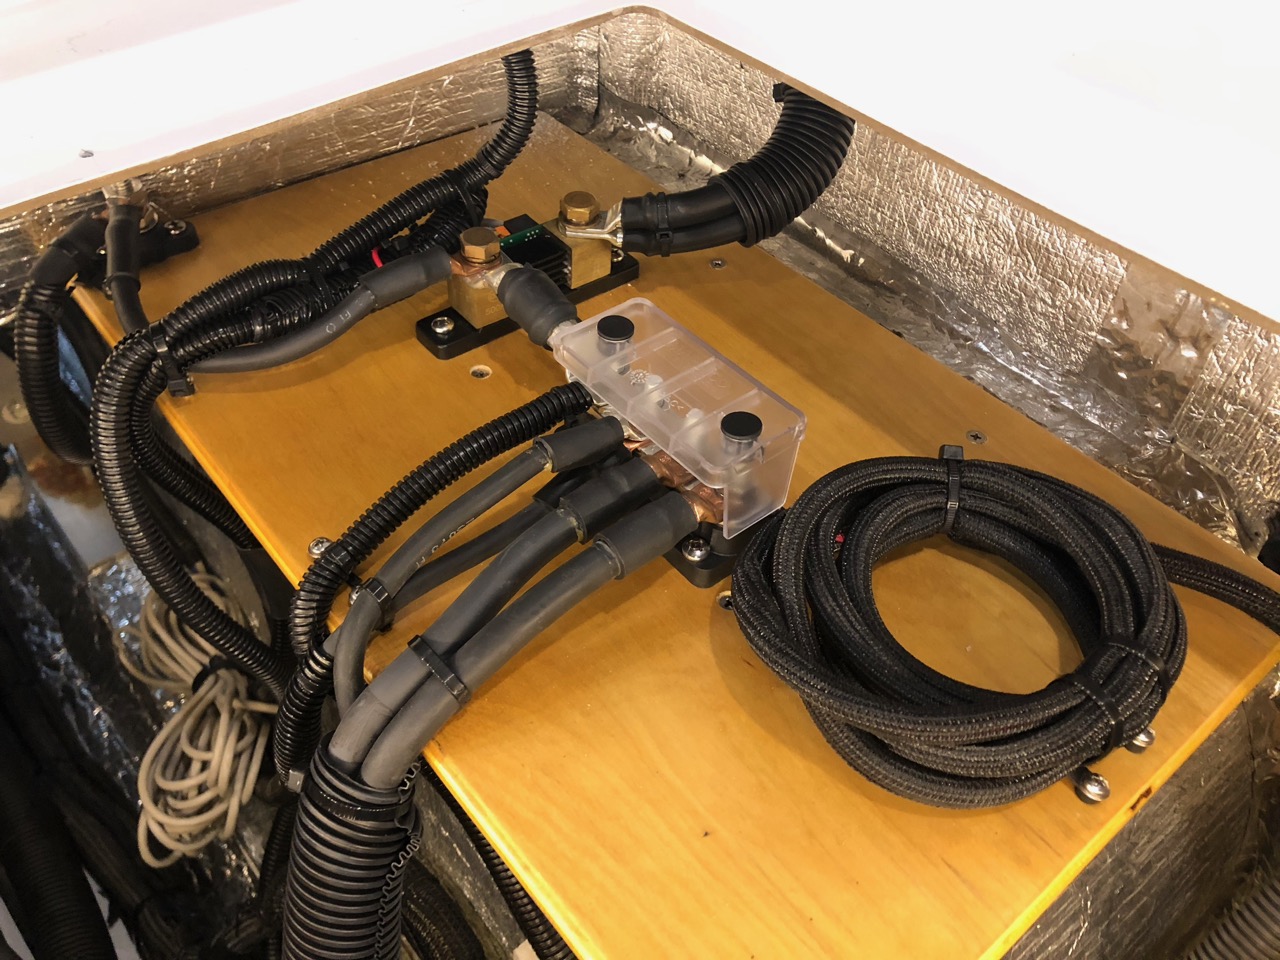
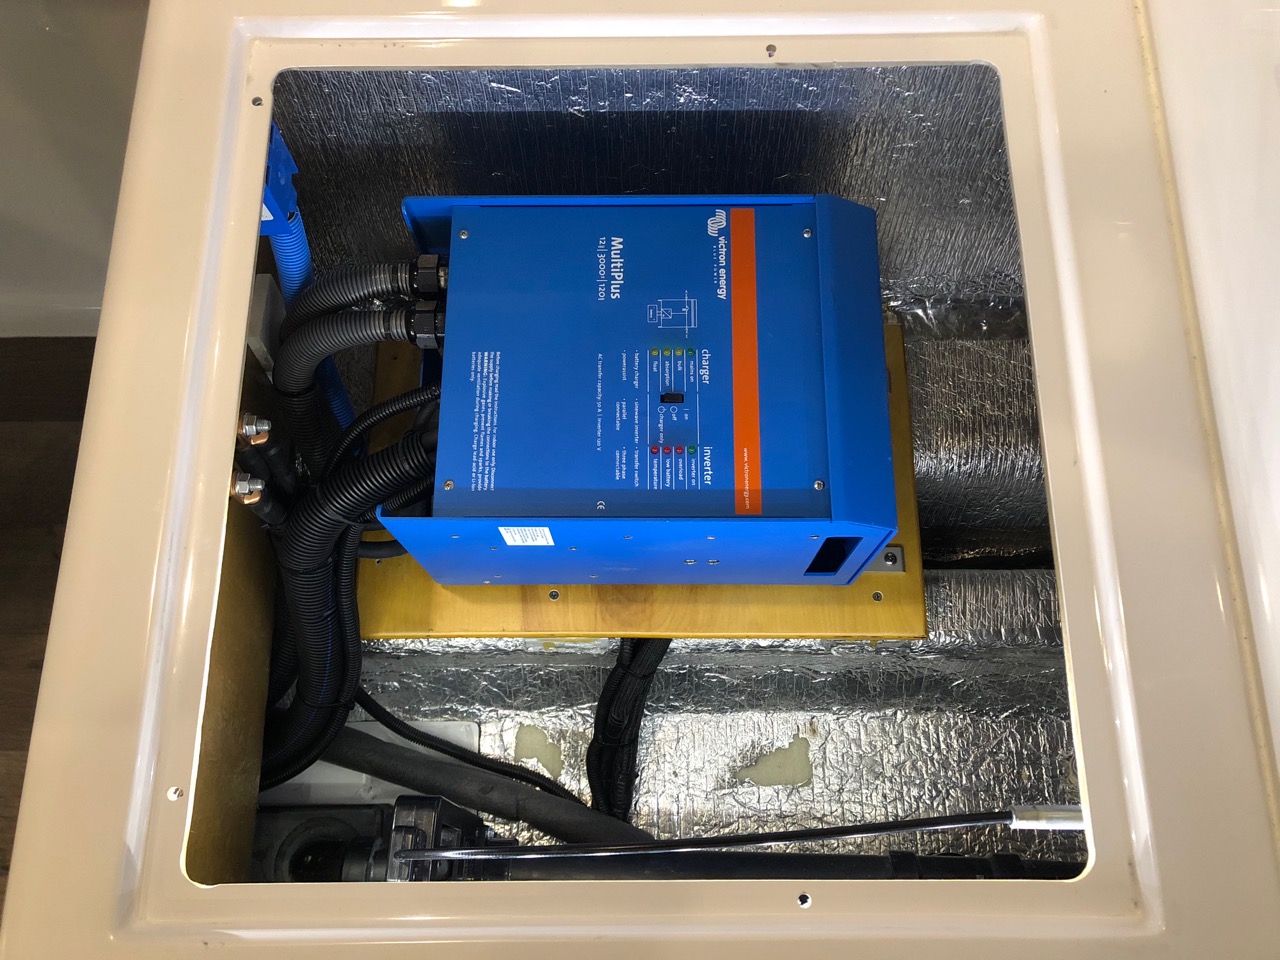
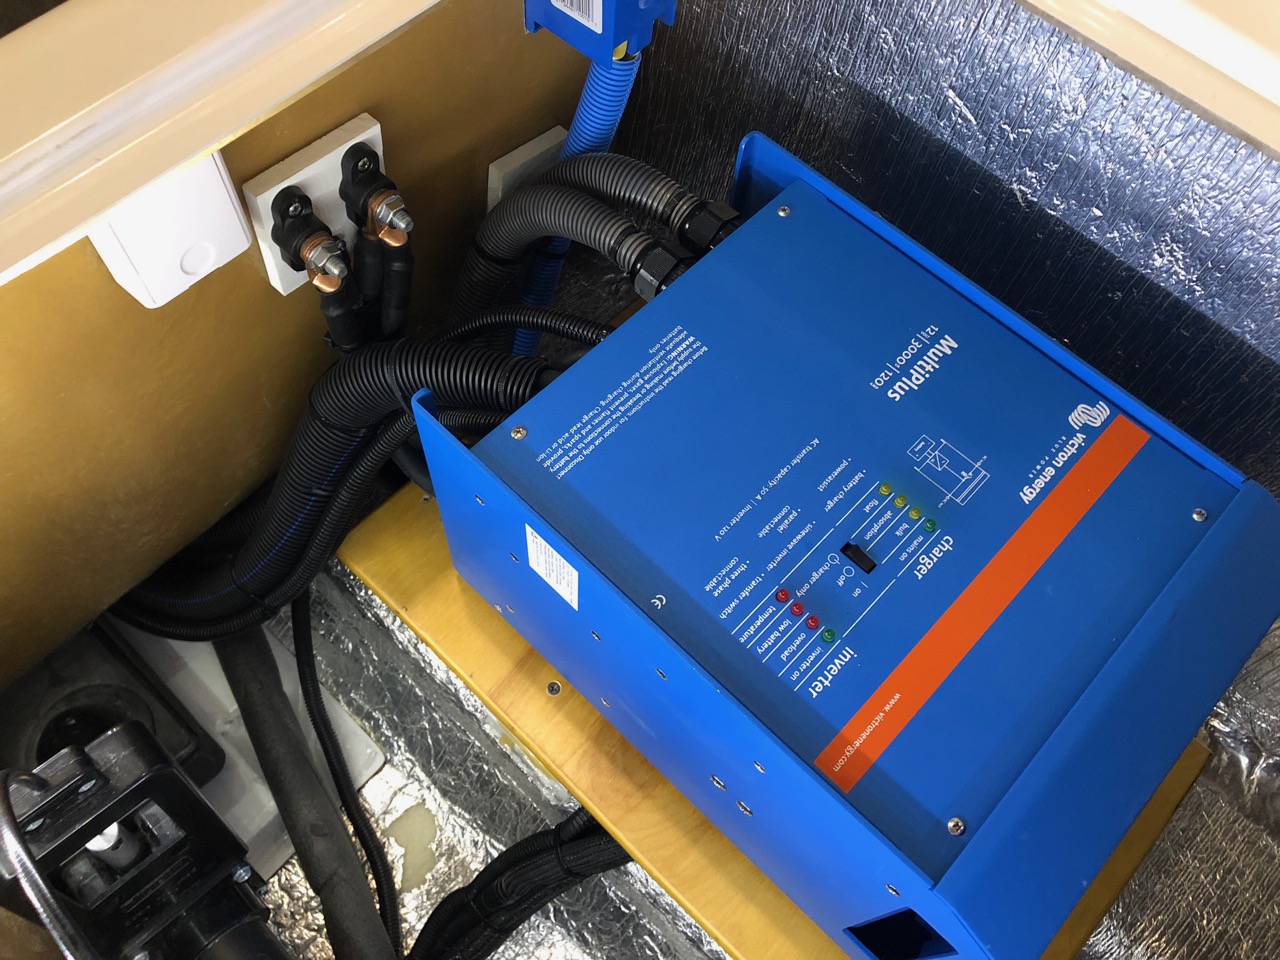
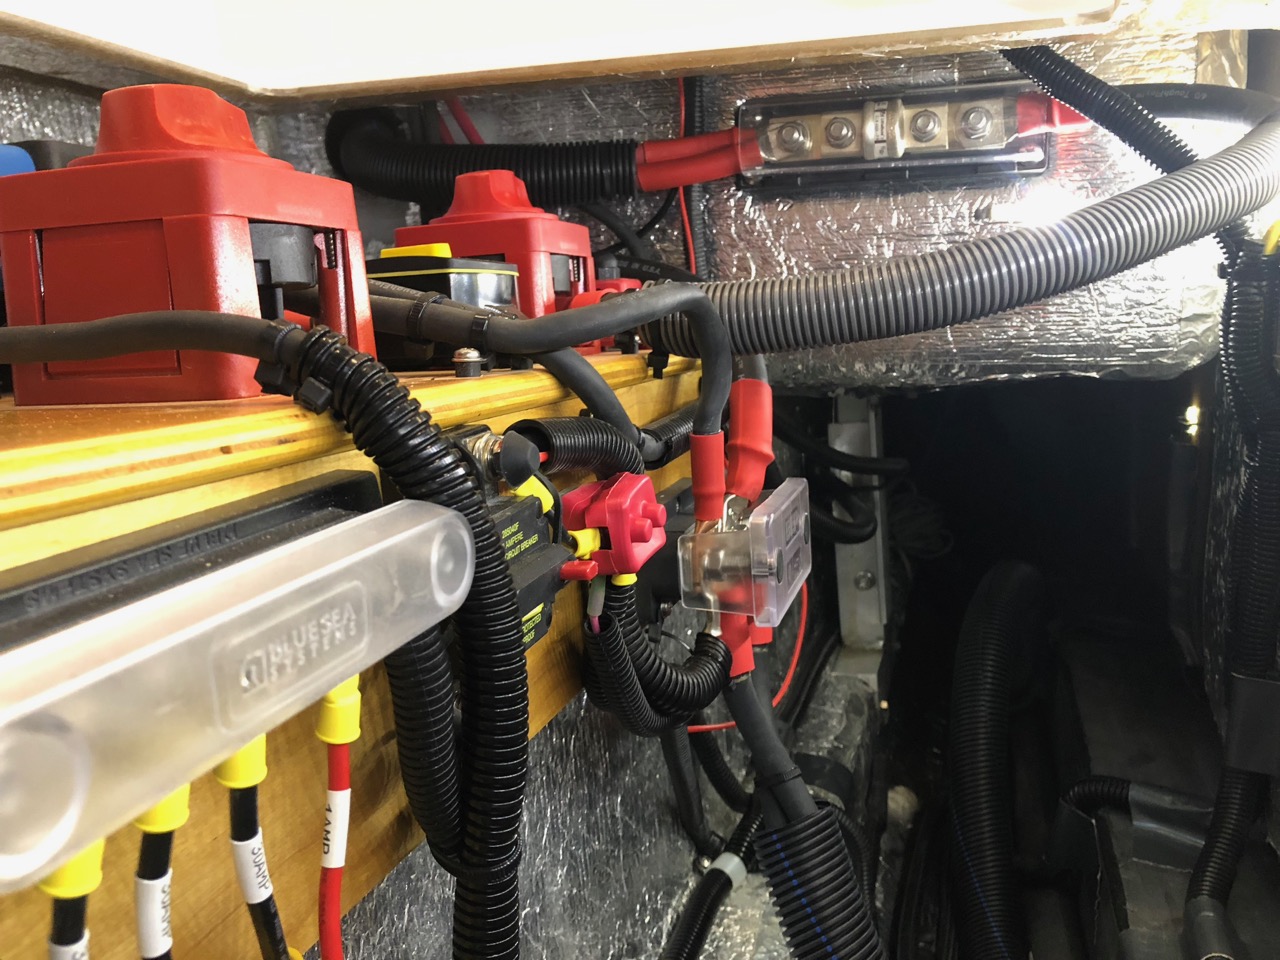
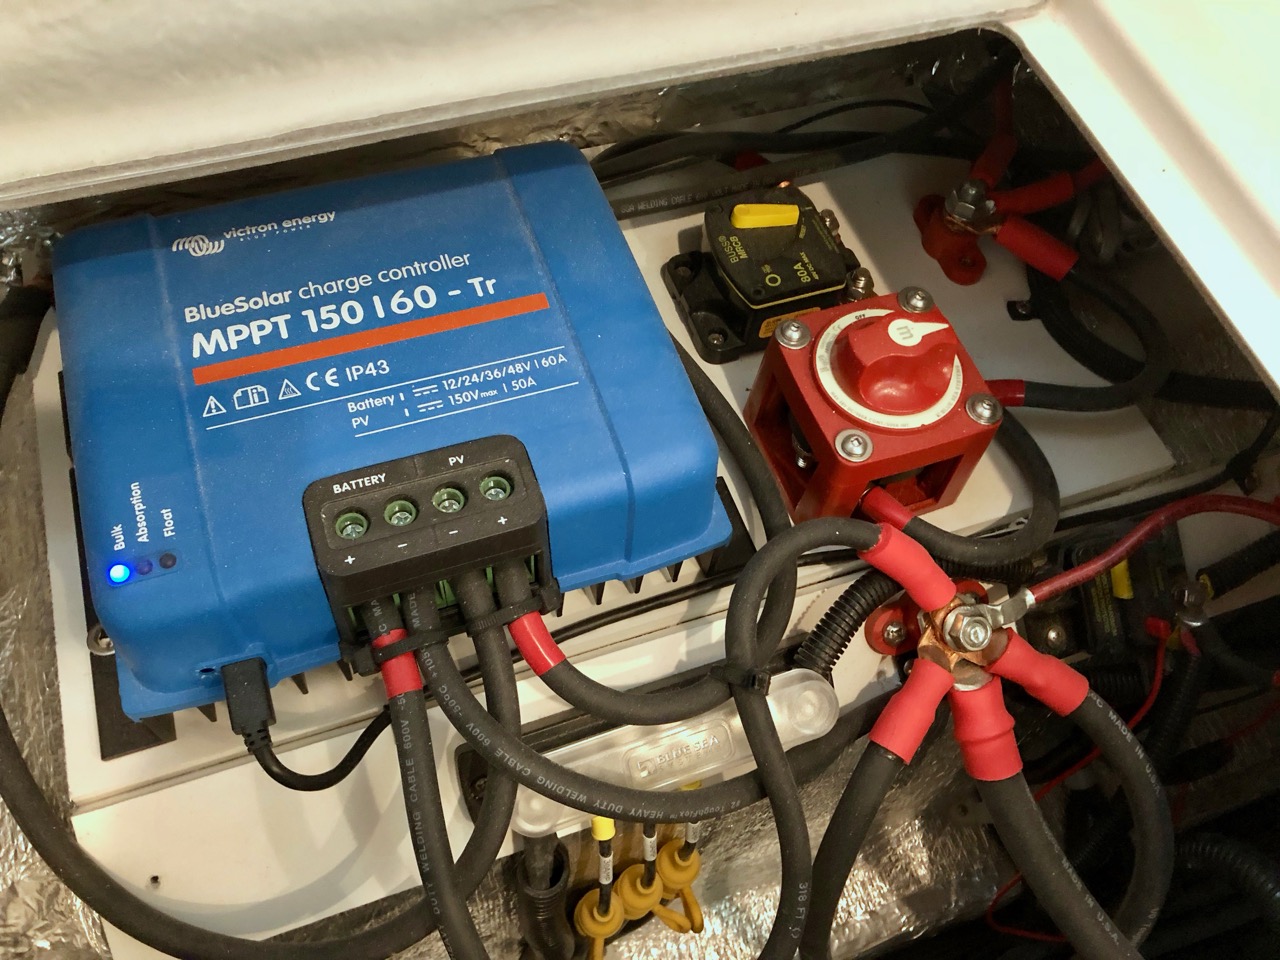
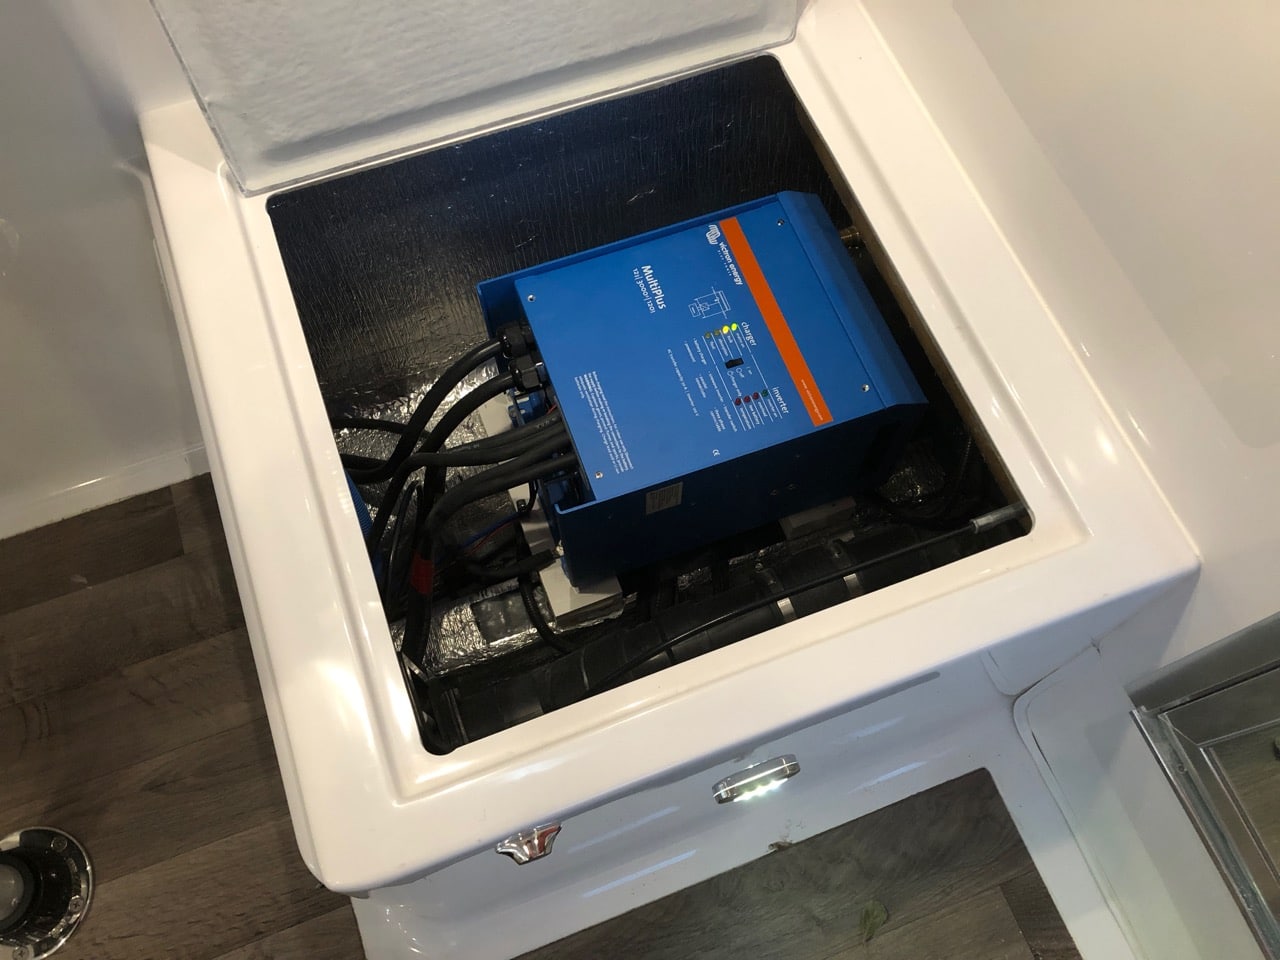
A little update on what I've been up to so far this summer, which has been all electrical. I've been wanting to redo all of the electrical work that I did when I took delivery, just because one, I was rushed, and two, I learned a lot both doing it and since doing it. So I made some new plywood boards to mount everything on, since I didn't really trust the PVC ones that I originally used. I rounded the corners of the plywood to try to minimize the chances of the corners digging into any cable that rested on it. Then reorganized it all, made sure all the cables were wrapped, and tried to tie down everything as securely as possible. I've been using zip tie cable supports. They're nice and small and grip the cables well. I used washers under the screws to prevent the ties from pulling through. Since part of the work involved removing the inverter, I decided that while it was out I might as well go ahead and get rid of the black tank and the sewer line. (You'll notice that I still need to recap the sewer at the grey tank.). That was a pain, but since I wasn't trying to salvage anything I could just go at it with an oscillating saw. I had to cut the pipe into pieces to get it out the rear hatch, and the black tank I had to cut in two as well since it wouldn't make the turn out the dinette seat hatch. Also meant I had to cut the vent pipe but I needed to remove the shower caddy for my next project anyway. None of this was too difficult and getting rid of the sewer pipe gave me a ton more room to run my cables. Before this, they were wedged pretty tightly in places, not very accessible - I was worried that they could wear against a sharp edge of fiberglass or something else that I couldn't see. I mounted a half-height milk crate where the black tank was, and enlarged the hole under the composting toilet. As an excuse for not deleting the black tank, Oliver once told me that it was needed as structure for the bath floor. That was pure fiction of course, since there's a gap between the floor and the tank, and you can enlarge that hole almost to the edge of the toilet and the floor remains solid as can be. That's where I'll store zip lock bags of extra peat moss in case we need to empty the toilet while traveling. It should be perfect storage for that - since I'd have to pull the toilet out anyway, access to the peat will be right there. I'll add a small rubber gasket around the hole to prevent shower water from seeping in. It hasn't been a problem, but with the larger hole I'd like to make sure. I also took the time to straighten up the rats nest of cables behind the fuse box as best I could. I don't know what other Ollies are like, but prior to this, I could barely even see in there. I'd even lost a small Atom smoke detector under the wiring after it fell loose. It was a few months later before I found it by wedging my phone randomly into the wiring nest and taking photos. Another thing I did was to saw off the sharp end of some screws in that space. Pretty much anything that is screwed into the fiberglass, like courtesy lights, has sharp screws that could potentially damage an electrical cable. All in all, I feel a lot more confident about the electrical, at least in these areas. This was all done working an hour or so a few days a week, so it seems like it's taken forever. I got about half of it done before the rally, but then it was slow going after that - a bit here and there as I found time. And I could still go back through to secure or wrap a few more things - seems never-ending. Also, working with the power off means no A/C and I have confirmed that I never want to boondock in the summer. Oh, I also added LED light strips in the compartments to make things easier to see. They really make a difference, so I highly recommend them. I'm using the Luminoodle Clicks that I listed above, but any similar strip light would work. Pics - Charge controller and breaker with cutoff switches for solar and batteries. Panels feed into bus bars on the right. I left space to the left for a second charge controller, breaker, and cutoff for external solar, just in case I decide to go that route someday: I moved Oliver's electrical and the positive bus bar onto a vertical panel. Main fuse is mounted to the battery box above: Negative side. The coiled cable is from the Zamp port, which I'm not using right now: And the inverter, which is much more secure now than it was when mounted to PVC:
 3 points
 -
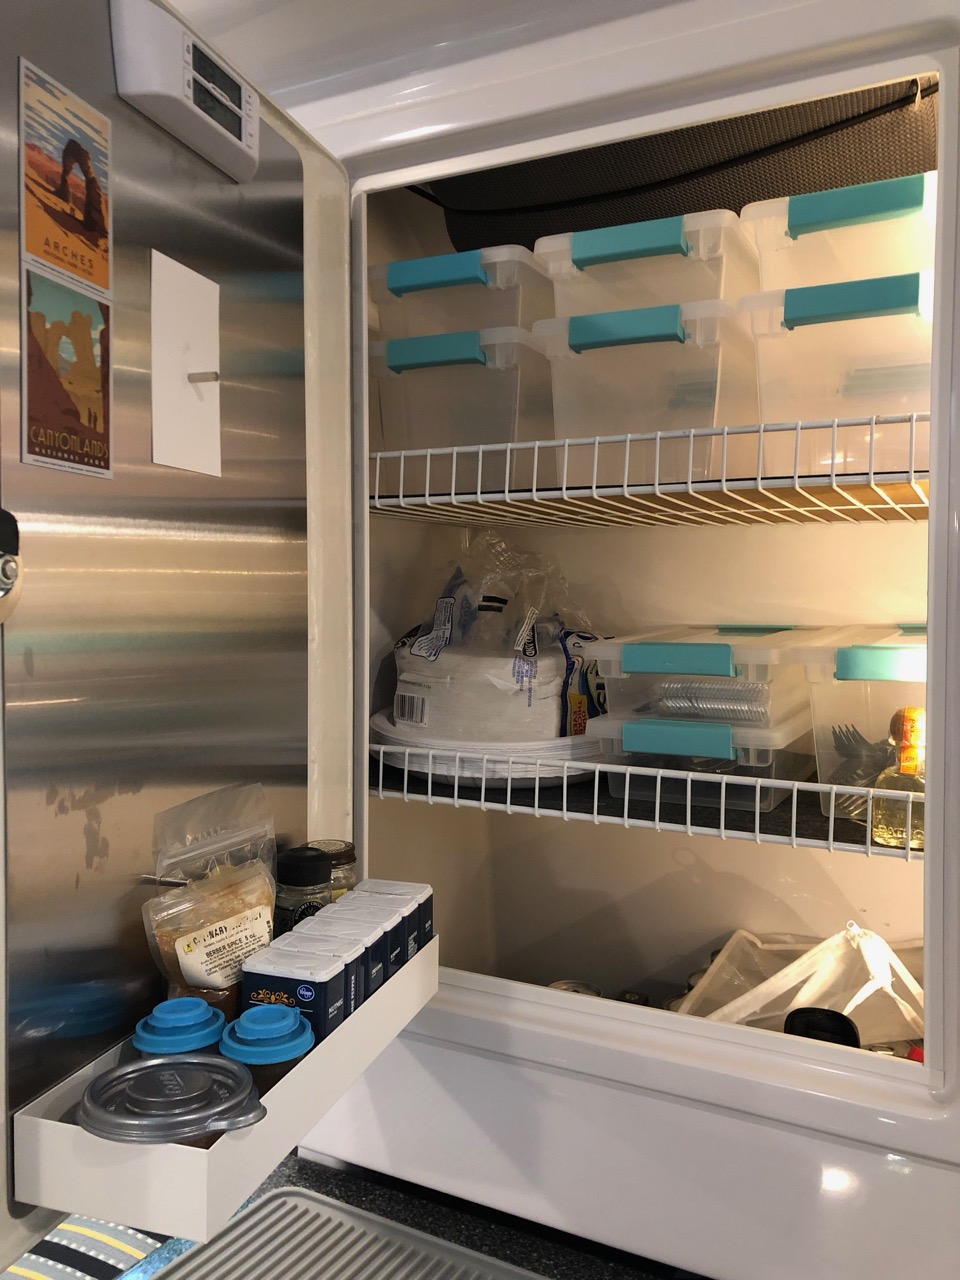
I reorganized the pantry earlier this year. Painted the back of the door to make it easier to clean and added a stainless sheet I got off amazon. Then attached a small box from Ikea as a spice rack. The boxes I found at Target and they really fit well - much better than the ones I had before. And I added a LED strip light to the side to make it easier to see. You can't really see it, but I ran a bungee across the top and it's a perfect spot to store one of those folding drying mats. Also, I had some plywood left over from the electrical, so I made a quick shelf to go over the toaster oven (in the microwave cabinet). I ordered a giant neoprene mouse pad off of amazon, and cut it to size to keep the dishes from bouncing around too much. The cabinet itself was just bare wood, and was starting to get dirty, so I sanded it and added a coat of poly to make it easier to wipe out. I couldn't get used to plastic dishes, so I bought a few plates and bowls at Ikea. They haven't broken yet is all I can say.
2 points
-
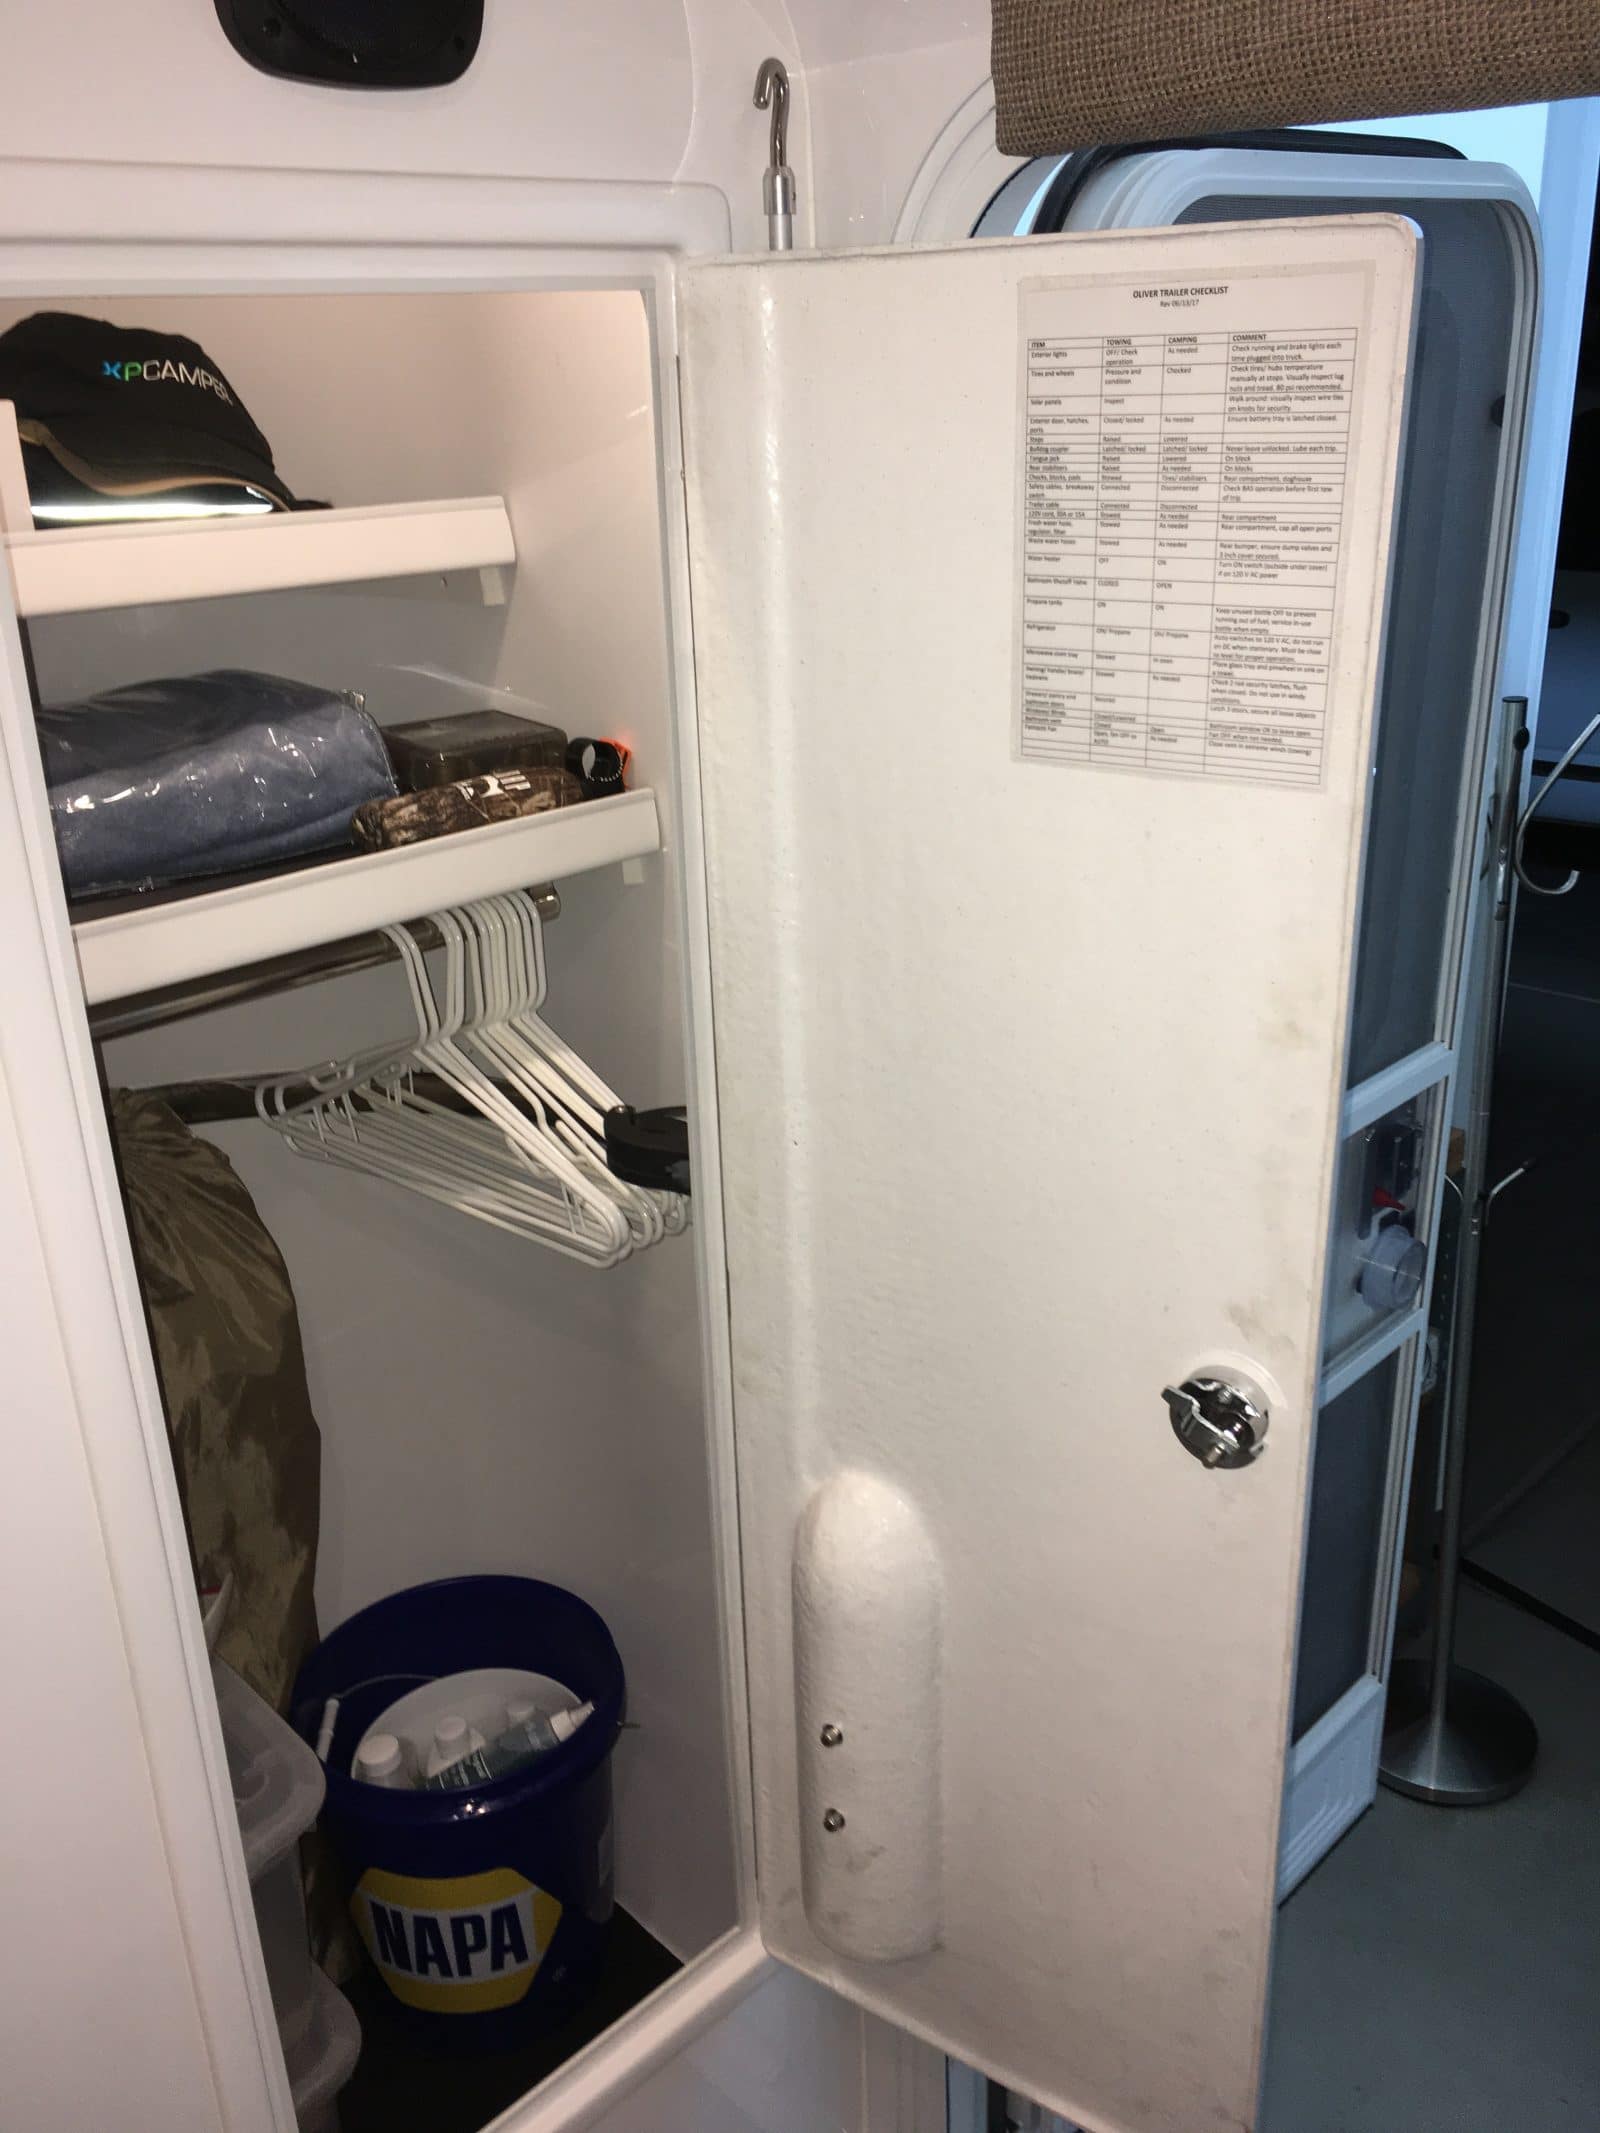
I made this because the Owners Manual towing and camping lists are simply lame. This one is set up like an aircraft preflight checklist. Feel free to edit and change as needed, some items may not apply or you may just want to do it differently. Mine is laminated and posted inside the closet door: Click the attachment at the bottom to download the Word file. John Davies Spokane WA OLIVER-TRAILER-CHECKLIST-–.docx
1 point
-
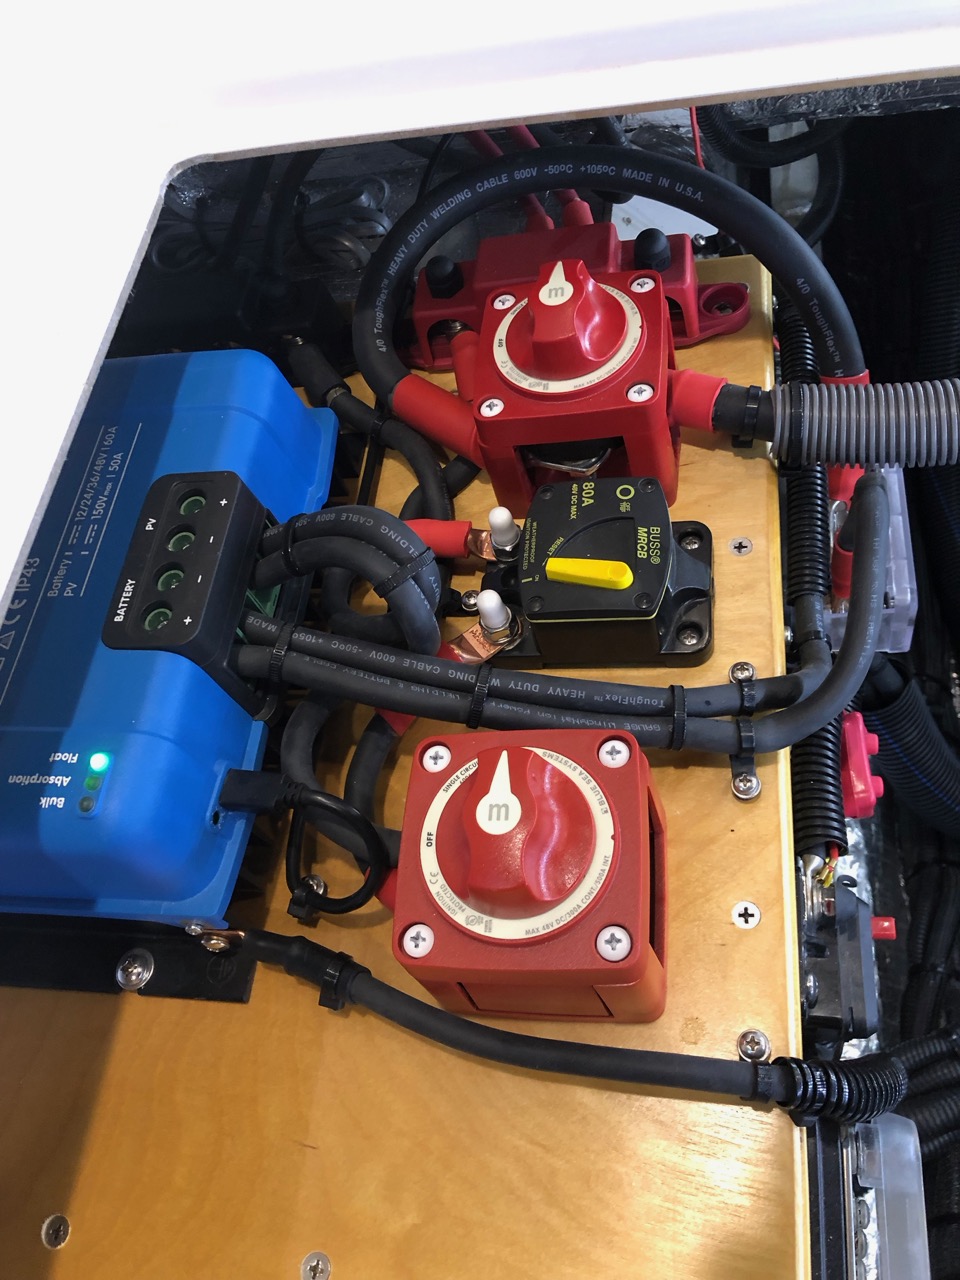
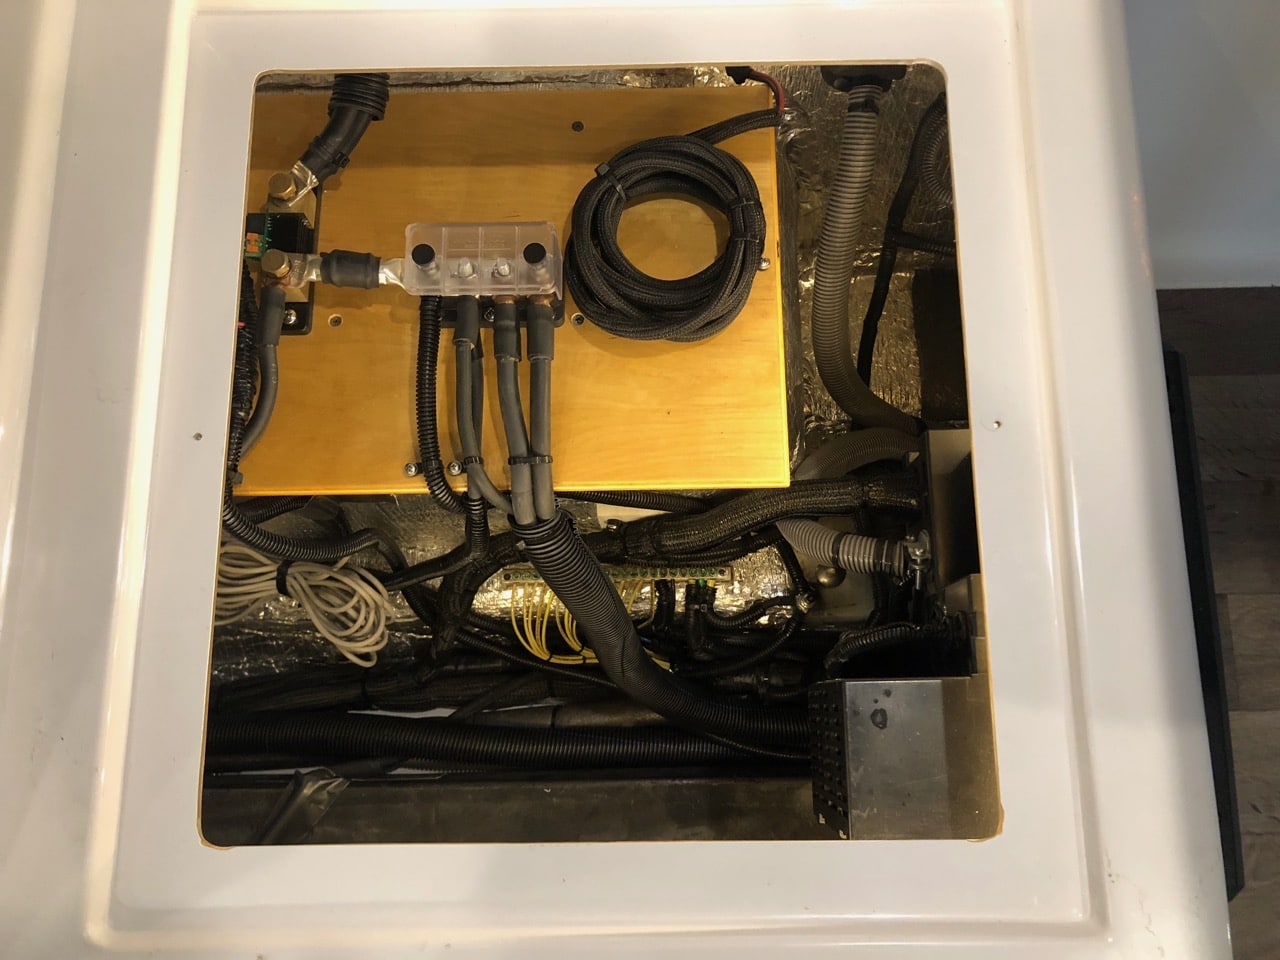
Starting a new thread since the other one seems flaky. This is mostly for Mike since I can't figure out how to send photos via PM. I'll do a big post on my electrical setup someday, after I've redone a few things and added a different hookup for my portable solar. Mike, this is the inverter itself, mounted under the dinette seat by the bath. You have to run pairs of + 12v, at least 1/0 AWG, in and out and also 120v both ways. And a ground strap to the case, so that's 7 large cables plus a coms cable and a temp sensor wire. I ran the 120v along the side and the 12v, ground and and coms through the trough under the dinette. I plan to pull the inverter and screw down a plywood base to secure it better, though it seems fine as it is, screwed into 2 layers of PVC. One thing I do want to do on this end is to install a manual transfer switch for the 120v, in case something ever happens with the charger. [attachment file=IMG_0078.jpg] The inverter has plenty of space for airflow in there. The only time I hear the fan is if I'm really loading it to the max, or if it's really quiet in the trailer when I just plug it in and it's bulk charging the batteries. This is the 12v + side, under the street side bed. Solar comes in at the top right, + goes to the combiner post, then to the cutoff, then though an 80a breaker, then snakes around into the charge controller. + out goes to the combiner post on the lower right, as does the twin + 1/0 from the inverter and the 4/0 + from the batteries, as well as Oliver's cable to their + bus. The bus bar and breaker on the small angled PVC panel are both Oliver's. I moved them a bit to get the post on there but otherwise, I tried not to touch anything on Oliver's side of the electrical. The battery + goes through a cutoff and a 400a fuse first, which are mounted out of sight on this side of the battery box. Solar negative goes around the back of the charge controller onto a combiner post that's hidden, then around the left side and in. Negative out goes down the open space in the hull to the terminal in the next photo. When I redo all of this, I'll add a much larger plywood base, swap the main combiner post for a bus bar, move the battery cutoff and fuse to the board for easier access and generally tie everything down better. Negative connections are kept away from the + on the dinette side of the battery box. Battery - goes into the shunt for the battery monitor, then I have the charge controller coming directly off the shunt and a short 4/0 jumper to a combiner post. Off that goes the twin 1/0 from the inverter, the ground from the inverter, and Oliver's - cable which goes into their distribution box. I removed the charger unit from their box so it's just a fuse and breaker box for me now. I'll redo this in plywood, swap out the combiner post for a bus bar and secure the wiring better.
1 point
-
Nan, Driving a pickup is definitely a different experience than driving a car. But, once you get used to it, you'll likely prefer the pickup, as I do. I see better ahead and to the sides in my truck, because I'm sitting up higher, and it's got a great big windshield and big side windows. And, I have great power. And, when I signal to change lanes, I find people are a bit more likely to fall back a little ( not always,) than when I'm driving a car. You're simply a bigger presence in a truck. Learning to back the trailer will take some practice, but honestly, that's better learned with your own trailer. You can try John's suggestion, but if you do, put some weight in the uhaul trailer.. an empty or light trailer tends to back really squirrelly. Most campgrounds have at least some pull through spots. You may have to reserve, or get there early, til you learn how to back. One skill at a time. If you want to try before you pick up Ken's, go " test drive" a few. Or, drive a truck. Use some air miles and rent a nice truck at Enterprise, and drive it, really drive it, for a weekend. The 2500 you're buying is the same size as a rental 1500, just the 1500 has not as much power, and a smaller fuel tank, and different suspension. The ride will be a little different from brand to brand, but turning radius, etc, isn't that much different. Today's trucks aren't the trucks of yesteryear. The interior is pretty plush, the ride is fairly carlike. I learned to drive a truck with manual transmission, as a kid. I love driving modern trucks. Sherry1 point
-
I would install a larger self tapping screw AND the 3M tape, aligning the switch with the lanyard attach point on the trailer hitch. I don’t think that in normal operation it has to rotate, as long as it is positioned correctly when secured. Even an off-angle pull easily withdraws the plunger. One thing you do not want to happen in an accident is for the switch assembly to pull off the frame instead of the plunger coming out. That would be very bad .... John Davies Spokane WA1 point
-
1 point
-
The switch needs to be free to rotate so it can adjust to the angle of pull by the cable. Best to replace the screw.1 point
-
Yes, from my limited experience with VHB tape, yes, as long as you prep both mating surfaces with alcohol. But why not replace the screw in addition, since the hole is already there.1 point
-
@rideadeuce reminded me of this and I wanted to get back with why my numbers were off. The A/C actually pulls 1731 watts, per Dometic, which would give me 3600/[(1731-500) x .75] = 3.8 hours. Close enough. It doesn't surprise me that the wattage number that I was seeing was off. I've talked with Victron before and they admit that their inverter readings are just estimates. Next time I'll pay more attention to what the battery monitor is saying vs trust the inverter, as it should be more accurate.1 point
-
In the only experiment I've run, I got 3.5 hours on a day that I was getting 500W from the solar. That was 75% DOD, which is when the inverter started kicking off due to low voltage. See here. I'm not familiar with the Lifeblue but Scott Oliver was telling me that they were looking at a battery with built in bluetooth and so it may be the same.1 point
-
I am looking at the Victron 200Ah battery "type a" otherwise known as "new version". Old Victron: 11.7"x16.7"x10.8" 92 lbs New Victron: 6"x12.6"x9.1" 48 lbs So much smaller and lighter. Not yet available in the US, but coming "very soon" . If you already have a multiplus, color gx, and MPPT from Victron, then you just need to VE.Bus BMS and battery protect (And maybe Cyrix combiner) to use their batteries. https://shop.pkys.com/New-Victron-lighter-Lithium-200Ahr-Battery-BAT512120610.html has the pre-order out of MD.1 point


-
Recent Achievements
-


")


")


")
