Leaderboard


Popular Content
Showing content with the highest reputation on 04/17/2022 in Posts
-
And you can forget going to Alaska.3 points
-
Believe the 2022 Tundra Hybrid and 2023 Sequoia Hybrid will be beast for towing. They will be developing power/torque in the lower RPM ranges like a diesel. Our 2022 Tundra's 3.5L V6 (without Hybrid system) is very powerful as a TV for Ollie, can only imagine how the Hybrid will be as a TV.3 points
-
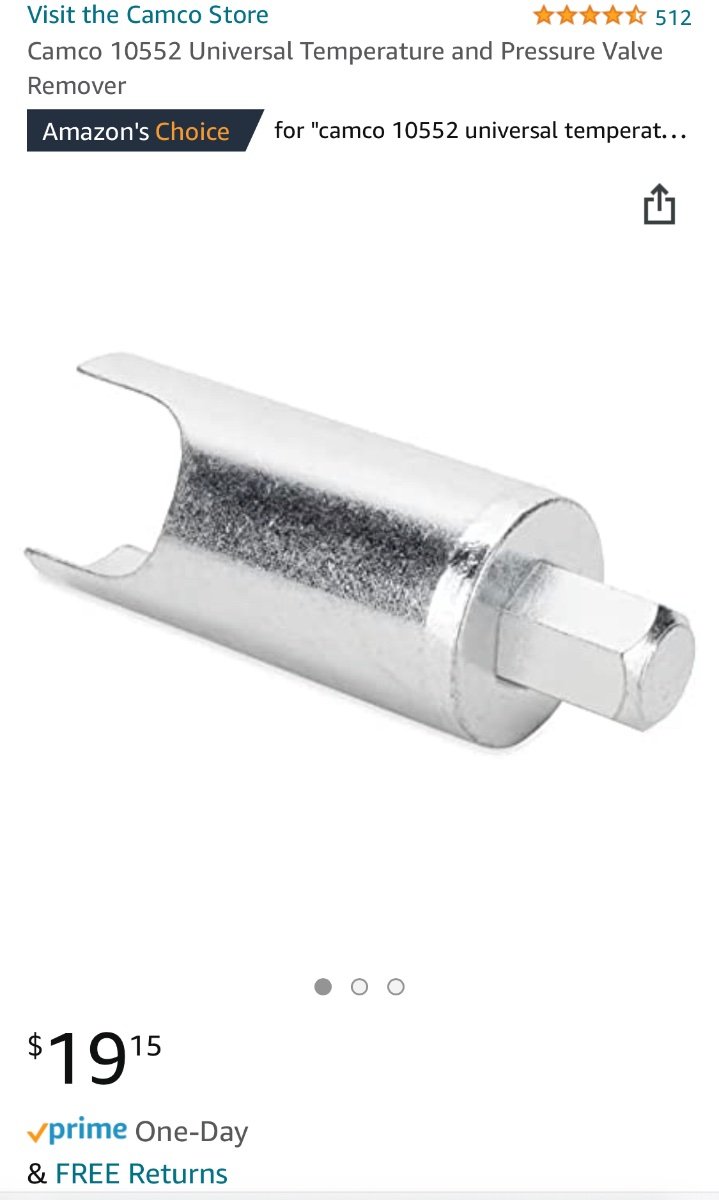
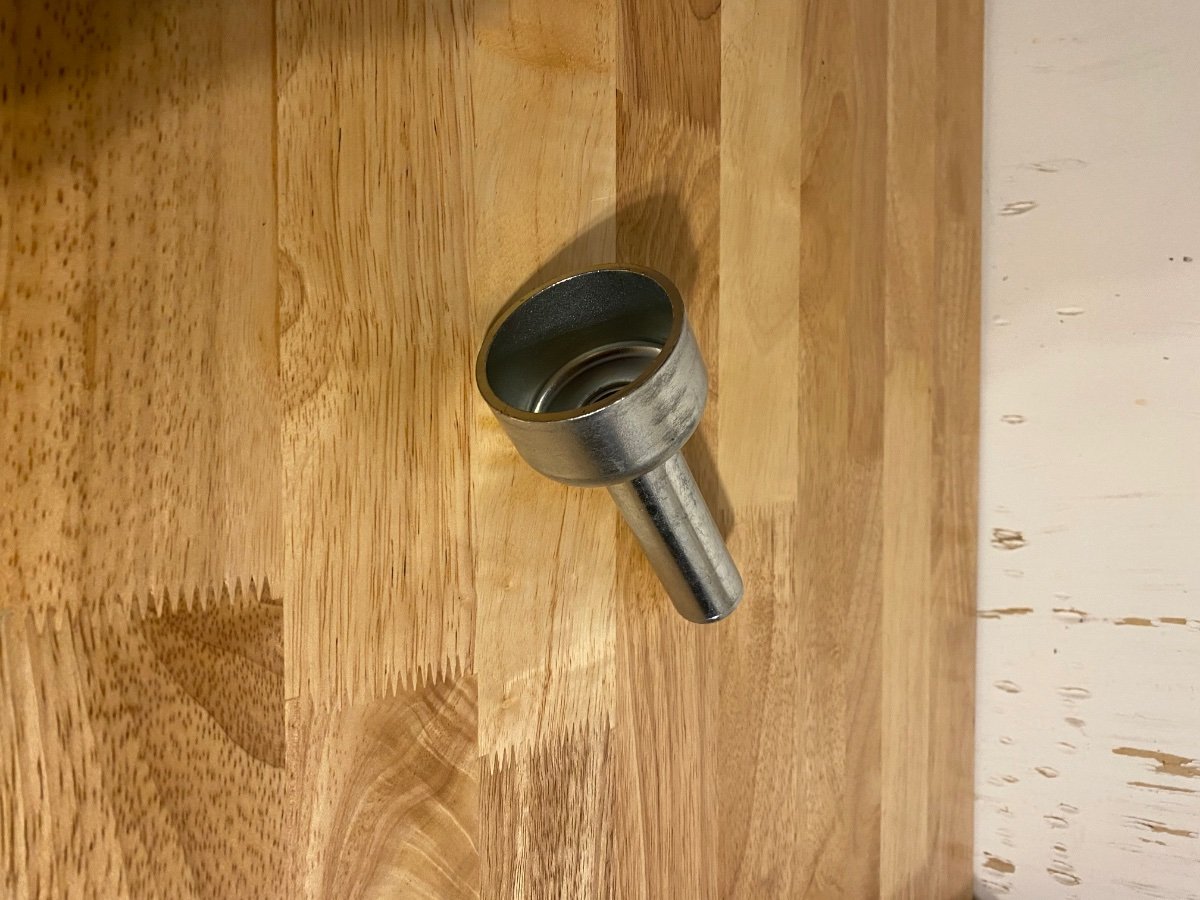
That was a great post. Thanks! FYI if you buy the special tool needed to remove your standard water heater pressure relief valve (which also works on your home WH) that axle cap driver nests beautifully inside it, to minimize space. Wrap both with stretchy mover’s wrap so they don’t rattle around in your spares kit…. John Davies Spokane WA
 3 points
 -
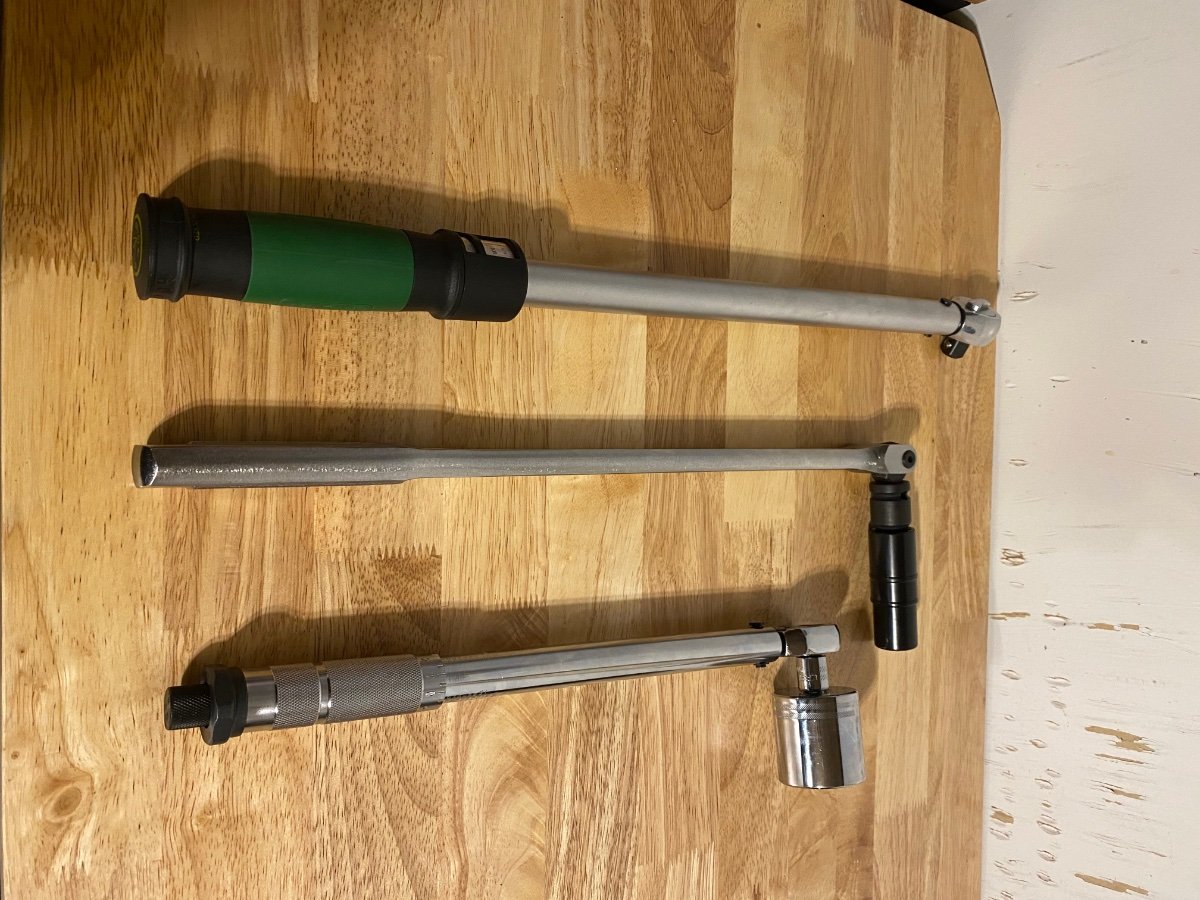
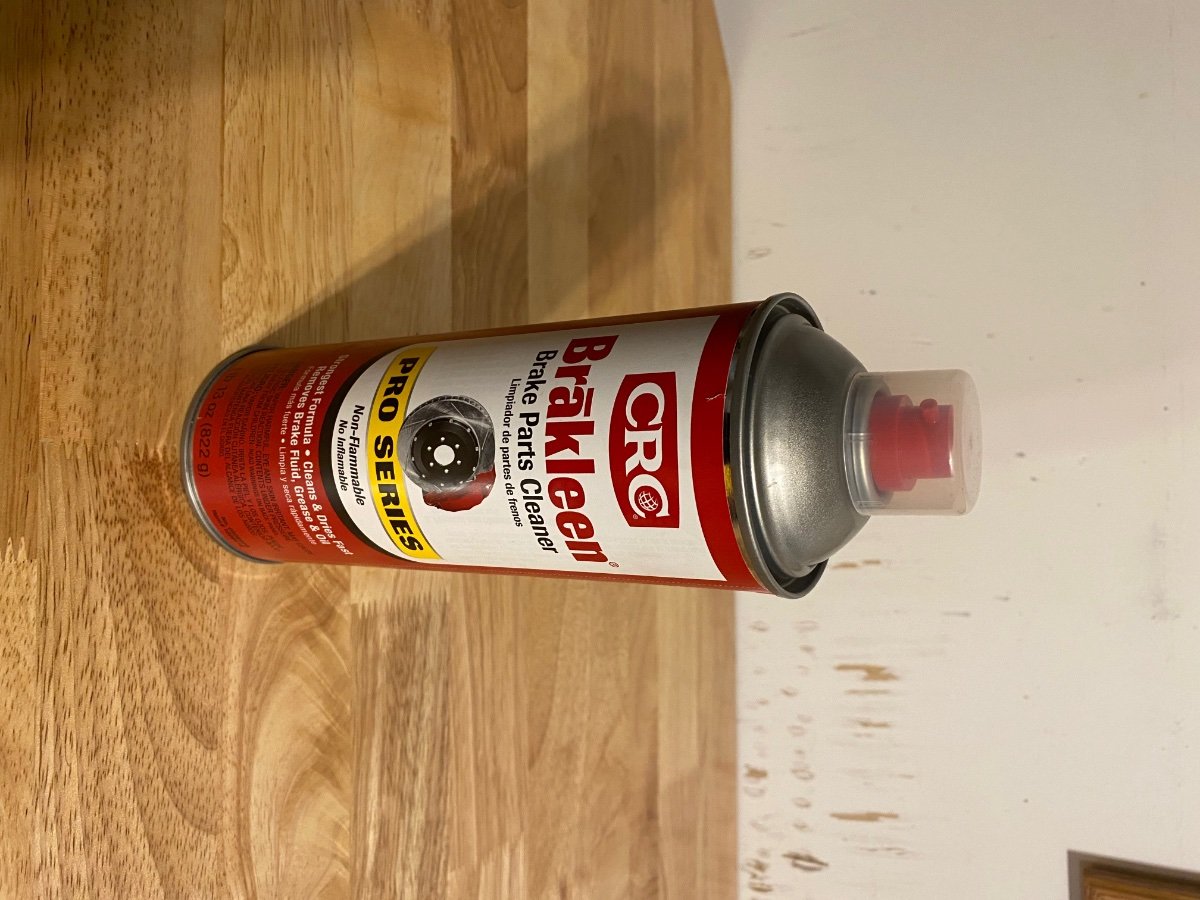
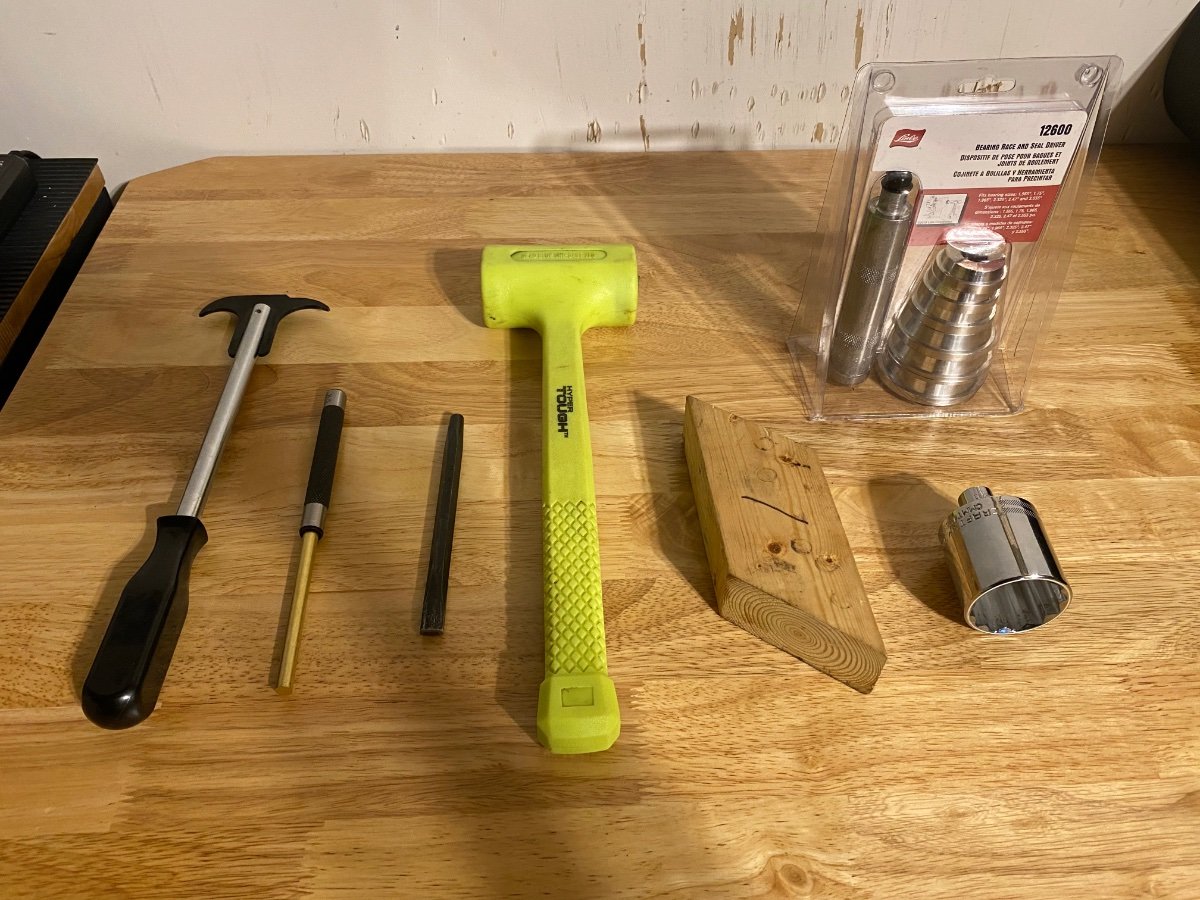
The Dexter video is very helpful. https://youtu.be/GnH-h3W9XvI As mentioned before the complete bearing sets must be replaced, you can’t leave the old races in the hub. And the seal and grease cap must also be replaced. So new bearings, seal and grease cap on each axle. Here’s the tools/etc. that I used for my recent replacement of the bearings on all 4 wheels: Breaker bar & 3/4” lug nut socket for loosening the lug nuts to remove wheel. Screwdriver to pry off old grease cap. You may have either a spring clip or cotter pin as the axle nut retainer. Mine have the spring clip that can be reused. Cotter pins should be replaced. The axle nut should come off by hand since it’s only supposed to be finger tight at final assembly. Seal puller from Harbor Freight to remove old seal. Brass and steel punches to drive out old outer races. Brakleen to remove all old grease from hub and axle spindle, and clean the inside of the brake drum while you’re at it. Also check your brake pad thickness while you have the brake drum off, Dexter says 1/16” minimum thickness for the pads. A bearing driver set to install the new outer races. A good high quality grease to pack the new bearings. A dead blow mallet. A wooden block to install the new seals. A 1-1/2” socket for the axle nut. Torque wrenches for the axle nut and lug nuts. I use two different ones because of the difference in torque settings. The axle nut is to be torqued to 50 ft-lbs. to seat the bearings, then backed off and finger tightened, then install the retainer clip or cotter pin. The lug nuts are 120 ft-lbs. I don’t have one single torque wrench that can cover that range for the axle nuts and the lug nuts, so two torque wrenches in my tool box. Grease cap driver tool to install new grease caps properly. Follow the Dexter video. And I carry all of this with me, including spare bearings, seals and dust caps, in my road tool kit, along with a heavy duty scissor jack, a full ratchet/socket set, small air compressor, and other common hand tools. Flat tires and wheel bearing failures have been common points of failure that leave people stranded. I like to be prepared. Mad Max was the Road Warrior, call me “The Road Worrier” 🙂.
3 points
-
If you do buy replacement bearings, make sure you get genuine Timken parts. There are a lot of counterfeit “Timken” bearings out there, especially on Amazon. Here’s the link to the Timken site to find an authorized distributor. And the complete bearing assembly needs to be replaced, which means pulling out the old seal and knocking out the old outer races that are pressed into the hub. So a few special tools are needed. I just replaced mine. I’ll do another post with the tools that I used to make the job easier. https://www.timken.com/contact-distributors/2 points
-
So.. interesting video.. For Oliver owners we can expect a modest savings moneywise while on the road. More reading and leisure time while waiting for the EV to charge... a LOT more reading time considering we will have to charge every 100 miles or so. BUT... if we charge at home we can expect up to an 80% savings. No problem... I never tow my Oliver more than 50 miles from home anyway.2 points
-
geO: Here is the informatioin: Timken Outer Bearing: SET4 Timken Inner Bearing: SET17 National Seal 473336 Be sure to buy real Timken bearings not China knock-off's (packaging looks the same)2 points
-
The infrastructure isn't there for 100 per cent , or even 40 per cent, ev. Charging networks, other than Tesla, are scattered, often lame and inferior. And, the new networks are often slow and geared to local traffic. We charge mostly at home. Changes will happen. I just hope as states mandate change, that they help make it happen, to meet the mandates they create. It's expensive, and intensive. So far, Tesla is the only realistic way to take a long trip. In a car.2 points
-
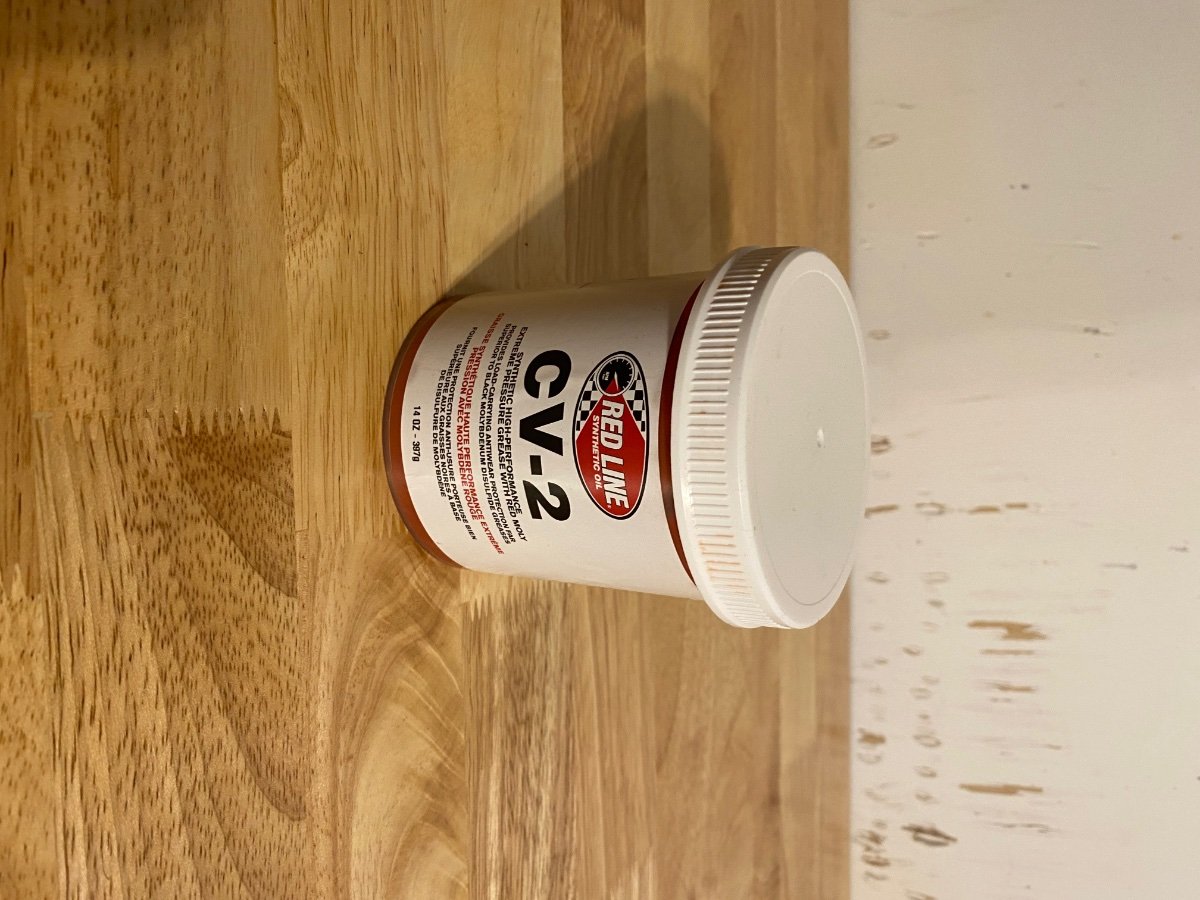
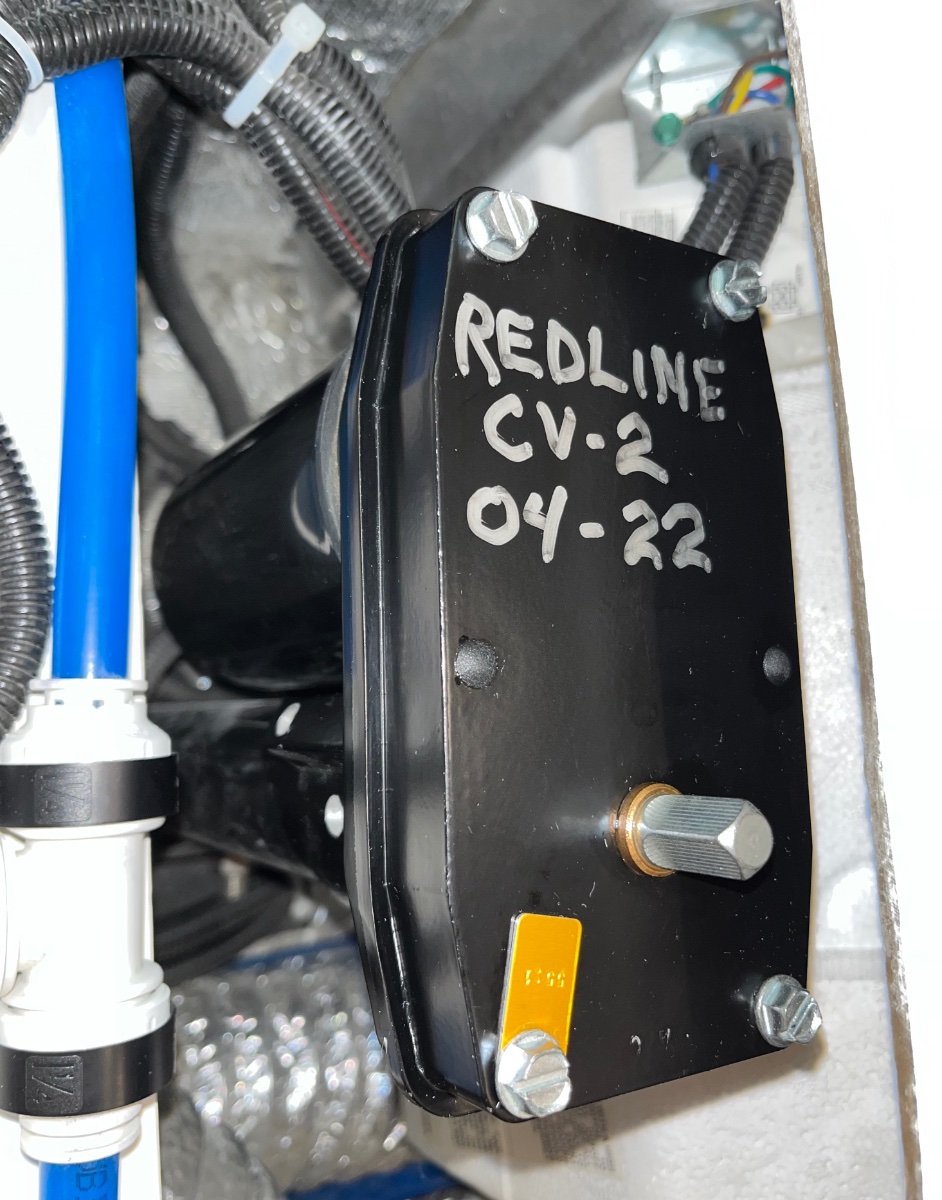
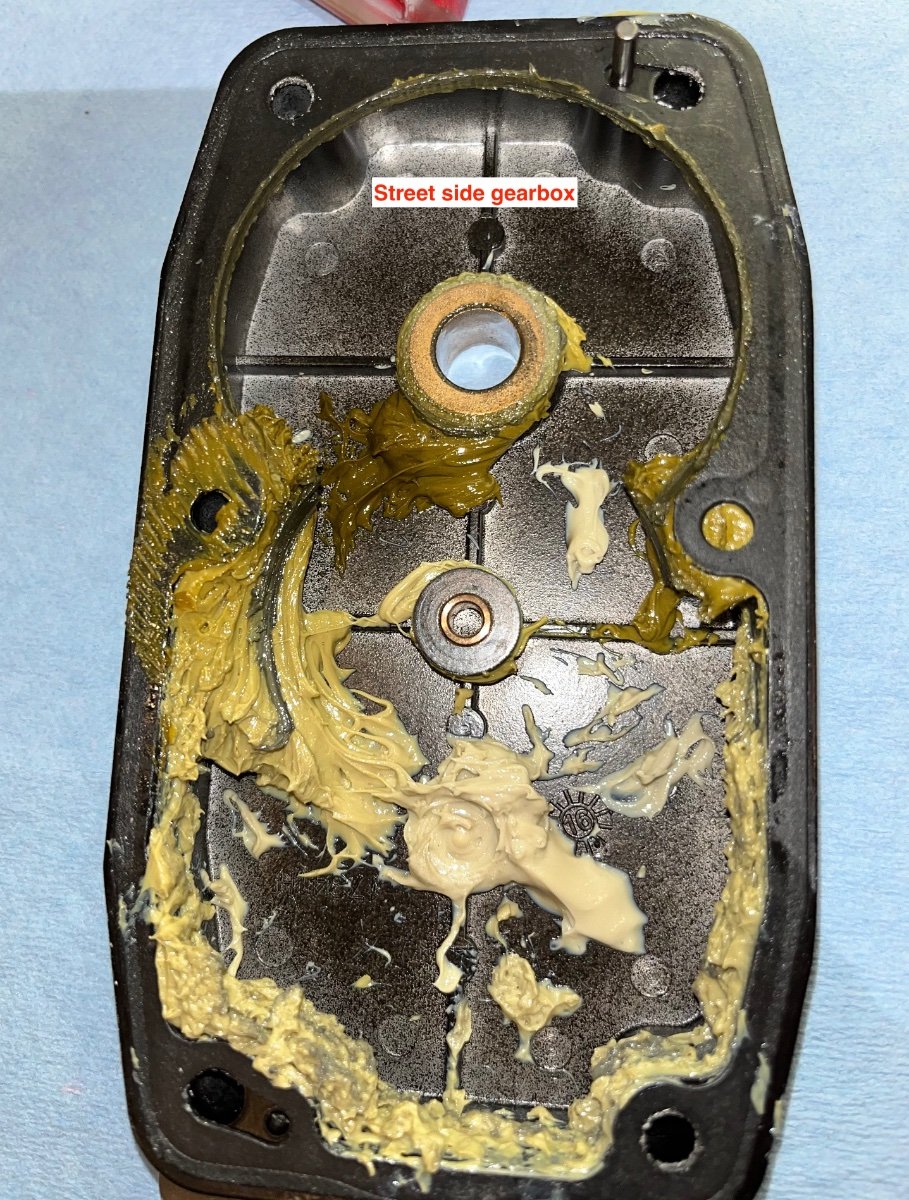
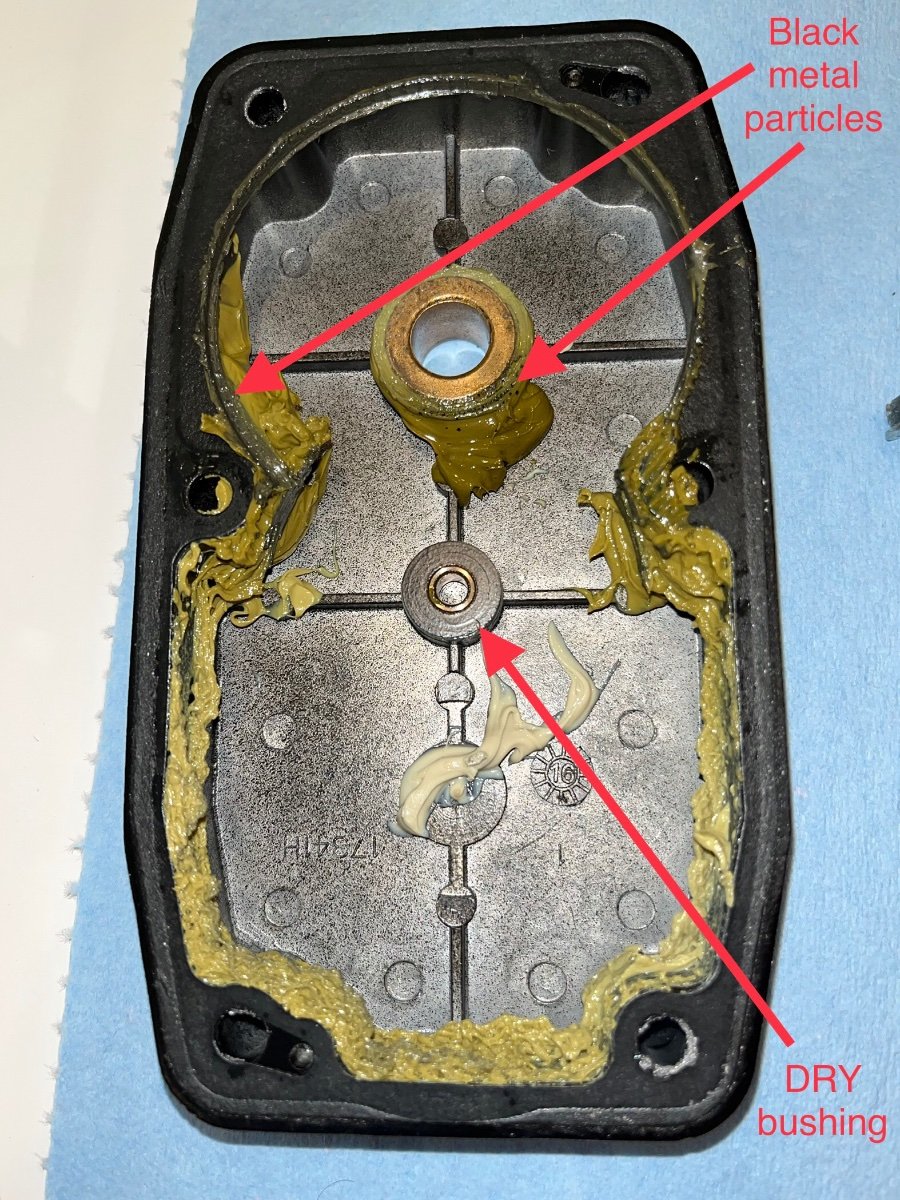
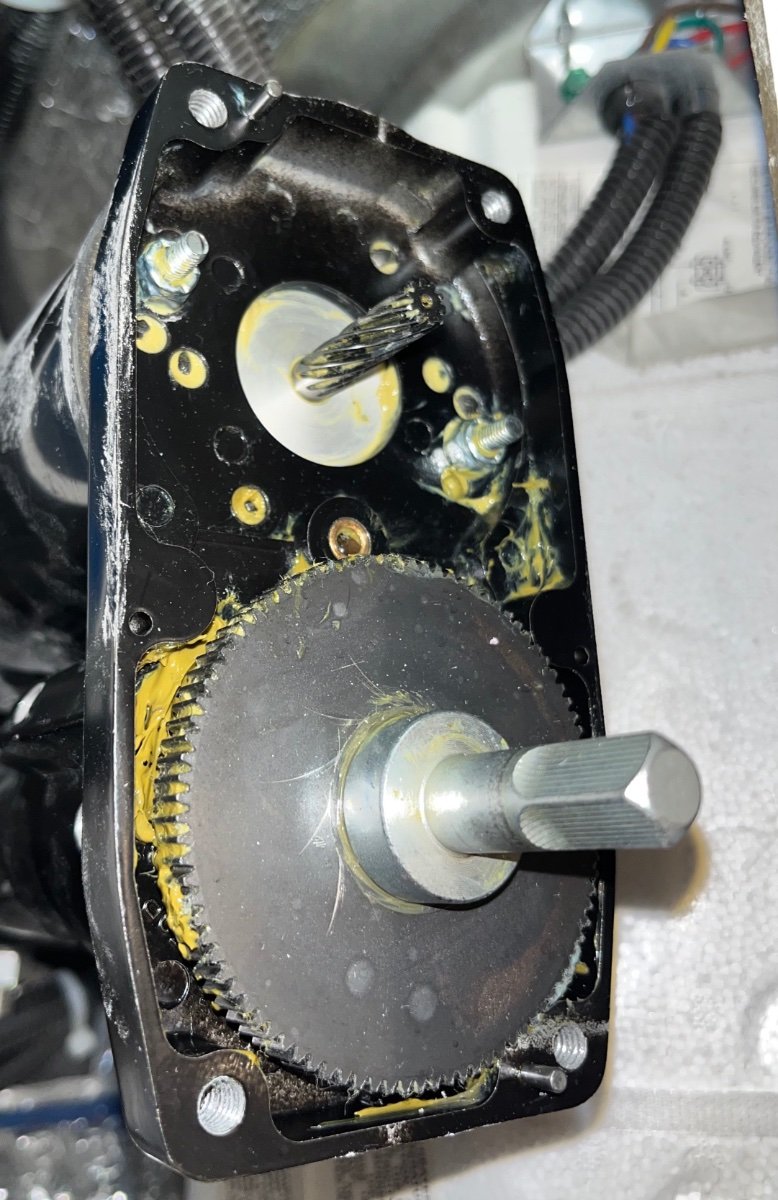
Grease the upper cover: Set the gear and shim down over the lower part, align the gasket and install the cover and the four bolts. Tighten the three set screws firmly, be careful they are steel in aluminum. Clean off the top and make a record of the service: Test the jack for proper operation and shift all your tools and stuff to the other side. My street side gearbox looked very similar - too little lube, some gear wear: Each jack took a couple of hours, most of that time was cleaning out the old contaminated grease. A future service might be a whole lot faster, you could just take a look and add some more CV-2 if needed. I do NOT recommend leaving the old white lithium grease in place, it will not mix well with the full synthetic, and you should get all those black metal particles out!. John Davies Spokane WA
2 points
-
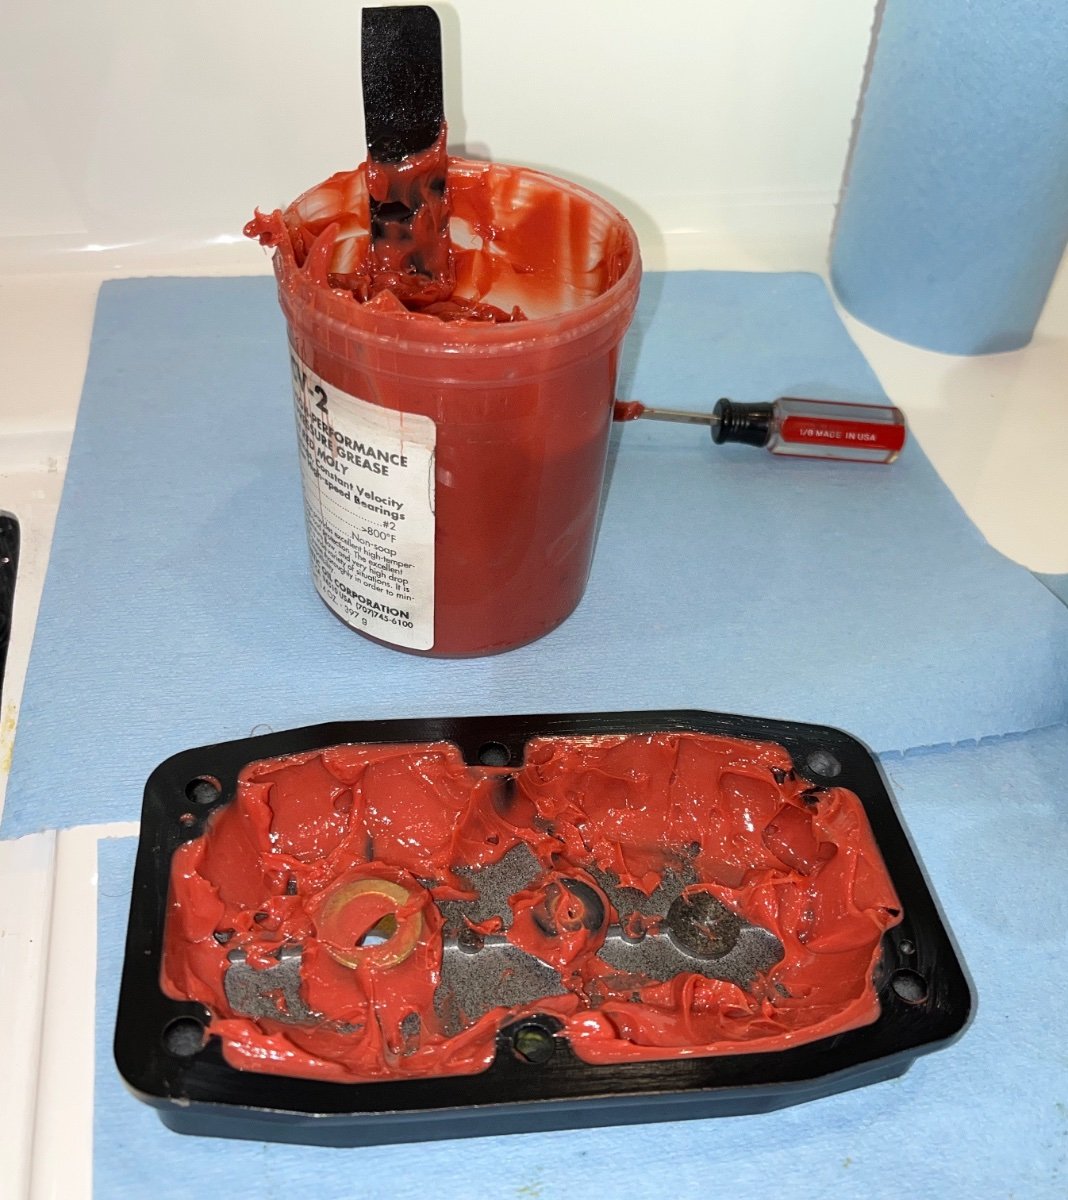
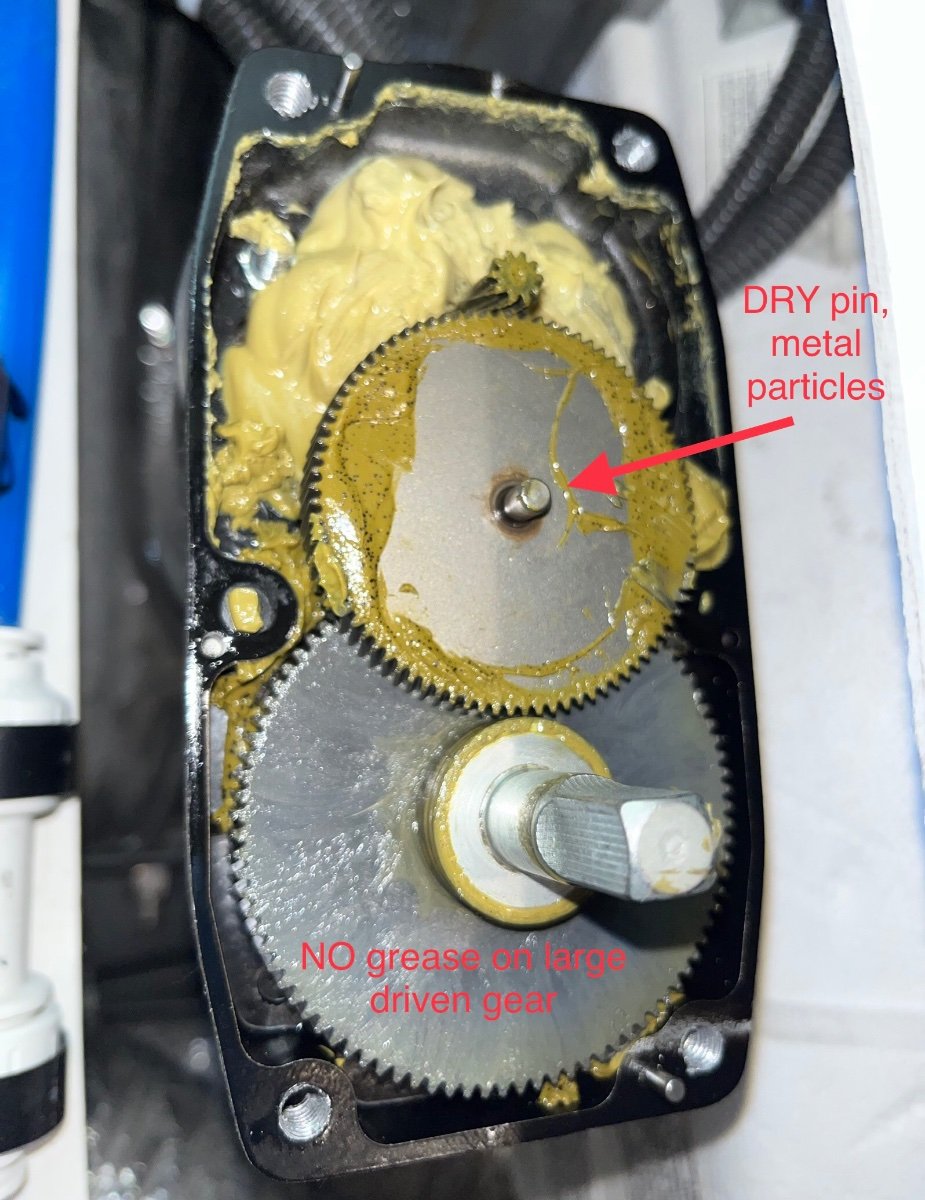
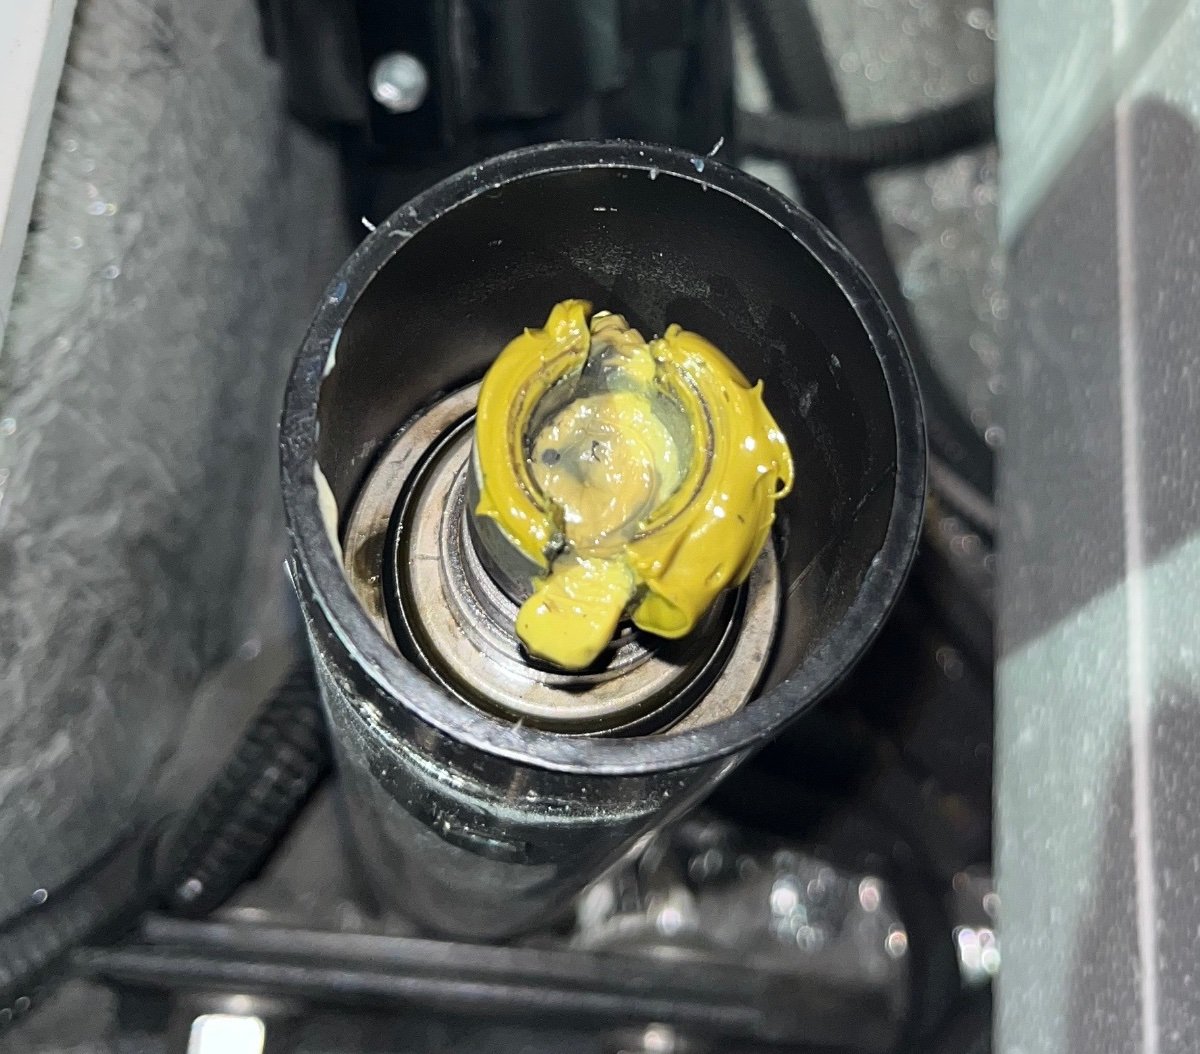
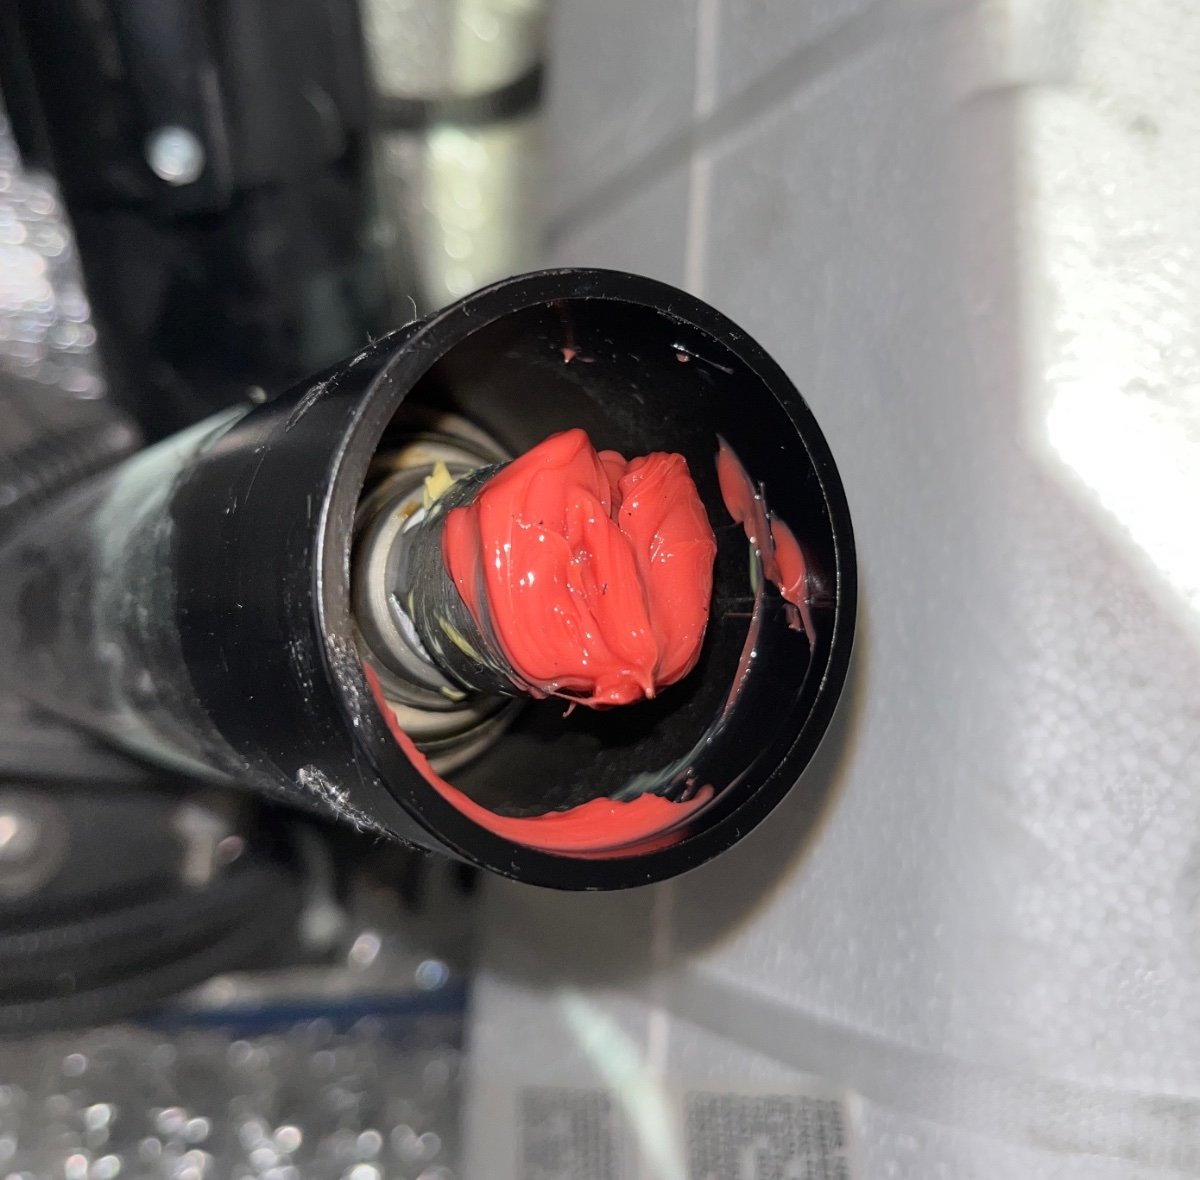
I covered a lot of info here, read this thread first please: https://olivertraveltrailers.com/forums/topic/4094-how-to-vip-3000-electric-stabilizer-jack-service/ FYI I used about 2/3 of a jar on two jacks, so a full one might be enough for all three. I finally got around to doing the rear ones, it is not especially hard but it is a little nasty. For the tongue jack, I removed the entire head unit and took it to the workbench. It is possible to remove the head on these rear ones, if you don't mind cutting and re-splicing the power wires. I chose to do the job in situ, with a couple of foam pads to cushion my knees. I wore a headlamp so I could see better. Loosen the three set screws a couple of turns, with a 3/16" Allen wrench. Once they are loose, the gearbox/ motor assembly can be swiveled around for better access to the top bolts; This is the CURB side one, the STREET side one has a lot more room around it: Remove the four bolts, tap the side of the upper cover carefully with a soft mallet to break loose the gasket. If it doesn't tear, you can reuse it, be careful. Both rear gearboxes looked a lot like the tongue one, except that the grease had not hardened in these. It was however contaminated with metal particles. There was not nearly enough grease installed at the factory, and there was some obvious wear from "dry spots". By lifting off the unit you can access the drive pin and the top of the jack screw. Clean off all the old stuff there with paper towels and a light dash of a solvent like brake cleaner. Lube with CV-2: Set the unit back in place and clean out the old glop. The top cover and big gear can be taken away and blasted hard with brake cleaner. Do NOT try that inside! Lube the bottom part. I used a small plastic piece as a trowel. Try to get the lube under the big gear and apply it liberally around the outside. Wipe off the gasket surface. Be VERY careful not to lose the little stainless shim that goes against the small gear face. When you reinstall the gear,use grease to capture the shim. John Davies Spokane WA
1 point
-
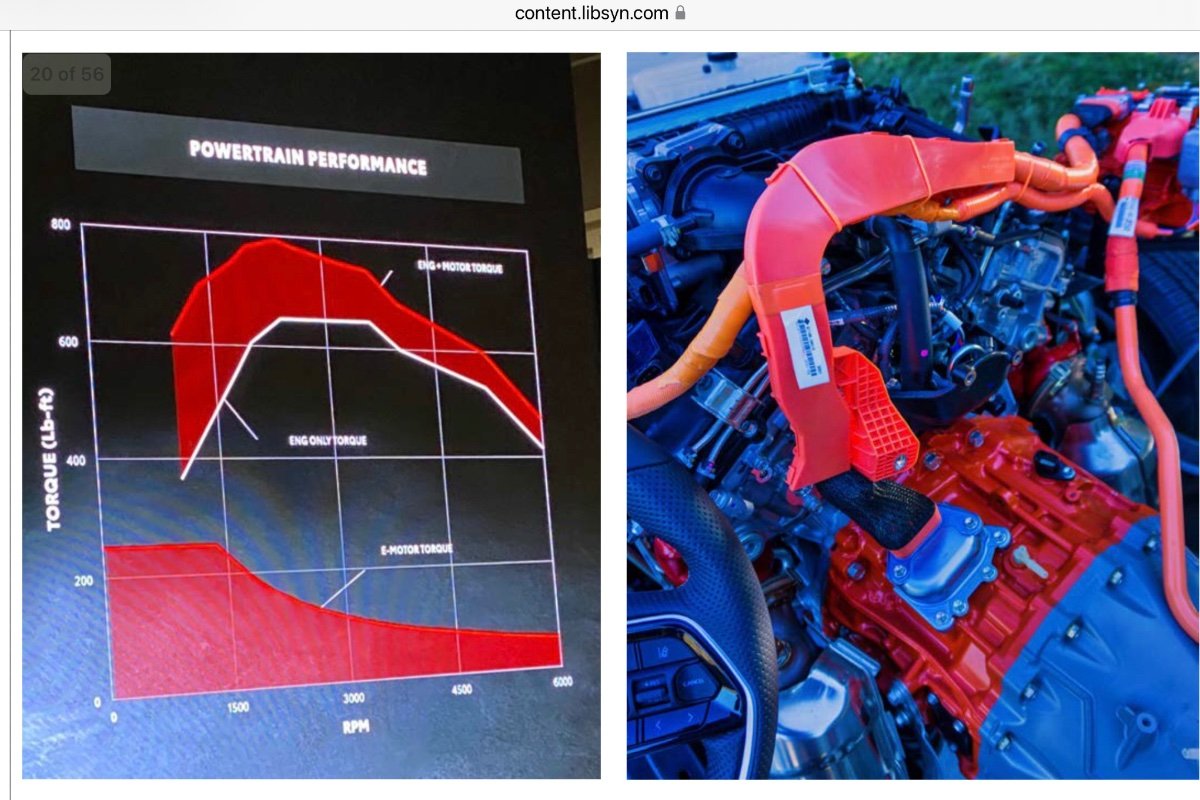
This is from the Toyota Cruisers and Trucks e-magazine.The author test drove three models with this engine, including towing a 5500 pound Airstream. I find the dyno graph to be enlightening, showing how the electric and engine power overlap. 600 ft lbs or torque at about 1300 rpm! 😳😳😳. That is about what my 2006 Ram 5.9 Cummins made at 1800. And the peak torque is 800? I actually find it hard to believe since they advertise 583 ft lbs. Scroll down to page 18. Toyota Cruisers and Trucks Winter 2022. Maybe those power figures are hypothetical, and they dial it way down for longevity…. John Davies Spokane WA
1 point
-
This very thing has happened to me twice over the years. A phone call or Service ticket results in receiving a new grease cap and center hub "plug" within a couple of days. However, I too have resorted to heavier duty grease caps and I also carry a couple of spares with me on the road. Ones like THESE are easier to seat while out on the road. Bill1 point
-
They likely make even more by our having to replace them if we don't follow your lead!1 point
-
@routlawit is not even that fast. Takes about an hour when fast charging to restore 200 miles of range. So for a non-towing base range battery like this car you are talking an hour and a half! You are not towing anything very far very fast with this.1 point
-
Our SR5 has a load capacity of 1400 pounds with a 6990 pound GVW. Noticed the heavier Hybrid has a higher GVW. Here's CAT scale results from a February camping trip towing Ollie with the 2022 Tundra. Posted additional information about the 2022 SR5 2WD Tundra here, these reports have additional information on comfort, MPG, and weights.1 point
-
John, Always though Toyota was spot on advertising specifications. More I look at the charts, the torque is not close to advertised specs.1 point
-
Maybe that chart is in the lab under a best case scenario. The suggested EPA MPG’s in the article also seem to be very optimistic. Mossey1 point
-
Mossey, thank you very much for the info. I'll try my luck with google and find the real ones. My bearing are the original when I picked it up.1 point
-
I don’t know much about bearings, but I do know that I would buy the same bearings you have gotten 60k miles out of. At 60k miles, they have passed my quality test no matter who made them or where they came from. Just saying, Mossey1 point
-
Totally agree. That was the part that bugged me the most as well. I agree this technology is not there yet for towing or even long road trips. It is interesting though with lots of things happening. Like the lithium-sulfur battery that some are projecting could do 900 miles. Early days still on all this, but exciting to see the innovation.1 point
-
Here is a follow-up on my investigation of Cilajet that may interest others. Well, I called the Cilajet company and received an email after speaking to the representative. This was included in her reply: "As mentioned, you ask about fiber glass. Cilajet can be applied to Fiber Glass and will provide great shine with long-lasting protection! Below you will find a list of authorized dealerships near you!" I was pleasantly surprised that one dealership listed was indeed near me, only twenty miles or so. (The next closest one was over 200 miles away.) So I called and spoke to the guy who does indeed apply a ceramic coating to fiber glass. He spent considerable time educating me on these types of products. First of all, he told me that he DOES NOT use Cilajet. He said it was "junk" and did not know why the company listed him as a dealer. He thought that Cilajet company was pushing an inferior product. He said that he uses a different product made in Japan. (I failed to take note of the name.) The most interesting part of this conversation was that he spent many minutes basically talking me out of using his service. According to him, all "ceramic" coatings were based on silicone dioxide. He explained that, once a gelcoat had even once oxidized (which mine had in the past), it was compromised in a way that the ceramic coating could not properly protect it, and the oxidation would continue under the coating. He said that he only recommends applying his product to gelcoats that have not experienced any oxidation. He said that the best I could do was to apply a synthetic polymer-type product, which will degrade rather quickly in the Arizona heat and that my Ollie will need frequent re-applications. I am unable to keep my Ollie in a temperature-controlled environment, so this is disappointing news, as I was hoping to find a product that would protect my trailer's gelcoat for longer than the products I have been using. (I hate doing this work myself, and I don't much like paying someone else to do it any better.) I was told that it is the heat, and not just the sun, that degrades the polymers, and that covering the unit would only partially protect the coating. I forgot the exact temperature he mentioned, but it was less than 100 degrees, I think, when the stuff "cooks," he said. While what he told me wasn't a pleasant surprise, I WAS impressed that he spent so much time dissuading me from using his own service. One thing he DID suggest was that, if Cilajet guarantees their product for a significant amount of time, it might be worth the cost to go with their product and service. So I just now called the company, located in California, and asked about a guarantee. This representative told me that she could not find any guarantee in her materials but would investigate and get back to me. We'll see. I would need to take my Ollie to the Phoenix area, a long and mostly unpleasant journey from my home in SE AZ to get the Cilajet coating. It DID seem a bit fishy that the rep could not immediately tell me if the product was guaranteed and for how long. I would think that a guarantee against oxidation for a number of years could be a great selling point; it might sell me. I might go with Rejex, as John Davies recommends, which is a polymer product. On the other hand, I just watched a video comparing different products on cars, and 303 Graphene Nano Spray Coating came out on top. On Amazon, it is advertised as offering over a year of protection that somehow "reduces the surface temperature of your vehicle." It has good reviews on Amazon, although it leaves a "slightly grippy" feel due to the graphene: https://www.amazon.com/303-Graphene-Nano-Spray-Coating/dp/B08K3N5QP5/ref=cm_cr_arp_d_product_top?ie=UTF81 point
-
Thanks. I just clicked on "read online," and read it all. I'm impressed.1 point
-
Yeah, I went through different configurations and panel sizes in order to make that happen. I didn't want the panels to hang over the back in case a stray rock flew up while underway but it could only go so far forward to allow fully opening the cover. In the morning and afternoon that angle can take the truck array from around 230 watts to 290 watts. Every little bit helps.😬 John1 point
-
Keep in mind how these parts are made, most likely an unskilled worker has ten seconds to shoot a measured amount of lube in one place, then the gearbox goes on to the next station. They could not spend the required time needed to hand pack it properly. And think how much money they save by not using enough grease. John Davies Spokane WA1 point
-
Thanks for the tutorial John. Very helpful. The jacks are one of my next maintenance projects this summer.1 point
-
I have a slightly different issue. I can log onto the Oliver web site using my main computer as well as my laptop. When I try to log on with my Samsung Galaxy S-10e antroid phone I get the following error message: "Something went wrong. Please try again" I have tried a number of times and continue to get this message. Any ideas on how to solve this issue would be appreciated?0 points


-
Recent Achievements
-


")


")


")
