Leaderboard


Popular Content
Showing content with the highest reputation on 12/27/2024 in Posts
-
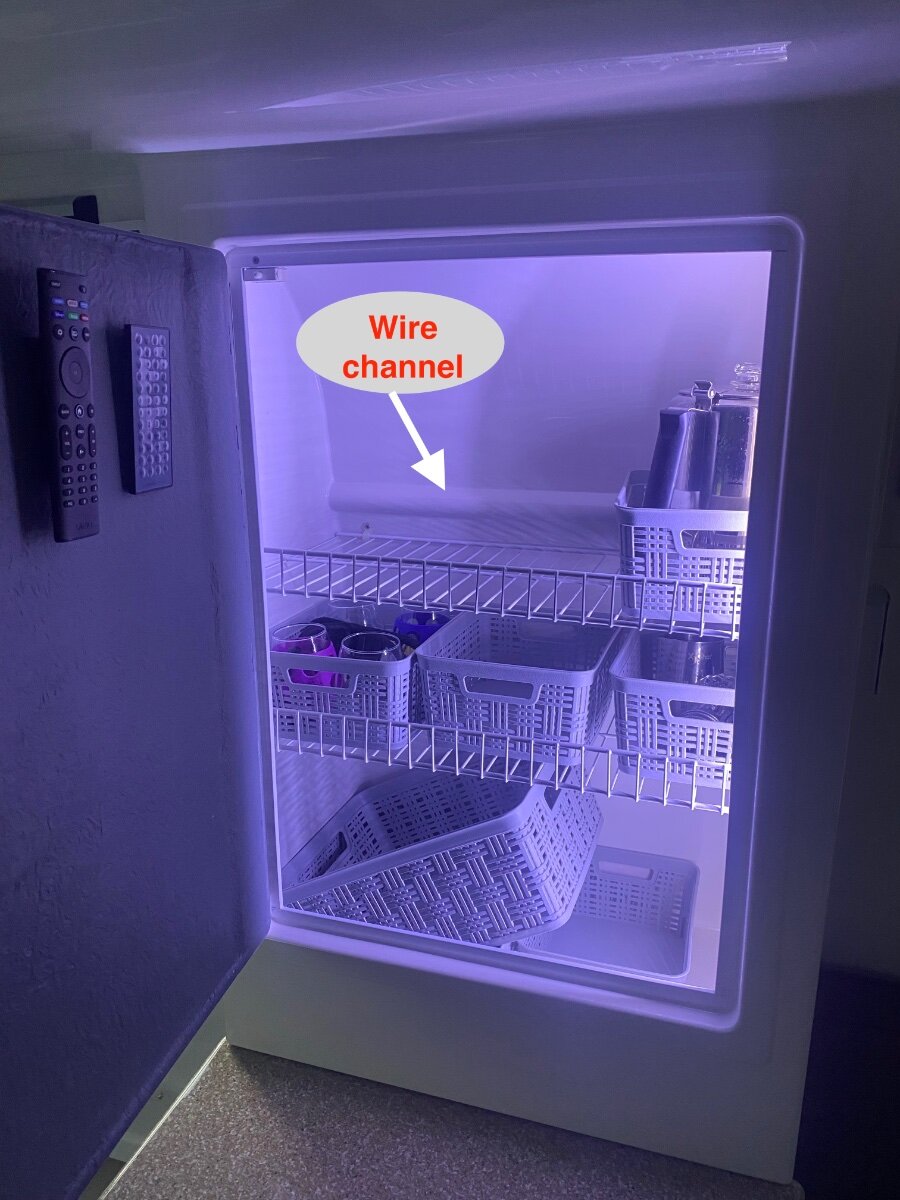
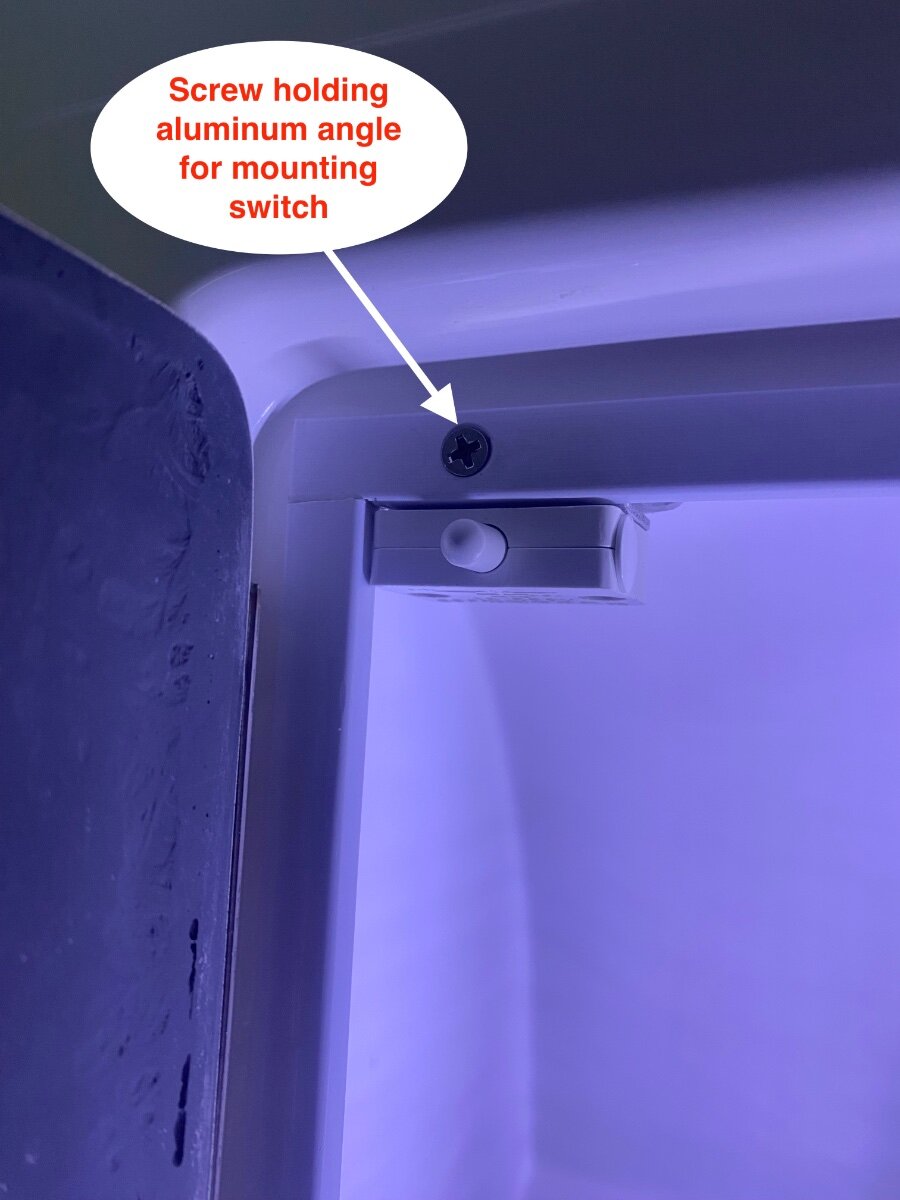
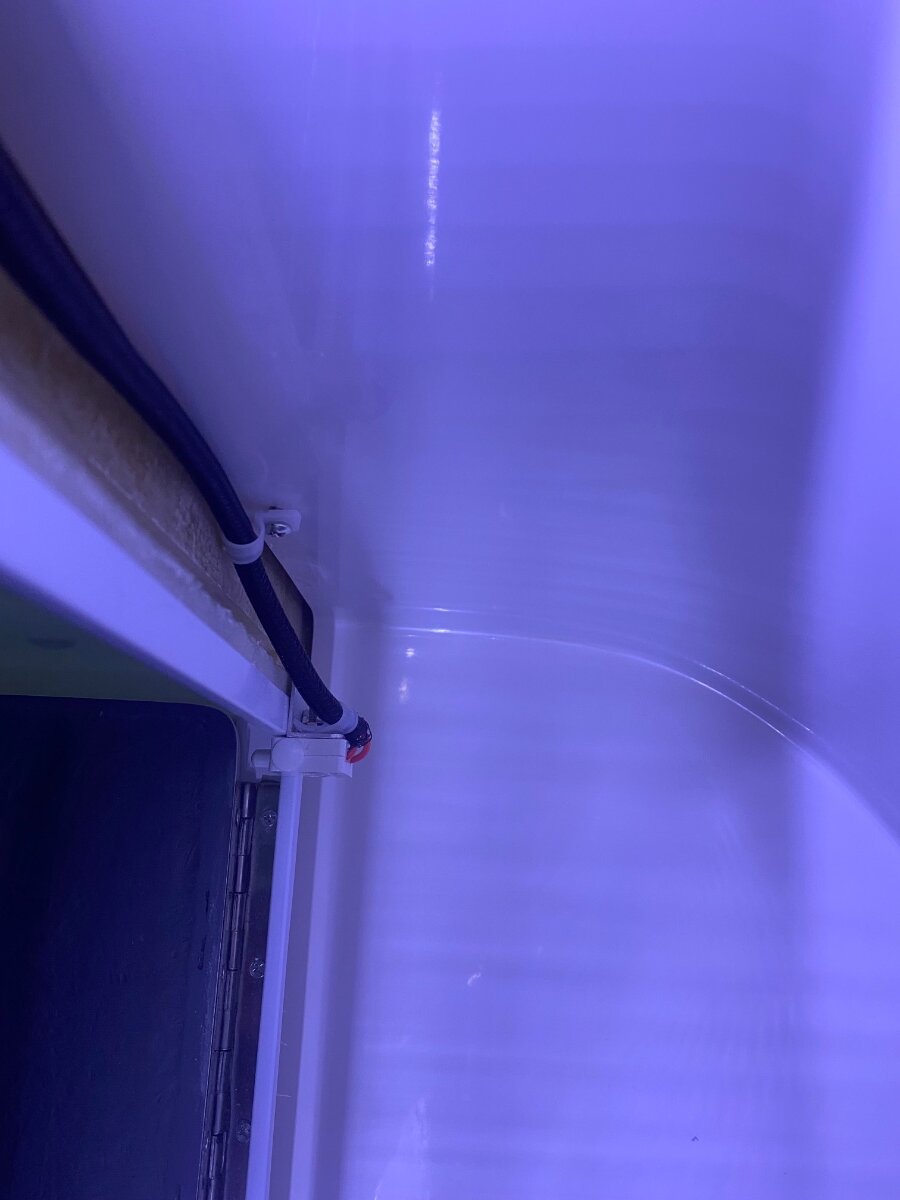
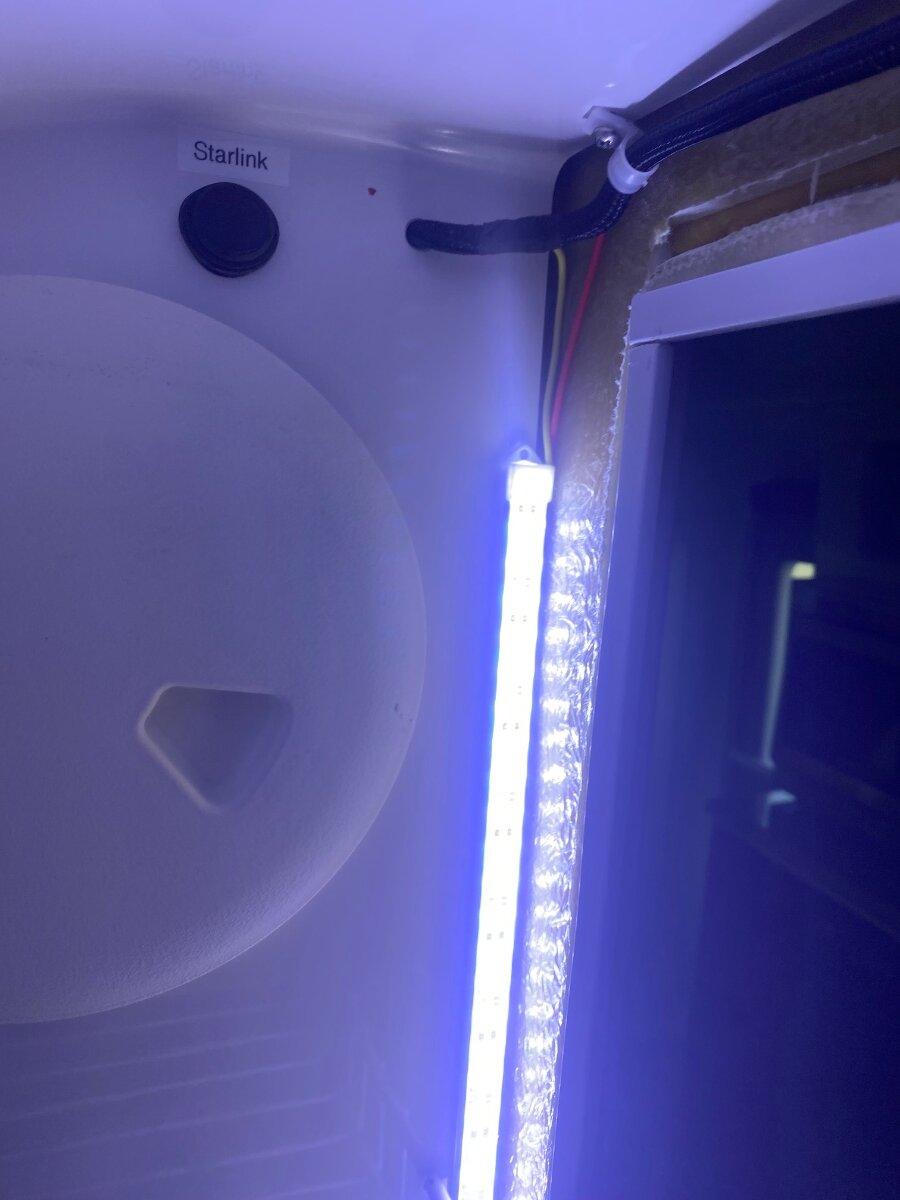
I’ve awoken wifey more than a few times; noisily groping around in the dark looking for a tasty midnight snack. So it occurred to me, why not install automatic pantry lights. . . ones that won’t light up the whole trailer? In a previous post, “Lighting the Abyss automatically,” I similarly installed closet lights that turn on when the door is opened and wifey loved it. So here was a perfect opportunity to use the leftover LEDs and switches from the Amazon 4-packs. This is an easy modification, except that there wasn’t a hot wire in that location. Well actually there is a hot wire for the radio, but I wanted one that’s on the master switch that shuts all the lights off at once. So I’ve done the hard part by figuring out how to get a hot wire from the master switch to the lights. I’m not allowed to make any visible holes or have exposed wiring, so I fished the wires from the rear street-side overhead cabinet - behind the pantry - and into the space behind the radio. There are wire channels in the overhead cabinets under the mats and Oliver conveniently moulded a wire channel in the back of the pantry to join them together. It’s easy to snake a fish-rod through the channel to pull a new hot and ground wire through. I’ve found that a $12 Amazon fiberglass sectional fish rod works great for fishing wires in the Oliver because you can add sections as you push it through. It’s a good idea to pull a string through with the wires incase there’s a need to add more wires in the future. Once the wires are fished though, they can be spliced to the under cabinet touch light. The lights wiring is covered by black duct tape under the mat, and there is enough room to tuck a butt splice in the slot. However, I personally preferred splicing into the lighting circuit in the attic where there is more room. This requires a clamp-on amp probe to find the lighting circuit while turning the lights on and off. Be mindful that the master switch wire is there too and it will also show current, and don’t ask me how I know! 1/2 sheet metal screws work well to attach the LED light bars, or use good double stick tape. There is an air gap between the inside and outside walls of the pantry, and screw holes can be drilled through the inside wall in the same way as Oliver did for the shelf mounts. Just be careful not to drill all the way through the outside layer. I put two LED bars end-to-end on the right side of the pantry where they can’t be seen. A piece of 1” aluminum angle was screwed to the upper left corner to mount the cabinet light switch, and the wires were sheathed and secured with cable clamps behind the door frame. Bon Appetit! Cheers, Geoff
 4 points
 -
Oscar and I joined a group of Casita friends across Route66 in 2010. At that time, I was maintaining a travel blog, and wrote about this slow roll, 6 week rolling rally. What an experience. You may see the blog entries for each leg below . . . Route 66 https://draft.blogger.com/blog/post/edit/3007645756726633026/1827028768887329538 https://draft.blogger.com/blog/post/edit/3007645756726633026/8557206823382872761 https://draft.blogger.com/blog/post/edit/3007645756726633026/2370223351315749809 https://draft.blogger.com/blog/post/edit/3007645756726633026/7528988860661103017 https://draft.blogger.com/blog/post/edit/3007645756726633026/3350449929685143274 https://draft.blogger.com/blog/post/edit/3007645756726633026/1792859826806688906 https://draft.blogger.com/blog/post/edit/3007645756726633026/5491990304103997971 https://draft.blogger.com/blog/post/edit/3007645756726633026/7005605717953597183 https://draft.blogger.com/blog/post/edit/3007645756726633026/2075147676490719768 https://draft.blogger.com/blog/post/edit/3007645756726633026/5599260935664730409 https://draft.blogger.com/blog/post/edit/3007645756726633026/8860680107278109509 https://draft.blogger.com/blog/post/edit/3007645756726633026/6688281851089301235 https://draft.blogger.com/blog/post/edit/3007645756726633026/6688281851089301235 https://draft.blogger.com/blog/post/edit/3007645756726633026/4051672574782160612 https://draft.blogger.com/blog/post/edit/3007645756726633026/8051115801610050117 https://draft.blogger.com/blog/post/edit/3007645756726633026/9599903652413439174 points
-
I don't think you can have over 225 of usable amp hours in a lead acid battery setup in an Elite II. It's usually about 200ah. Do you have 6v or 12v batteries.4 points
-
Your usable amp hours of 368 would be half that amount, 184ah. You should never run LA batteries below 50%. It will significantly shorten their life. Lithium's, on the other hand, can be take down to 0% (best practice is 10%) without harm. Lithium's biggest shortcoming is that you should not try to charge them if the ambient temp in the battery box is below 32 degrees F. My advice would be to buy the biggest LiFePO4 battery you can afford.3 points
-
I'm still working on getting that ad posted here on the Forum so we all can see it. Bill3 points
-
AGM (Absorbed Glass Mat) batteries are lead-acid based, like flooded batteries, so they should behave, and charge, the same as your existing batteries. AGMs will also have about the same expected service life as your Bright Way flooded batteries. But, they are sealed, and so require no periodic top-off. The challenge will be ensuring that the new AGMs are the same physical size and voltage as your existing Bright Ways, so they will fit in the battery tray and be "plug and play." And, if you plan to reuse your OEM battery cables, be sure to buy "dual terminal" AGMs, as that is the way your Bright Way battery bank is wired. I hope another Oliver owner has done this exact swap, and can provide more specific info, such as sizes, voltages and model numbers.3 points
-
That drive up thru Oatman was fun with Elite2 in tow back in 2022. Had one of the donkeys open up my truck door and left teeth marks on the handle while asking for snacks. If I get back out there I will take the motorcycle out of the truck and do it again. Thanks for the video.2 points
-
Call Blue Sky technical support, as other BS owners have reported that their support is excellent. Mossey2 points
-
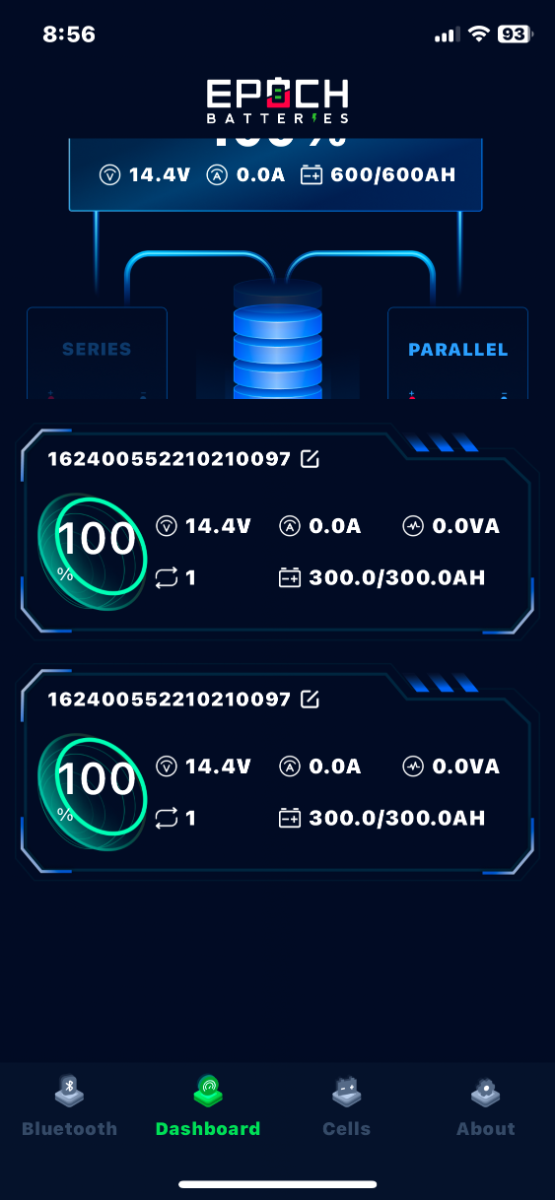
Thanks for the assistance and information. The Epoch batteries (2x300AH) are installed with a new PD charging module utilizing 2017 Oliver wiring (20 degrees and snow) The batteries are fully charged, sofar so good. Now if I could only get the Blue Sky programing menus to behave
2 points
-
There are only a few miles of route 66 through Kansas, but it's actually kind if pretty. https://www.nps.gov/articles/000/route-66-kansas-places.htm#:~:text=Despite its short length%2C the,%2C Riverton%2C and Baxter Springs.2 points
-
Geronimo, if the inverter is disconnected like that, then it wouldn't be drawing any "parasite" losses because that's how it gets its power. However, I can tell you that it’s a negligible value and a non-issue if it's turned off. It doesn't even register a value on the shunt because it's below the margin of error. My guess would be something less than 20 milliamps, which is a general stand-by current value for electronic devices. Although it’s true that old and new inverters are not efficient at inverting power, that efficiency should not be confused with stand by current when turned off, and they should always be turned off when not in use. Here are some calculated values for perspective: A 20 milliamp current would take over two years to completely drain the subject 390 amp battery. However, the afore mentioned 481 milliamp fuse panel current could drain it in 30 days. . . or less considering other battery losses and drawdown limits. That's a pretty powerful argument for doing nothing more than switching off the fuse panel breaker. For those still on the fence about installing a battery switch, I think it’s important to understand this perspective in order to make an informed decision of what option is best for them. Hey, thanks again for the kind words and Happy New Years! Geoff2 points
-
@ScubaRx gave you the basic math. So you currently have 50% of 368 for 184AH usable. The inexpensive LiTime 230 at 90% is 207AH. This would be a 12% increase in useful capacity. There should be room for two of these in the slide-out tray for future upgrade. Glad to help Gary. There are several members here who have installed LiTime batteries who could chime in on their performance. I went Epoch to achieve 2x 300AH for 600AH in the tray.2 points
-
No one told you! It's automatic! All you have to do is figure out a way of backing up to it.😁 Welcome to our world and its great to have you as a part of the family. Have a safe trip and if you've not already done so - give the Oliver University a through look. Bill1 point
-
Agree, their phone support is excellent.1 point
-
Thanks, Pete. I’ll wind my way through your blog posts tomorrow! Mike1 point
-
I think I will, Thanks.1 point
-
Hey Gary, money spent on 4 AGM batteries today, you really should just buy one LiTime 260AH for about $470. You can save money and over 100 LBS and remove all those short battery-to-battery cables for the same usable AHs! This is a minor mod compared to work you did in adding your Xantrex inverter. Read through this post. At the bottom @Hokieman mentions a $20 pendant to upgrade your OEM charger for LiFePO4 charging.1 point
-
Best wishes for a happy holiday season to the entire Oliver community… Best group ever!1 point
-
It was lots of fun last night when a big group of us were watching TV. An ad came on for the Ford F-150, showing it towing an Airstream on some beautiful coastal road. Of course I had to pipe in with "That's not such a great trailer. Ours is better!" (And our LE2 was sitting right outside.) Then the next ad, back to back, was for Oliver. Wow. We all hollered. Very nice ad.1 point
-
That’s one of out “On the list” We have done the southwest sections on our trip with our Happier Camper to California. Looking at doing the section from Oklahoma to Chicago next.1 point
-
We love that park. Camped there with our Happier Camper but want to go back.1 point
-
I sent you a PM if you want to discuss. Coming from Tyler you could start by going up to Lake Thunderbird State Park just before OK City, then head on the highway west. One stop in Oklahoma that's a nice museum is the Stafford Air & Space Museum. (Also a harnest host site). If you like horses, Amarillo has the American Quarter Horse Museum along side I40. They have parking outside large enough for trailers and many folks have horse trailers in tow. The midway point for the route is here - 301 I-40, Adrian, TX 79001 You can pull off the highway before and then rejoin I40 to continue onward. Just before the town of Holbrook on I40 is the Petrified National Park. Location: 35.06768055675693, -109.77800719186772 Worth a 1/2 or Full day visit and perfectly doable with the Trailer in Tow. We've stayed at Holbrook KOA which is just after the NP and found them very friendly and a good stopping point for an evening. Next up is Winslow , and very near to Winslow is Homolovi State Park. Depending on how far you want to drive you can go as short as 150 miles...and see a lot...or 300 and see major sites. Contact me on PM if you want to talk through. Merry Christmas. Craig
1 point
-
Seeing the ad the first time was fun because we are used to seeing trucks in ads pulling Airstreams. When the trailer pulled into view we realized it was an Oliver and an Oliver ad not a truck ad. The voice over seemed like a familiar voice also.1 point
-
I'll send a note to Jason W and ask if he has a way of putting that "ad" here on the Forum for all of us to see. Bill1 point
-
If you haven’t already done so, I recommend downloading the FXC Xantrex Control app. It makes it much easier than using the remote display to check or change the settings.1 point


-
Recent Achievements
-


")


")


")


