Leaderboard




Popular Content
Showing content with the highest reputation on 05/26/2026 in Posts
-
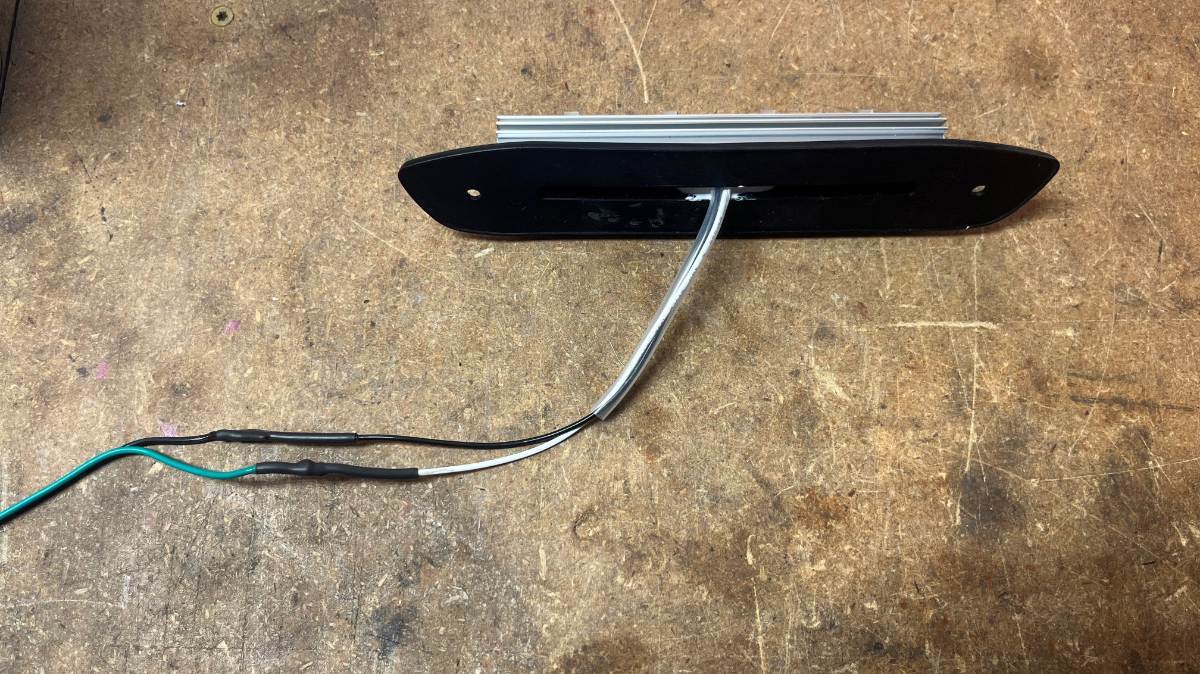
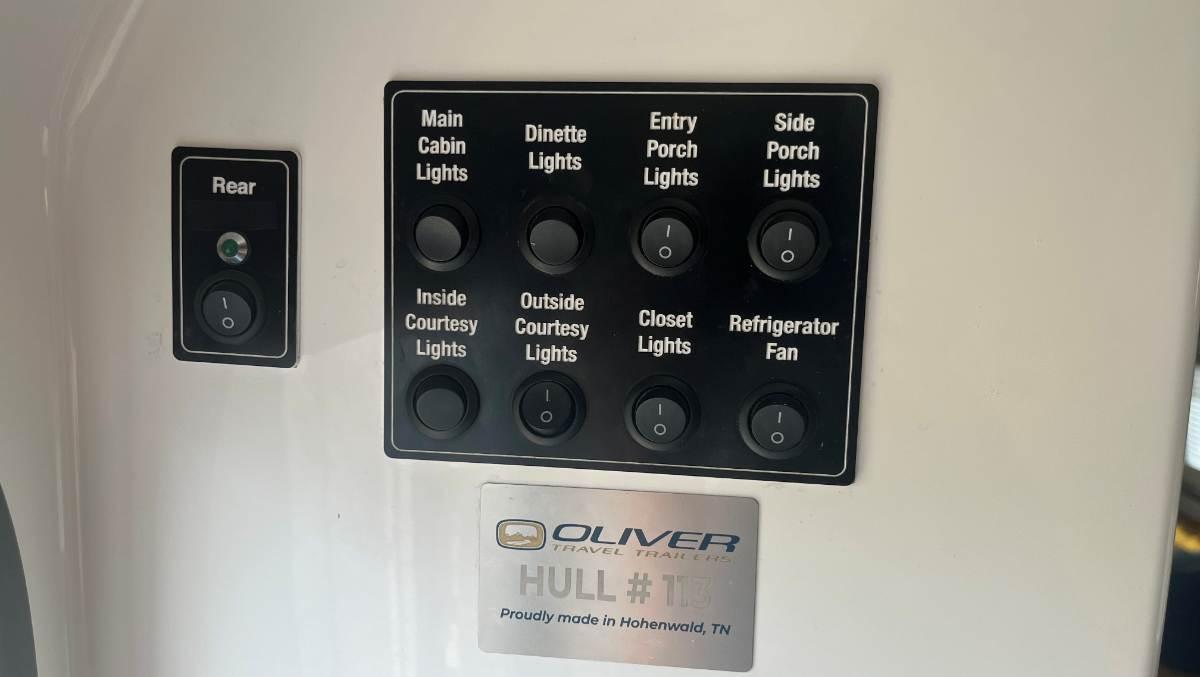
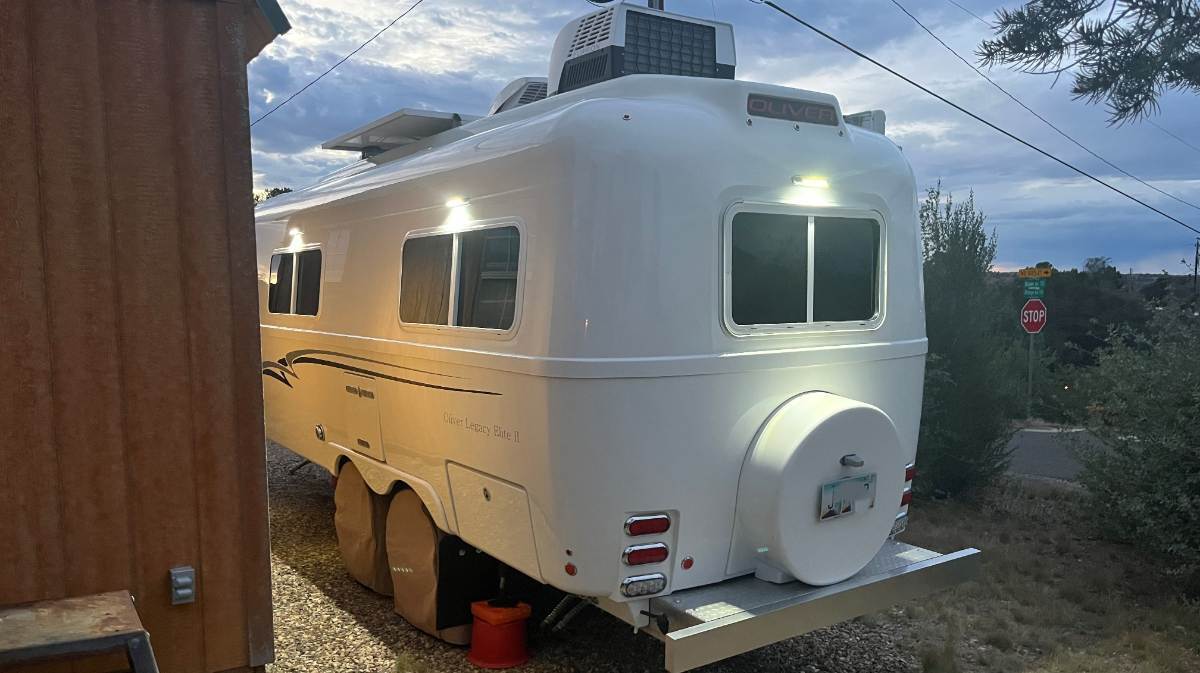
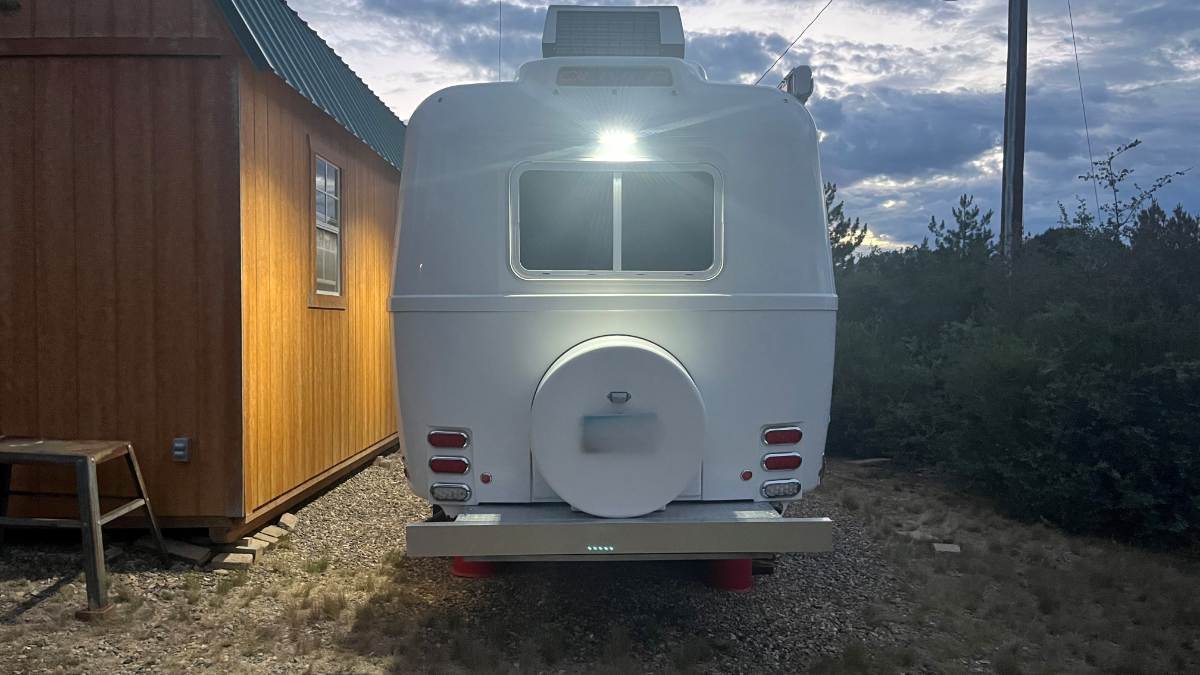
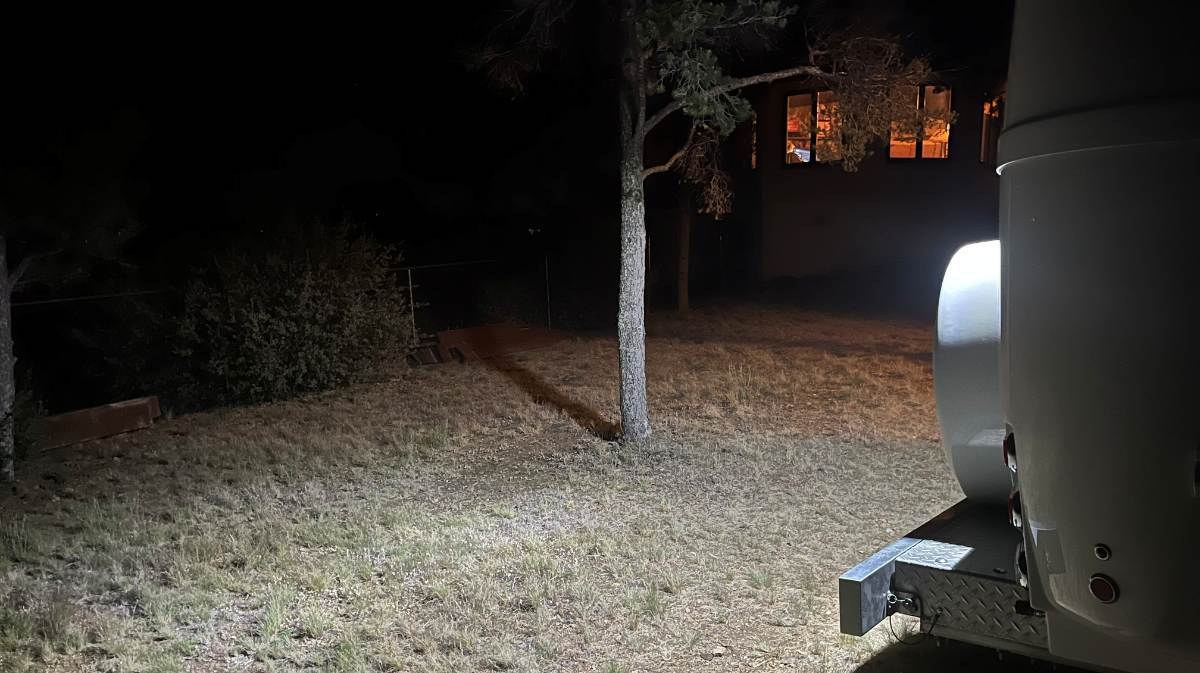
The Oliver Porch Lights are bright for a dark campsite, so we rarely use them. But if you need to light up the area they work great. I've often wondered, why isn't there lighting on the front and rear of the Oliver? I asked a year ago about replacement lights for our OEM Porch Lights and just purchased some recently. OTT should install these lights in all four directions. I would have done one up front too, but running wire would be difficult. I got something else for up front, more on that later. https://itcshopnow.com/products/assurance-exterior-flood-light?variant=50392962007319 I carefully measured the four Porch Lights OTT installed, as the distance from hull belly line, which btw holds a tape measure nicely, up to centerline of the Porch Light at the mounting screws. Turns out they were all installed at different heights +/- 3/4". As a special bonus, this light is 1/4" off from front to the rear mounting screws. My new Rear Porch Light, I promise is the straightest of the bunch! 🤣 It's not easy to choose the best spot to drill into the exterior of your hull, this one especially. I cut away some of the white insulation in the back of the attic. I used a 2-ft piece of metal fish-tape with the ends curled back, running it down the inside of the back exterior hull. Repeatedly, it measured 12" form the bottom of the OLIVER taillight to where the fish-tape hit the top of the rear window frame. It measured 12" so I figured I should go 10" max. Looking from the outside, there is a flat fiberglass frame around the rear window. Above that, the top rear is convex. I had to find the best spot so that the approx. 8" x 1 1/2" light would sit flat in both directions. If not water would get behind it. I drilled a 1/4" hole centered to the window, so the light is just above the flat frame area of the rear window. I soldered and heat shrink extra length of wire to the light. If they only attached 18" of wire! Offset the splices so that they would fit nicely into the drilled hole. It wasn't an easy pull but a few ins and outs and the light pulled flush (would be easier with 2 people, one in one out). I eyeballed the light level to the window frame. I wanted to VHB the light housing vs. drilling two mounting holes but the design of the light would not allow for it. They do not include hardware. Found the stoutest 1" course thread screws that would fit the openings and I drilled 6/94" holes after marking the centers. Wiring? I wanted to add the new rear light to the Side Porch Lights (streetside). However, I could not find the switch leg in the back corner of the attic and I did not want to remove all the stuff out of the kitchen cabinets. But that would be the right way to do it. Cabinets empty, you can easily run wiring up to the main switch panel. Our hull had a rear camera and a separate switch to power it. I removed the camera a year ago, so I'm using this separate switch with existing wiring. I copied something Geoff did, where he used a Sharpie to black out the word "Awning." Mine has a thin cut piece of black tape over the word "Camera" so it just reads "Rear" now! 🤣 I had to wait patiently for dusk and dark tonight! The hull looks great with the new Rear Porch Light to compliment the side lights. And finally, it alone lights up the yard! 😎
 8 points
 -
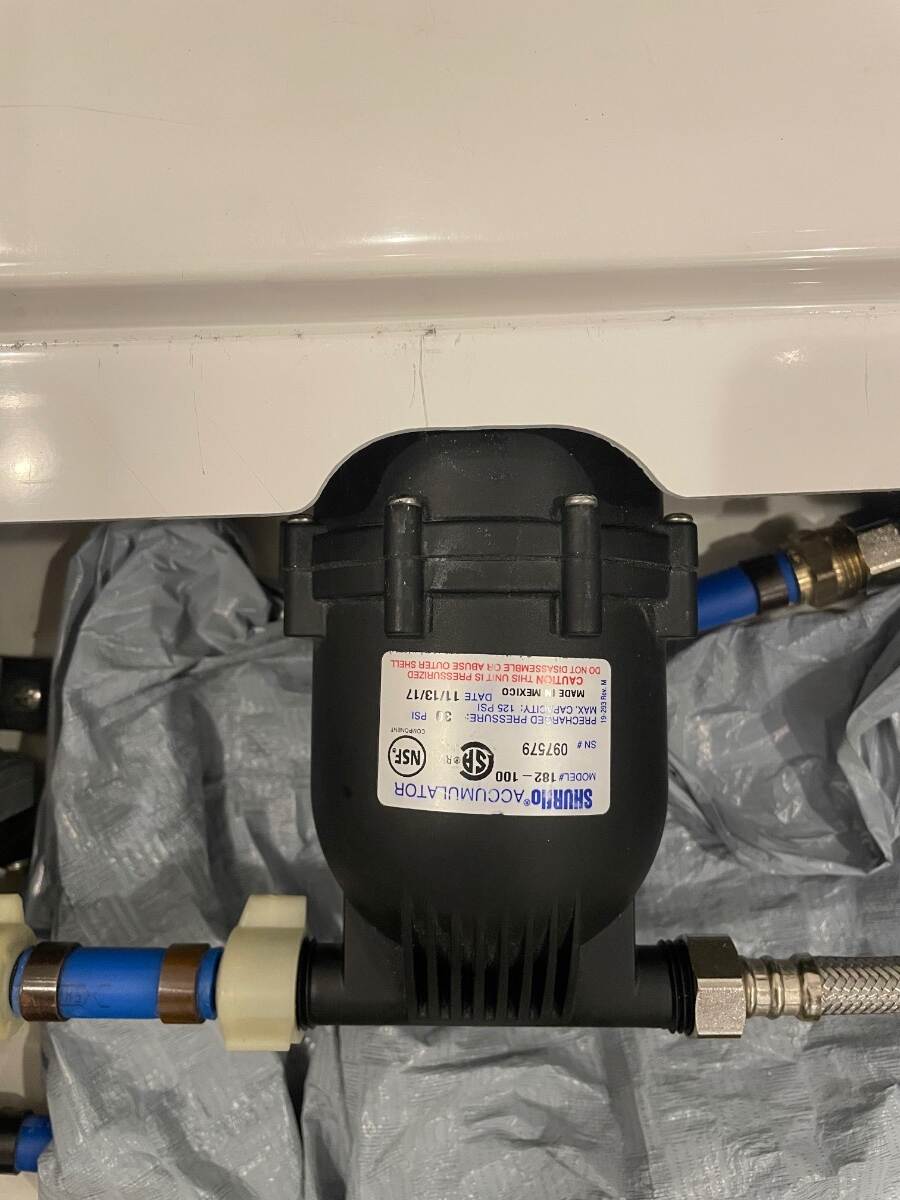
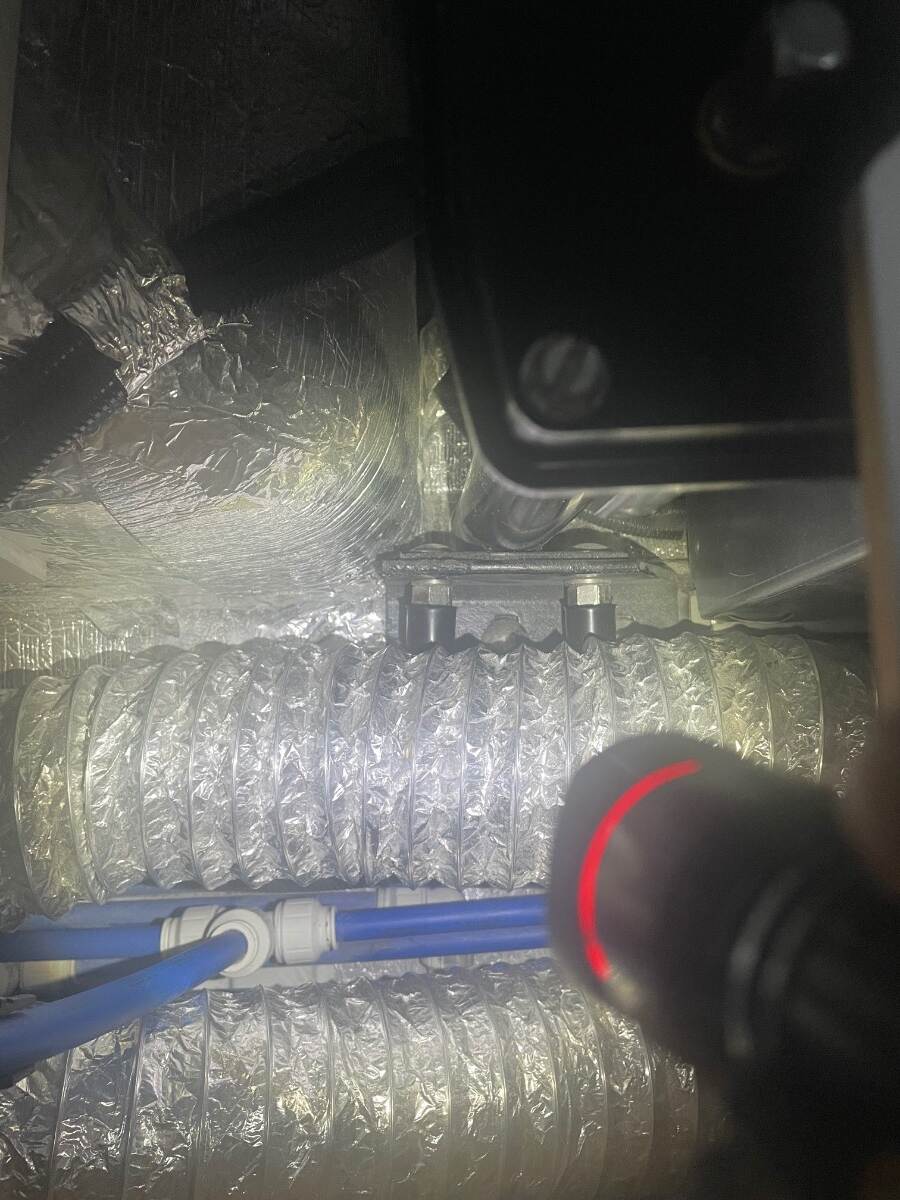
Finally got around to fixing the problems that I identified in my original post almost 2 years ago. I used a small drum sander on a cordless drill motor to make a cutout for the part of the accumulator that was rubbing. This also quieted a vibration heard during pump operation While I had the drum sander out I enlarged the cutouts above both rear jack manual operation studs so that I can now get the manual crank on them if needed I placed a couple of spare bolt protectors on some 1/2 inch nuts and threaded them on the exposed bolt ends where they contacted the heater duct I know that these are really simple fixes but they might help someone that doesn’t know that the problems even exist. Bill
5 points
-
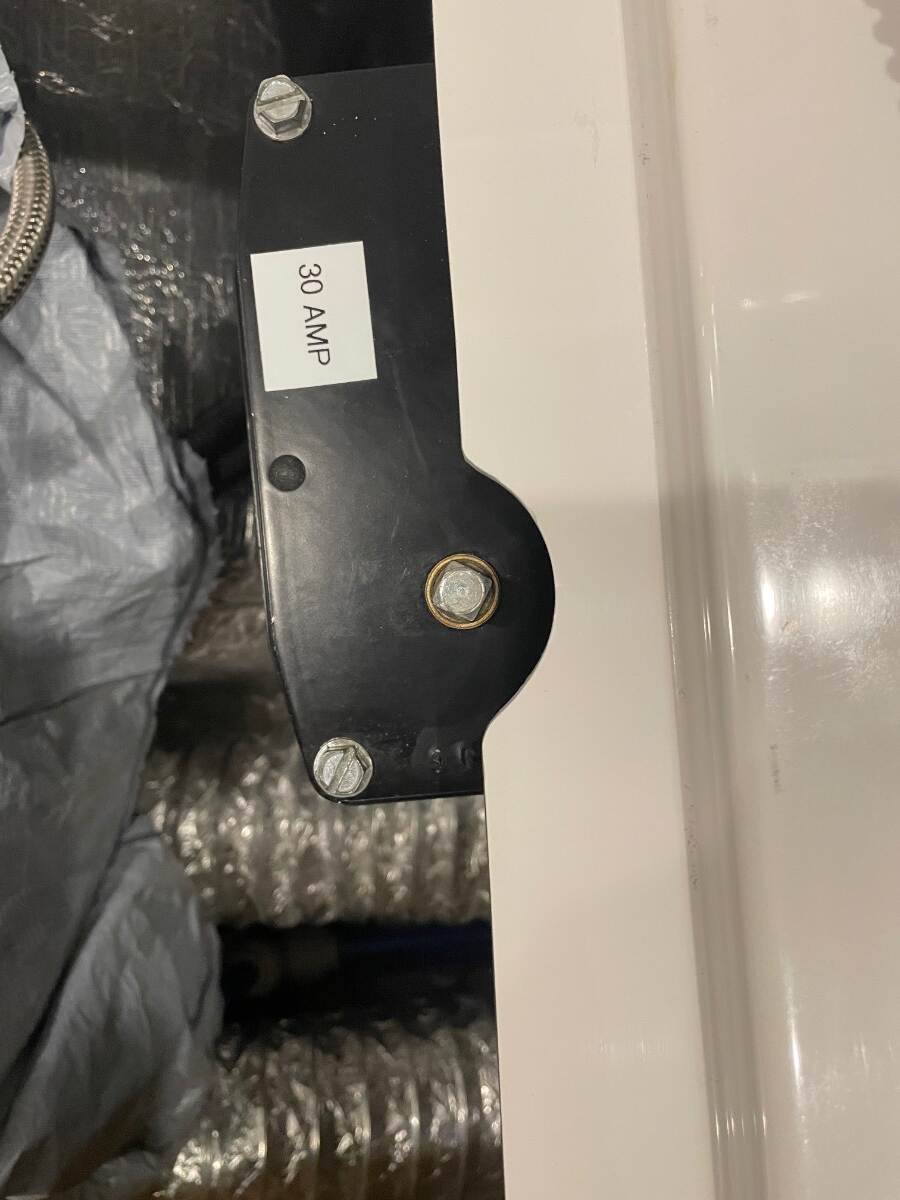
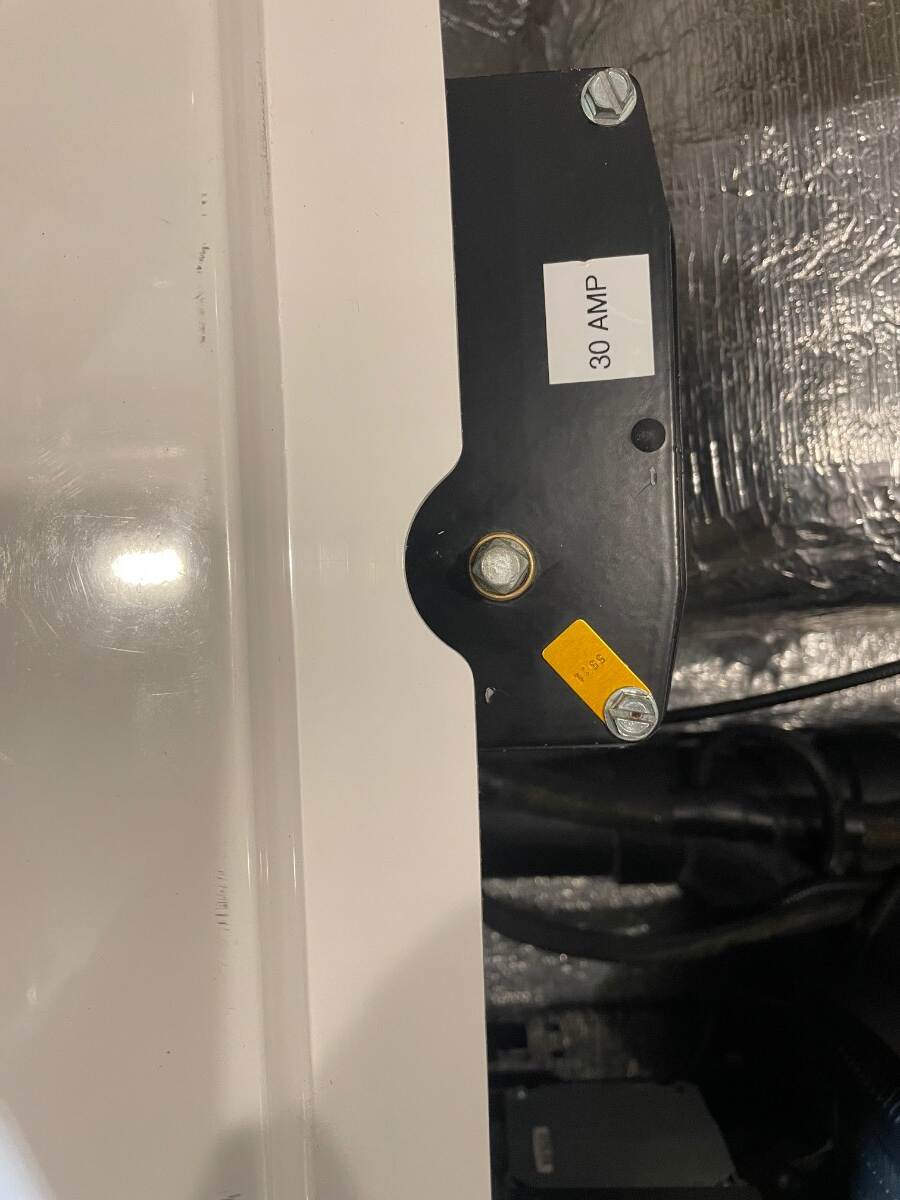
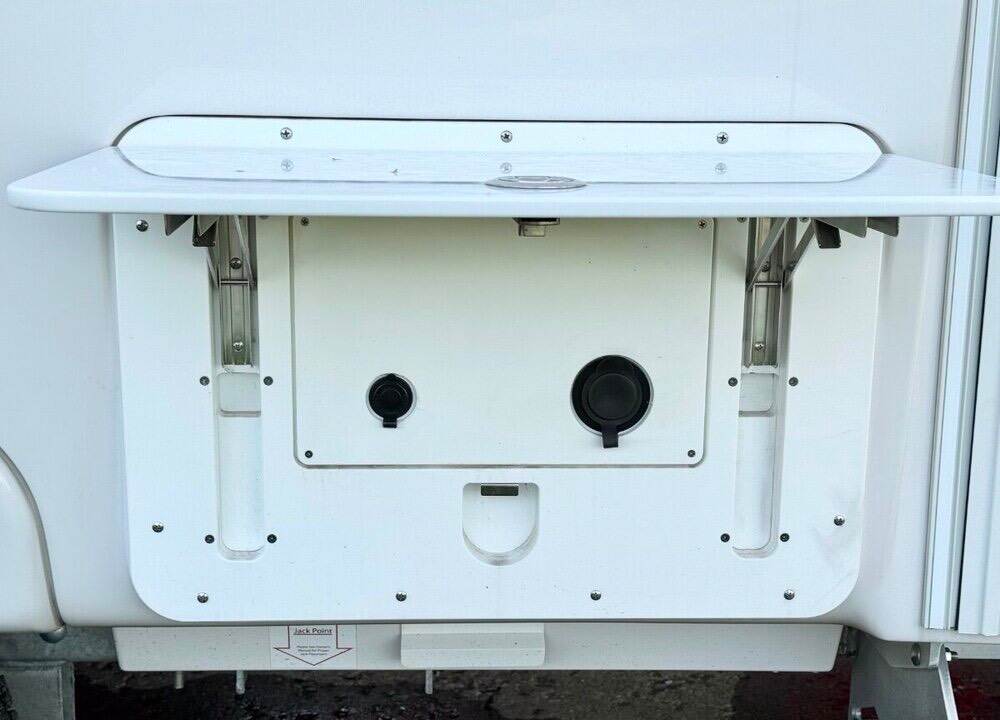
My 2023 has the same outlet, and I think Tom is correct in that it is for AC power to the fridge. I used that outlet with a 12 ga extension cord to supply power to my exterior AC outlet under the folding table. I tapped into the fridge's 12V DC power for the cigarette outlet.
4 points
-
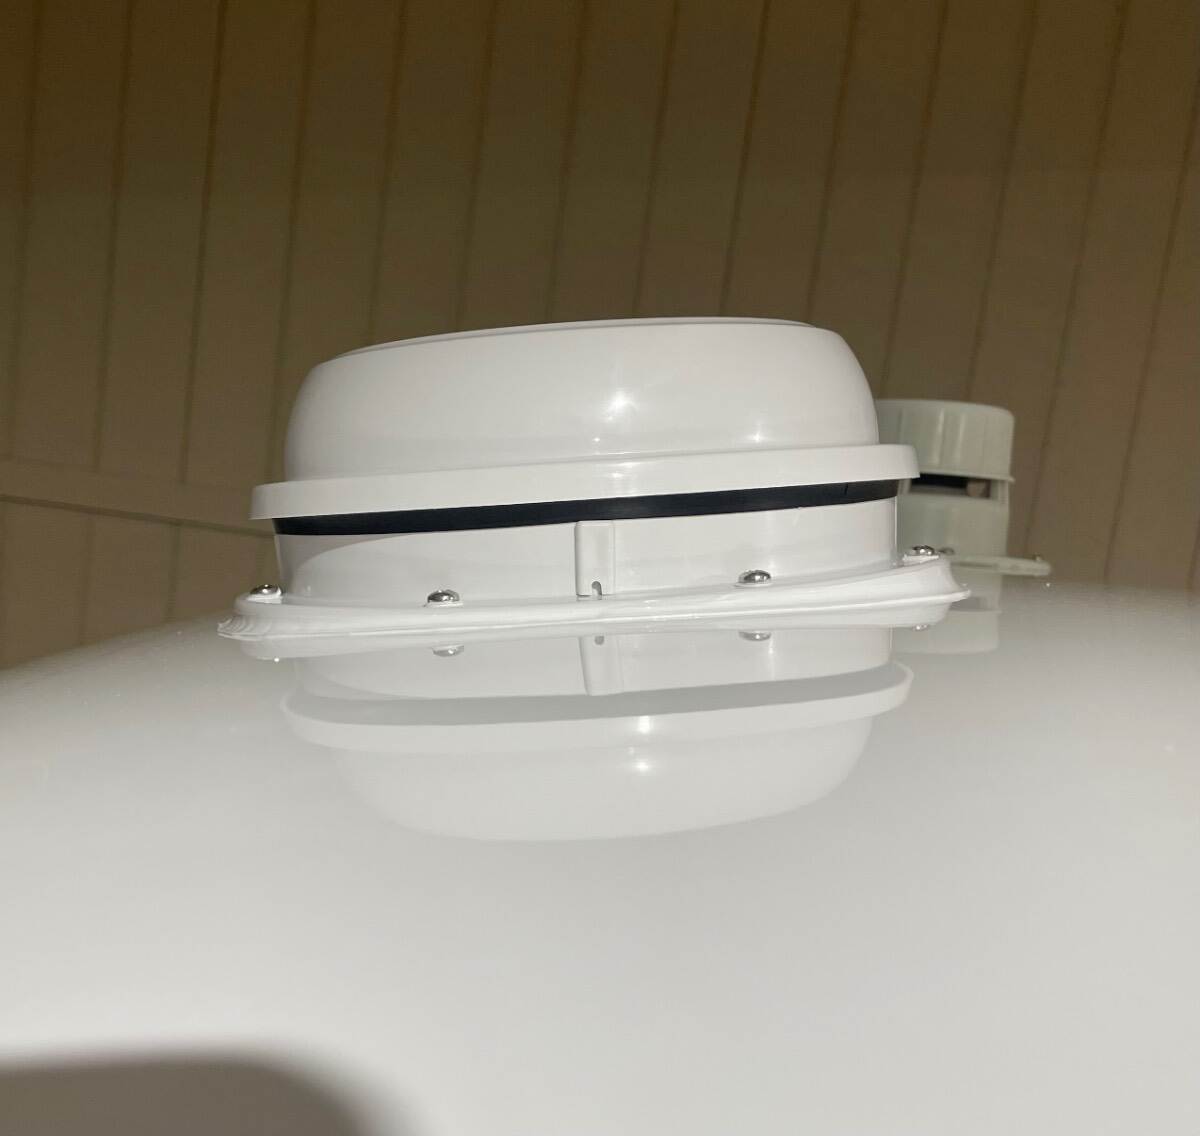
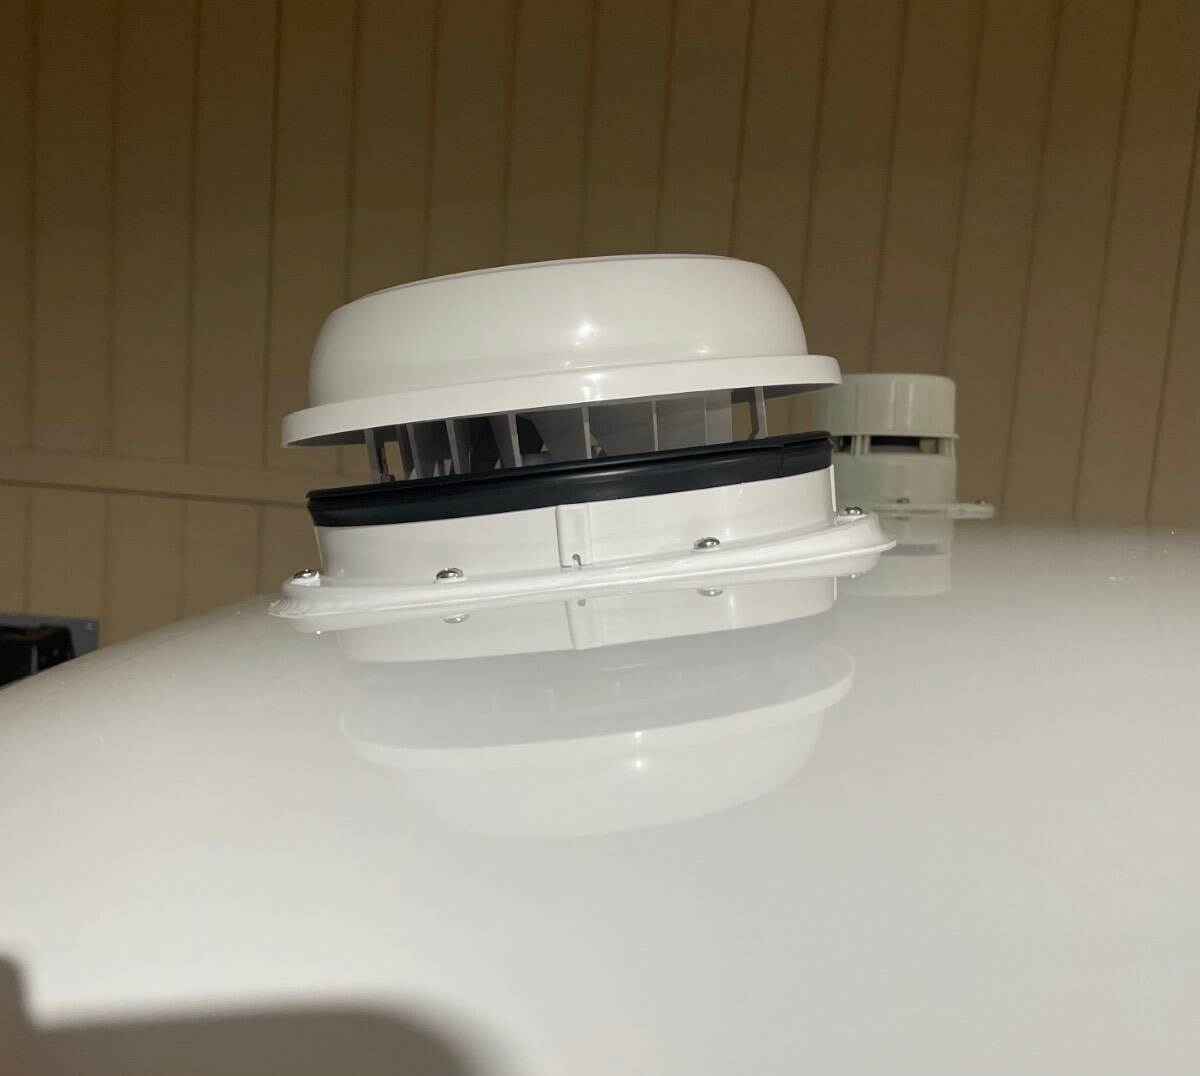
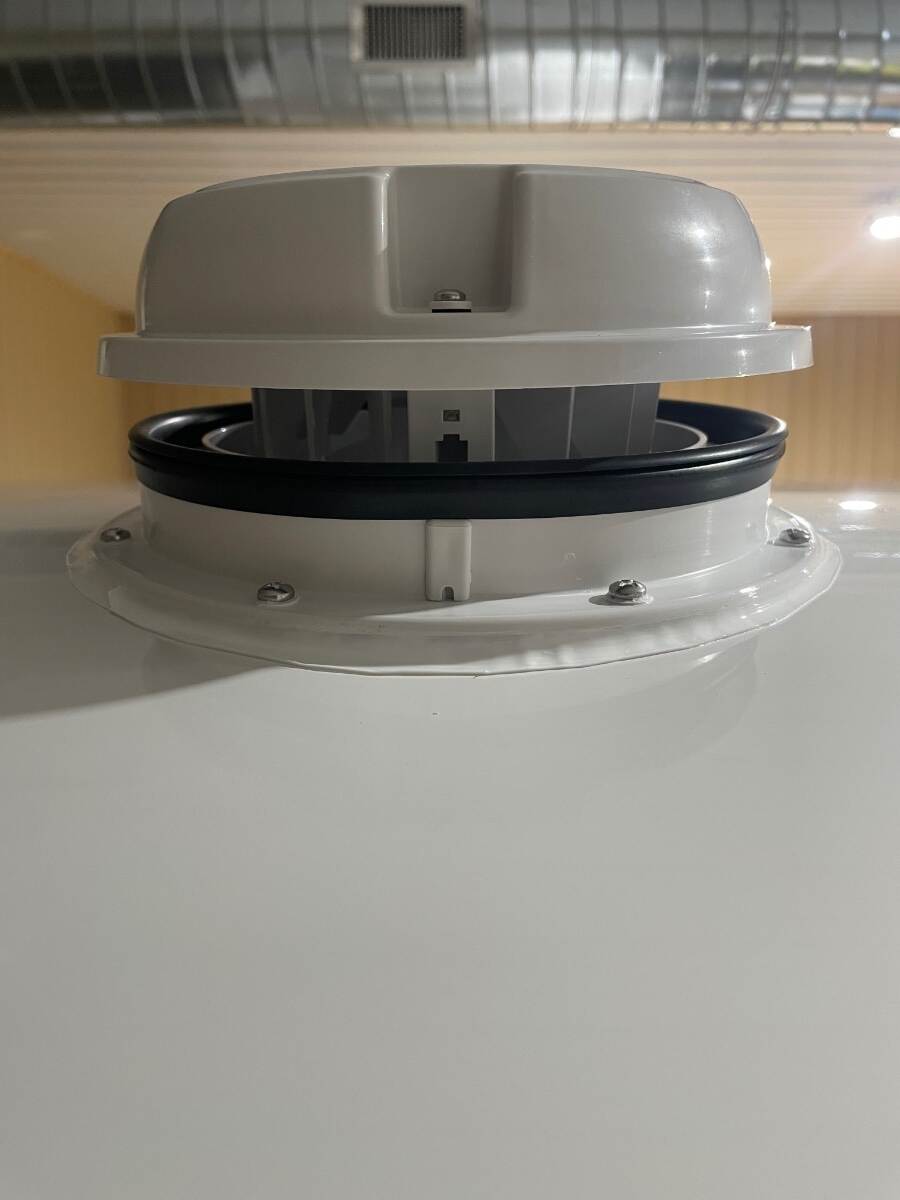
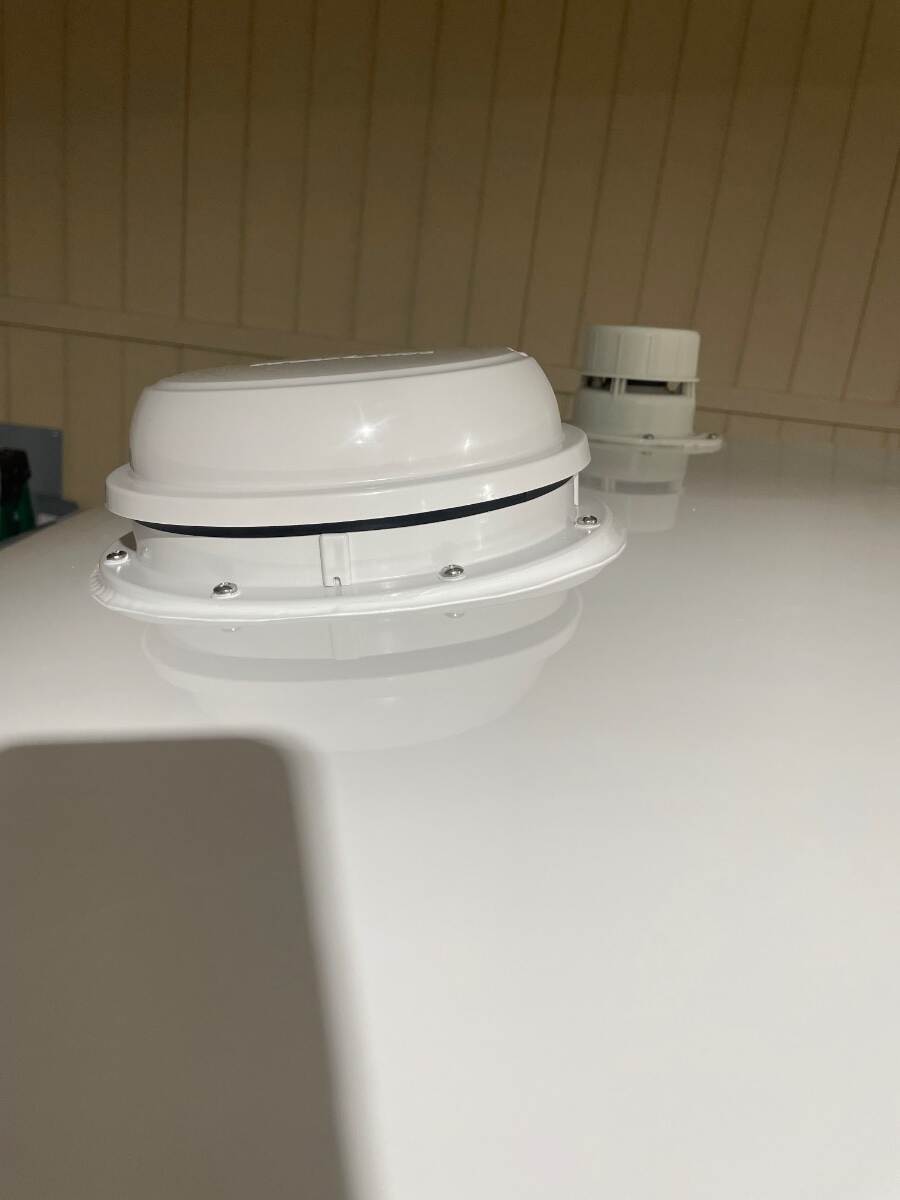
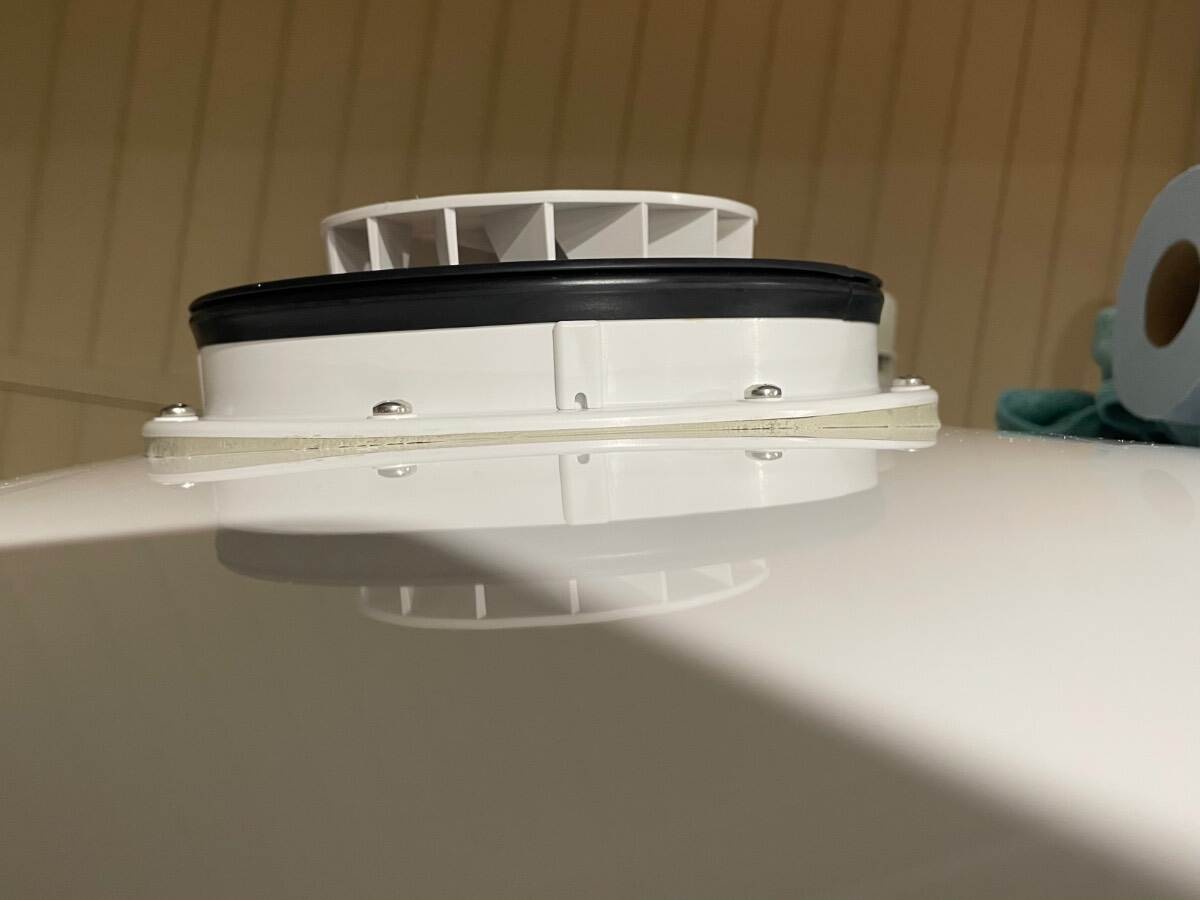
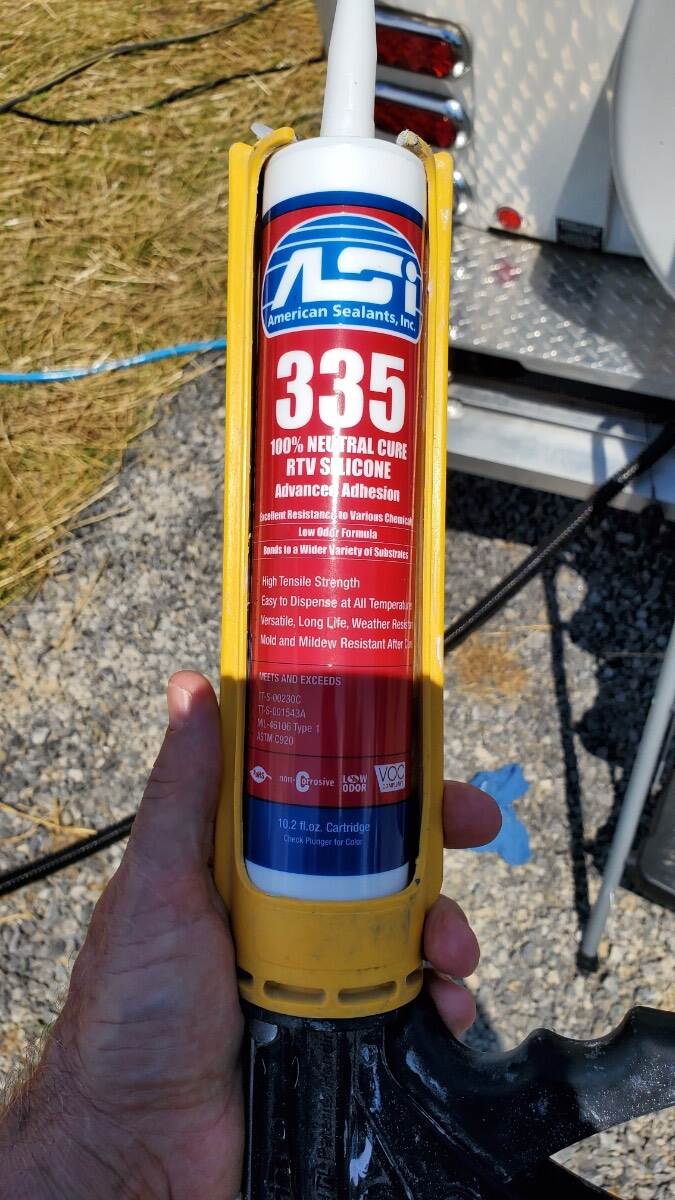
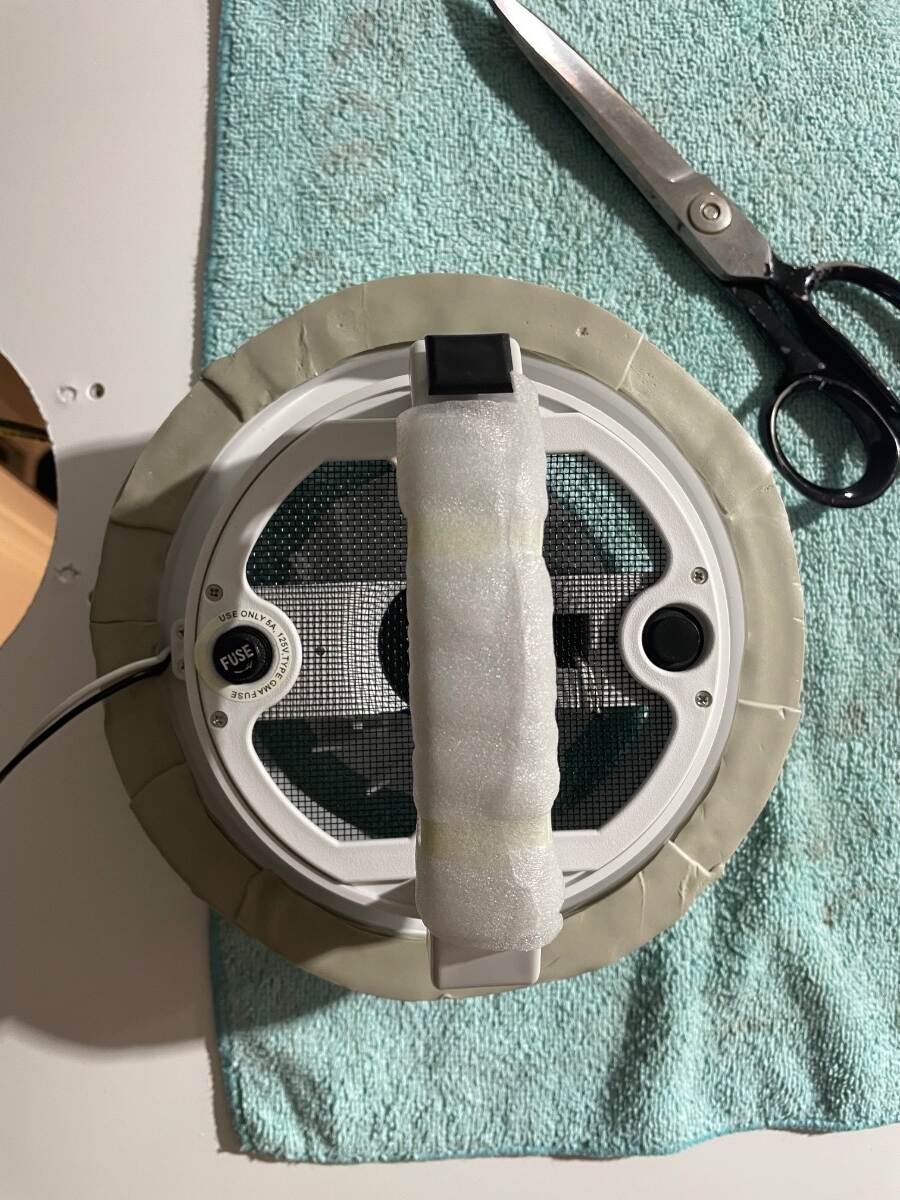
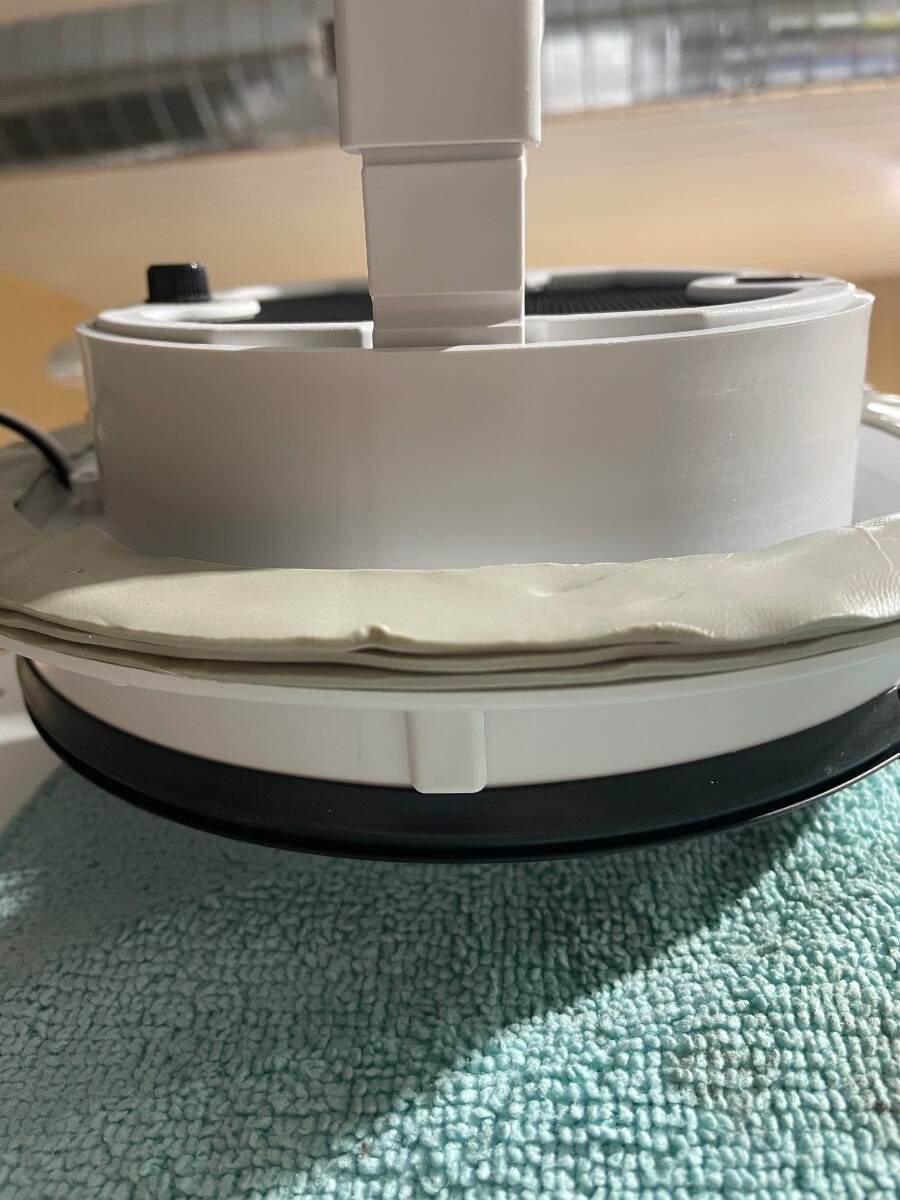
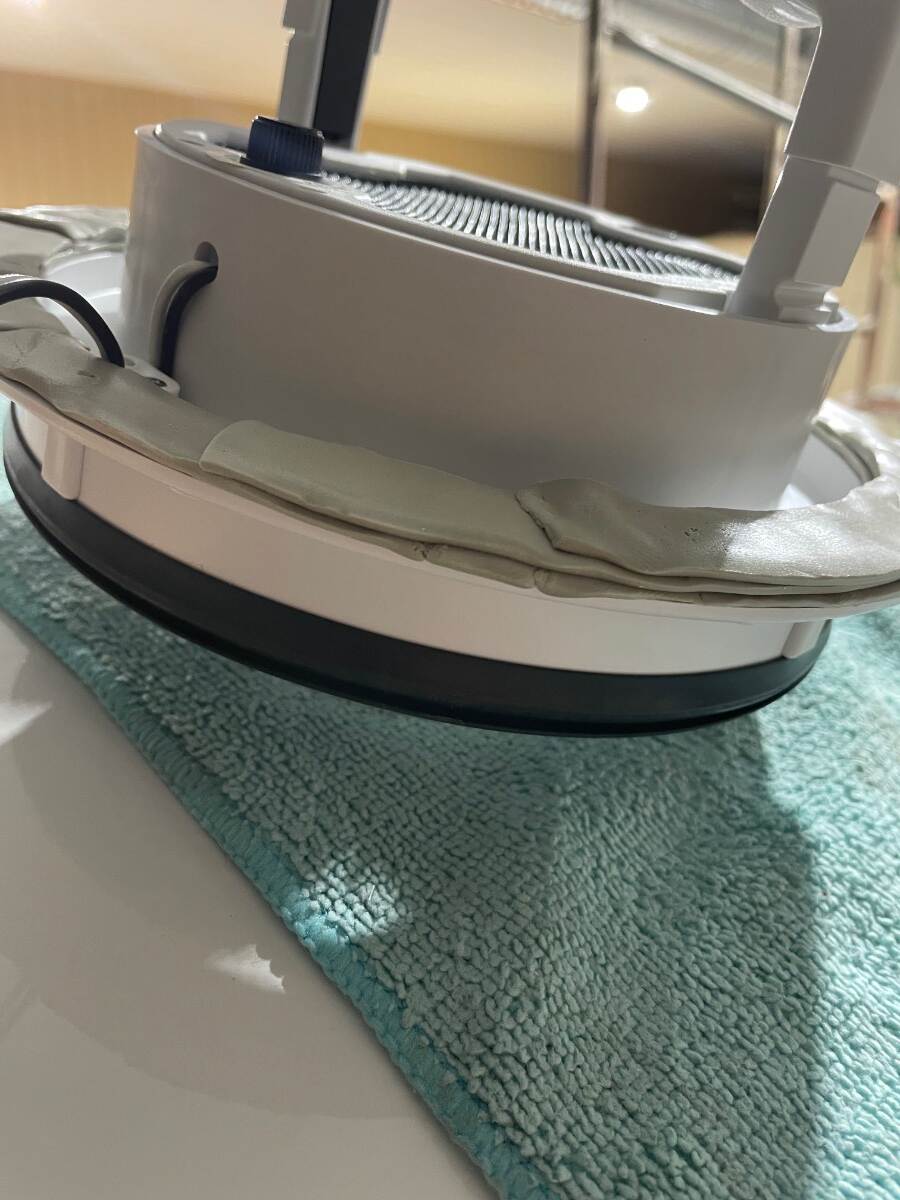
With the inside work complete I went back to the roof area, trimmed the oozed butyl, wiped with isopropyl alcohol again, and taped off the area to be caulked leaving about a quarter inch gap from the edge of the flange in the front and rear and about an 1/8 inch gap on the sides where the caulk would be the shortest. I applied the caulk 3 times, wiping it off the first two times, reapplying the tape and recaulking each time because I didn’t like the way it looked. I finally left it alone because I decided that if I kept messing with it I would keep screwing it up and it was close to supper time and I was starting to get hungry. This picture shows the fan after the oozed butyl was trimmed back. It shows the built-up butyl in front of and behind the fan to keep the flange straight. This next picture is after the ASI 335 was applied. Notice that the black seal is straight, not bowed down at the front and rear due to having the flange pulled down to touch the roof. The black seal must remain straight so that the cover will seal properly when closed. I applied the ASI 335 to the screws but didn’t like the way they looked so I wiped it off. I had applied ASI 335 to the screw holes and the screws were twisted in through up to 3 layers of butyl so I figured they were sealed well enough. The caulk job wasn’t perfect but it looks good from the ground. The ripples are from my hand shaking after going through the process 3 times before finally accepting that it wasn’t going to be perfect. I actually like the stepped edge of the caulk versus a feathered edge because I think the feathered edge of caulk doesn’t hold up well after repeated washing, drying, and waxing. We’ve pulled the trailer through wind and rain for 1350 miles and it has remained closed and hasn’t leaked. I can’t completely say that it is quieter than the original Ventline fan but it does not have the rattle that it did. ASI 0240 https://meridianadhesives.com/products/asi-0240/ ASI 335 https://meridianadhesives.com/products/?product_search=335 It looks like ASI has two versions of the 335. The stuff I used looked like this Good luck on your installation. Bill
3 points
-
Interesting, but not interested. Oliver is simple, well designed for the space available. It is not full of gadgetry. KISS (Keep It Simple Stupid). I think I'm showing my age. SkyDream is just the opposite. The only thing they have in Common is they are made out of Fiberglass. Probably half the places I camp the deck would useless due to thing being in the way. Also in the Pacific North West (PNW) I would worry about leaks. Although when I saw the newest walk through video on the new LEII, I had reservations over the awning with the solar panels on top. It is great having that much extra charging power. I don't think the longevity of these flexible panels would come near the useful life span of the solid mounted roof top panels. Replacing the awning I'm sure would be very expensive. I have trouble getting the regular awning clean and dry in the PNW due to the 7-8 months of rain. When I do have the opportunity to roll out awning and clean and let it dry completely the Oliver and Awning ends up blocking the whole driveway. So it has to be a planned project. I do pack a small Stihl blower and a ladder so I try to blow off the pine needle/leaves/twigs off of the top before finally rolling it up for travel.3 points
-
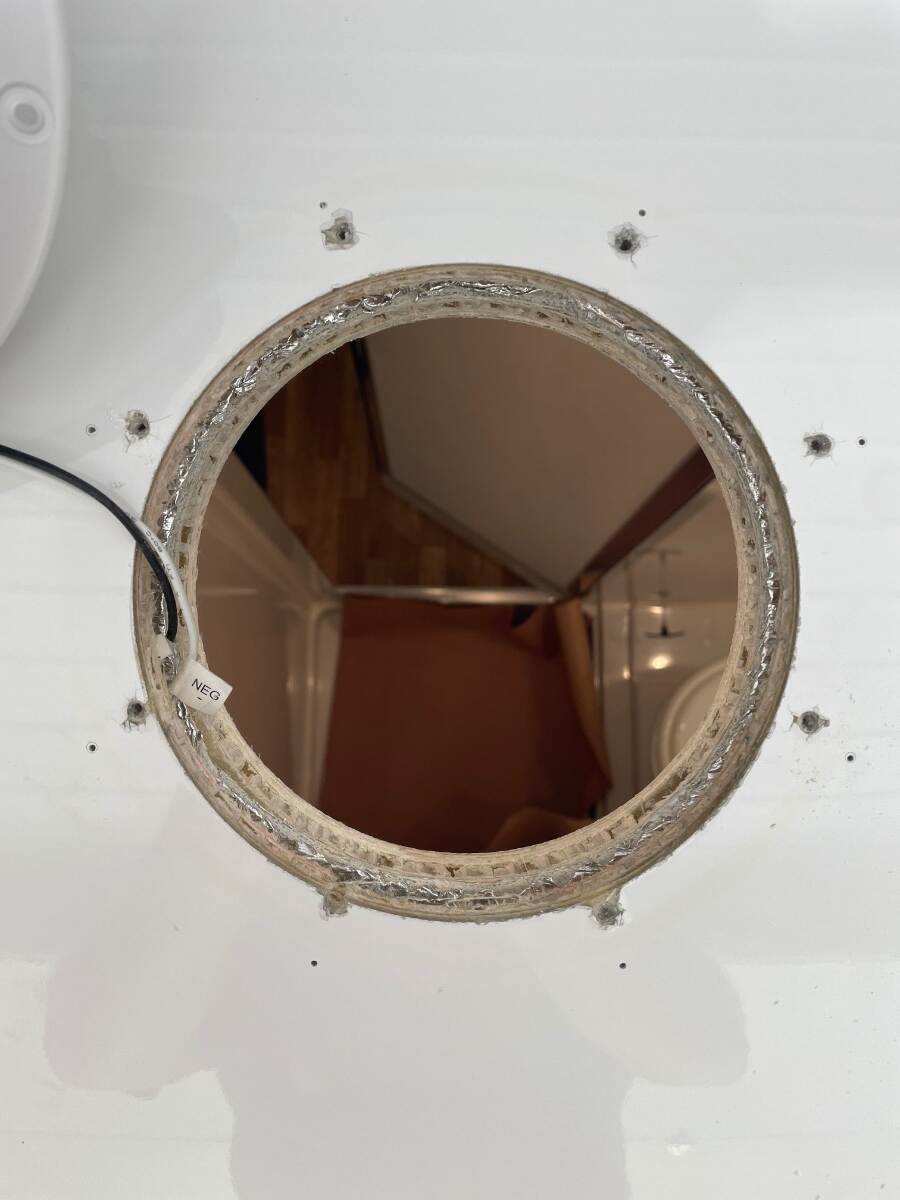
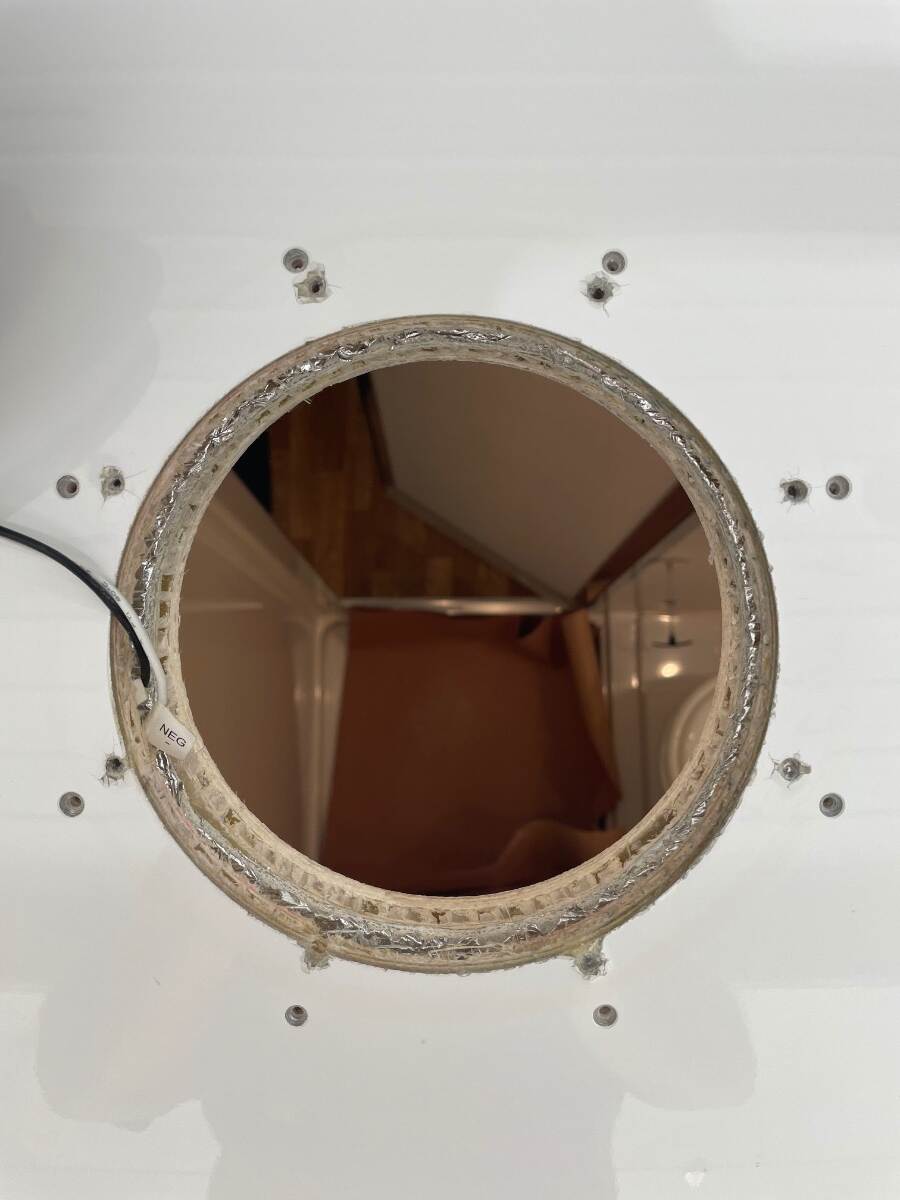
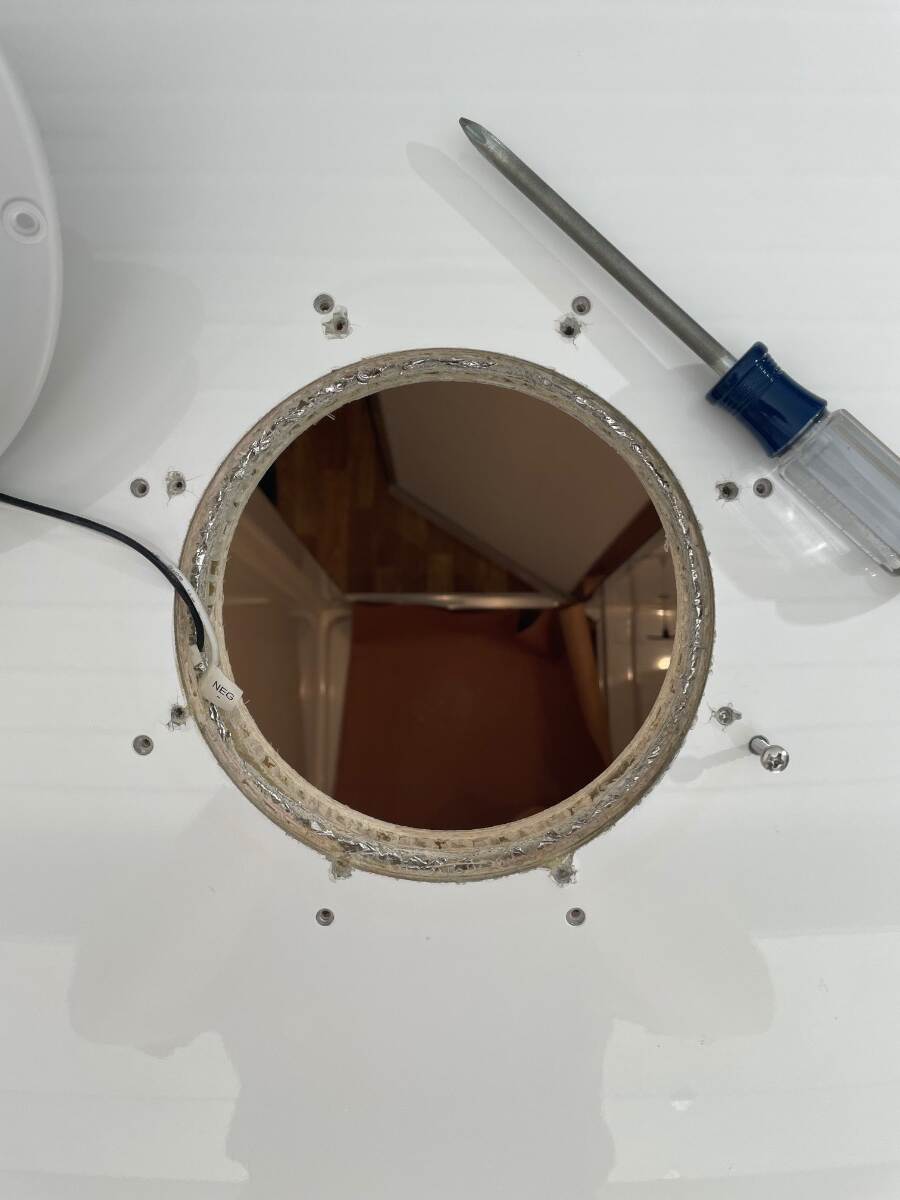
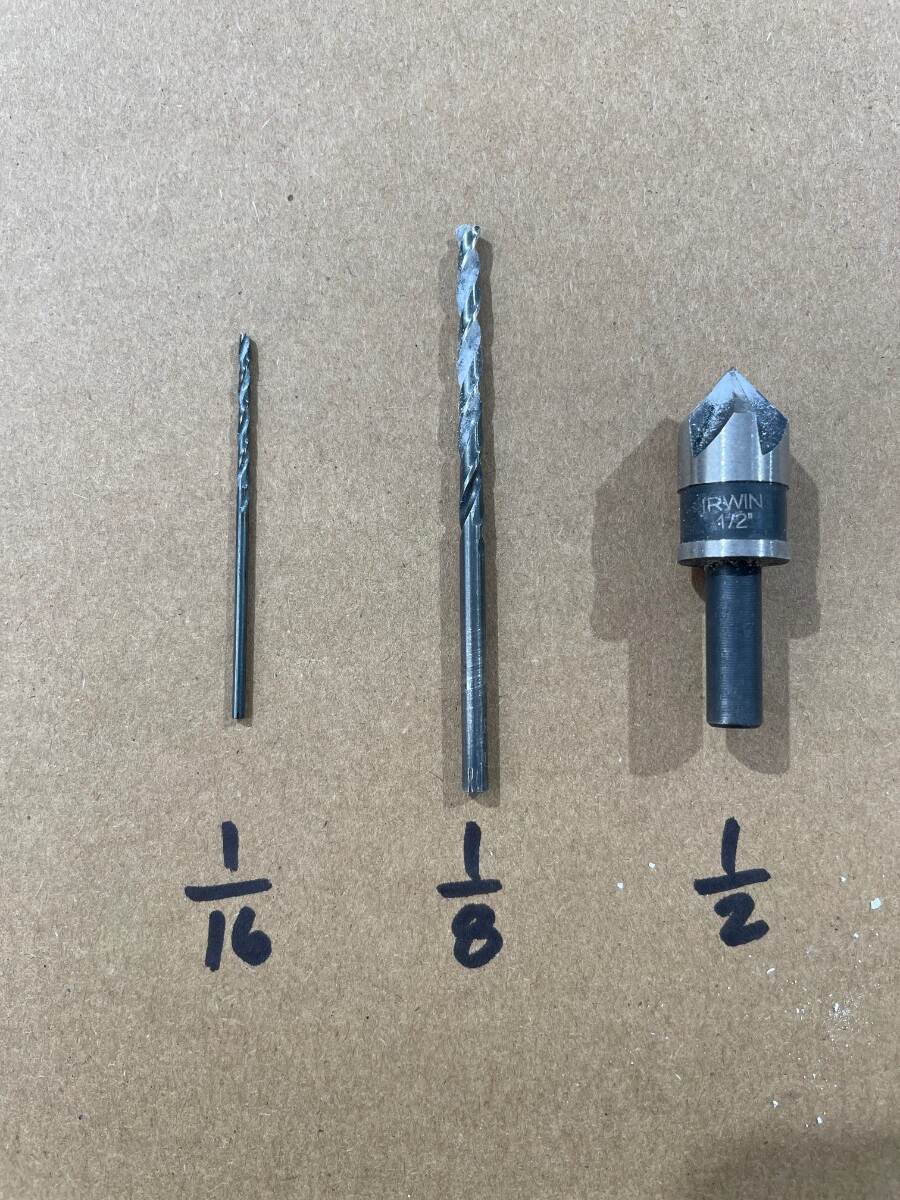
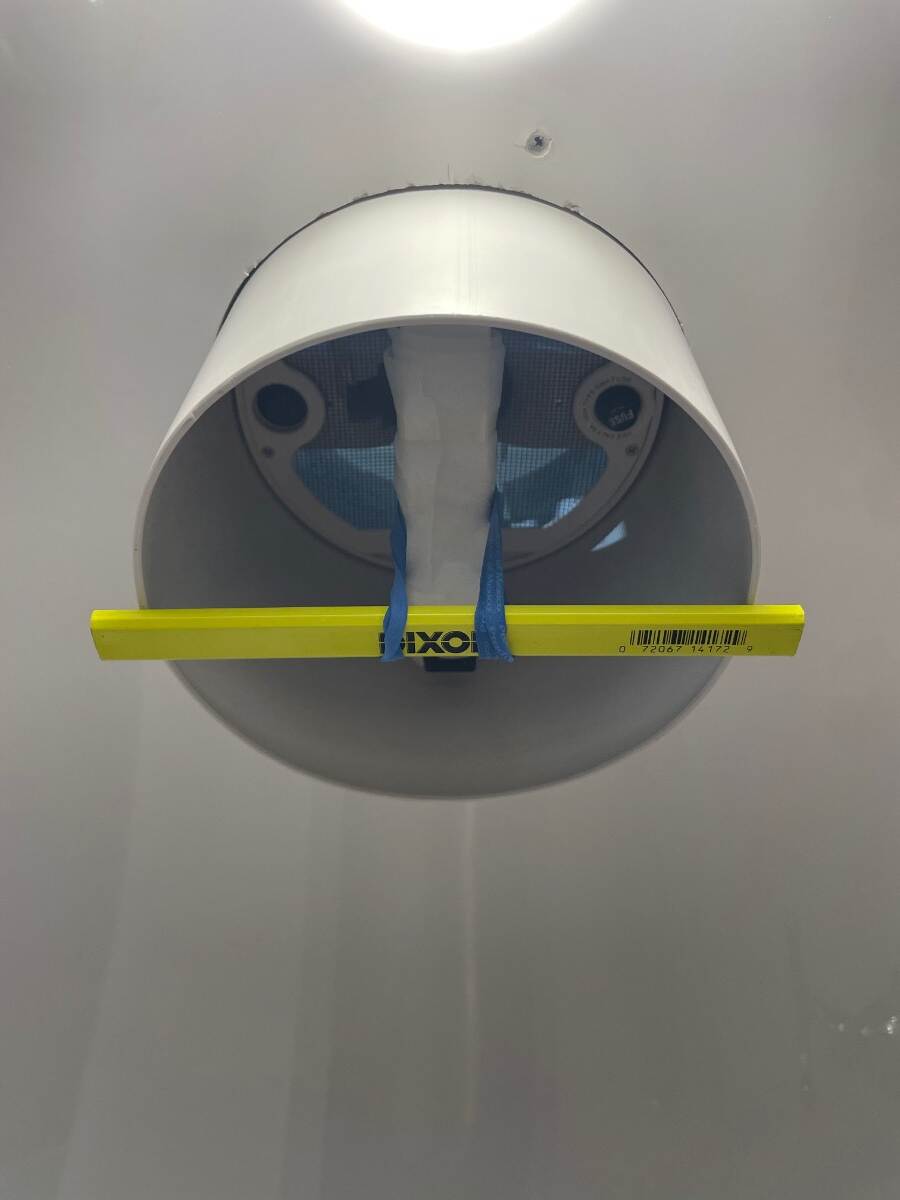
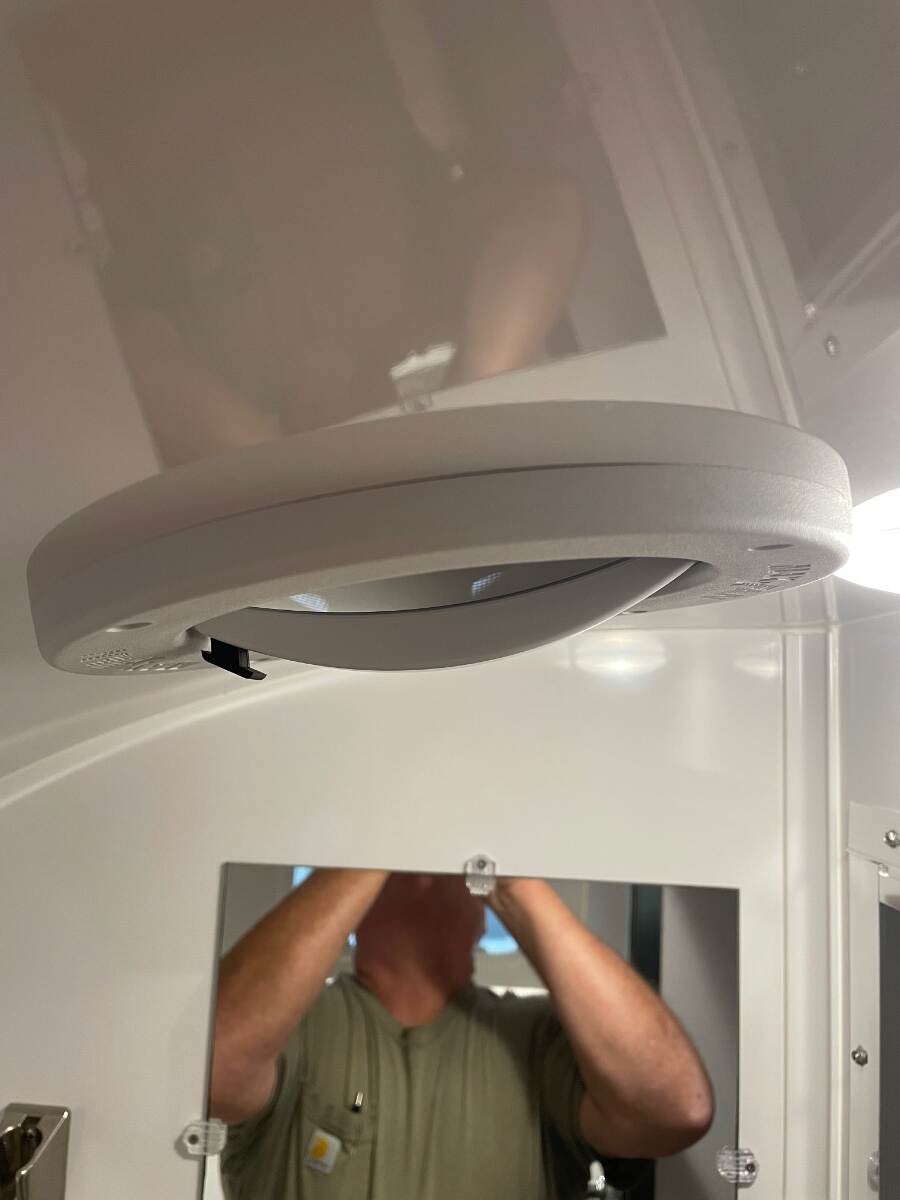
Picture below shows old Ventline fan removed and the roof area cleaned up. I used ASI 0240 adhesive remover and plastic razor blades. I cleaned up the edges of the original holes with a chamfer bit in a drill motor. The factory didn’t align the old vent with the hole very well resulting in screw holes too close to the edge of the opening and didn’t drill and chamfer the holes which resulted in chipped gelcoat. In this picture the pilot holes (1/16”) for MaxxFan Dome are located and drilled. I wanted the screws to be perpendicular to the MaxxFan mounting flange not the roof line so I tried to drill them at the correct angle to the surface of the roof. I did a lot of test fitting inside and out. The outside fan, the middle sleeve, and the interior trim ring must fit together well for this retrofit to work out right. I used a carpenter’s pencil and 2 rubber bands from of a bunch of broccoli to hold the sleeve in place while I got the pieces located just right. I did this before I marked the holes for the flange. New pilot holes are enlarged to 1/8 inch and chamfered Test fit the screws to make sure they are not too tight. If they are too tight you risk twisting the screw in two in the hole. This would be bad. Very bad. If the test fit is too tight go up to 9/64 inch bit. I used a 1/16 inch drill for a pilot then enlarged with a 1/8 inch drill and finished with a 1/2 inch chamfer bit. Be sure to use sharp bits and drill SLOW. I wanted the flange to be straight, not pulled down to fit the curved roof. I applied one layer of butyl all the way around the bottom of the flange. I then applied 2 short strips between about 10:00-2:00 and 4:00- 8:00. I again applied 2 even shorter strips between 10:30-1:30 and 4:30-7:30. I tried to build the butyl up in the places where the widest gaps would occur, that is the front and back of the fan. I wiped the mounting location with isopropyl alcohol and let it dry and filled the old and new screw holes with ASI 335 and set the fan in place using a couple of screws inserted through the flange and butyl for alignment. The black button on the handle goes toward the front of the trailer. Work the wires and splice connectors into the space between the hulls while inserting the fan assembly into the hole in the roof. Go back inside the bathroom and put the sleeve, pencil, and broccoli rubber bands in place to help maintain alignment of the fan on the roof. Back on top, tighten each screw down a little at a time and try to keep from distorting the flange. I would tighten the screws and leave them for a while to let the butyl push out then I would tighten them a little more until I got the flange sitting like I wanted it to sit and then left the butyl to do what it wanted to for a while. While the butyl was oozing I went inside the trailer and made sure the sleeve was in place with the upper edge of the sleeve against the bottom of the fan and the notch in the sleeve for the wire retainer properly located. Using a pencil I marked a line around the sleeve where it exits the curved ceiling. I drew another line 0.35” below this line to account for the interior trim ring and cut the sleeve to this line using a pair of heavy shears and a razor knife and finished to fit with a sanding block. I attached the trim ring and tightened the screws enough to pull the ring up to conform to the curvature of the ceiling.
3 points
-
It actually looks very good in your pictures, so must look perfect from the ground. Job well done and an excellent detailed write-up! 😎 Too bad OTT doesn't make a small flat area for the bathroom fan in their fiberglass molds (inner and outer hulls). It would make for a better fit and make this job easier on all of us!2 points
-
We use 200w Renogy panels when dry camping or boon docking for more than 3 days in one place. See our article. External Solar Kit Details - Hull 505 We've found that it's helpful when the trailer is shaded by tree's and we want to keep things topped off for longer stays. CS2 points
-
Ugh, no thanks, I’m retiring from having to work in an office building, why would I want to take one on the road?2 points
-
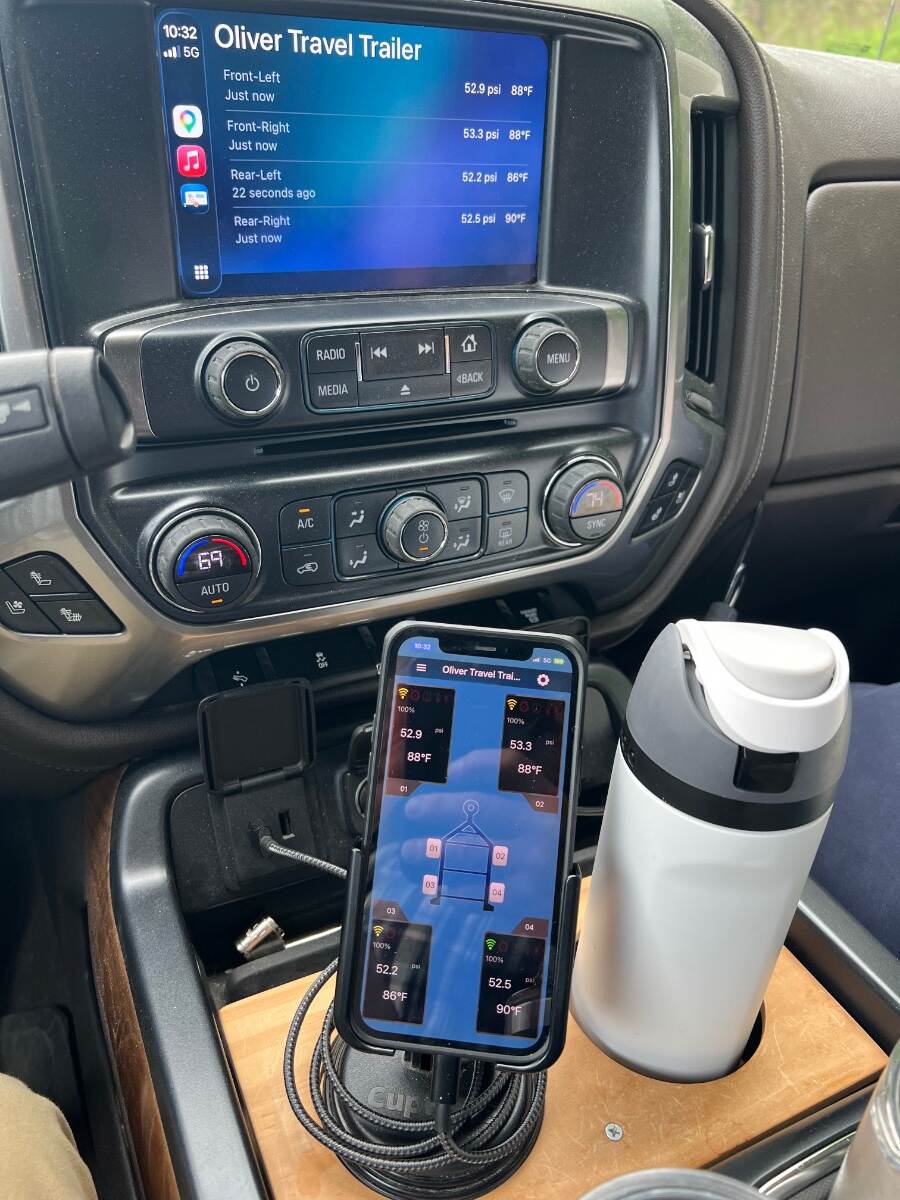
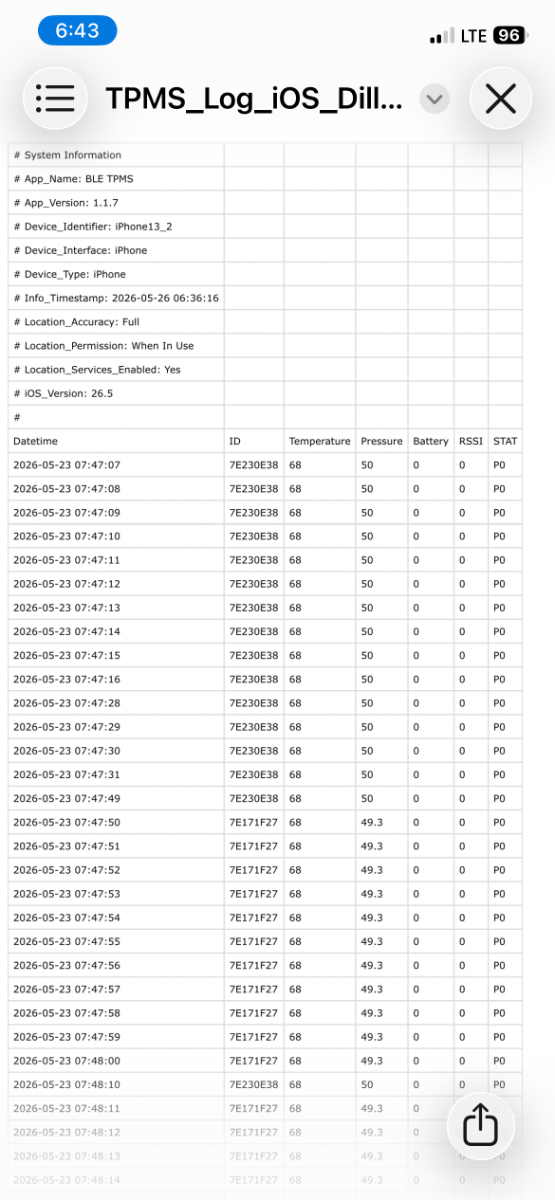
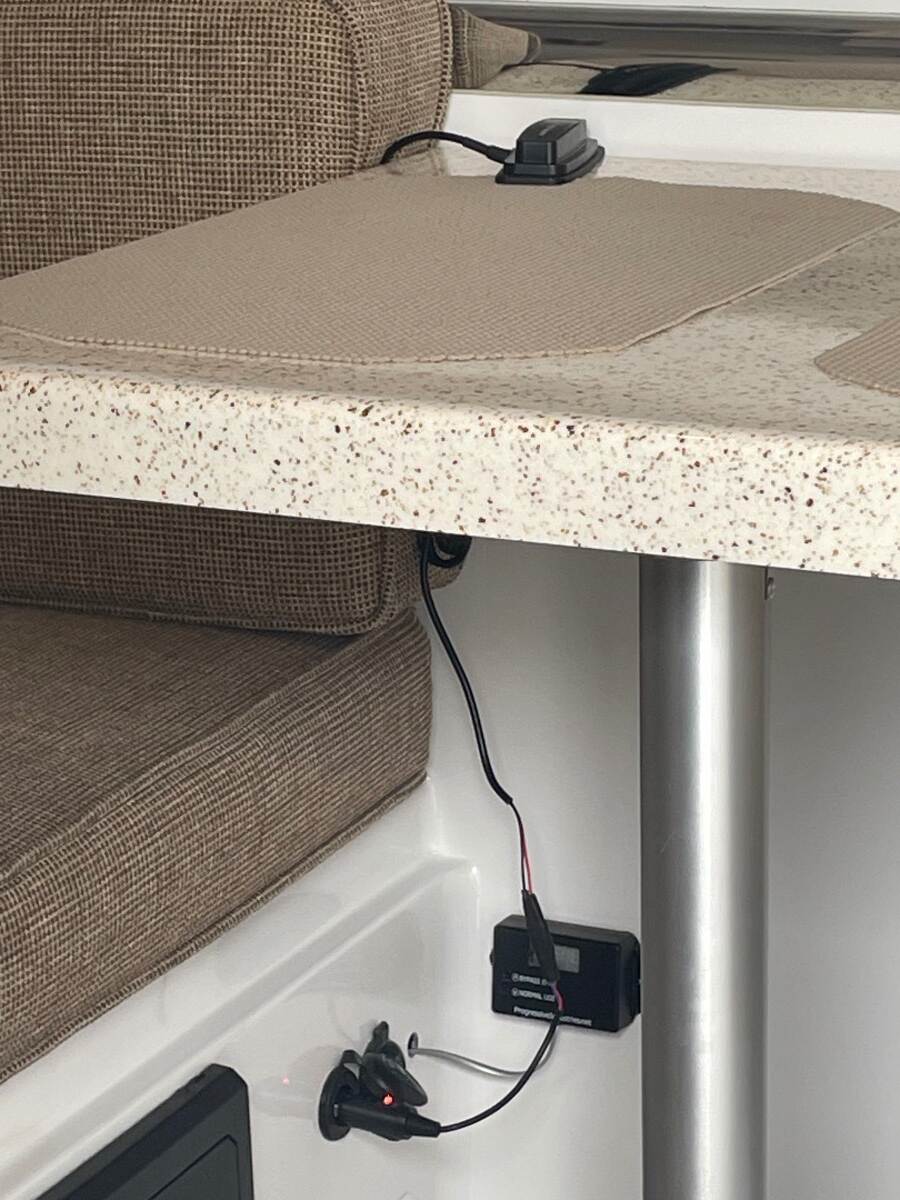
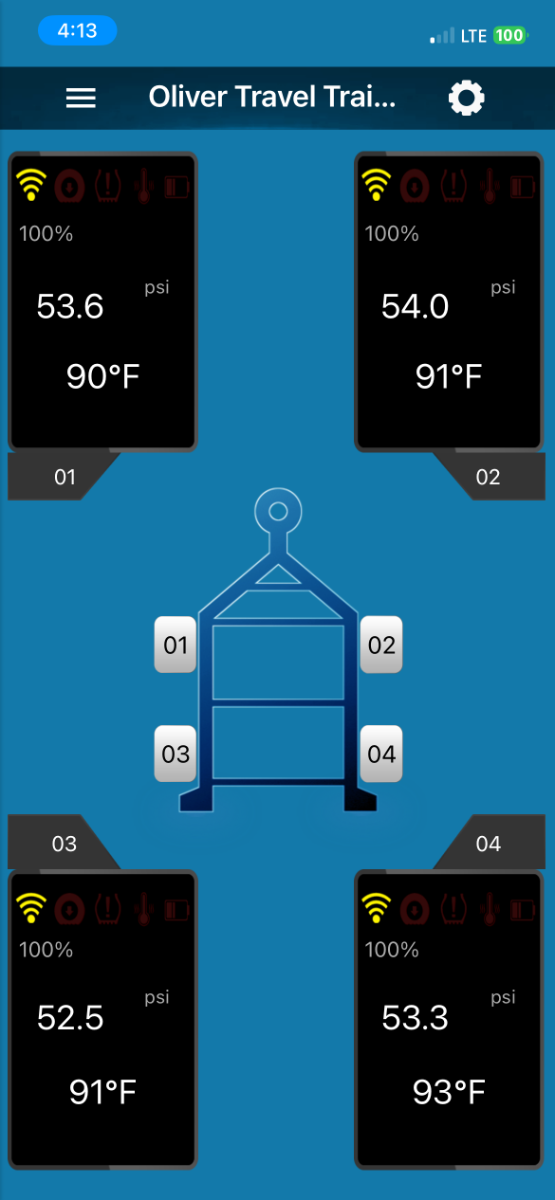
Update to my original post I replaced my original Dill TPMS system with the new Dill Bluetooth TPMS system and have used it for the last 3 days. These sensors are internally mounted just like the sensors on your truck and automobile tires. My truck doesn’t have the required RPO necessary to receive the sensor signals but the output is displayed on my truck infotainment screen when my phone is plugged in. I usually keep my phone display on the Dill app and keep Google Maps displayed on the infotainment screen but here is a picture that shows the Dill output on both screens You can download the data from the sensors into Excel. Dill recommends that you use a BLE signal repeater to extend the signal to your phone. I am trying different locations for the repeater but for now I have it on the left rear corner of the dinette and plugged into the 12v accessory receptacle under the dinette. I attached the 12v accessory plug to the repeater wires. I am getting 100% signal reception with the repeater located here. Signal reception is noted on the app display. I really like this version of Dill’s TPMS system compared to the older version that I used from 2019-2025.
2 points
-
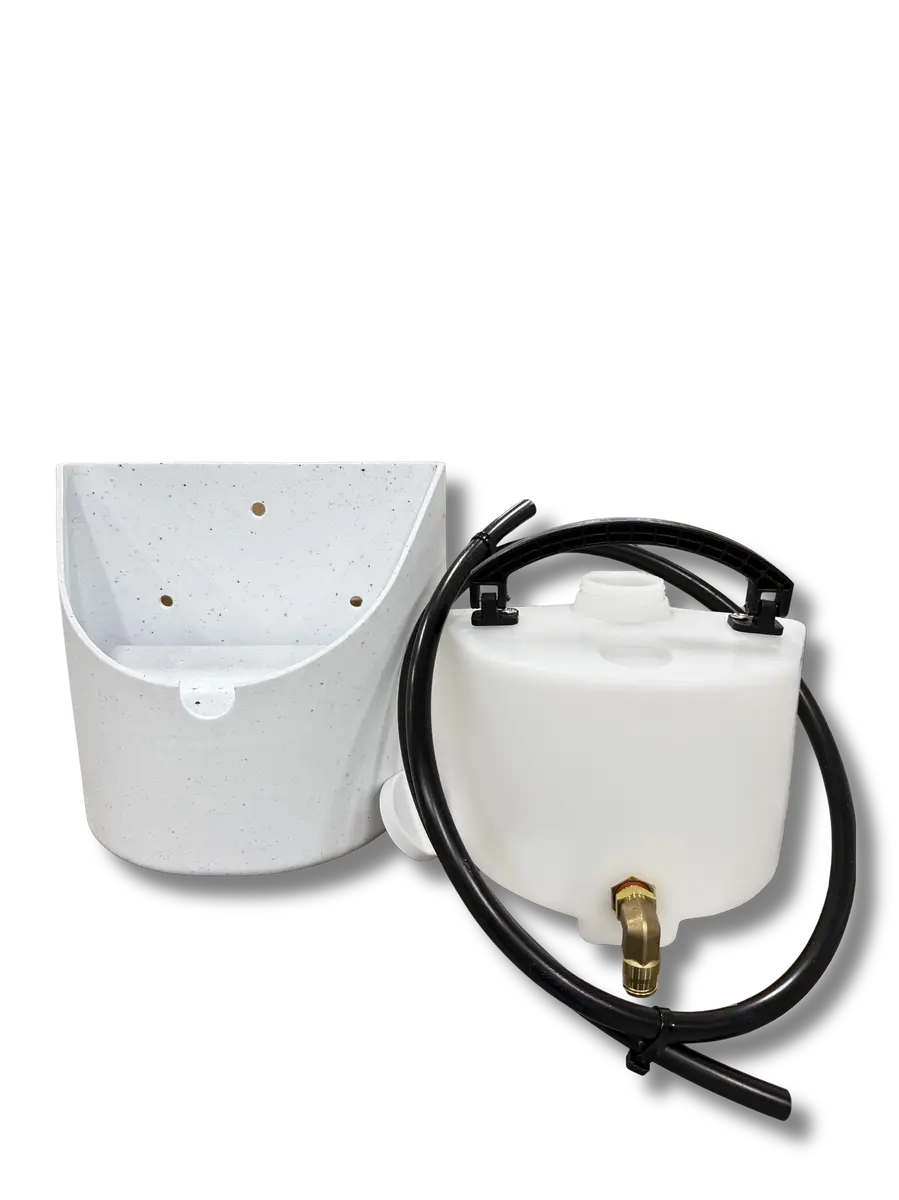
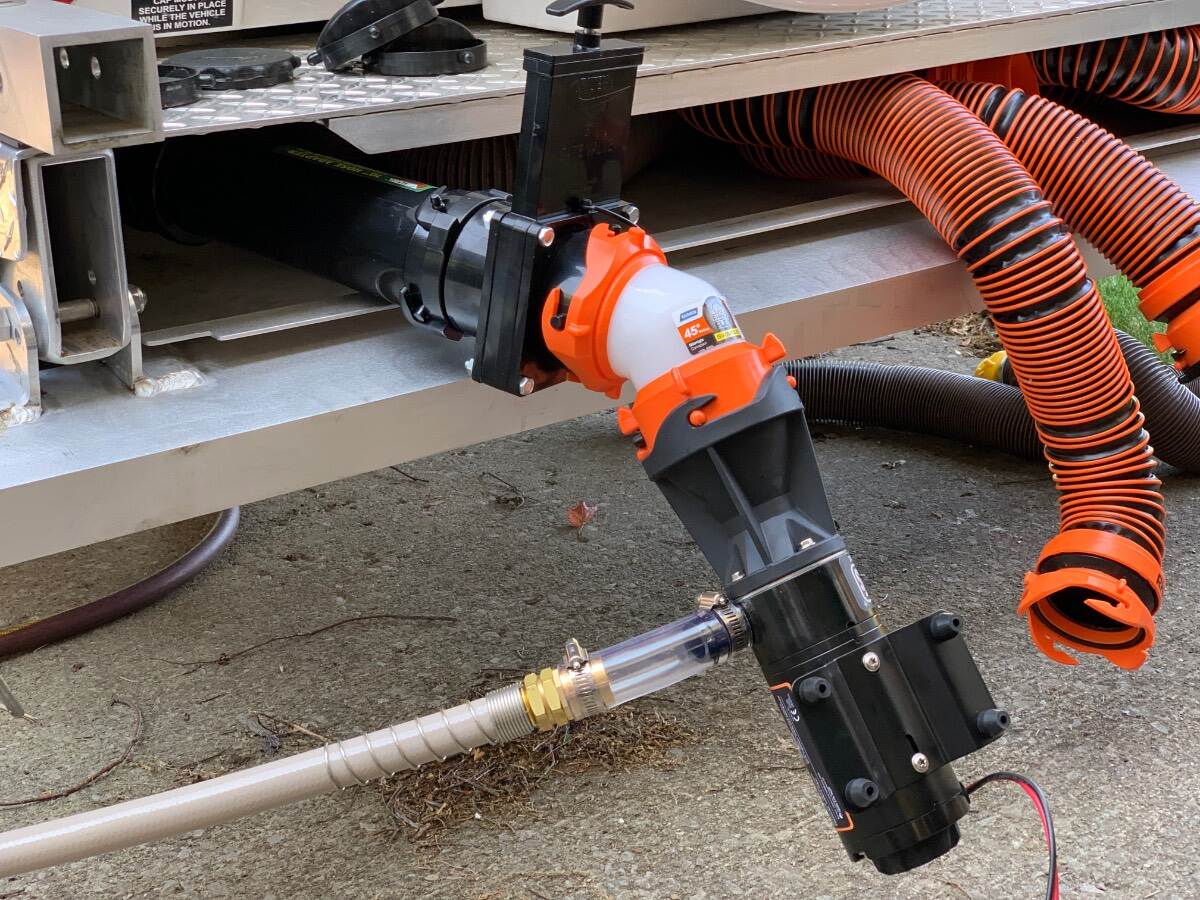
FIDISP 12 Volt Water Pump, Portable Transfer Pump, 330GPH Larger Flow, 1/10HP Electric Utility Pump with On/Off Switch, 2 * 6’ Water Hose Kit for Garden Pools Aquariums Hot Tub https://a.co/d/0hzZ7HoS Camco Durable Sewer Cap with https://a.co/d/0h5qZBVm Been using this for 4 years. Takes 3 minutes to fill black tank and takes up minimal space. As a bonus it is simple to hook to a hose bib to flush out. John2 points
-
Not sure about this one…. https://youtube.com/shorts/QOvTdqhmEgk?si=yu9p2qfs7fkid0ch1 point
-
Bill - Wonderful job - both on the install and the writeup! Almost makes me wish that my original fan would give up the ghost. 😉 Bill1 point
-
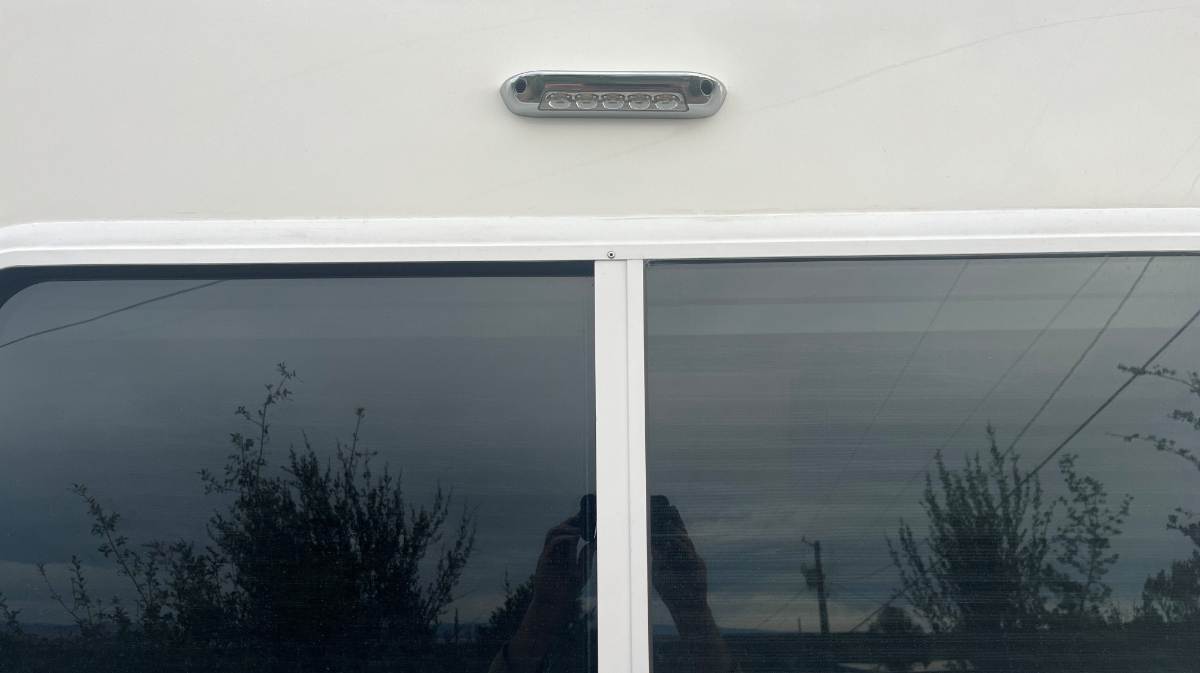
I realized I did not take a picture of the installed Rear Porch Light in the daylight so I did that today. I kept the black rubber seal that OTT was removing since they were causing streaks with age. The rubber looks to be good quality, not like the rubber surround on the Furrion 30A receptacles that really streaked badly. If it streaks later I'll simply remove it then, but at this time I didn't want to mess with sealant. If I do add a rear camera, it would be for security purposes while camping vs. having eyes when backing up. I would not mount it rooftop where OTT did, but surface mount something below the OLIVER taillight and above the new Rear Porch Light. We usually have the TV down and the rear window shade closed, so it's not easy to look to the rear. Either way, it will be nice to have light back there when needed. Got my front light done today. Pictures coming soon! 😎
1 point
-
We have only the stock panels (360W on our model year) and lithium batteries. We spend 3 weeks at a time at beach campsites with full sun and have no shortage of power. I suppose if we had portable panels we could run the A/C more, but probably not worth it in our use case.1 point
-
I like what you did Bill, with the rubber and polypropylene spacers. For sure it's filing the angled slot that truly helps the friction and noise in the up down movement. You got yours smooth and straight! Noticing in your pics the step material is coming up in the corners which will soon break off with use. I did a similar job but also sanded down and ceramic coated the aluminum steps and added new 3M Safety Walk 4" Resistant Tape. Our steps still look very good almost 2 years later! 😎1 point
-
Welcome Brian, looking forward to hearing more re your project(s)! Is it worth it? An extra 100W is a drop in the bucket, although aimed at the sun it is more efficient compared to each 100W on the roof. We added a Victron MPPT 30A SC and the 30-LB Renogy 400W suitcase. I've found almost 2 years later that we rarely use it and should have saved the upgrade $$$. Wish somebody told me this 2 years ago! We move around a bit. I now believe extra solar is for those who want to boondock in one place for a week or longer. And you have to chase the sun all day in moving panels. There is an Oliver owner who sells a machine that rotates the panel, but it's another thing to carry and it only holds one panel. The only guys I see running much solar are the ones that live in their campers, staying the 14-day limit on BLM lands. Since we move around a bit, sometimes just one overnight, most often we stay 3 nights and then "on the road again." In this use case the DC-2-DC charger is a much greater value. We can charge 200 Ah while towing a half day drive. 😎 Our 400W suitcase will not add 200Ah babysitting them all day on the sunniest of days! Here are my two related upgrade links:1 point
-
Could it be that Oliver did the same thing with the cooktop? Is it simply plugged into a hidden outlet like the microwave and fridge is on our unit and that outlet is on Circuit 4? If the cooktop is on the 2000 watt inverter it could easily overload it. Most small induction burners max out around 1800 watts/15 amps. At full power that only leaves 200 watts/1.7 amps for anything else. If it's NOT on the inverter, that sucks, too.1 point
-
On further thought, actually no. I doubt any of the pump ideas you mention would work, in my description above I mention that this high powered pump is just doing the job. It’s pumping slower than the spec. I’d only go with this one personally. Yeah I researched these on the forum. The sink option didn’t seem to do a lot for me. The pee bottle diversion would be a big benefit, with three of us (wife and adult son) we need to empty it several times a day. And now Natures Head has this option making it easy https://natureshead.net/multi-directional-urine-diverter-kit/ But that would involve some drilling and a permanent solution, not ready to go there as this trailer isn’t yet three months old. So I just bought a couple extra bottles.
1 point
-
Hank White has used a portable pump as you’re describing, so it does work. Another option is to plumb your pee bottle to the black tank. Several owners have done this. An additional step would be to swap the bathroom sink drain from the gray tank to the black. Just connect the sink drain to the vent pipe and it will go to the black tank. This gives you 15 gallons of pee and sink water, and the soapy water dilutes the urine and prevents crystallization. I use a macerator pump on the sewer drain at home to pump black and gray water to my septic tank 50 feet from my driveway. Works great!
1 point
-
I assumed when Lamar wrote this in his original post that there was a separate breaker for the induction cooktop. There truly should be, but not according to the manual that @Steve and MA found. In our hull, OTT wired the microwave to the breaker marked “Outlets.” They wired two separate hots to the breaker (outlets GFCI and microwave on separate 12/2 Romex runs). Maybe they did something similar here. I corrected our situation by connecting the microwave to a free breaker when I disabled the OEM converter for the Victron inverter/charger. The fix I suggested above just got more complicated! I would still rewire the main panel so that induction cooking is possible off-grid! @Lamar last logged in 9 hours ago. Hard to say, but the first thing he should do when connected to shore power is to run the cooktop and trip each breaker to know where in the world OTT wired their True Induction cooktop!1 point
-
LOL -- I have all my remote controls in there, where Oliver Delivery team placed them -- but also these things: my fire lighters; a clear plastic travel "soap box" that I use to collect miscellaneous "mystery parts" that I find now and then; I keep 'em just in case; sandwich baggie with bulldog clips, paperclips, rubber bands and twist-ties small flat koozies small pliers and a screwdriver with changeable tips; pens, pencils, sharpie markers; small box of magnets; a pad of sticky notes; my extremely condensed "GO LIST" that is my pre-travel checklist -- it sits on top and I only have to take a peek to be sure I'm ready. But I like your use as spice drawer. My spices wouldn't fit in there, though.1 point
-
So, I had the one overnight mentioned above, where the Chill Cube made the cabin much colder than the set temp. This was a one-off, not experienced again. I had it on AUTO MODE and AUTO FAN that time. I noticed it switched itself to DRY MODE during the night. We were in the desert valley at 20% RH outside and a very comfortable 40% RH inside. When we got home, I ran the Chill Cube 24x7 for 8 days and nights unplugged, on batteries/inverter only! This time I set to COOL MODE, fan in AUTO MODE. The cabin started at 90F and it was 88F outside. I set temp on the Chill Cube at 76F and the Chill Cube kept the cabin at 76F daily for most of the week, got down to 74 on day 7 and 72 on day 8, as ambient temps got lower. I ended the test after 8 days, since it got cold again up here again (highs low 70s, lows high 40s). We're having a wonderful long spring in the AZ High Country! In the first 24 hour period, we used 60 Ah. This would be -10% SOC only for those of you with 600 Ah. Day two was about the same. Ambient temps lowered a little and on Day 3 we ONLY used net -15 Ah! These numbers include the 320W rooftop solar adding about 12 Ah every sunny hour of the day. The next few days were the same, only using about -2% SOC per day. I believe the Chill Cube will get colder than set temp ONLY when A/C is not really needed, like overnight in the desert where it gets cool outside. Next time when sleeping on a cooler night I should just turn it off. Our lovely spring temps will end soon. I'll run a similar test in 60-90 days when it gets very hot even at high elevation. Last 3 summers, I had the Oliver plugged in with the Dometic P2 set at 80F. It would run nonstop during afternoons with near 100F highs. Without A/C the Oliver could get to over 110F sitting in the sun outdoors, not good. We could hear the LOUD P2 from our deck 100 ft away. Last week while the Chill Cube was running, I thought once Chris had turned it off. I was outside walking around and behind the Oliver and I could not hear the A/C running at all! When I entered the cabin, I could hear the Chill Cube on its very lowest fan setting. In Auto FAN it will run slower than the LOW FAN setting, very low and quiet! 😎1 point
-
We've had decidedly mixed results with service at Hohenwald.0 points







-
Recent Achievements
-