Leaderboard




Popular Content
Showing content with the highest reputation on 05/27/2026 in Posts
-
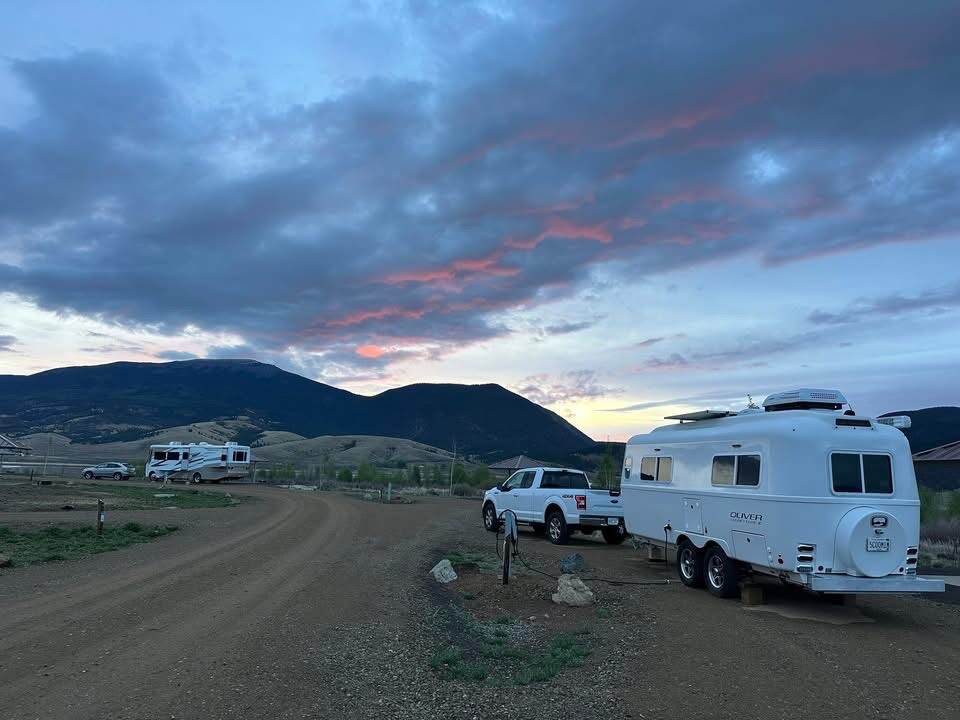
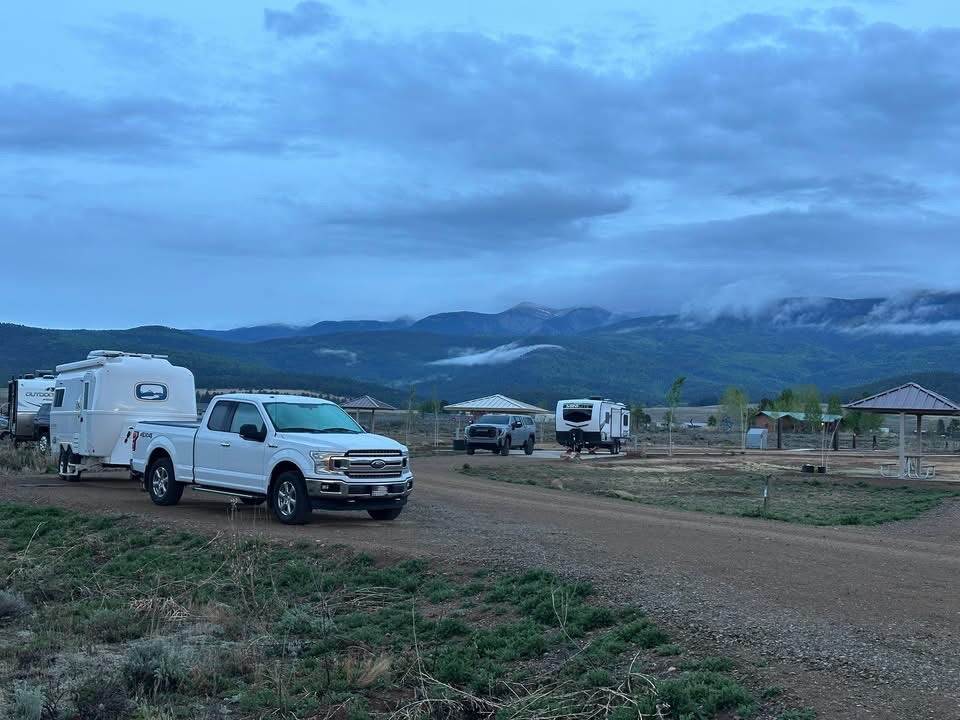
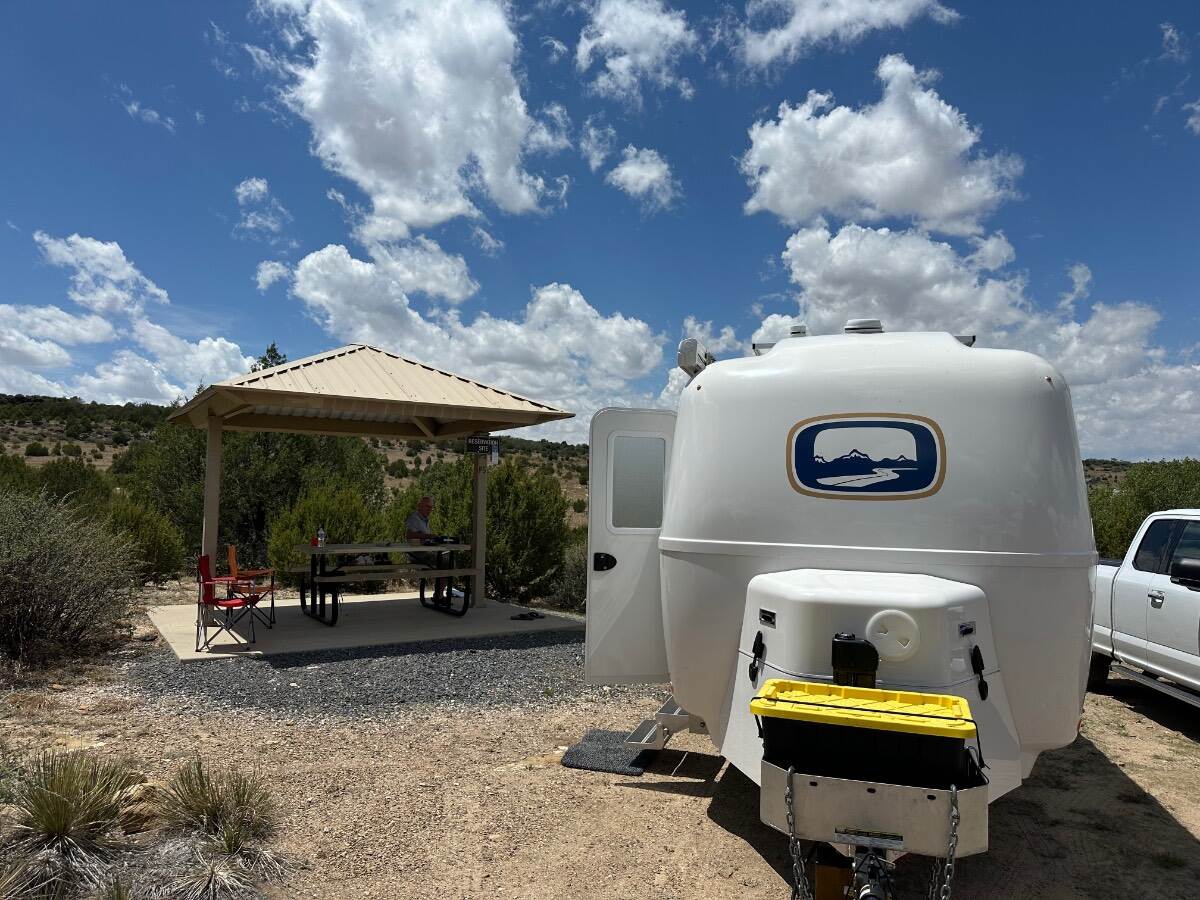
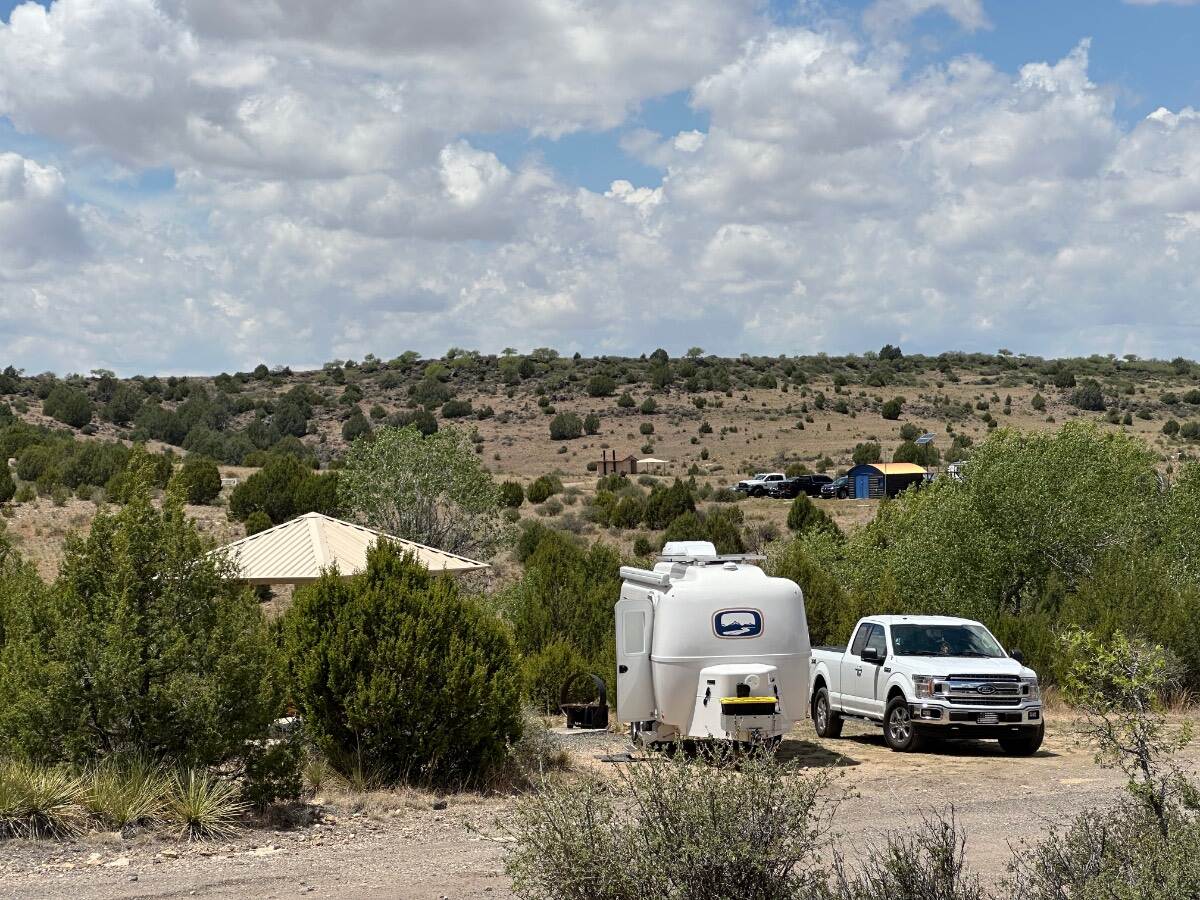
Eagle Nest State Park , New Mexico park has been remodeled and is very nice, sites are electric only water fill available, no dump station cloudy and rainy and cold weather has us a little wet super nice Vietnam War Memorial Park nearby Remembering all of the men that served and the young men that never came home 🙏
 5 points
 -
I wonder what the "deck/wall" starts to look like after years of people walking on it. Can you screen that wall area at all when that is down? If not, I don't see myself keeping my wall open while camping.4 points
-
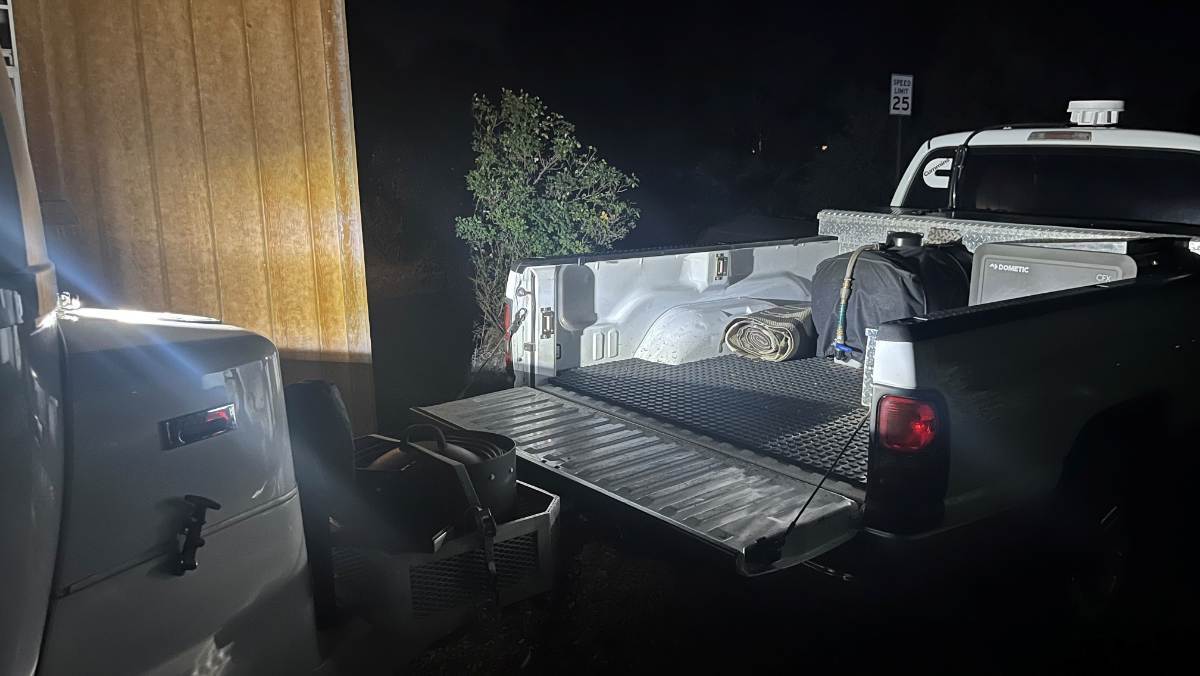
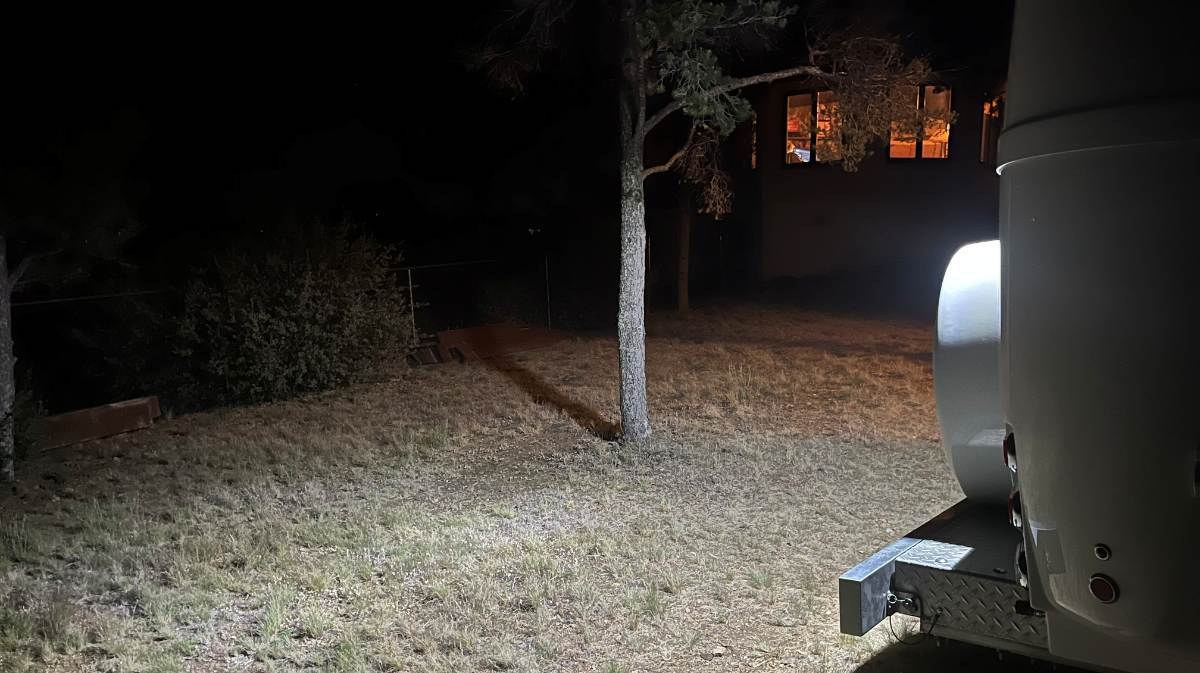
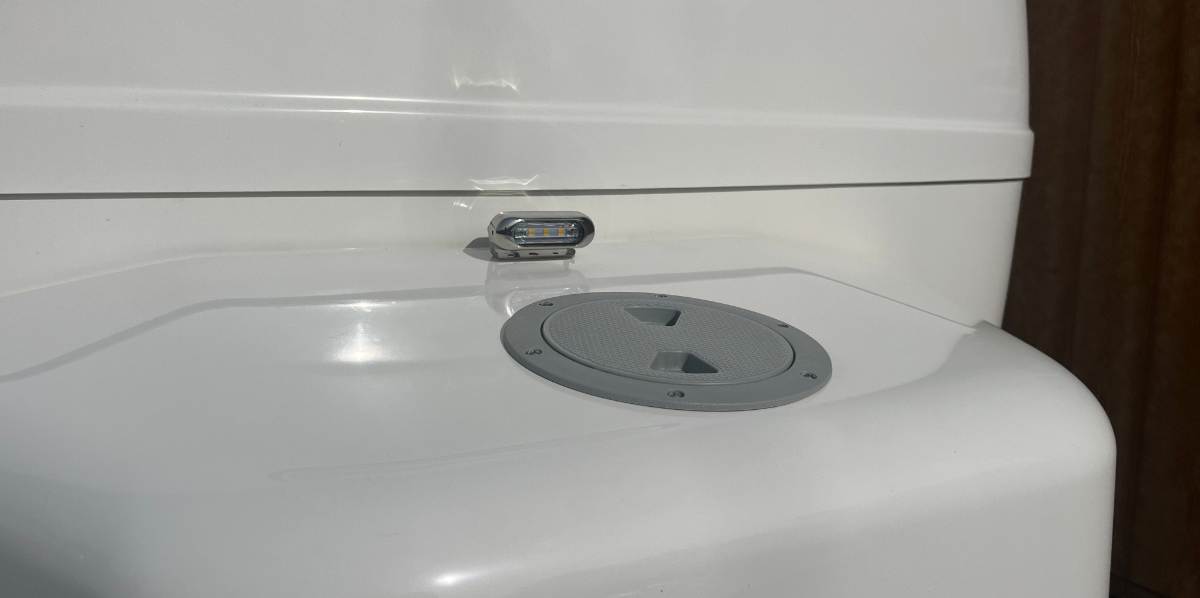
This is great, there's more than enough light! Notice there's a shadow on the close section of the truck bed. It's from the deck plate hatch. Those with newer hulls would not have this issue since the hatch is now placed below. The light just needs to be an inch taller. The bracket that comes with the light is so short, it only lifts the light 1/4". I have some ideas for this...
3 points
-
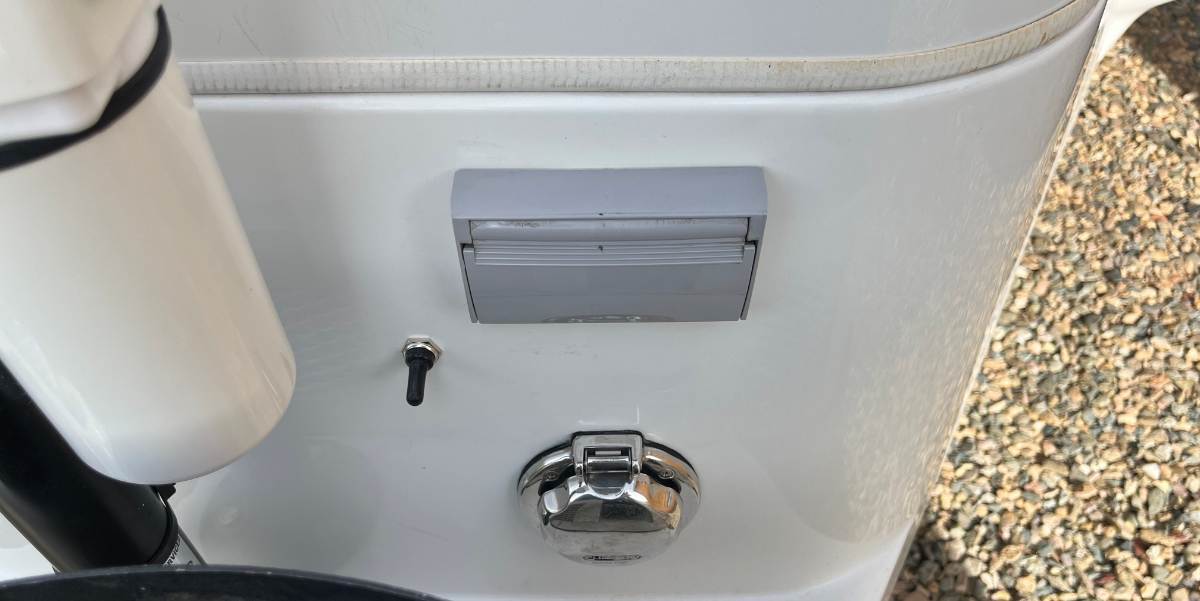
I've considered adding a forward facing light to the front jack housing using the existing light switch.3 points
-
Alternatively, I bought three solar motion lights for camp security and general outdoor lighting. Once camp is setup, they are staged forward facing on the propane tank housing, rearward facing on the spare tire cover, and usually on a picnic table or other strategic location. I instantly have light when and where I need it, and a deterrent to unwanted visitors!2 points
-
Boy, i have repeatedly taken and not taken a small step ladder along. There are an awful lot of things that are unreachable without it including my truck oil dipstick. So far, i have never used it on the short trips we take and i kind of feel like a worry dork taking it. Maybe with your encouragement i will take it with greater confidence. Sorry to be off topic of the main thread.2 points
-
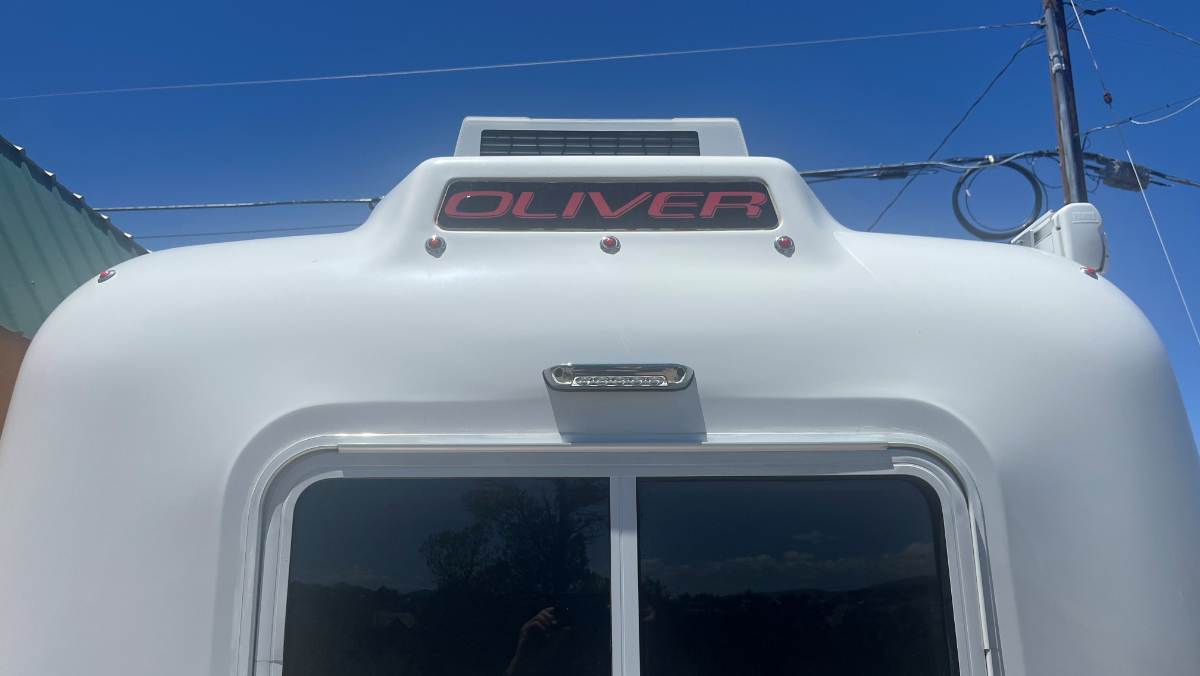
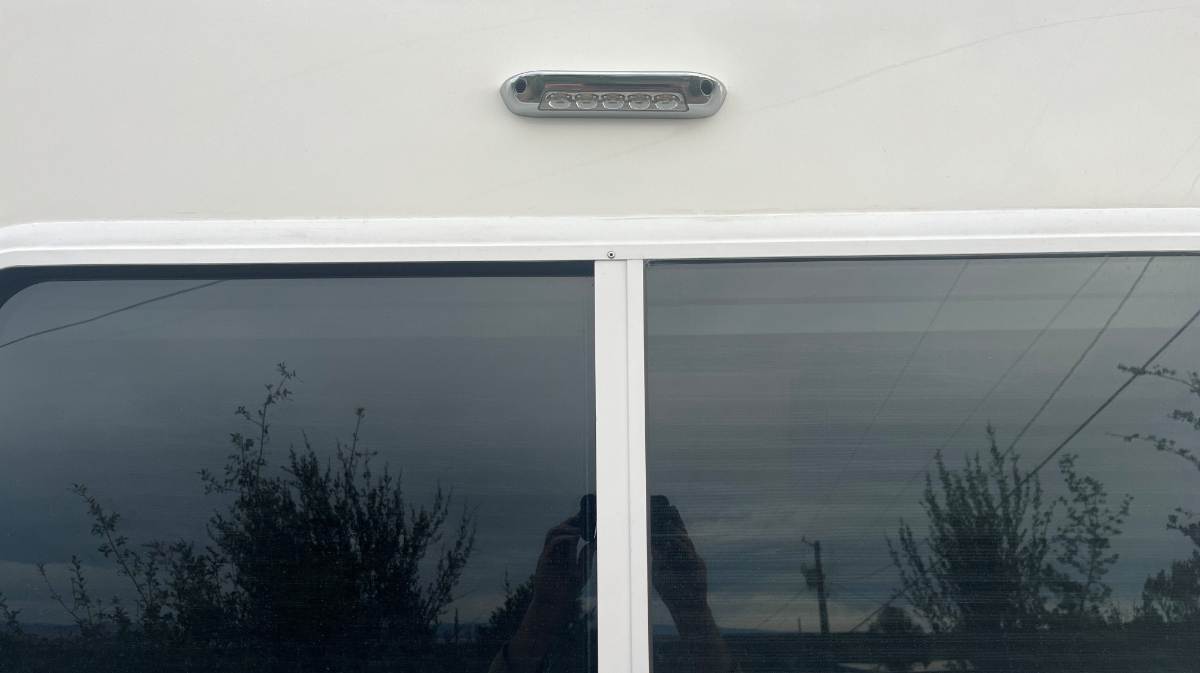
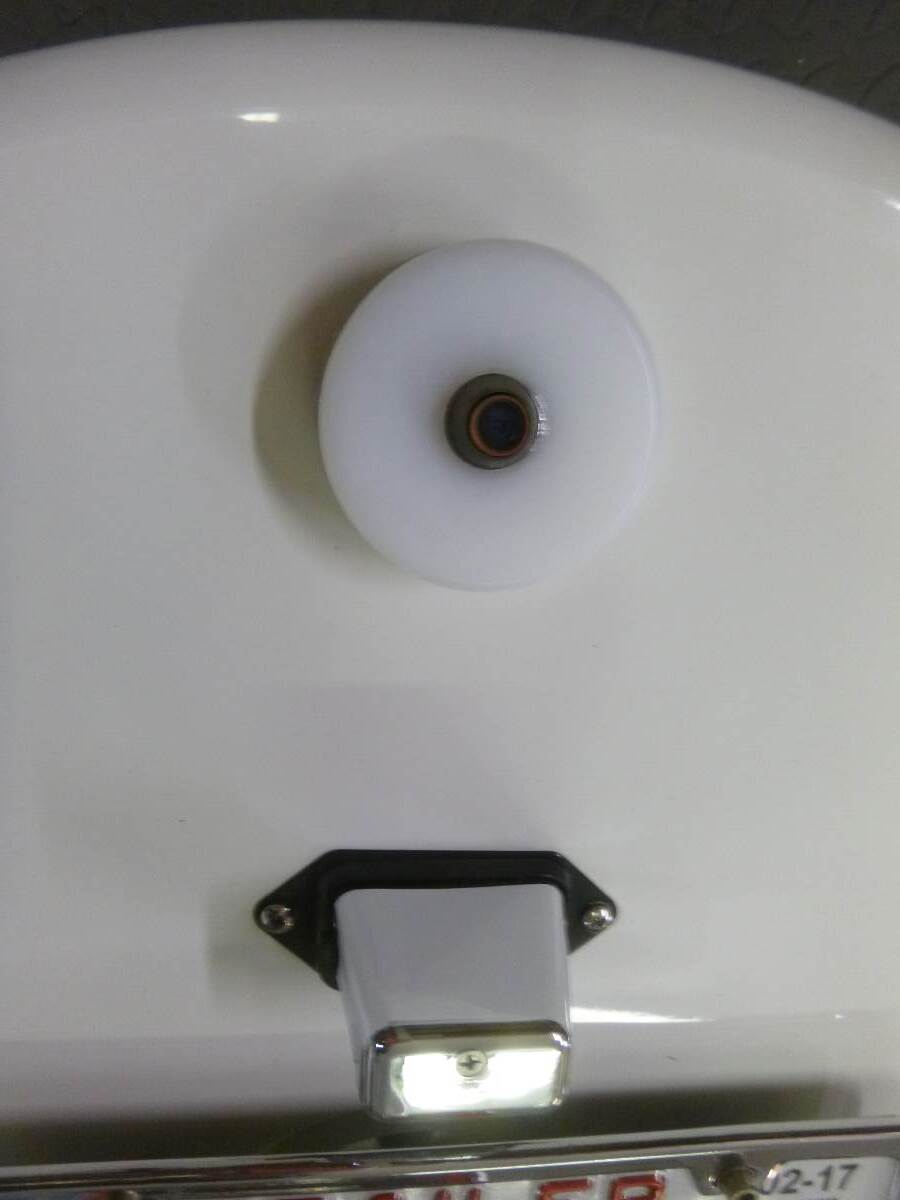
I realized I did not take a picture of the installed Rear Porch Light in the daylight so I did that today. I kept the black rubber seal that OTT was removing since they were causing streaks with age. The rubber looks to be good quality, not like the rubber surround on the Furrion 30A receptacles that really streaked badly. If it streaks later I'll simply remove it then, but at this time I didn't want to mess with sealant. If I do add a rear camera, it would be for security purposes while camping vs. having eyes when backing up. I would not mount it rooftop where OTT did, but surface mount something below the OLIVER taillight and above the new Rear Porch Light. We usually have the TV down and the rear window shade closed, so it's not easy to look to the rear. Either way, it will be nice to have light back there when needed. Got my front light done today. Pictures coming soon! 😎
2 points
-
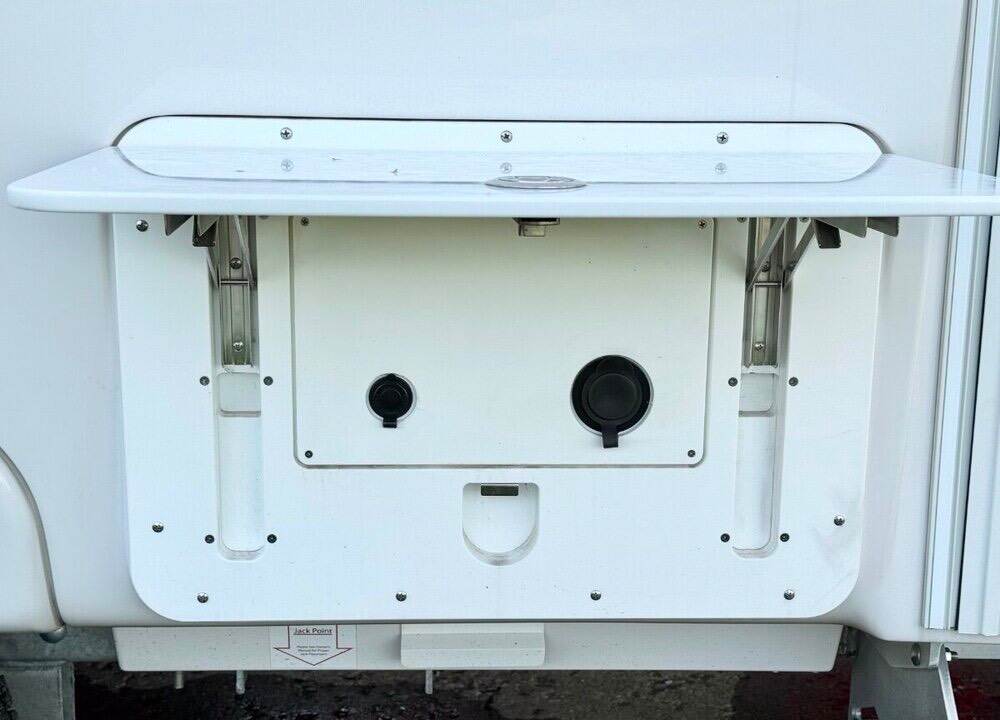
My 2023 has the same outlet, and I think Tom is correct in that it is for AC power to the fridge. I used that outlet with a 12 ga extension cord to supply power to my exterior AC outlet under the folding table. I tapped into the fridge's 12V DC power for the cigarette outlet.
2 points
-
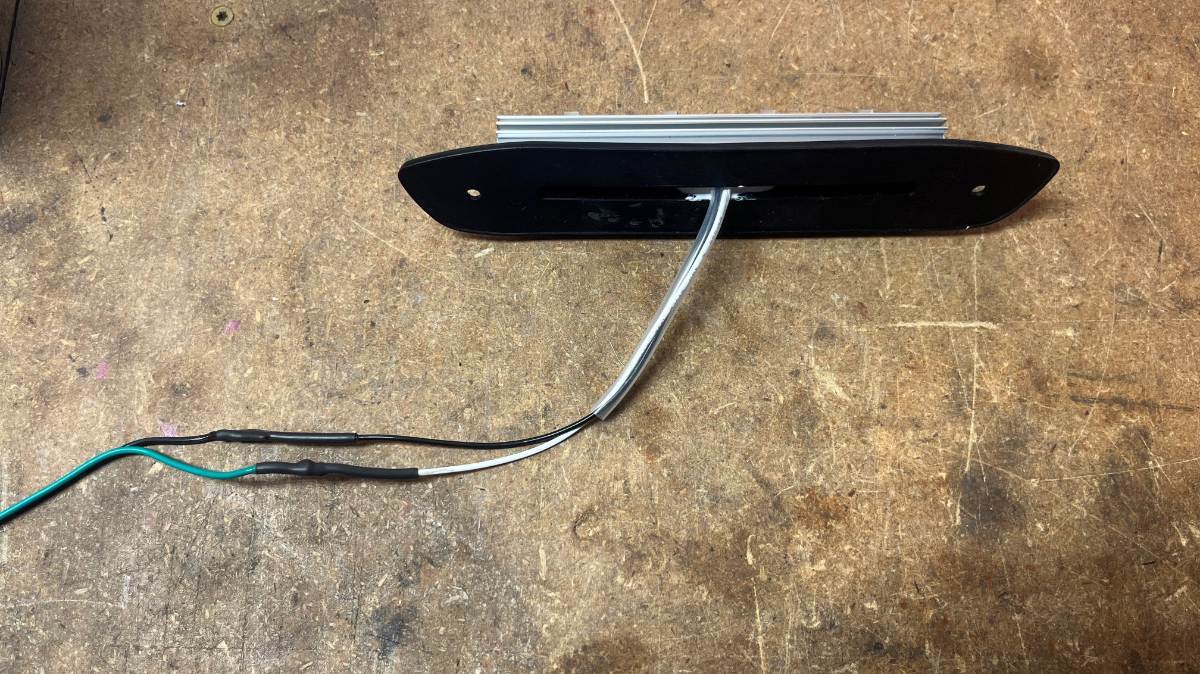
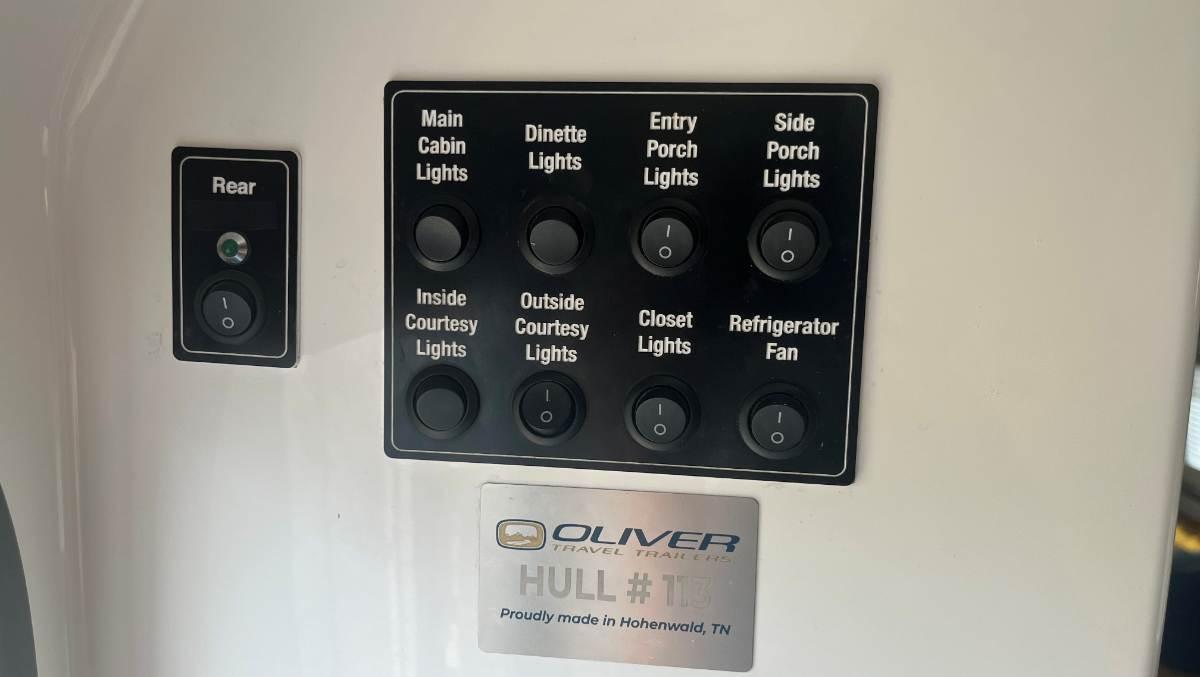
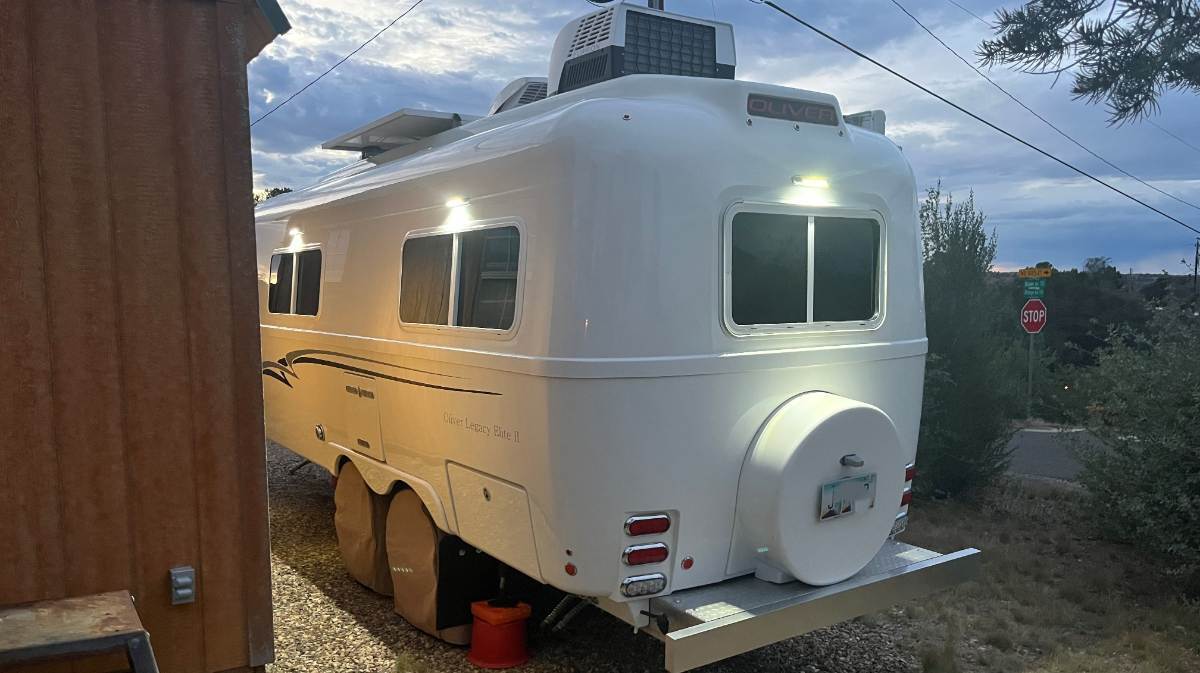
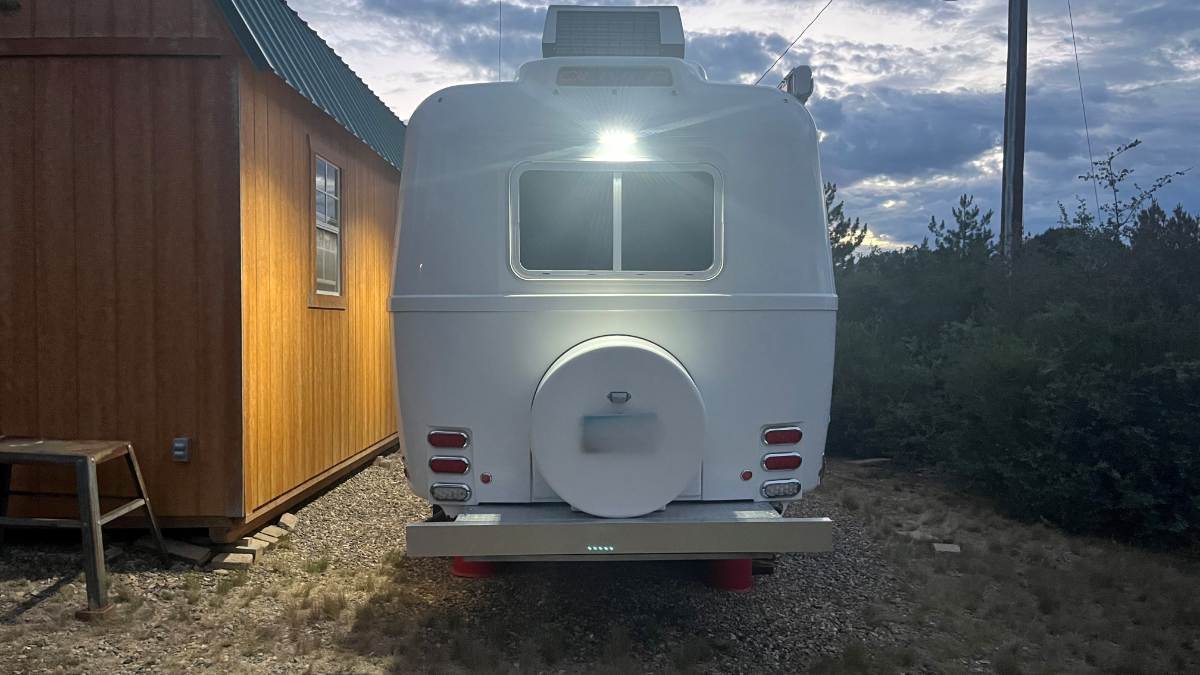
The Oliver Porch Lights are bright for a dark campsite, so we rarely use them. But if you need to light up the area they work great. I've often wondered, why isn't there lighting on the front and rear of the Oliver? I asked a year ago about replacement lights for our OEM Porch Lights and just purchased some recently. OTT should install these lights in all four directions. I would have done one up front too, but running wire would be difficult. I got something else for up front, more on that later. https://itcshopnow.com/products/assurance-exterior-flood-light?variant=50392962007319 I carefully measured the four Porch Lights OTT installed, as the distance from hull belly line, which btw holds a tape measure nicely, up to centerline of the Porch Light at the mounting screws. Turns out they were all installed at different heights +/- 3/4". As a special bonus, this light is 1/4" off from front to the rear mounting screws. My new Rear Porch Light, I promise is the straightest of the bunch! 🤣 It's not easy to choose the best spot to drill into the exterior of your hull, this one especially. I cut away some of the white insulation in the back of the attic. I used a 2-ft piece of metal fish-tape with the ends curled back, running it down the inside of the back exterior hull. Repeatedly, it measured 12" form the bottom of the OLIVER taillight to where the fish-tape hit the top of the rear window frame. It measured 12" so I figured I should go 10" max. Looking from the outside, there is a flat fiberglass frame around the rear window. Above that, the top rear is convex. I had to find the best spot so that the approx. 8" x 1 1/2" light would sit flat in both directions. If not water would get behind it. I drilled a 1/4" hole centered to the window, so the light is just above the flat frame area of the rear window. I soldered and heat shrink extra length of wire to the light. If they only attached 18" of wire! Offset the splices so that they would fit nicely into the drilled hole. It wasn't an easy pull but a few ins and outs and the light pulled flush (would be easier with 2 people, one in one out). I eyeballed the light level to the window frame. I wanted to VHB the light housing vs. drilling two mounting holes but the design of the light would not allow for it. They do not include hardware. Found the stoutest 1" course thread screws that would fit the openings and I drilled 6/94" holes after marking the centers. Wiring? I wanted to add the new rear light to the Side Porch Lights (streetside). However, I could not find the switch leg in the back corner of the attic and I did not want to remove all the stuff out of the kitchen cabinets. But that would be the right way to do it. Cabinets empty, you can easily run wiring up to the main switch panel. Our hull had a rear camera and a separate switch to power it. I removed the camera a year ago, so I'm using this separate switch with existing wiring. I copied something Geoff did, where he used a Sharpie to black out the word "Awning." Mine has a thin cut piece of black tape over the word "Camera" so it just reads "Rear" now! 🤣 I had to wait patiently for dusk and dark tonight! The hull looks great with the new Rear Porch Light to compliment the side lights. And finally, it alone lights up the yard! 😎
1 point
-
Not sure about this one…. https://youtube.com/shorts/QOvTdqhmEgk?si=yu9p2qfs7fkid0ch1 point
-
Morning, I know a lot (too much) has already been written on replacing the very very loud AC systems but I have just one simple(?) question. This relates to my very limited "extra" ceiling height room above my Oliver in my storage building. What are the two "best" low (no higher than existing Oliver installed) profile quiet AC to replace the current beast on my 2022 Oliver? Why? Thanks (FYI: From Wisconsin and we don't use AC here. However, just returned from the 100 degree SW and rethinking the topic.)1 point
-
I was thinking the same thing. You walk all over the “deck” then fold it up and it becomes an interior wall? I’ll pass.1 point
-
I don't take the room to carry a ladder. With an old metal milk crate, I can reach up to our awning safety strap. Not going on the roof for anything! And for your dipstick and anything in the engine bay or an open truck bed, ya gotta get on of these! Somebody linked this in another post and I bought one. We always put it on our curbside rear truck wheel which allows Chris to climb up and reach in for cooking equipment. https://www.amazon.com/dp/B0002Q8TWI/1 point
-
Wow, just a $3,000 upcharge for a few hours labor! 🤣 Sorry @Gliddenwoods I can't help much since we would NOT ever again be without our HIGH-PROFILE Furrion Chill Cube! Its height in condenser and evaporator coils is one thing that makes it so efficient. At 3.25" taller than the Dometic P2 our Oliver measures 9' 8 1/2" tall at the top of our new Chill Cube A/C. It should fit under a 10 ft garage door. You should measure for yourself the true heights of your Oliver on top of the A/C and your garage door opening. I do not believe the advertised height of the Oliver E2 is accurate. Furrion has a low-profile unit, but it's not "whisper quiet" nor variable speed: https://furrion.com/blogs/rv/chill-cube-vs-chill-he-vs-chill-he-low-profile I hate to see anybody go with a Dometic A/C product. OTT doesn't exactly have a proven track record in picking winners in this category!1 point
-
Basically I did the same with THESE LIGHTS. Fairly often I camp where there are bears. Certainly I do not want to step out the door and come face to face with something a bunch stronger than I am.😵💫1 point
-
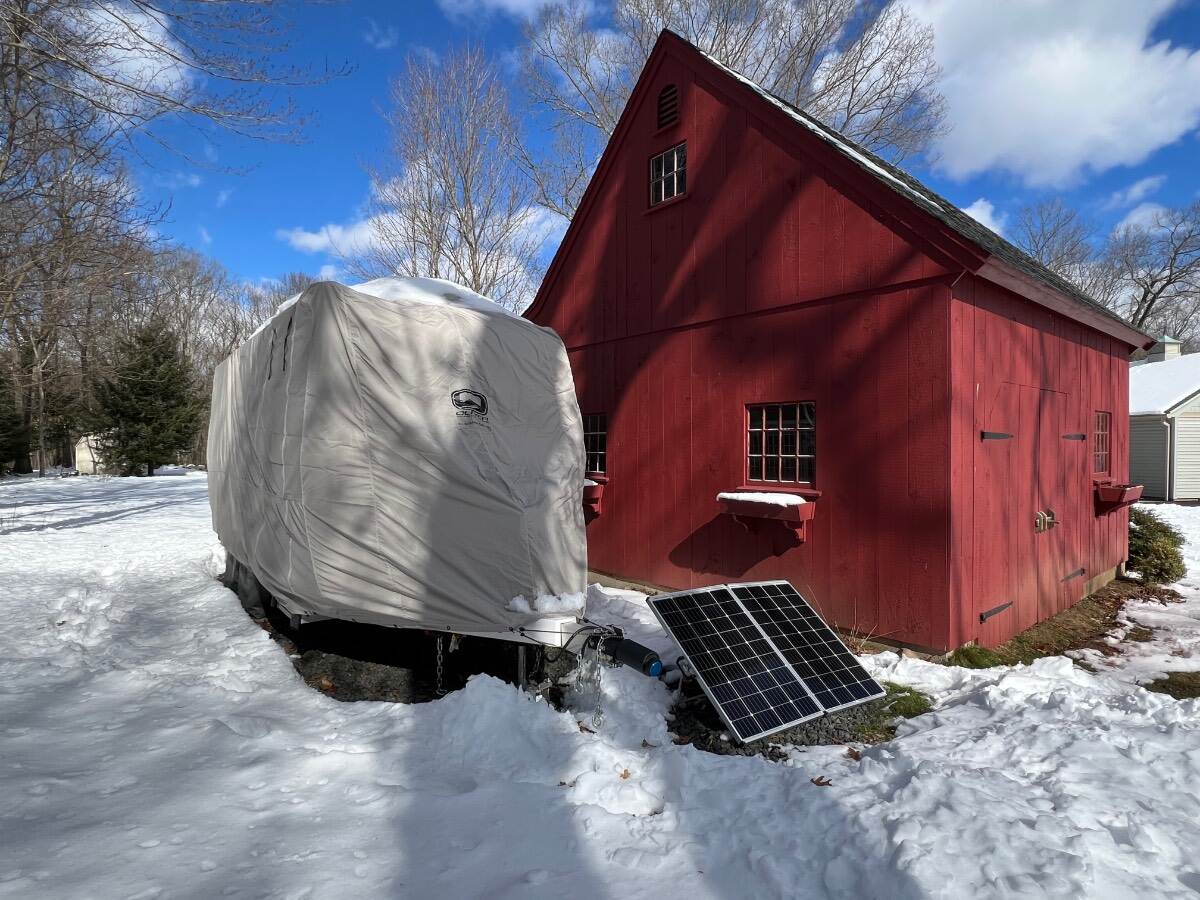
At the time that we purchased ( Jan '23 ) Oliver sold a portable panel as an add-on. It's basically the same panel(s) that are on the roof but with a stand and controller / converter. We found them of little use other than as a battery maintainer during the winter. It also works great for charging tractor and trolling motor batteries when needed.
1 point
-
For the do it yourselfers, you can buy 12” wide rolls of 3m clearbra and install it vertically on the lower front leading corners (below belly band) of the trailer hull. All you need is a spray bottle of soapy water, some spray alcohol and a squeegee. Since this area gets the most stones as it is directly behind the rear TV wheels, this is a simple and inexpensive way to protect your hull from a majority of debris kicked-up by the TV while towing. Mine has been installed since 2021 and is still in good shape and has taken a few stones along 40,000+ miles. Cost less than $40 in materials.1 point
-
Nice but too much luxury for my crusty 'ol a**. Couldn't take where I like to go either. Definitely not camping at this point.1 point
-
That's an excellent idea with the switch and 12V right there! You could remove the bubble level (for those of us who use LevelMate) and mount a post light top center.1 point
-
I have the zamp portable suitcase panel that I believe adds another 240 watts (this particular size is no longer available) Its awful heavy and the cable is just too short to be able to move it optimally with the sun on the streetside of the trailer. Several calls to zamp technical support did not result in being able to purchase a longer and heavier cable. When its only in the sun for a few hours the gain is not that great - we are typically in partial shaded sites. There is also the worry that someone will walk off with the panel while i am not at camp. Pulling it up and placing it back multiple times is a hassle. Finally even though we are at nonelectric sites most of the time, we typically dont need the portable unit. For all of these reasons, i find myself taking it along less and less. There are a few situations where i will be happy to have it but those situations are far and few.1 point
-
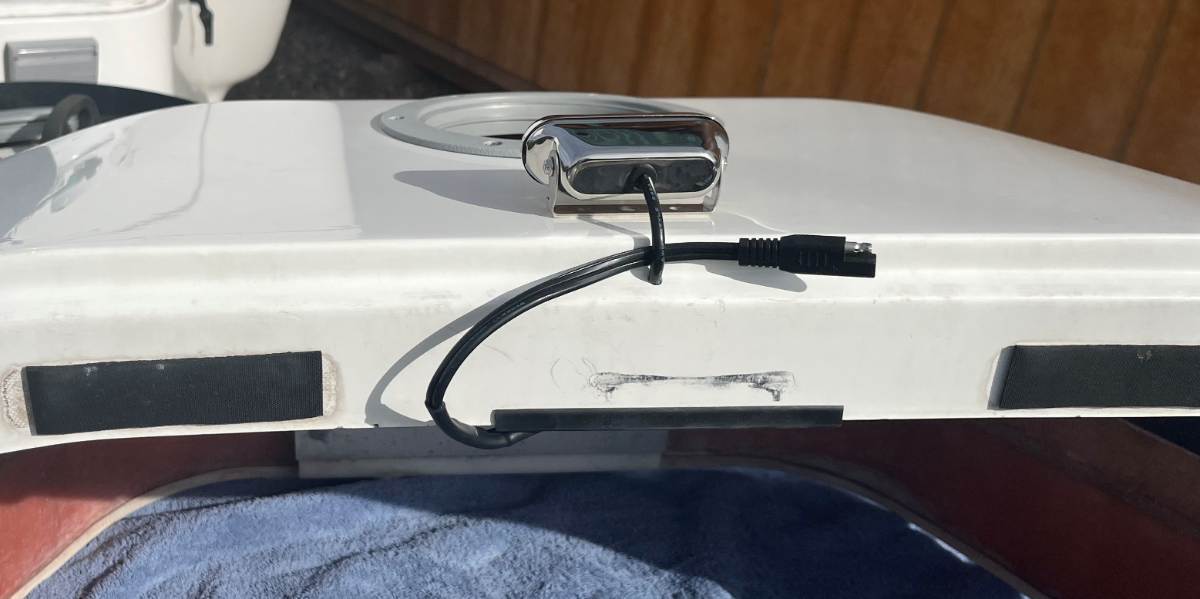
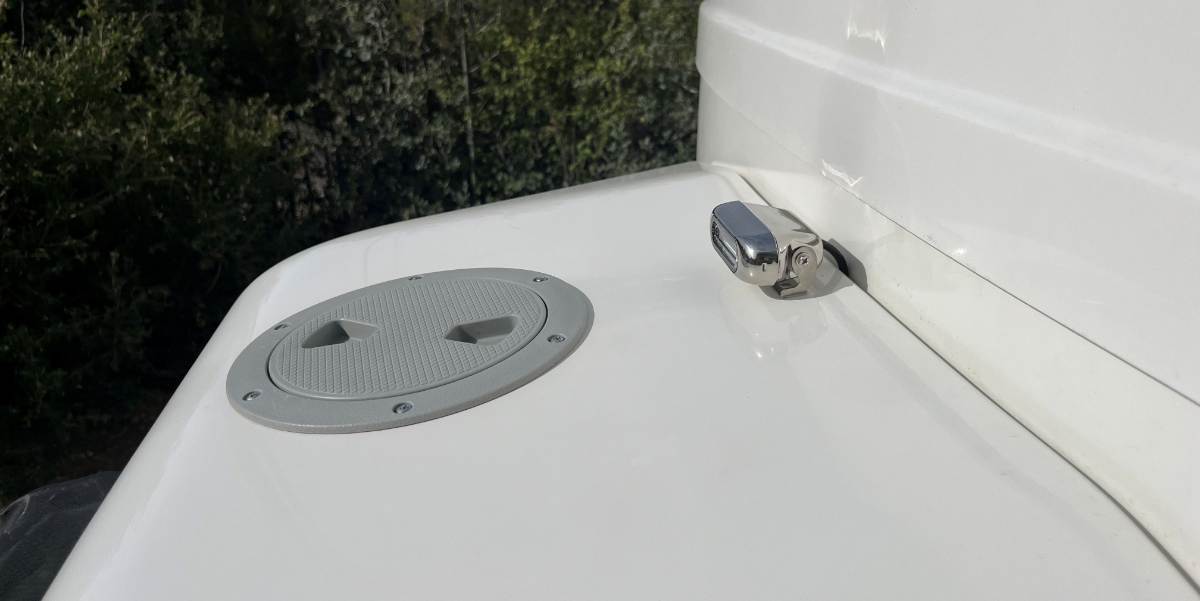
Finished my install on a front light, but won't be able to see how effective it is until it gets dark tonight (more pics after). My hope is that when the TV is attached, I can unhitch when getting to a campground after dark and see what's stored in the truck bed. I got this Docking Light on the same order as the Porch Lights. https://itcshopnow.com/products/exterior-led-flood-boat-docking-light I used 3M 4950 VHB tape to mount it the the top of the doghouse. There is of course a wire harness, so I drilled into the doghouse but not on top, just behind it where there is room and it's out of sight. I used a 13/64" drill bit which is a hair over the diameter of the wire loom. The picture shows the SAE disconnect wrapped up, only so it could be seen in the photo. Got to have a disconnect to fill the LP tanks. I tapped into the power for the emergency brake which is unfused 12VDC (the brake switch still has a direct connection). Added an inline 2A fuse and a switch in front of the doghouse. Added wire loom and tied up everything. Chose this location for an easy reach from either side, somewhere out of the way, and with a straight line for drilling the hole. The light draws 0.3A and provides 290 LM at 5000 K. Can't wait to see it at night! 😎
1 point
-
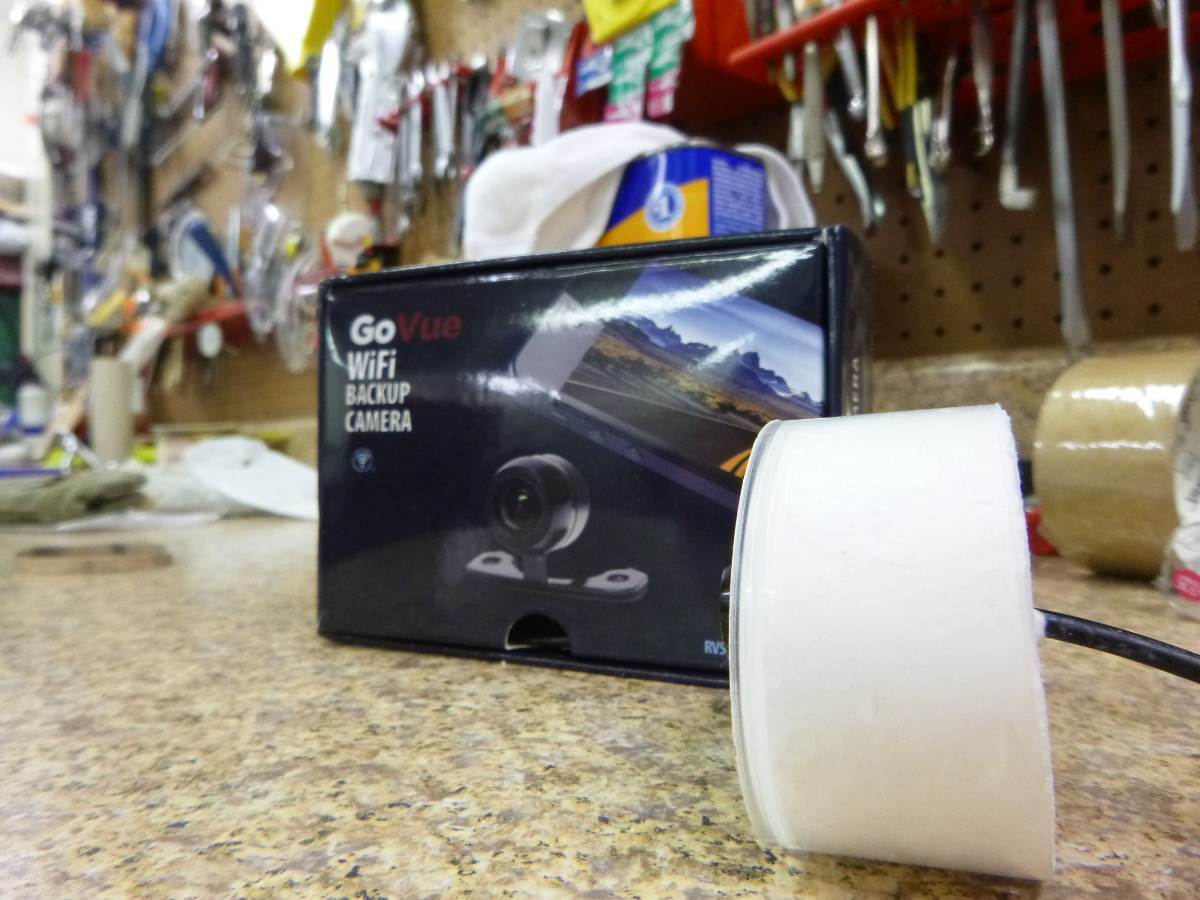
When Twist was in production I asked that the trailer be wired for a rear camera but I would supply and install my own camera. I decided that I would mount it in the spare tire cover. For security purposes this is a good place. However, for traveling down the road - not so much. The spray from wet roads makes this camera location virtually useless and even when its not raining it is difficult to use the camera in order to see beyond the vehicle that is directly behind me. Therefore, for driving, I now have another camera mounted in the usual high position (up near the marker lights) but still retain the lower camera too. If you decide to do as I did and mount a camera in the spare tire cover - PM me. The spare tire cover is NOT "in line" with the body nor the rear bumper. Because of this I needed to put a spacer in so as to compensate for the different angles. Bill
1 point
-
Bill - Wonderful job - both on the install and the writeup! Almost makes me wish that my original fan would give up the ghost. 😉 Bill1 point
-
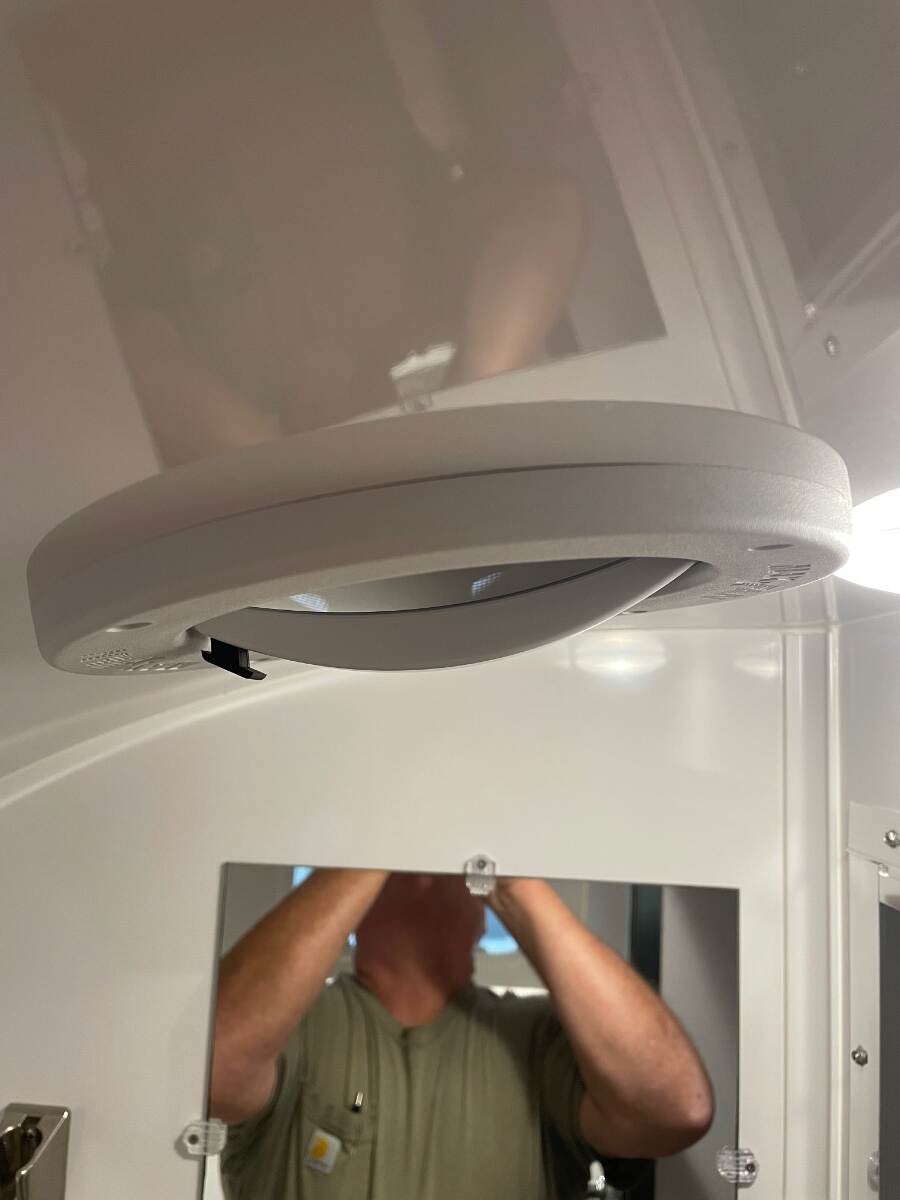
It actually looks very good in your pictures, so must look perfect from the ground. Job well done and an excellent detailed write-up! 😎 Too bad OTT doesn't make a small flat area for the bathroom fan in their fiberglass molds (inner and outer hulls). It would make for a better fit and make this job easier on all of us!1 point
-
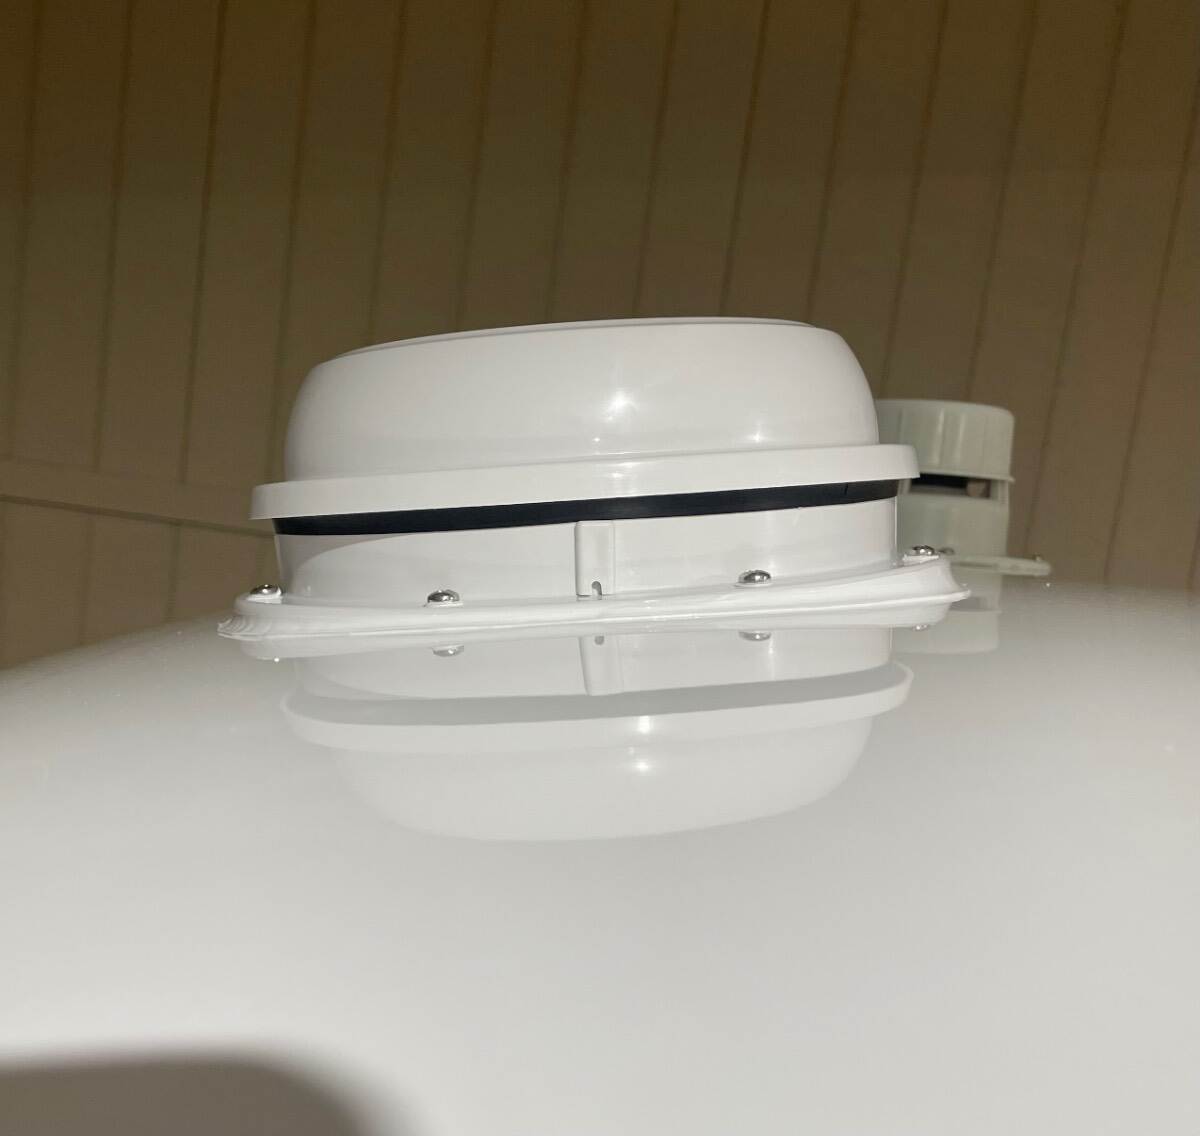
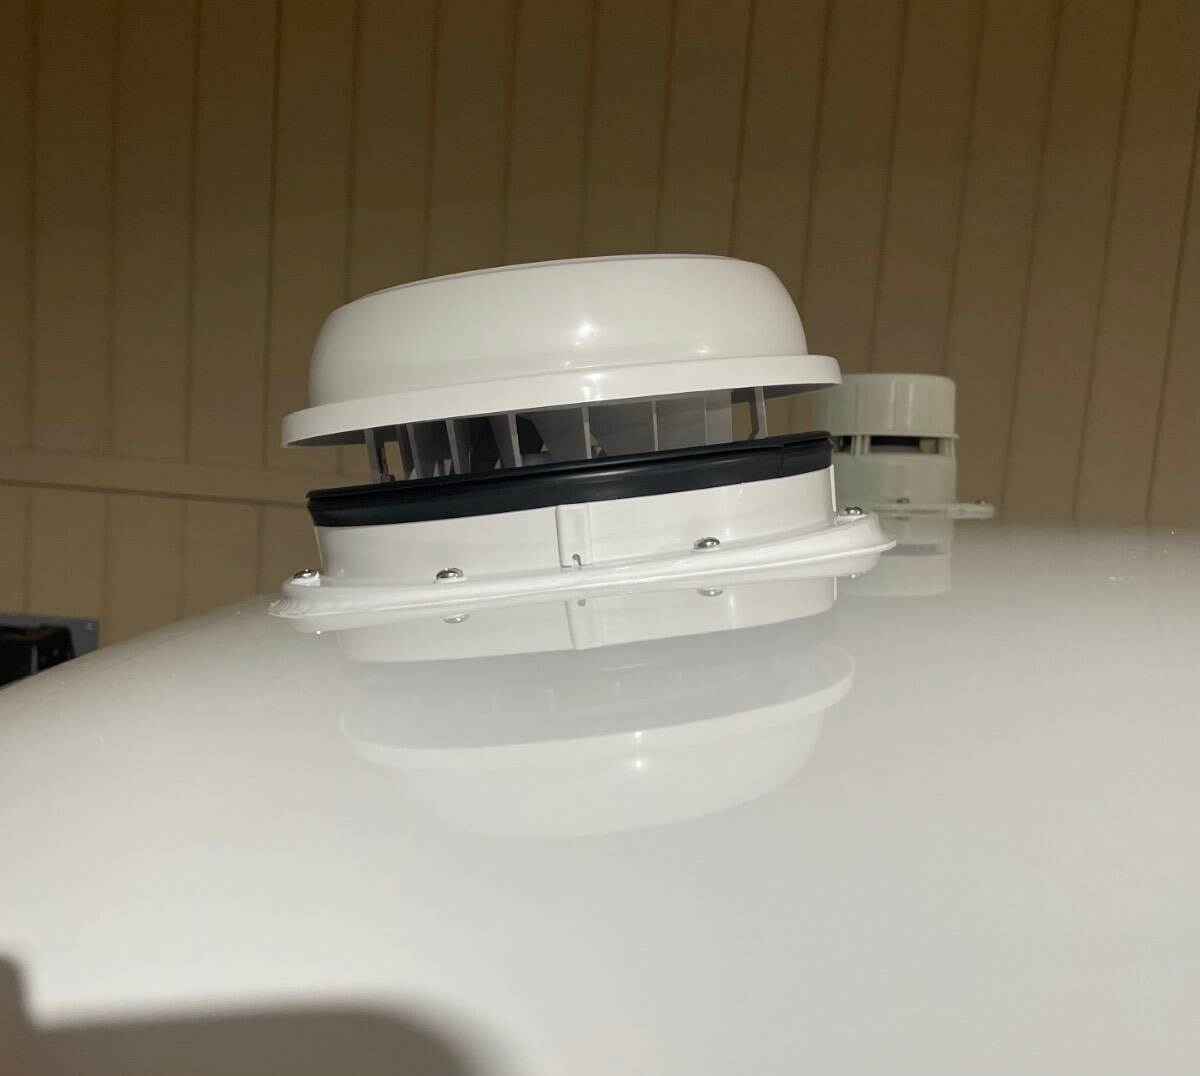
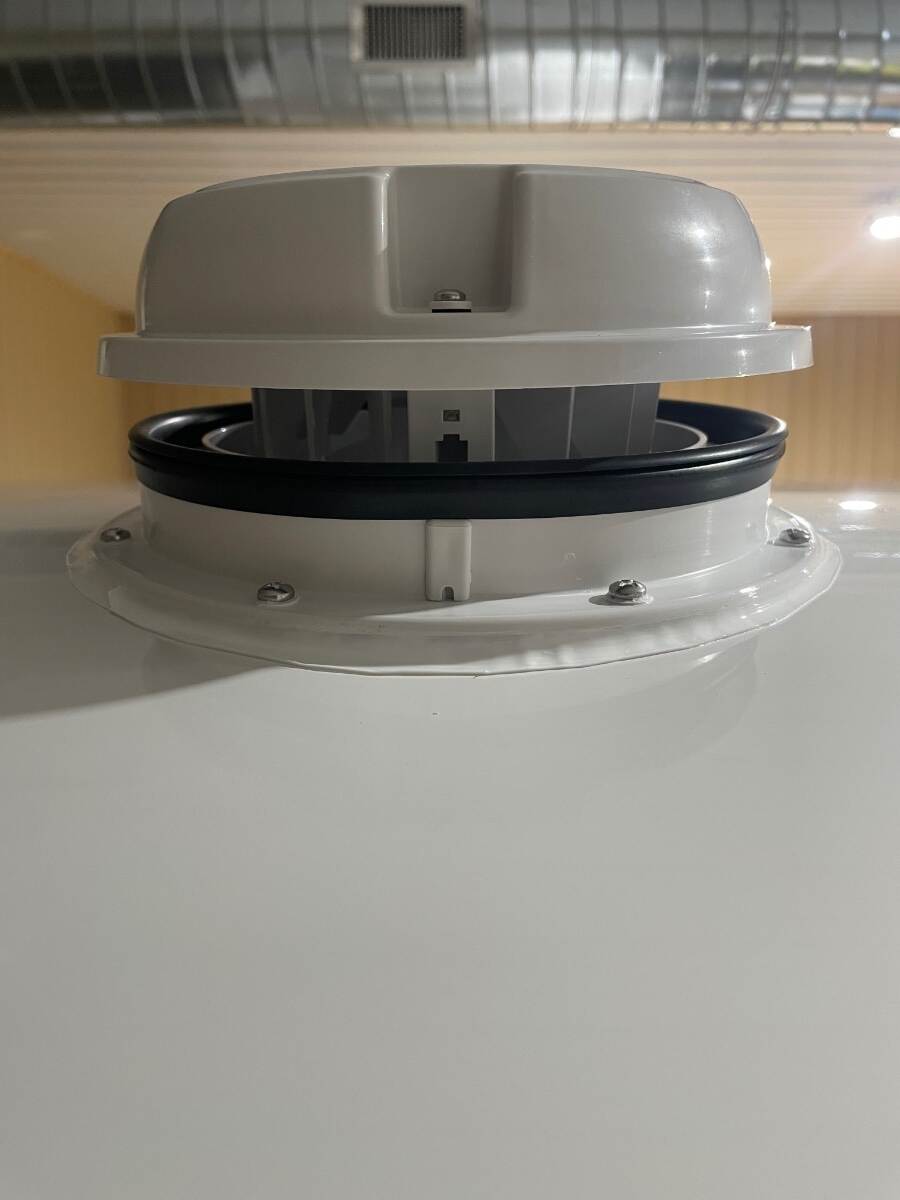
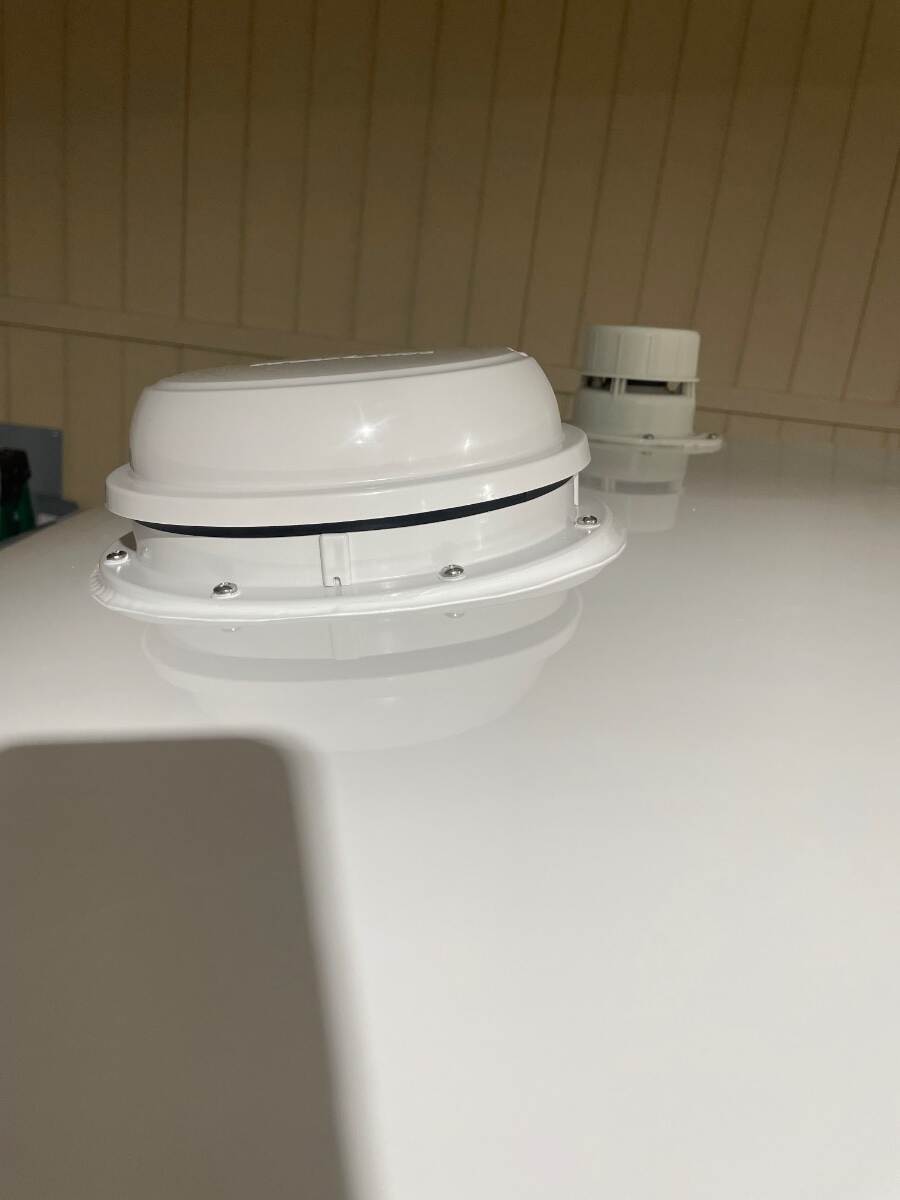
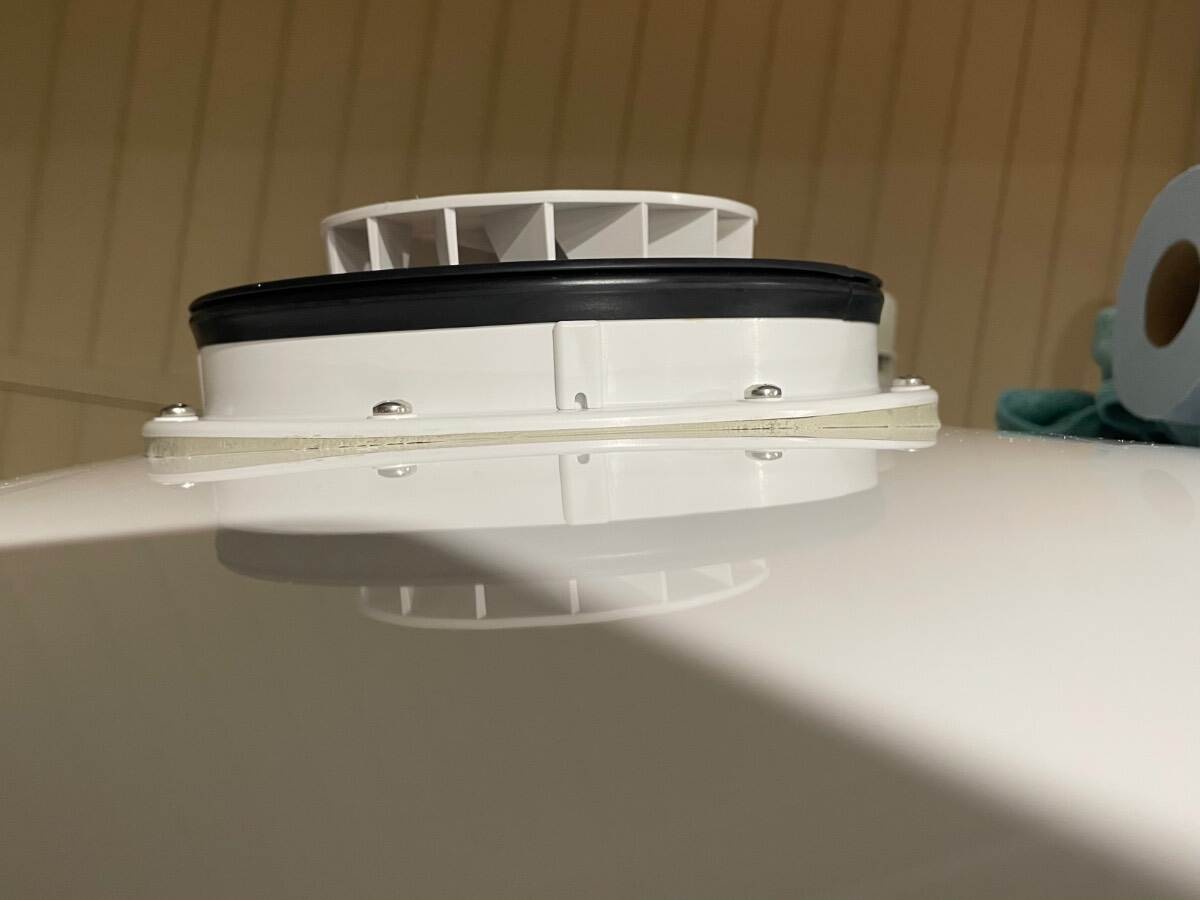
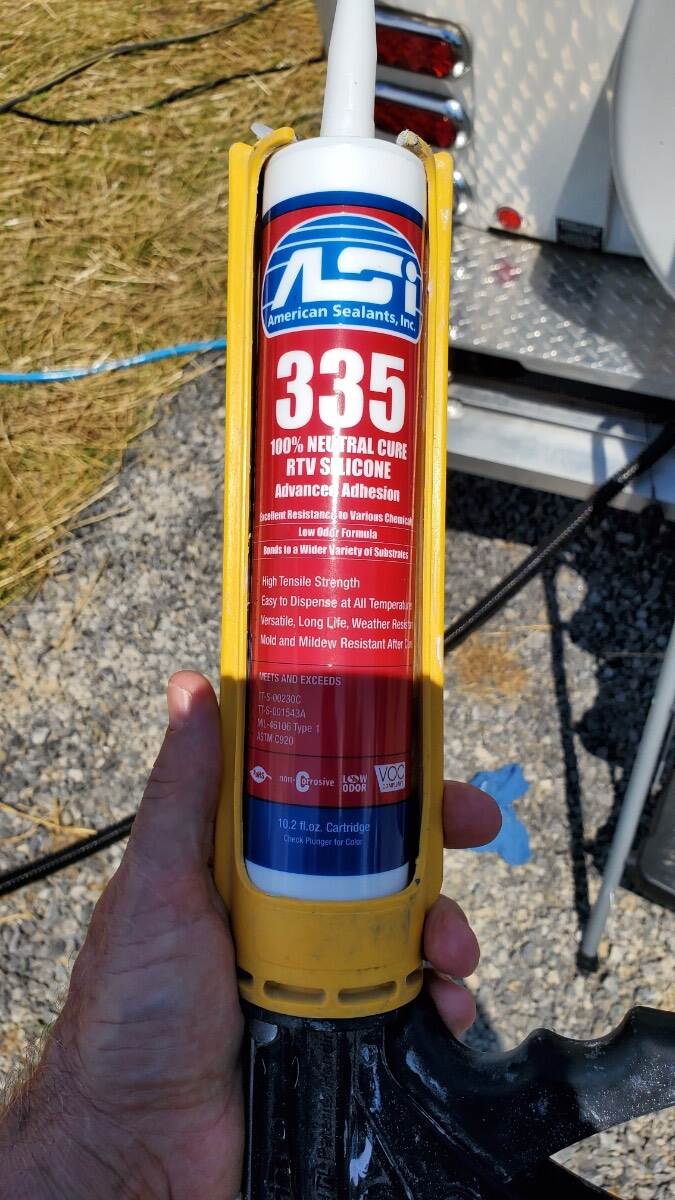
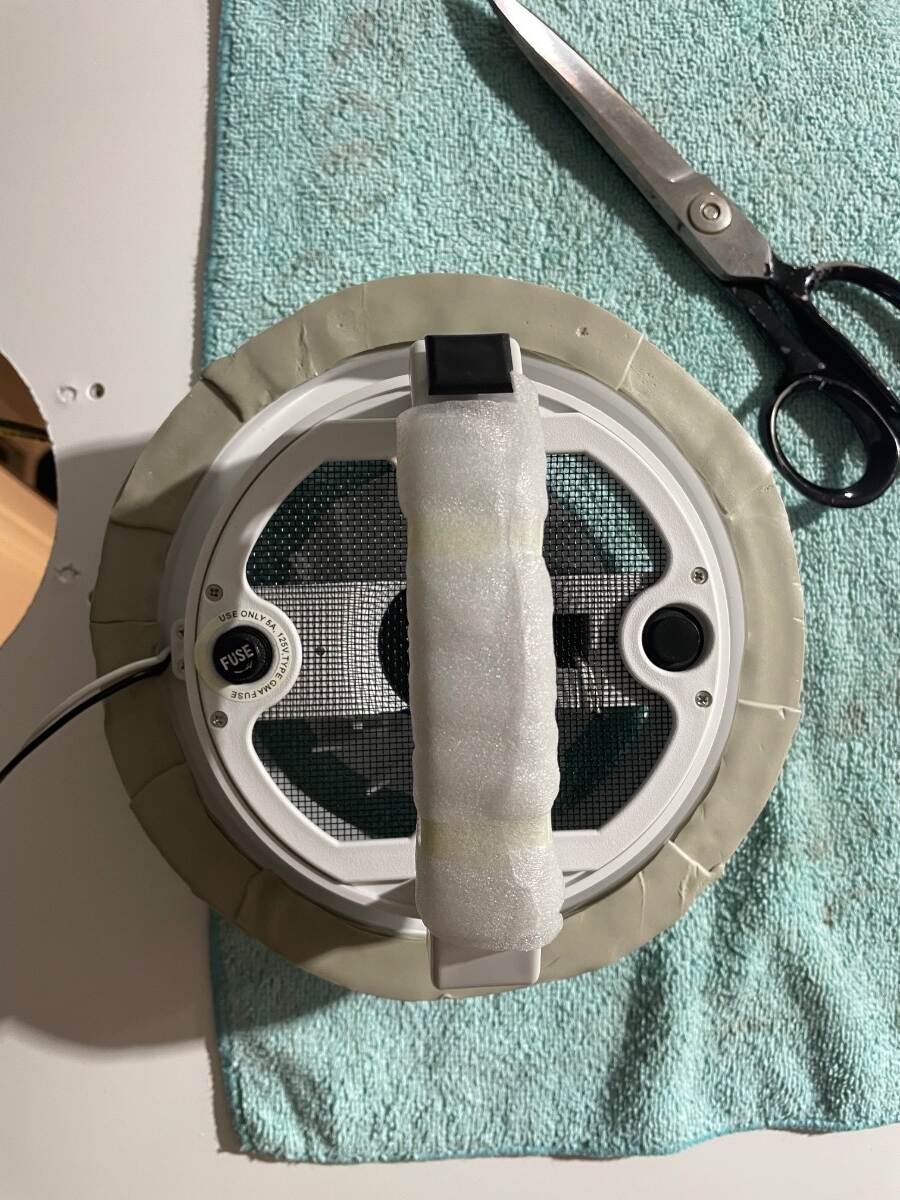
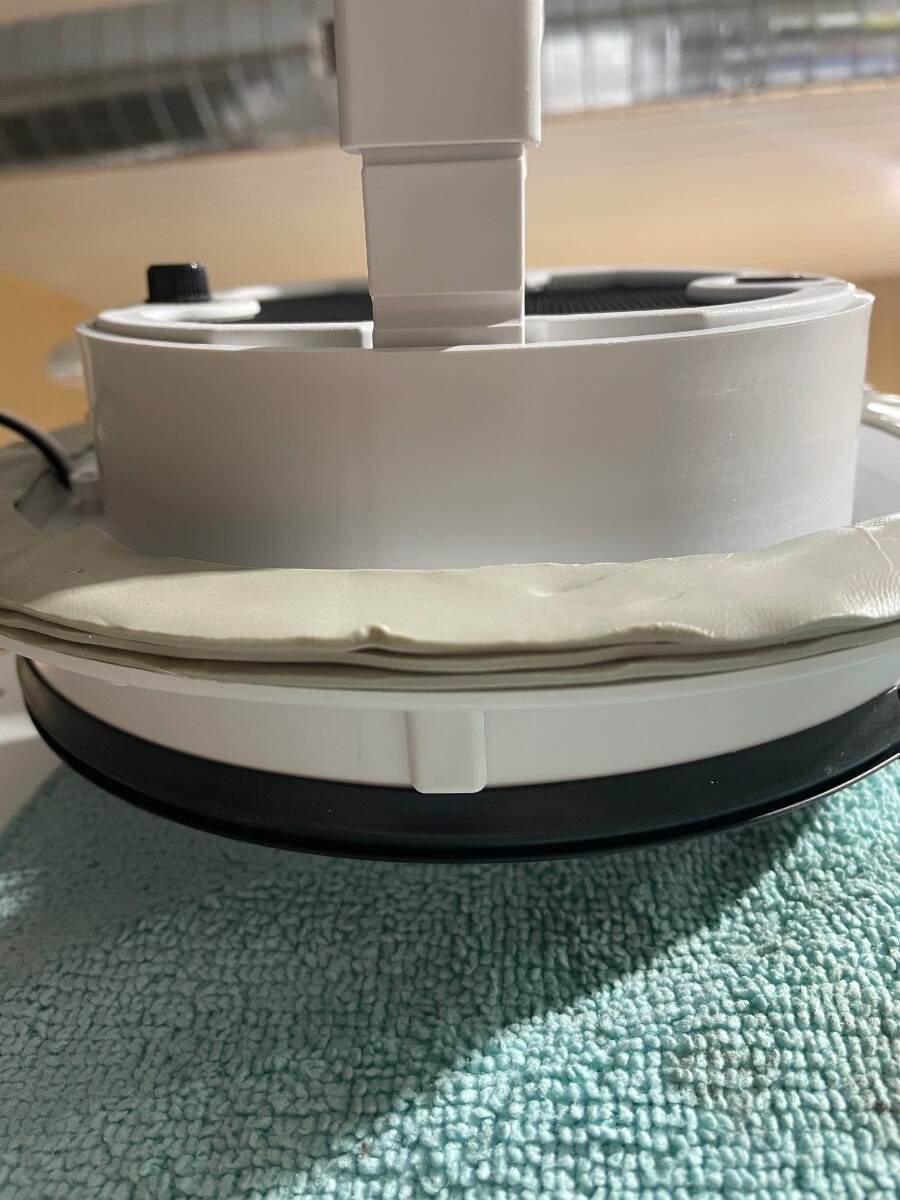
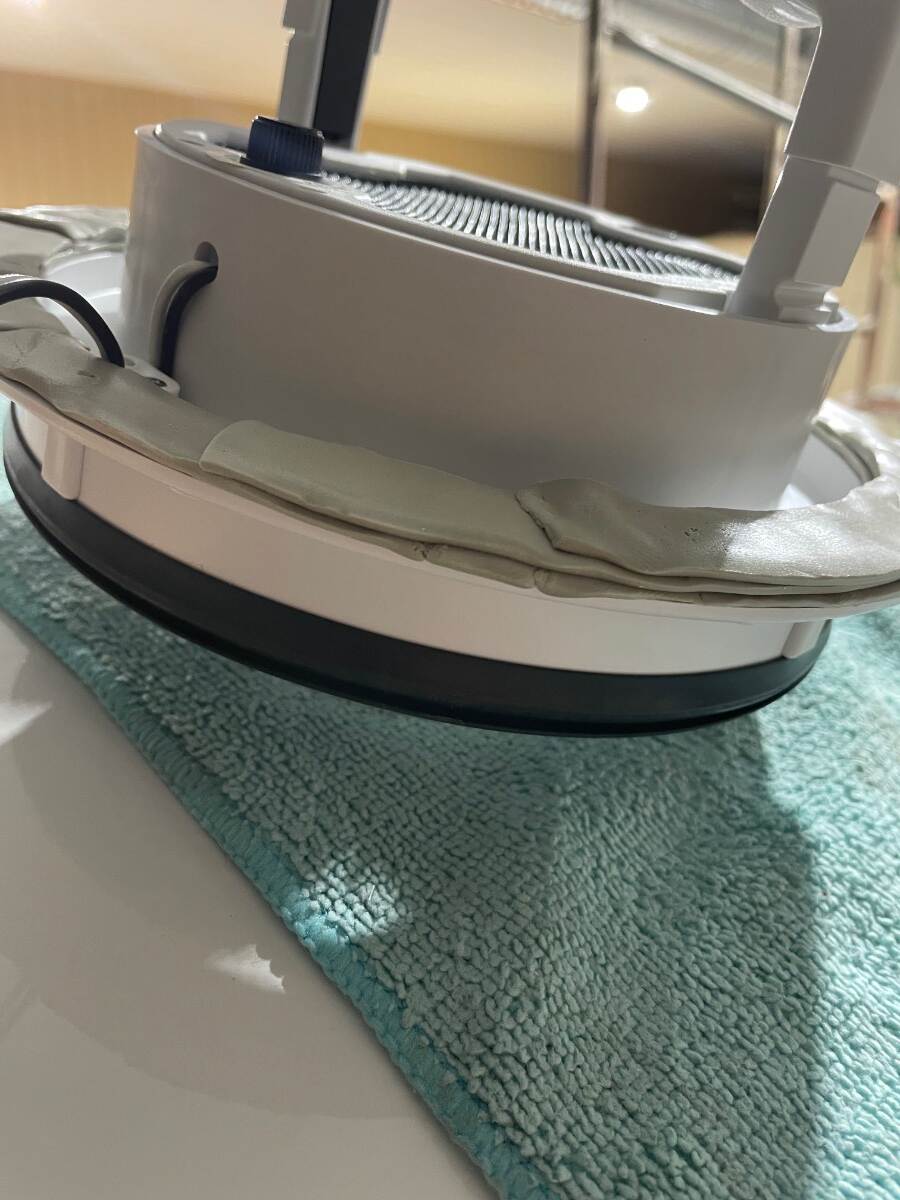
With the inside work complete I went back to the roof area, trimmed the oozed butyl, wiped with isopropyl alcohol again, and taped the area to be caulked off leaving about a quarter inch gap from the edge of the flange in the front and rear and about an 1/8 inch gap on the sides where the caulk would be the shortest. I applied the caulk 3 times, wiping it off the first two times, reapplying the tape and recaulking each time because I didn’t like the way it looked. I finally left it alone because I decided that if I kept messing with it I would keep screwing it up and I was starting to get hungry and it was close to supper time. This picture shows the fan after the oozed butyl was trimmed back. It shows the built-up butyl in front of and behind the fan to keep the flange straight. This next picture is after the ASI 335 was applied. Notice that the black seal is straight, not bowed down at the front and rear due to having the flange pulled down to touch the roof. The black seal must remain straight so that the cover will seal properly when closed. I applied the ASI 335 to the screws but didn’t like the way they looked so I wiped it off. I had applied ASI 335 to the screw holes and the screws were twisted in through up to 3 layers of butyl so I figured they were sealed well enough. The caulk job wasn’t perfect but it looks good from the ground. The ripples are from my hand shaking after going through the process 3 times before finally accepting that it wasn’t going to be perfect. I actually like the stepped edge of the caulk versus a feathered edge because I think the feathered edge of caulk doesn’t hold up well after repeated washing, drying, and waxing. We’ve pulled the trailer through wind and rain for 1350 miles and it has remained closed and hasn’t leaked. I can’t completely say that it is quieter than the original Ventline fan but it does not have the rattle that it did. ASI 0240 https://meridianadhesives.com/products/asi-0240/ ASI 335 https://meridianadhesives.com/products/?product_search=335 It looks like ASI has two versions of the 335. The stuff I used looked like this Good luck on your installation. Bill
1 point
-
Welcome Brian, looking forward to hearing more re your project(s)! Is it worth it? An extra 100W is a drop in the bucket, although aimed at the sun it is more efficient compared to each 100W on the roof. We added a Victron MPPT 30A SC and the 30-LB Renogy 400W suitcase. I've found almost 2 years later that we rarely use it and should have saved the upgrade $$$. Wish somebody told me this 2 years ago! We move around a bit. I now believe extra solar is for those who want to boondock in one place for a week or longer. And you have to chase the sun all day in moving panels. There is an Oliver owner who sells a machine that rotates the panel, but it's another thing to carry and it only holds one panel. The only guys I see running much solar are the ones that live in their campers, staying the 14-day limit on BLM lands. Since we move around a bit, sometimes just one overnight, most often we stay 3 nights and then "on the road again." In this use case the DC-2-DC charger is a much greater value. We can charge 200 Ah while towing a half day drive. 😎 Our 400W suitcase will not add 200Ah babysitting them all day on the sunniest of days! Here are my two related upgrade links:1 point
-
Interesting, but not interested. Oliver is simple, well designed for the space available. It is not full of gadgetry. KISS (Keep It Simple Stupid). I think I'm showing my age. SkyDream is just the opposite. The only thing they have in Common is they are made out of Fiberglass. Probably half the places I camp the deck would useless due to thing being in the way. Also in the Pacific North West (PNW) I would worry about leaks. Although when I saw the newest walk through video on the new LEII, I had reservations over the awning with the solar panels on top. It is great having that much extra charging power. I don't think the longevity of these flexible panels would come near the useful life span of the solid mounted roof top panels. Replacing the awning I'm sure would be very expensive. I have trouble getting the regular awning clean and dry in the PNW due to the 7-8 months of rain. When I do have the opportunity to roll out awning and clean and let it dry completely the Oliver and Awning ends up blocking the whole driveway. So it has to be a planned project. I do pack a small Stihl blower and a ladder so I try to blow off the pine needle/leaves/twigs off of the top before finally rolling it up for travel.1 point
-
We use 200w Renogy panels when dry camping or boon docking for more than 3 days in one place. See our article. External Solar Kit Details - Hull 505 We've found that it's helpful when the trailer is shaded by tree's and we want to keep things topped off for longer stays. CS1 point
-
I believe that it's used for a certain model of refrigerator that used 110VAC. My '23 model has one as well. Oliver wanted to have an AC option available if they decided to change refrigerator types / brands. The end of the cord in my trailer feeds up to the back of the refrigerator but it isn't connected to anything (since I have a 12V refrigerator). It's basically an extension cord.1 point
-
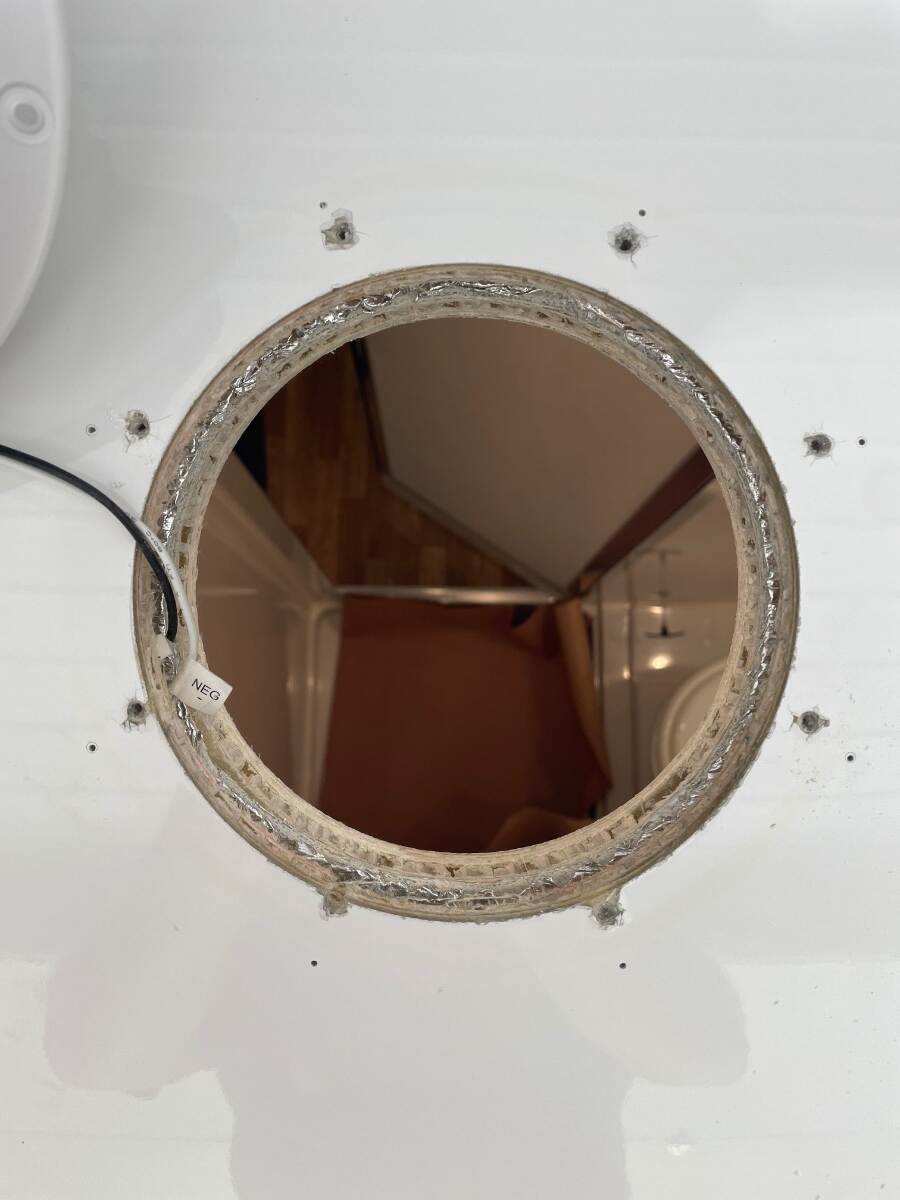
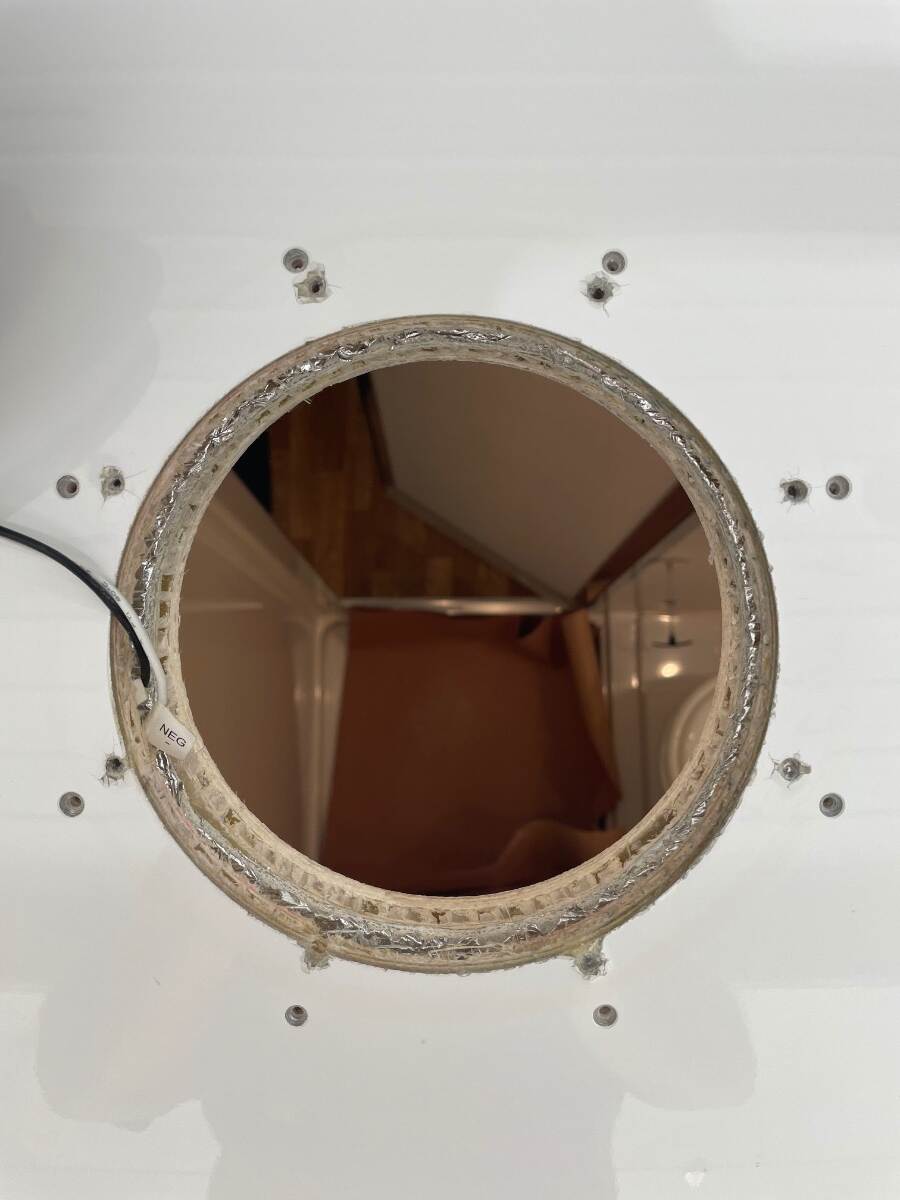
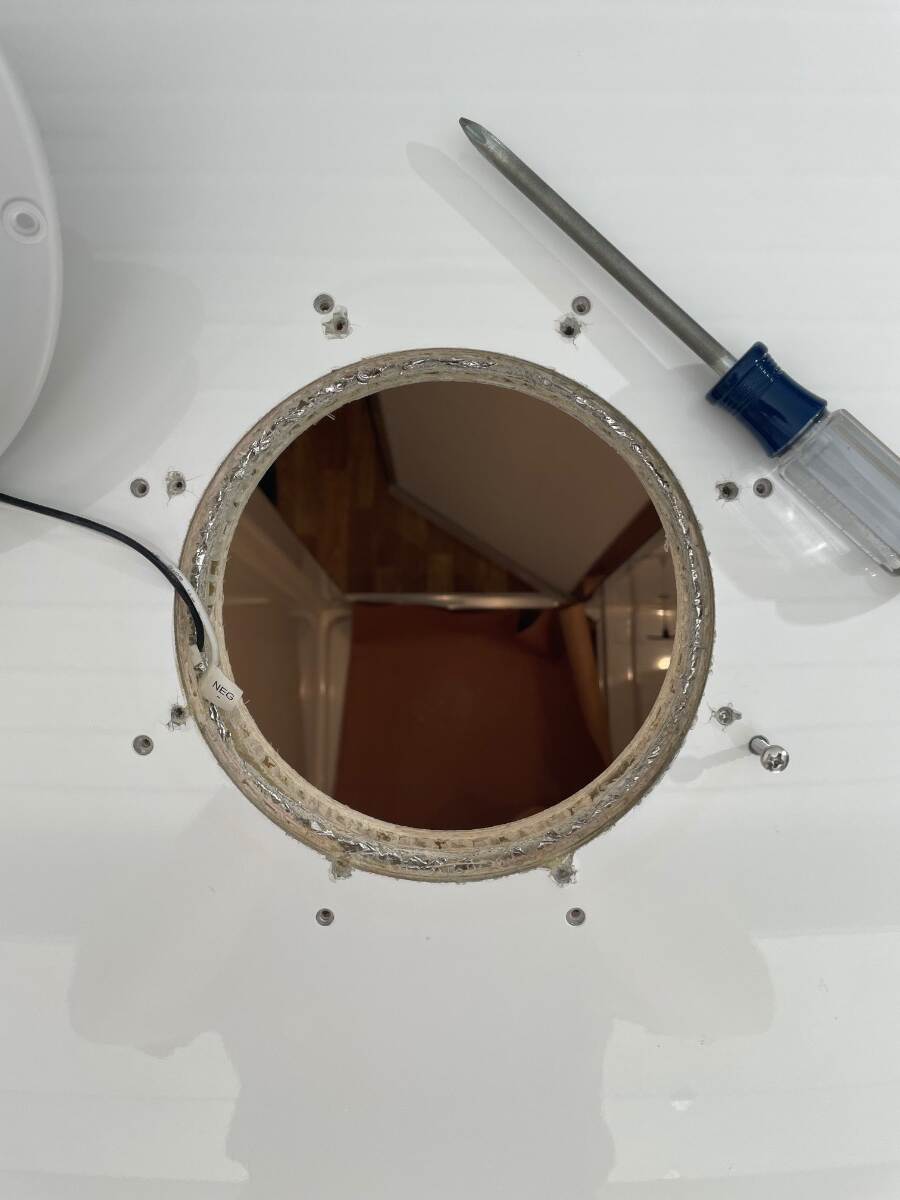
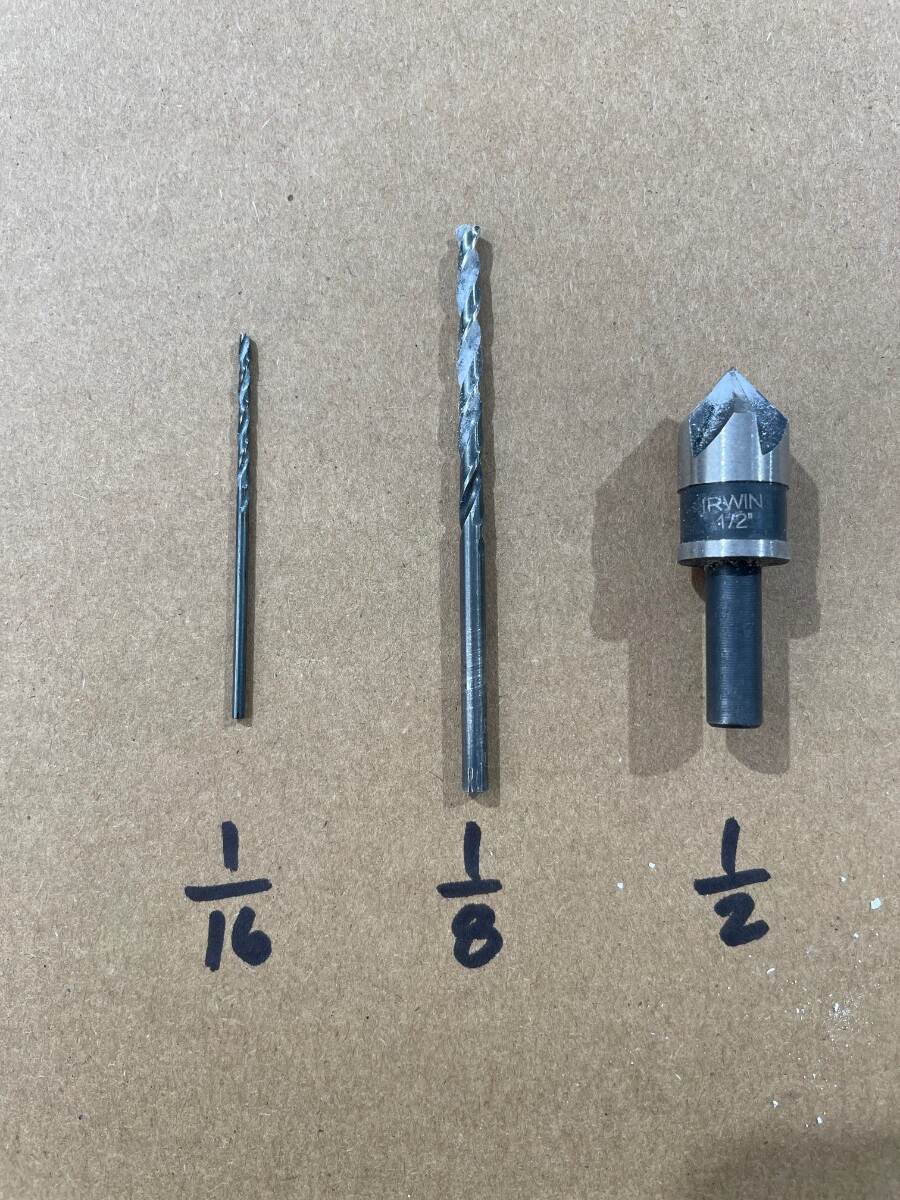
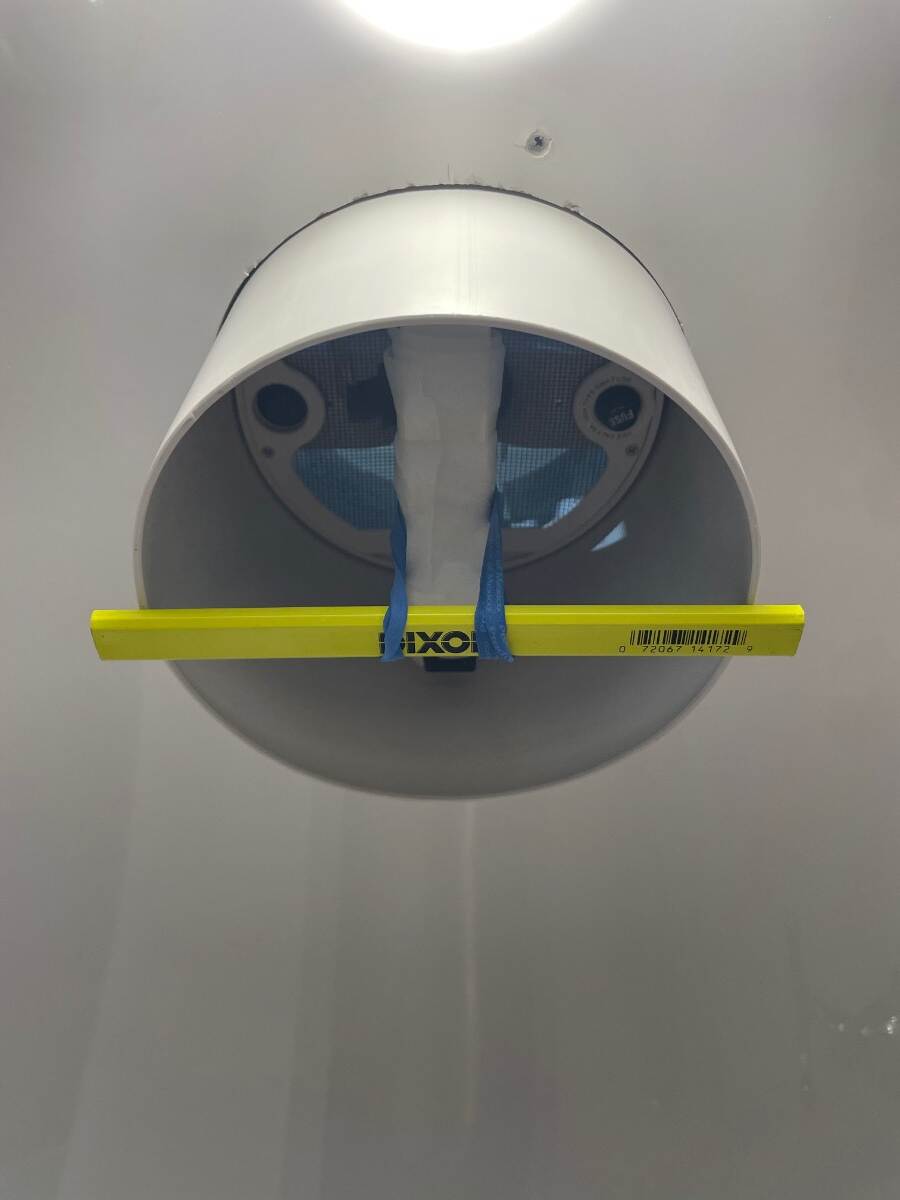
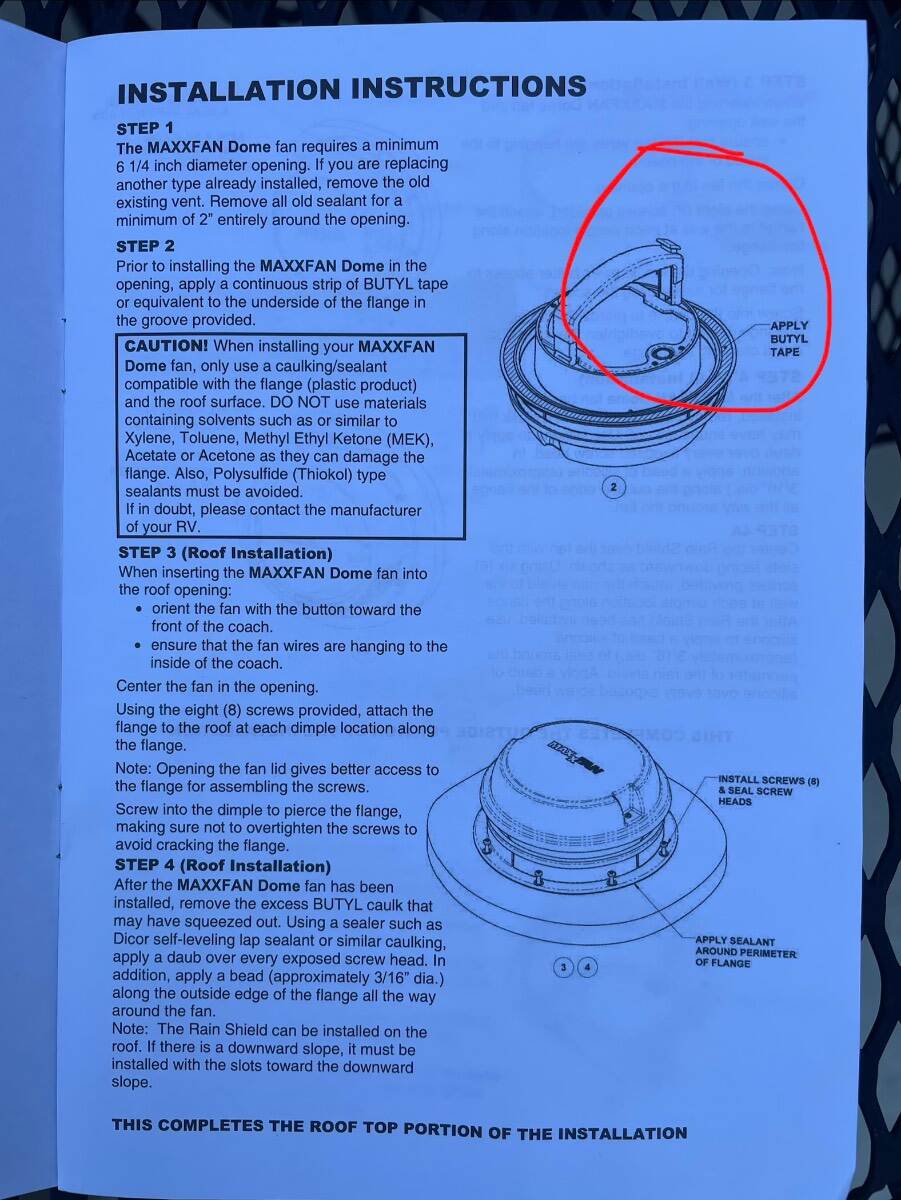
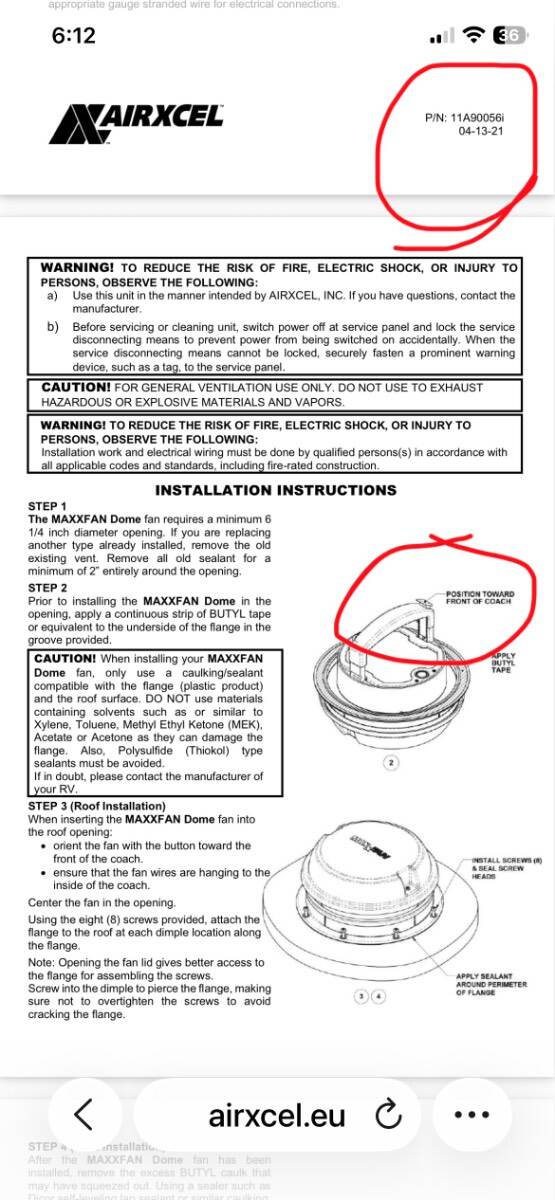
Picture below shows old Ventline fan removed and the roof area cleaned up. I used ASI 0240 adhesive remover and plastic scrapers. I cleaned up the edges of the original holes with a chamfer bit in a drill motor. The factory didn’t align the old vent with the hole very well and didn’t drill and chamfer the holes which resulted in chipped gelcoat. In this picture the pilot holes (1/16”) for MaxxFan Dome are located and drilled. I wanted the screws to be perpendicular to the MaxxFan mounting flange not the roof line so I tried to drill them at the correct angle to the surface of the roof. I did a lot of test fitting inside and out. The outside fan, the middle sleeve, and the interior trim ring must fit together well for this retrofit to work out right. I used a carpenter’s pencil and 2 rubber bands from of a bunch of broccoli to hold the sleeve in place while I got the pieces located just right. I did this before I marked the holes for the flange. New pilot holes are enlarged to 1/8 inch and chamfered Test fit the screws to make sure they are not too tight. If they are too tight you risk twisting the screw in two in the hole. If the test fit is too tight go up to 9/64 inch bit. I used a 1/16 inch drill for a pilot then enlarged with a 1/8 inch drill and finished with a 1/2 inch chamfer bit. Be sure to use sharp bits and drill SLOW. I wanted the flange to be straight, not pulled down to fit the curved roof. I applied one layer of butyl all the way around the bottom of the flange. I then applied 2 short strips between about 10:00-2:00 and 4:00- 8:00. I again applied 2 even shorter strips between 10:30-1:30 and 4:30-7:30. I tried to build the butyl up in the places where the widest gaps would occur, that is the front and back of the fan. I wiped the mounting location with isopropyl alcohol and let it dry and filled the old and new screw holes with ASI 335 and set the fan in place using a couple of screws inserted through the flange and butyl for alignment. The black button on the handle goes toward the front of the trailer. Work the wires and splice connectors into the space between the hulls while inserting the fan assembly into the hole in the roof. Tighten each screw down a little at a time and try to keep from distorting the flange. I would tighten the screws and leave them for a while to let the butyl push out then I would tighten them a little more until I got the flange sitting like I wanted it to sit and then left the butyl to do what it wanted to for a while. While the butyl was oozing I went inside the trailer and placed the sleeve back in the hole and made sure the upper edge was against the bottom of the fan and the notch in the sleeve for the wire retainer was in place and using a pencil I marked a line around the sleeve where it exits the curved ceiling. I drew another line 0.35” below this line to account for the interior trim ring and cut the sleeve to this line using a pair of heavy shears and a razor knife and finished to fit with a sanding block. I attached the trim ring and tightened the screws enough to pull the ring up to conform to the curvature of the ceiling.
1 point
-
On to Clayton Lake State Park, near Clayton New Mexico first boondocking since we left home April 18 We were enjoying the COE sites at $12.50 per night with power and water gotta practice our energy and water management now Too much rain has been a little depressing, finally saw the sun today
1 point
-
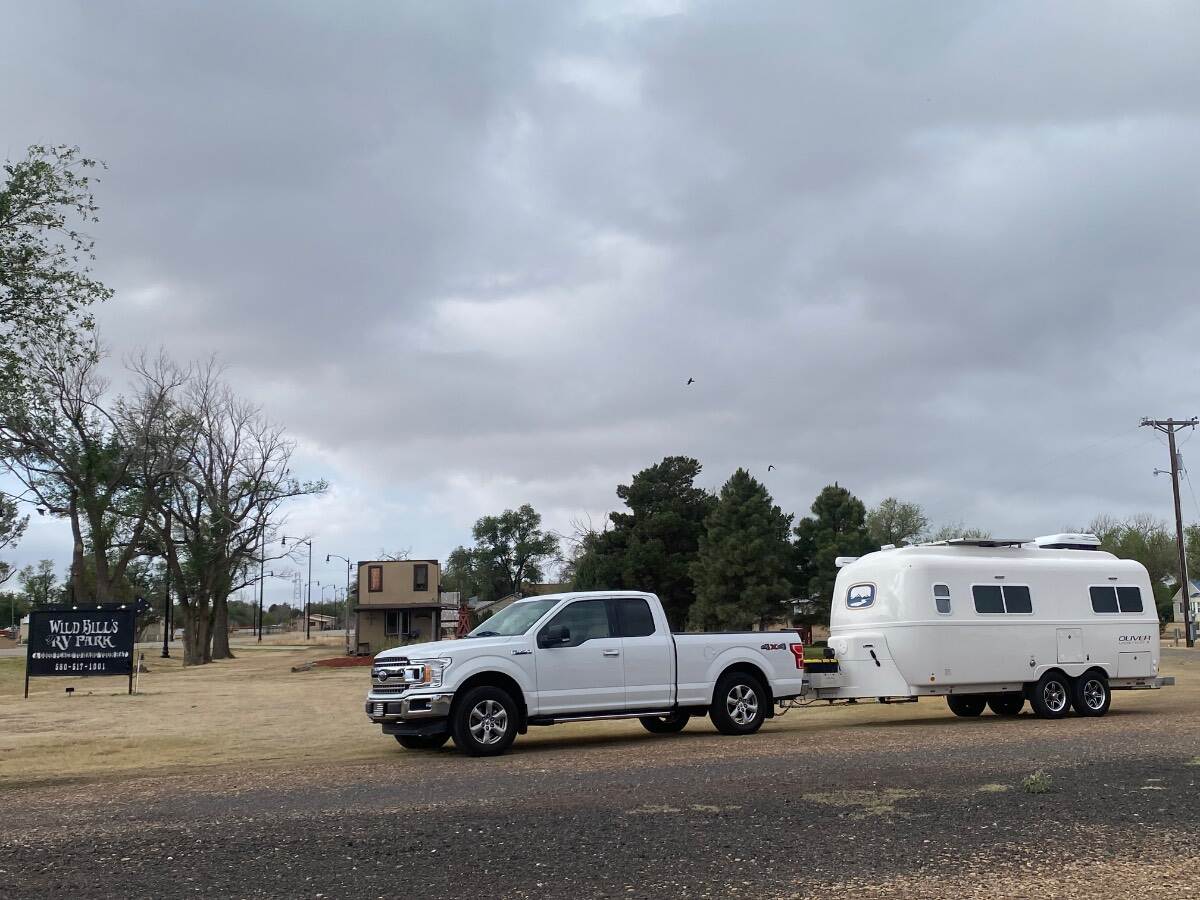
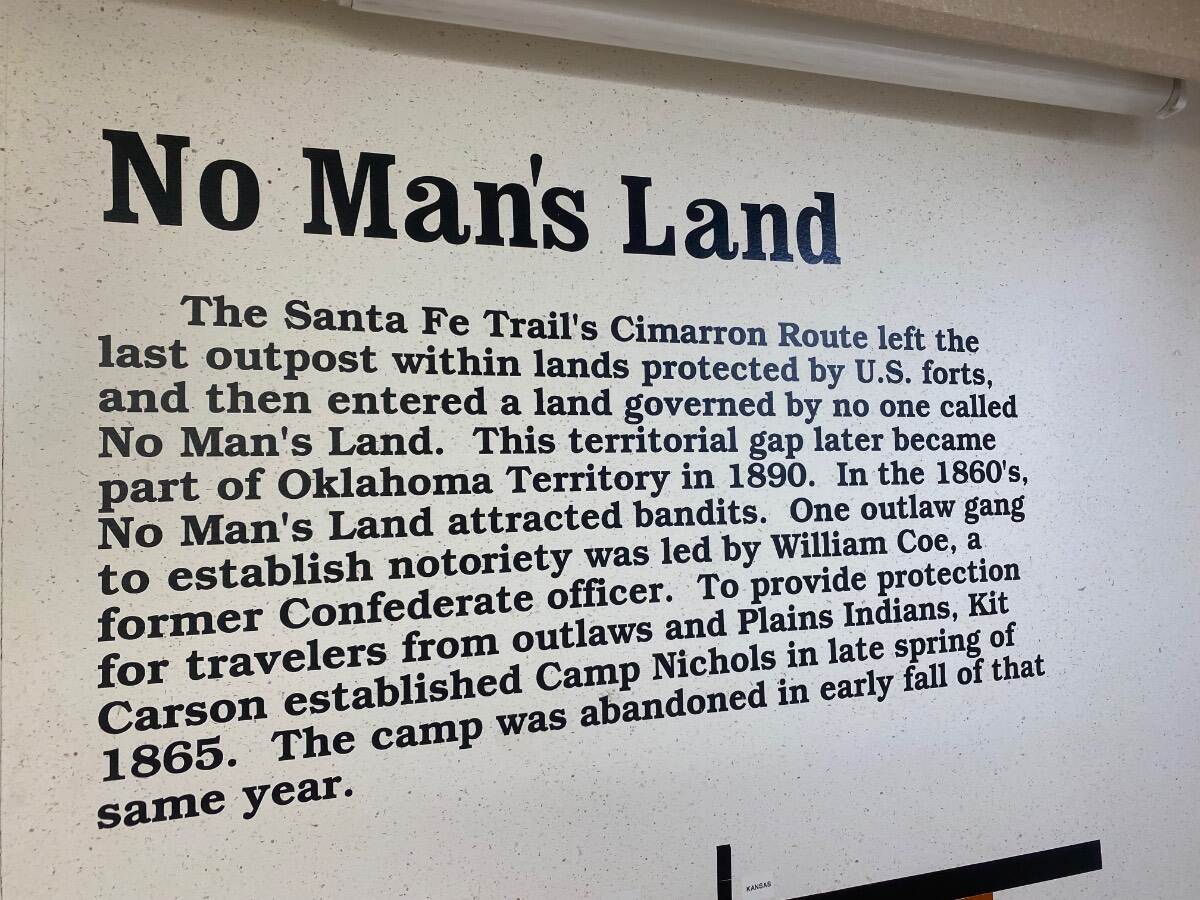
Wild Bills RV and trailer park Boise Oklahoma overnight stop fantastic museum next door do not pass up the museum !!!
1 point
-
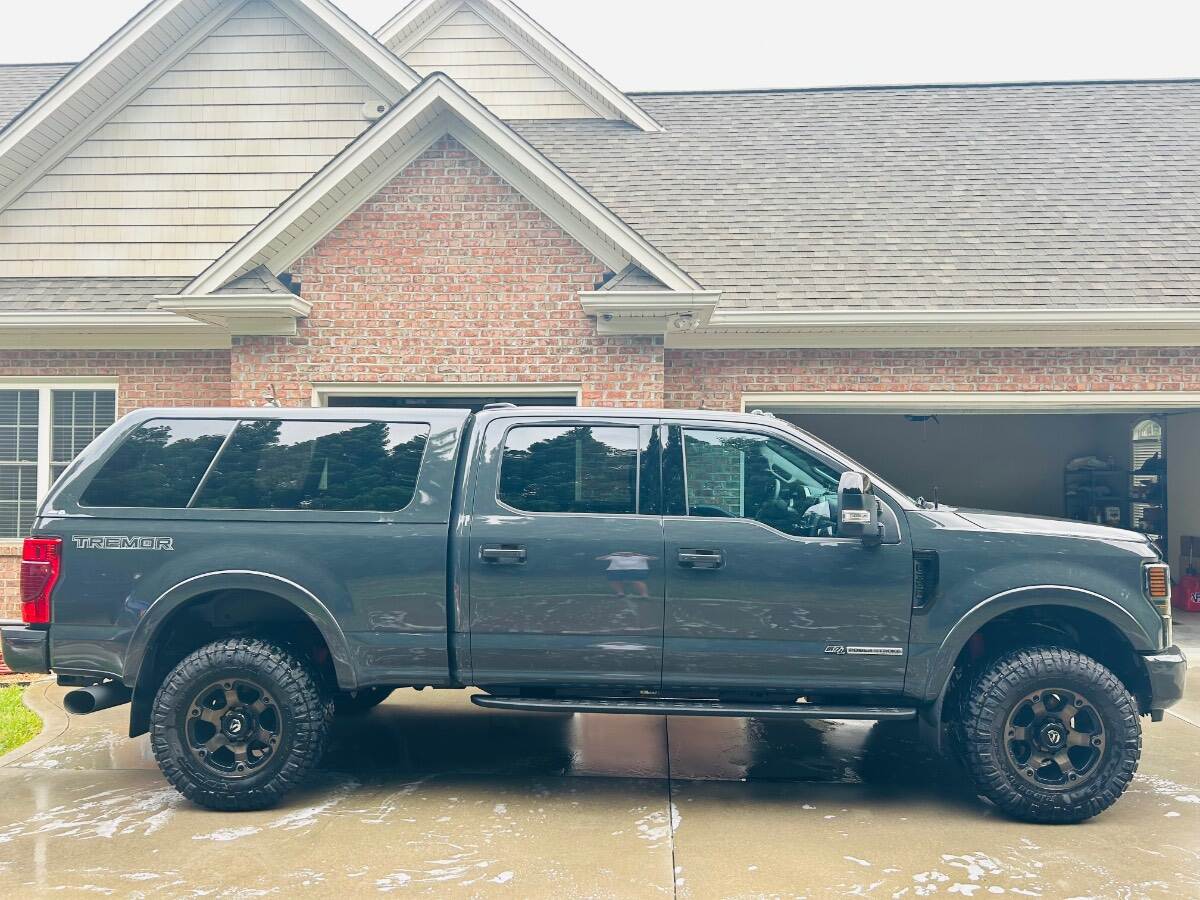
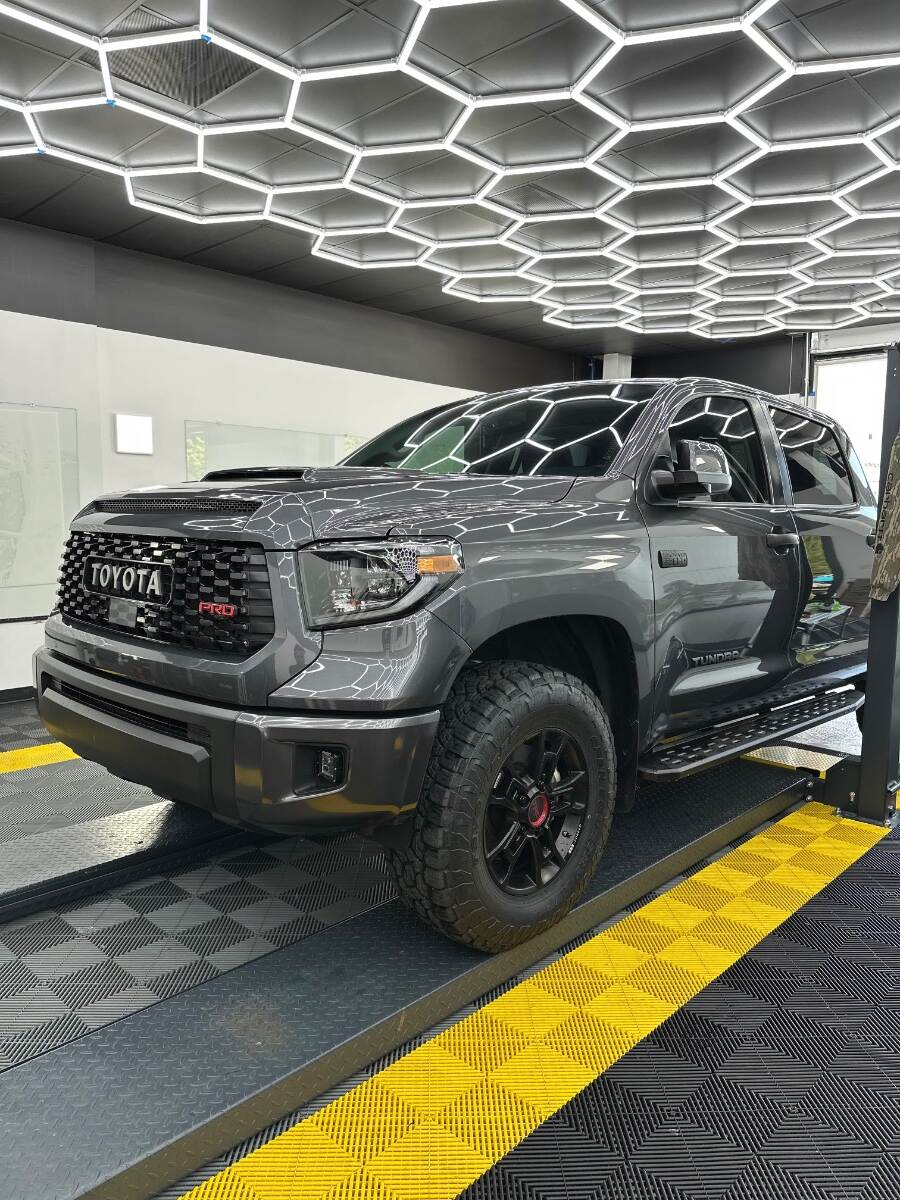
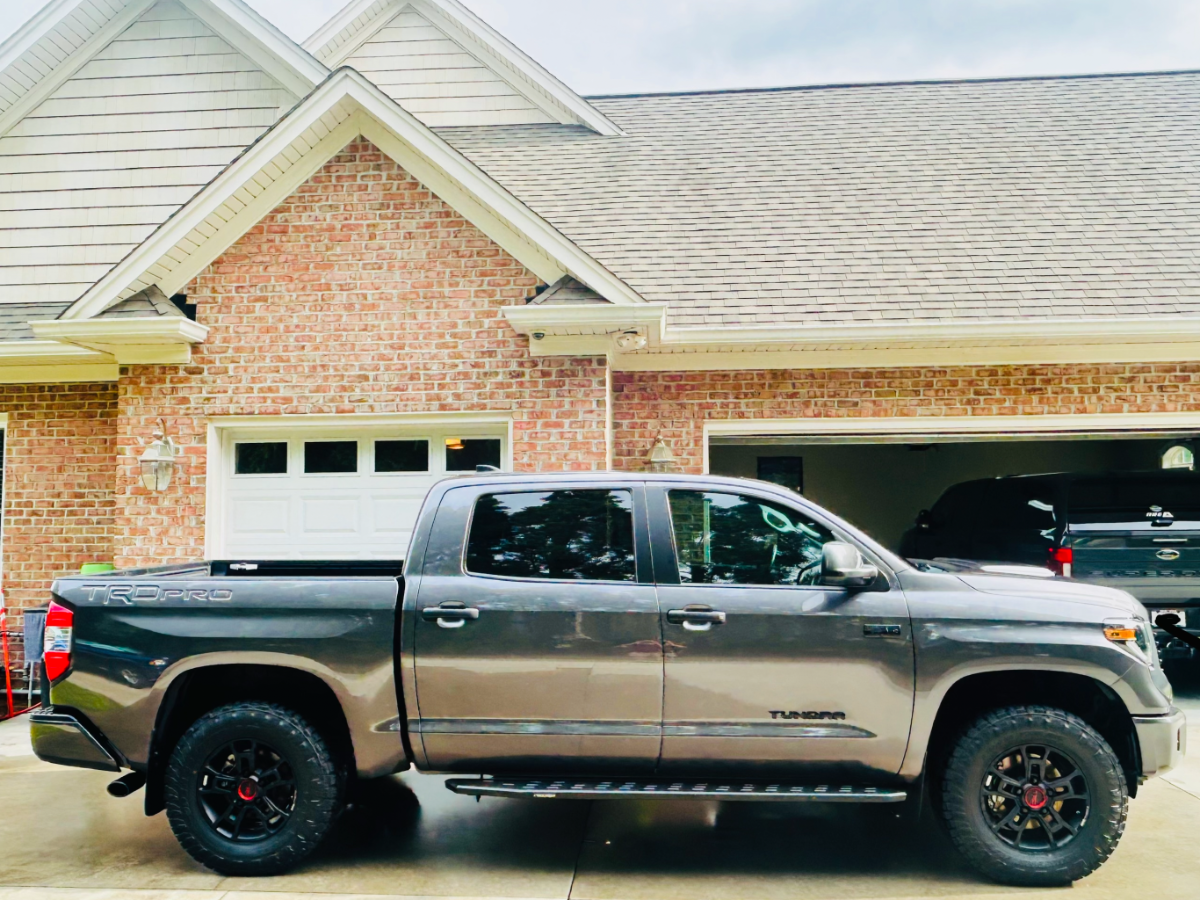
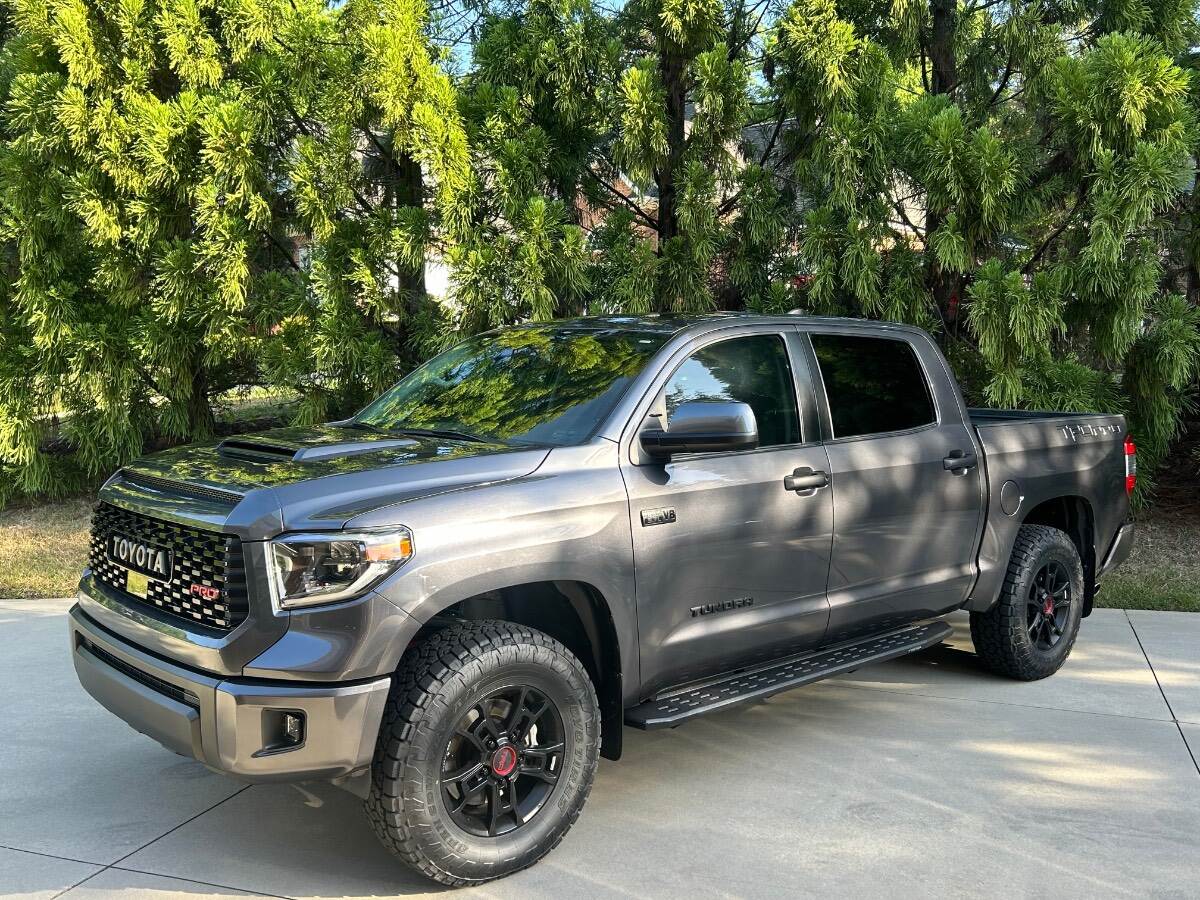
I am glad the CGI crew is now offering PPF on the front of Olivers. We have had XPEL PPF on the “blast zones” on the of our Oliver to include the dog house, aka LP surround and all the way down each side under the bottom edges of both sides of our Oliver. We have had it for several years now and it has really worked as advertised. Shortly after we took delivery of Hull #634 we had 10 mil XPEL paint protection installed. Here is a photo of our installer working his magic. The standard paint protection used on most cars and trucks today is 8 mil. The 10 mil material is naturally thicker and it’s really tough material. It’s presently the thickest p/p made by XPEL. So far, it’s held up great with no damage to our gelcoat. It’s fairly expensive to have installed, but well worth it in our experience. We use a product called Plexus to keep it clean and polished up. Our installers business name is Sun Stoppers located in Cornelius, NC. Also, we have PPF on all our vehicles. The 8 mil still offers robust protection from road rash, missiles etc. https://www.xpel.com This same fella installed 8 mil XPEL PPF on our entire Super Duty just after we purchased it in 2021. It was well worth the money and has kept our TV paint chip free 5 yrs later. If you trade vehicles every few years it may not be worth the expense. We tend to keep our cars and trucks for the long haul. I recently found and purchased a one owner, NC dealer serviced 2020 Toyota TRD Pro. It is in really excellent condition. So I took it to my XPEL PPF tech to let him work his magic. I could not be happier with his work as he exceeded my expectations. It’s all about the install and the installer. A few things to note: if you take it to an installer make sure you don’t have any paint chips on the areas you want protected by PPF. If any installer wants to cover areas on your truck or car with PPF with existing paint chips…in my opinion, you have the wrong installer. Find an installer that does high-end Teslas, Lexus, Benz, Lambos, Bentleys etc. After having a complete paint correction done, I had the headlights, front and rear bumpers, trim below the headlights, the painted grill surround, windshield pillars all covered in 8mil XPEL PPF. The prior owner already had the entire hood and mirror caps covered. The larger the surface area you cover, the higher the cost. I like XPEL PPF as it is hydrophobic and just repels dirt and dust with ease. You can also ceramic coat over XPEL PPF. ** Prices vary on installation, so its best if you’re considering PPF to get a quote from your local installer. My XPEL PPF installers shop 3 weeks ago. I also had XPEL 50% tint installed on the interior front w/s. A game changer in reducing heat and dangerous UV rays into the cabin. Note; check your State DMV on tint % laws. Post PPF install.
1 point
-
Based on your numbers I'd say, yes, you could tow an Elite 2 with your Expedition. As you mentioned, your limiting number would be your payload limit. Take 600# off for tongue weight and you're down to 725 for you, your wife, and any cargo in the truck. Should be enough. You'd have to check your manual to see if a weight distributing hitch is required for a 7000# GVWR trailer, although it may not be with those specs (AI says it's not needed until the trailer is over 7000#).1 point
-
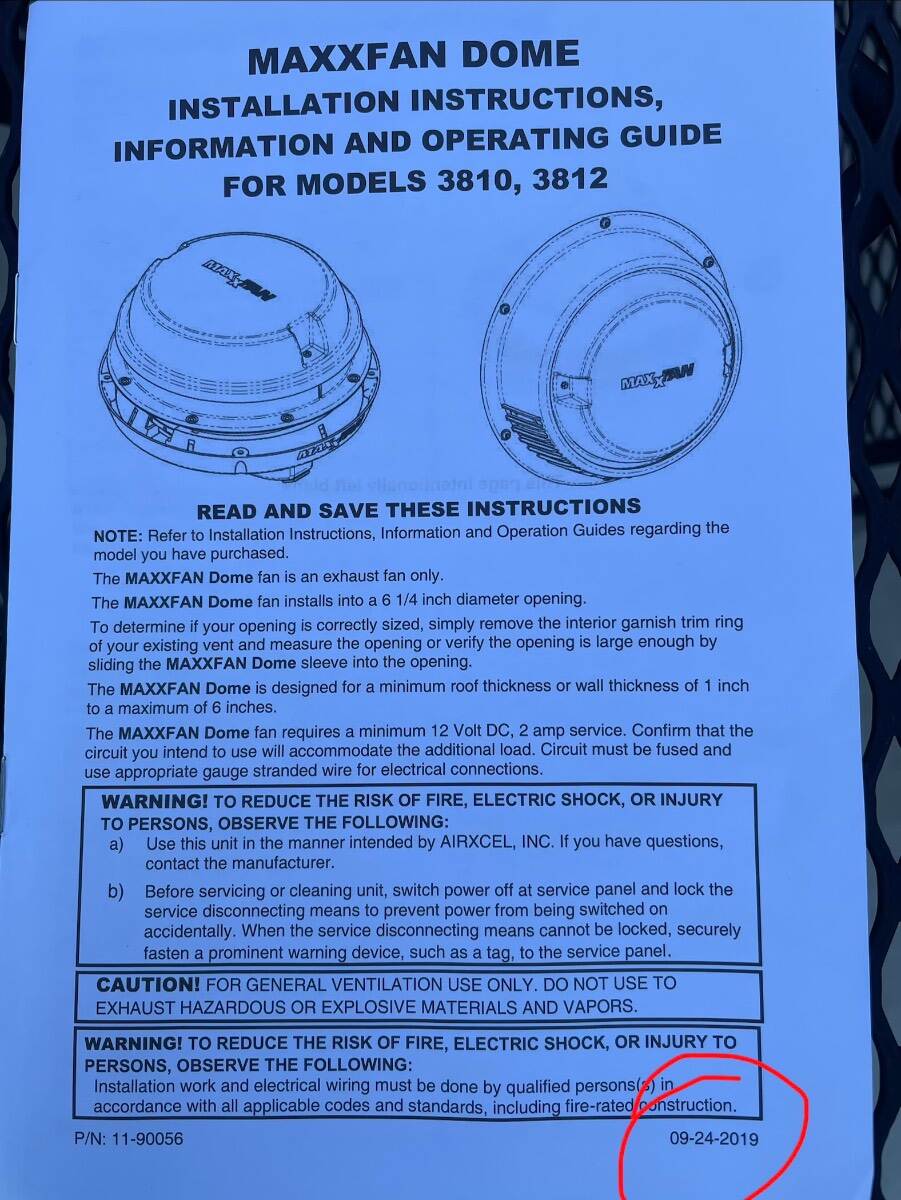
Thanks for your responses. I found a newer version of the installation instructions online. My installation instructions dated 09-24-2019 do not have the note on the drawing that the instructions dated 04-13-2021 have regarding what button to place forward. The old Ventline fan that I removed has a steel base. The butyl tape used to bed it had been built up under the front and rear of the base so as to conform to the roof curvature. Bill
1 point













-
Recent Achievements
-