Leaderboard




Popular Content
Showing content with the highest reputation on 06/03/2026 in Posts
-
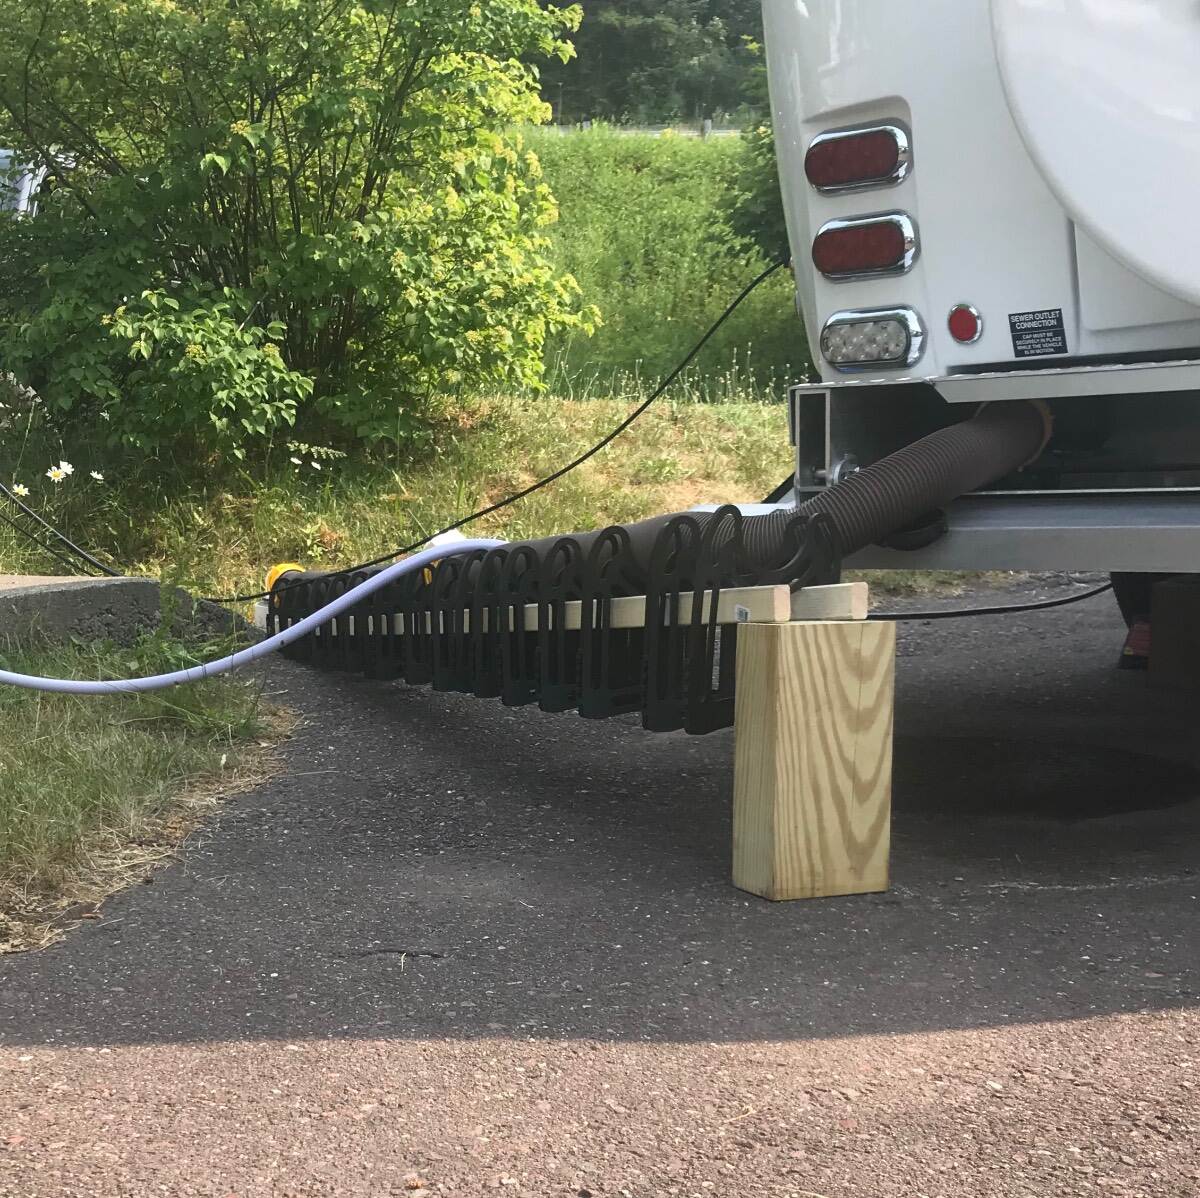
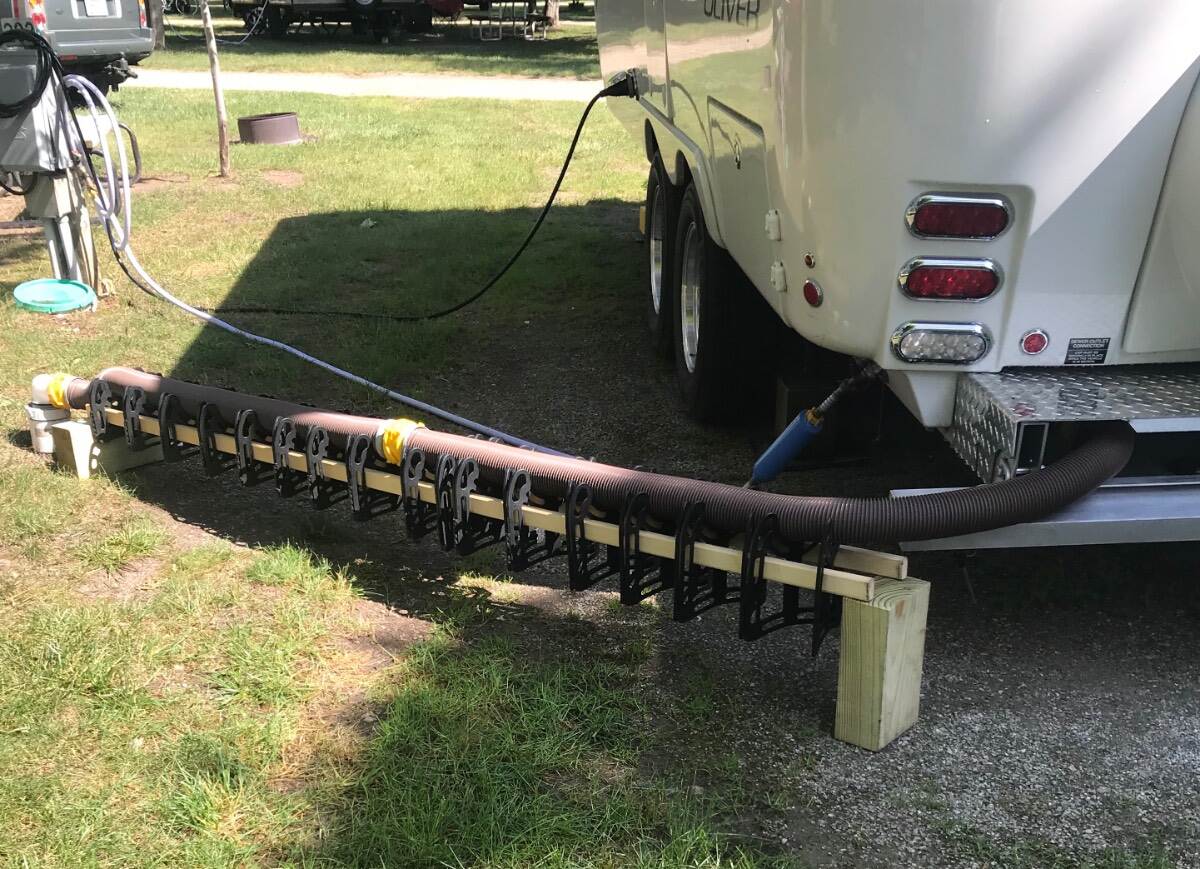
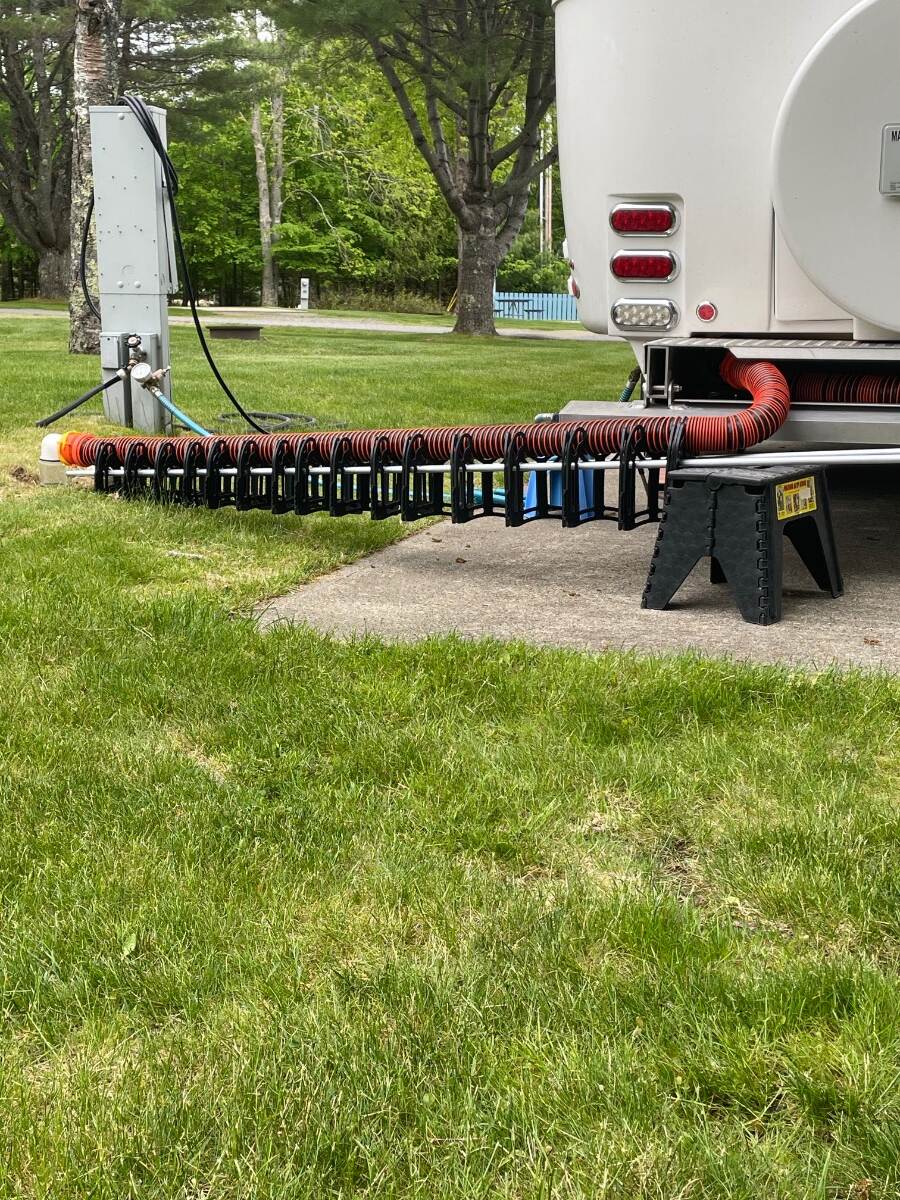
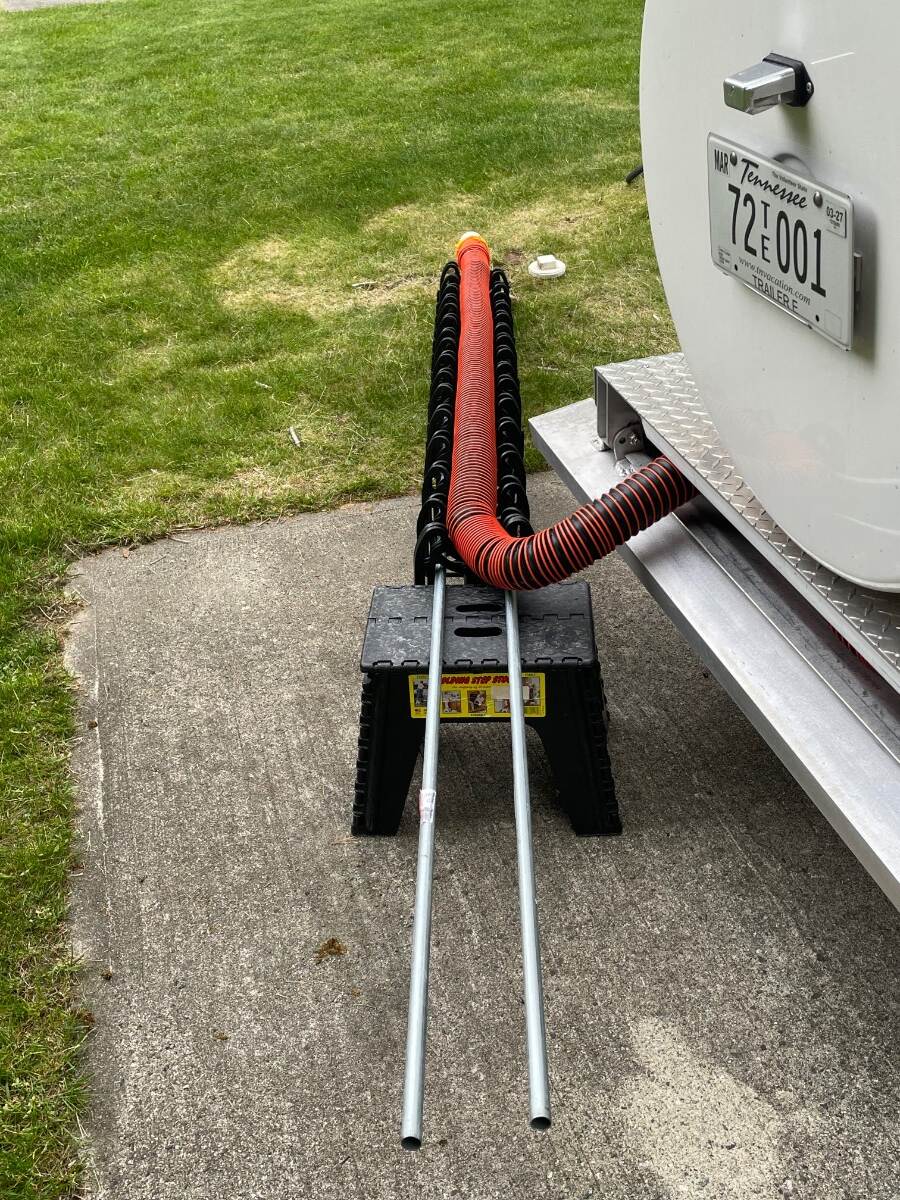
Here’s a trick to dump your tanks when the sewer hookup is uphill from your bumper. Here I used (2) 1”x2”x8 ft from an Ace Hardware store on the Keweenaw Peninsula Houghton MI Door County WI This time I picked up (2) pieces of 1/2”x10 ft EMT conduit from HD in Ellsworth ME. I like the conduit better than the 1x2 wood. The sewer hose supports slide better on the conduit and when I get home I’ll cut each conduit in half and turn a steel rod to just fit inside the conduit to make a splice for the halves. I thought I could stick the whole 10ft length into the Oliver aluminum rectangle frame rail but bolts through the rail prevent my doing this. Bill
 8 points
 -
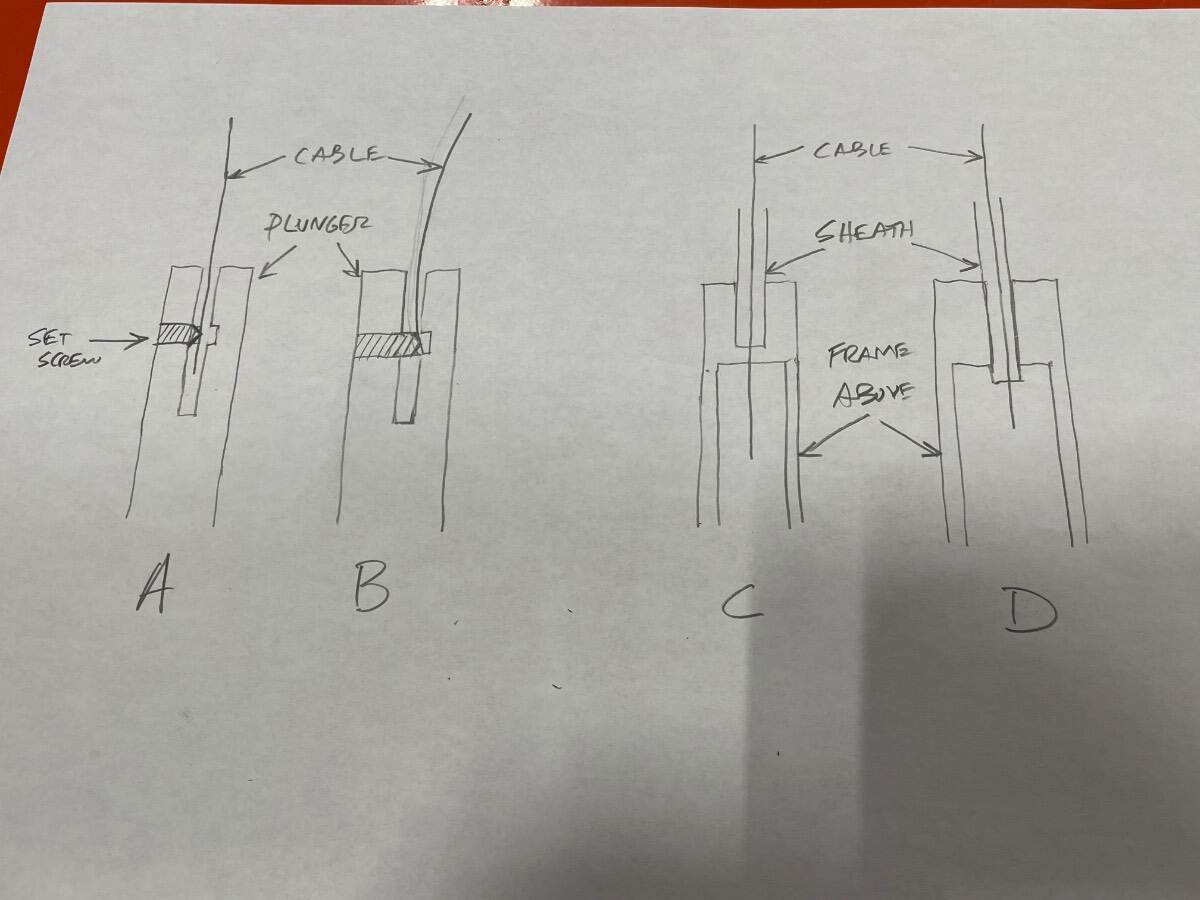
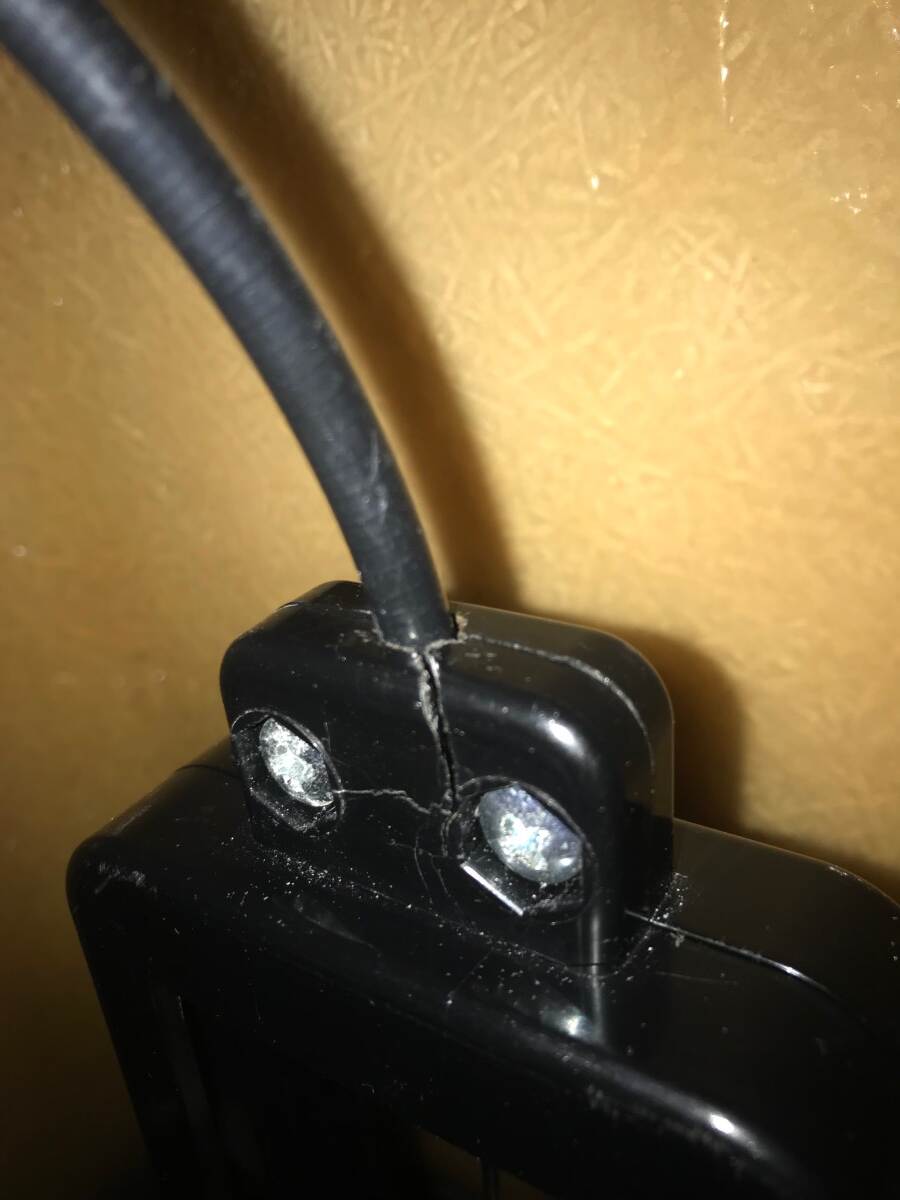
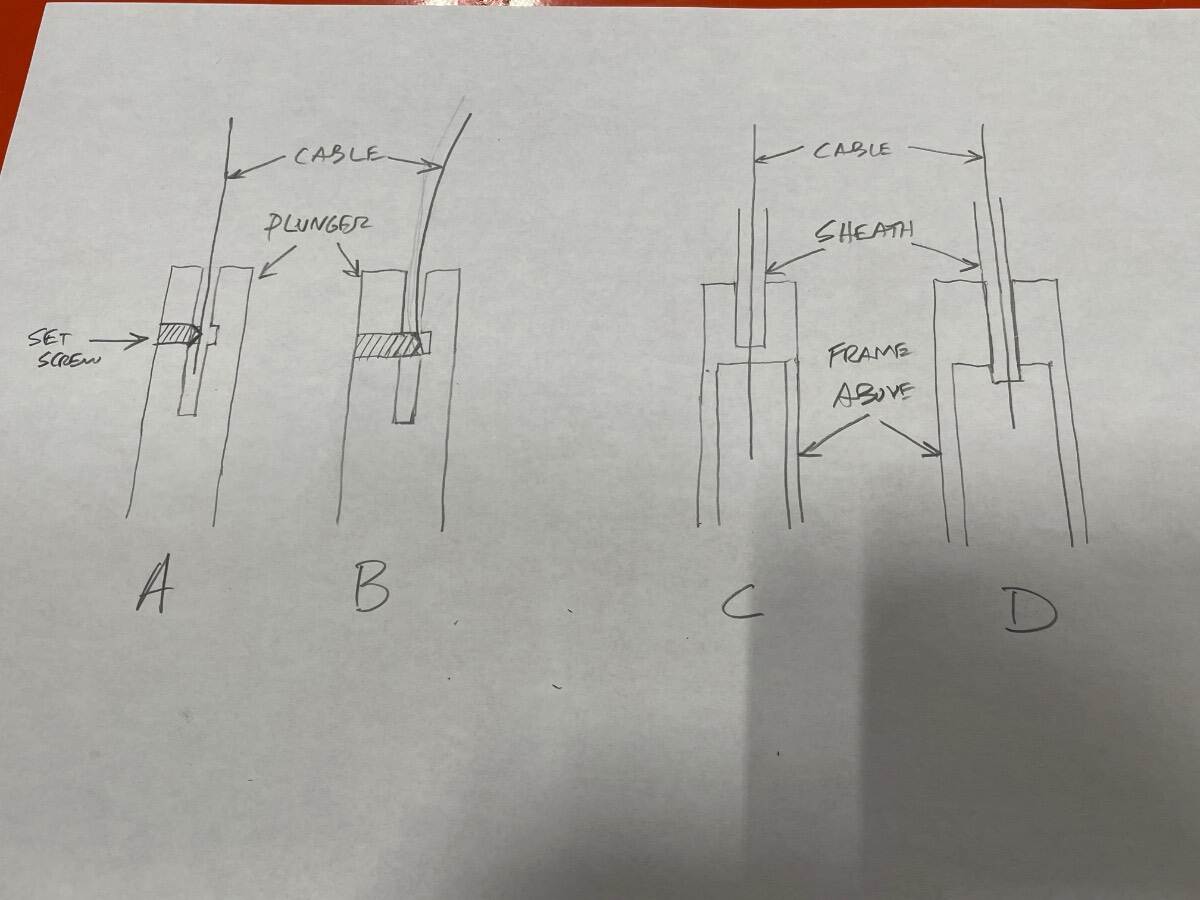
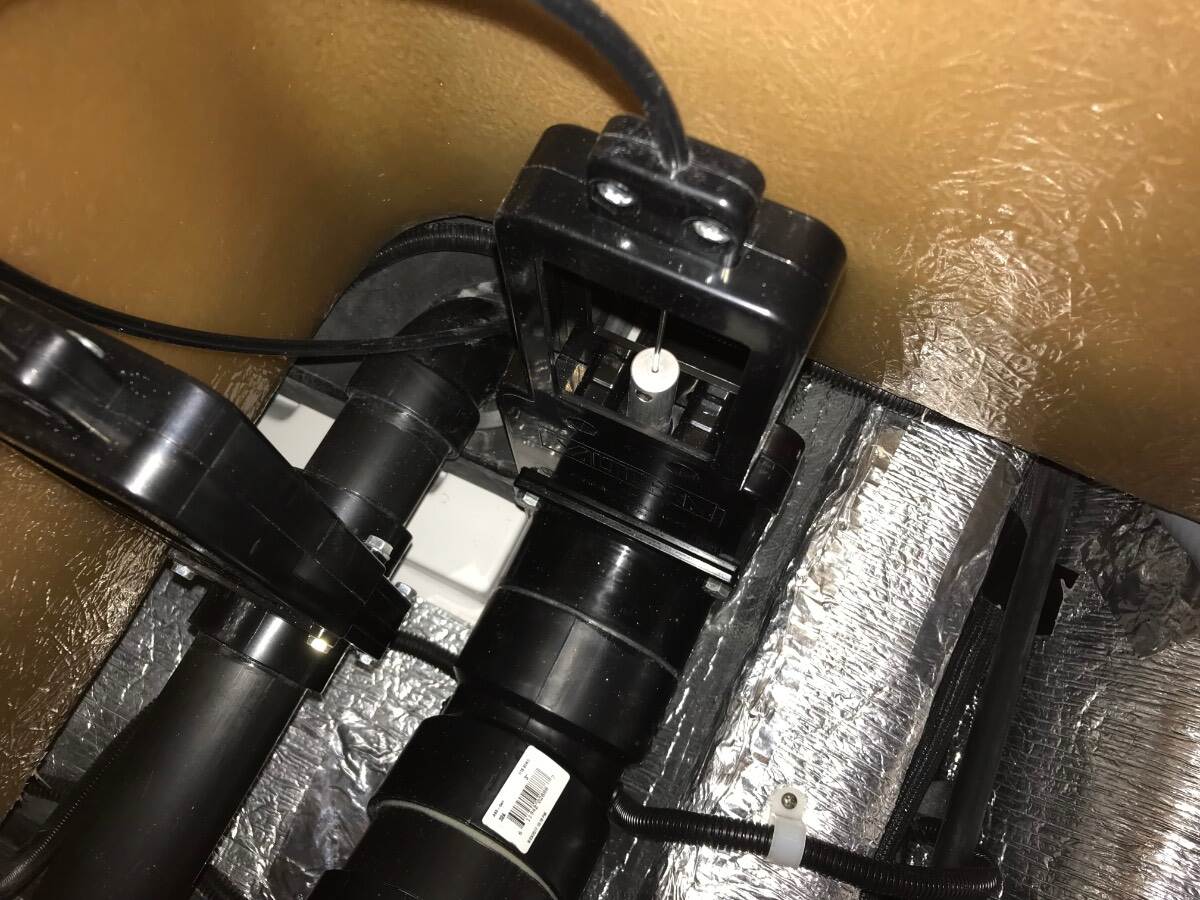
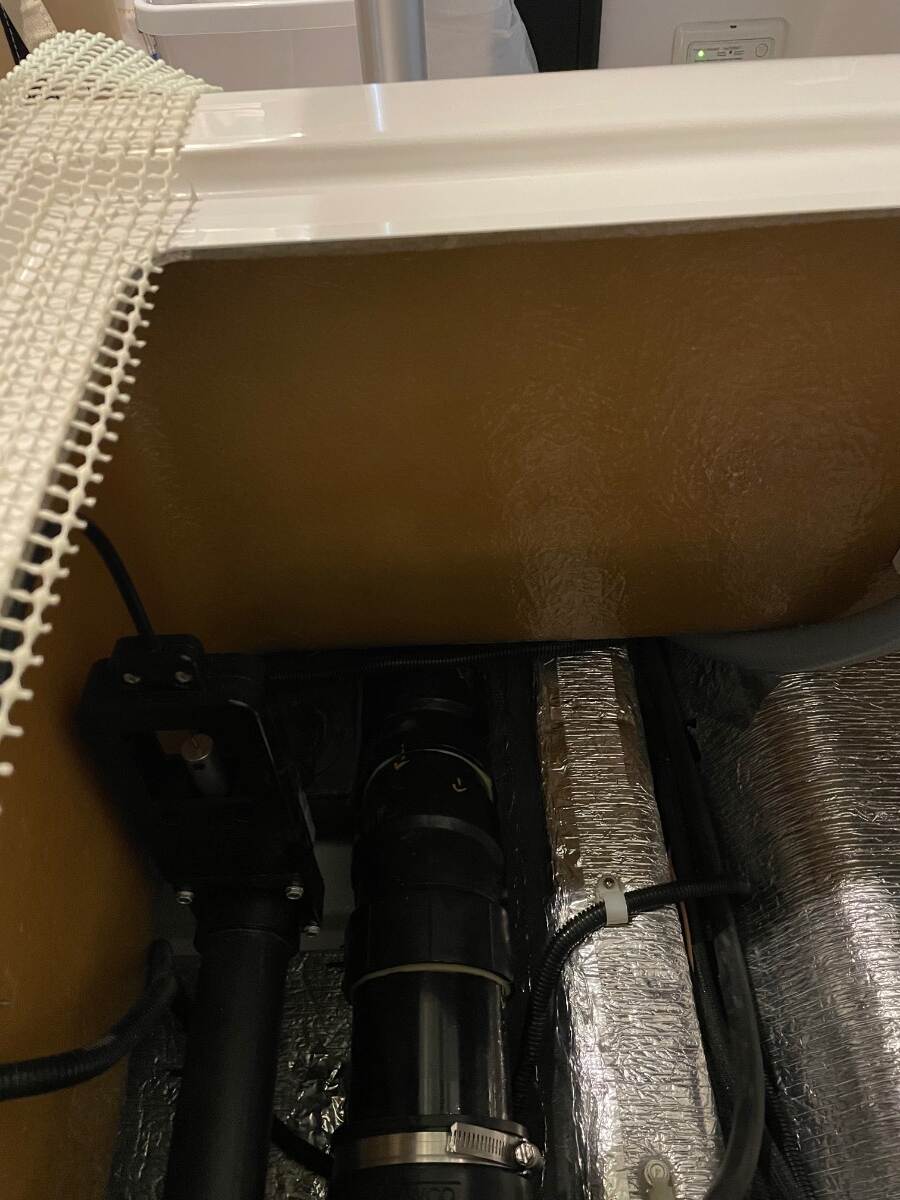
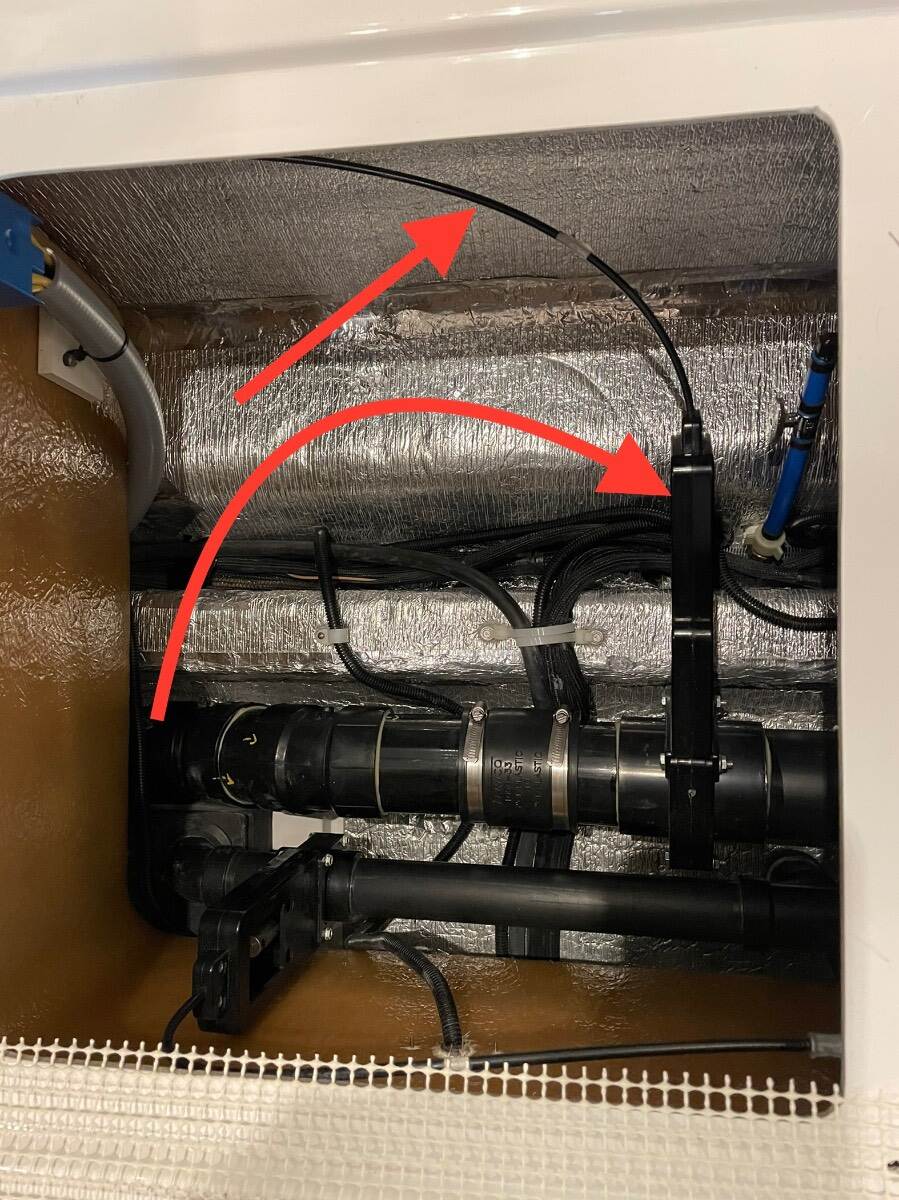
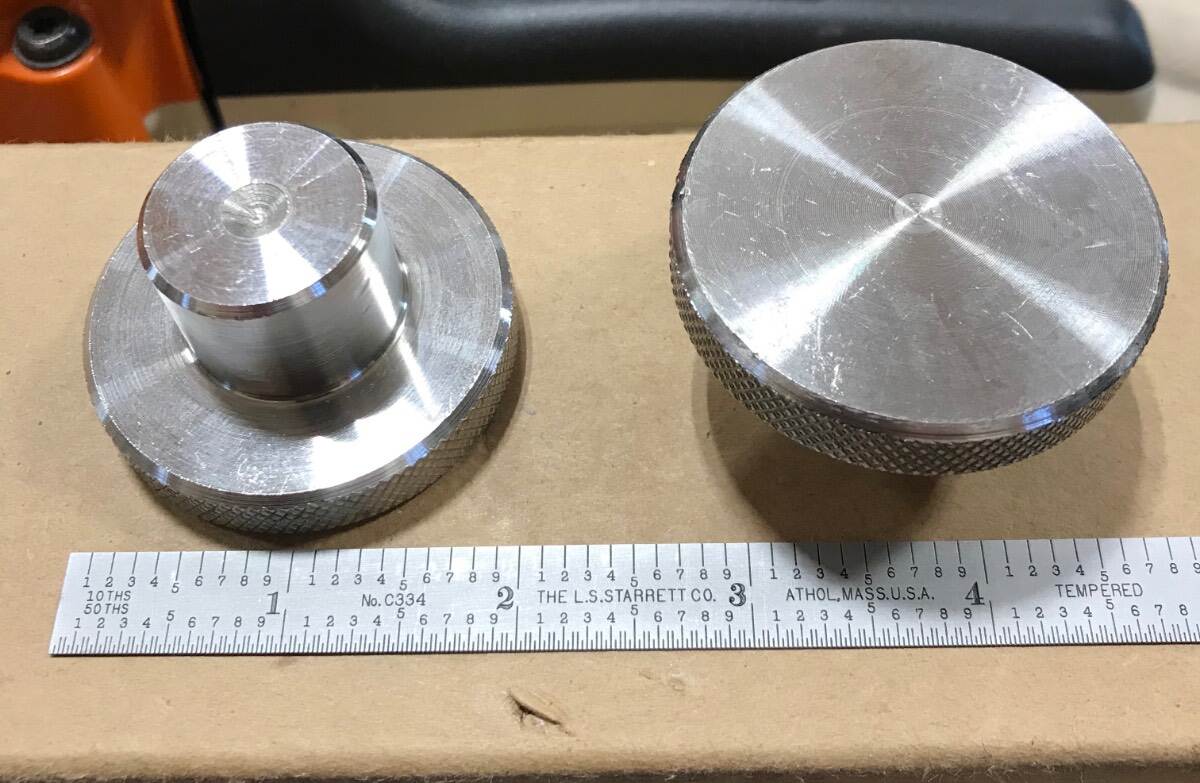
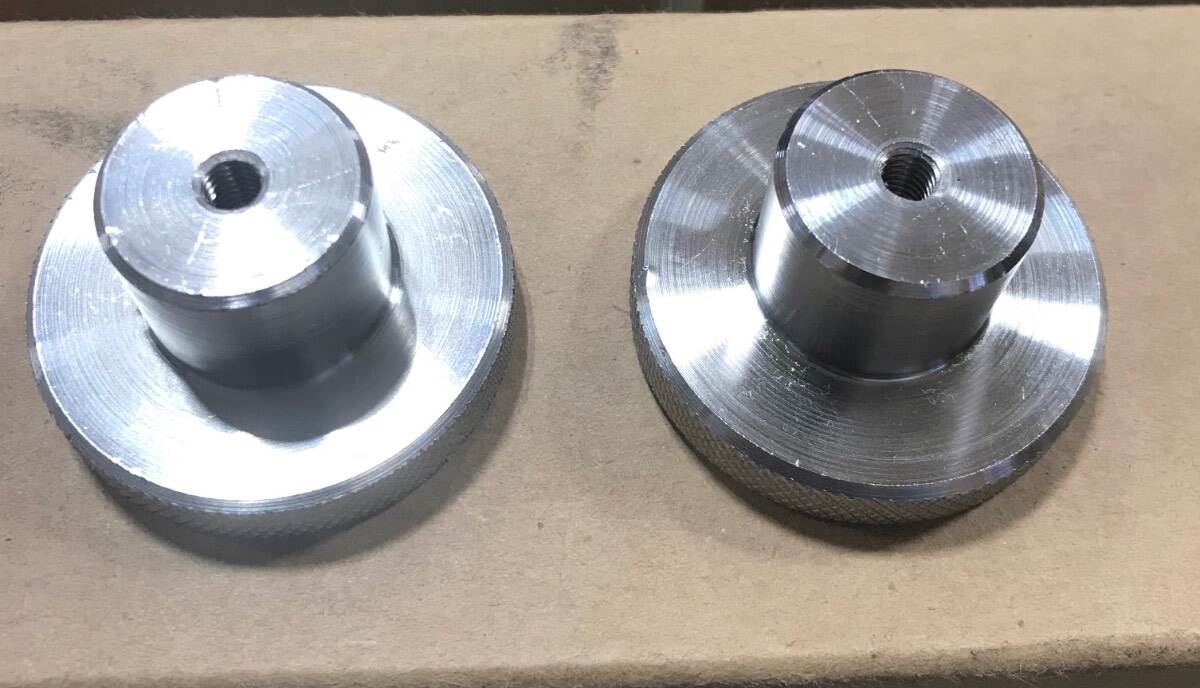
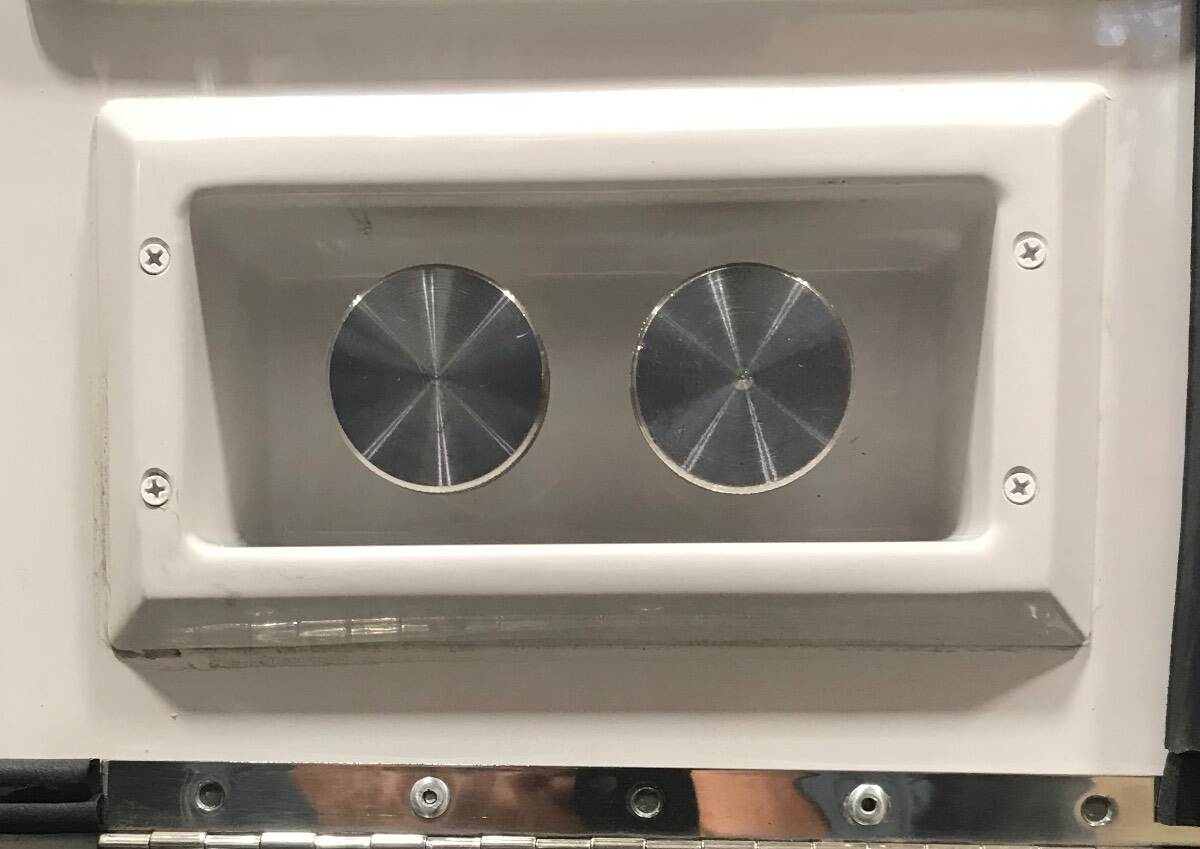
My black tank dump valve was hard to close from day 1, March 14, 2018. During the Summer of 2018 I found the installation instructions for the cable and valve and realized that it was at best a marginal install. I pulled the cable out and lubed it with a dry type lubricant and straightened the kink in the very end of the cable where the factory had screwed the set screw in and barely caught the end of the cable and bent it into the hole opposite the threaded set screw hole. This caused the cable to be slightly bowed which didn’t help the situation (See A and B below) and didn’t make valve closure any better. I also noticed that the clamp on the frame above the valve was broken and didn’t properly secure the cable sheath. I could get some clamping force but not enough to suit me. Given this and the fact that the cable/sheath/clamp length and position relationship weren’t going to permit full closure of the blade (if you have worked on bicycle brakes, throttle cables, choke cables you know what I mean) I decided to modify the clamp portion of the frame above the valve. I disassembled the frame and drilled the hole where the sheath is clamped through the bottom of the frame (See C and D below). I used a drill size that would create a tight fit of the sheath in the clamp hole. I reassembled everything, pushing the sheath lower in the frame (which also allowed me to push the end of the cable down past the set screw in the plunger) and this permitted the blade to completely close. Now with the valve closing completely I wasn’t having water in the sewer hose when I went to hook it up at a campsite but it was still difficult to open and close the valve due to the routing of the cable. Winter of 2020, I finally accepted that manual operation of the dump valve wasn’t going to be as smooth as I expected it to be so I ordered (2) stainless steel knobs from McMaster Carr, drilled and tapped them to fit on the opposite end of the cables, and installed them in place of the Valterra handles that came on the trailer. This made it easier to pull and push the cables without concern about breaking the handles. I think it was Spring 2021 when I talked to the service department about my findings and what I had done and that I still wasn’t pleased with the force required to operate the valve and that I thought it was due to the cable routing. They offered to relocate the black tank dump valve and since the sheath clamp part of the frame was broken I took them up on their offer. The service department relocated my black tank dump valve as shown below. This resulted in the valve assembly being tilted about 75 degrees from the vertical to the street side and the cable was rerouted from under the dinette seats to the street side of the dinette seat. This resulted in an improvement in valve operation, not perfect, but it is an improvement. Valve location before After, showing only the 1.5 inch sink/shower drain valve New location of the valve showing also the new routing of the cable I hope that this information is helpful to those trying to improve the operation of the black tank dump valve. I also hope my high school English teachers don’t read this. They would be appalled. Bill Very early 2018 Hull 313
4 points
-
Lesson learned. So after a little deeper dive into cause and effect of how my water filter failed, I learned the following. Last fall when we winterized, I turned off the water supply to the Truma. I went out and pulled the yellow lever down, pulled the filter out and drained all of the water out of the Truma tank. With the system and the tank drained, I reinserted (error on my part) the Truma filter and it must have had a tiny amount of residual water near the internal plastic sacrificial disk inside the filter which resulted in it freezing and then cracking. If I had completely removed the filter and stored it inside the Oliver as I have done for the past 5 yrs, I likely would not be needing a replacement filter. Important to note, the Truma tank system was completely void of water with exception of what residual was in the filter housing which was apparently just enough to cause the sacrificial disk to do what it is suppose to do…fail. To complete my inspection of the Truma hot water tank, I temporarily used my winterization filter and the system worked as designed. We had the system set at 120d within about 8-10 seconds we had unlimited hot water in the galley and shower. Here is what I learned -open source- If your Truma AquaGo filter (or Easy Drain Lever) blew out, gushing water from the housing, the internal plastic disc or O-rings likely failed. This is almost always caused by residual water freezing and expanding inside the housing, or the O-rings being misaligned. [1, 2, 3, 4] The Fix You cannot repair a broken filter assembly with glue or tape due to the system's high water pressure. You will need to replace the entire filter/drain assembly. [1, 2, 3] Depressurize the system: Turn off your RV water pump or city water supply, and open a hot water faucet to relieve the pressure. Remove the old filter: Lift the thumb latch on the easy drain lever to drop the assembly down. Inspect the housing: Look inside the chamber for any leftover pieces of broken black plastic. Install the replacement: Pop the new filter cartridge into place and snap the lever back up to lock it. [1, 3] How to Prevent It Truma designed the filter to fail (break) first to prevent the internal mixing vessel from freezing and causing a $2,000+ tank replacement. During winterization, always make sure you pull the yellow lever, remove the filter cartridge, and drain the water entirely. Do not reinstall the filter until you are ready to use the RV in the spring.3 points
-
Here's just a little insight into what likely happened in David's situation and how to reduce the chances of others experiencing the same situation in the future. After examining this filter plug more closely, I have determined that the part that broke out of David's filter is designed as an over pressure protection for the water heater. By code all water heaters are required to have a high pressure relief. For the Truma, instead of a standard pressure relief valve, they have chosen to use a sacrificial relief that's designed to let an over-pressure situation release and drain to the outside. With David's description of the event, I'm convinced that when the water supply valve at the water heater was opened to run through the water heater, a high pressure surge hit the water heater causing the "safety device" to rupture. This was very likely a high water pressure situation, possibly caused by and air pocket in the water line just before the valve that caused a water hammer effect in the heater when the valve was opened. Now I can't prove this is what actually happened, but in liquid and steam systems I have worked with over the years, coils such as that in the Truma water heater are usually protected by what is called a rupture disc, designed to fail before damage can occur to the more valuable parts of the system. Whenever opening a valve to pressurize a system, it's imperative to open the valve very slowly so as not to cause a hydraulic hammering of the system when doing so. Also it's very important to run a system clear of any air pockets before opening a valve to other components in the system. For air and gas systems this is not an issue. But with hydraulic systems it's critical. A very good precautionary step to reduce the chances of water hammer when opening a valve is to very slowly open the valve to prevent a surge. One additional precautionary step to take before repressurizing the water heater is to open one of the faucets to hot water to allow flow through that side of the system when the valve to the is being opened to the water heater. Again this allows flow through the water heater, allowing air pockets to escape without cause a water hammer condition. These steps should prevent this from occurring to anyone in the future. Hope this helps anyone with concerns about their Truma water heater. PS - Obviously a high water pressure from the utility source connected to the trailer could also cause this situation to happen. This is the obvious reason why we must always use a pressure regulator and never setting it above 40 psi. PPS - If you purchased the Truma anti-freeze plug when you bought your Oliver, it can be used in place of the regular filter plug should you need a short term backup. It works exactly the same as the standard filter plug, just has a heat coil built into it. You don't need to plug the coil in for this use purpose.3 points
-
Excellent idea! Mossey1 point
-
Clever!1 point
-
For the Alcan spring Oliver group would you do anything different if you had a second chance to make this upgrade ? or would you suggest any other improvements ?1 point
-
Very clever use of basement space. Never thought of removing the panel under the nightstand to gain a few inches of height. Blutech didn't offer their low profile filter system at the time we set ours up, and most softeners small enough for the basement have limited capacity between recharges, so we installed our filter/softener system in our TV, which also has two Blutech hose reels with quick connects for intake from city water and output to the Oliver fresh tank. The reels each hold 50' of hose, so reach hasn't been a problem. Even when full hookups are available, we fill the fresh tank and rarely use the city water port. The basement door stays shut. We also have the Nature's Head, so we only deal with fresh and gray. We run out of fresh water about the same time the grey is full. The inaccuracy of the gauges isn't much of a problem since the grey can't overfill from a single fresh tank, and we haven't ever run out of fresh water before knowing it was low. Steve1 point
-
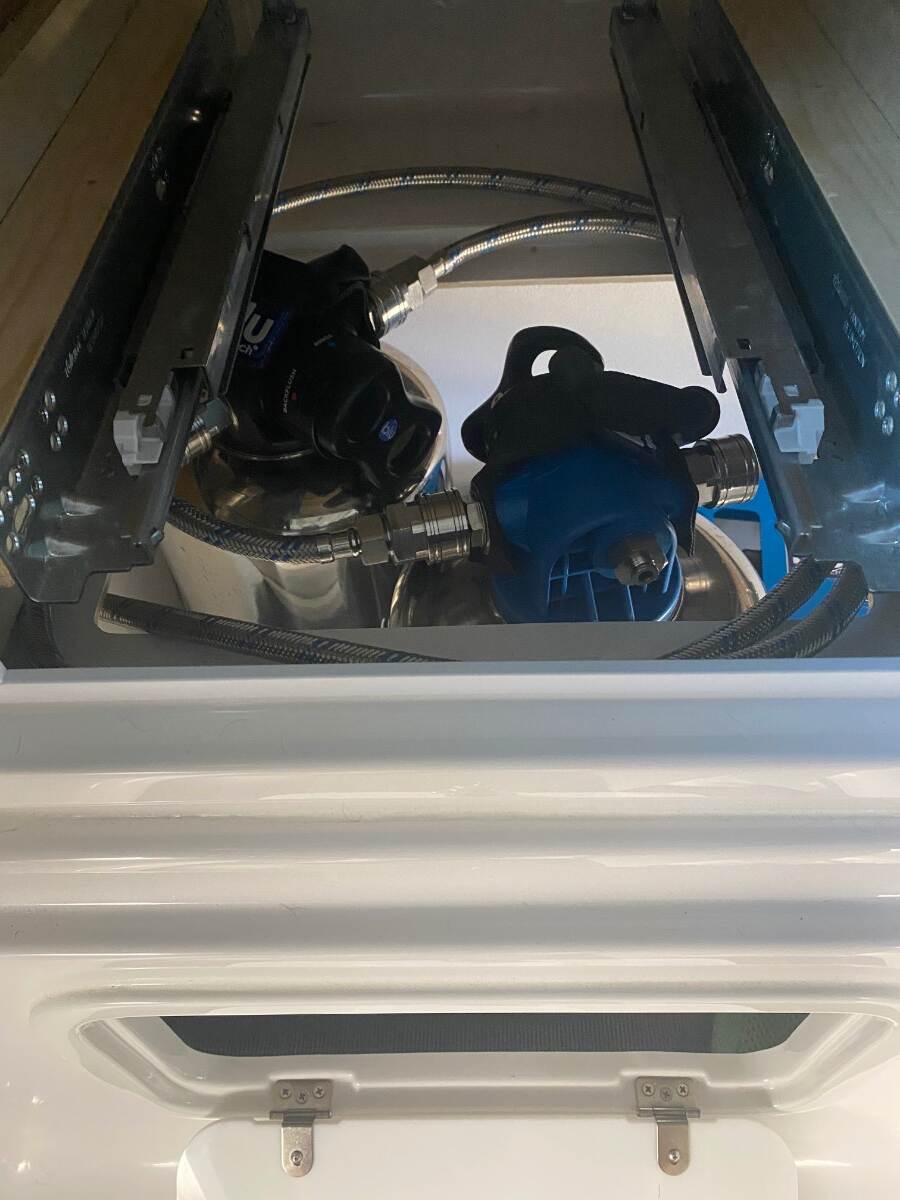
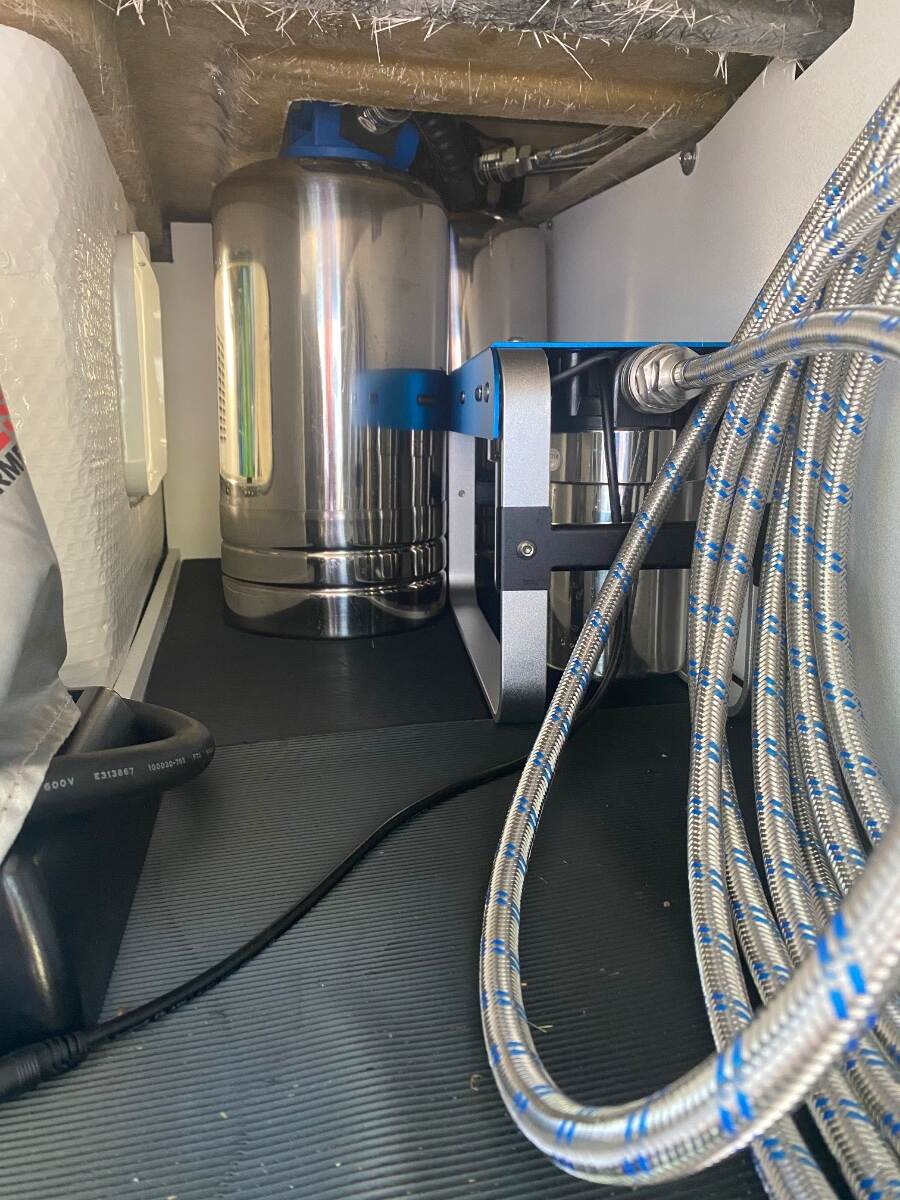
Proof of concept; onboard (inboard?) water conditioning and filtering. The problem has been the water softener and iron filter. So far it’s all be a modular system I move around. A pain but flexible. I gave up on putting the tanks onboard as they’re a bit too tall for any of the storage. But poking around I found that the panel under the bedside drawer is just sitting there so … Pros All contained nicely Puts weight in the back near the wheels (I’ve got plenty in front) Always set up so just takes two hookups, one from the faucet and two to the back water input. For waterpoint boondocking (e.g. national parks) I haven’t used it. Too much to futz with pulled off at some waterpoint and usually blocking the road. Since it’s permanent those hoses won’t kink, they’re a pain as they want to kink up if you use them modular Easy to access the valves for backwashing and regenerating by just taking the drawer out which is easy It just works out nicely with the lines having the right amount of coil Cons Not so great for city water. Unless I jack into the line internally I have to keep the hatch open which isn’t optimal But that’s fine, just use the tank and pump until/if I decide to make it more permanent Takes up the back storage But that’s odd storage anyhow, I finally settled on putting a folding chair and table there, plus dirty laundry shoved through the interior hatch. And now this frees up that storage elsewhere. The tanks have been knocking about, mainly in the truck. The main filter has been in the Sea Biscuit back storage, but now I can put the chairs and whatnot there And … that’s it? I’ll sit with this a few days but I think I like it and will start to make it permanent 👍
1 point
-
Eek! I guess i need to take my antifreeze filter along even in warm weather. I was keeping it safe at home. Thanks for the heads up.1 point
-
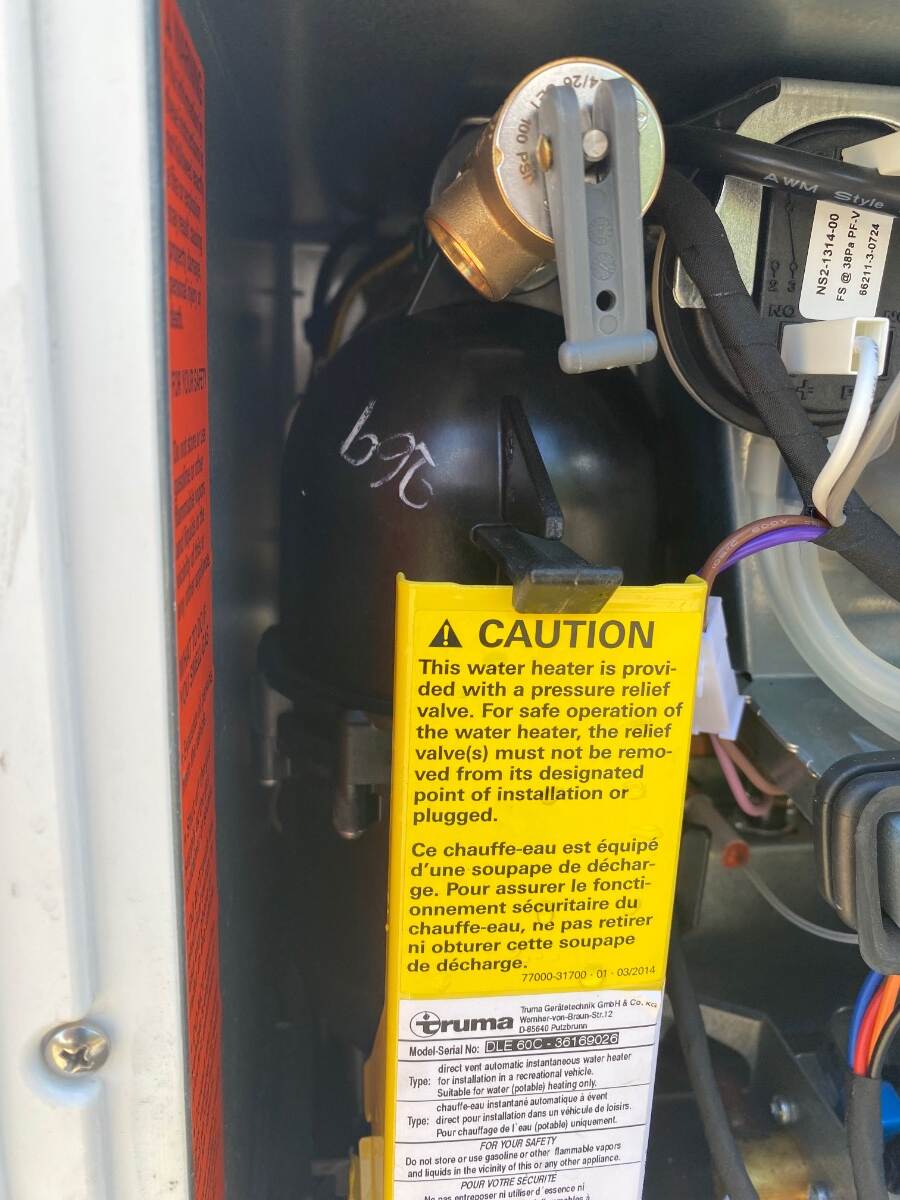
Too funny! I was standing up when I looked under the cover plate and my relief valve lever was turned upwards where I couldn’t see it. Kind of like me looking for the ketchup in the fridge I guess. 😉 Looks like they have the typical water heater relief setup after all. Nevertheless when you look into the open end of the filter, you can see it’s designed with a much thinner wall around the back of the plastic housing, very similar to a rupture disc. Again I don’t know first hand if that’s actually Truma’s design intention, but with an overpressure situation this would be a weak point that would likely fail. And it would fail through the drain port of the water heater as you would expect if that was their intention. Anyway, take it for what it’s worth.1 point
-
Great comments thanks. This part is interesting because it does have a standard over pressure valve just above the filter housing. Do older Trumas not have this? Otherwise great tip about the antifreeze unit, I had it in there full time
1 point
-
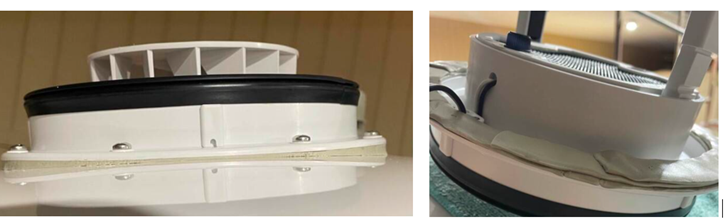
AMEN! Best suggestion of the week! ++++++++++++++++++++++++++++++++++++++++++++++++ Bill: Best installation approach I have seen. Very creative way to intall the fan on a curved roof. Thanks for your time and effort to create a bathroom fan replacement "Best Procedure" yet. GJ
1 point
-
That creek that is basically on your right as you take the drive up to Saint Elmo is full of hungry trout. Bill1 point
-
@DunnYet Open source - No, you should not leave the Truma winterization (bypass) filter or standard stainless steel filter installed all season long. [1] If you are actively using your RV during the camping season, you should be using the standard stainless steel filter (or the Truma Electric Antifreeze Kit if actively in use). The official winterization plug/filter is strictly designed to replace the standard filter for winter storage and is not meant to be run full-time. Keep these quick winterization rules in mind: For Winter Storage: Drain your Truma system and remove the filter cartridge entirely. Store the filter in a dry place inside your RV and leave the yellow Easy Drain Lever closed. Leaving any filter inside during freezing weather can trap water, expand, and permanently damage the unit. [1, 2, 3] For Active Winter Camping: If you plan to travel in freezing temperatures, you can use the Truma Electric Antifreeze Kit. This specific kit can be installed in place of your standard filter to keep the water heater from freezing without draining your propane. [1, 2] For Normal Summer Use: Remove the winterization plug and reinstall your standard stainless steel mesh filter before de-winterizing and turning your water system on for regular use.1 point
-
In looking at the circuit description that @Steve and MA provided, it seems that there are two separate feeds. The 30 amp main feeds circuits 1 through 3 which include the water heater, AC and Inverter. These would appear to be circuits that run only on shore power. The water heater (20 amps) must be a propane/AC unit and it makes sense that this would not be energized from the inverter, likely not the AC either. Then there is the "SUB-MAIN INVERTER SUB-PANEL 25 AMP." You could infer that this 25 amp feeds loads that run from the inverter (circuit 4 receptacles and circuit 5 microwave). This is not the correct circuit description for your trailer because stove top load is not listed. However, it does provide clues for what could be going on in your trailer. If the inverter does not support the AC, then it probably doesn't support a high amp induction cooktop either. That would be crazy that a stove cannot be used while boondocking! There are some Xantrex models that have built in circuit breakers for split feeds like this. So there could be the AC sub panel under the dinette feeding AC inverter circuits, and shore power breakers built into the inverter for the water heater, and stove-top. Just an idea to look at, I hope that's not the case though. Geoff .1 point
-
We had the Furrion DV1230 in our LE2 and it failed after about three seasons. We mostly play DVDs as we’re often in no-signal areas. Basically, the CD/DVD drive failed. Founds an exact replacement on Amazon (where all good things come from) and dropped it right in. With the full-sized remote, it seemed like we were back in business. Passing through some town a few months ago, we found a complete 8-season DVD set of the West Wing at a church thrift store in Pagosa Springs, CO. While I wasn’t a rabid fan, it looked too good to pass up. $10 for the whole 30+ DVD set(!) We enjoyed the whole first season in about 4 days. We had a small about of skipping and drop-outs that I attributed to scratched or dirty discs. Hitting season two - I couldn’t get any of the discs -except- the “special features” ones to play at all in the Furrion. That was true for all the remaining seasons. My brain started working. On a hunch - we visited another thrift store in Washington, UT and bought a used/donated Sanyo Blu-Ray/DVD player for $7. Another $2 bought an HDMI cable. Hooked it up to an unused HDMI port on the ROKU/OON television we replaced the original on with. EVERY disc played perfectly! Verdict: If you didn’t’ have enough to dislike about the Furrion DV1260 - add to it that it won’t play some DVDs. I’m guessing this has to do with the “multi-layer” technology of some high-capacity DVDs. The Sanyo Blu-Ray player now resides in the cabinet above the television. The remote even works through the translucent cabinet door. Cool! Im debating mounting the player under the cabinet above and to the left of the television. That will make changing discs a lot easier. I can likely use 3M “Command” strips to mount it without drilling and keep it damage-free.1 point
-
As is the south loop of Kalaloch CG in Olympic National Park ...where some bright summer crew member sent to repaint arrows, made a mistake. People have just had to live with the result for multiple years as the same intern also changed the maps to match the mistaken arrows. (Heard all that from a Ranger.)0 points










-
Recent Achievements
-