Leaderboard



Popular Content
Showing content with the highest reputation on 07/15/2026 in all areas
-
I just noticed that with the exception of the dealer in Canada, all of them are now gone. All sales have officially moved back to Hohenwald. I think this will come as welcome news to many potential new owners. Many were opting to actually come to Tennessee for their pickup and delivery anyway. It has been reported that many dealers were taking payment, handing over the keys and sending people on their way without any kind of walk through. That's just not acceptable. Other dealers were selling the trailer, allowing the new owners to pick up their unit in Tennessee and still charging them $1.2-1.5K for "cleanup and delivery". That's just wrong. I believe this is a wise and good move for Oliver. They gave it a good run. Sometimes things just don't work out as well as predicted. Good job, Guys...8 points
-
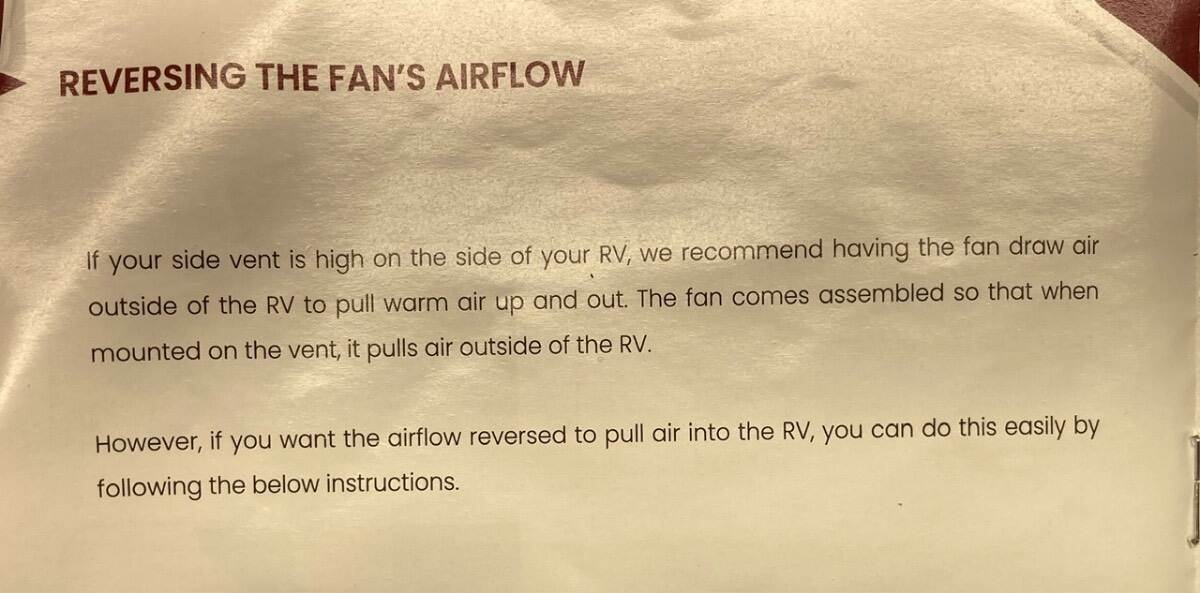
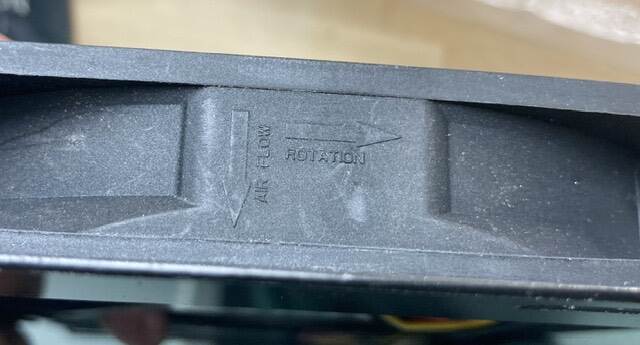
For those considering installing the Beech Lane fan, the instructions advise to mount it on the upper vent, blowing outwards. There is a small diagram on the side showing fan rotation and airflow direction.
 2 points
 -
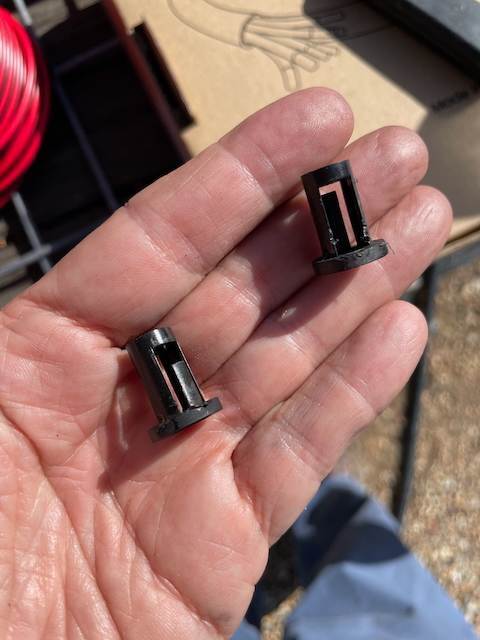
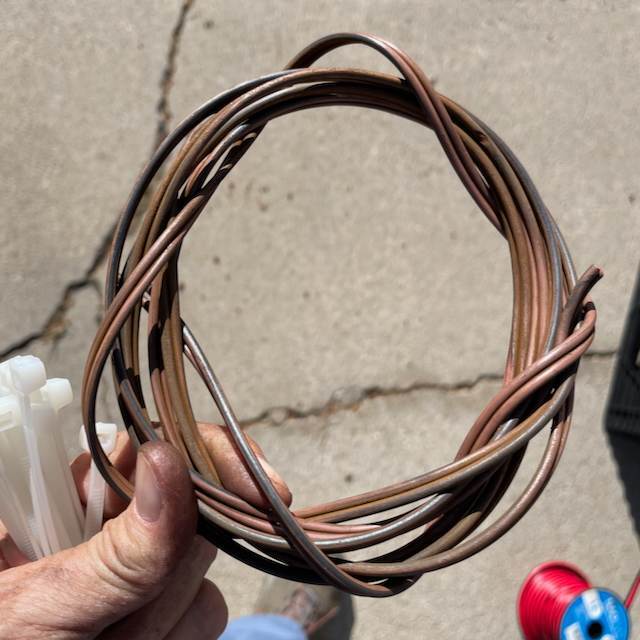
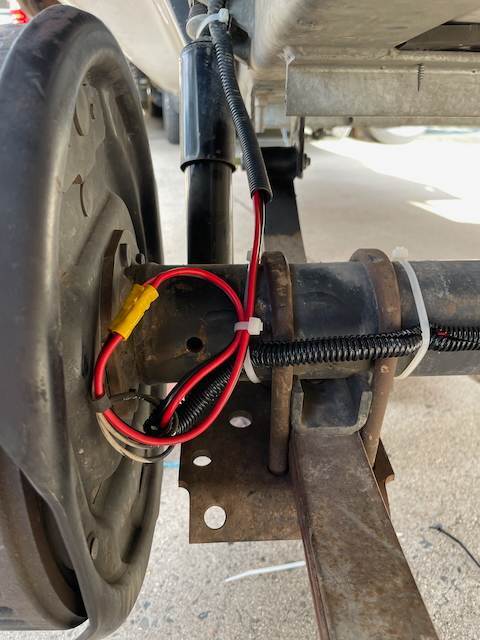
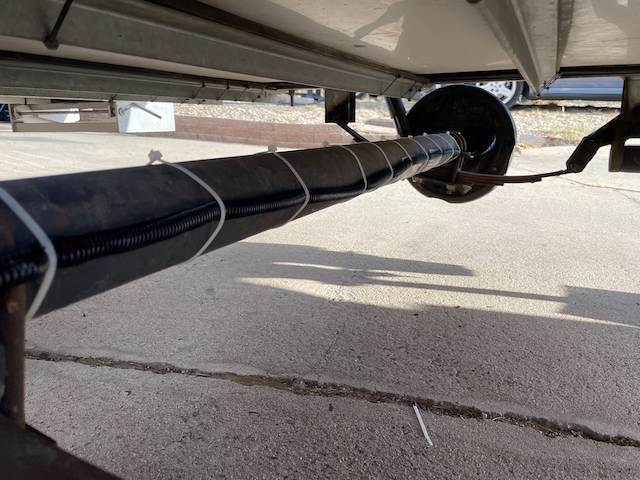
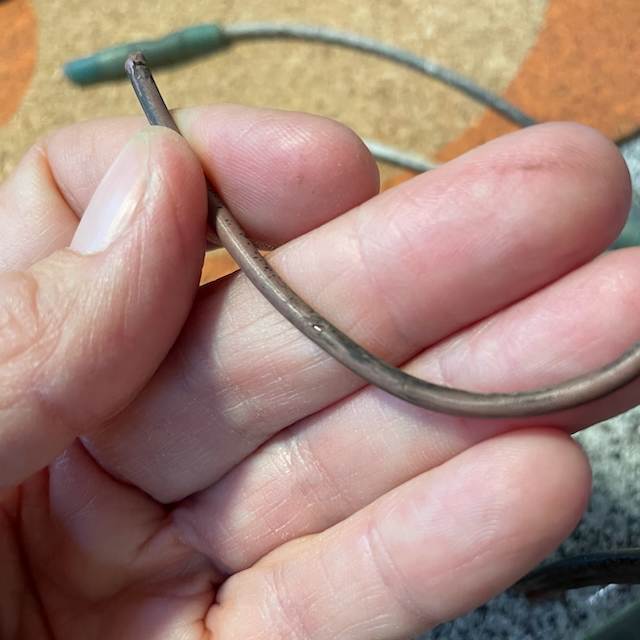
BRIEF UPDATE July 14, 2026: I accepted the generous offer by John @jd1923 and Chris to come farther west to Prescott and tackle this 'Check Trailer Wiring' issue. While my Oliver was jacked up, I was able to take care of some other regular maintenance work, and John helped out with that as well, but I will focus here on the trailer wiring. The main job was to replace the brake wires beginning at the left side (below the battery box) where the wiring exits the hull, and connecting new wires to each of the four brakes. John suggested pulling the new wires through the axle by taping them to the end of the old wires, for various reasons, but once the taped joint reached the opposite side and I needed to pull it out through that small hole in the axle, the tape broke apart. I tried pulling the new wire through that hole with some needle-nose pliers but the wire was so soft that small pieces were breaking off. So we reverted to my initial plan (based on several others here on the forum), and ran the new wires along the rear side of the axles, using split loom and zip ties to anchor it. We found that the butt connectors I ordered from Amazon did not hold; John tested one and the wires pulled right out without any effort. He had some older style butt connectors that we used, with much thicker metal inside, and then we added tape on the connections. I will probably come back to those taped joints with some liquid tape to try to weatherproof them better. (I saw that someone had used a clear sealant -- if anyone knows what that is called, I would like to find it. The liquid tape I have is black like tar.) The finished job looks really good. Note that I haven't tested by towing yet. After the rewiring, I measured the amperage at each wheel, after disconnecting the 7-pin connector from the truck and pulling the Emergency Brake pin. Each one measured about 3.0, with the left front measuring slightly higher. This was a good result in so far as the power was flowing from the Emergency Brake battery (I believe on the Oliver, this is the trailer battery; SOB trailers have a separate little battery for this power). After the tires were back on and everything was back in place, I tested again using the power from the truck through the 7pin connector, with John's son Adam helping me by being at the controls in the truck. Measuring the two main wires exiting the hull (below the battery box) the amperage was 1.85 and 1.71 on the left front and rear wires. This measurement is obviously without being in motion, and my understanding is that the truck will not provide the full power to the brakes in this case; I'm not sure what amount should be expected here, but power is flowing to both wires from the truck. Quoting from @Geronimo John in an older forum post, "... modern brake controllers sense when a vehicle is stopped and back off the power flow to the magnetic coils when stopped..." Yesterday, John and I performed another set of tests on the 7pin Cable wires where they enter the hull and exit the cable, inside a double sized junction box behind the small panel below the vanity sink (see earlier photos in this thread.) We tested amperage for each of the wires, and the 7pin cable seems to be working fine -- even jiggling the wire at the connector and below the Oliver -- so we elected not to replace it. Of course, once again, this is not in motion driving down the highway. None of this is definitive until I actually tow the Oliver, tomorrow morning. I will report again in a few days, and try to add some photos here for clarity. I don't think this is resolved yet, but making progress on eliminating things is good. Many heartfelt thanks to John, Chris and Adam -- they have all been extremely gracious hosts and very helpful, and have cheered me up as well. Many thanks as well to all the other forum members who have been helping out with ideas and links and questions. Now we are heading out for some fun! EDIT: Added Photos with captions. Some of these might be helpful for others. These are the grommets that come with the Dexter Axles -- the wires pass through these from left to right side of axle. NOTE that they have sprung tabs on them to keep them in the axle; when you try to remove them, the tabs break off. They are not rubber grommets they are stiff plastic. I tried to replace the missing one with a rubber grommet (I cut it to place it around the existing wire) but my rubber grommets were not deep enough to cover the thickness of the axle. These two came from a new Dexter axle that John ordered. This is one of the nicks in the wire where it passed through the hole in the axle without a grommet. There was a larger section of exposed copper, but I can't find it this morning. This is the brake wire pulled from the front axle; I didn't see melted insulation nor other nicks exposing the copper here. (The original rear axle wire is still inside the rear axle --EDIT: but it is cut loose from the brakes. There's a new brake wire run outside that axle as well.) John's handiwork -- thank you John. Butt connectors splicing original to new brake wires, before being wrapped in tape. I would have preferred heat-shrink style for better weather-proofing, but this is what we had to work with. The front axle with new wire from left to right brake assembly. Butt connectors (both images after crimping); the new heat-shrink style on the left didn't hold the wire at all -- it pulled right out. The old style held, but is not weather-proof. They are taped for now. I'm seeking a good quality liquid tape or other product to address this.
2 points
-
To each his own, but from what I’ve seen from trailer sway videos, I’d rather have more protection than less, so I’m willing to forgo a little wear on the ball in the unlikely event that I would have to take evasive action at highway speed. So I’m stayin’ on the “Don’t lube your balls team” for now. 🤣2 points
-
I'm jealous! Really beautiful area.1 point
-
Welcome to the family. As you wait our Blog has lots of info on various gear, upgrades, solar, and campgrounds visited . The link is at the bottom of our signature below. https://4-ever-hitched.com/trips-overview1 point
-
We live less than 10 miles from Guadalupe River SP. Mike1 point
-
Also in hill country is Guadalupe River sp. Place is an absolute little jewel. Hill country also has a LOT of Army Corps of Engineers reservoir campgrounds that often have nice views. Strongly echo all the callouts for Mustang Island. If you want to boondock, the national sea shore south/west of Mustang Island permits it and is beautiful.1 point
-
Good info above. Many have found that dishwasher pods work very well, as well. They are near zero-suds and store well for a year or so. Regardless after cleaning and dumping I rinse at least once to clean off any residue from the valve seals. GJ1 point
-
As JD pointed out natural convection will be low to high. Adding the fan above to move that hot air out is from an engineering perspective logical. Doing so puts the refer cabinet into a slight negative pressure condition. On the flip side, for those of us with the three-way there is another more important reason that I feel needs to be considered. The three-way units may be used on gas. Burning gas can, and does, omit some by-products that can harm. Like CO for example. If you set your fans up as a pusher (Moving air into the refer cabinet, and your seals on the cabin side are not perfect (And NONE of them are), you would be in effect giving the bad stuff a direct powered path into the cabin. You and your traveling partners may not wake up as a result........ This is why mechancal rooms are properly designed to be negative air pressure to occupied spaces. If yours is pushing air into the refer cabinet, I emplore you to change it. GJ1 point
-
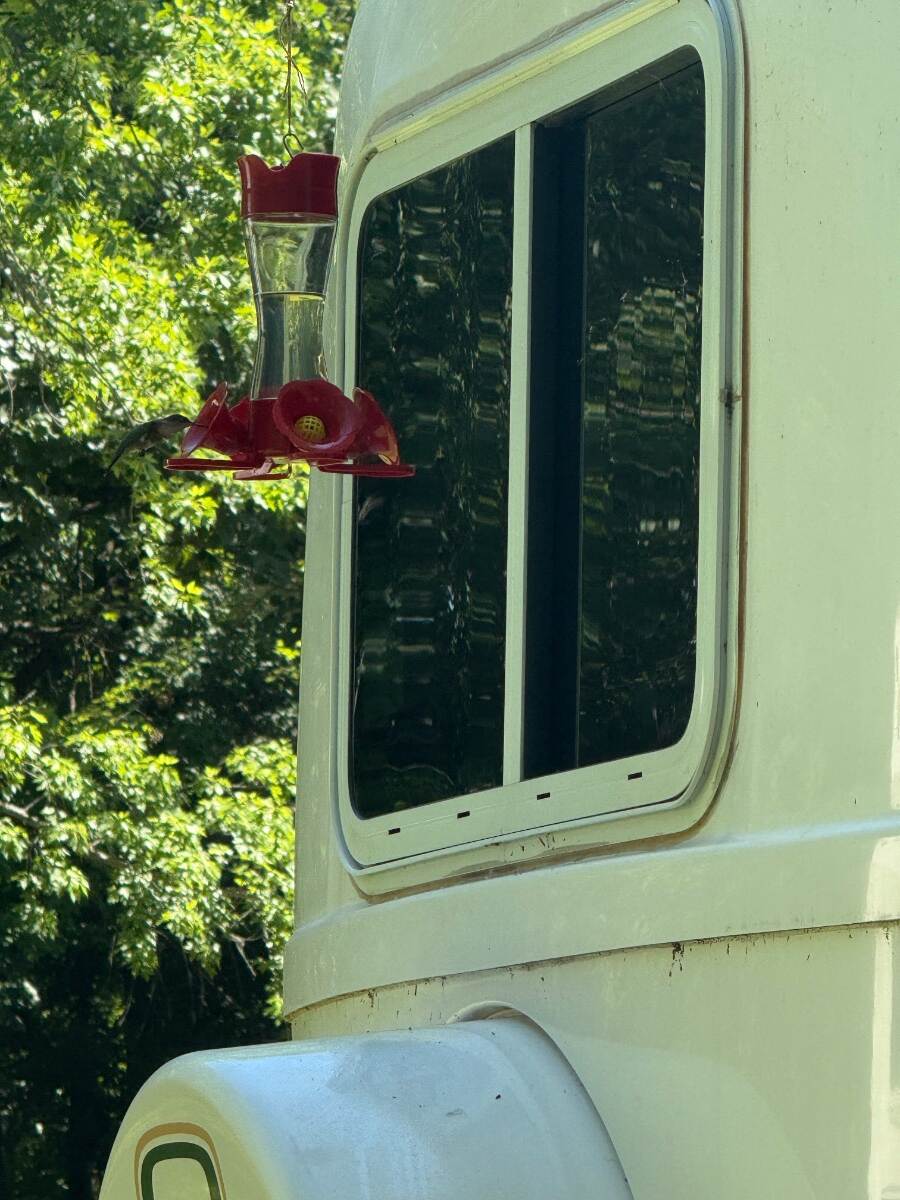
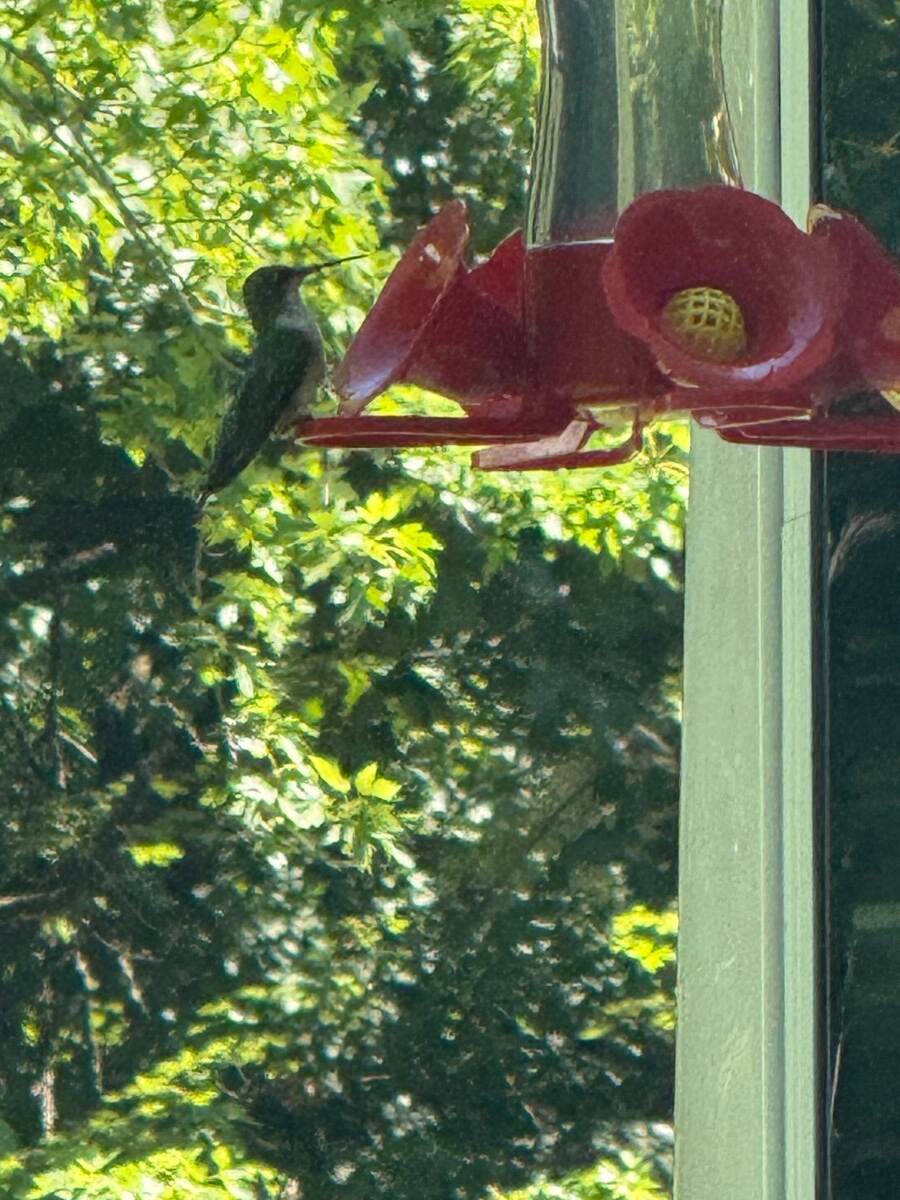
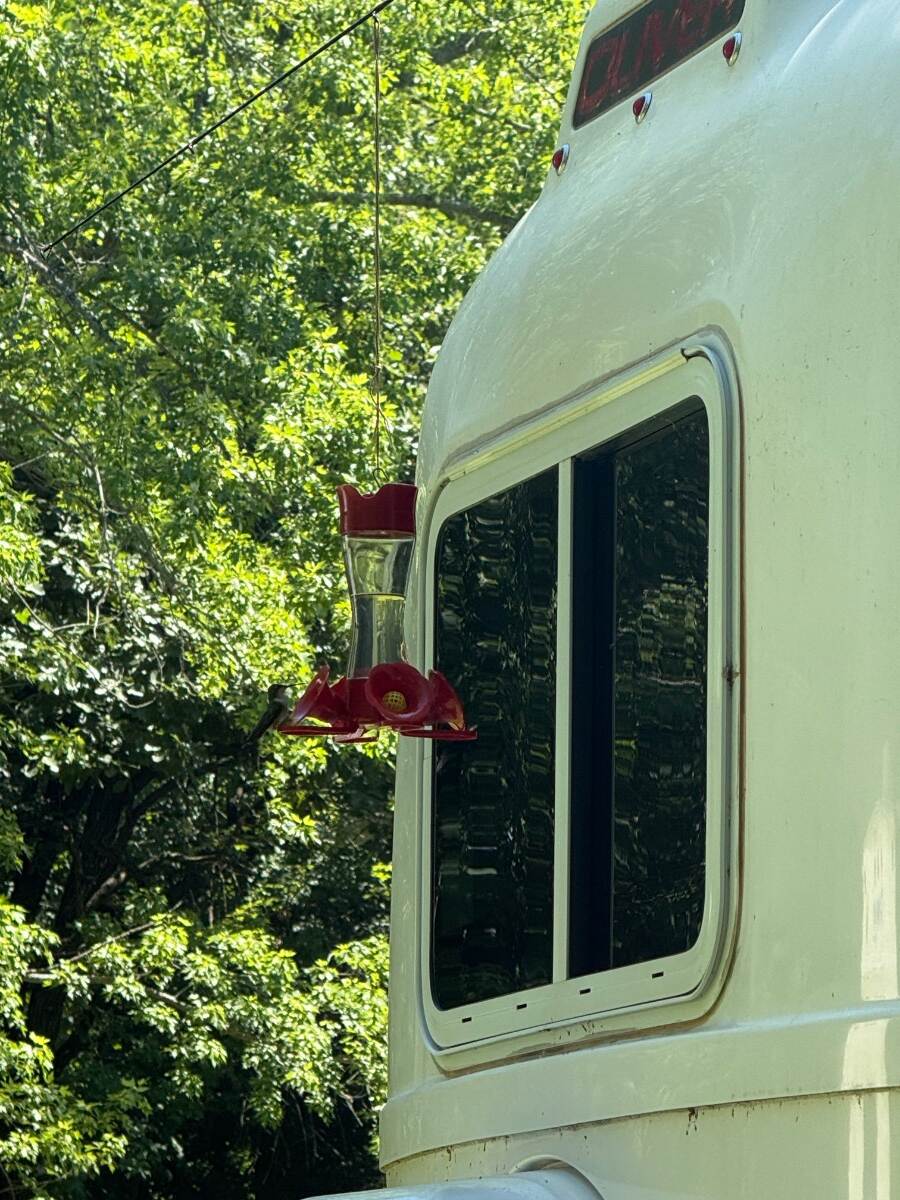
Hanging out at Glacial Lakes State Park (near) Starbuck Minnesota. Our second time here as the campground hosts. Been here since the first of July and leaving the 29th. I saw a camp host at another campground that put out hummingbird feeders, so I thought I’d give it a try. This isn’t “elegant” by any means. I grabbed an old fishing rod and secured the handle end under the edge of the A/C - twist-tied it to the TV antenna to keep it from coming loose. (Extreme vibration of our love-to-hate Dometic Penguin 2) Hummers showed up less than 24 hours later. I have it rigged just outside of the rear window so we can relax in bed and watch them come and go. IMG_9854.mov
1 point
-
These windows on the 2026 models are the ones that only open 3" at the bottom. The 90 degree windows are only on the 2027 models and should not be affected as the design is completely different from the ones on the 2026 models.1 point
-
That was big of Oliver. In my opinion Truma clearly had an engineering problem but didn't have the capacity to correct all the units in the field. Oliver really stepped up and backed their customers; awesome!1 point
-
Read the post here on the Forum about how Oliver footed the entire bill for the repairs to the Truma water heaters. Bill1 point
-
No inverter in your Oliver? In our hull the B+ and B- battery cables go directly to the inverter, not to a ground stud as you've show. The negative DC bus under the rear dinette seat may be easier for your ground. Notice the 4 AWG cables shown in the picture which is how I grounded ours (second picture in the post linked below). Bottom-line is you want the most direct connection (least resistance) from the Orion charger to battery +/-. There are many ways to do this. Do purchase the Orion XS 50A model.1 point
-
Well, it's finished! The installation of the DC to DC charging system in now complete and operational. I first started the installation in the Oliver Elite I trailer (#924) and finished the installation with the Jeep. I'm generally a DYI guy, but this was a bit of a stretch for me. It's not that it was difficult, I stressed on doing something to the Oliver that would ruin it, especially penetrating the hull for the charging cables. That was a big concern. But with careful planning and a ton of help from this community, I was able to get this done. Special thanks to Coddiwomple (David) for his help, patience, and guidance. I first went out to his place to view his installation in his Elite I. It's amazing how different his wiring was in just two model years. Mine is a 2021, and David's is a 2023. It was a bit confusing for me at first so a second visit was called for. In the second visit, I pulled my trailer to his place and asked more questions and advice. That second visit really helped! Thanks again David! Here is a few pictures I took during the process: I followed David's idea of mounting the components on a board that I later installed in front of the street side wheel well. I used the buss bars to step down in size from 2AWG to 4AWG which was necessary to connect to the Orion XS. I think pulling the 2AWG wire was the toughest part of the installation. A shout out to my son-in-law who was there helping that day. Couldn't have done it without him! Upon examination of the hull, I realized that under the sink (above picture) the hull is only a single layer thick, not a double hull there. That made things a bit easier. There was little existinting space to run additional cables through the hull, so I modified the housing for the propane tanks just a bit. With the propane tanks and tray removed, it was easy access to the trailer font. With my oscillating saw, I cut out an addition piece of the propane housing to the left of the three existing cables. That gave me plenty of room to install two additional cable glands for the DC charging cables. The way the propane tank housing is constructed and attached to the hull, the small piece I removed does not compromise the integrity of the housing. The following pictures show the final hull penetration. With the cables pulled, I was able to finish connecting everything to the DC charger. I finished the umbilical cord that connects to the back of the Jeep. I used the Trailer Vision enclosure to protect the Anderson SB120 plugs. Onto wiring the Jeep. (Much easier) At the battery box, I used a KASS terminal extender to accommodate the fuse and the other cables. I ran the cable along the chassis and installed the Anderson connector in a Trailer Vision enclosure which allowed me to mount it directly to the rear bumper of the Jeep. With everything installed and attached the batteries at both ends (Jeep and Oliver), I plugged it in and tested the amperage. I was getting between 49 and 50 amps at idle. Now the next step is to road test this on a long trip. Can't wait. Very excited to always have full batteries after a long day driving. Thanks again to everyone who had a part in making this a success! Carl
1 point
-
Just so everybody is on the same page, the bearing Kit shown above is for the 3500 pound axles used on the Elite II's through 2021. In 2022 Oliver started installing a 5200 pound axle on the Elite II models. This axle is the same size that has always been supplied on the Elite's except it is de-rated to a 3500 pound weight capacity due to using a 4 leaf spring pack (3500 lbs) instead of the normal 5 leaf spring pack (5200 lbs.) These new axles are now standard with Dexter's Nev-R-Lube Bearings. If you have a 2021 or earlier Elite II with the standard bearings they cannot be replaced by the Nev-R-Lube style. There were changes made to both the hub size and the spindle size. The complete axle would have to be replaced. If you have a 2021 or earlier Elite I it will require the standard bearings for a 5200 pound axle. If you have a 2021 or earlier Elite II it will require the standard bearings for a 3500 pound axle. Advantages with Dexter's Nev-R-Lube Bearings: * No need to pull the hubs to repack the bearings or replace the grease seals when checking the brakes. * No more inner and outer bearings. Just one sealed bearing cartridge. * Pre-set adjustment means installation is easy and human error is virtually eliminated in bearing adjustment. * Pre-lubricated at the bearing factory providing resistance to contamination. * Sealed for life which means increased durability and reliability and no more bearing maintenance. * 5 year or 100,000 mile warranty against defects in material and workmanship. I do want to emphasize if you do have a trailer that has the Nev-R- Lube bearings installed there are periodic checks that need to be performed to make sure they are in good working order. Nev-R-Lube Bearing maintenance needing performed every 12 months or 12,000 miles. 1. Elevate and support the trailer unit per manufactures instructions. Never jack the trailer up on any part of the axle. Always jack the trailer up on the main frame rails of the trailer. 2. Check for excessive wheel end clearance by pulling the tire assembly towards you and by pushing the assembly away from you. Slight end play is acceptable. 3. Rotate tire slowly forwards and backwards. The wheel should turn freely and smoothly. 4. Excessive wheel end play, restriction to rotation, noise, or bumpy rotation should be remedied by replacing the bearing unit. Note: A slight amount of grease weeping from the seal is normal. Excessive leakage may indicate abnormal bearing operation. The important thing to remember is that even though this bearing is sealed and does not need lubricated it still needs to have a yearly inspection for the end play. Having this checked will hopefully keep you from having wheel bearing issues on that next adventure you are planning. If there's a downside, it would be that if/when you need to replace them it will cost a lot more than the old style bearings and seals. A sealed Nev-R- Lube bearing Kit -42MM CARTRIGE & ATTACHING COMP, FITS 5,200 LB & 6,000 LB AXLES - Part #K71-997-00 will cost over $300 per wheel. I would be remiss to only replace one at a time.1 point
-
I found this posted by Jessica Taylor on the FB page. She does not seem to be a member here on the forum. It's not good news but it bears repeating for all the anti-FB owners. "Second camping trip since getting hull 1701 back to Alaska in May and one of our windows shattered while pulling into our campsite. Looks like the opening arms broke and may have come out of the slider bar at bottom of window and hit the glass causing it to shatter. The glass is broken, the arms are broken, and the sliding bar is on the road to the campsite never to be found again. We noticed on our trip home to Alaska and on our next camping trip that the windows work themselves loose as you drive, because of this event if you have a 2026 you may want to check window tightness often throughout your travels! Has anyone else had a window break on their 2026 Oliver? It’s the weekend so will call service Monday, but am curious if anyone else has had this happen. Have been 100% happy with our new camper except the windows. Bill is going to look at the window on the street side bed in a bit because it looks like that one’s arms are out of the slide as well and may be broken. Not happy with these windows at all. Not to mention the fact that I pray this tape doesn’t ruin the paint. Oliver Travel Trailers we will call Monday and I’m sure this will all get cleared up Adding again, all of the windows in the Oliver are broken this way except the bathroom window. We will have to tape all of the windows closed and possibly tape all of the arms down to the frame to get home without further glass shattering because the glass bounces freely and the arms move about freely. The arms seem to act as a shatter point when they poke the glass just right. I have just placed a service ticket on their website as suggested. I will also keep gaffers tape on hand from here on out as suggested. 2026 owners, be very careful when traveling. I’m not sure that constantly tightening your windows throughout your travels would have solved this. The arms are clearly not built to handle this job as evidenced by all of them breaking on a brand new camper." https://www.facebook.com/groups/OllieOwners/permalink/2252240891847686/0 points

.jpeg.0f93612bbf4fb0d95523906b33480b7c.jpeg)
.jpeg.7457453c7ac37518691adc6a5238294f.jpeg)










-
Recent Achievements
-