jd1923
-
Posts
3,506 -
Joined
-
Last visited
-
Days Won
264
Everything posted by jd1923
-
 I would ride a west-east commute from Lakeway TX to the VA data center in SE Austin (TX-71/US-290). In a car or truck it would take you a full hour+ any morning, more in the evening, but on this beast an easy 35 min! 🤣 Loved that job, the year was 2014. I would ride the bike 2-3 days a week to work, other days in our Passat TDI. Both vehicles got 38+ MPG city.
-
Our Annual St George trip and PPA Pickleball Tournament
jd1923 posted a topic in Campgrounds & Parks
Chris and I met playing tennis in 1991, and 3 years ago we transitioned to Pickleball for the community and it's also a little easier on our older bodies! Chris has competed in a bunch of tournaments with her Ladies partner, and we have played a few mixed doubles together. Loved our visit to St George for this tournament last year and we are playing it again this week: Selkirk Red Rock Open in St. George, Utah | PPA Tour So, it had the makings of a great Oliver trip. Thought we would boondock a first night just 2 hours from home, then 2 nights at Valley of Fire Nevada on the way. Starting tomorrow, we will spend 3 nights at a St George RV park right in town to be close to the tournament. This was our first night, off Signal Rd in Wikieup AZ (pics below).
- 23 replies
-
- 13
-

-
They make hitch pins in several sizes for tractor equipment, etc. Yet the standard 2" tow receiver always takes a 5/8" hitch pin or lock. You have the right one now. Just 0.8mm smaller, which is very close to 1/32", I've never seen that size. There may be a 9/16", but the next standard size smaller is a 1/2" pin and that is 1/8" smaller, over 3mm. A smaller pin would certainly bang around a lot and is NOT safe at all. The 5/8" hitch pin or lock is all you really need.
-
Is this really true? Is the aluminum wrap everywhere? When I did our cellular router installation in the TV, working with MobileMustHave.com, they asked about the trailer being fiberglass vs. aluminum like the AS trailers. In an AS you have to install an access point inside of the trailer, since the roof-mounted Wi-Fi antennas cannot penetrate the AS shell. I got a free access point with my deal but did not need it to install it. I'm typing this now inside our Oliver, parked on the north shore of Lake Meade. I'm getting 80 Mbps down, 20 up connected to the TV router which is parked outside of course. We have one window blind open, the other two in the sun ar closed. Run our computers, stream TV, not seeing much effect of the insulating wrap.
-
We spent a few years together. An '08 R1200R at a home we had in Lakeway Texas.
-
Mike knows how to get 'er done the right way! 😂 Wish I had an "Ollie Hanger" like @Patriot! You really need to "wax" undercover or in the shade. I don't believe I could get a permit for one on my property without spending a fortune. Local government is getting a bit Californian around here. And it's so hard to hide from the sun in the SW. It's another sunny day in Arizona, and our windy season just started. A couple months of wind until everything gets toasty dry out here! Each year we wait it out 'til the summer monsoons come.
-
@Geronimo John your post shows you quoted me, but it was @Mountainman198 who installed the Alcan springs and wrote this.
-
Five leaves vs. four and the lighter rating would certainly be "less jarring." Also, the Alcan design has the second leaf at full length so that it would not fail at the contact point where the end of leaf #2 hits the primary leaf.
-
Trade ya!? 🤣 We are new to being Oliver owners, so I will wait this out a bit... Had a Class-A with electric awning, we used it once, but only had it for two seasons. Class C over 4 seasons, didn't use it once (manual). I'm actually thinking of pulling it off the Oliver for wind resistance and aesthetics. I will never again wrench my neck under a manual awning, what a PITA (and we live in 300 days of strong sunshine out here in the GREAT SW)!
-
Problem with 12 volt circuit - some lights are very dimmed
jd1923 replied to serge's topic in Mechanical & Technical Tips
I understand touch lights were added at some point. Our older hull does not have them and I'm happy for that. Is every light a touch-light? Do you have lighting switch panels to turn on/off Main Lights, Kitchen Lights, Courtesy Lights, etc.? If so, I would remove all the switch lights for standard hardwired lights. Switch lights gives you a point-of-failure at every light location. -
@Geronimo John you made a brief mention of China, so I'm guessing their heavier springs are also made there. Too bad, and I see other issues too. Several members here, going back 12 pages of comments, were worried about going too stiff on replacement leaf springs. I had written earlier that 14% stiffer is a nice bump - perfect! You're suggesting 2400 LB rated springs which are 37% stiffer. That's a big difference, that personally I would not at all advise this option. The Dexter "Tech" was selling the only option they had. Rethink this? Anyway, when it's time for me to upgrade I'm going with MADE in COLORADO, U.S.A. For $310 more NP and getting the right weight rating. Besides I also trust @MAX Burner and he showed us a quality installation using Alcan parts. I have for years paid a considerable premium so NOT to purchase from that large land mass in eastern Asia. This country stole IP from Motorola, where I worked during the 90s. and so many US companies. Come visit my garage to witness a 50-year collection of Made in USA tools. I'd say 96% Made in USA, and 4% from quality Asia manufacturers (also US Allies), specifically Japanese and Taiwanese made tools. Amazon has read my comment 100 times when I return junk. I click "Not as advertised" and just write "China" for the stated reason. They take them back with a smile!
-
Pretty area! Have never camped on such a HD asphalt pad. The pad looks level in the pic, but your trailer is way up in the front. Best wishes.
-
@rich.dev am I seeing things, or are you? Hard to see the orientation fully, but it looks vertical to me. Notice the curve of the Oliver shell and the Furrion which is laid flat in the cabinet. Yes, the vertical direction allows air flow to aide in cooling.
-
I get it, but I don't have time for waxing, nor the patience for therapeutics! 🤣 Some of you may feel different if you were still working, had 3 trucks, 2 cars, 2 motorcycles, 3 dirt vehicles, a 4000+ SF home on 3/4 acre and 8 gas-powered yard tools to maintain. Spring has sprung and in a couple weeks we will be knee-high in grasses and weeds to whack. I've also been rebuilding our Sundance spa lately, new wet heads on the 3 pumps, new control panel and FLO switch, new skirting is next. There is always something else needed here, so I cannot see hours buffing is utilizing my core competencies. Before it gets too hot this year, I need to pressure-wash and stain two levels of redwood decking, should have done that last year! I may have to also contract this work, if we can afford to. I'll be getting back to all this work soon, after we leave Sunday, to get away for 3 weeks in the Oliver! What's nice about the Oliver is after some prep work it is ready for camping. Last time out, I was working fulltime 'til the day we left. I had plugged in the day before, so Chris could fill the fridge and I merely packed some clothes the night before. Next morning, I filled water in trailer and TV since the lows were in the 20s, got the TV loaded up with gear stored in our adjacent shed, and hitched up the Oliver. In under 2 hours, we were on our way! I think we can get this down to an hour, nice! Pickleball is our therapeutic, and so much more fun than power buffing, waxing a vehicle in 2x2' sections, 3 times over. I truly prefer yard work over detail work which can be therapeutic as well. Our Oliver was new-to-us June of last year and it has been prioritized in our first year of ownership. Going forward it must be just one of the toys, with home and trucks being more important. I don't wax cars anymore, but we do 98% of all maintenance & repair work on our property, every family member included. I don't trust contractors or mechanics to work on our home or vehicles, but I know for sure there are many experience detailers that can do a better "wax job" than me and it's not a safety item. I will spend hours perfecting a brake job, so I know it's done right. And I've been known to drive old cars for years needing paint. It comes to priorities. Shine on the Oliver would be more important to us, if we had had made the big investment in purchasing a new one. Ours was a bit dull to begin with. In the fall, I hope to find the right shop to put a good shine on her.
-
Dicor is generally used as an RV roof sealant, where the roof is penetrated, vent openings and screws holes. Using VHB only, there are no holes, no need for a roof sealant. Add Dicor if it makes you feel better, but it's unnecessary. 3m writes this re VHB 4950: "Resistance to solvents, temperature extremes, and U. V. Light make VHB products suitable for many interior and exterior applications." 4950.WD6 (3m.com)
-
I used 3M VHB 4950 on the panels on our (ex-) Bigfoot. The project was 4-5 years ago. I double the standard solar mounts, 8 vs. 4 to be extra safe. Each panel had eight times 3x1" VHB tape ONLY, no screws. VHB is CERTAINLY all you need! Still holding strong and you don't have to put Dicor mess over top of it as VHB resists sun and weather nicely.
-
I already had this feeling, but you have all thoroughly convinced me that there is no way in the world I will ever polish our Oliver! I'd rather install new leaf springs, a new fridge, new A/C, add lithium and upgraded charger/inverter, and rework the furnace ducting than buff the Oliver in 2x2' increments, three times over! This detailing sounds like prison life working a rock pile. Save money on that buffer. For now, our Oliver stays oxidized. The upper front is/was pasty flat when we purchased it used last summer. When we get home from our next trip (leaving Sunday for 3 weeks) I will pressure-wash it quickly upon return and cover it for the summer. After Labor Day, I'll look for a local detailer. If we were any reasonable distance from CGI, I would make an appointment there for sure. I already contacted a Phoenix based ceramic coating chain. They advised me that they would not work on our Oliver due to its age and oxidation. They prefer to quickly coat new paint on new vehicles only. I need to find a company like CGI in the SW.
-
OTT Forum members reading this really, REALLY need to carefully read the 100s of posts, already provided in the 12 long pages of this thread. Every question asked in the last many days has been asked a good 2-3 times already and answered in considerable detail in the pages above. Bottom line, have your suspension inspected. If your leaf springs show anything but a natural arc, have them replaced. The Alcan product is a good upgrade at a reasonable cost. Mine look fine now, so I have no concern or worry. When needed, replace your leaf springs. It's just that simple.
-
You received good advice already on the storage box. This subject has been covered in dozens of threads. I wrote an upgrade thread last fall and have read many others before and a few since. There is a lot to consider here, no quick answer. Study the subject, measure your water flow rate, and ask specific questions. You will get good advice here!
-
Yeah, if I was to buy another Beemer, it would be a K1600 for sure! Had an '08 R1200 for several years, commuted around Austin with it. I still have an old K-75c for grins, but the only one I will keep is my '84 Goldwing Standard. Not sure how the K1600 truly rides, but this old Goldwing will outlast and be much more comfortable than any BMW 1200 cc or less, jury out on the K1600.
-
It's GREAT when a repair and upgrade come together nicely. Also had time to clean everything under the bed and worked some Forever Black into all the black trim I had removed. Got the truck 100% yesterday, filled the tank (with 2SO/ATF additive), ran some errands and this truck has considerably more power. Levels 1-2 on the Juice are really strong! (Levels 3 and above are for built engines AND transmissions only.) Running previously at 6 PSI +/- was starving the injection pump to a point, and likely it was running hot. Now fuel pressure is 15 PSI at idle and a constant 14 PSI when driving. Love the Juice, love the Fleece, love being done with positive results.
-
@Geronimo John will certainly need to talk to OTT service. When I read pre-wired, I assumed only to the roof and that you would have to wire a solar controller, etc. So, did you just drill a hole into the roof at a measured location and the #6 cable was there as promised? That takes nerve!
-
I wonder what that means, pre-wired? For "pre-wired" to be viable you would have to have a roof mounted junction box. Do you? How would you add solar if not? Not easily! How would you run cables from the roof to a solar charger in near proximity to the battery bay? I took another picture for you, Gj. The only way an Oliver is truly pre-wired is if you have a junction box, like is what's pictured on ours.
-
@HDRider coolers are very heavy when full, a tank tote is light when stored empty. Pull your 1 1/4" hitch bar off completely, buy some 2x2" Aluminum stock and build something like what @rich.dev showed above (an excellent example). You really need the two receivers, so it doesn't wobble up-n-down and left-to-right. The beauty is OTT already installed two perfect receivers for any kind of well-supported shelf or basket. They say 150 LBS MAX for the bike rack. I would think Rich's design could easily hold 250+ LBS, if you want that much weight, that far rear. You want to over-engineer such a cargo carrier so that it is safe and sits nicely for years.
-
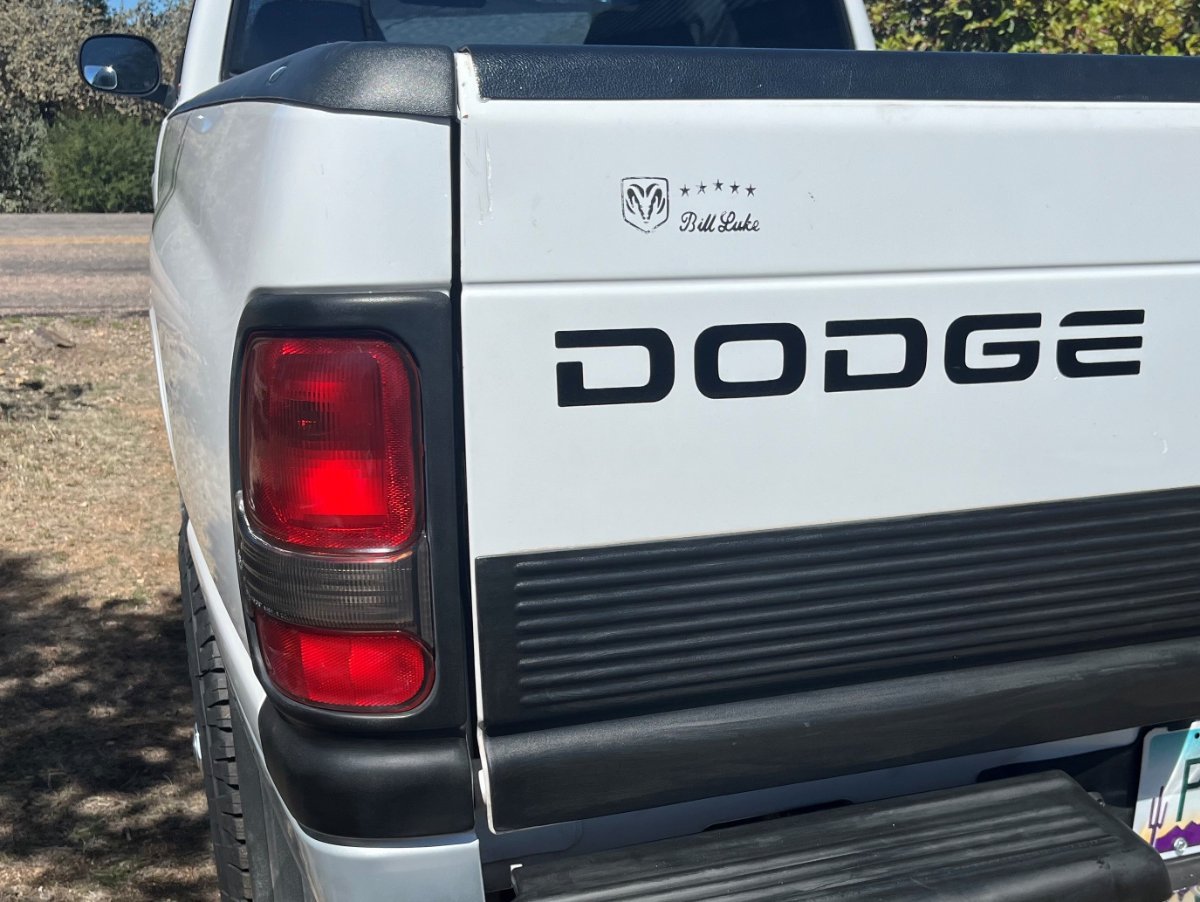
Blacked-out is for kids, but when I had all this disassembled, we detailed the taillights, license plate surround and bumper covers and then all black trim on the TV! I degreased all parts, getting off all the sloppy car wax and rubbed them down with rubbing alcohol several times until the final paper towel was clean. Used Mothers Back-to-Black in the past, but it never really did the job. Recently, I purchased "Forever Black" and it works great, covering in deep black without brush marks: Amazon.com: Forever Black Bumper & Trim 6 Oz. (New Improved Formula & Larger Size) : Automotive Looks amazing for 23-year-old trim! Right?