
jd1923
-
Posts
3,846 -
Joined
-
Last visited
-
Days Won
314
Everything posted by jd1923
-
I did not actually measure. Height change may be up, <1” or negligible. Tongue weight should not change since distances, the 3-point geometry of the trailer has not changed. Porpoising will be minimized, so that weight up and down on the hitch will be more even.
-

Yes you can fit a piano in an Oliver!
jd1923 replied to DanielBoondock's topic in Ollie Modifications
No room in the tow vehicle? Piano in case, the stand, your chair, cables, etc… In our Oliver, I would not change the dinette except for the firm taller cushions we had upholstered. We enjoy meals together there, including lunches on travel days. I never got into extending the table or counter extensions, needing all the aisle so that two bodies and the dog can pass comfortably. Just enough living space. -
Yes you can fit a piano in an Oliver!
jd1923 replied to DanielBoondock's topic in Ollie Modifications
Find the right size/depth brackets for your piano case which will take a bit of searching. Use 3M VHB 4950 tape ONLY to mount to the fiberglass. 😎 -
For sure. Ours reads the same 13.2V now and we’re at 48% SOC. We’ve been parked unplugged for the week, running the fridge on DC. And that much voltage drop? Battery health or wiring? Get rid of that Optifuse breaker, replace it with an ANL fuse, clean/tighten all terminals.
-
Yes you can fit a piano in an Oliver!
jd1923 replied to DanielBoondock's topic in Ollie Modifications
Love your install! You should add Z-brackets on both ends to replace the blocks and then your full-size seat cushions are good as-is! Keep us posted. I take an acoustic guitar on our longer trips and that alone is not so easy. Have a high-end travel case which helps. It lays on the bed when towing. When we sleep it’s standing up at the entrance, or on the back seat of the truck, weather depending. In the bed is a strong folding chair to play anywhere comfortably! 😎 -
The power grease gun sits nearby on the ground, has a long hose with the lock-n-lube on end. Just attach, hit the power button for a few seconds. Used a manual gun for 40 years, always fighting it!
-
axle and spring replacement at Alcan Spring
jd1923 replied to Ospreybob's topic in Mechanical & Technical Tips
I did the work myself, so I can tell you, it's rather straightforward. I promise you, and your wife, there's nothing special here, no need for specific Oliver experience since any tandem-axle trailer would take the same installation. Find a local trailer shop with good reviews. Find one that is a Dexter shop and they may give you better pricing on the axles. It's good to have a local trailer shop you have frequented, who you can call on again when needed (e.g. replace the Nev-R Lube bearings in 5 years). Alcan will always be too far away for hands-on help. They make great springs though! Order Alcan springs shipped directly to you. There has been some question on the quality of their wet-bolts in recent Forum threads. I would certainly replace ALL parts, including the EZ Flex, given your 5-year-old trailer. You could buy a new EZ Flex kit with or without the wet bolts. I went with all the Alcan parts, leaf springs, U-bolts, shackles and wet-bolts (they're fine), and also ordered two (2) of each of these parts for the centers (yes, ALL new parts): https://www.etrailer.com/Trailer-Suspension-Parts/Dexter/013-144-03.html https://www.etrailer.com/Trailer-Suspension-Parts/TruRyde/TRFA73Z916DLNZ.html You have the right idea! You'll feel much better leaving home READY for your cross-country trip! I always get my work done at home. My sole purpose for camping in our Oliver is to go somewhere, just anywhere, forcing me NOT to work. You won't find me under our trailer on some gravel lot! 😎 -
Yes, you could. I just wanted the security of the larger ball. The referenced model is the direct replacement! It’s critical to line up/drill the bolt holes accurately, but that’s it. Chapter 11 surprising, but they did put 7K labels on one or more 5K couplers. One failed on an Oliver. Maybe the lawyers got them, too bad.
-
Replace your wet-bolt grease fitting with 45s. Yours are likely M6x1mm threads (Alcan 1/4"-20): https://www.amazon.com/dp/B08R8GYYYM/?th=1 Then do yourself a BIG favor and invest in a power grease gun and a LockNLube coupler: https://www.amazon.com/dp/B00H7LPKKU/?th=1
-
Ditch the Andersen and all 2" hitch hardware. Replace the old with a 2 5/16" Bulldog coupler and use whatever you need on the tow vehicle to get a 2 5/16" ball at the correct height. I installed this product: https://www.bulldogproducts.net/product/028462_square-rectangular-mount-coupler
-
Hopefully only the latter. The BMS should be efficient, but movement of high amperage causes heat within its design. When I removed our battery tray, it gave our batteries a lot more headroom. How much clearance do you have above your batteries? Don't leave that door open too long, or those expensive items may walk! I have ours locked down double and only open the door to remove ground when doing an electrical mod.

-
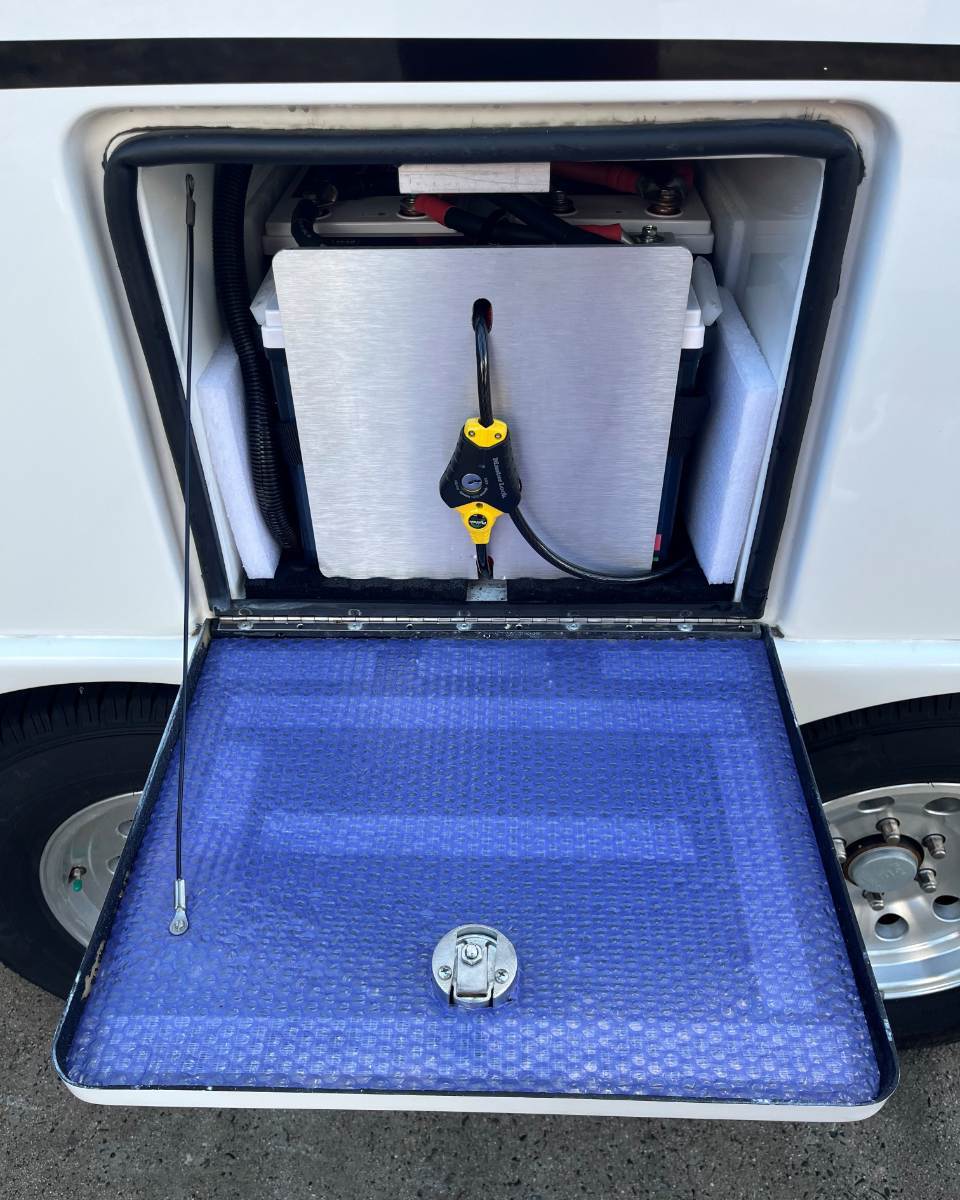
You’d be a first! I’ve have added 2 temp-activated exhaust fans, behind our absorption fridge and in the basement cavity for the inverter. But for the battery bay, I closed up the vent holes that were designed for lead acid venting and added insulation to the door, to close the air, minimize collection of road dust. Many of us have done this (two examples shown in pictures above). Uncertain the specs of other brands, but the Epoch Essentials batteries many of us have installed, will supply 200A continuous, in or out as designed, without overheating and 400A Max Amps capacity. Most we used camping this week was -120A with the fridge, the Chill Cube A/C and electric HWH all running on battery/inverter. We’re camping again this Sun-Mon again, so besides these 120V appliances, I’ll boil water in our electric kettle. Power them all on at once should hit or exceed the 200A Continuous Rating. The Victron MP2 can also exceed its 3KVA rating, found it up at 4.5K for a spell when once I turned on the power-hungry Dometic P2 A/C (thank Goodness that’s gone) not realizing the electric HWH was heating! Good thing I have a back-up 400A ANL fuse for the Victron! I’ll test and post the app screen prints that lists 3 internal temps per our 3x 300 Ah batteries! I expect to feel a cool cabin, hot water at the tap, a pot of boiled water for coffee and battery and inverter temps within spec! We’ll see… 😎
-
If you live south, and have the Dometic Penguin II A/C installed, the Oliver is also merely a 3- season camper! Any season is good when the A/C is OFF! 🤣 First real trial of our Furrion Chill Cube, camping in the Phoenix Valley this week. We turned it on yesterday at 3 PM, been running since. In start-up it pulled 50A on 12VDC. Was down to pulling only 16A, 40 min later. Overnight it was whisper quiet using very low amps. I estimate <25A per hour daily average. Like our friend @FloraFauna, we’re not going on any winter survival trips! This 3-day trip, we ran the A/C, our Suburban HWH (largest power draw -120A) and the Dometic fridge ALL on battery! Still have 50% SOC as we’re breaking camp today. 😎 Yesterday the Victron shunt read 67% SOC. I looked at Chris asking, “you know what that means?” 67% of 900 Ah is equal to 100% SOC when we had our 600 Ah battery bank! Those of you who recently upgraded 300 Ah Battleborn to 600 Ah Epoch, next time you read 50% SOC on the shunt, just smile knowing that was your 100% in years past! So cool…
-
Not just the older trailers! @Tom and Doreen own a 2023! Hope you have Alcan Springs on all fours now! 😎
-
This is all you need. Figured out where you want the wet bolt opening. Weld a little 1/8” x 1:4” x 1” tab perpendicular to the shackle to the inside of the bolt head. Install the bolt in position and only the nut only should spin when torquing. I’ll turn mine some while greasing, prior to torquing maintenance. Mine are all still clean and straight. My thought is Ken’s got that way from less torque. They would not bend if held square. As often as I’m doing regular maintenance, I’m not going to worry. If they look bad years later, I’ll buy a new MOR-Ryde HD shackle set and replace them. 😎 https://shopmorryde.com/products/heavy-duty-shackle-kit
-
You got this right! Dan is new here, but there are 20-some failures written up on our Forum posts. When you read the title of this thread, I should have more posts than you. Since I've actually installed "Made in USA leaf springs" and wrote posts about my installation, maintenance and performance observations! 🤣
-
I agree. I went with lower torque numbers. Instead of the Alcan recommended 65 ft-lb on the EZ Flex and 80 on the ends, I went 55/65. Of course the U-bolts must be 90 as specified. The Alcan shackles and wet-bolts are not the quality of their leaf springs. I believe they cut the shackles and likely outsource the bolts. Ken’s @mountainoliver shackles have already bent some, bolt holes buggered. He made new shackles in his machine shop, drilled tighter fitting holes. If I were to do this again, I’d certainly buy the Alcan 5-leaf pack springs, but buy a full new HD EZ Flex kit, including shackles and wet-bolts. I had to get new EZ Flex centers anyway which should be replaced if more than a few years old (the center bushings will wear off angle due to the design).
-
Not good! We camped Monday and ran the fridge and hot water heater together (-120A) for 30 min, until the water was hot. Then turned on the A/C on all afternoon, not plugged in, all on inverter. Temp on the Victron inverter rose to 90F, in its closed space, well within the 104F warning . I installed a basement exhaust fan, yet rarely use it. The Epoch app had been acting up, so I manually tested voltage with a multimeter. It read 12.9V, certainly a very good number considering the -120A load of the HWH. Battery tops and 4/0 wiring were all cold to the touch. I sealed the vents in our battery bay to keep dirt out. IMHO, call Lithionics, fix the issue vs. venting heat away that should not accumulating!
-
We left for a trip yesterday. No Cat Scales where we live, but our city dump has scales. I go there often to recycle engine oil. With both Oliver axles on their scale, it came to only 5700 LBS. I’ve measured hitch weight separately at 580 LBS. We are packed light for a 3-day trip, so I estimate we’d pack another 220 LBS in food and clothing for a long trip adding to 6,500 LBS Max. So she’s sitting at only 5700 LBS on two axles! Shouldn’t 7,000 springs be enough? The Oliver is more top-heavy than most trailers, with its upper double hull, tall body, multiple cabinet storage at head height, rooftop A/C, solar panels and other rooftop accessories. We dropped 4000 FT in elevation yesterday! Coming down steep, hard turns, exhaust brake on, descending smoothly! The top of the Oliver stayed put, maybe leaning left or right 2” going into a hard turn. Look out your mirrors when towing to observe this. Our hull used to lean over a foot vs. just inches! Original springs, the Andersen WDH was a must! Not anymore, since the Alcan springs keeps the Oliver weight centered over its axles. This is why the OEM suspension is undersprung. It’s not only the weight it carries, it’s the total body weight it must control while towing in various conditions! 😎
-
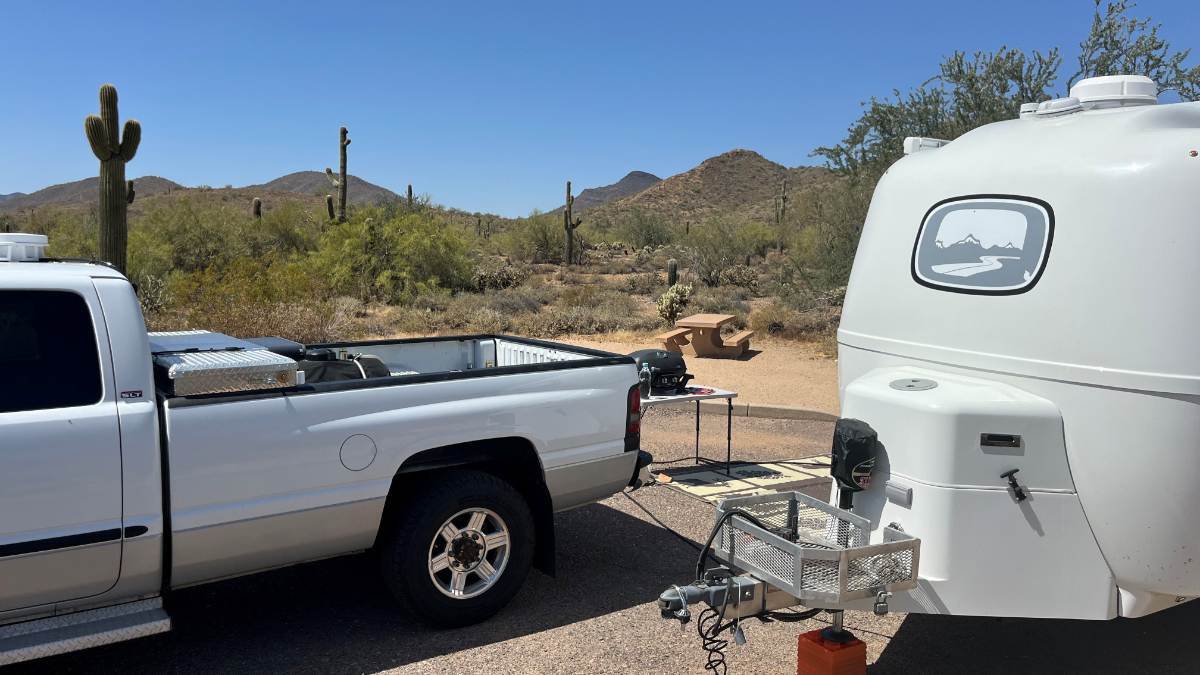
Cave Creek is our favorite of the Maricopa County Regional Parks. Often our first night away, just 90 min from home! There are currently 5 county parks, all excellent camping with hookups, around the perimeter of the Phoenix Valley. We've stayed at all of them! https://www.exploremaricopacountyparks.org/maricopa/facilities Snowbirds are gone, so the campground has lots of availability and it's not hot yet (high 80F today). Staying at campsite #9 for a few nights, the best in the park. It's like you have your own 5-acre campsite! 😎
-
Carrying this thought out in comparison, Alcan to Dexter Leaf Spring packs: Dexter 4 leaf-OEM1750 LBS x 4 = 7,000 lbs (-20% = 5,600 LBS) Alcan 4 leaf-pack 2250 LBS x 4 = 9,000 lbs (-20% = 7,200 LBS) Dexter 4 leaf-SW4 2400 LBS x 4 = 9,600 lbs (-20% = 7,680 LBS) per @Geronimo John Alcan 5 leaf pack 2750 LBS x 4 =11,000 lbs (-20% = 8,800 LBS) Keep in mind besides this 20% “wiggle room” there should already be safety margin in the manufacturer’s spec capacities. But I like the additional 20% per Alcan! 😎
-
Yep, that’s why I wrote “over time.” To me that interesting data is that outside the temp swing/range was 38 degrees, while indoor the temp range was only 16. This shows the difference in the insulated space. The averages should be close over daily cycles. Thank you@Steph and Dud B, many of us love seeing some performance data of our Olivers!
-
Regardless of the R-value of insulation, interior and exterior temps will become equal over time. Also, when temps are in the 50s it's not the same test as when ambient temps are in the 20s, the teens or worse. What matters most is when we add furnace heat, will the temp rear of basement by the water lines be kept above freezing? Say it's consistently below freezing outside, what should interior temp be set at to keep the rear basement above freezing? We also keep a Ruuvi sensor in the same rear basement location (and 5 other locations), including one outdoors. Rear basement temps will not drop below freezing while camping, with our thermostat set to 63F. The rear basement temps is always above freezing a good +10 over outdoor temps. Generally we do not store and winterize, since we "winter" camp often (but no real winter down here). Winter overnights are often down to low-mid 20s by dawn, but then it will always warm up to 50F +/- in the sunny afternoons. If it's cold just a night or two, I do not worry. If we are to have multiple consecutive cold nights, I'll set the furnace to 50F if I had not blown the water lines clear. The Oliver could have better insulation, but it is certainly sufficient for our use. I like how it's thin so that we have room in the basement for mods. I would add more if we lived north. I did the battery bay door already. Good reminder to add some to our basement access door. 😂
-
Of course, when towing fully loaded, run the specified PSI listed on the DOT label which is calculated to be safe at the full GVWR. But for example, when driving a pickup around town, no cap installed and empty bed, and I know I won't be towing or carrying a load for days on-end, I’m certainly not running the rears at 80 PSI! I'll bring them down to 60-65 PSI so the rear axle won't be bouncing down the street without a load to carry! On my sports cars, I run higher pressures, because I like a slight skid into a hard turn! I owned a 1975 Alfa Spyder during my 20s, through my 40s and learned over many miles. Now I run my 1992 Lexus SC400 a few LBS over spec and the car handles like a dream. 😎 There is a reason tire pressure is adjustable! And Yep, we air down our AWD GX470 when we have a bit of weather or washboard dirt to travel. But on this truck, I upgraded the OEM P-rated tires to LT tires C-Load Range. (didn't want the harshness of E-Load tires for this application). The DOT label states 32 PSI, but LT tires don't stand up nicely at pressure this low (also 32 PSI is below the lowest level on the Cooper load table for this A/T tire). For around town and highway driving, I chose to run 44 PSI, but we air down as low as 24 PSI for a day out playing in the dirt. I put a bit of thinking in what works best for the situation. Engineers and manufactures often wrongly use the "one size fits all" approach, and when lawyers get into the mix, they just throw physics right out the window in lieu of Indemnification! 😒 The DOT label on our relatively light TV, a 2WD long-bed capless truck is 55/80 PSI at 8800 GVWR. Our 2WD truck is hundreds of LBS lighter than its 4WD counterpart. After we setup camp, the truck is only 6800 LBS with all passengers and tools. Add all our camping stuff, the 35-gal tank full of fresh water, the bed fridge pretty full, plus 580 LBS measured tongue weight and we’re still 500 under the GVWR, fully packed for a long trip! I regularly run slightly lower than the GVWR at 52/72 PSI for our combination of state and county highways, dirt and gravel roads. At 80 PSI, when our TV rears hit the bottom of a dirt wash (think 2WD), they could spin some, but less likely with a little less pressure. When we traveled more on Interstates, like our Minnesota trip last summer, I increased the rears to 78 PSI, while 80 PSI is the stated MAX. Dan, I do agree that engineers should speak their mind. I too often get accused! 😎
-
Missing screws on cabinet cabinet drawers
jd1923 replied to Gliddenwoods's topic in Mechanical & Technical Tips
Four screws would certain hold it tight, but does a light-duty latch need such strength? I looked around my kitchen at home and all the cabinet latches have only 2 screws. I've complained about several of OTT installation practices, but for me not this one. They use the slotted hole to allow for adjustment. Easy enough to add two more in the round holes, if your sure the adjustment is exactly correct and it will stay that way. I would add, when I did maintenance of our Oliver kitchen drawers that the drawer slides ONLY had 3 thin short screws each. These are holding the weight of the drawer, so I added three more per slide, using beefier screws too. 😎