Leaderboard


Popular Content
Showing content with the highest reputation on 09/15/2017 in all areas
-
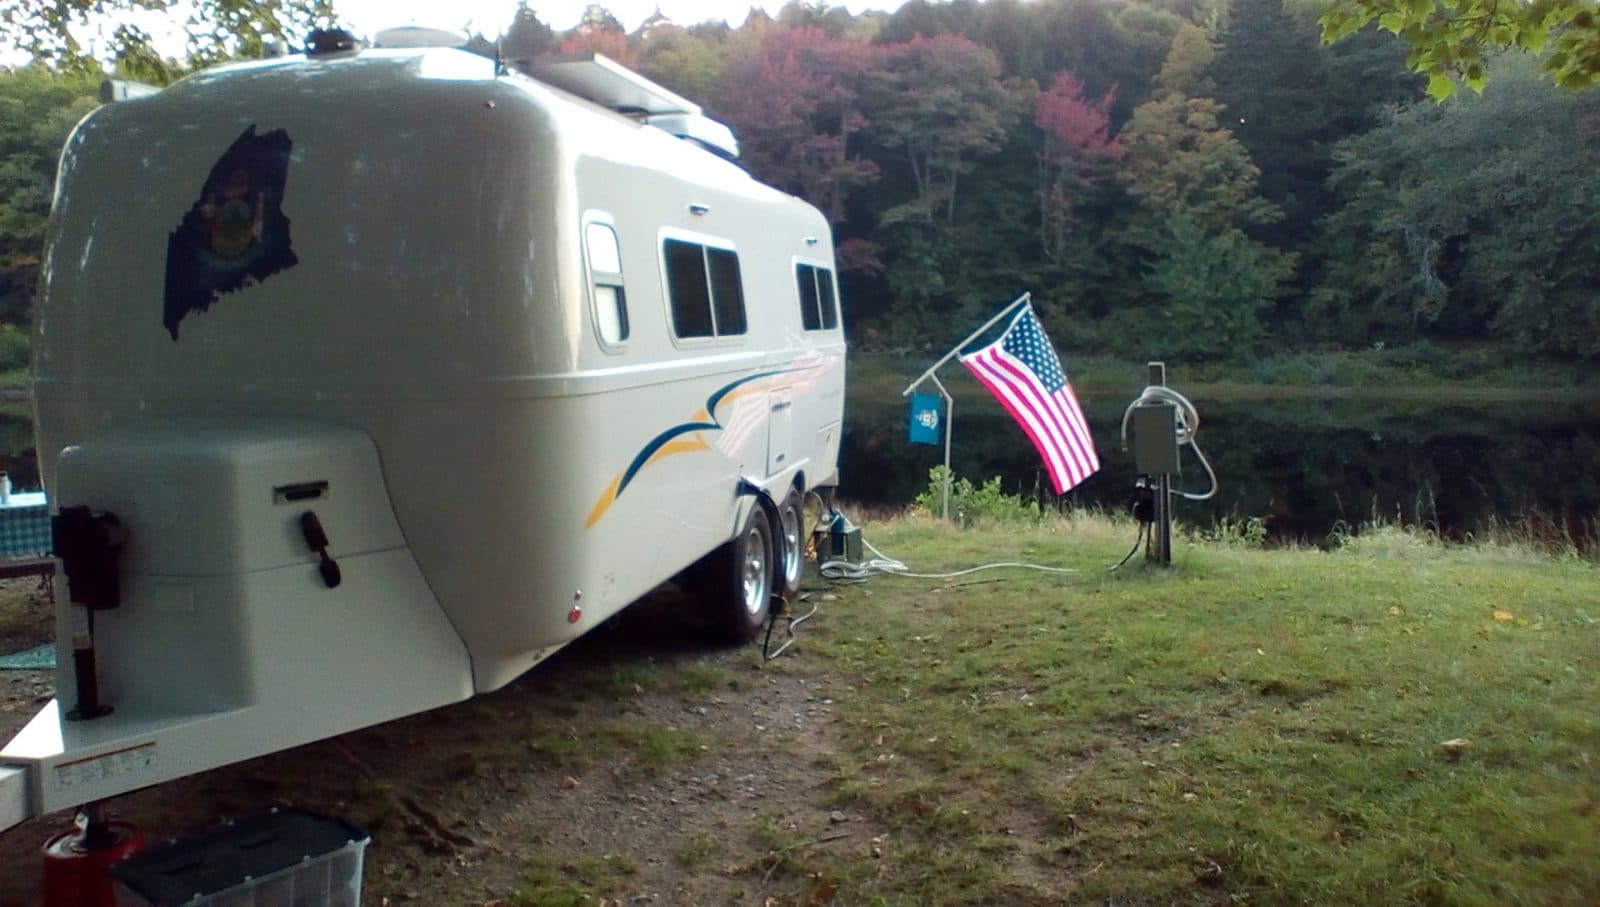
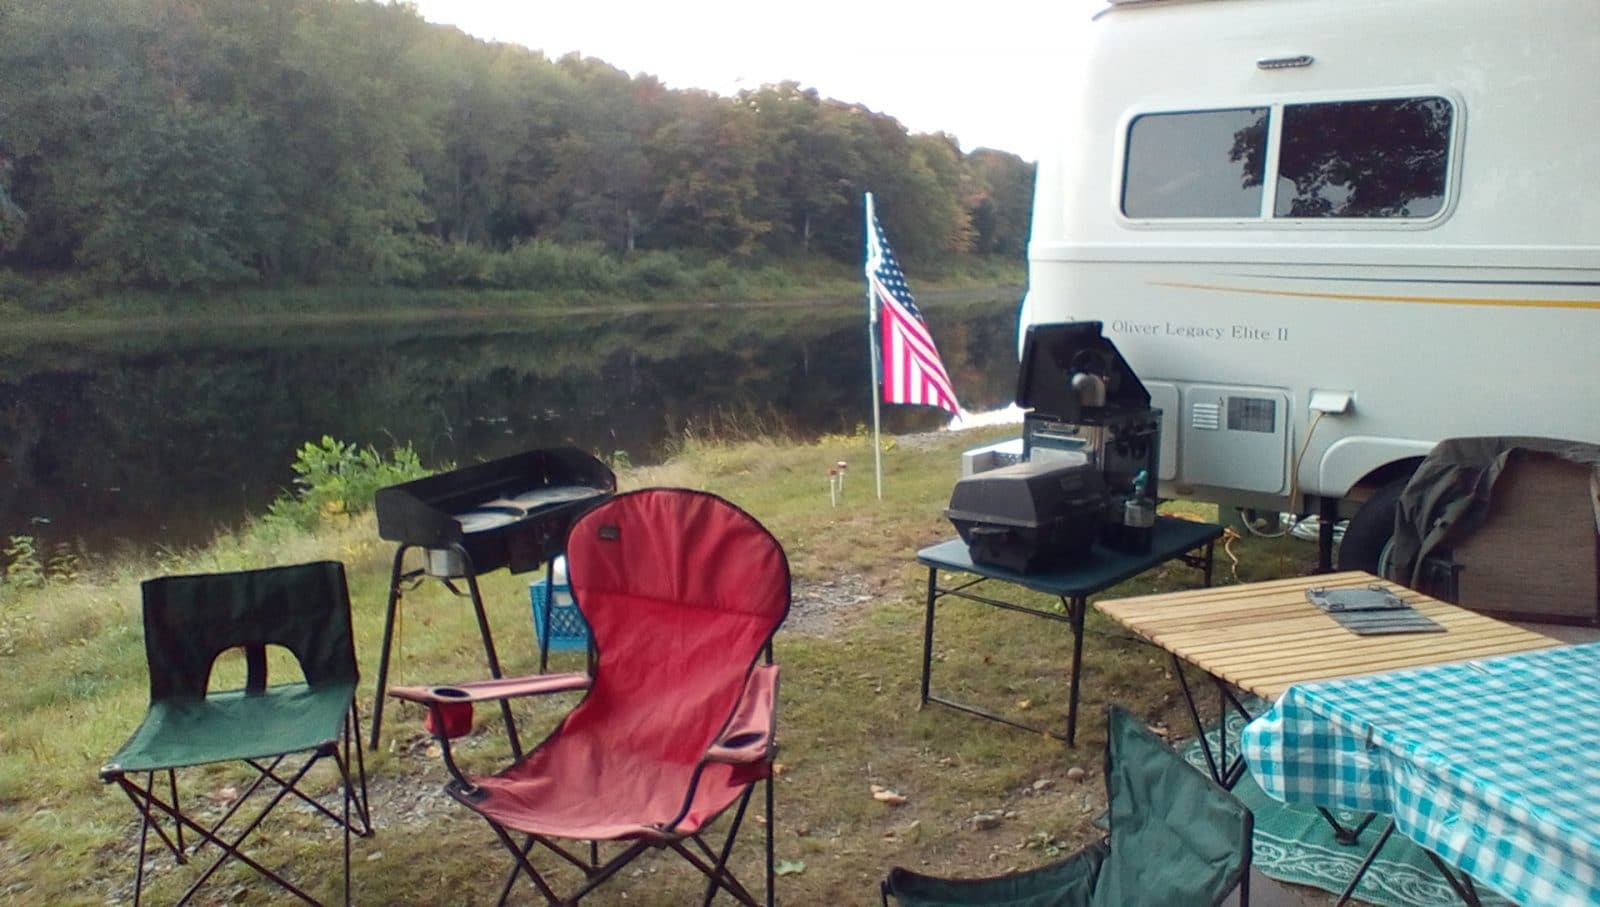
Pine Grove Campground Medway, Maine Near Mt. Katadin, by Baxter State Park, near the new National Monument...
 2 points
 -
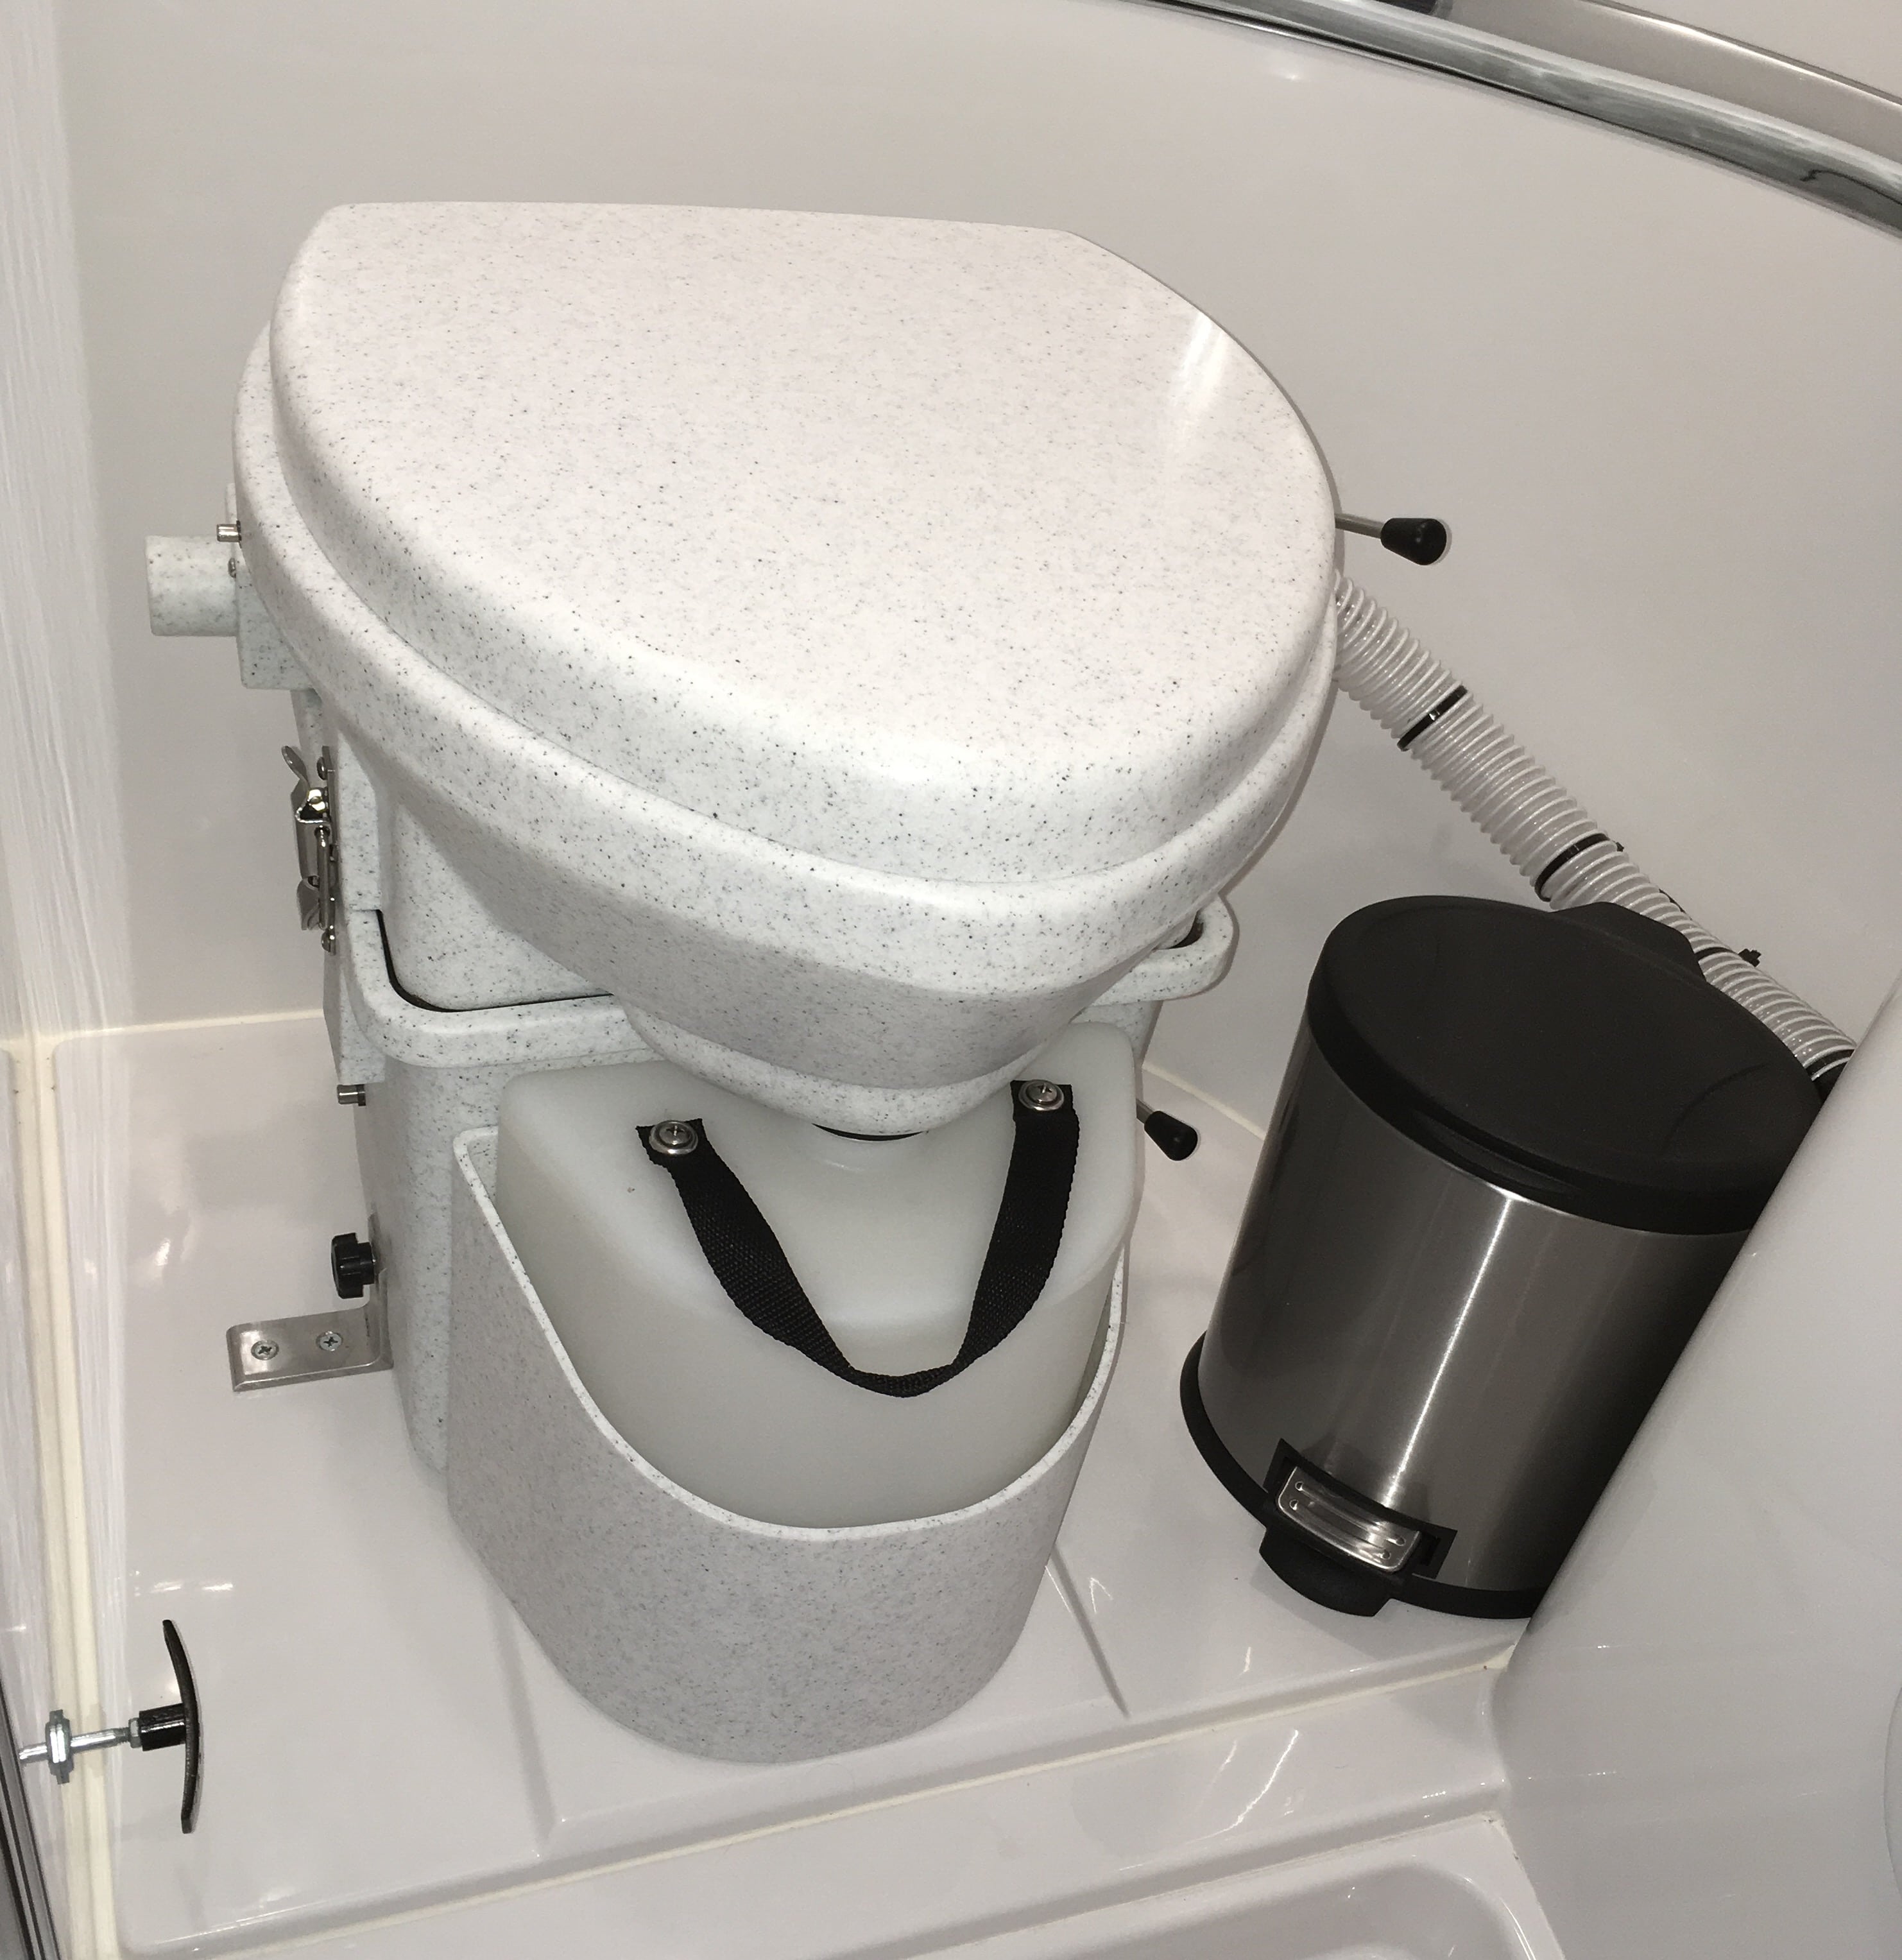
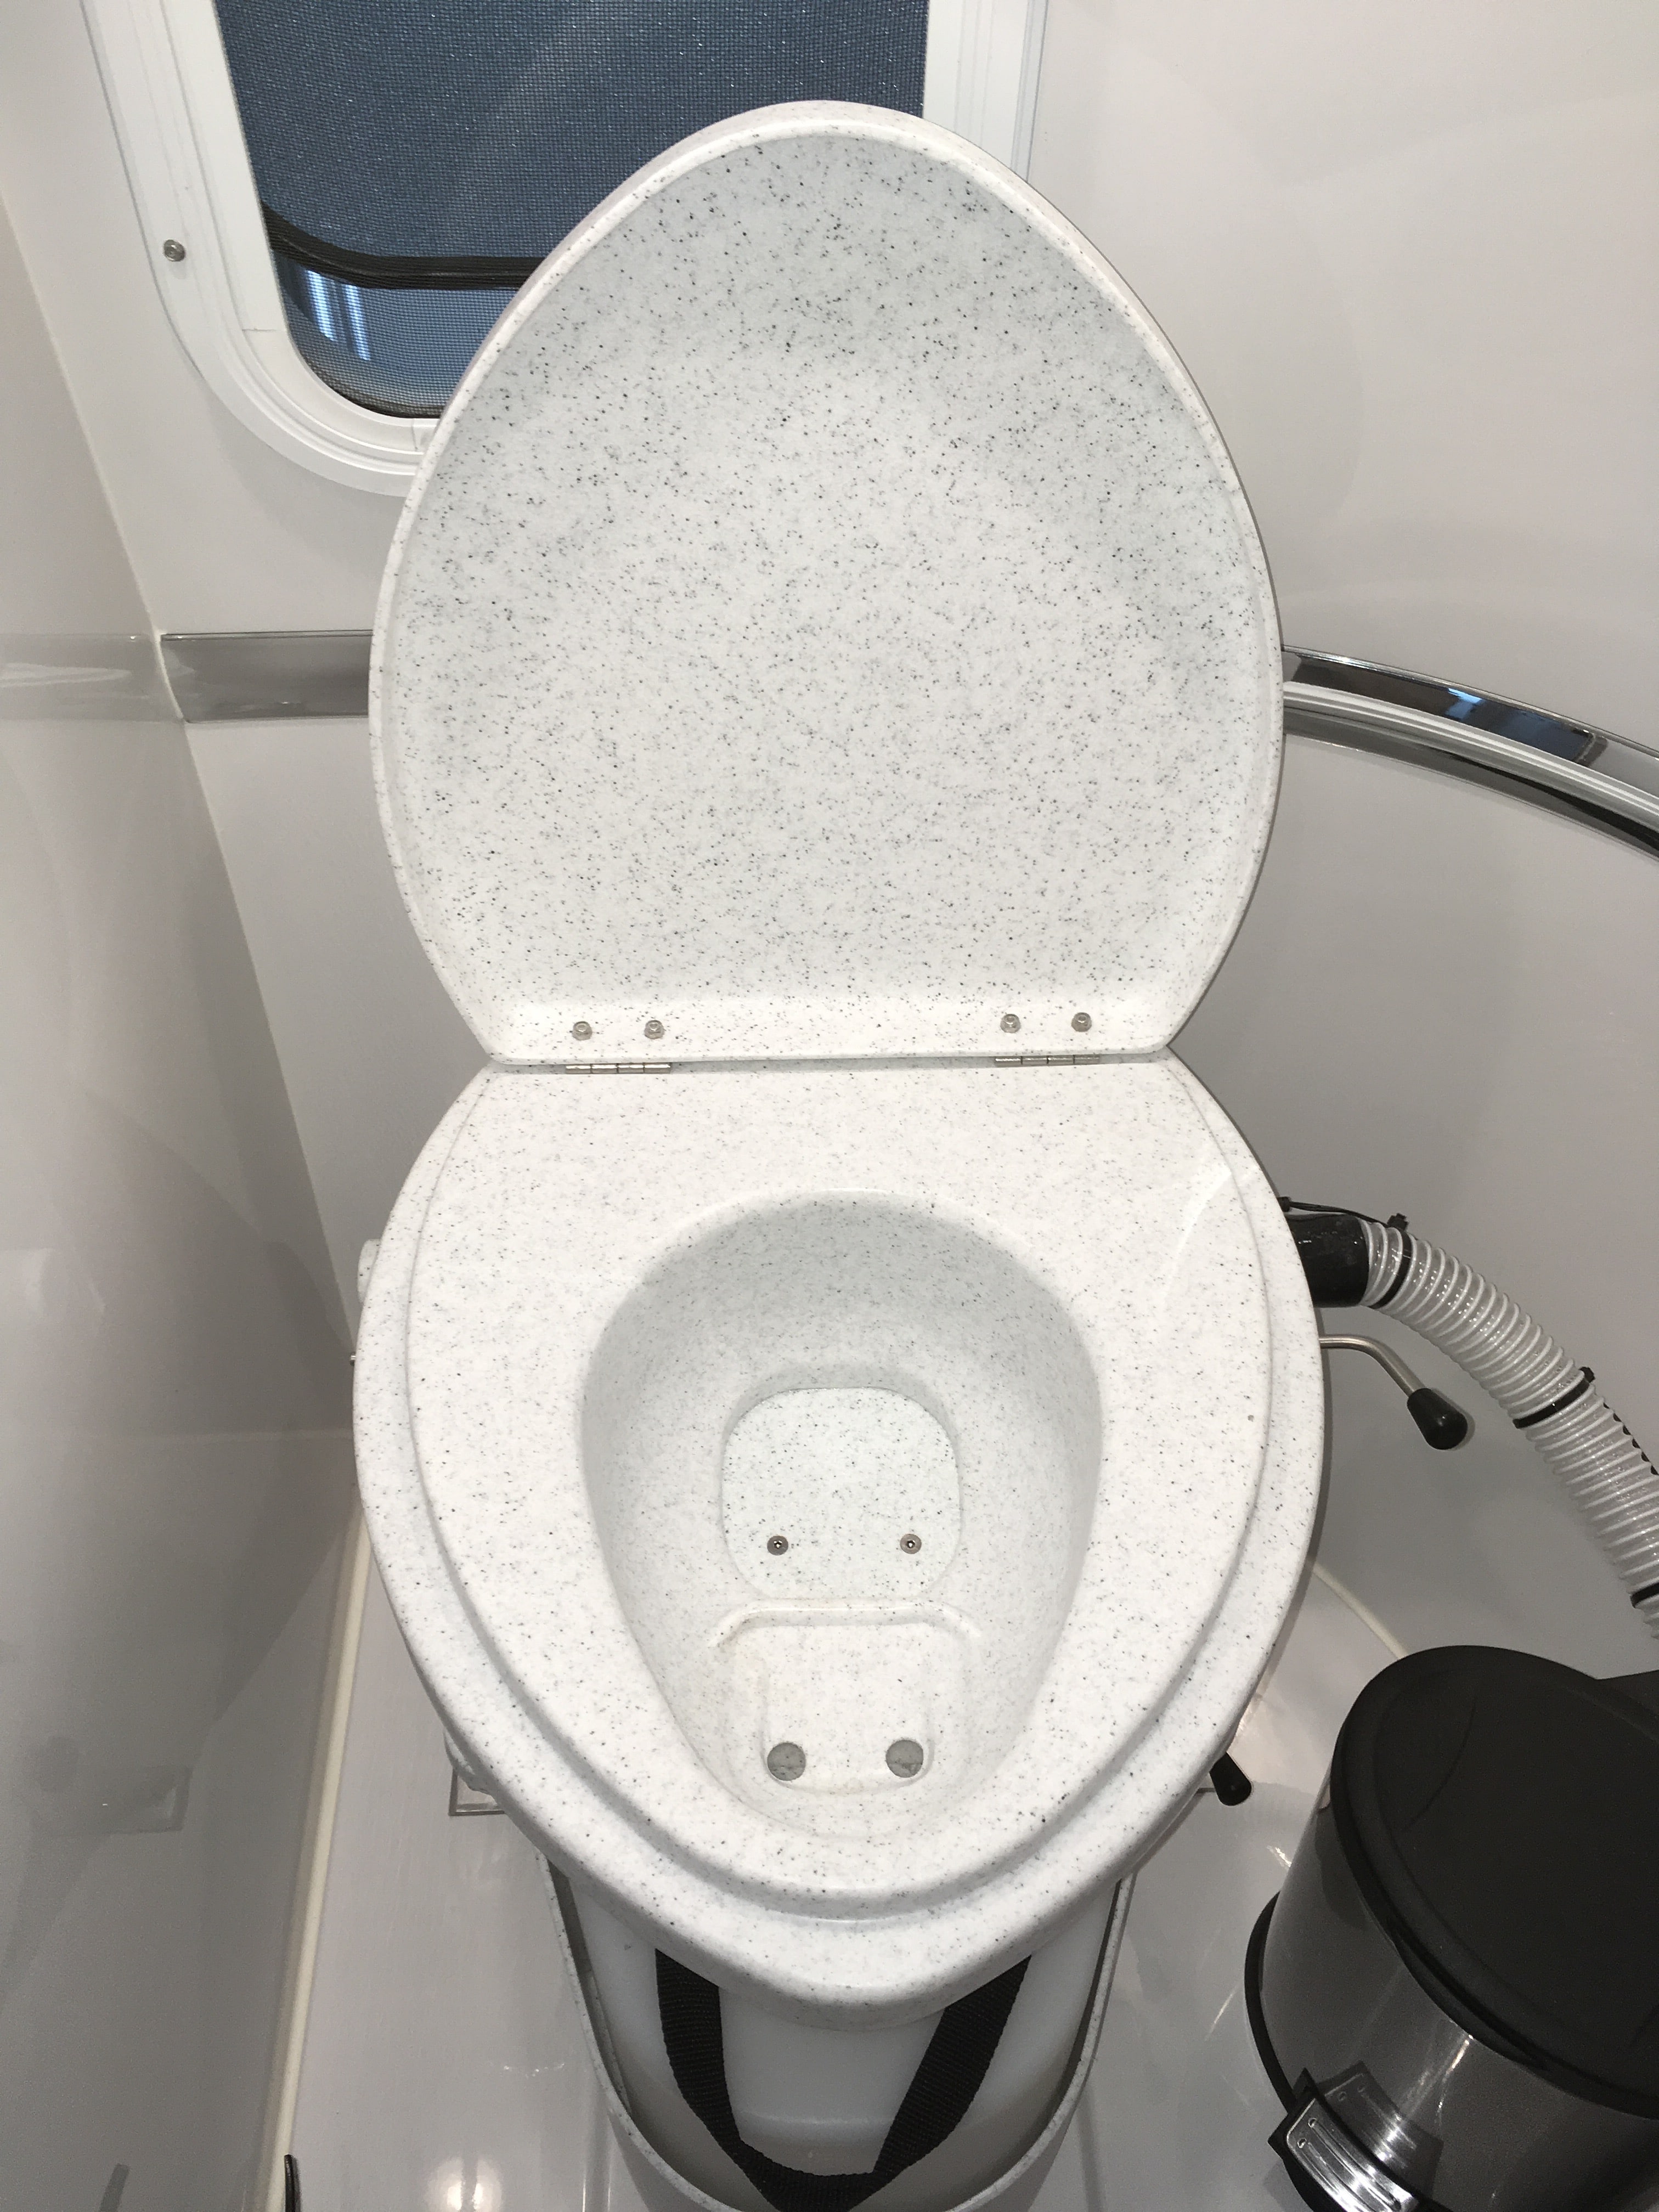
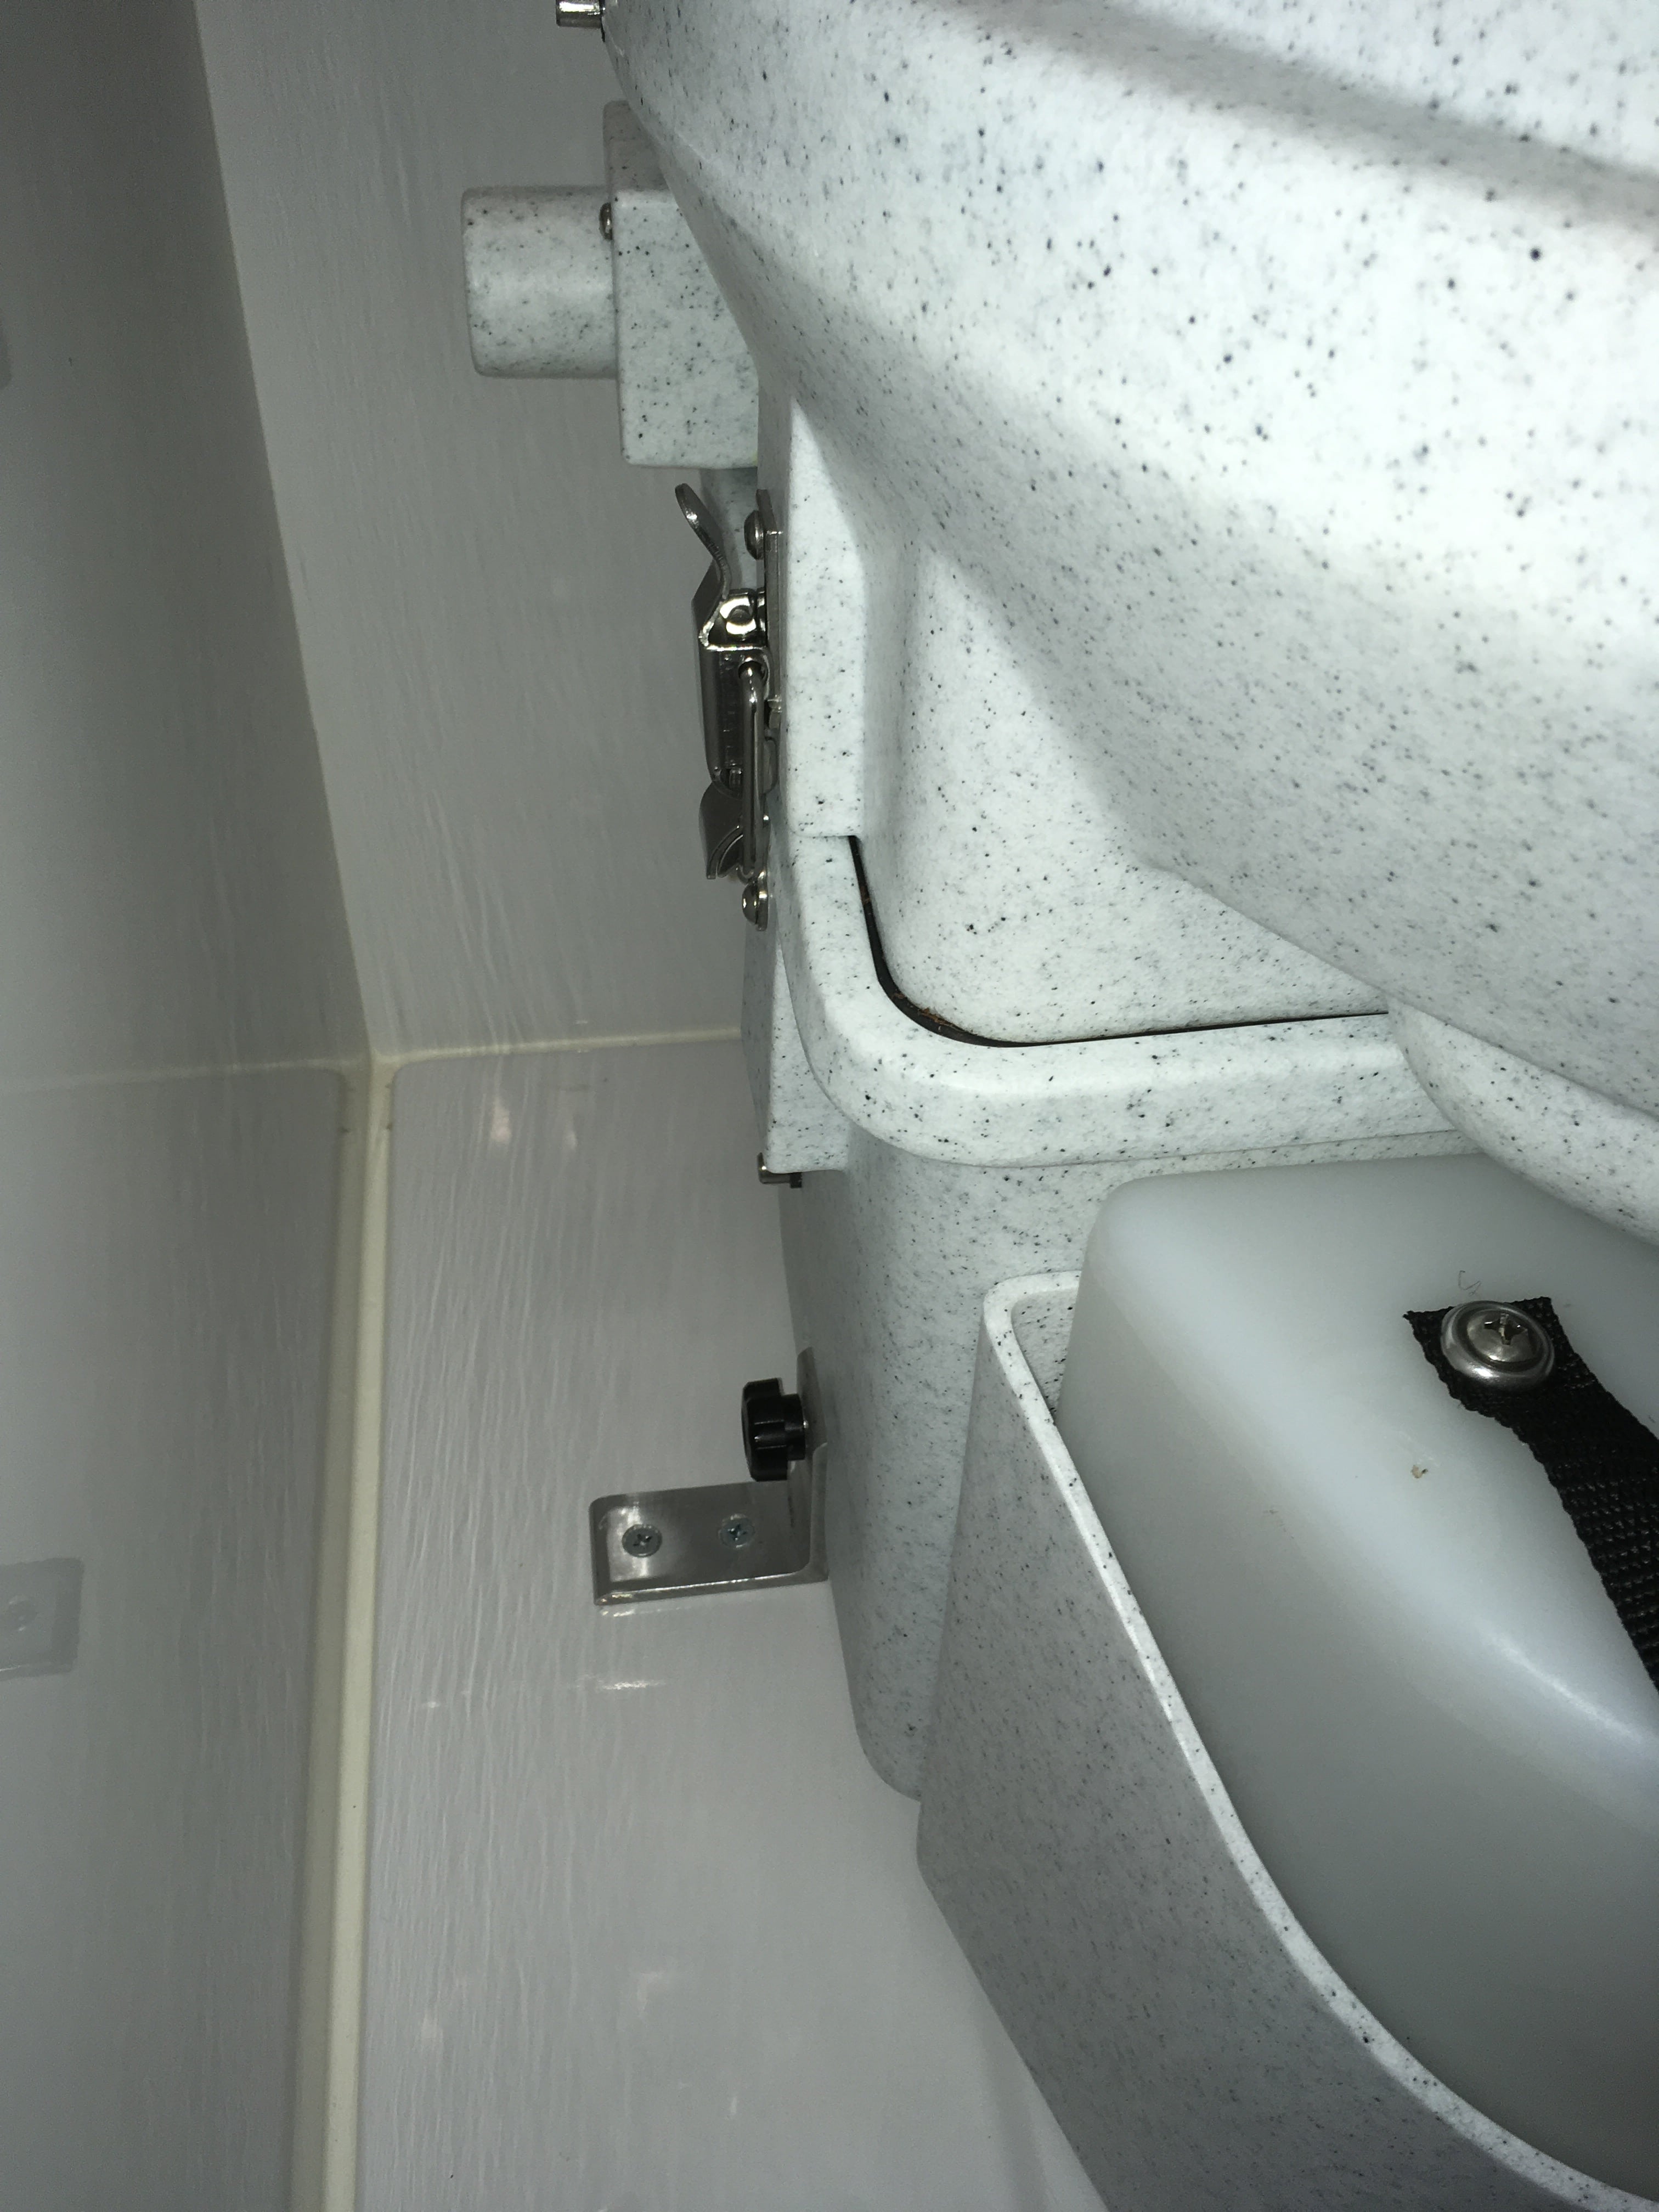
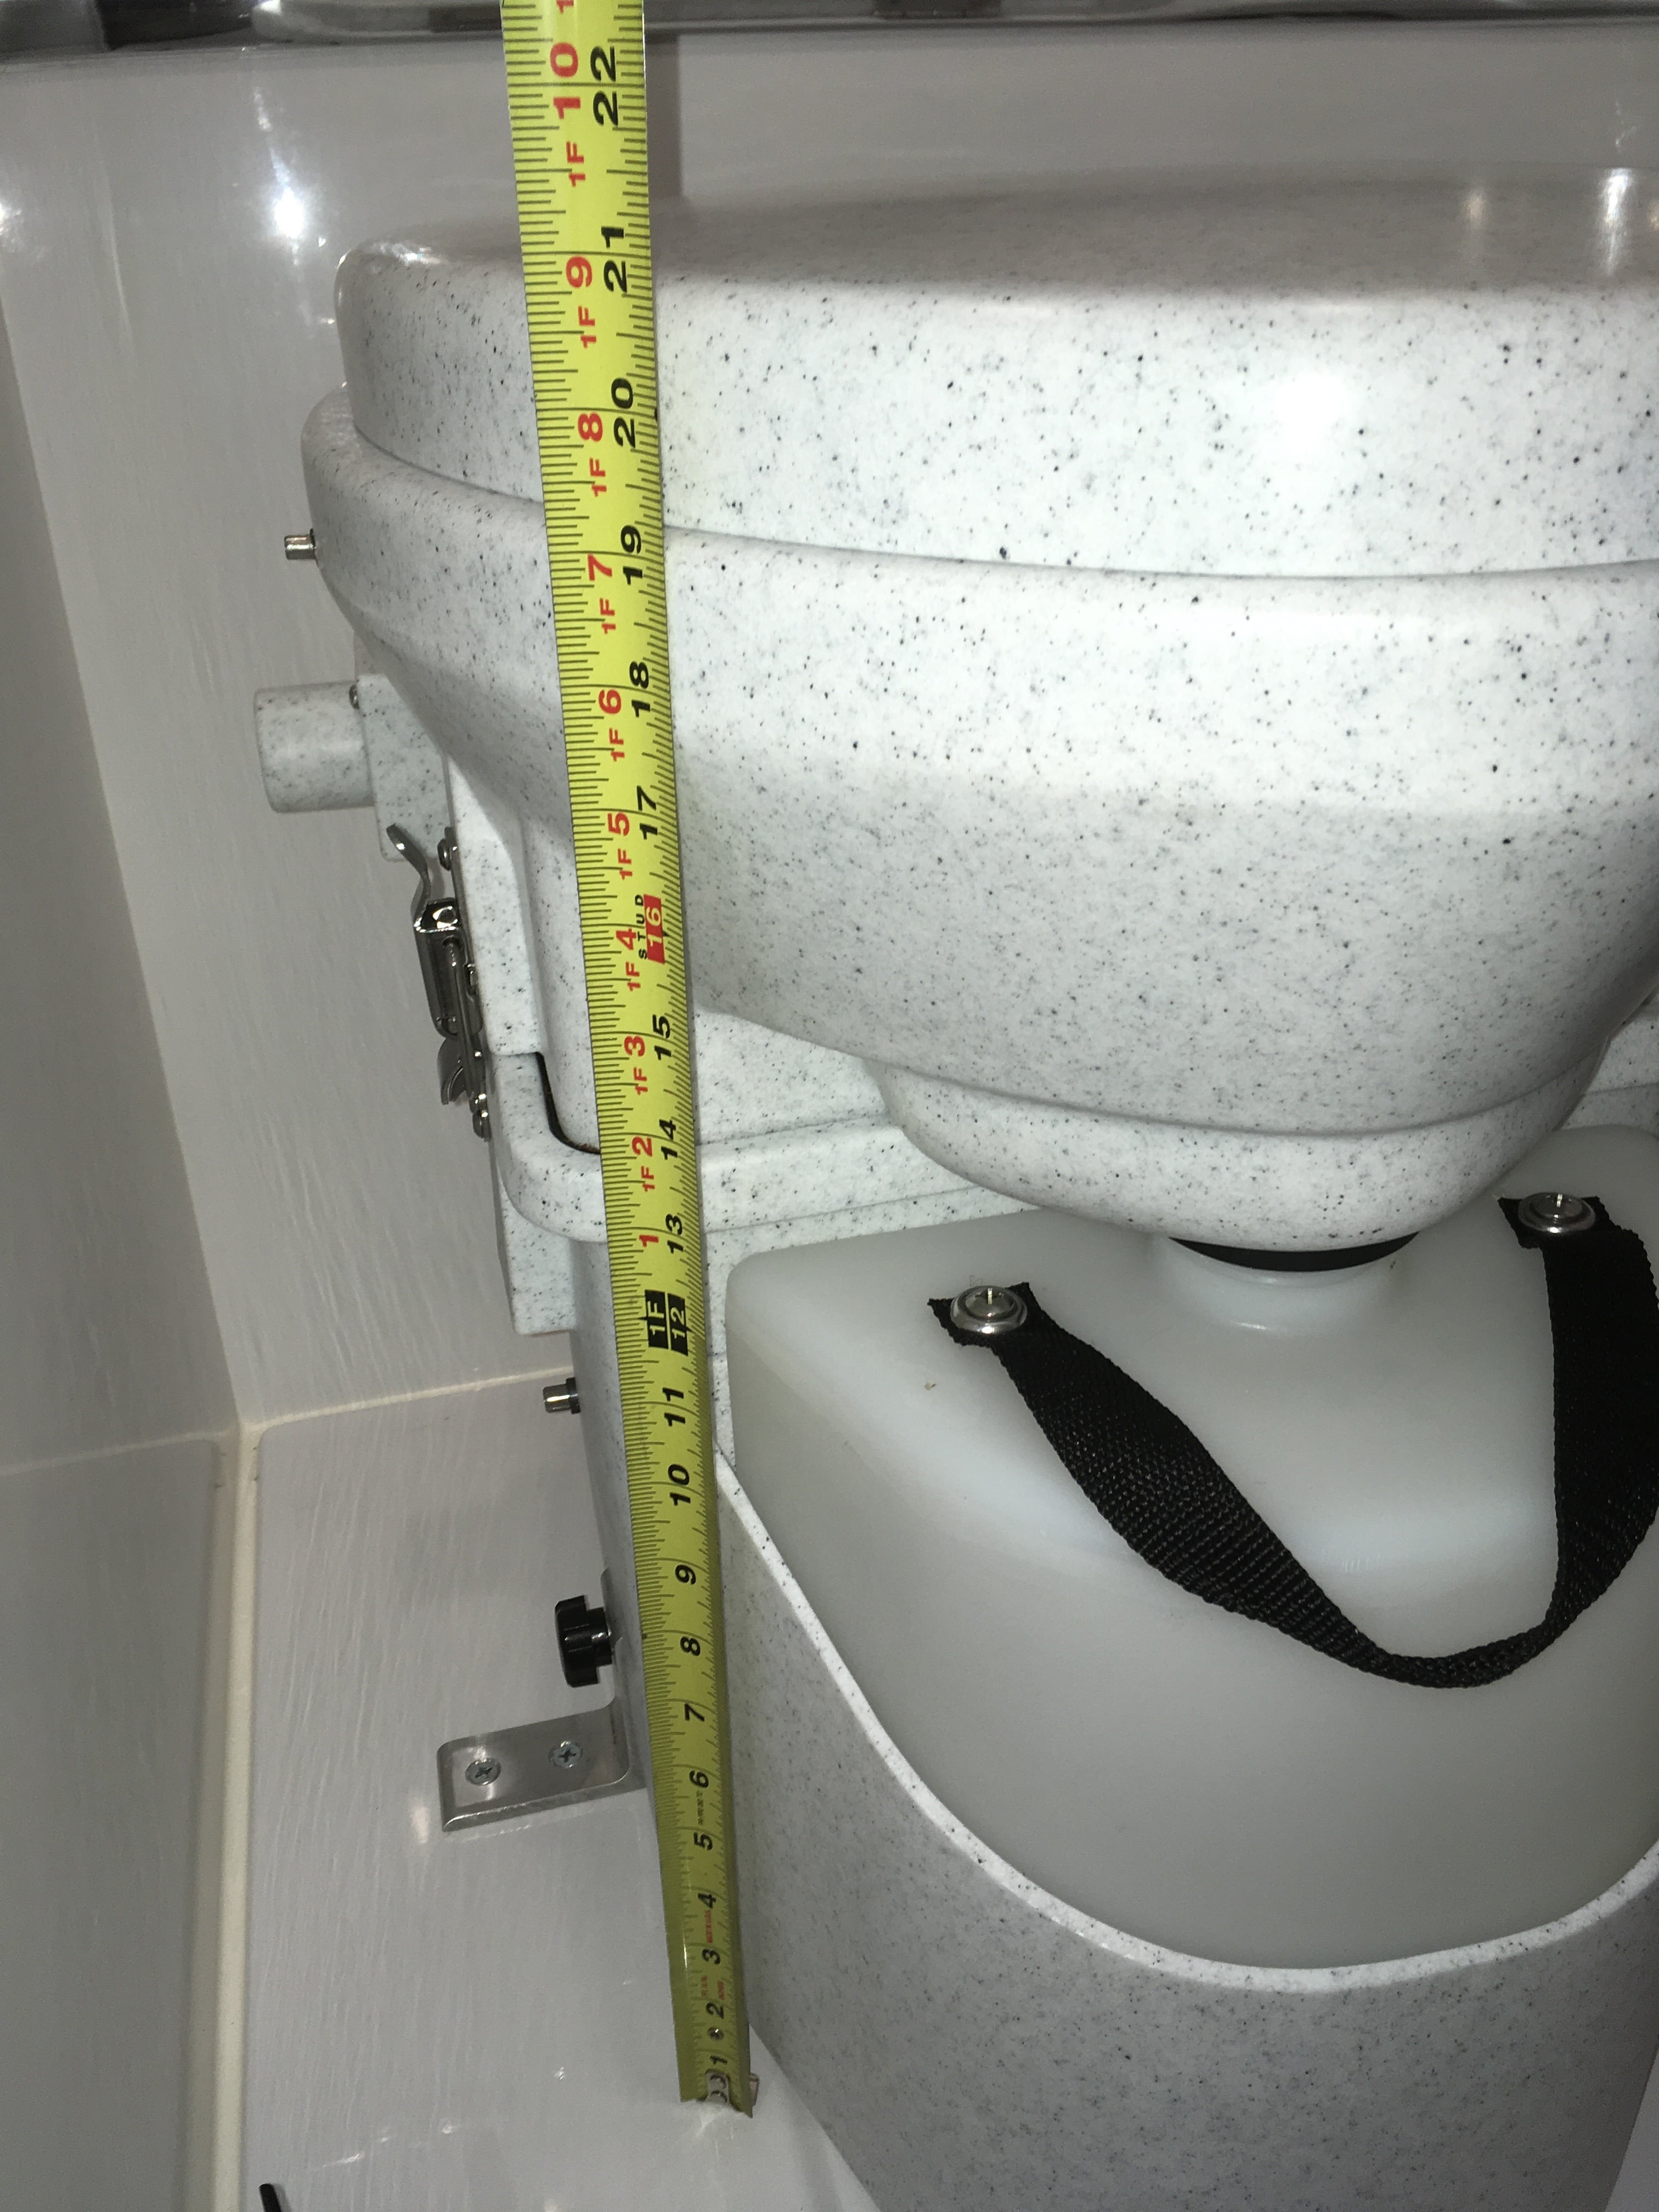
EDIT 12/10/23. Useful link: https://olivertraveltrailers.com/forums/topic/6720-natures-head-compost-toilet-troubleshooting-user-guide/ EDIT 06/06/23. This is an Oliver factory installation, not mine. One member has assumed that I did this. There are a number of threads asking about this toilet. I hope we can gather up a lot of the talk here in one place. I think there has been one other installation in an Ollie but there have been NO published pictures of any kind, that I have been able to find, even from the factory. This is baffling to me. I really wanted to cut the dump station umbilical. We routinely dry camp and finding an open station during a busy holiday weekend or off season is not something I want to face. With the NH toilet we can get rid of our grey water with a 3/4 inch garden hose. In many western states it is legal and encouraged to run a hose out to a nearby shrub and let your water trickle into the ground. The black tank, drain plumbing and vent system are all completely retained. The factory folks are extremely reluctant to delete these parts, since they are part of their certification. If you wanted to reinstall a regular toilet, it would be a very minor job. The fresh water line is even in place, next to the wall. You could sell the used NH for $400 and that would pay for the replacement conventional RV toilet, with a lot left over. An RV toilet is less than $200.... I chose to charge the base with coconut coir rather than peat moss, since it is a renewable resource and doesn't damage the environment. https://smile.amazon.com/s/ref=nb_sb_noss_1?url=search-alias%3Daps&field-keywords=coconut+coir I made the mistake of just dropping a dry 2 pound brick into the bottom, adding water and then letting it hydrate. I ended up with WAY too much material. You need to do this in a bucket, outside, and then transfer the expanded stuff into the base, and the leftovers into gallon zip bags. The correct height is even with the internal agitator centerline. Any higher and it becomes difficult to turn with the handle. It takes about two gallons, I did not measure. There are many online sources with info. To summarize: Sit to pee, everybody, so there is no splashing. The trapdoor stays closed and your pee goes forward, and then down into the reservoir. Which you pre-treated with a half cup of vinegar, to kill the odor. That part is easy. To poop, open the trapdoor, finish the job, wipe and close the door. Give the agitator handle two or three turns. The poop and paper will decompose rapidly once the natural process gets going, which may take a few days. The fan keeps a steady flow of fresh air into the reservoir and out of the trailer through the existing roof vent. I never noticed any bad odors except the first days, before I figured out that Oliver had installed the wrong fuse, a 1 amp, which had blown. Once I installed the correct fuse (2 to 5 specified, I used 3 amp), the fan worked as designed. The fuse is located in the main distribution panel under the dinette table, right row, bottom position (UN-labeled!). It is best to put only the absolute minimum amount of RV toilet paper into the base. If you put a lot in, it wraps around the agitator and makes it harder to turn. Only stinky paper goes down - the rest (damp with pee) goes into the small covered waste can to be disposed of weekly. The can came from Walmart, $10 I think. Cleaning is simple: spritz the area lightly with a dilute vinegar spray and wipe down with a disposable baby wipe, toss in can. Done. The residual vinegar and wipes control any odor from the can. The pee tank is big but it will fill up faster than you can believe if you have four people using it! Empty when it gets to within an inch or two from the top: Flip the two side latches, carefully rotate the top off the base, remove the pee bottle and cap it. Dump it in any approved location - a pit toilet or a rest stop restroom. Rinse with fresh water a couple of times and recharge with half a cup of vinegar. Reinstall into the toilet and close and latch the top. The pee will eventually form crusty yellow deposits. The fix, I have read, is to add gravel and water and shake it hard, then rinse several times. In two weeks of use I never noticed any significant deposits. The longer you let the poop decompose the better. If you can leave it over the winter, dump it out in the spring and it will be totally benign. If you need to empty it mid-season, remove the pee bottle and vent hose, unscrew the two hold down knobs and lift out the entire unit. Carry it outside and put a 13 gallon or larger trash bag on top, flip it over and empty the compost. Refill with clean coir to the centerline. There is NO need to clean it out. Any residual material will just help the next batch get started. The organic waste you can double bag and put in the trash, or if fully decomposed, it can be spread out in the woods, but not near a potable water supply or garden. The way to keep the smell in control is to keep the pee out of the main reservoir. It's the urine that makes a pit toilet smell so bad.... If you throw up or have a messy poop, you can add a little more fresh coir to help absorb the extra fluids. I keep a gallon bag of the hydrated stuff in the overheard cabinet (along with a quart of vinegar) and haven't had to add any extra. The fan has a dust filter that is supposed to be checked every few weeks, by removing two Philips screws. I think that is way too often in the clean environment of a fiberglass trailer, unless you have a dog that sheds. You can put your hand over the left (inlet) opening and feel a light suction. If that isn't present, you need to clean the filter. The pee bottle sits in a sealed cavity to catch overflows, This is a problem since when you take a shower, a bunch of fresh water gets trapped there. I intend to drill a couple of small drain holes in the bottom. I don't care if the pee bottle overflows onto the floor of the head, at least that way I will notice it! unless it is dark, and I am barefooted.... that would be bad 😉 This is why you want to empty the tank before it gets too close to the top. Agitator handle: ours fell off right away, the shaft has a set screw with lock nut. It is very easy to tighten correctly. I am not sure why the factory guy couldn't do it successfully. Spares: I intend to purchase a spare pee tank ($40), spare lids, and a fan.I already have extra 3 amp fuses. ... http://store.natureshead.net I intend to wire in a small LED in the wire harness to show that the fan has power. You can probably hear it running, faintly, if you are in a very quiet area and don't have bad tinnitus, as I do. The Nature's Head is a cool device, but it is really just a fancy bucket. A solidly built, very expensive bucket. I wish the price were about $250 instead of $800. That seems about right for what you get. OTH it is very rugged, and long time users seem to love it. My wife still has some reservations about using it, and we need to get a short step stool since it sits so much higher than even a tall toilet. This one might work well, and it might fit in close to the base with a bungee cord around it for travel: .... https://www.squattypotty.com/shop/poop-better/classic-ecco I am still learning, but I have no regrets at this time. Questions? John Davies Spokane WA
1 point
-
Don, ask them to cap off the now-unused fresh water line, they can do that out of sight under the sink, I think. That way you won't have to mess around with winterizing that segment every fall. Make sure to pre-purchase your consumables, and maybe some spares like an extra pee bottle and/or cap. Oliver doesn't give you any. http://store.natureshead.net Make sure they use a large enough fuse, and have them label it! Since it will be a retrofit, they will probably use an inline one, and pick up power close by, maybe under the sink. Make sure it is readily accessible. The fan uses less than an amp running, but the fuse must be 2.5 to 5 amps as per Natures Head support. Ask for a small led light so you can see if the fan is operating. It is audible if your tinnitus isn't too bad, but it is very quiet. Get a 3 inch sewer to male garden hose adapter, so you can dump your gray water with a 3/4 inch hose. It's slow but very convenient if time is not a factor. Post your thoughts here after having used it a while. I hope you like it. I am sure you will love being able to pass by dump stations and laugh at the lines. For off season and especially off-the-grid camping, it is a revelation. John Davies Spokane WA1 point
-
Got a call from Anita today. Turns out production is running ahead of schedule. We were scheduled to pick up our trailer Oct 30, but now can pick it up as early as Oct 2!!!!!! Needless to say, I didn't get much work done today as I am so giddy. The challenge is going to be schedule rearranging to try to get there. She said of course they will hold it for us if we can't get there before the 30th, but how can I sleep soundly knowing it's just sitting there waiting. I am on cloud 9 today! - Angela1 point
-
1 point
-
Many of the forum members will remember my frequent rants about the Andersen hitch while I owned Oliver #64. I almost lost my religion over the hitch and finally just removed it and towed with nothing other than Firestone airbags for leveling. When I bought my Airstream I did not even consider an Andersen because of my prior experience plus I did not know they offered anything with the capacity to handle the 1200 pound tongue weight of my loaded AS. I did some research and settled on a Blue Ox Sway control WDH with 2000 pound bars. This turned out to be a $500 mistake. On a 4,000 mile round trip to the Grand Canyon we encountered extremely rough roads on I-10 in Louisiana and East Texas. The jarring bounces and lurching of the trailer were very problematic and resulted in a reduced speed down to 30 MPH on an Interstate highway. As we made our way westward the roads improved but the large truck traffic increased. Each time a truck would pass the whole rig would lurch to the side. Even small vans had an impact on our rig. We did encounter some serious crosswinds and surprisingly the Blue Ox handled them well. When we returned I started searching for another solution and came across another Airstream owner who was talking about using the Andersen with his 34 foot classic and a Ford excursion...and very pleased with the result. After consulting with him via the Airforum I decided to give Andersen another try. First let me say that the hitch was easy to install. This in part because the A frame of the Airstream is open...not hidden by a nose cone such as the Oliver. Form over function what what. The brackets are visible, plus they are super easy to access for fine tuning adjustments. We set off for our annual trip to Asheville July 15 and what a difference in the towing performance. Instead of a jarring bounce when we crossed bridges with uneven expansion joints there was just a smooth springing sensation. The trailer did not move at all when trucks passed, or even when I sped up to 75 MPH to avoid a vehicle on an entrance ramp. Hitching up was easy because I watched some videos about raising the trailer to add some slack to the chains. Even when I had to back up and unhitch at a severe angle I was able to straighten the tension plate using the technique on the Andersen web site. So Andersen, my apologies for past sins. I love your hitch. O and the levelers are terrific.1 point
-
John & Sheila Shkor Sailors Ashore Alternative Mounting of the Andersen No-Sway Hitch Sheila and I have just taken delivery of our Oliver Elite II, Hull #217, and will be participating in the forum under the sobriquet "SailorsAshore." As the name implies we are lifelong sailors who reached a time when change in activity appealed to us. As trailer rookies we wanted to enjoy good handling and minimize the possibility of sway when towing with our softly sprung GMC Yukon. The Andersen no-sway weight distribution hitch looked like the right thing. I know that the Anderson hitch has been mounted onto many Oliver trailers and is giving great service. From Forum discussion and pictures, however, it appeared that there might be room for improvement. With the standard factory mounting, the axis of chain tension is not in alignment with the mounting brackets. The chains also pull somewhat sideways from the frame member on which the brackets are mounted. There are occasional reports of bracket slippage. And the force resulting from chain tension has to be carried through a number of welded joints in the frame. (The Forum contains a number of cautions about soft aluminum welds.) I wanted to see if I could come up with an alternative mounting system that might be closer to what the engineers would call an elegant solution. The chain tension required to shift tongue weight off of the hitch can be quite high. Our GMC Yukon has a 120" wheelbase and another 52" from the rear wheels to the trailer hitch ball. That is a 172" lever arm, long when compared to the 6.75" vertical distance between the center of the ball and the triangle plate on the Andersen hitch. The mechanical advantage (or disadvantage in this case) is 25 to 1. That means to transfer 150 lbs (of our estimated 600 lb loaded Oliver tongue weight) from the hitch to the front wheels, total chain tension must equal 3,750 lbs. (All numbers are approximate.) That sounds like a lot, and it is. But Andersen Manufacturing engineered the hitch to take this kind of loading. For those in doubt, please see the video at: https://www.youtube.com/watch?v=xvM7mCnqmwo. Mr. Ryan Andersen demonstrates the hitch and states "We like to compress the bushing....and that puts about 2,000 lbs pressure on the chain. With both of them they push the trailer forward with about 4,000 lbs. of force." What I wanted to find was a way to mount the chain brackets directly on to the center box shaft of the trailer frame. This location is attractive because the tension force is carried fore-and-aft solely by the center box shaft, without going through any welds. The axis of chain tension is closely aligned with both the mounting brackets and frame member. And the center box shaft is the heaviest and strongest component of the trailer frame. I first thought about mounting the brackets out in the open just behind the Bulldog coupler, but Andersen counsels against making the tension chains too short and Oliver didn't want to lengthen the trailer tongue. Instead, I found room to attach the chain brackets inside the propane locker, just forward of the propane bottles. (They could be mounted aft of the propane bottles, but that would make them harder to reach for adjustment.) A problem to be overcome was keeping the starboard chain from pressing on the tube of the tongue jack, since both would be in roughly the same plane. This was easily accomplished with two "quick links" which hold the chains closer together where they run by the tongue jack tube. This results in a slight "hour-glass" shape which does not interfere with the function of the chains or flexing of the bushings. (I have pictures showing this, but haven't figured out how to get them into the forum post. If anyone wants the pictures, send email address to (deleted) and I will by reply email.) The other thing I did was ask Andersen to fabricate the chain mounting brackets with a slight offset, which they were willing to do. This was to line up the axis of chain tension for the hour-glass shape I anticipated. Once mounted, however, it was evident that I over-estimated the angle needed for the offset. If I was doing it over I would go with a five degree offset. A potential weakness in this mounting method is that all of the tension load is carried by two brackets rather than being split between two pairs. This increases the possibility of bracket slippage, so I did two things to compensate. First, since I had to get longer bolts to span the 3" wide center box shaft, I upgraded to Grade 8 bolts. These stronger bolts enabled a bit more torque and friction. Second, I mounted the idler brackets just forward of the chain brackets to provide additional support. We experienced no slippage on the tow home and subsequent trips. Is this installation an improvement over the Oliver mounting method? Hard to say, but I like it better. At this stage it is only a prototype, and I am sure others will see possible improvements. If this catches on, however, perhaps someday Oliver will start welding aluminum cheek pieces with the right geometry onto the center box shaft. That would provide a mechanical stop to absolutely prevent slippage of the chain brackets. It would be an easy and inexpensive thing to do when the frame is in fabrication. P.S.: What a wonderful resource the forum is. Pioneers Betty & Mountainborn Harmon, video-meister Buzzy, all-things-mechanical Raspy & John Davies, and others too numerous to name, know much and have shared. Being able to draw on the accumulated wisdom of those with real world trailer experience has been priceless in enabling us to get a jump on understanding our Ollie. Many thanks from we sailors ashore to all who have contributed. # # #1 point
-
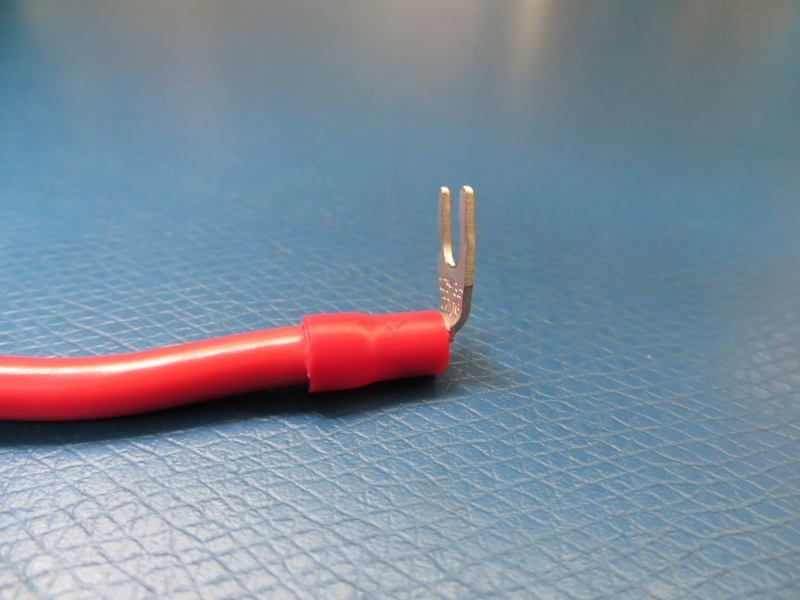
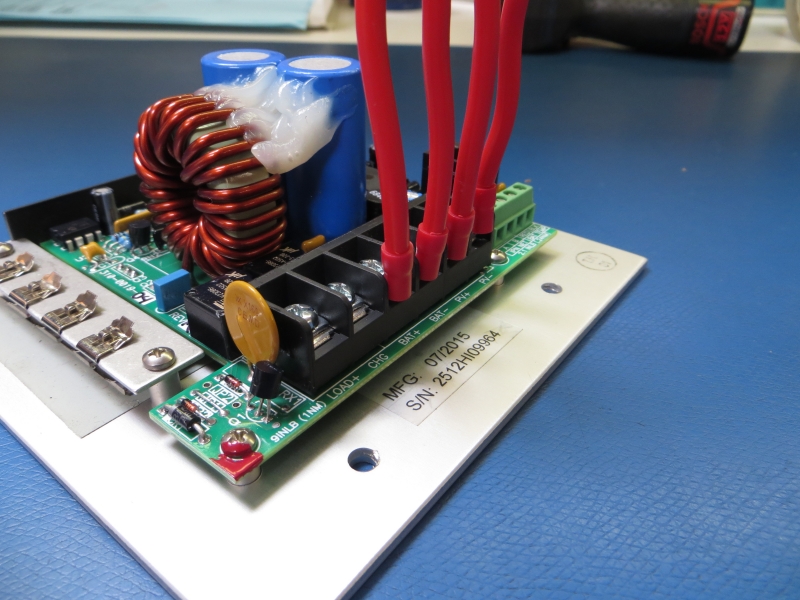
Hull #135, with the same issue as #178, is operational. Ryan at Blue Sky was good to work with. Oliver uses pretty heavy duty wires (good thing) going into the controller. Because of the way the controller mounts in the box these thick wires are required to bend 180 degrees in about an inch putting excess pressure on the circuit board. Ryan asked me to mail him my controller, they repaired and tested it and sent it right back. Like George, I made a 90 degree bend in each of the four spade connectors which relieved the pressure. All is well. I've learned a great deal about this controller from both the manual and the videos on the Blue Sky web site. Some explanatory pictures: Above is my controller before I disconnected it. I have removed the 4 screws holding it in the box and flipped it over. The four wires (2 red, 2 black) are straight in this picture, but to reinstall it the wires are bent 180 degrees as the controller is flipped over into the box. This is under the driver side bed. The above picture is one that Ryan sent showing the 90 degree bend that relieves the pressure. The above is another picture Ryan sent me showing the connections with the bent spades. Once this was done there was no pressure on the circuit board when putting it back into the box. Thanks to Ryan at Blue Sky and all the folks that posted on this thread. Let the learning continue! Mike
1 point
-
This thread has been a learning experience! My solar controller issue has been resolved after a fair amount of time and effort. The end result was controller replacement and modifying the four spade connectors with a 90 degree bend to resolve clearance issues inside the box which put stress on the controller causing the failure. My thanks to those who offered info. and help and especially to Ryan at Blue Sky and Jason at OTT for helping to coordinate the efforts. George1 point
-
GrayGhost, OK, the discussion on the battery parameters is below. ( First off, for those who are reading along and new to manipulating the parameters within the IPN ProRemote Monitor, review page 3 in the manual.) Hi Stacey, I have four of your 6V-AGM Dual-Purpose AGM batteries (black case). I also have a 320 Watt Photovoltaic Array which is controlled by the Blue Sky Energy Solar Boost 2512i(X)-HV Controller and the IPN ProRemote Monitor. I am in the process of configuring the solar controller and the Blue Sky technical support representative suggested I contact you prior to adjusting the battery parameters from the factory defaults to the AGM specific values. First off there are two parameters which I adjusted to match what I believe is appropriate for my four AGMs. 1. Set Battery Amp Hours = 400AH (The factory default was set at 220AH) 2. Set Self Discharge Rate in Percent per Month at 25 degree C. = 2% (The factory default was set at 12%) Do the adjusted values look appropriate? #1 is great. 5% is a better estimate for #2. The solar controller has eight Battery Charge Parameters which are software programmable settings. 1. Set Acceptance Charge Voltage Setpoint. Range 10.0 to 80.0V (Factory default = 14.4V) 14.4 is fine 2. Set Float Charge Voltage Setpoint. Range 10.0 to 80.0V (Factory default = 13.4V) 13.5 3. Set Equalize Voltage Setpoint. Range 10.0 to 80.0V (Factory default = 15.2V) No equalization for AGMs 4. Set Equalize Time. Range 0.5 to 10 hours (Factory default = 2.0hrs) 5. Set Days between automatic Equalize. Range is 10 to 400days. Full MANUAL equalization is selected by a setting of less than 10 days. (Factory default = 30days) 6. Set Charge Voltage Temperature Compensation Factor. Range is -0.00 to -8.00mV/degree C/cell. (Factory default = -5.00mV/C/C) This is fine. 7. Set Float Transition Current. Range 0.1 to 10.0A per 100AH. A setting of 0 (zero) disables function such that full charge is based on acceptance charge time only. (Factory Default = 1.5A/100AH) This is fine 8. Set Acceptance Charge Time. Range 0.0 to 10.0 hours (Factory Default = 2.0hrs) Between 2 and 4 hours. Use the low end if the batteries are discharged less than 30%...the high end if they are discharged more than 50%. Do you have any recommendations for altering the default settings? Noted above. In particular, do you have a preference for the transition from acceptance (absorption) to float to be based on AH or time period for my batteries? 1.5 A / 100AH means that the batteries are accepting current equal to 1.5% of their capacity. This is a very good way of knowing the batteries are fully charged as batteries naturally accept less and less current as their state of charge increases due to changes in their internal resistance. I made the adjustments on my IPN ProRemote Monitor based on Stacey's recommendations. Please be certain you have the same make/model of batteries if you plan to use this guidance! Circle back if questions arise. Buzzy PS - As previously stated, I deactivated the equalization process in both the parameters as well as the switch within the controller.1 point
-
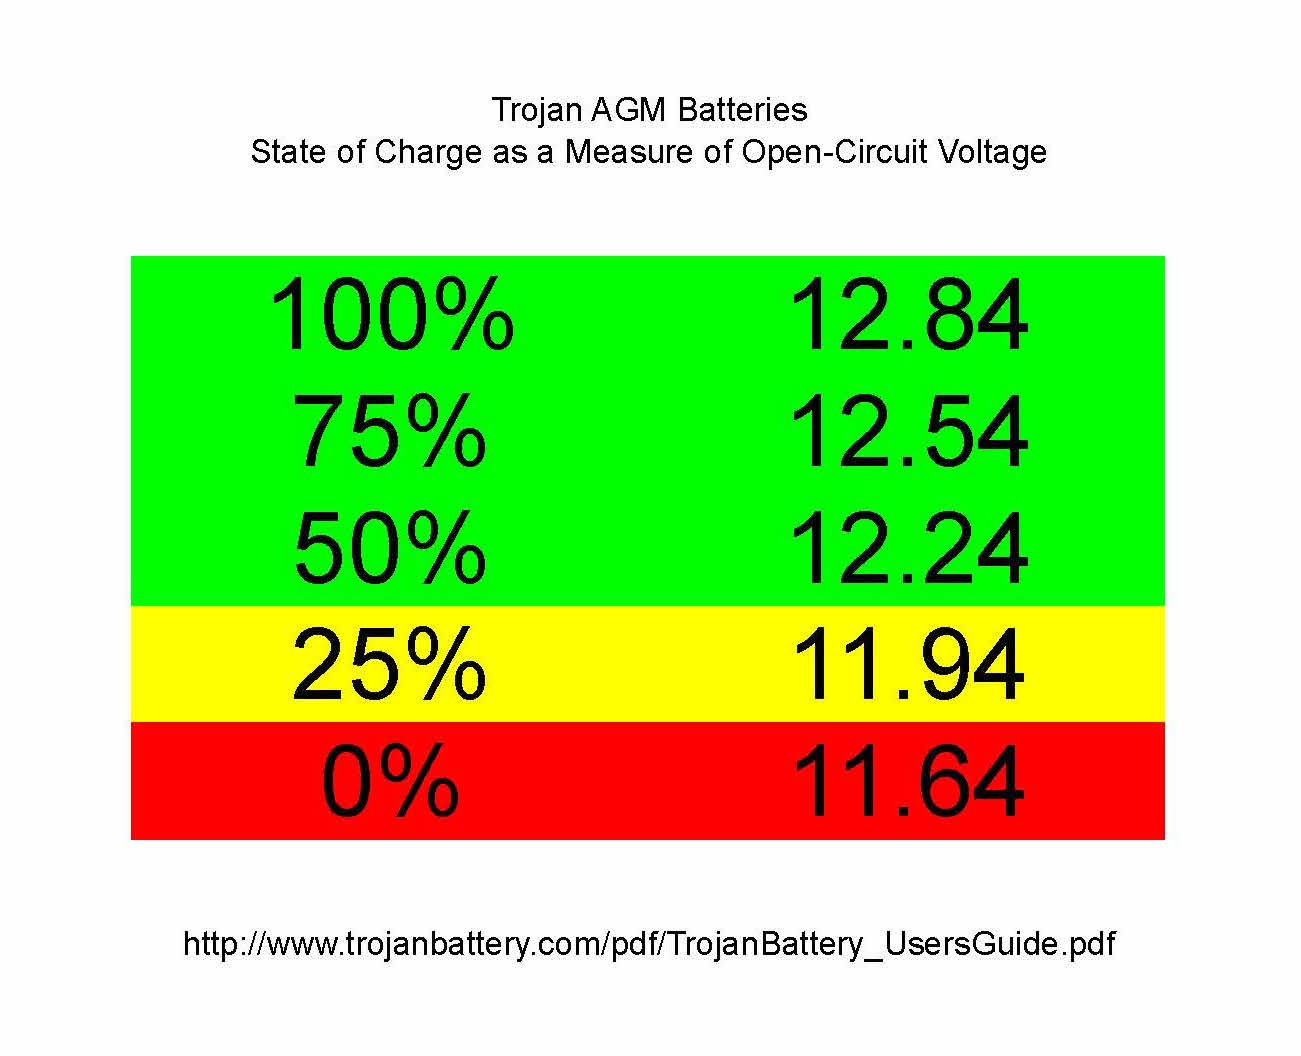
Buzzy, Thanks for posting these numbers. Before I ordered my 2016 Elite II, I did research on batteries, and ended up ordering the AGM battery upgrade. During my research I found a good web site http://www.marxrv.com/12volt/12volt.htm and they had a nice printable table for Voltage vs State of Charge http://www.marxrv.com/12volt/voltchart1.gif, and I posted it inside the pantry door. The numbers on my printed table are quite different from your numbers. I searched the internet, and mostly found the same data as in my chart. However, when I looked at the Trojan Battery web site, I found your numbers for their AGM batteries. http://www.trojanbattery.com/pdf/TrojanBattery_UsersGuide.pdf. Importantly, the numbers at the critical 50% point are quite different for deep cycle (12.06) vs. AGM (12.24). I made new table in the same green / yellow / red style, if anyone with AGM batteries wants to print it out. Thanks again, Buzzy, David
1 point


-
Recent Achievements
-


")


")


")


