Leaderboard



Popular Content
Showing content with the highest reputation on 12/10/2018 in Posts
-
Let it snow! Let it snow! Let it snow!4 points
-
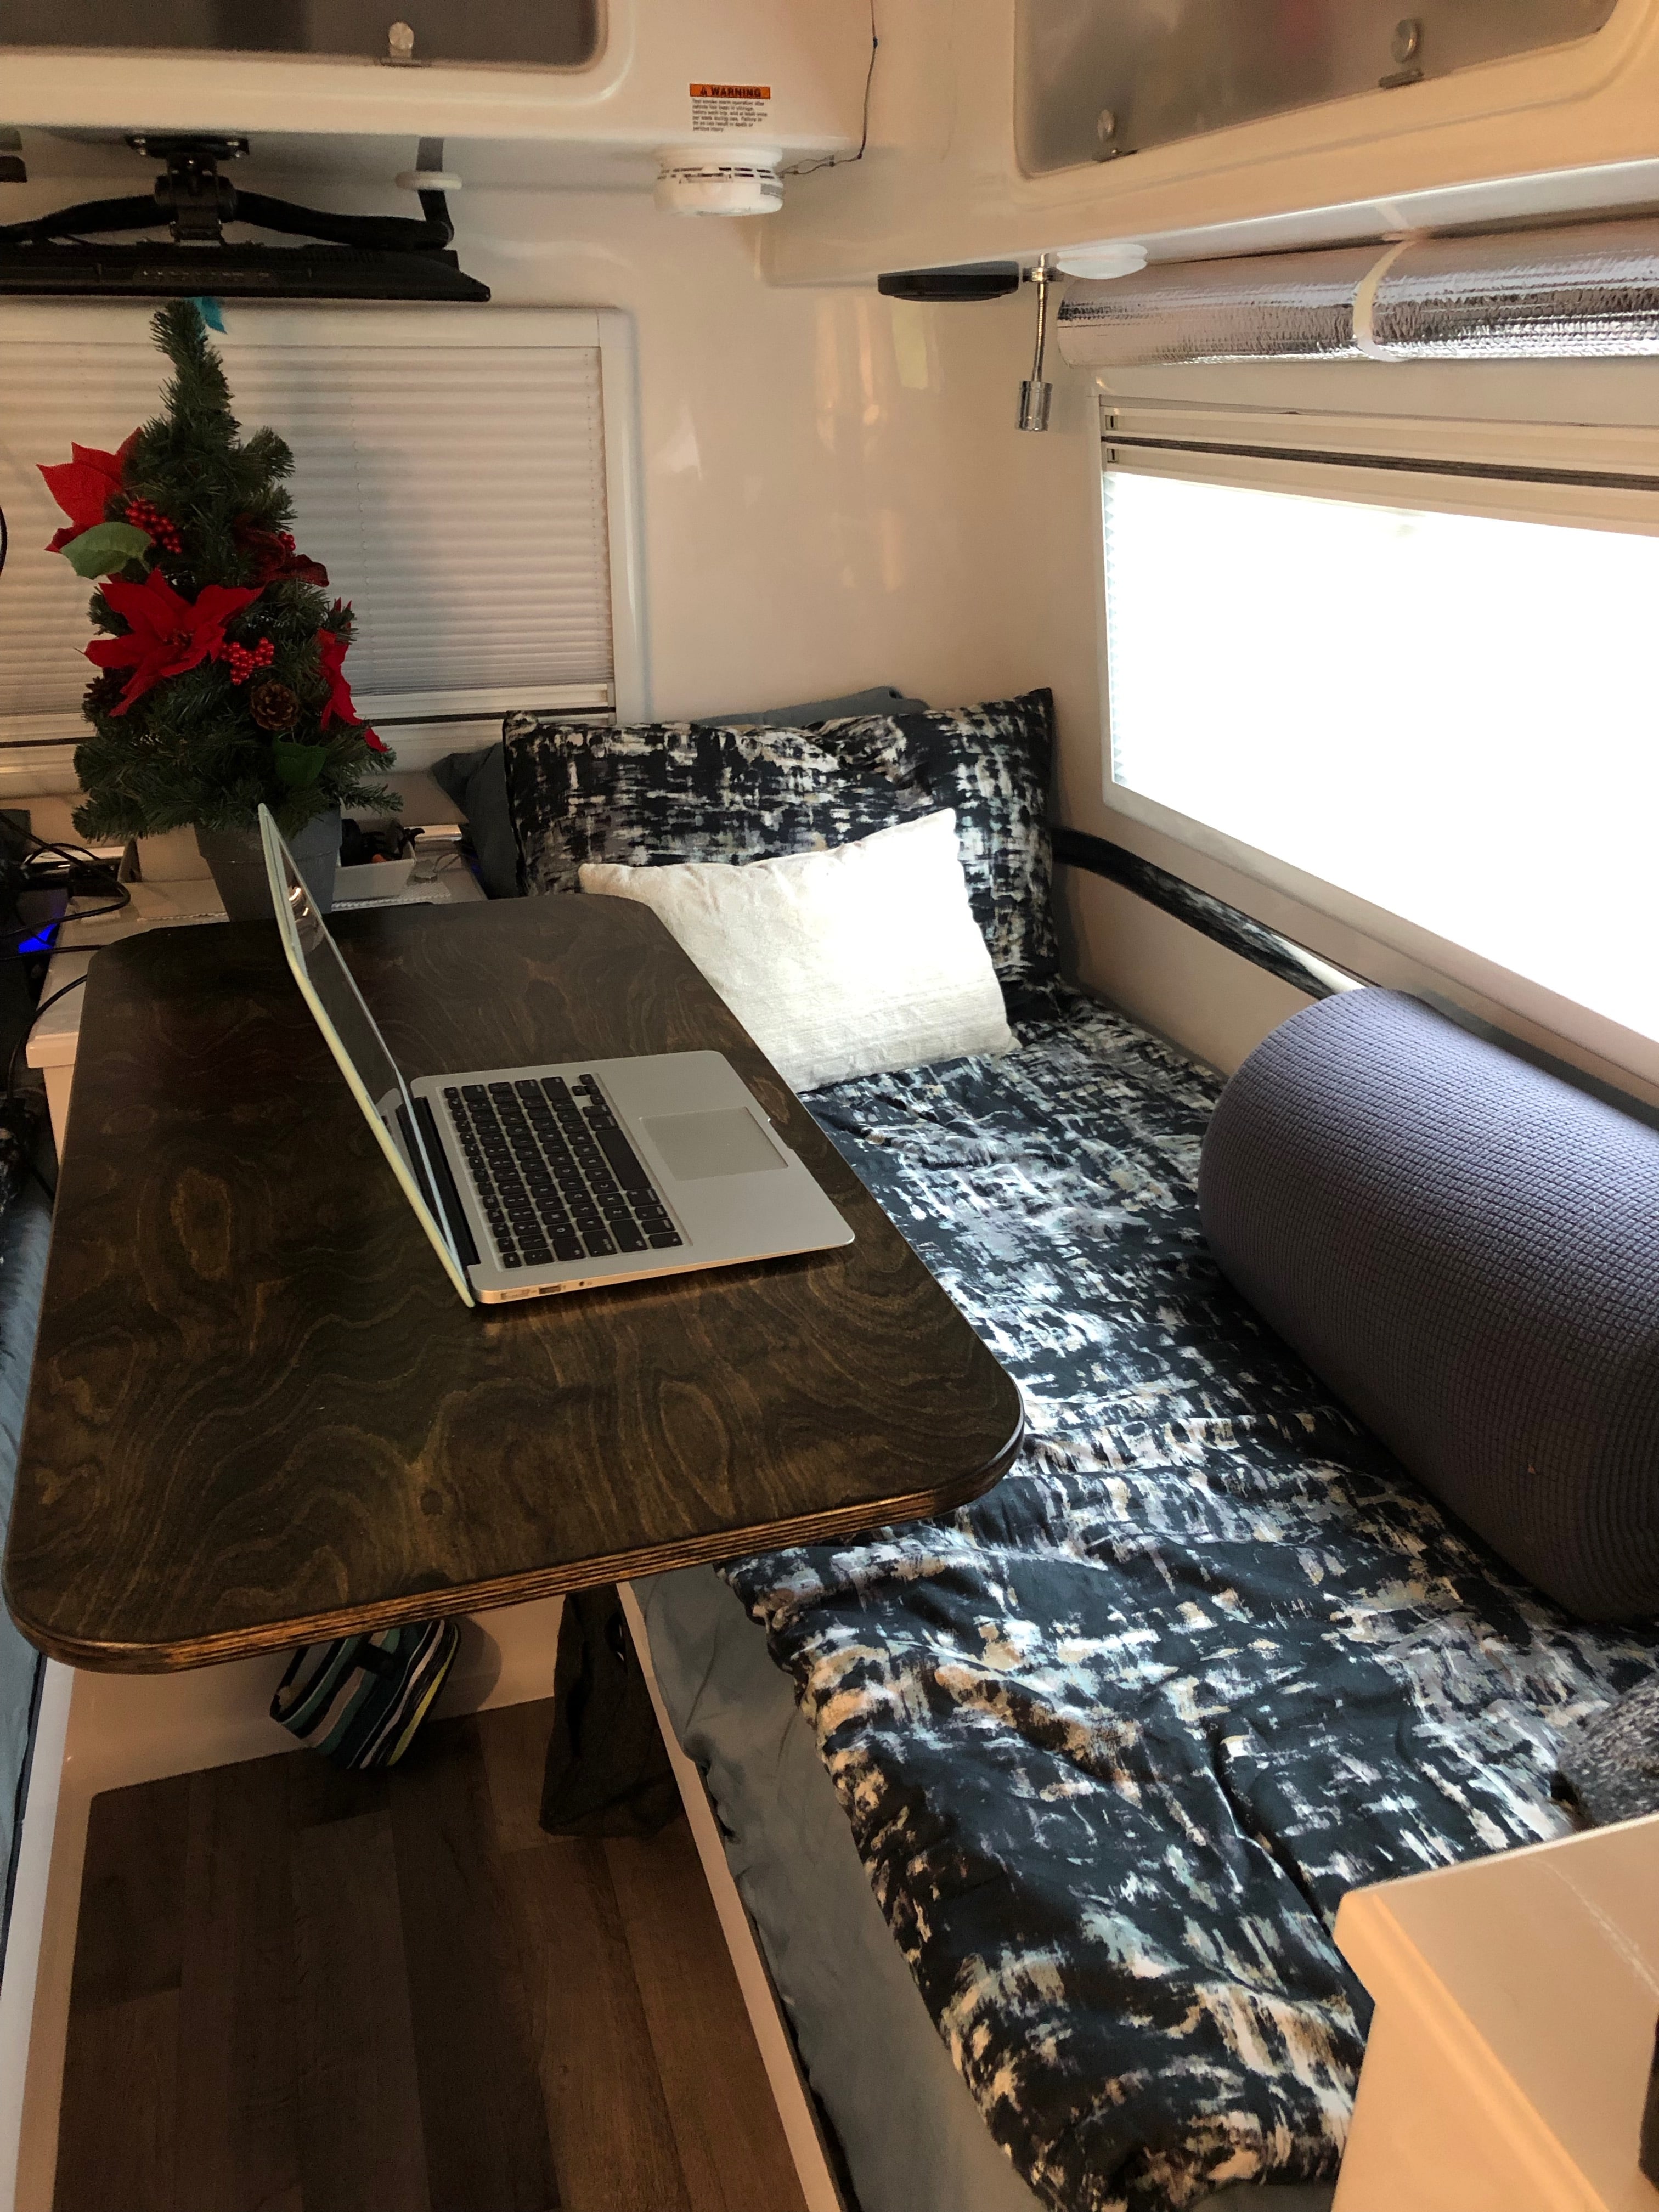
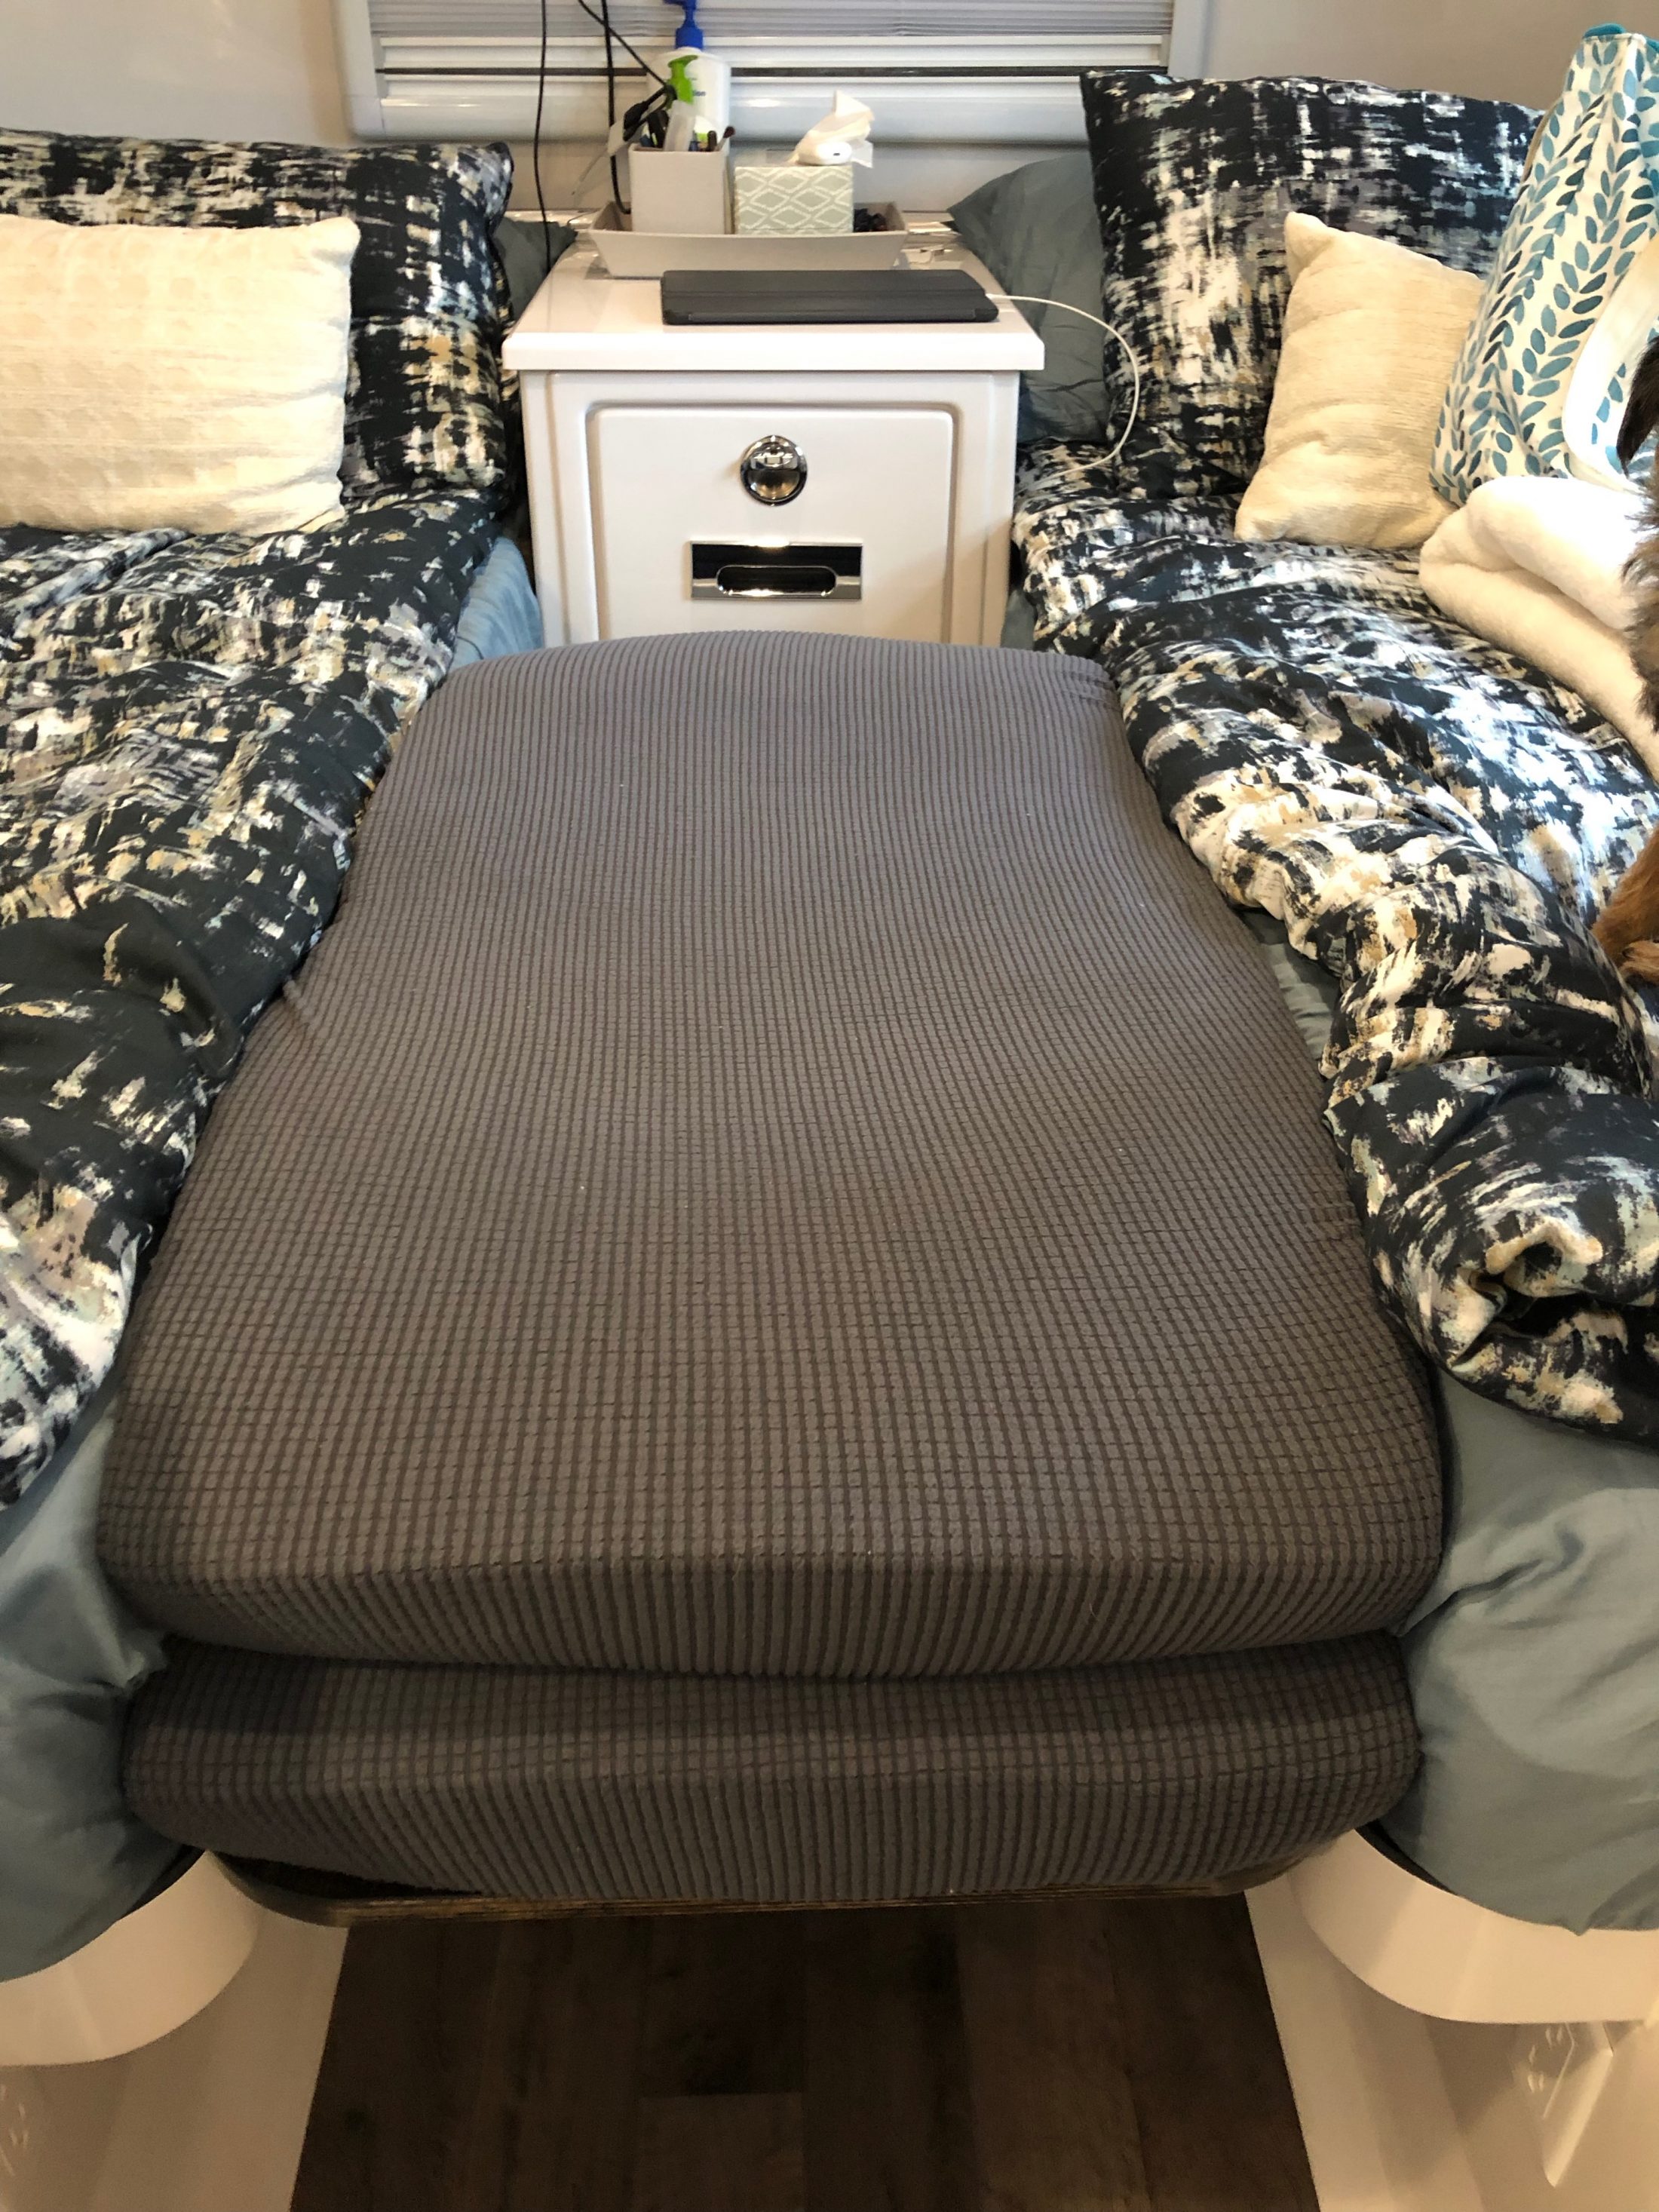
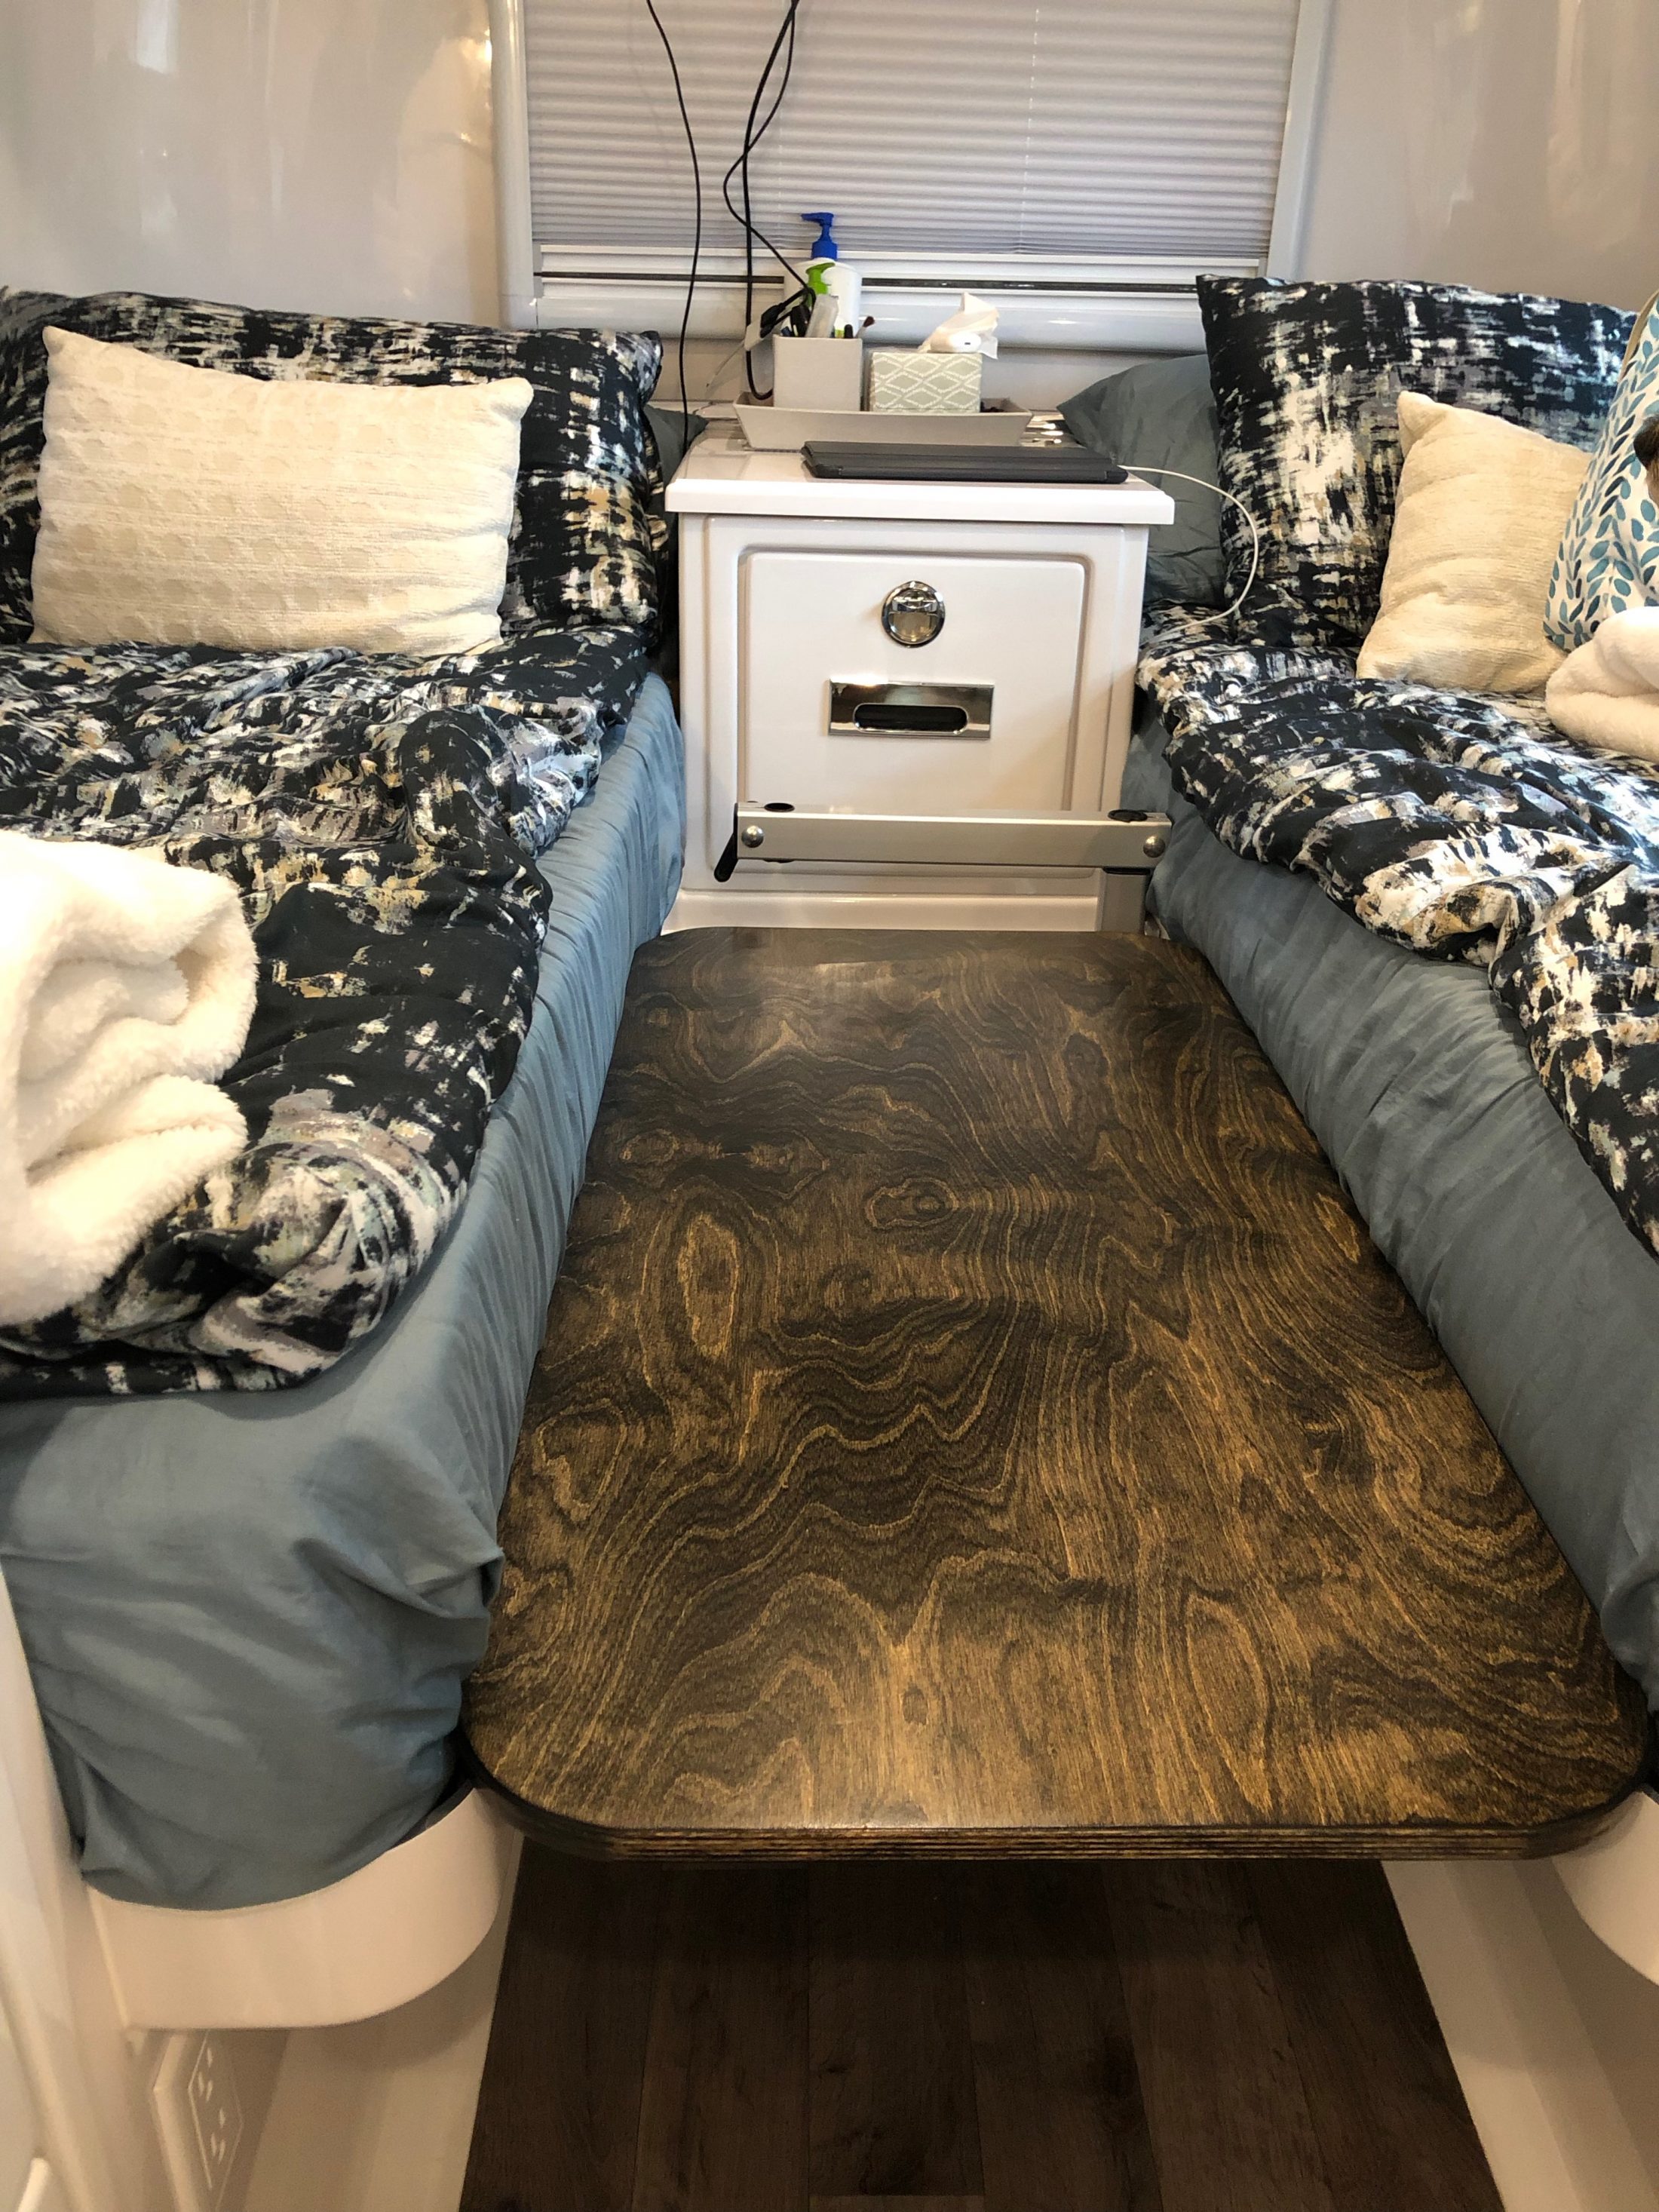
Well it's time for us to weigh in on this mod. With inspiration from overland we went ahead and made a similar retrofit in our Oliver, with a twist. We now have a table/desk as well as a twin bed bridge. I give the complete details here on our website.
 2 points
 -
@TexasMarshall We sincerely apologize for the issues you have had. We are passing along your comments to quality control. If you still have issues, don't hesitate to call the service department at 1-866-205-2621.2 points
-
Ah, well I guess I'm not so smart. No matter, since yours works both ways now.2 points
-
If you look on the boating forums, there are a lot of alternatives... dridek, hypervent, foli system, ikea slats, aire-flow. (Much like hypervent)..... Each of the products work by channeling moisture to the deck. But, just as in our boat, that moisture has to be given a path to evaporate. For us, it's pulling cushions away from the hull a bit. For mattresses, its a bit more work... We still use cushions, not a mattress, and the fabric cover is water repellent, so I've never actually experienced a wet cushion... when we store the ollie, i always raise some cushions on their sides, balance others, and leave air flow. All i use for a base is a very good, bumpy, shelf liner...when we are camping. It's different for everyone, based on how much humidity you and the climate generate. We spend, usually, , nine hours a day inside. I make coffee, and sometimes breakfast, inside, but rarely generate a lot of moisture. It's mostly us, the 9 lb dog, and a tea kettle. Even if you get dridek, hypervent, or the ilk, you'll need to give the the moisture a path to evaporate. IE, pick up the cushion or mattress, and give some breathing room, once in awhile... if you are generating a lot of moisture, or camping in severe weather. Daily, weekly, depends on what you find...in local conditions. Sherry2 points
-
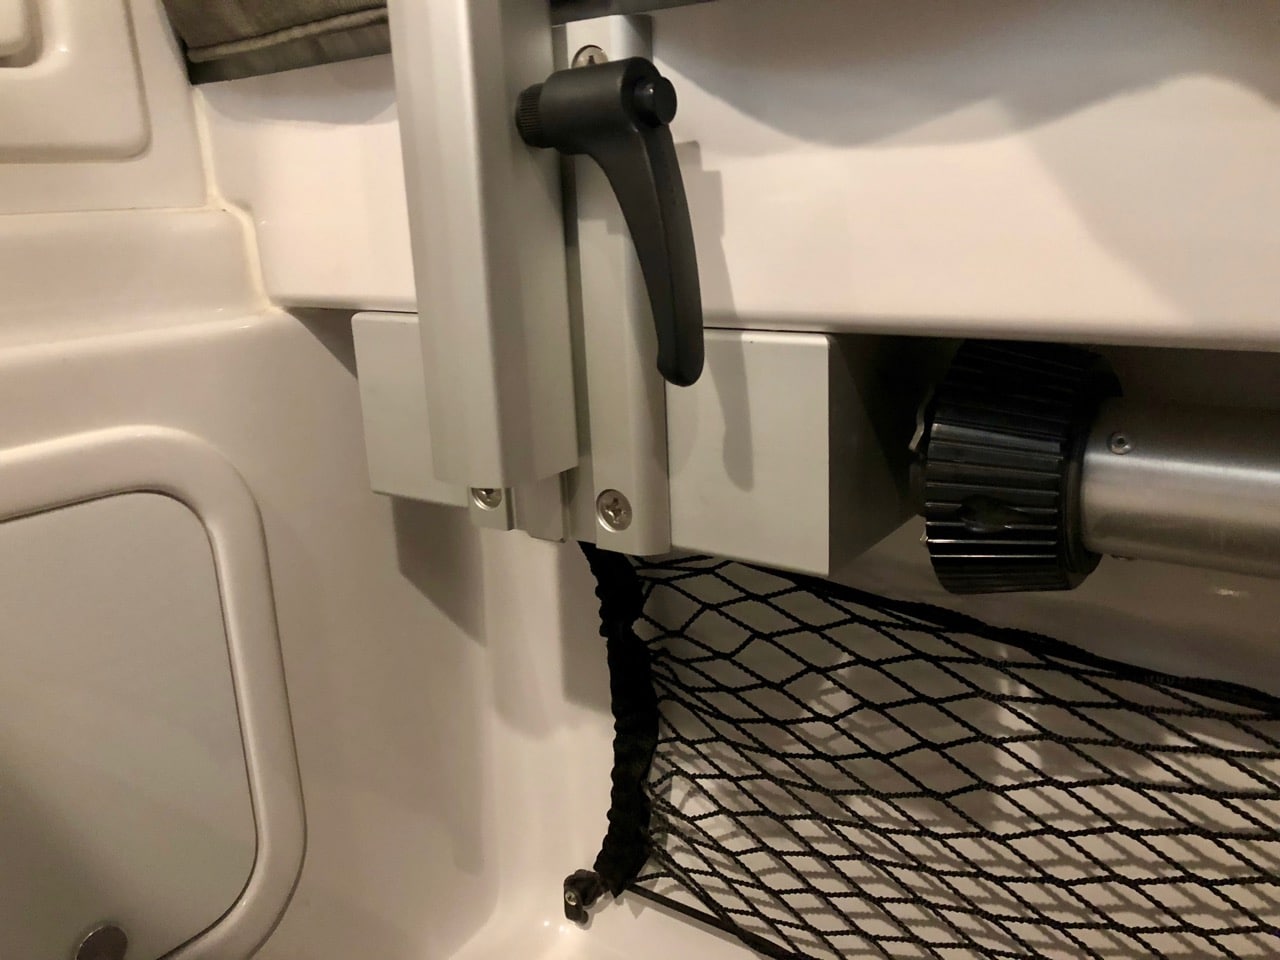
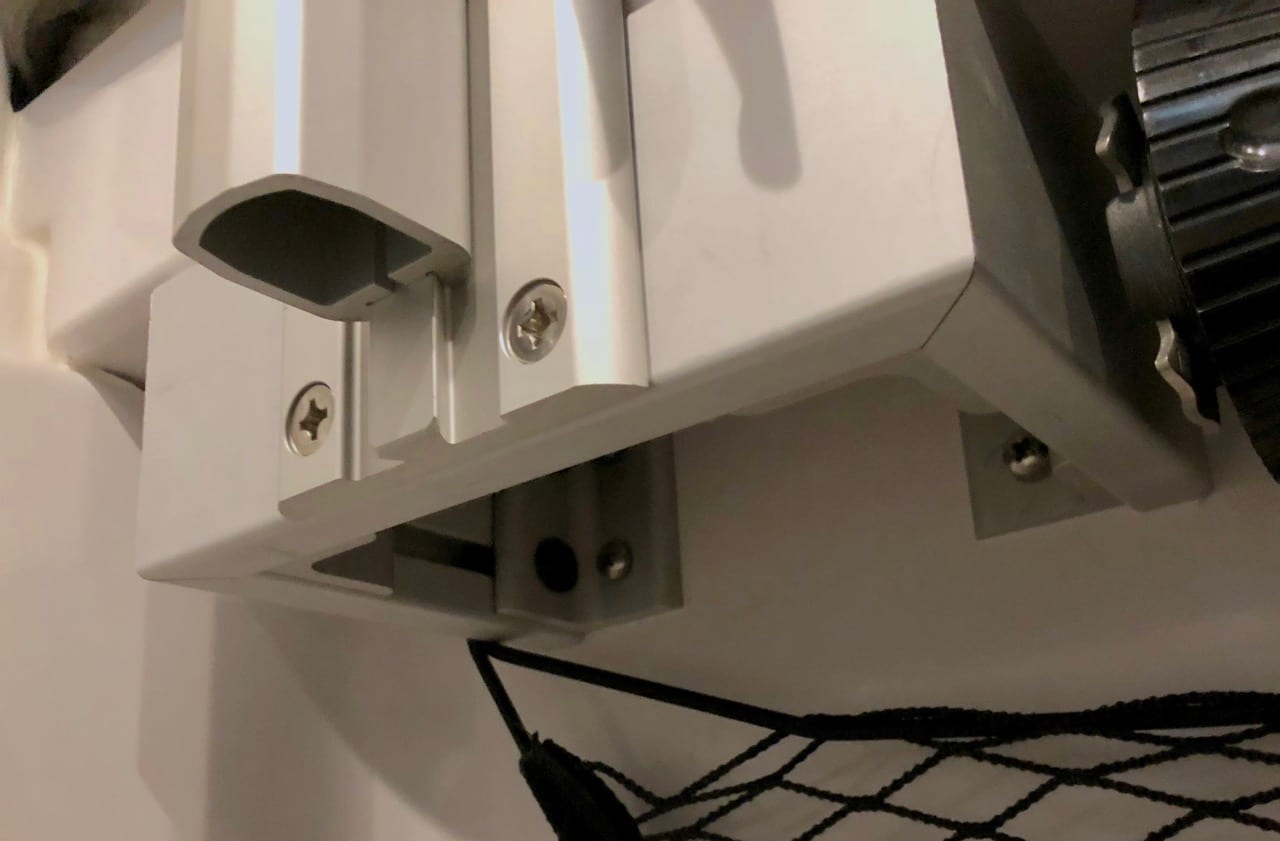
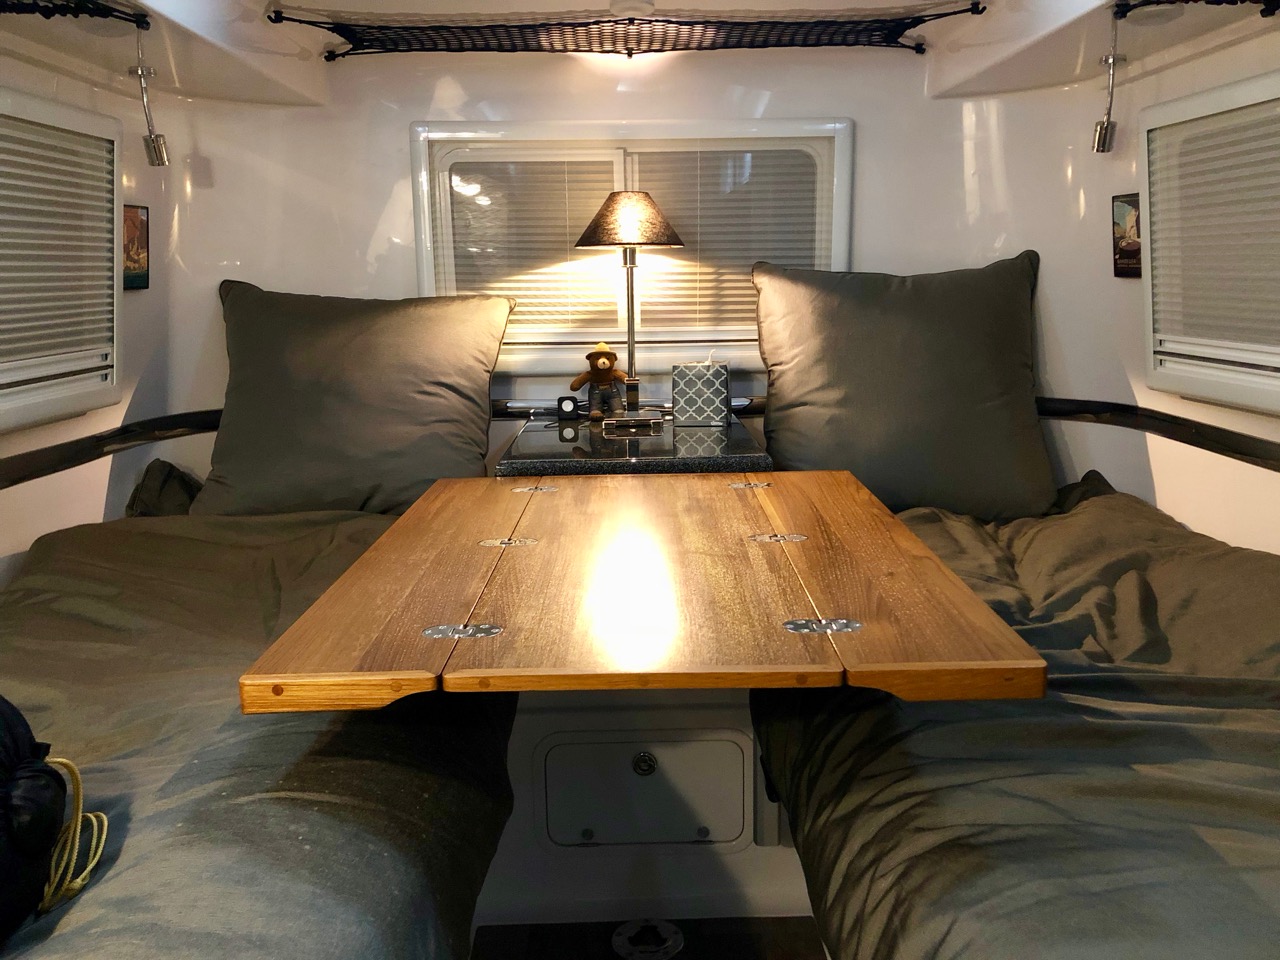
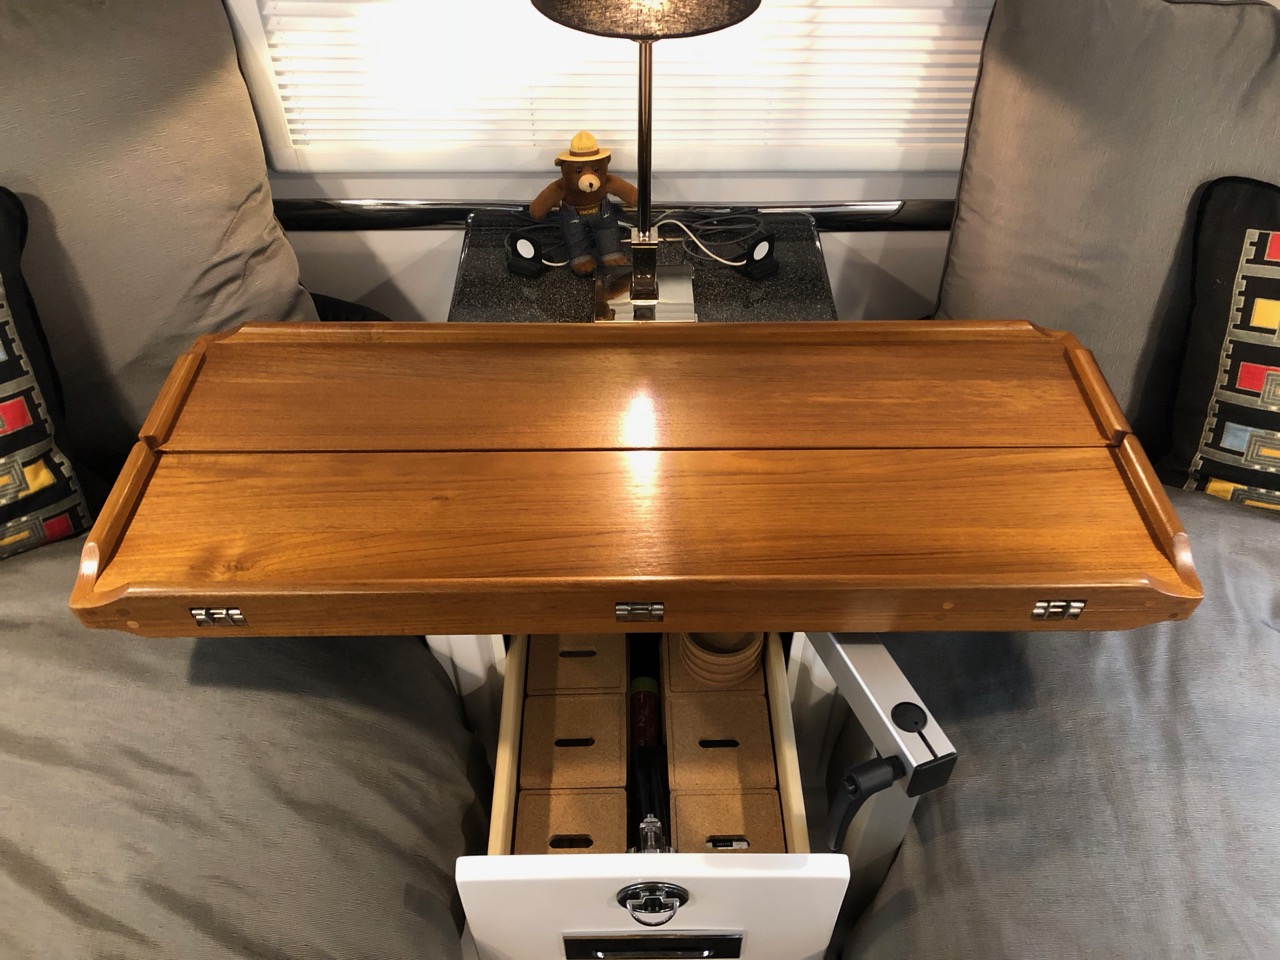
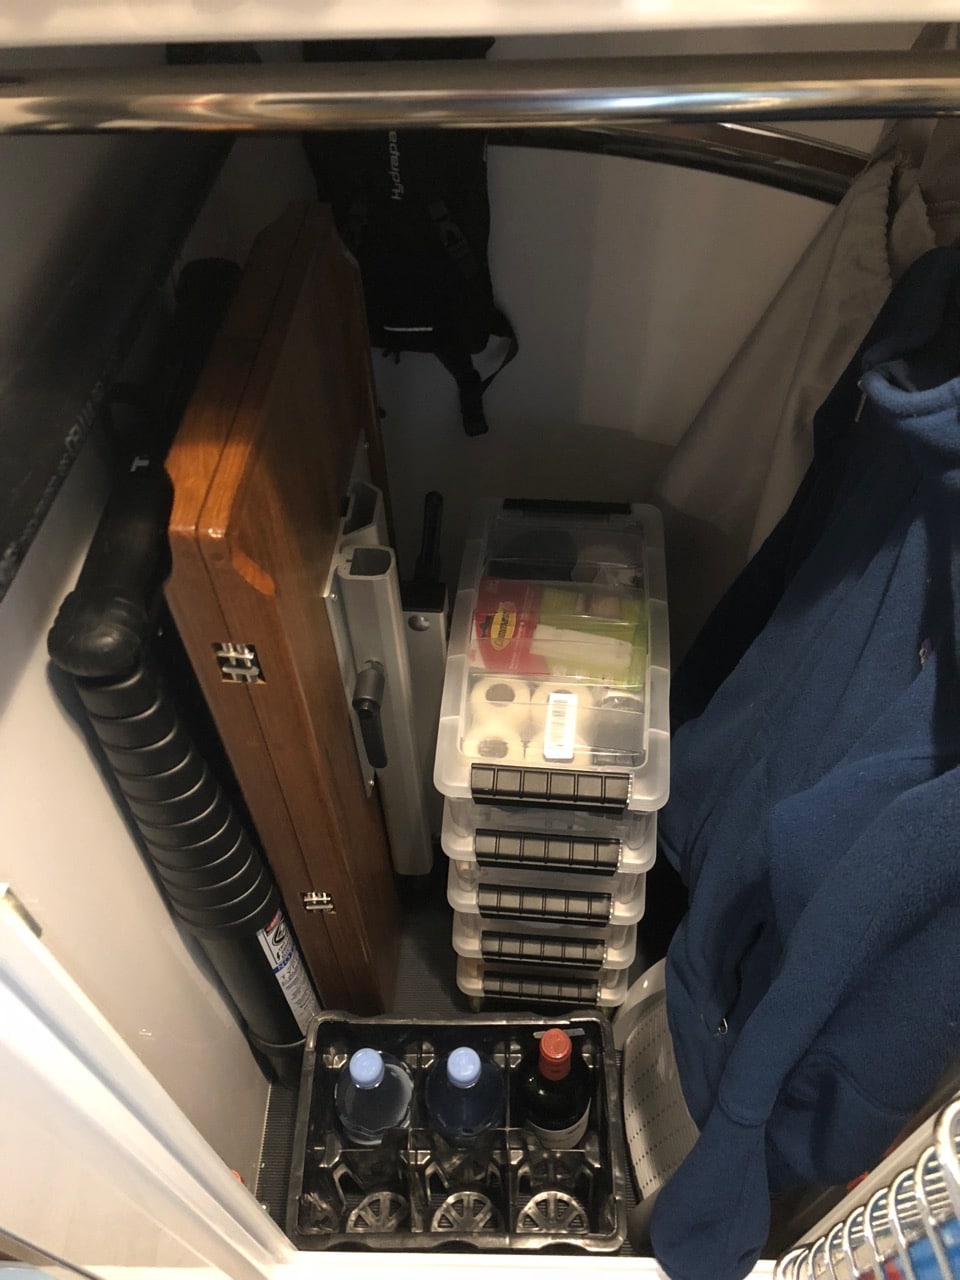
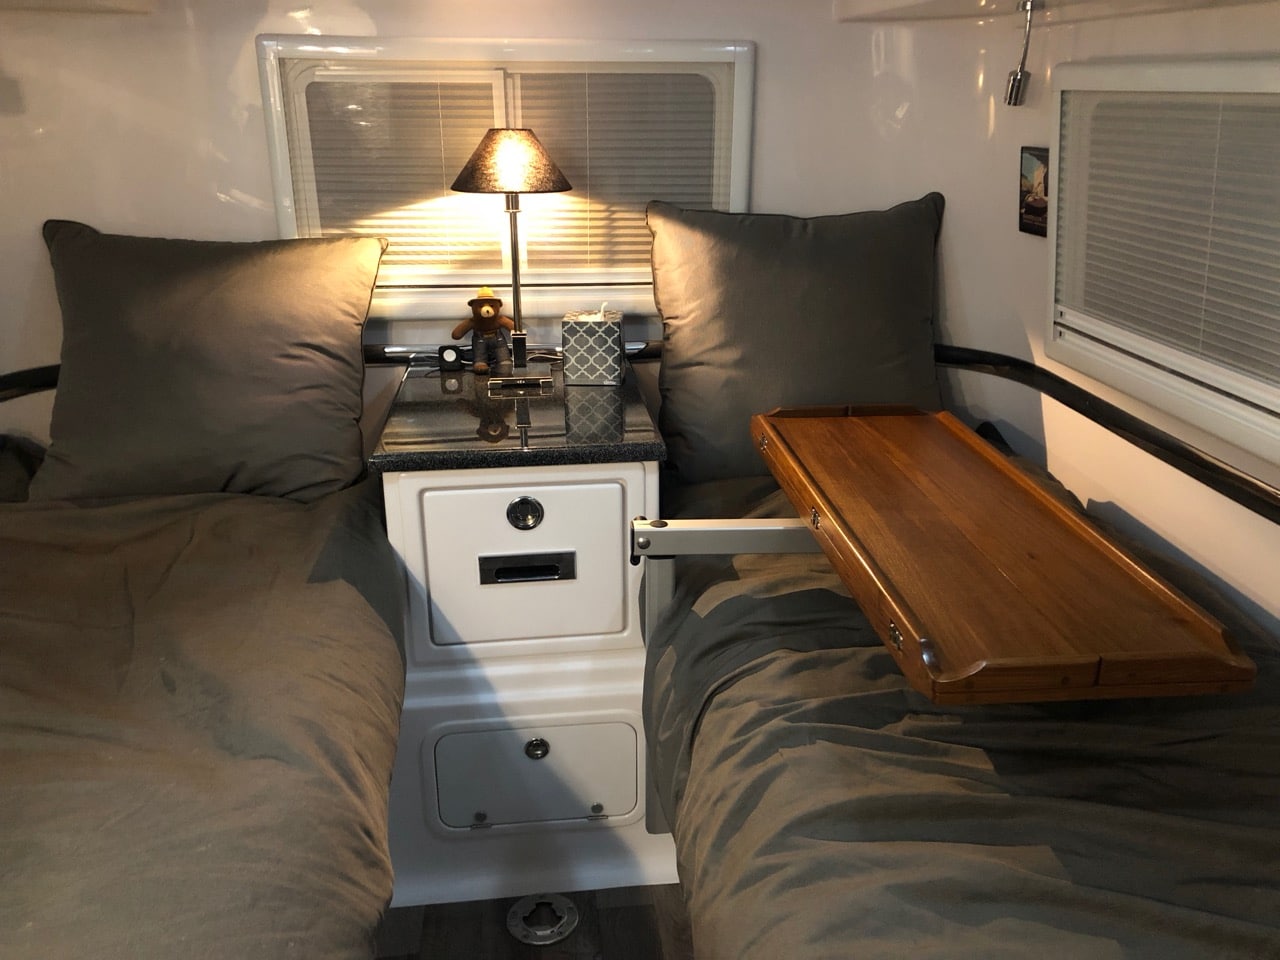
I think like a lot of Elite II buyers, we were torn between the twin beds vs the king. We chose the twin, but not so much for the size or comfort of the beds as it was the utility of nightstand and easy access to the overhead compartments. But we liked the idea of having a table and a large lounging area in the back, and so I set my mind on the idea of trying to have both. At first I designed a custom table for the back that would latch into the nightstand in the back with a pole in front, similar to how the dinette table works. I showed it to Oliver and they thought they'd give it a try, but as time went on and things got delayed or forgotten, I sort of gave up on that idea and asked if they would just sell me the standard table top and legs and I would figure it out. They did, and it was a big mistake since I could never figure it out. The table was just too heavy and bulky to put up and take down, and there was absolutely no place to store it. Plus the height with the standard legs was too short for the mattresses we had (another poor decision on my part). So on our first trip it was labeled the Albatross Table and it was just in the way the whole time. It didn't make another trip, just the two mounts screwed to the floor to remind me that not every problem has a solution. But the solution does exist in the Lagun table. I'd seen them before in the king bed model but I had sort of dismissed them as being too small to be of use. But that was before @rideadeuce started this topic about their upgraded table top. Their top was much larger, foldable, and just generally nicer looking than what I'd seen before; and so it clicked with me that with the Lagun mount, we could have a foldable table that could easily be stored or moved out of the way for access to the upper storage. Also the height could be whatever we wanted and unlike the table we had, could be quickly locked for travel. There were just two problems for us - the mount in it's normal location would block the nightstand drawer; and on top of that, we had opted for an access hatch to the basement right in that same spot where the Lagun is usually bolted to the hull. I needed a way to mount the table to the side somehow. So I made one of these - This contraption is made out of 15 Series extrusion from 80/20. I cut, mitered, and erector setted this little block and associated connectors to go beneath the bed overhang. The Lagun mounting plate (the vertical piece) bolts to the mount and then the whole thing gets bolted to the side wall under the bed in four places and to the bed overhang in four places. It looks complicated but if you have a miter saw and can play with Legos, you can build it. Here are some pics of the block in place so you can see how it mounts. The top two bolts on the Lagun plate bolt into the side of the bed extension, then there are two bolts on the block that secure vertically into the base of the extension, then another four bolts that go into the side wall of the base of the bed, opposite the basement. I marked and drilled for the two vertical holes first, then temporarily bolted it in place to mark all the other holes. You need to do this since not all of the surfaces are perpendicular to the trailer or one another. But the flat bottom of the bed extension runs parallel to the floor so if you use that as your starting point then the table top will end up parallel to the floor as well. The end result is extremely solid - The table top I chose is the 35" Nautic Sail top from Marine Teak. Look around on their site and you'll find a number of styles and sizes, any of which would be a great choice. (This is the same company as this one, btw, but they have more choices in table tops on their UK site.) I debated oiling it, but came to my senses and coated it in a couple layers of low gloss poly. Taking it apart to seal is no problem, but you do have to keep track of a number of shims that go under the hinges to make them flush to the wood. So here's the final result. I really like the versatility of the top. Use it folded, unfolded, bar height, table height, sideways, lengthways, stick it over the bed for travel or to get it out of the way, or...however. With the mounting plate where it is, we can raise the table hight enough to clear the nightstand and lower it enough that it sits on the bed locked in place for travel. As you can see, the drawer clears just fine. The table will work best once we have our cushions made to replace the mattresses, but we just did a quick weekend trip with it and it works well even as it is. And best of all, it fits in the closet -
1 point
-
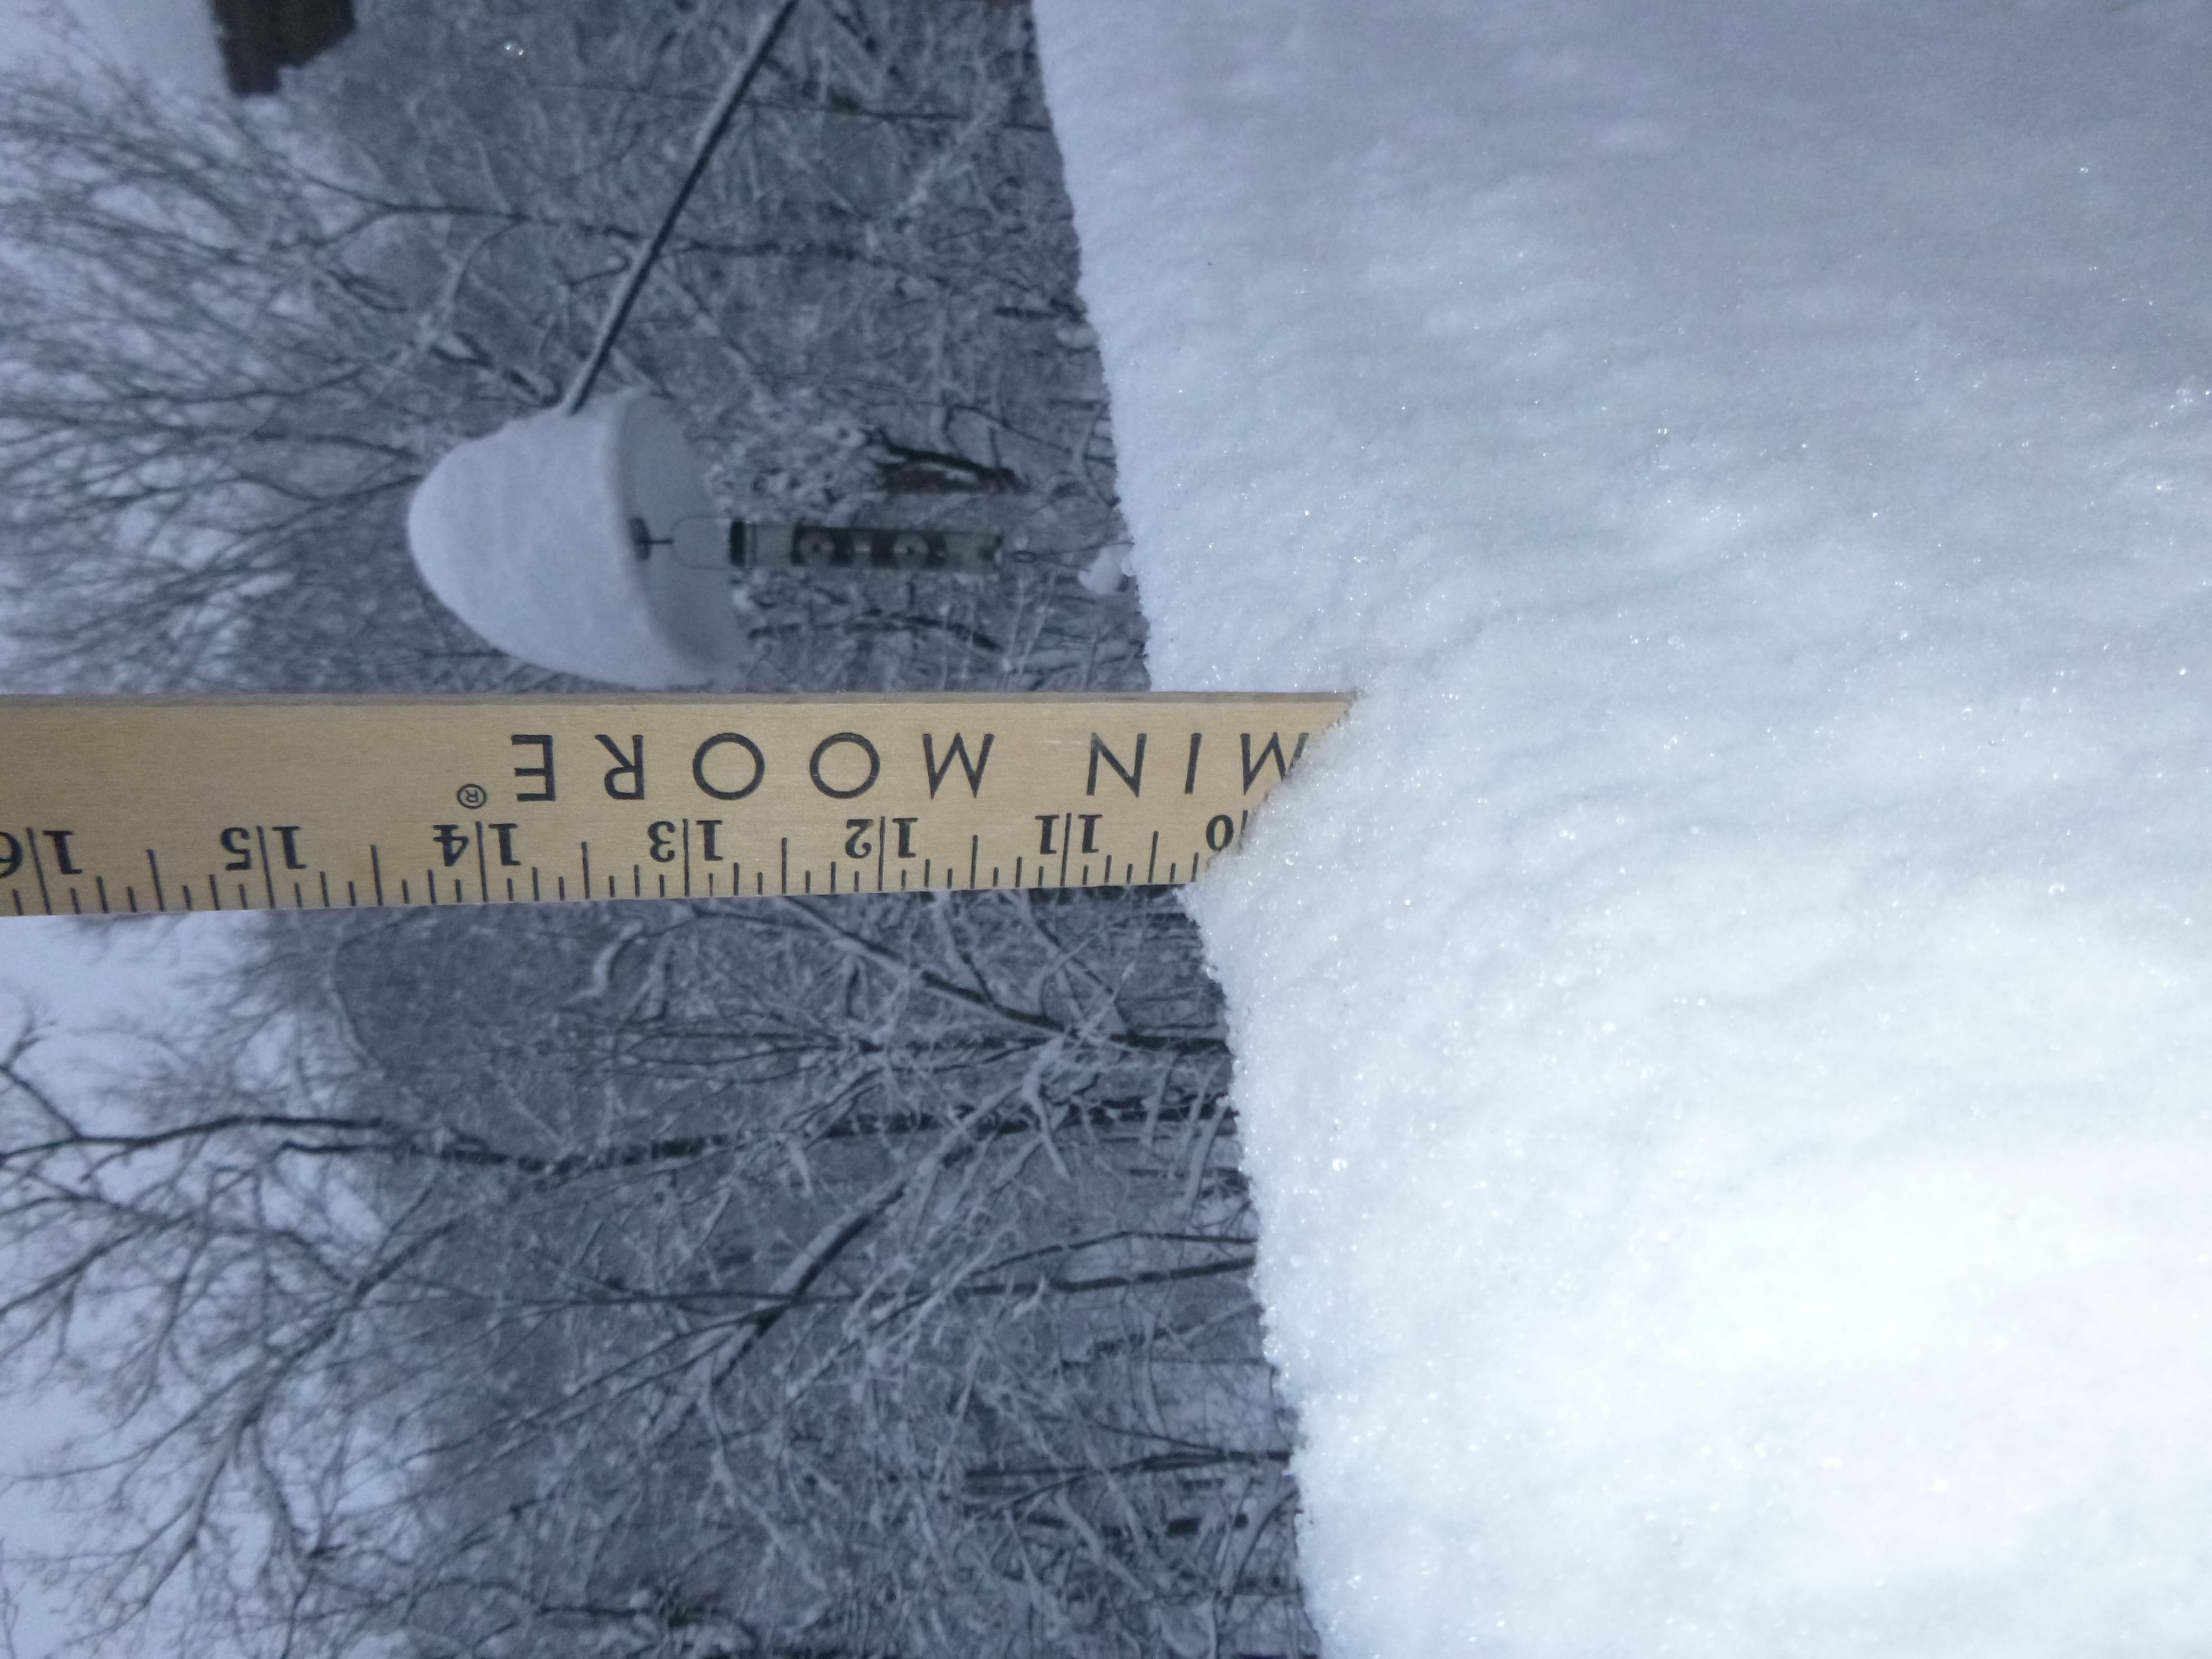
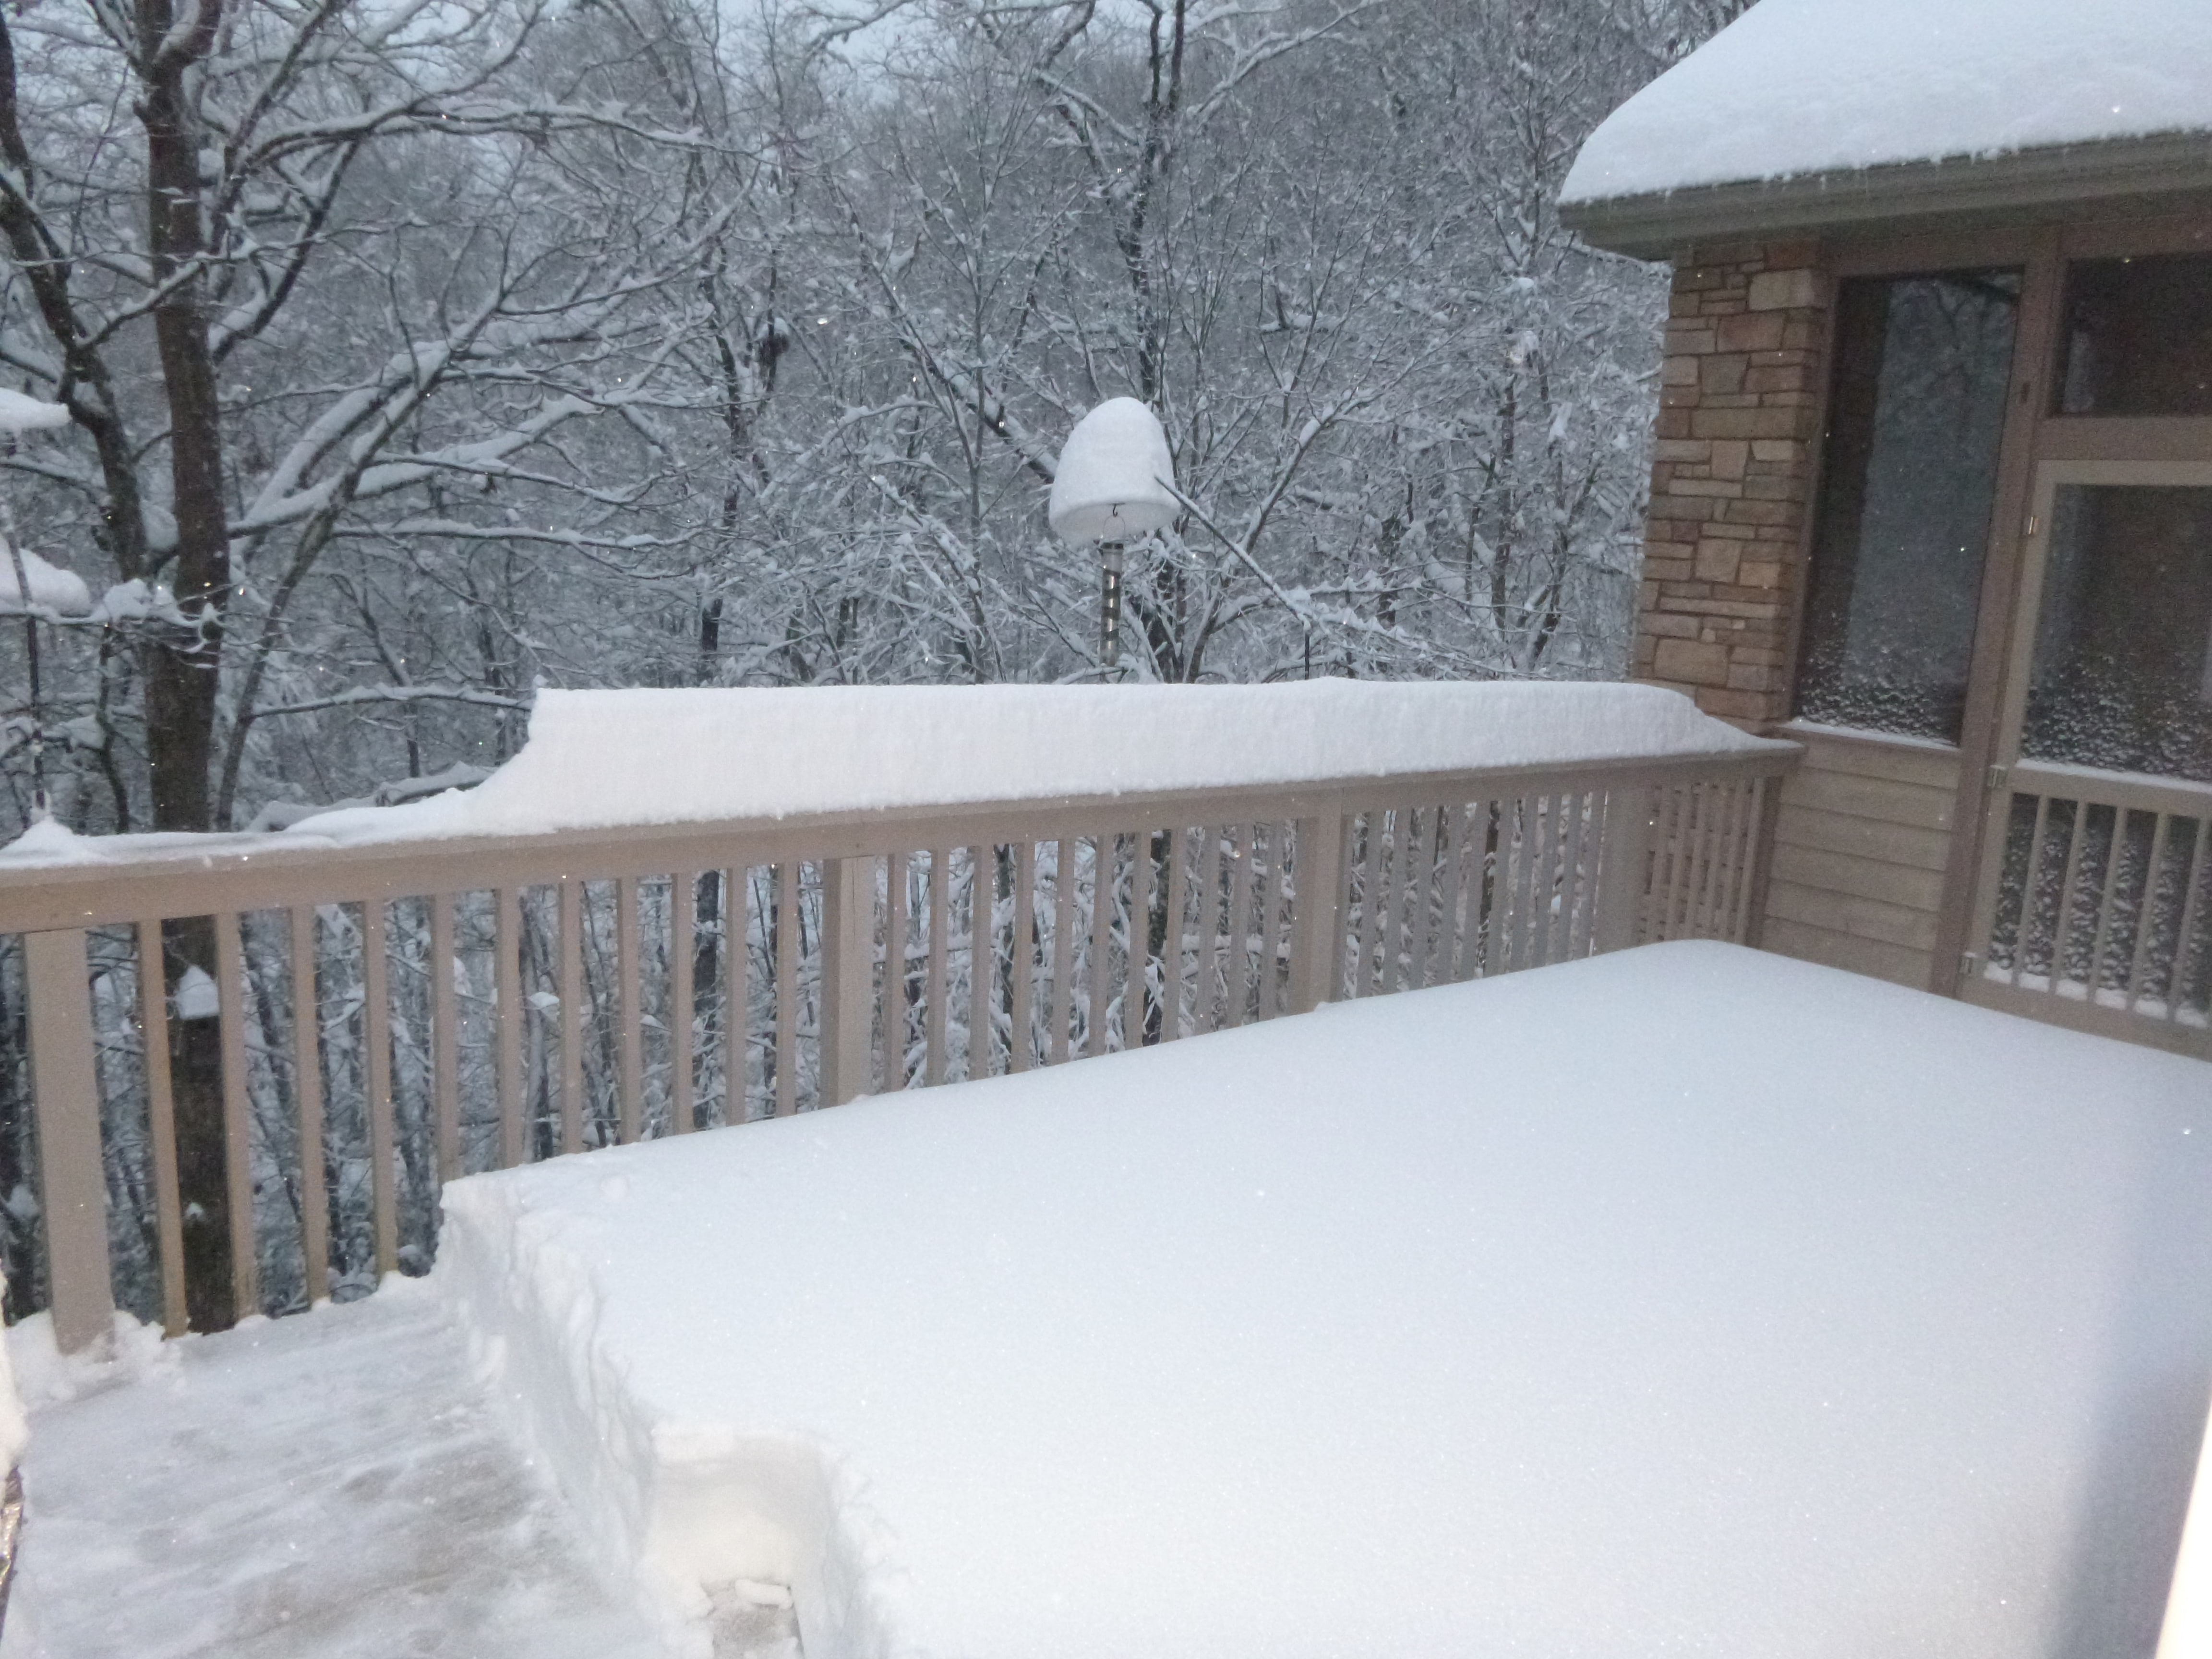
OK, having lived north of the Mason Dixon line for a period of time I know that there are places where snowfall is virtually a daily occurrence. However, the "average" total snowfall for the southern town in which I currently live is 6 inches and the average high temperature for December 9th is right at 51 degrees. At 7:30 this morning these pictures were taken. AND! It is supposed to keep snowing all day today. Sure is quiet and beautiful though and I'm one of the very few people that has a (small) snow blower. Of course this means that shortly I'll be out there making a first clearing job on my drive and the drives of at least 6 others. What time does the game start? Bill
1 point
-
Thanks Overland. Nope we cut down a twin 3" natural latex foam mattress topper. We added the same foam on top of the standard cushions to create our mattresses. We tried to roll and tie them but that was sloppy, then the "roll and tuck" approach presented itself. Takes a little elbow grease and having not too tiny hands helps.1 point
-
I agree with Bill and John D about safety of the trailer when arriving at a new site. Especially if it has some slope to it. I keep my jack blocks in a milk crate in the front tongue basket. The Harbor Freight HEAVY chocks are right beside them. They are a prominent reminder to use them first as suggested above. Another safety measure concerns when to unhook the safety chains/cables. I first park, chock, raise the tongue to unhitch, and then move the TV forward a few inches. Just enough that there is some daylight between the Bulldog and Anderson. I specifically do not unhook the chains until AFTER I have rechecked the chocks, placed all the jack blocks and leveled the trailer. At that point I am sure that Ollie is not going anywhere without me. I then unhook the chains and move the TV a few feet further away to allow easy passage all the way around the trailer. If one is a bit forgetful, a sign on the dash such as "Chains?" would be prudent.1 point
-
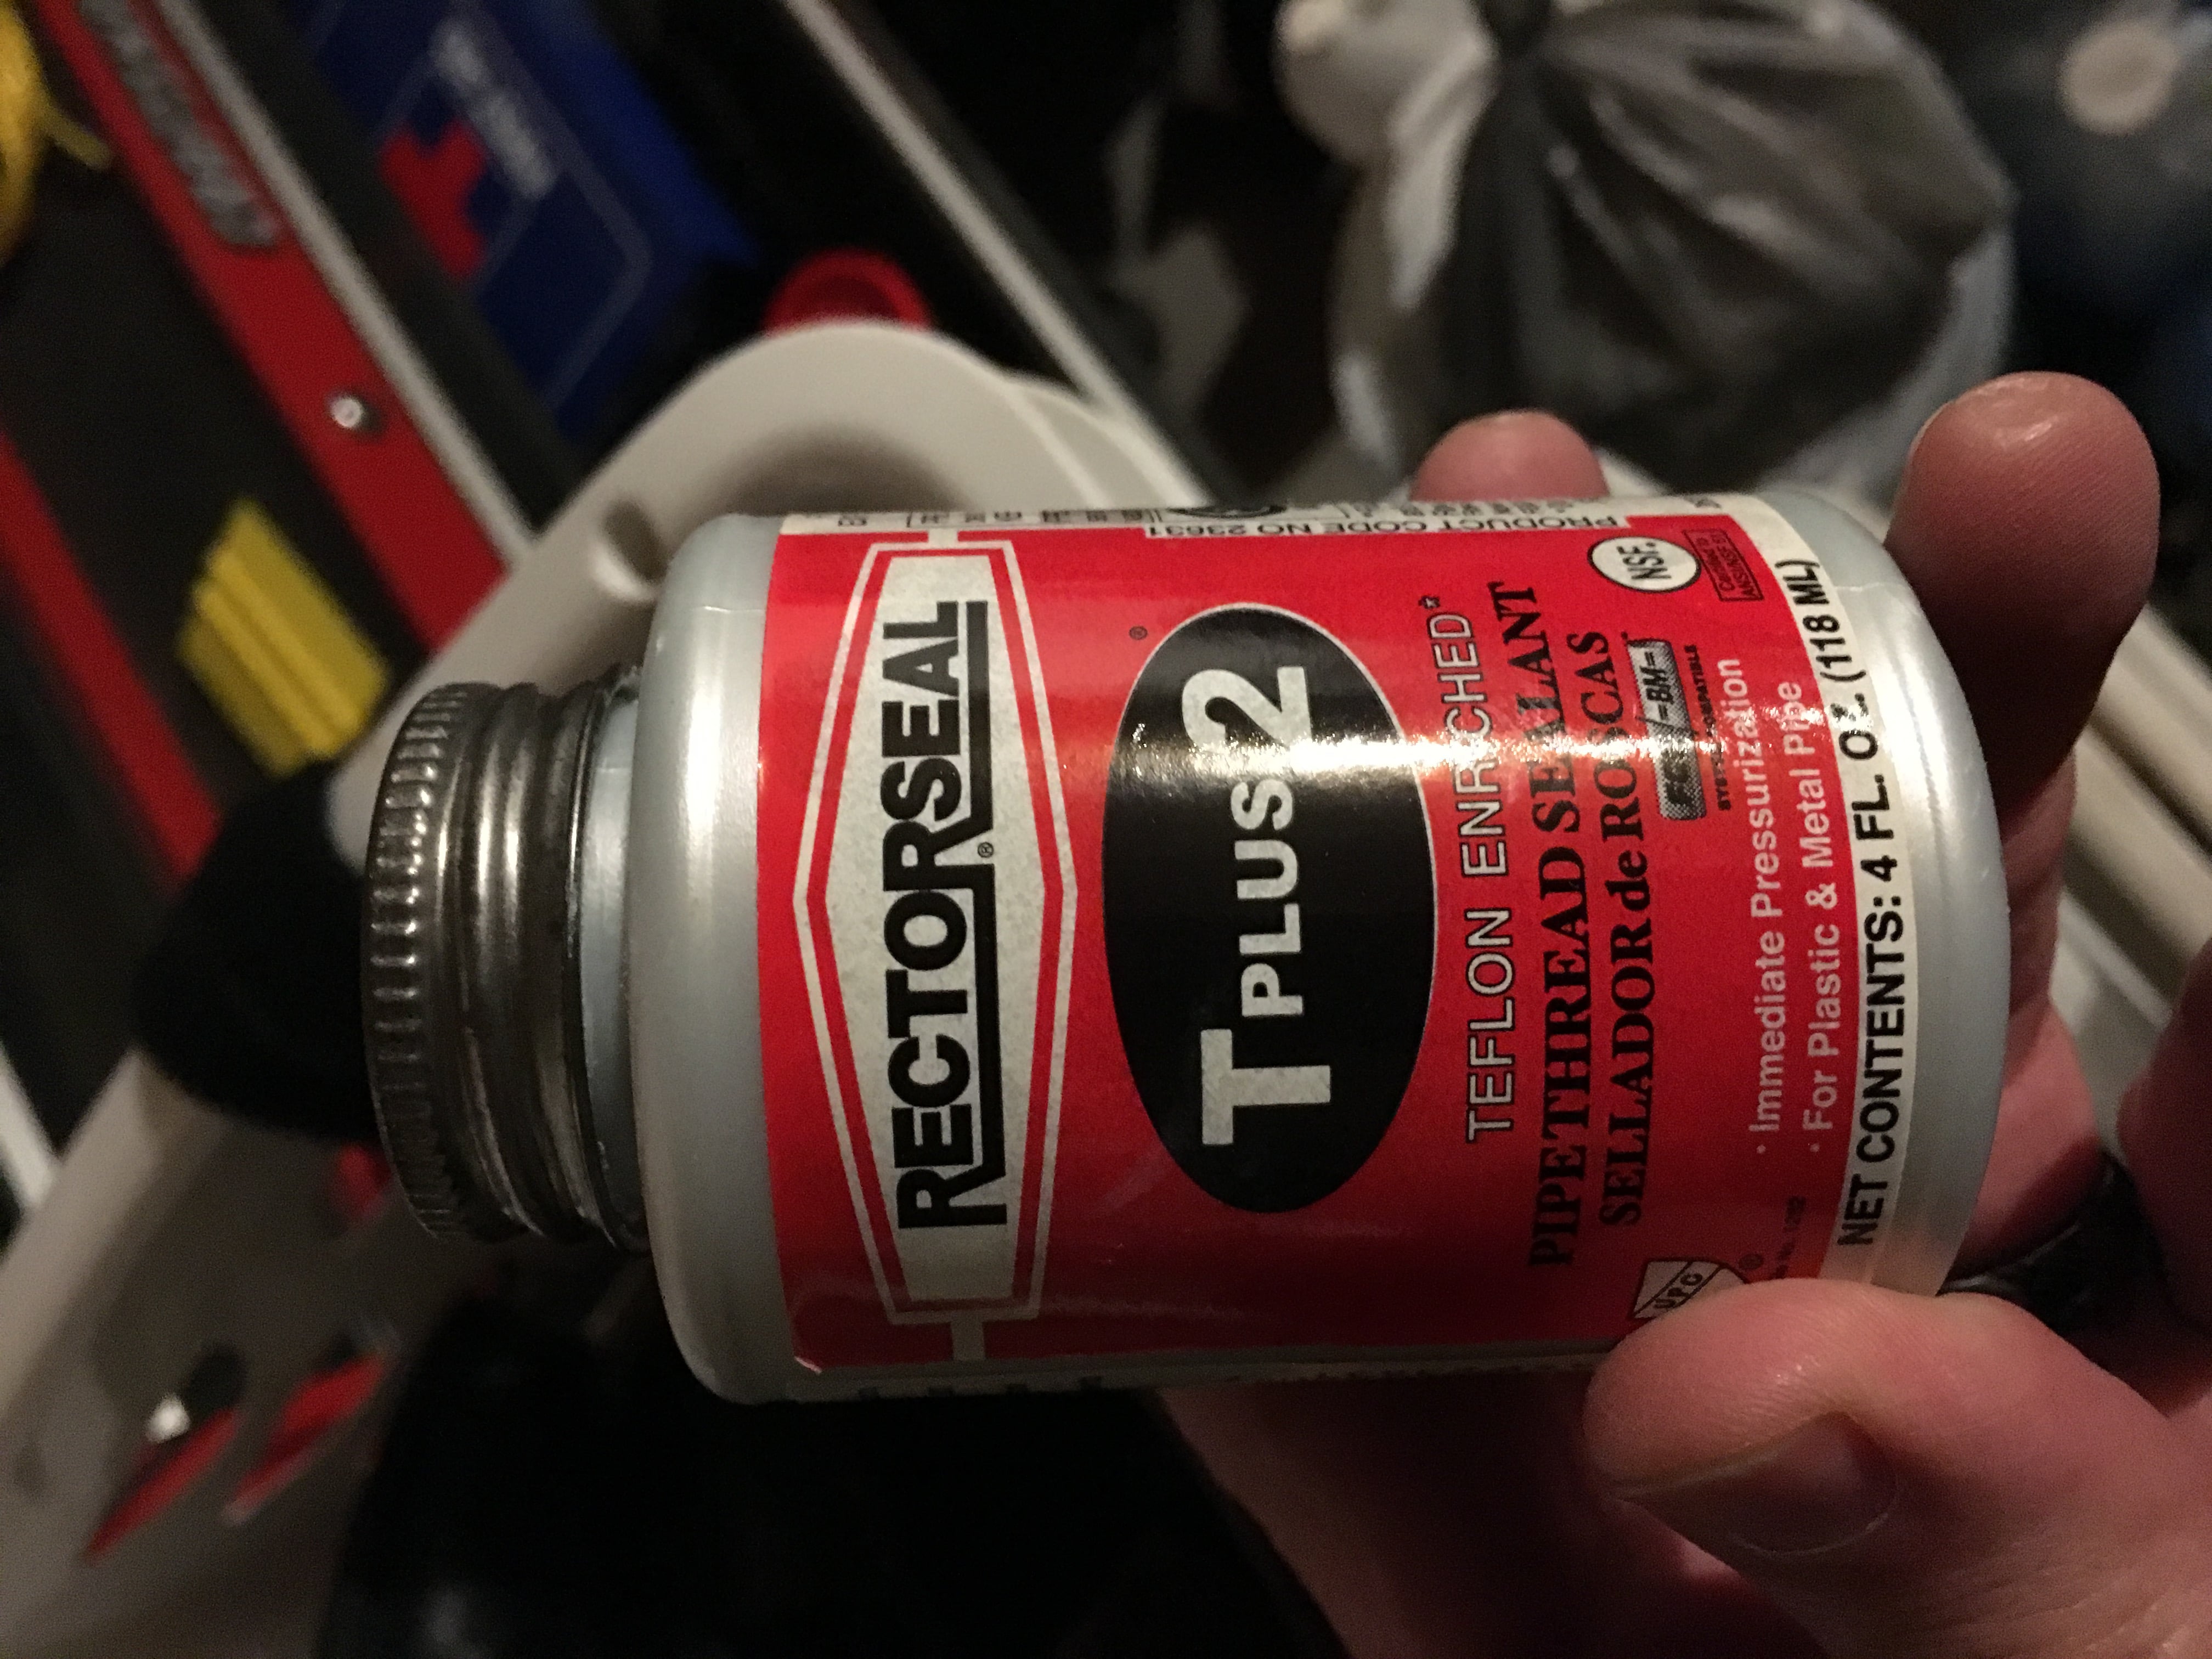
Just a thought. Have you checked your water pressure regulator to make sure it hasn’t gone bad? I had an issue with my house a couple years back when suddenly I had several faucets, compression fittings on pipes, and toilets in the house all start dripping/ leaking at around the same time. And I thought ok, that many simultaneous failures can’t be a coincidence. The pressure regulator on the water main supply line coming into the house had failed. And I’ll second the recommendation on the Rectorseal pipe sealant. I’ve used that on many plumbing projects lately with very good results. Much better than the Teflon tape.
1 point
-
I like the one Bill posted better then what I got.1 point
-
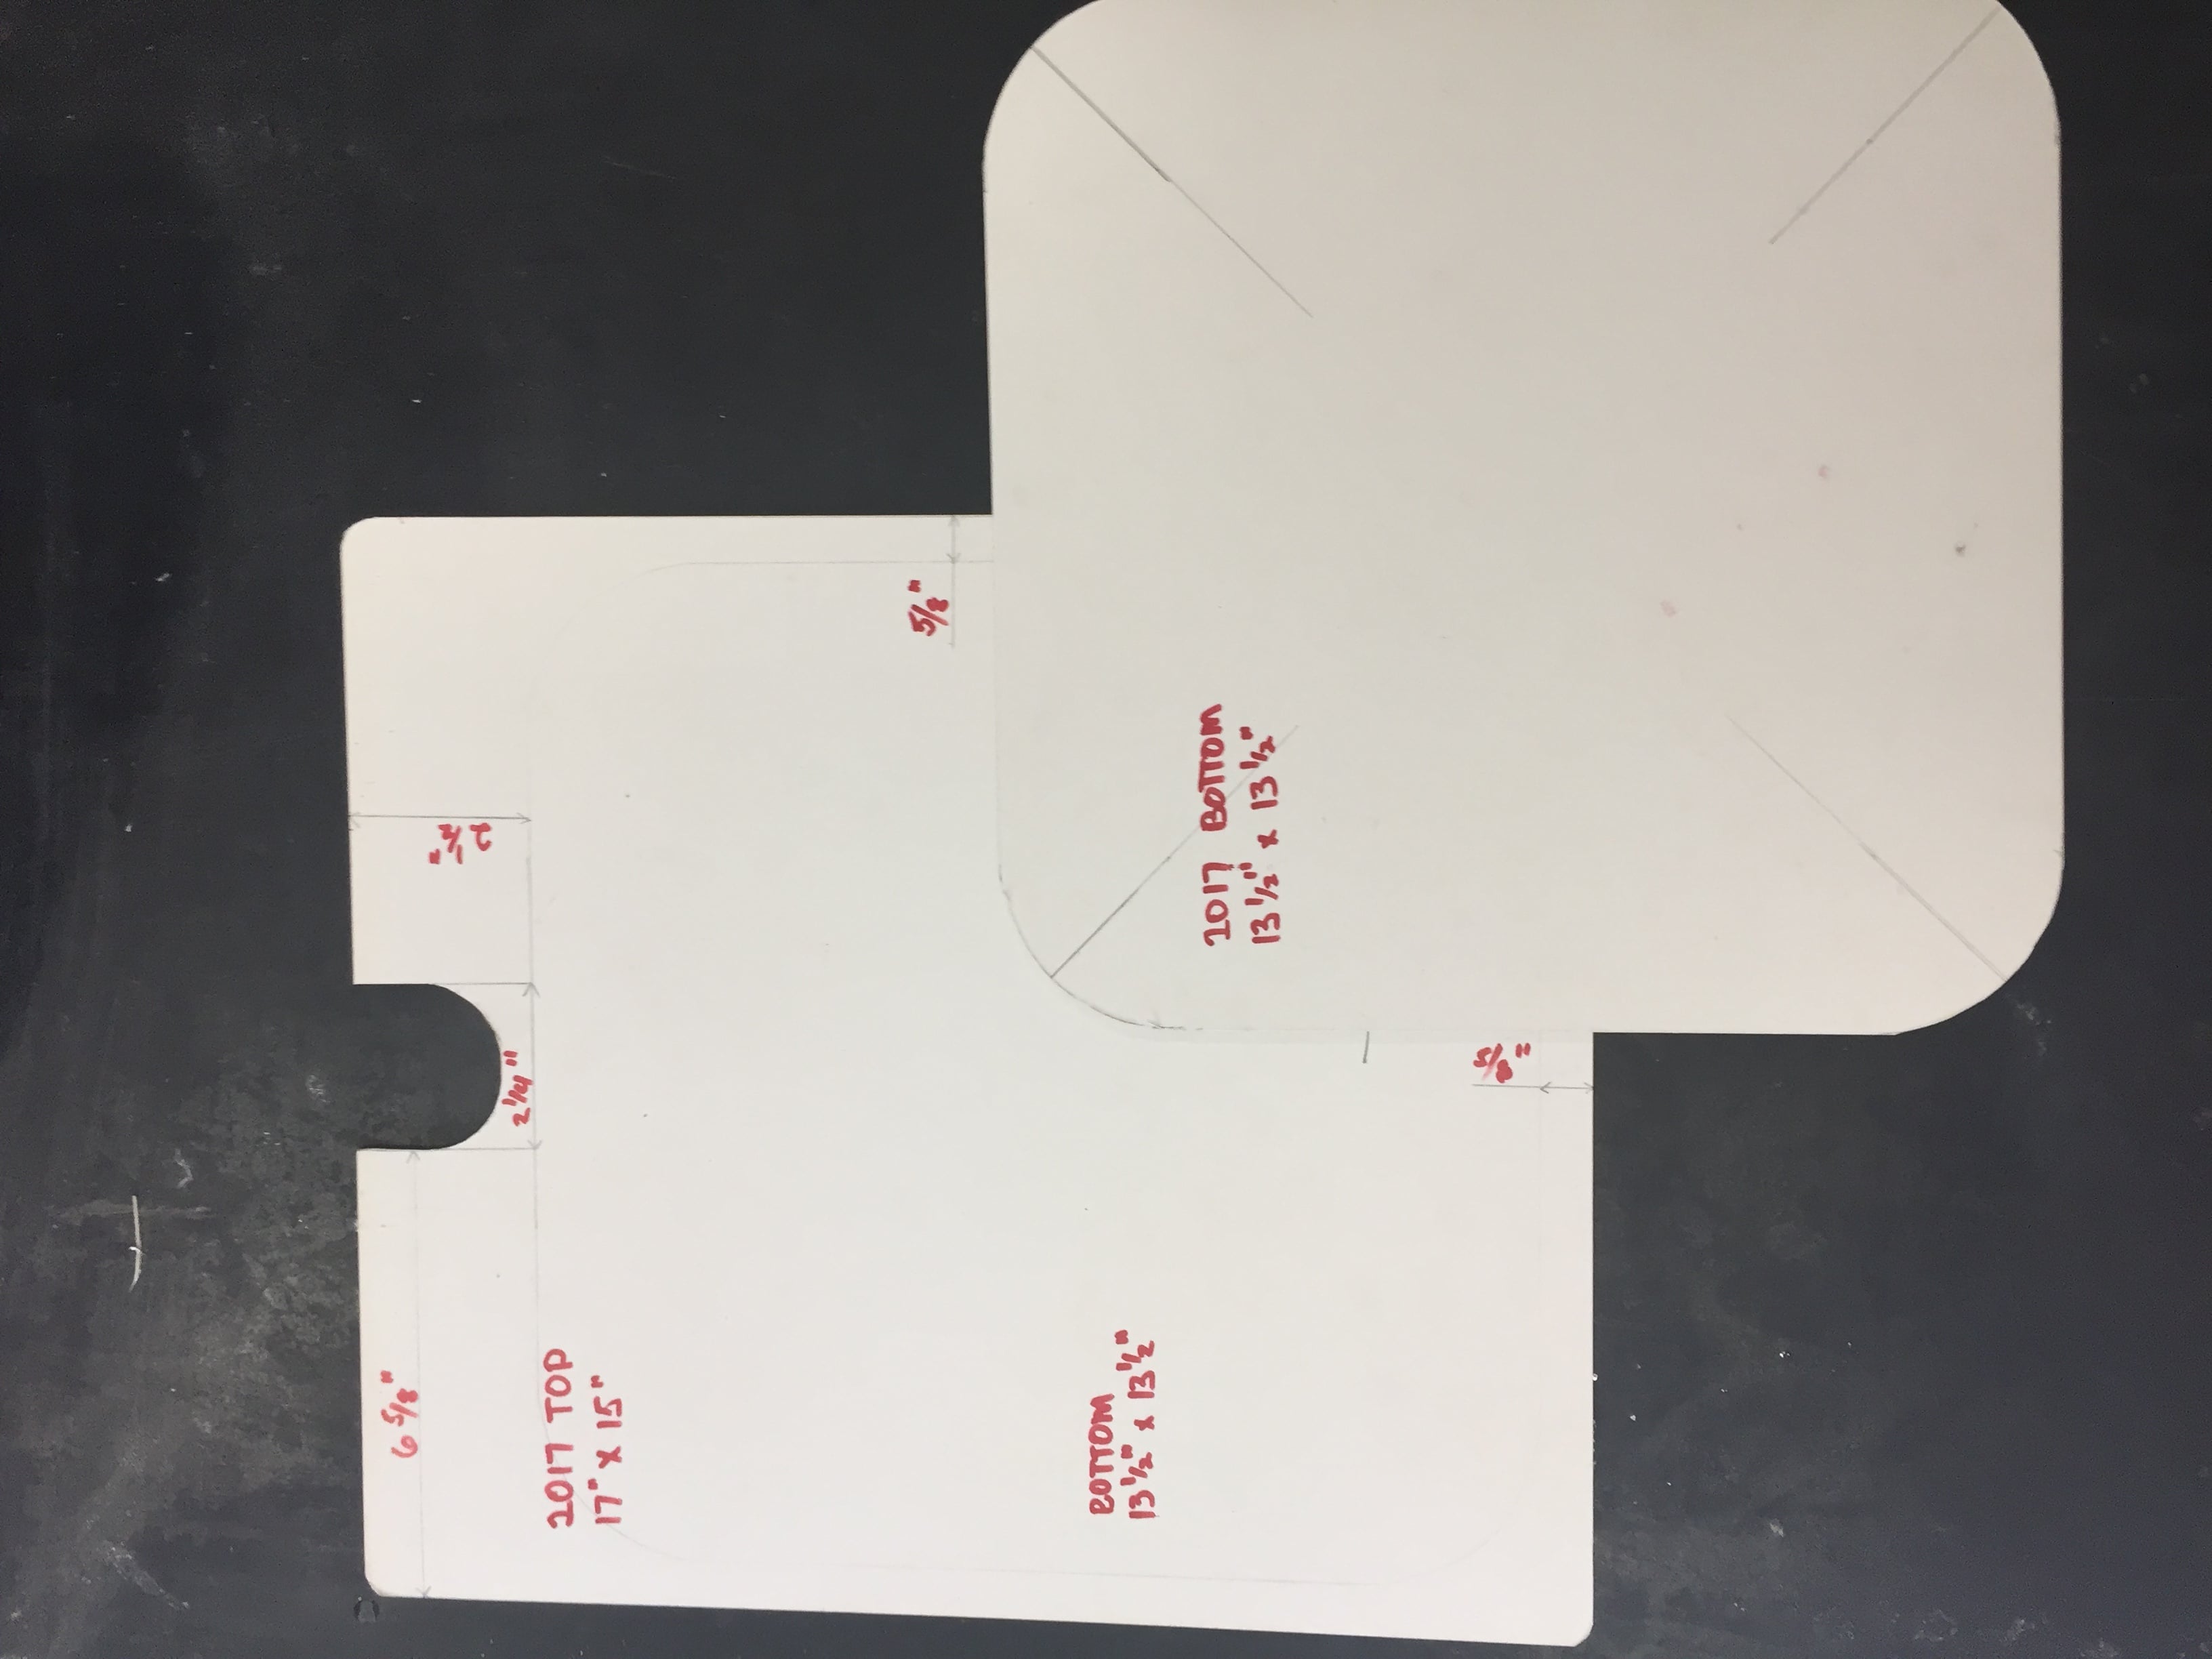
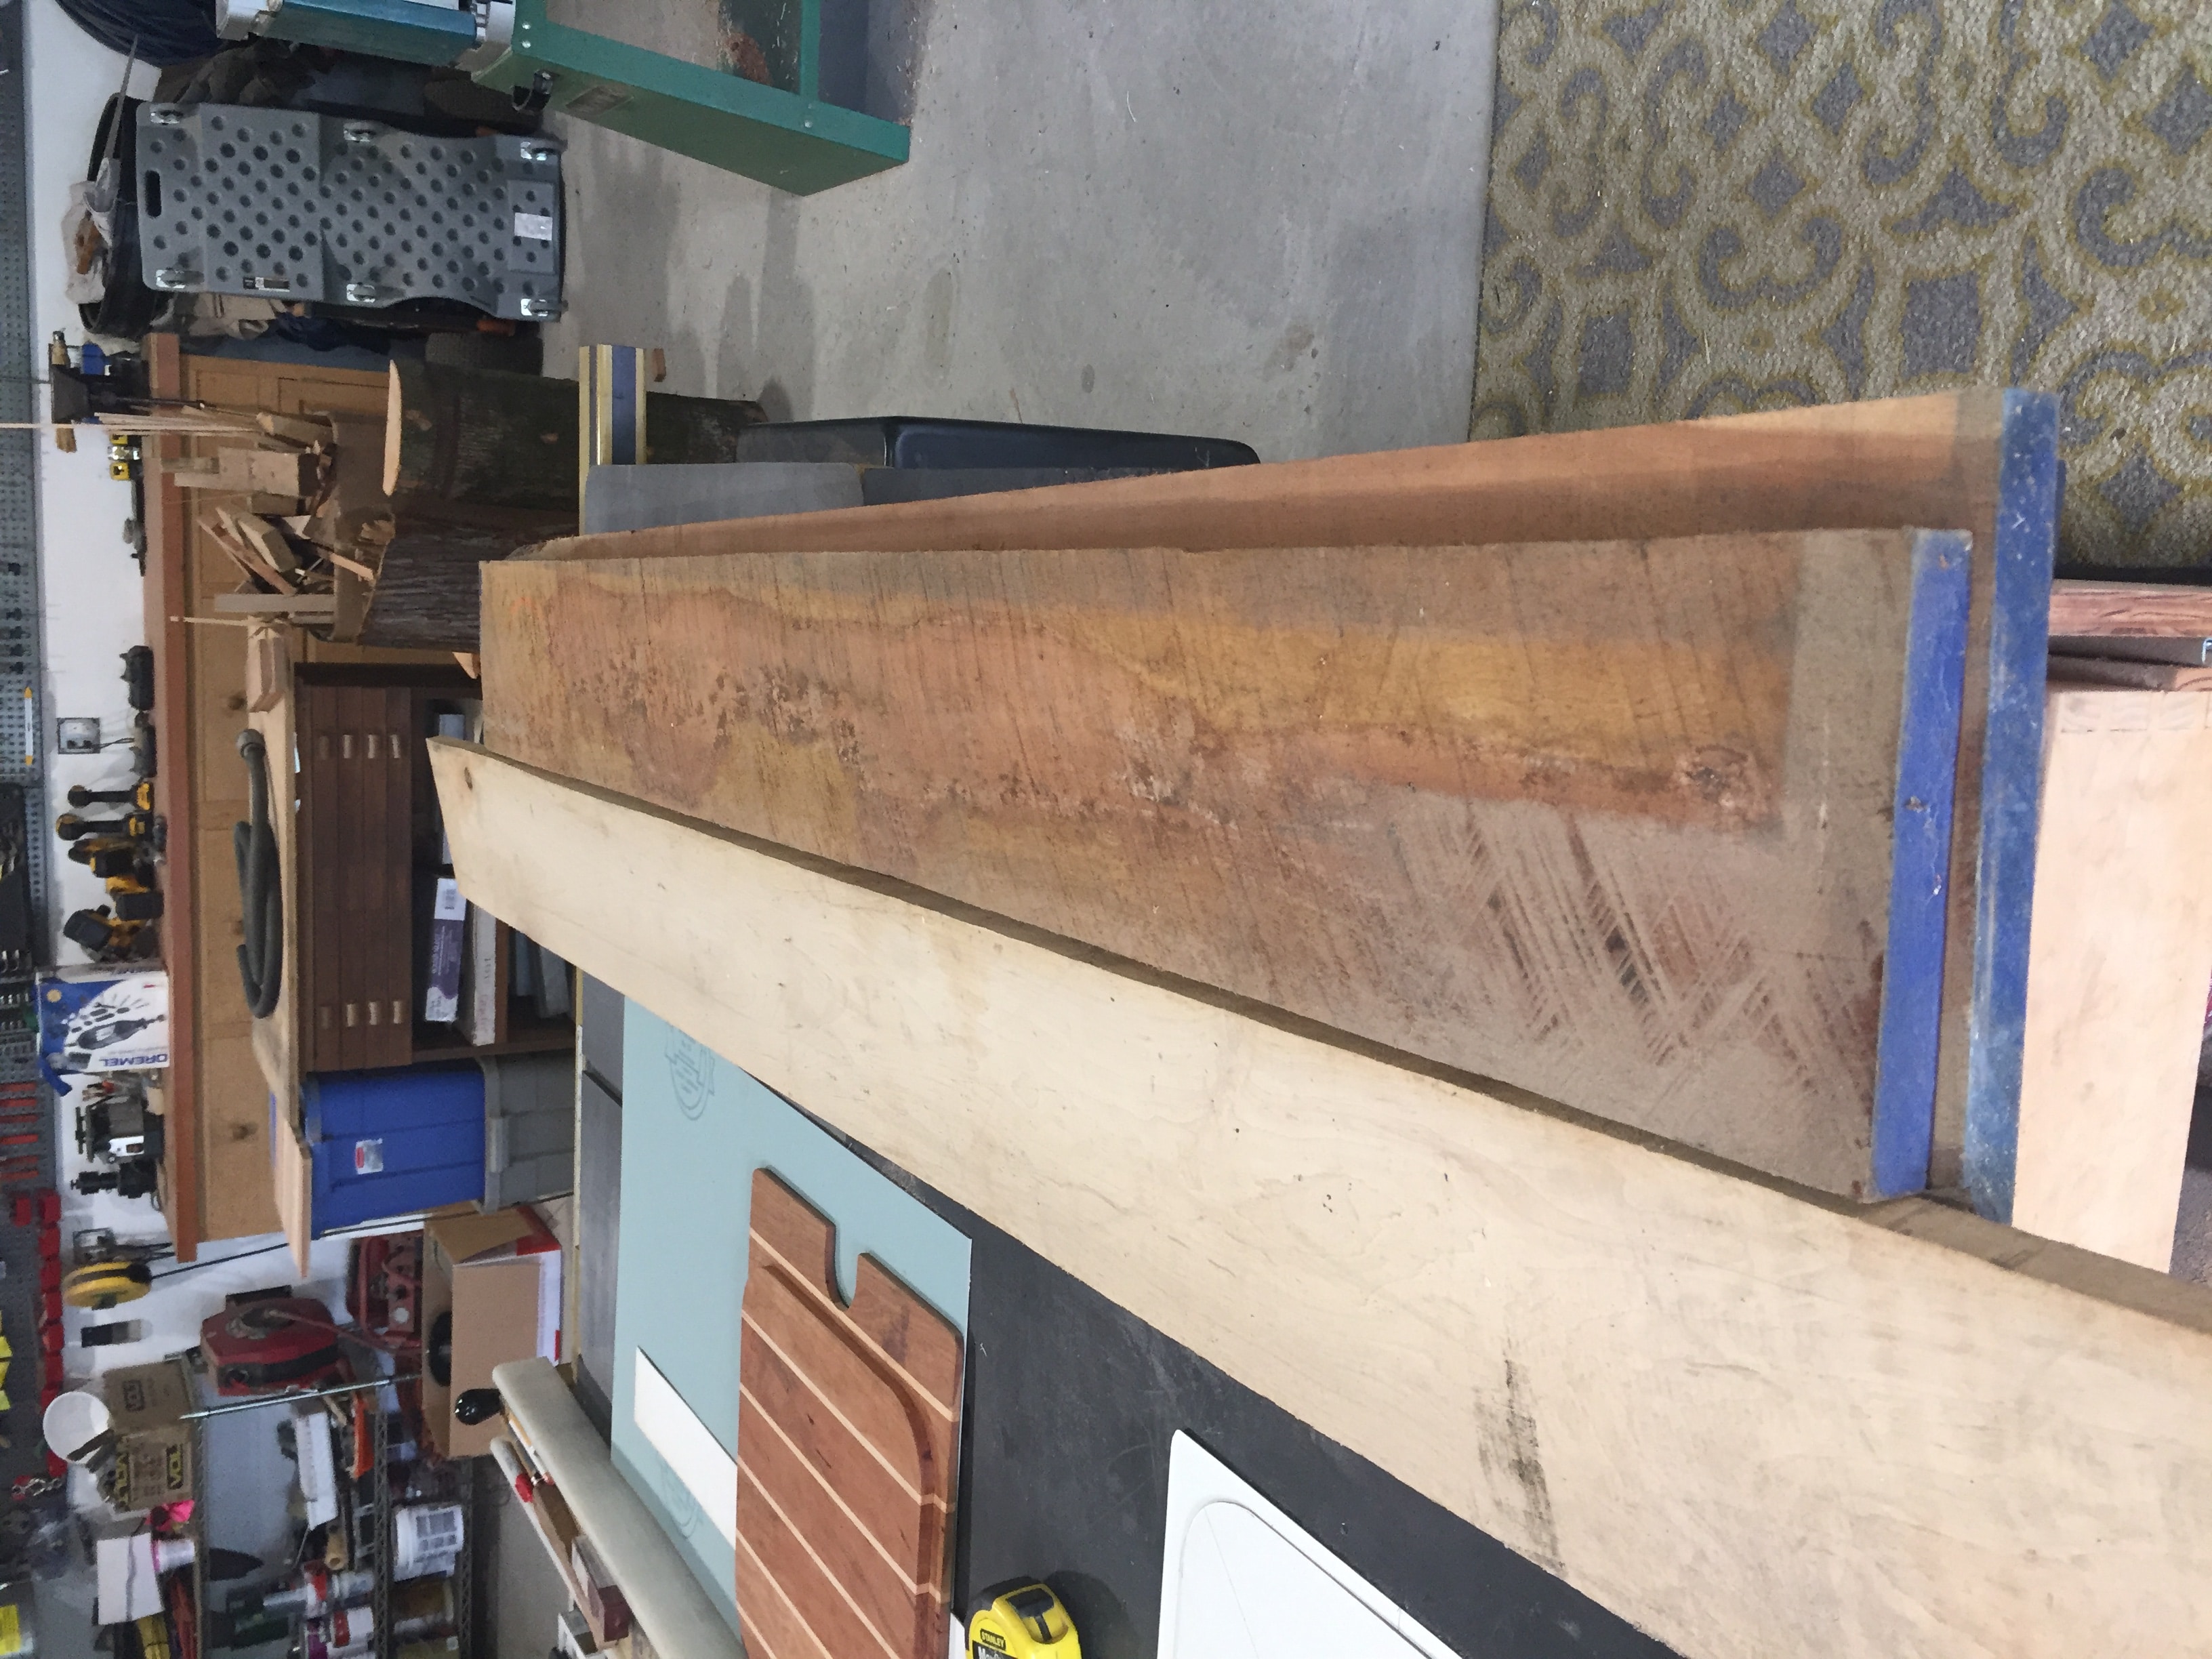
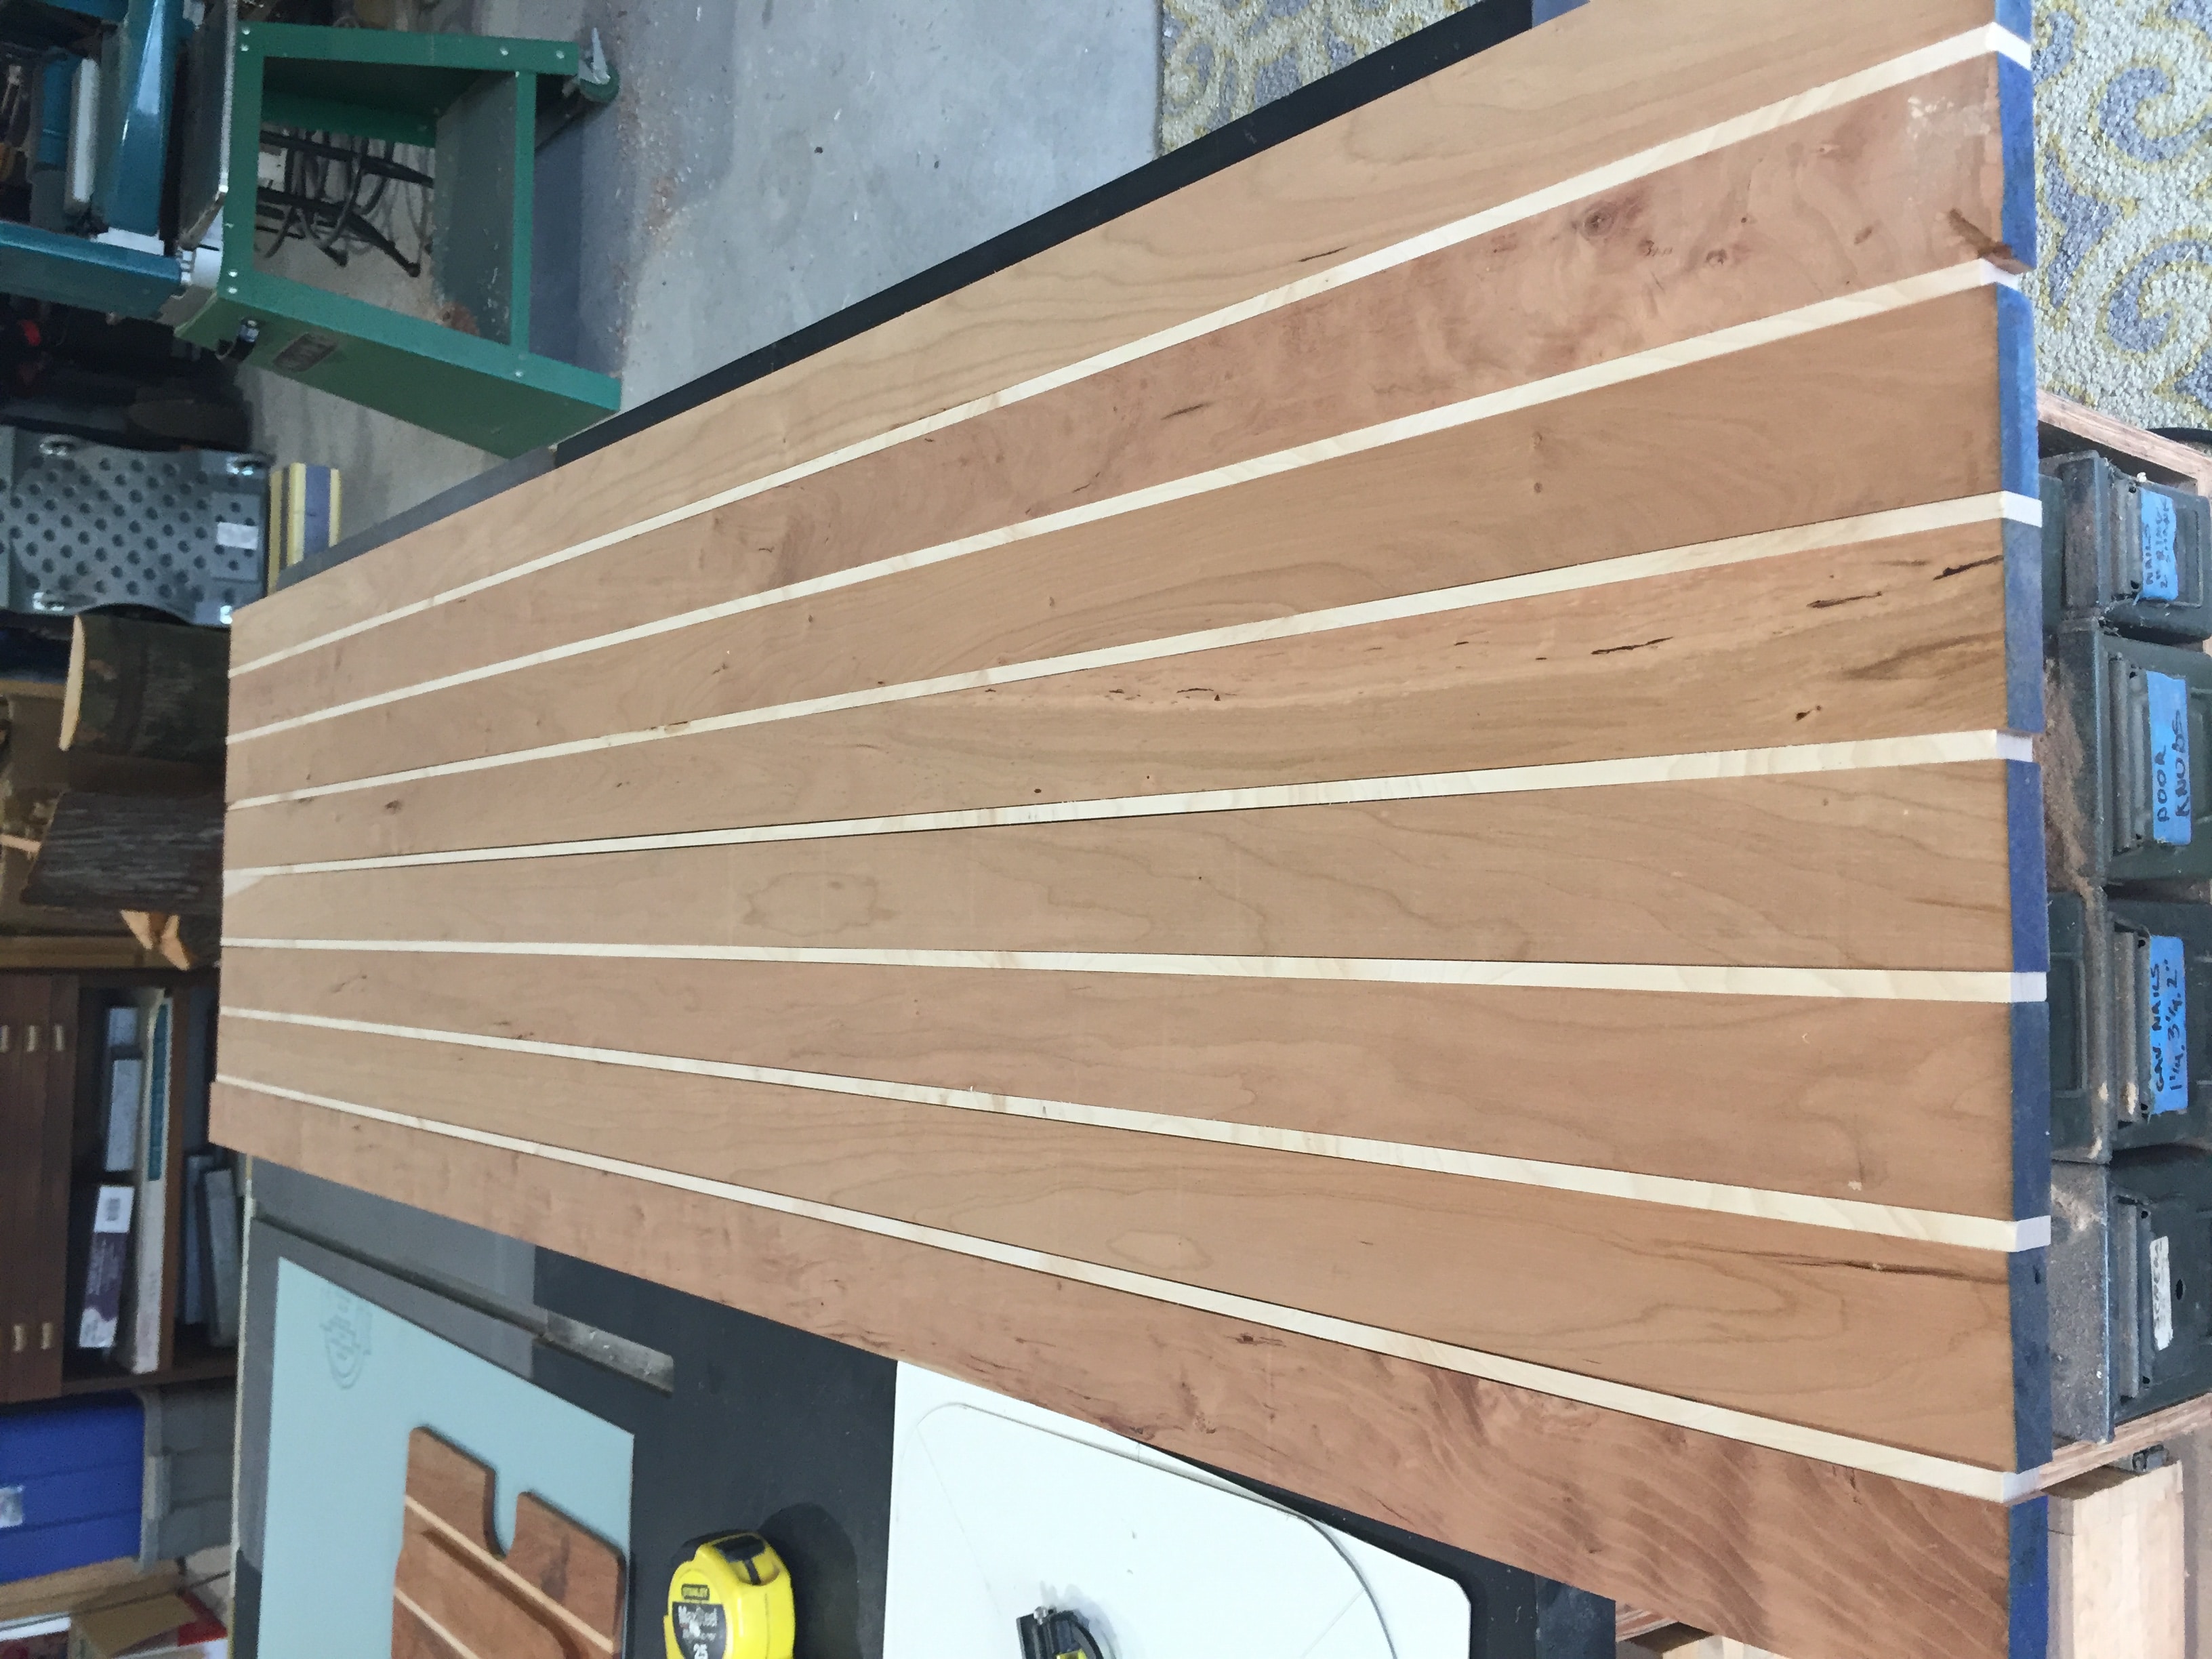
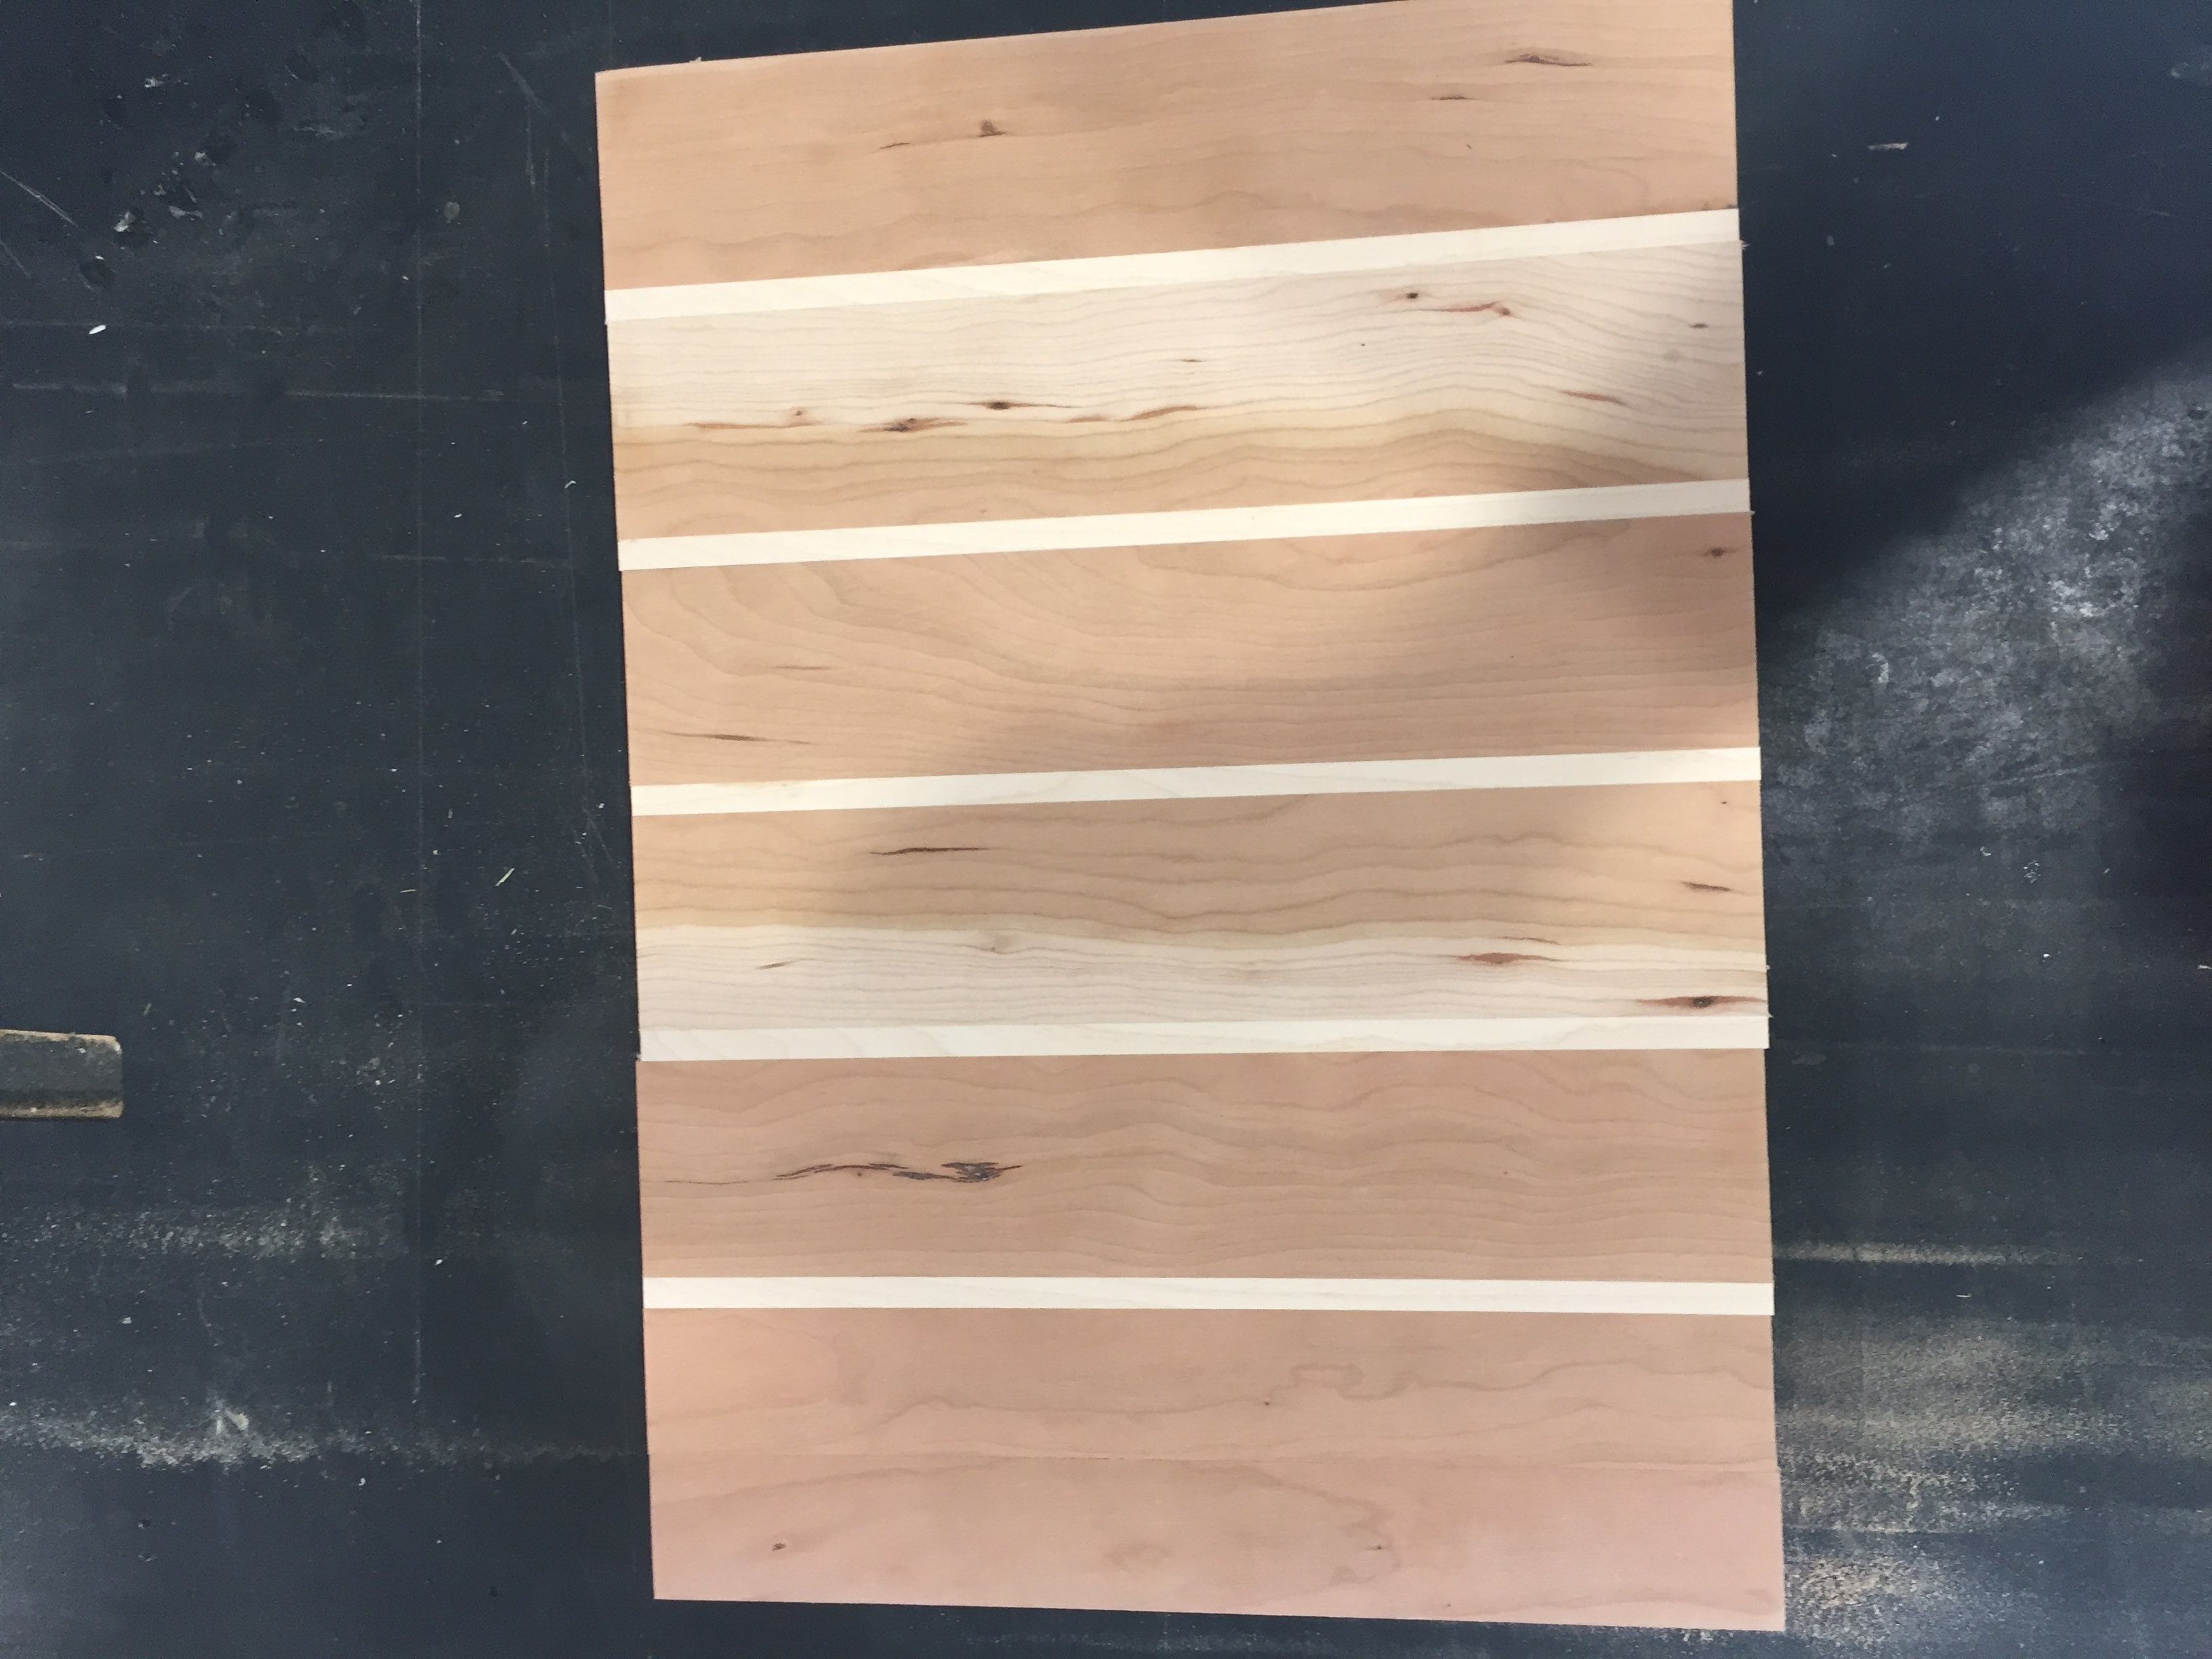
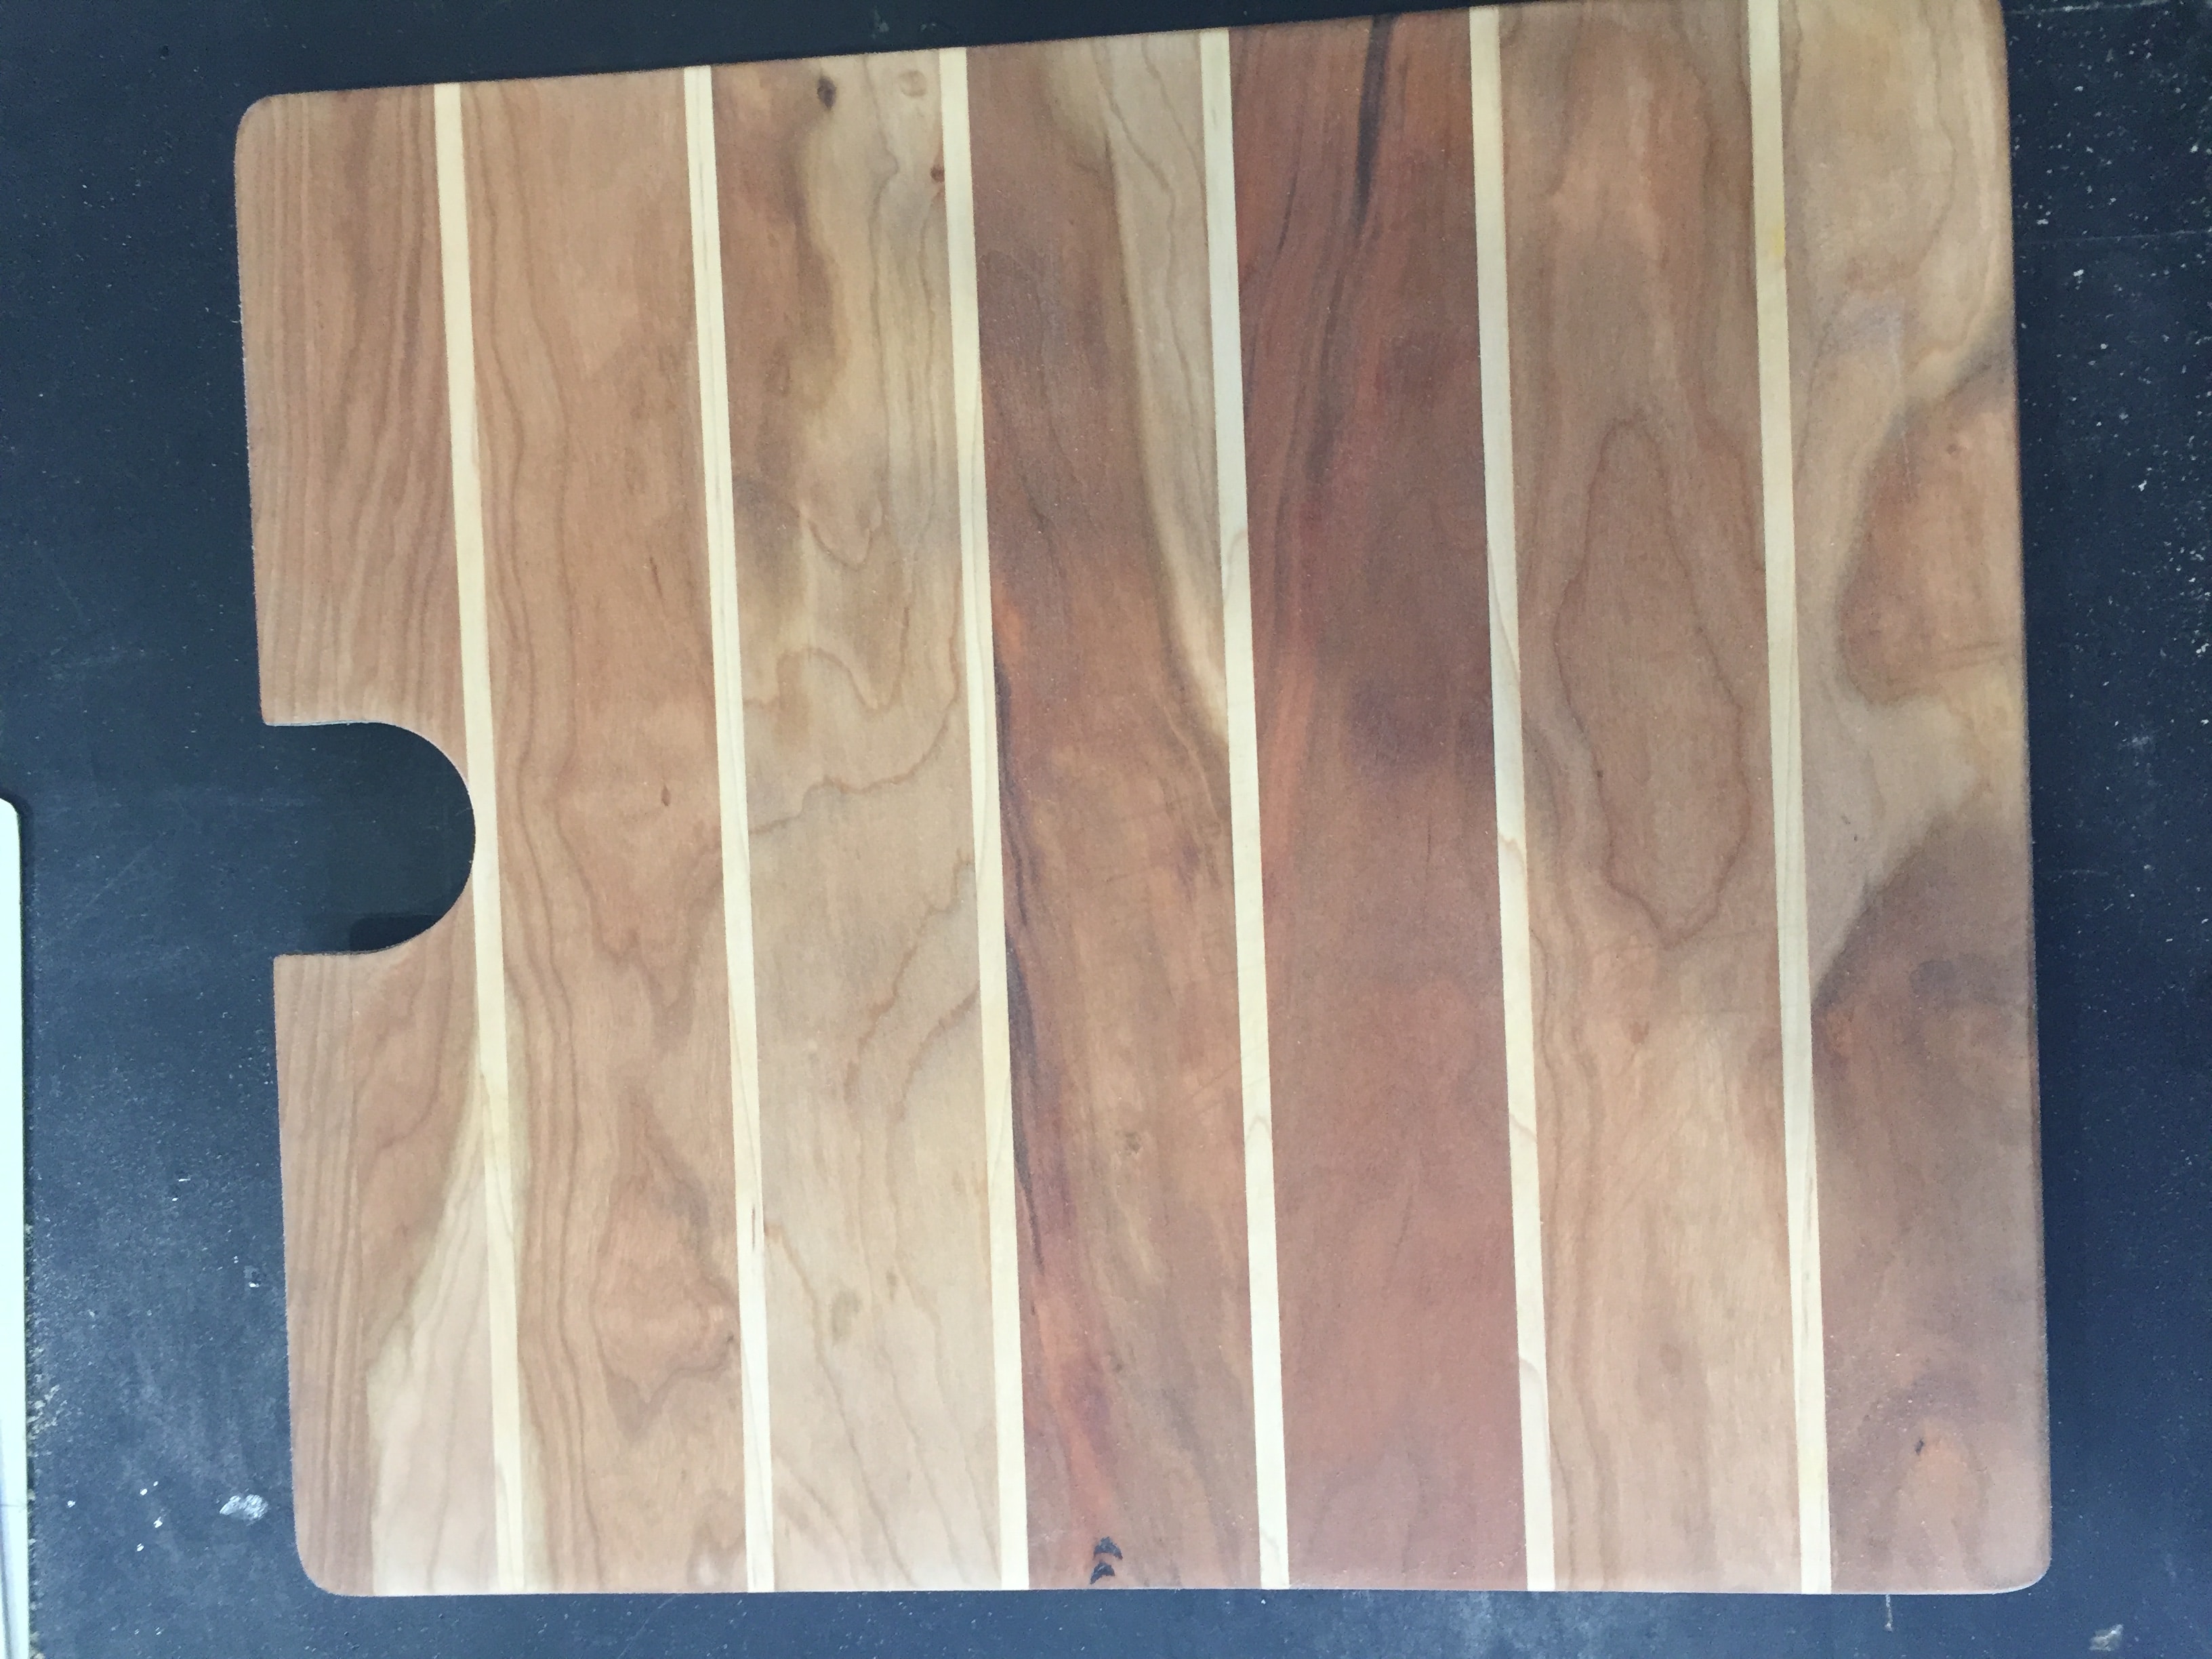
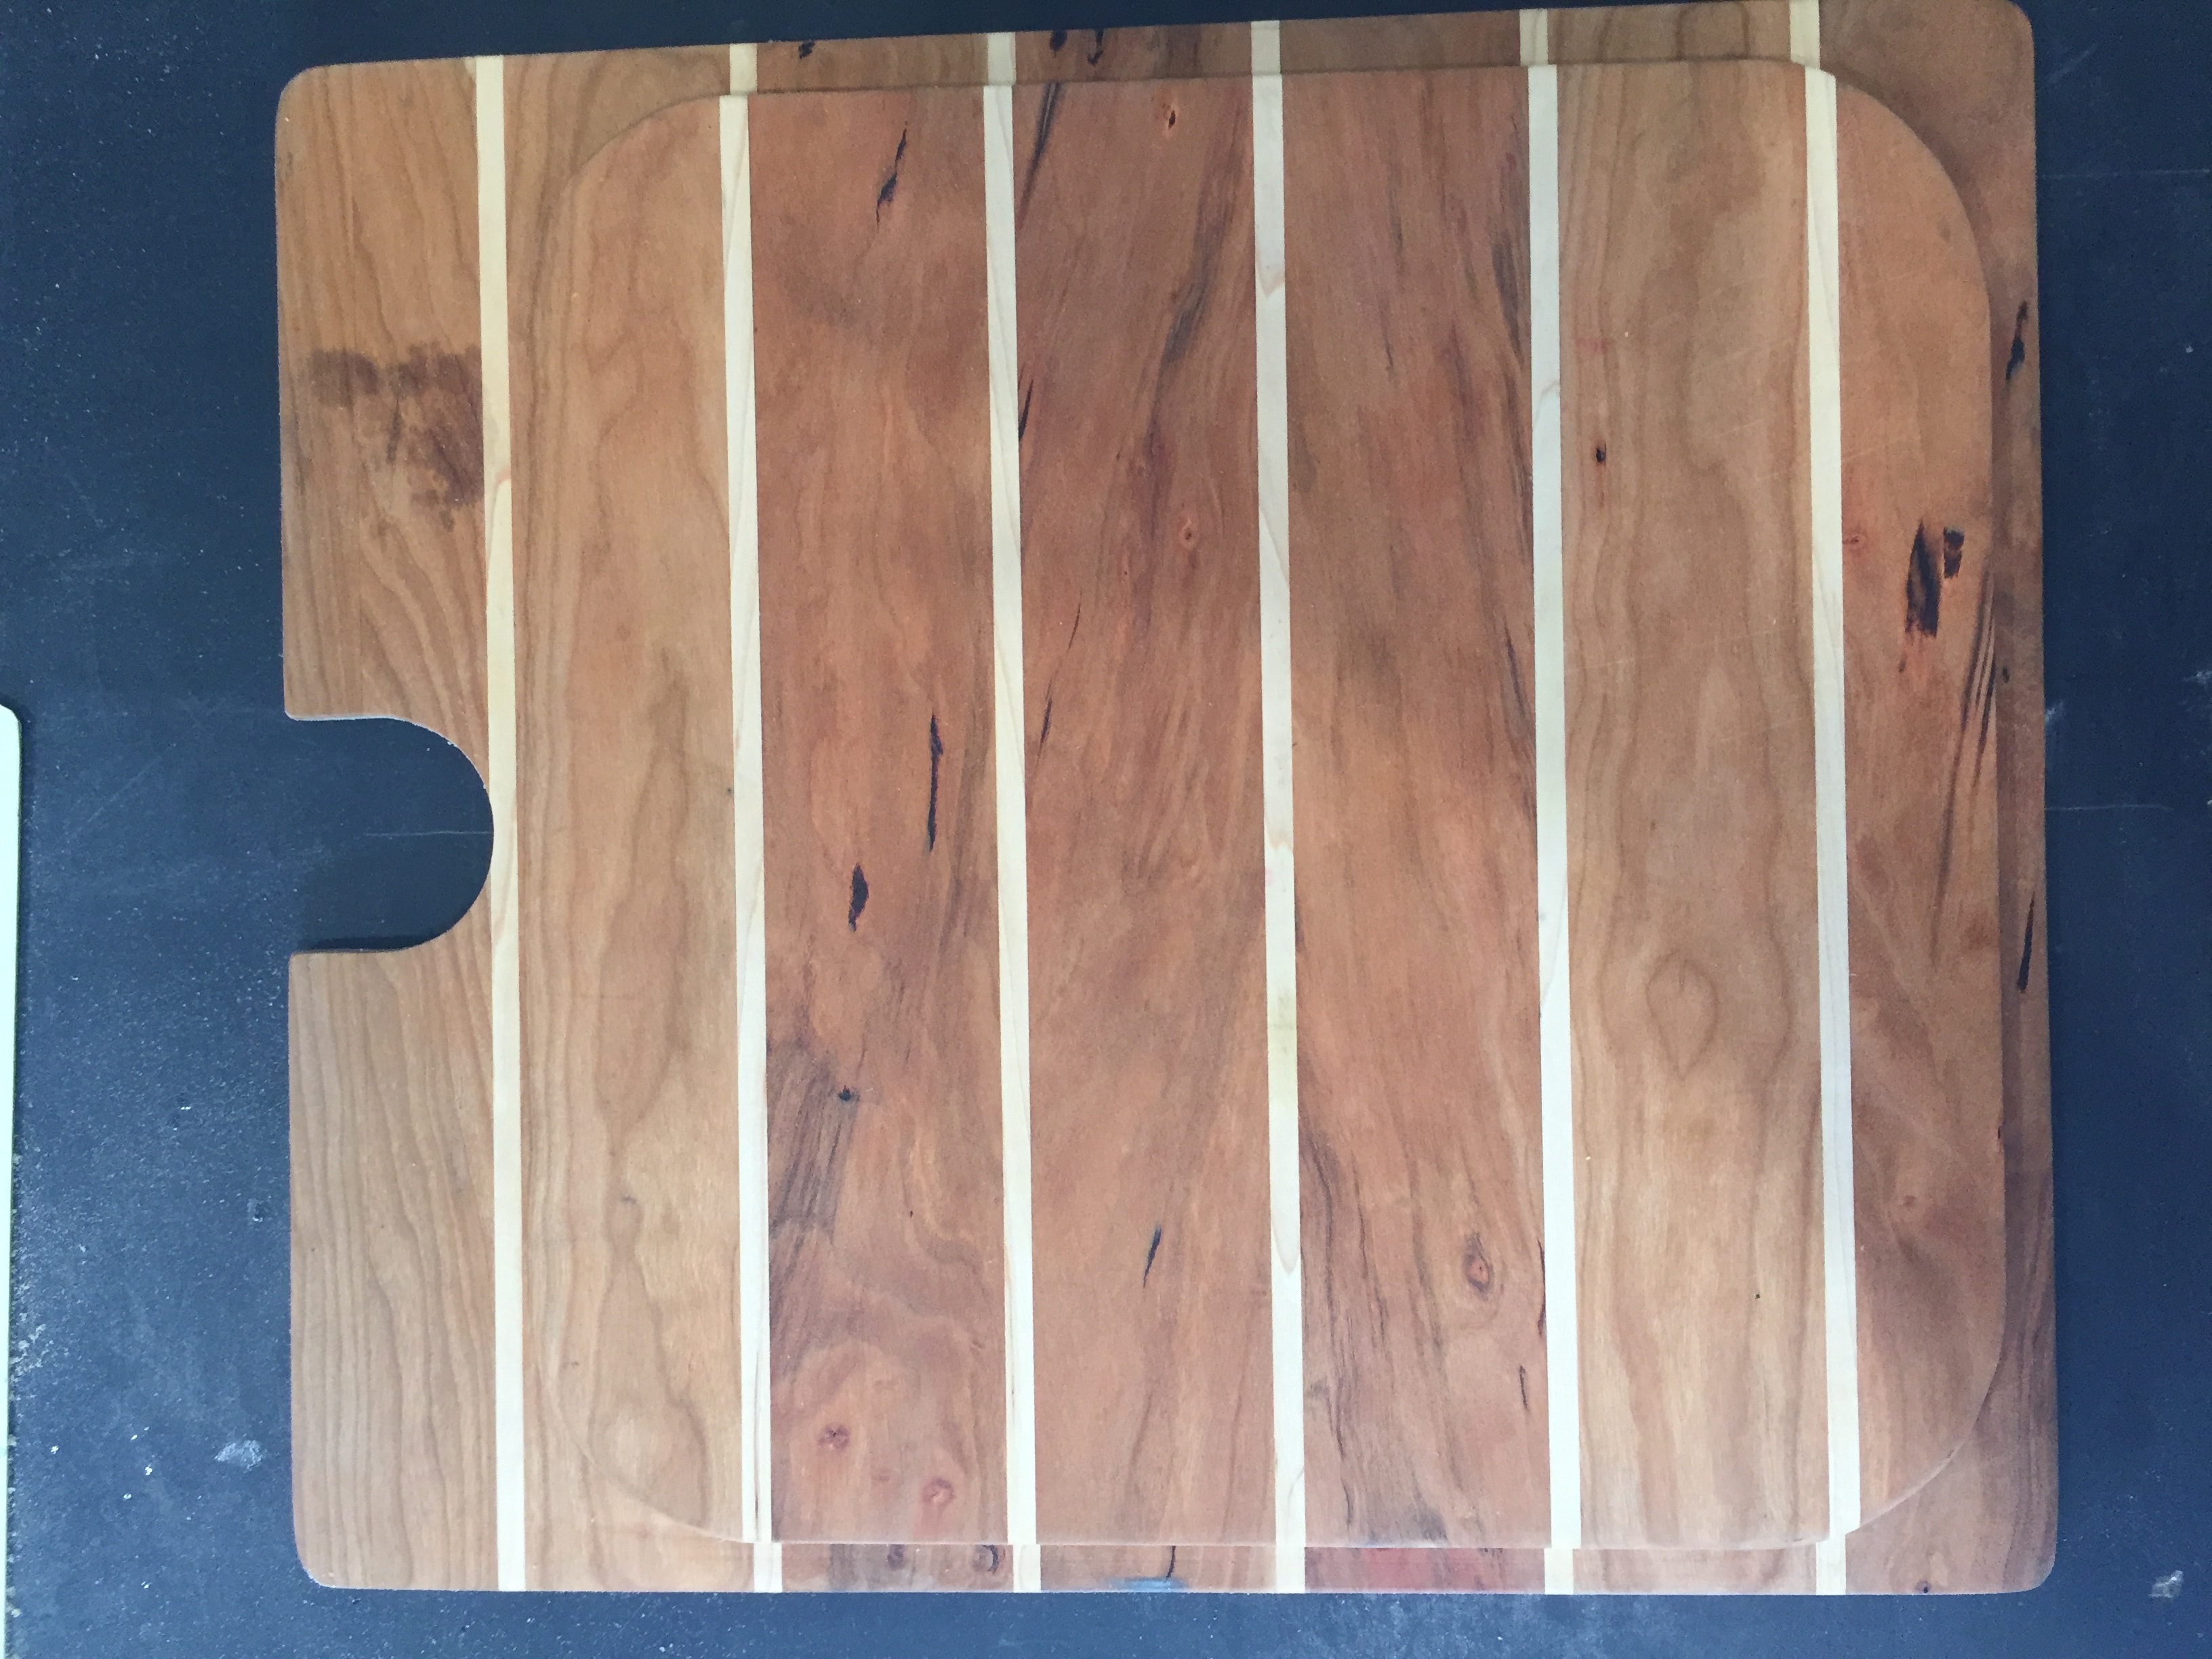
For those of you interested in my craft of making cutting board, I though I would do a quick overview of the process. It all starts with templates for the sink, in this case 2017 Elite II. A top cardboard template that is cut to the finished size, faucet location/cut-out and corner details are establish. I second template is made for the bottom which is use to hold the cutting board in place by dropping down into the sink bowl. Once these are checked for fit, I can make as many as I need knowing they will all be the same. Rough saw 1 1/4” thick Cherry and Maple are select and measured for total board feet need to build all the cutting boards. The board are then milled on the jointer to establish a flat bottom side and then passed through the planer for a perfectly flat board. The final thickness is 7/8”. These are then ripped down on the table saw – Cherry to 2 1/3” and the Maple to 1/4”. [attachment file=IMG_0859.JPG] With all the milling done the boards are then arranged in the ship decking pattern and glued together with food safe, water proof glue. These large panels are then cut to rough size cutting boards. Using the top template the corners are rounded and faucet location are cut on the bandsaw. The final size is cut on the table saw for last minute adjustments. The bottom template is then use to mark the bowl location and the wood is removed from around the edges at the router table. This allows the cutting board to sit inside the sink and not move. Last step is sanding and more sanding and more sanding. 80, 120, 220 and 320 grit sandpaper are used. The final step is a coat of mineral oil and they are done. It takes about 3 days to make a run of 4 cutting boards. Some people have ask why I do this? And think I am a bit crazy. It's not for the money for the wood alone cost what I charge. It is for the love of working with wood and created something I can share with others who value my craft. Over the next few week I will begin shipping these board to their new Oliver Owners. I hope they enjoy them as much as I did making them.
1 point
-
I'd love to have one of your cutting boards for my Oliver Legacy Elite. Not sure if the sink is smaller. Are you willing if I can get you a template? Duane Smelser1 point
-
Oliver’s intent for paying for your first night nearby is for them to be able to address any issues you might have right after pick up. Your awning sounds like something that would have prompted a phone call to Jason for resolution. As Steve mentioned, the black tank issue is not difficult to adjust. I had the same problem a year or two ago. Before I fixed it I did what Stan mentioned, lift the back dinette seat and manually push down the gate. It started again last month so I’m back to a manual push after dumping and rinsing until I adjust again. If you’re having issues don’t hesitate to call the Oliver service guys. They’ve been quick to respond with instructions and parts. Mike1 point
-
Got a text from our neighbor at our camping property outside Asheville. 14 inches so far, 8 more to come. With ice. Please be careful out there, and stay home if you can... Sherry1 point
-
Let me see if I can help you. You state that "...Water is dripping from the rear and front “vent” on the dinette side only..." From that, I gather that it is dripping from two places (front and rear of trailer.) Does it drip constantly and consistently? I suspect that IF there is a leak it is coming from a single source. But based on the size of the puddle in the picture you included, I would expect a lot more water from a constant leak. A single leak could cause water to run out at both ends of the trailer due to the fact that the collection channel runs the entire length. If you are going to chase after a leak, I would start with the last fitting you replaced. On the other hand, it could merely be condensation between the shells. You state you are in Las Vegas and have been using heat at night. The outside humidity is probably very low but if it is cold enough to require heat then the temperature differential between the two shells will be significant. Every time you guys exhale you are releasing moisture into the air. Two people could easily put out a couple of quarts a day. If you are cooking inside on the propane cook-top, there would been even more.1 point
-
I can almost guarantee that you had the awning arm rotated the wrong way like Tom suggested. I did that once and scratched my head for five minutes trying to figure out why it wouldn't work before I realized what I'd done. It's just like you describe, that the foot is too long to make it past the retainer. It's probably one of those things that Oliver needs to add to their orientation, since I'm sure it's confused others as well. I managed to get mine out of the grooves on our first trip as well, and actually broke one of the little metal guide fins off the arm trying to get it out. But that too was my fault since it was pitch black and cold and I was rushing to get it in when the wind picked up suddenly. I suspect that, again like Tom said, I'd twisted the arm the wrong way and tried to jam it in. Fortunately, the broken guide fin doesn't seem to make any difference. By the way, after examining mine afterwards, I think if that ever happens again, you can unscrew the endplate on the awning and that will relieve the tension to let you slide the arm back out and get it re-situated. For what it's worth, after those first few learning experiences, I've had no problems and with a little practice they go up and come down without much thought or effort. I've found that they don't quite close up perfectly flush, which bugs me for aesthetic reasons, but I don't think it's a problem otherwise. I do feel like the orange tabs will eventually break, and I've been meaning to order a spare just in case. I don't know if the Fiammas are any better, but I don't think that Oliver had much of a choice at the time. Perhaps the Dometic awnings are better made, though I doubt it.1 point
-
Wow! It would be nice for Christmas, but it’s a little early. It’s a good thing your snowblower is tuned up and ready to blow. That same cold front is blowing through Florida at this time with heavy rain and tornado watches in effect. Good Luck! ☃️☃️☃️☃️1 point
-
Regarding your comment on chocks... “There are those that have and those that will”. Ways to keep from being one of those is. 1.) The CHOCKS sign is good. 2.) I flew for years using checklist. There is a good reason too; regardless of how many times you've done something, one day you’ll likely forget a critcal step. 3.) Take your time and pause between steps and think about what you are about to do. The times I’ve run in to trouble I was rushing. Usually due to setting up or hooking up in nasty weather. When the trailer is sloped downhill from the TV, keep the safety cables and emergency brake cable attached as you are raising the tongue off the ball. Once you know the chocks are holding you can remove the cables. Just remember to remove the cables before you move the TV. Suggest you do it as soon as you know the trailer is stable and before you leave the area of the tongue. - Randy1 point
-
When I got my first boat trailer (about age 15) I made the same mistake of not chocking the trailer wheels before unhitching. Nice hole in that garage door that my Dad sure wasn't happy about and I got to fix. Since then I've always placed a sign on the tongue that says "CHOCKS". Bill1 point












-
Recent Achievements
-