Leaderboard


Popular Content
Showing content with the highest reputation on 03/08/2020 in all areas
-
It is so cool to see a 12 year old thread revived. I would caution about going overboard by insulating everything that you can touch; consider what it will mean for future servicing, such as identifying and fixing a water leak, or removing an item for repair. I do really like the idea of adding stuff under the cabin access hatches, but since there is a great big return air opening for the furnace on the LEII model, I am doubtful it would actually quiet down anything under that area.,.. John Davies Spokane WA1 point
-
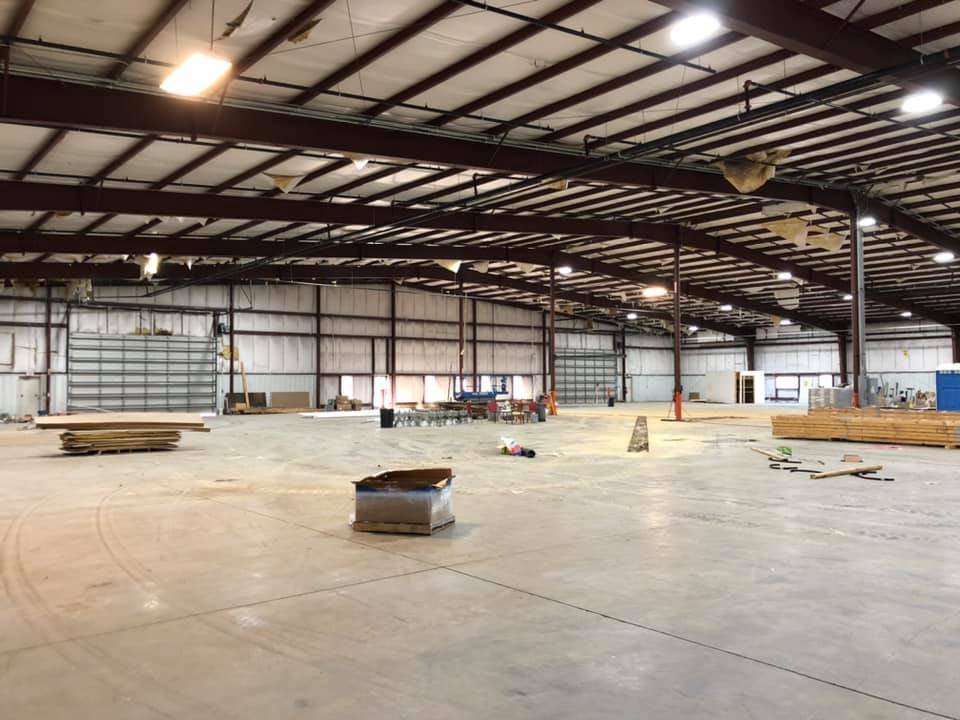
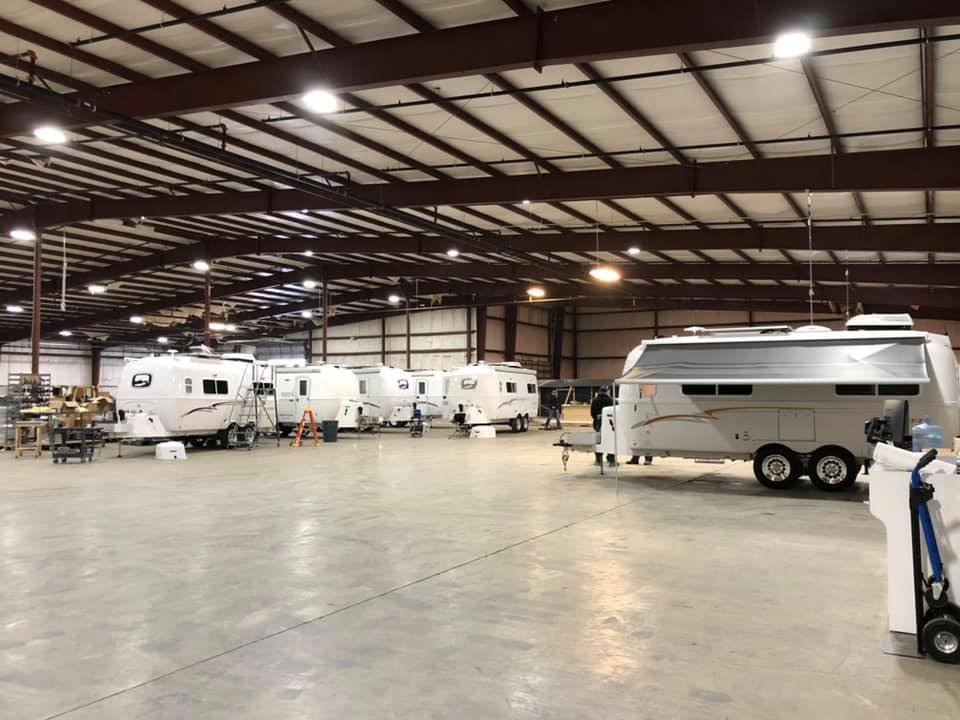
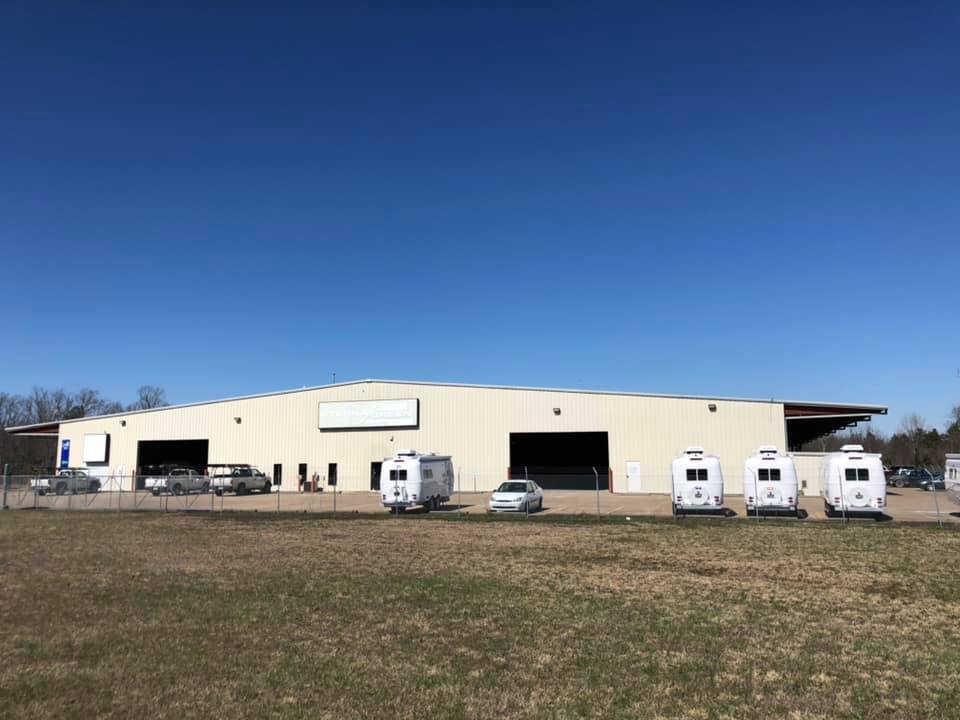
On February 11 during our previous visit to Oliver, Anita told us we would be taking delivery at the new sales office/service center in mid May. We are looking forward to delivery of Hull #634 and a hopefully a tour of the new facility. A few pics- with big wow factor!
 1 point
 -
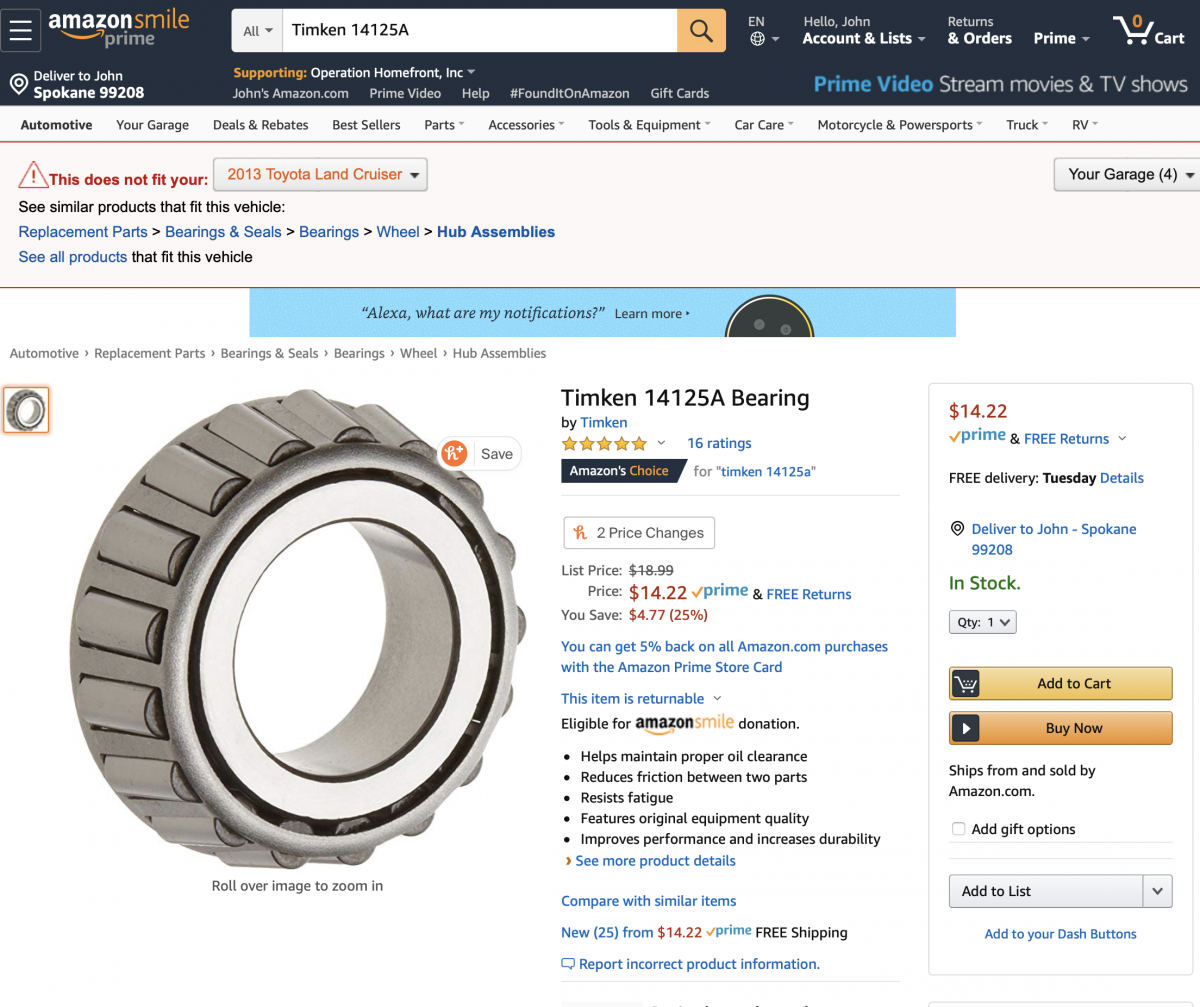
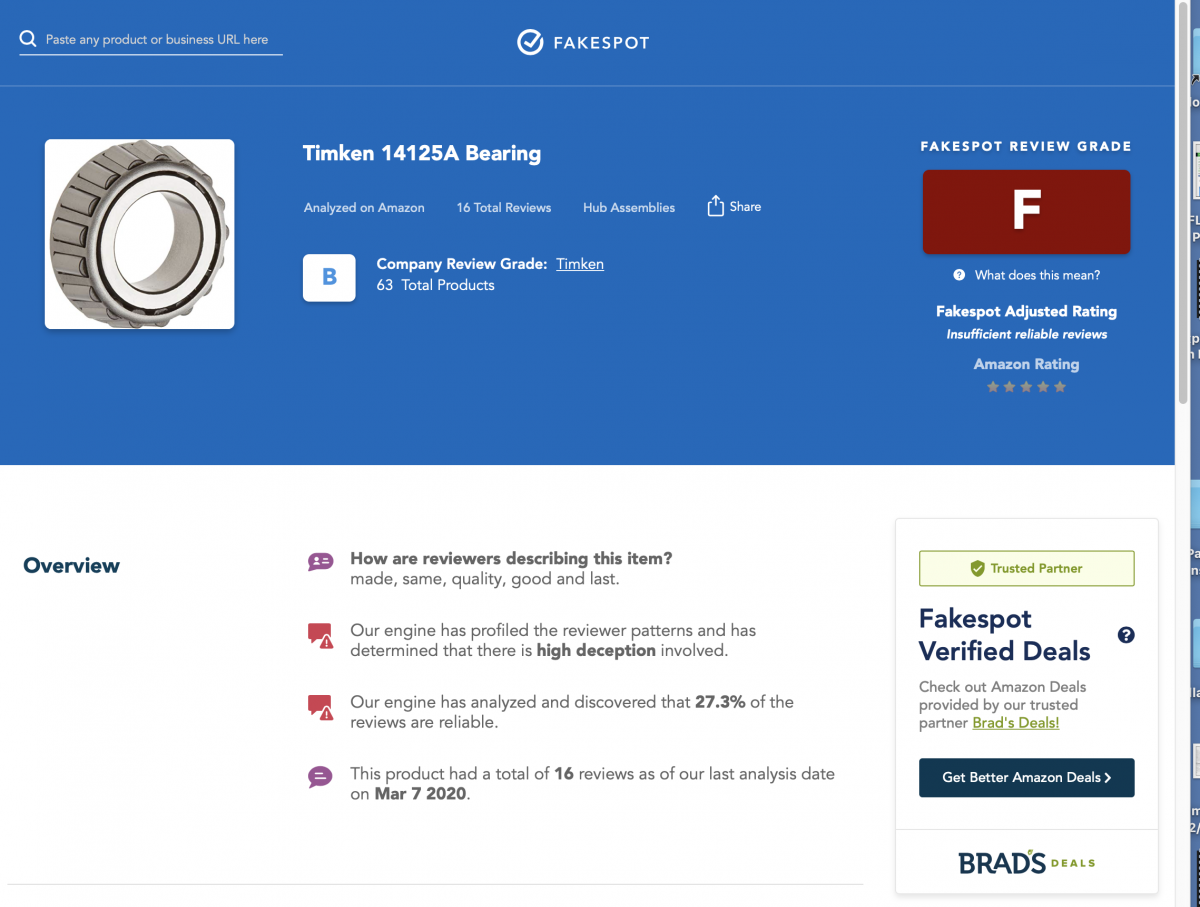
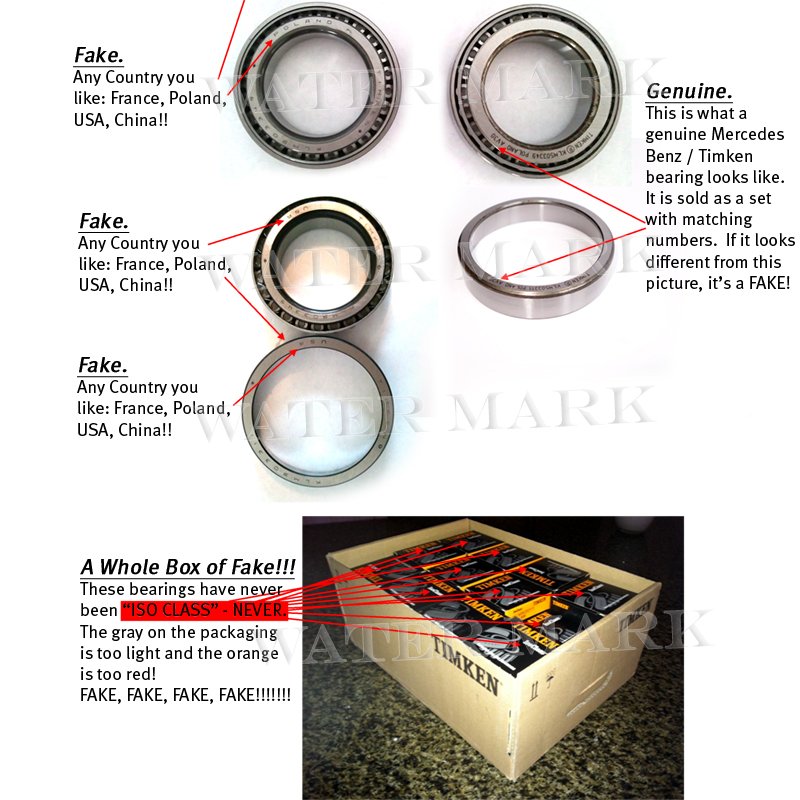
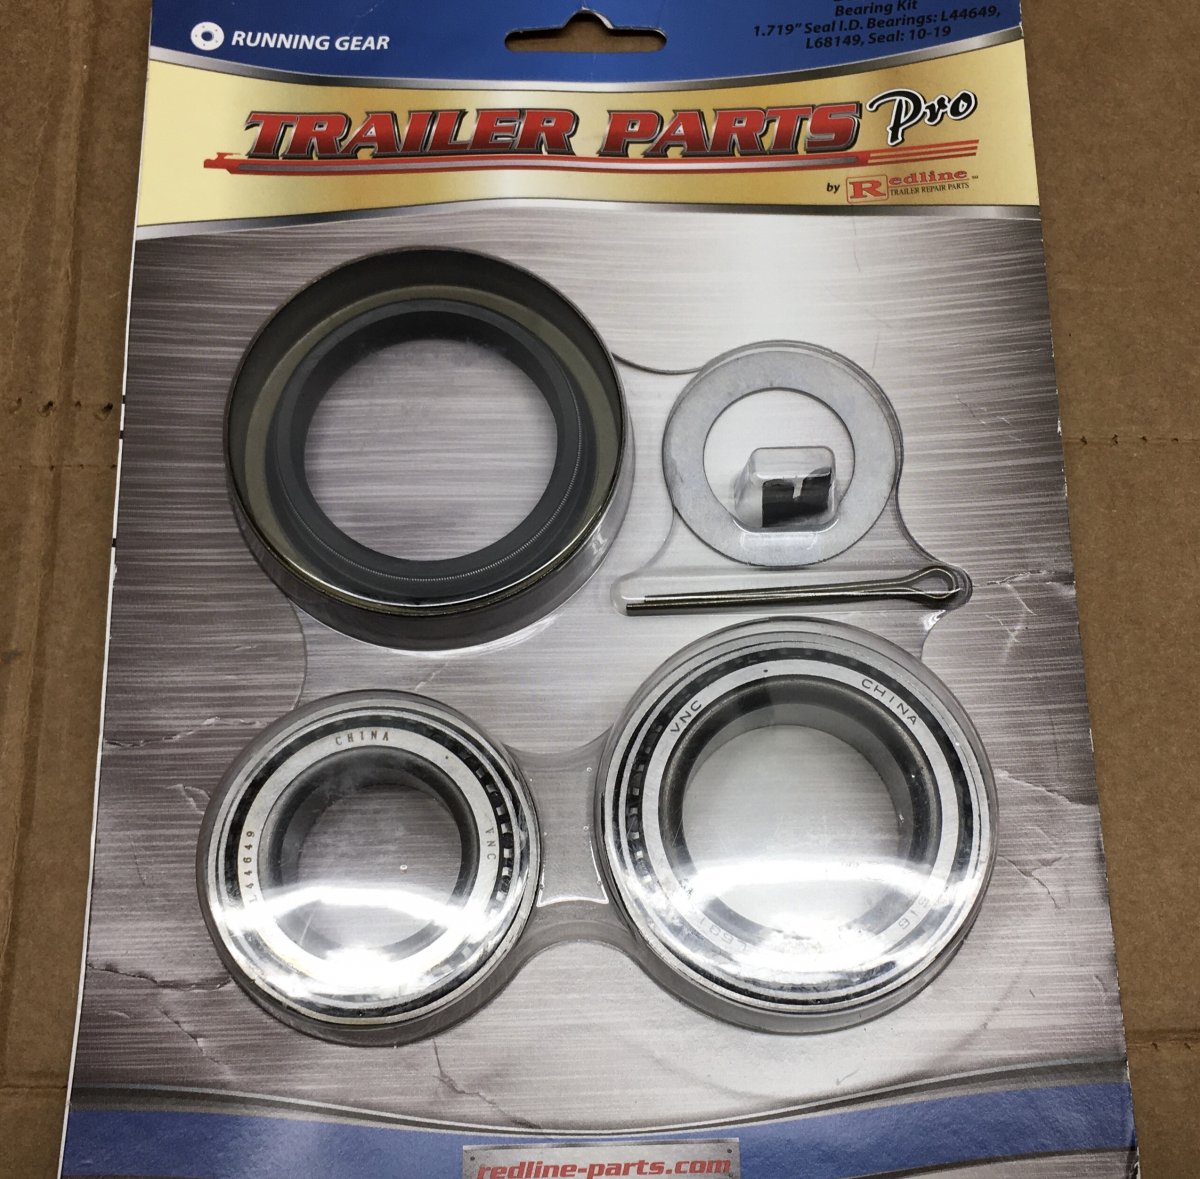
It is so very frustrating. I tried the bearing check app and it crashed n my IOS devices. This Amazon ad looks good - the seller is "Timken". So you run it by Fake Spot and get this: You click on the seller "Timken" and all you get is a bunch more bearings, nothing at all about the seller. Who is fake anyway, since the genuine bearings and races are not sold separately. I am 99% sure mine are the real deal, they look correct, with high tech label, and the inner wrapper over oiled parts (but mine do NOT have the QR code - so maybe they are Old Stock?) : I paid $145 for the eight bearing sets, locally at a professional supply house (part of the BDI network). The seals cannot be identified by inspection - they say "National" on the outside, but they are definitely high quality and have the orange sealer material where they go into the race cavity. See interesting video: "Follow the Chinese authorities in a raid against a counterfeit bearing workshop. In this video you can see how low cost bearings are branded to look like high quality premium bearings. Even small scale operations use using sophisticated equipment to mark the products to look like original products. The poor working conditions of the under-age workers are also displayed." Raid on Chinese Counterfeit Bearing Manufacturer I found a dozen or more links about the problem, this is typical: https://rogtecmagazine.com/timken-counterfeit-products-are-a-trap-for-end-users/ So I guess what we should be asking, is "Should I worry about cheap bearings in my Ollie?" My answer is, don't lose sleep over it, but carry a spare set like this and a pound of bearing grease. You may not have the skill or tools to install them out in the boonies, but most likely somebody around you can help. Monitor the hub temperature with a temp gun or a careful finger; a distressed bearing will run hot. This is in my kit, and I wouldn't hesitate to install it to complete a long trip, but I would not INTENTIONALLY replace all my bearings with this kind. If you go far out into the boonies, or way up into Alaska, or are super anal like me, I think you will sleep better knowing you have genuine high quality parts in your hubs. Nobody wants to deal with a blown or melted bearing beside the road... John Davies Spokane WA
1 point
-
Like a lot of people a year or so into ownership, I've been working lately on reducing the amount of stuff I carry - getting rid of things we never use and also finding strategies of making what we do carry lighter and more compact. I've also been working on a dedicated toolkit that would just stay in the truck permanently, so I don't have to worry about packing tools up and inevitably forgetting the one tool I need that trip. So what I've been after is, 1) a complete toolkit that has everything I might reasonably need for roadside or campsite repairs; 2) compact enough that it can be stored in the cab of the truck permanently, without being in the way; 3) can be stored in a way that still gives easy access when traveling; i.e., I don't have to completely unpack the truck to get to them; and 4) contains quality tools that can be relied upon. Certainly the easier solution is to ignore requirement #2 and just put a toolbox of some sort in the bed of the truck. I think that's perfectly fine; but personally, I'd rather keep them in the cab to protect them from moisture, trail dust, theft, and getting all scuffed up from being jostled around. Plus by keeping everything compact, I'm also forcing myself to keep the weight down. So in the following posts, I'm going to try to list all the tools I've placed in my kit, the reasons for choosing what I did, and then some ideas on how to best store them in your vehicle. The tools I've included are, as I said, what I think constitute a "reasonable" tool kit for repairs while traveling. "Reasonable", of course, is subjective. If you're the type who is likely to call Good Sam to change a flat tire (nothing wrong with that), then your "reasonable" might be limited to a few screwdrivers and a pair of pliers. On the other end of the spectrum, there are guys over on Expedition Portal who wouldn't go to the grocery store without a welder in their Jeep. And nothing wrong with that, either - to each his own. With that in mind, I'd like to think that my following posts are just a starting point for conversation. I'd love to know what others think about these choices - surely I've forgotten something, or one of you knows some better options or alternatives. With some additional voices, hopefully this thread can provide some guidance for new owners or others like me who are looking to pare down what they've been carrying. Fair warning, I do like nice tools, and have a thing for German tools in particular, so some of the stuff listed below is pricey. But I don't think that there's anything here for which you couldn't find a decently priced alternative, and arguably a better value. Or, you might be the guy who doesn't accept anything shy of Snap-On. Either way, buying all of these at once will put a good dent in your checkbook, even if you're shopping at Harbor Freight. So keep in mind that this isn't intended to be a "must have" list. Like I said, you probably don't "need" any of this. All you really need, in most situations, is a cell phone. But if you do decide to put together a toolkit of any size from scratch, I suggest you make an Amazon list and then set price alerts for each tool using 3 Camels (www.camelcamelcamel.com). That way you can buy at the lowest price and spread your purchases out over several months to make the cost seem more palatable. (I've also found after explaining that strategy to my wife, that when the packages arrive, she asks how much we saved vs complaining that I've bought yet another tool.). Actually, she does both, but I think there's less complaining than before.1 point
-
If you bought them from Amazon, you can find out the details on the purchase as well as the supplier. Log onto Amazon, and click the Returns & Orders button at the upper right. There is a Search All Orders field, where you could enter Timken or Ball Bearings. It will return your order details, along with a link to the exact product you ordered. Amazon never forgets....1 point
-
Hi Bob. We are at Collier Seminole Park in Naples. A guy from the Mooshead region stopped by and was chatting with me. He volunteers here. He mentioned another Oliver that was in this park last year from Maine it sure sounded like he was describing you. Hope all is well. Granite Staters, we look forward to running into you. We lived in Exeter for 20 years and 2 years ago moved back to Maine. We liked Exeter a ton.1 point
-
? It looks like any other Ollie with no rack, other than the Stone Stomper support I made.... what are you asking, specifically? John Davies Spokane WA1 point
-
I don't see the Oliver listed on the ordering website. Which model did you purchase ? I assume you used three? Finally, best source to procure? Thanks1 point
-
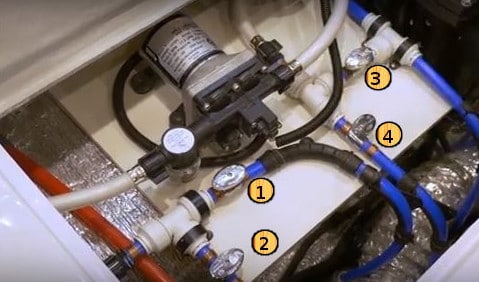
The attached three images shows a plumbing flow diagram rather than an approximate physical layout diagram. The images are for later Legacy II models. I print out all three and lay them out side by side when trying to follow water flow. Please advise of any errors or omissions.
1 point
-
You were extremely lucky that it was a side hit. A direct hit, especially in a car size vehicle, usually takes out their legs and the body rolls up the hood. Their body is usually 5 to 7 feet at the shoulder and can weigh from 900 to over 1000 pounds. From there it takes the top of the vehicle off down to the steering wheel. We have seen where it ends up on the roof of the camper. The results are not close to pretty. In the fall, especially, the moose will move to the roads for multiple reasons. To get way from the bugs, the heat of the roads, or able to cover larger areas in the rut. With no natural predators they will stop and stare at a vehicle dating it to come closer. Extremely lucky, and we are so glad all are OK...1 point
-
Will do for sure. We generally camp right on a river or lake and have always pumped water, so water is easy to come by. Its the desert hunting trips and what not where the water is more sulfur than water where it would be nice to have an extra 18 gallons for a couple weeks. Loading up the pickup is definitely an option but since the black tank is there, unused and out of the way I figure I might as well try to make it work.1 point
-
Hi everyone! First post...I did a quick peek and didn't see this as a topic as of late... Has anyone had the exterior of their Oliver painted? No, not the swooshy graphics (hate those!): I mean painted. While we've not bought one yet, we were impressed at a recent visit with what we saw. But, I don't really care for the all-white exterior; I may want the lower half done in a different color. Dub Box has some really fun colors but those are toooo small, have no bathrooms, and seem to be geared towards weekending with the dudes. My husband and I like amenities at our age. We like what Oliver offers, except the all-white exterior (aside from the swooshes). I'm not looking for a name of a company per se--I have an old buddy who works at a place in town that does auto body/paints fiberglass bodies, so I have a lead--but let me know what if any experience you or someone you know has had with this. Company names welcome, but not necessary. Thanks in advance!1 point
-
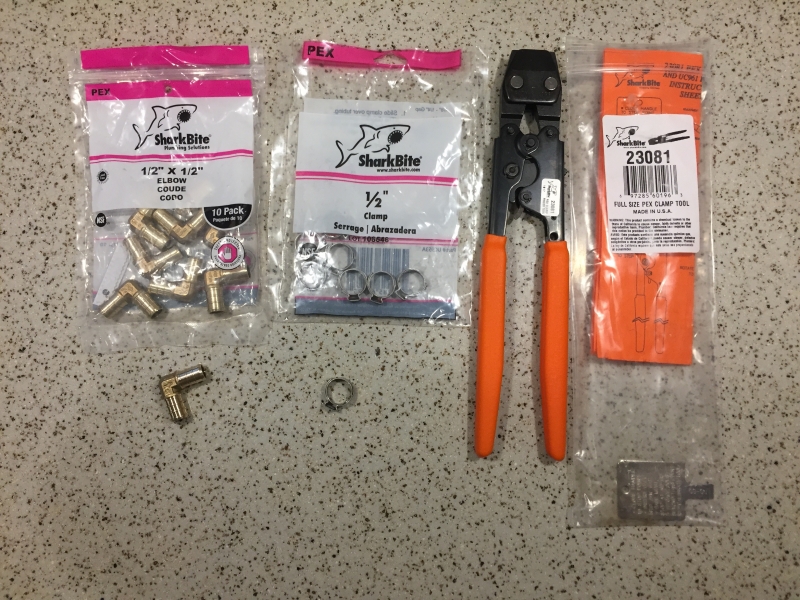
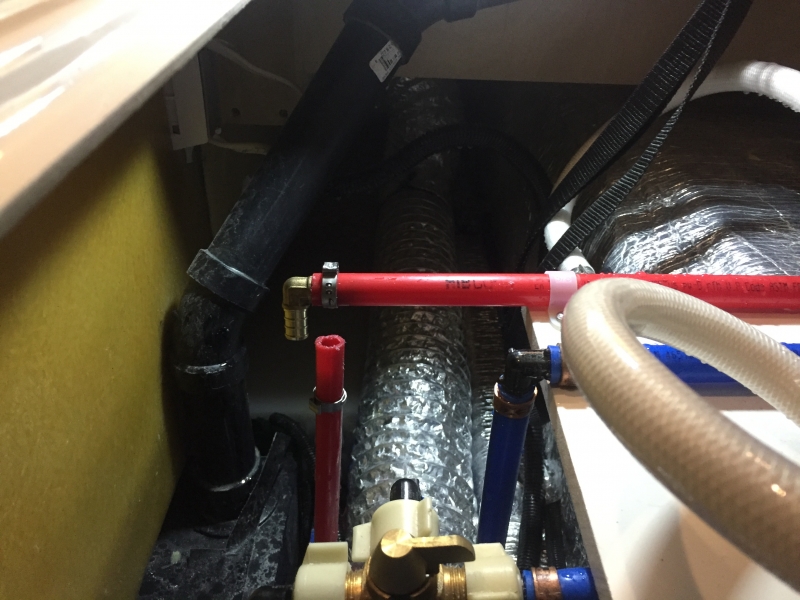
We had a major plumbing problem on our trip to Olympic National Park. We were setting up camp in the Hoh Rainforest campground, where we were boondocking without a water supply. I turned on the water pump and I heard a gushing sound. I checked the faucets, but they were off. I turned off the water pump and the sound went away. Not good! I looked in the curb side under bed compartment where the water pump lives. When I turned the water pump on I could see water gushing out of a pipe. One of the plastic elbows had broken. I have tried to assemble a good tool kit for the Oliver; I even have spares for all of the fuses. I had seen this post from Mountainborn about PEX repair, and getting these PEX repair parts was on my ToDo list. In retrospect, I think I did not get the parts and tools before this trip because I needed to do some research to figure out what parts and tools I needed to get. I remembered this post while in the campground, and I pulled it up on my phone and read about Sharkbite and PEX. I then drove one hour (each way) from the campground to Forks, WA. Fortunately there are two hardware stores in Forks (one was useless in regards to Sharkbite and PEX), and both were open late in the day. The second hardware store also had a very knowledgeable salesperson. John Davies may be correct that PEX parts and crimp pliers are not that expensive, but the hardware store did not have them. But they did have a Sharkbite crimping tool, but ONLY ONE, for the outrageous price of $68.99. I also bought a bag of Sharkbite clamps ($5.79) and a bag of brass 90° elbows ($16.99). Fortunately, I have a hacksaw in my tool kit. I used the saw to cut off the brass PEX crimps, inserted the brass elbows, and crimped the Sharkbite clamps. Fortunately there was enough play in the existing pipes to make the connection. I spent $99.48 on the crimping tool, the clamps, and the brass elbows, but the camping trip was saved!! When I got home, I looked at what I could have saved if I had bought them in advance. I suggest you buy a crimping tool with clamps ($29.88) and some brass elbows ($7.65) from Amazon. (Please correct me if I have the wrong items listed!) I would have saved money if I had bought these items from Amazon in advance; more importantly I would have saved time. The job itself took five minutes, but the time spent driving and researching made it a three hour job. Also, if you don't have one, get a hacksaw for your tool kit. BTW, my brother in law, who is much more mechanically experienced than I am, was surprised that Oliver uses plastic elbows instead of brass ones.
1 point


-
Recent Achievements
-


")


")


