Leaderboard


Popular Content
Showing content with the highest reputation on 07/07/2024 in Posts
-
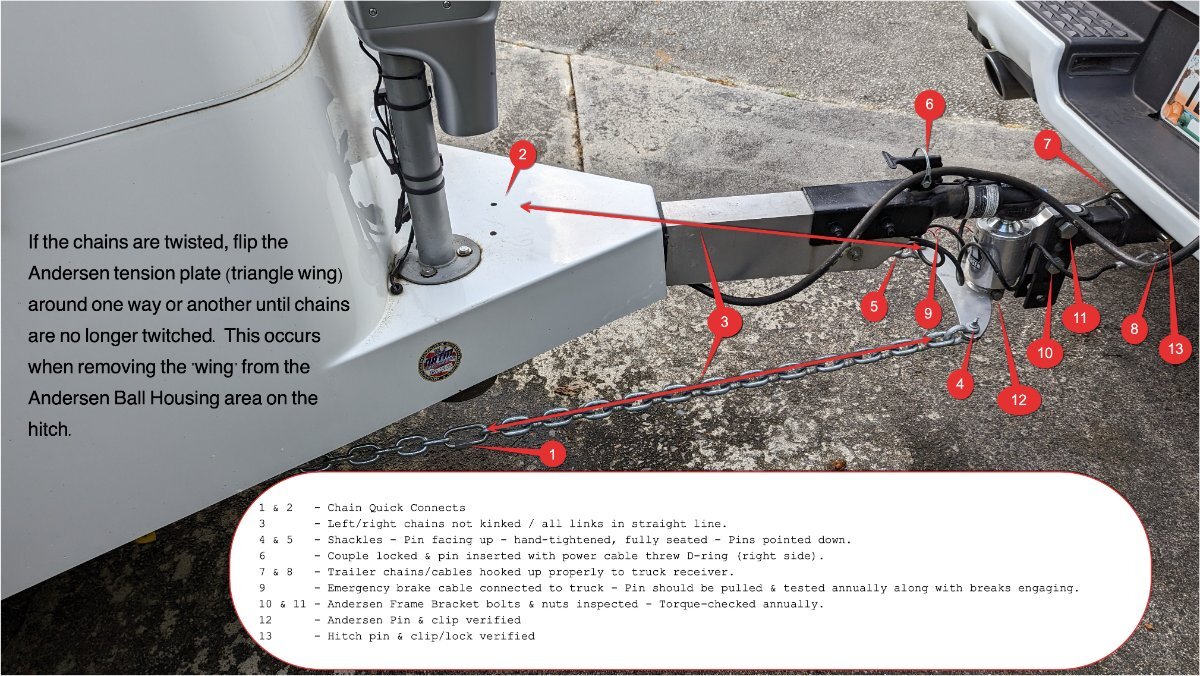
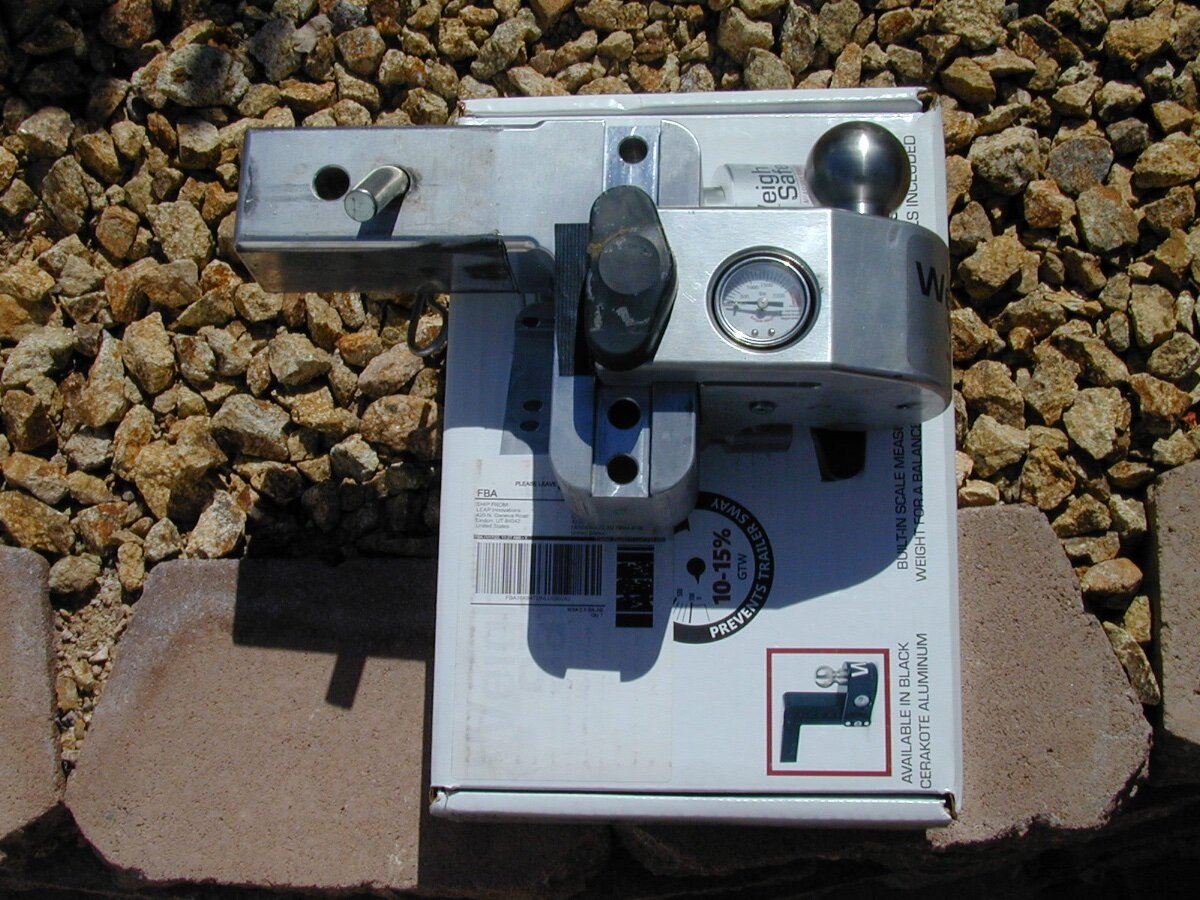
I replied to someone on Facebook, I figure I would post here too for coverage. I use 13 points of interest to check before rolling out on a trip and anytime before I move the camper. Even if parked along in a shopping area. Just to ensure someone is not "mucking" with stuff. I don't always get "13", so I'll start again! LOL I've seen both Oliver and non-Oliver folks with twisted chains using Andersens. Very easy to correct by "flipping the wing" one direction or another.
 5 points
 -
The fan and switch are the only active components in that circuit, so I would test their functionality with new wire. When I replaced my non working fan, I found the 3500 RPM operating speed a little noisy so I added a 12v PWM speed controller to slow it down. That's a possible hidden feature that test wiring would eliminate. I do leave my fan switch on 365 and let the thermostat control the fan operation. I guess that qualifies as AUTO mode. Mossey4 points
-
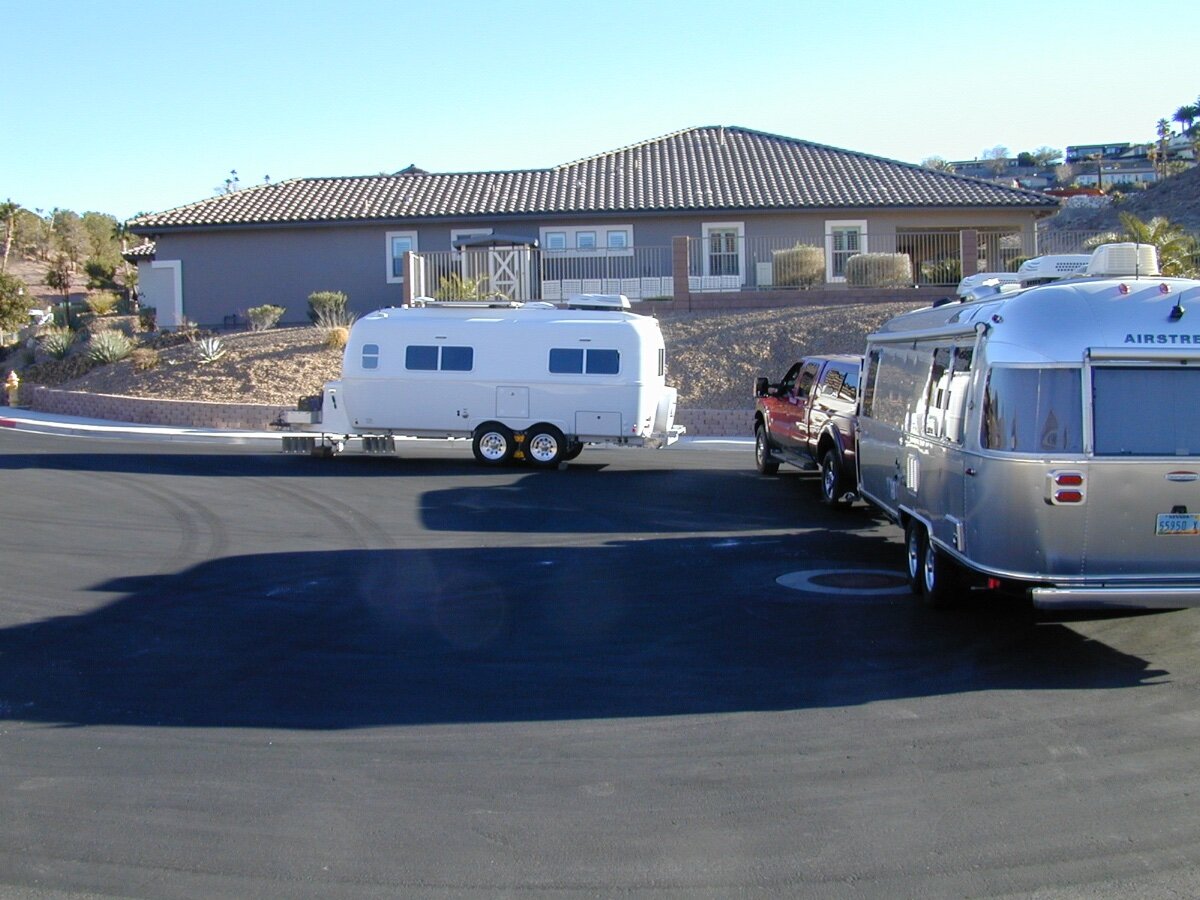
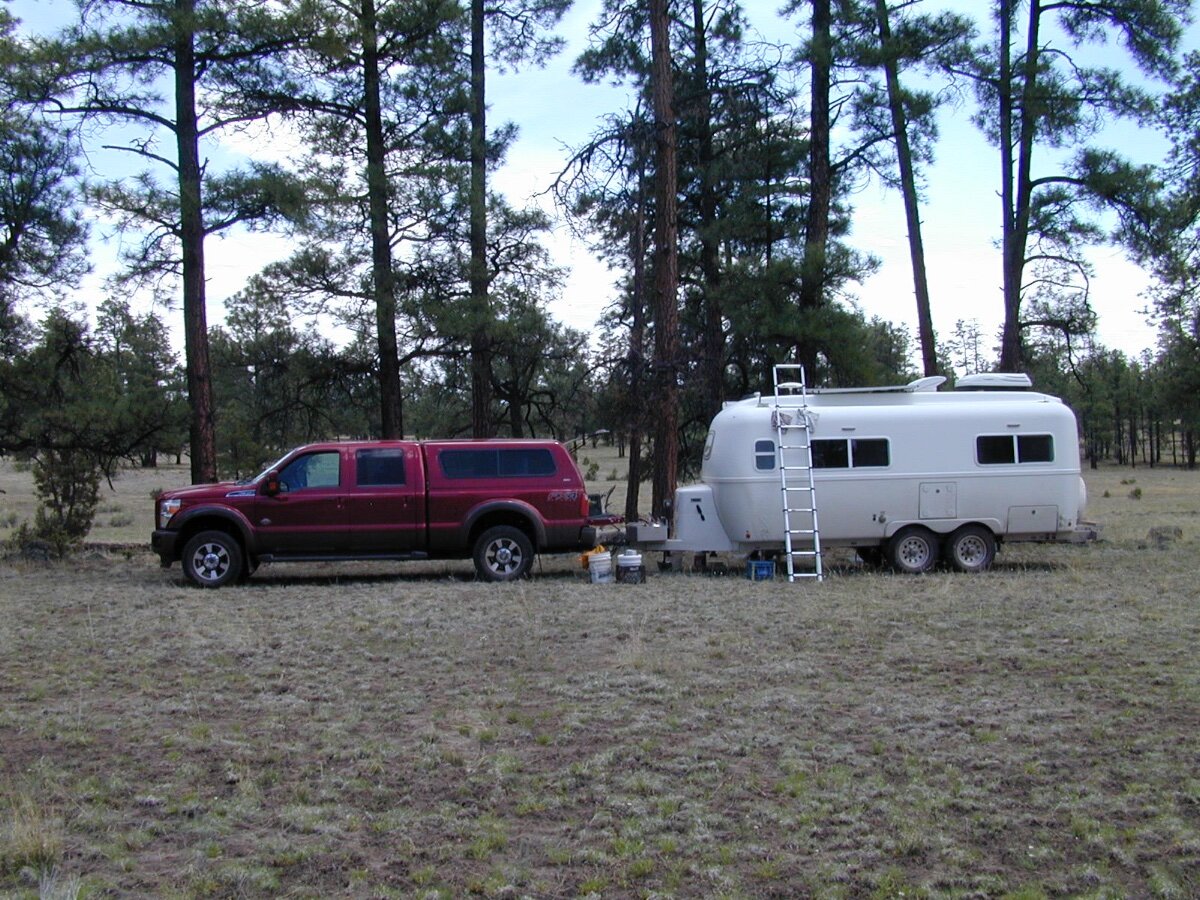
Tent camped since I was 16 with a 1956 VW to collect fossil vertebrates in the Badlands of Nebraska in 1966. Sometimes three of us using an Army pup tent or sleeping under the stars for days or a week. Sun sets and the Sun rises. No clock... if you can see... time to get moving. Walk and discover fossils washing out after the Rain washes them out. Ahhh... the Hunting Days are great memories... Gone. Married we tent camped and bought a 23 foot Airstream in 2006 off the Dealer's Lot. They attached the trailer and waved... The adventure began. A 25 foot and then a 27 foot and then... kept the 2019 27 foot Airstream and the 2019 Oliver Elite II... was a chance sighting at a Boondocking site in Colorado. A go anywhere travel trailer, four season, double axle and built well. Found one in Las Vegas, Nevada in February 2022. Both travel trailers had ALL of the Propane, Solar, Batteries and plug in options. Most buyers are RV Park travelers and do not need what the 2019's offered. Generators and then Plug In. Times change and so do the Buyer's who want different travel trailers. We have been everywhere. This spring we went to our favorite New Mexico 'Off the Grid Boondocking National Forests and BLM'...and we have been going since 2006 trailer camping and before in a tent. Then came home and... been there, done it all, now what? We saw all of the western National Parks tent camping. Before the... crowds. You drive up, pay a fee and go anywhere. Not any longer... times change. ...and we changed. Not because of our current choices in 2019 Airstream and 2019 Oliver Elite II... but we been there, once, twice, twenty... times. We are western Rocky Mountain rock, fossil, mineral and hiking campers. In our 70's and sat down, sell which, keep one, sell both... discussions. Pristine, clean and shopped out with hardware (Airstreams three of them... you know where to begin)... and decided it is time to... reconsider why we need one or both travel trailers. Been there. Done it. Saw it. Seen everything and even now some areas are closed to camping, Ranches have gone to Corporate Ranches and NO Visitors Allowed on the Properties. The Ranchers we knew died or the kids sold out as it is hard work. We would even volunteer time to 'pay our way' to collect fossils in the Badlands of Nebraska. All gone today... and gone commercial leasing. Not the trailers fault... there is a time when change is coming. Done it All. Been there Often. I pull out a DeLorme Atlas... and on some pages the GPS locations and comments fill the blank borders. Some with 20 campsites with comments. Even the guides for Wagon Trains leaving Independence, Missouri in the 19th Century... once the Union Pacific laid track... it was over. The double Axle Oliver Elite II can go anywhere. Same clearance as our 27 foot Airstream, 3 inch lift and upgraded to 16 inch Michelin tires. All standard on the Oliver Elite II and had the Airstream add two Solar Panels and both are perfect for OTG camping... and built to go anywhere. The Oliver is the Go Anywhere Travel Trailer. The Airstreams took us time to discover the weak points... and when purchasing a new Airstream... tweaked it to be Solid... as the Oliver Elites are...from the Factory. Time to move on an there are lots of Airstreams for sale... most we would not want at any price... but Olivers are scarce and few are familiar with them. Some travel to travel. We travel to walk, hike, hunt and enjoy the solitude outside the City. Stepping out of our Oliver is ahhhhhh fully nice. We wil always remember fondly. The Oliver hunt. Owning an Oliver. ...and time to sit back and recall we did it ALL.. and content.
3 points
-
Same here, Mike.... love the "auto" mode on just about anything - so long as it works correctly. HA!2 points
-
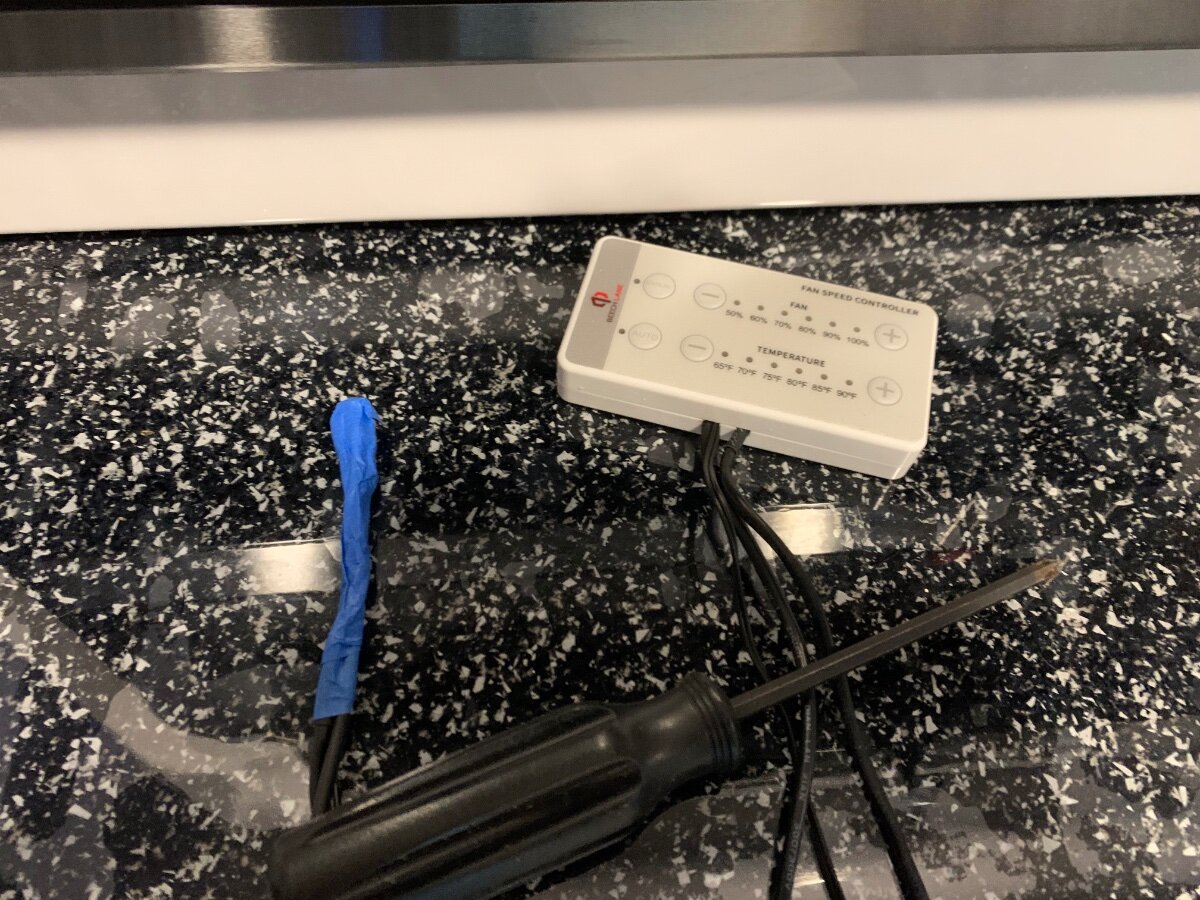
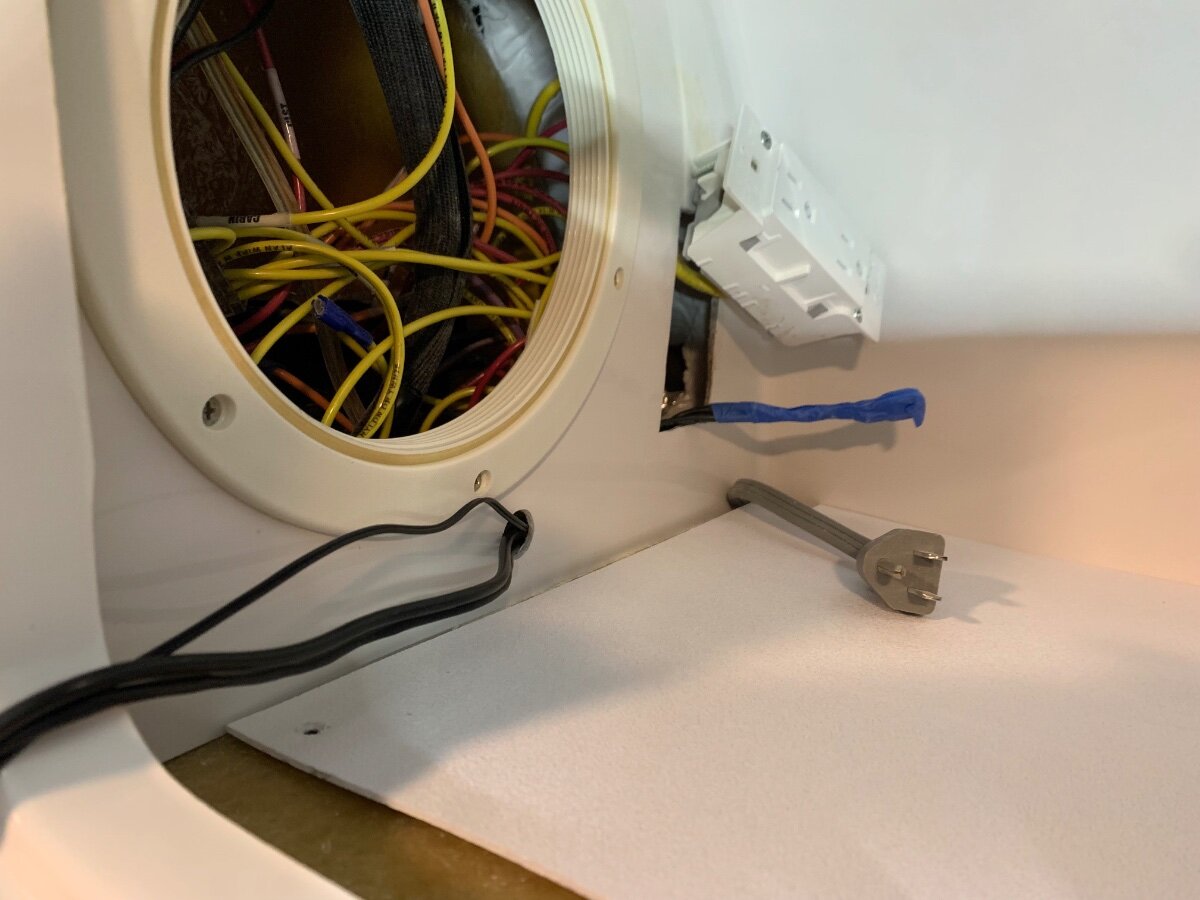
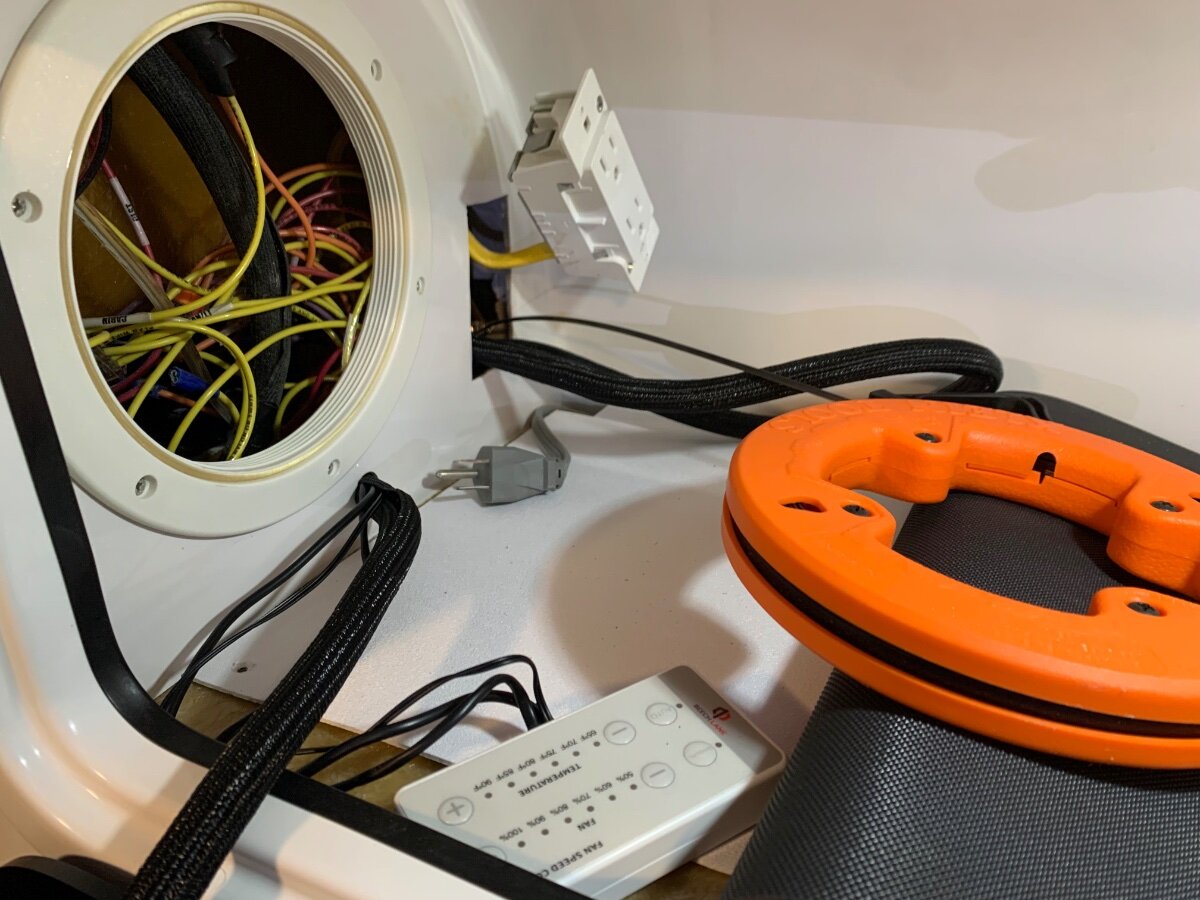
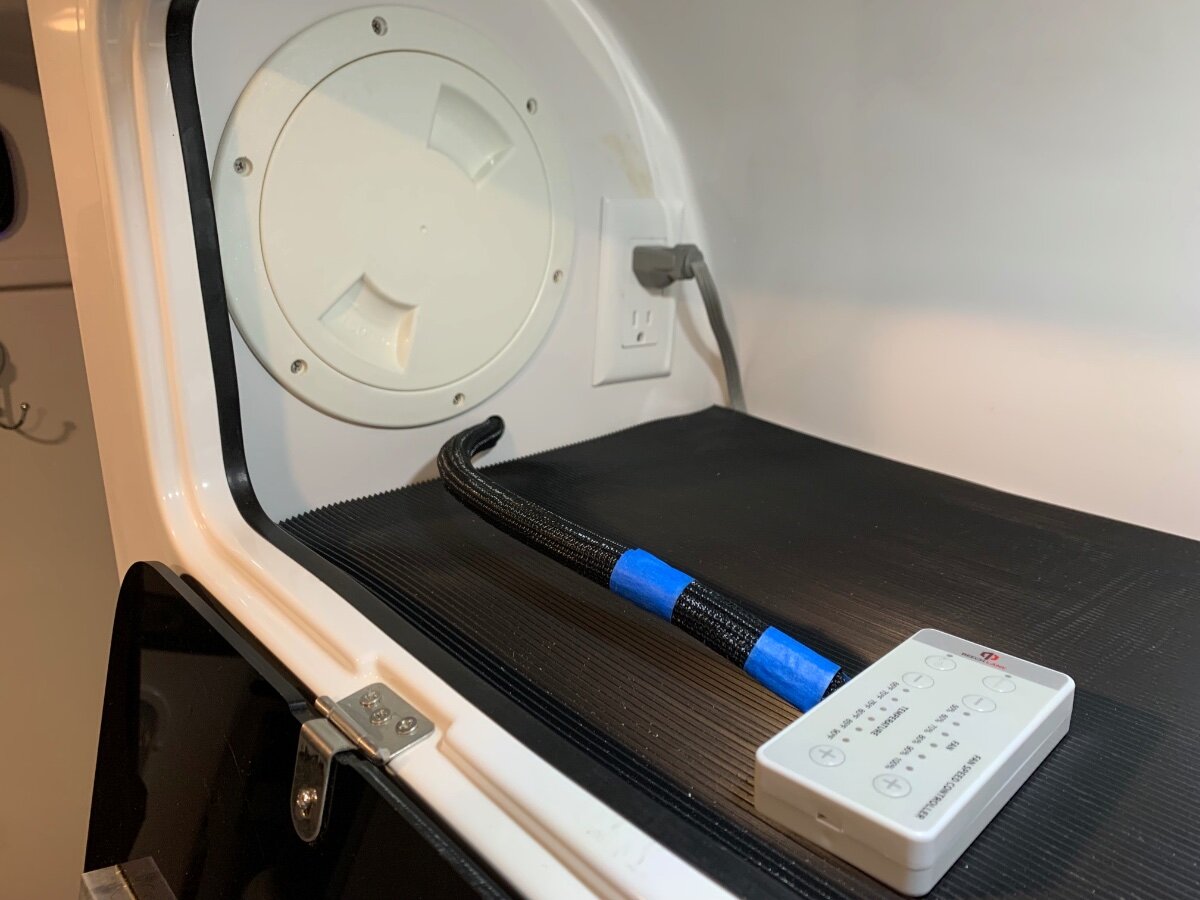
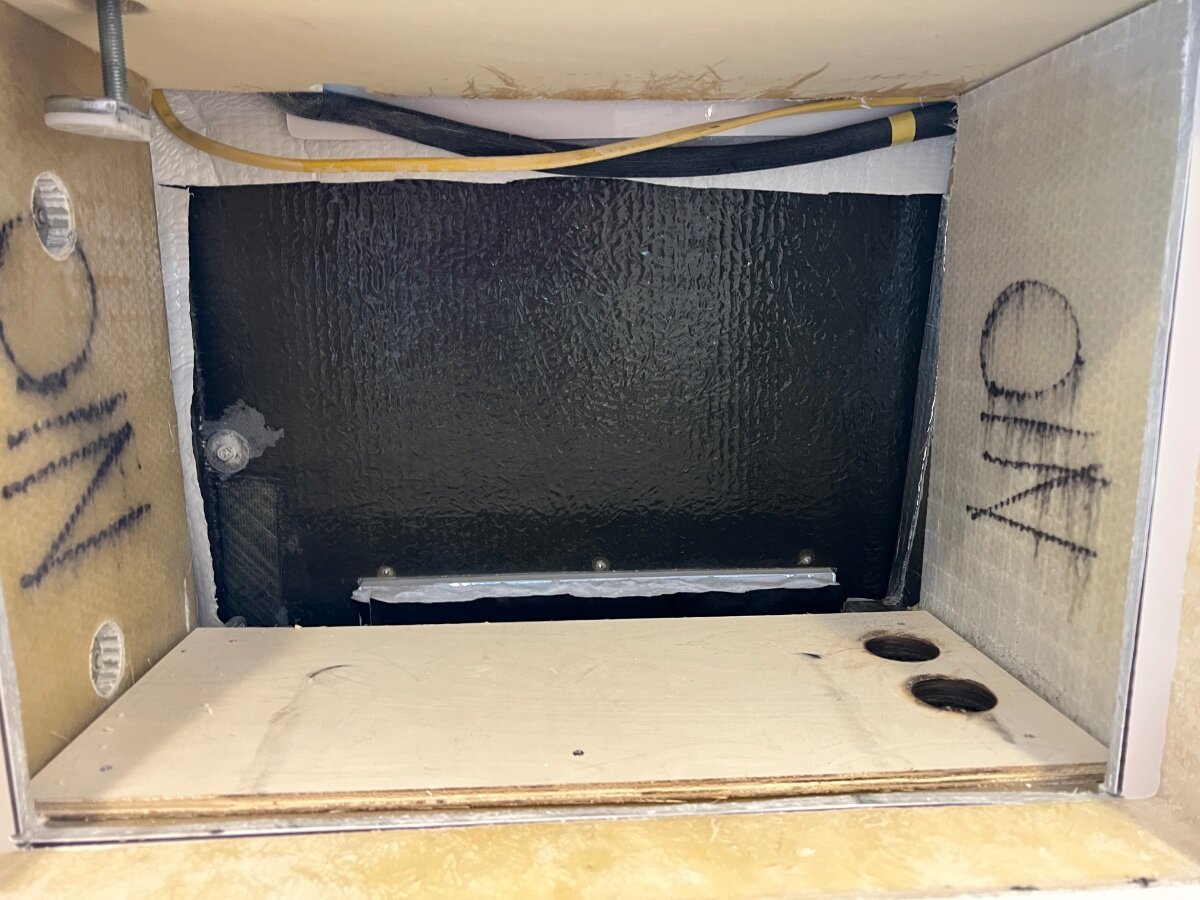
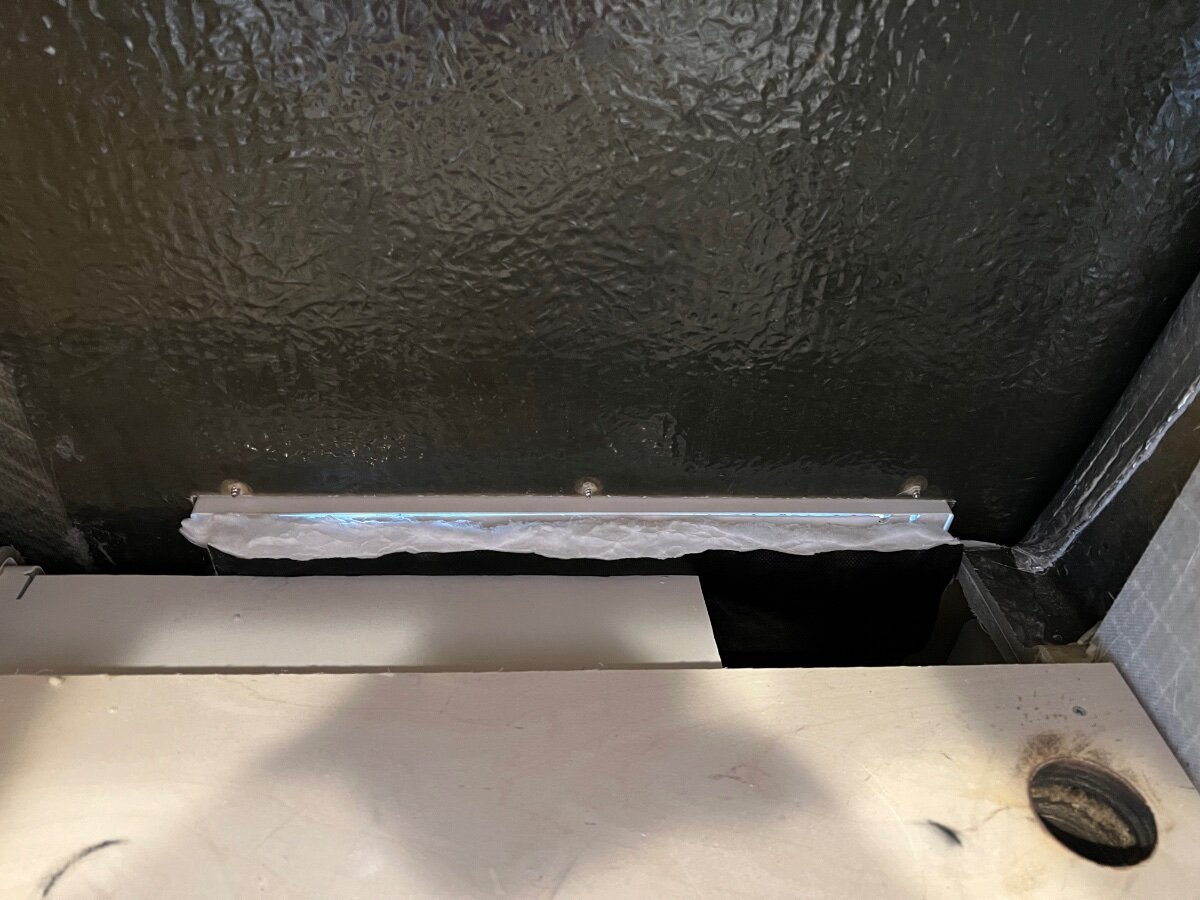
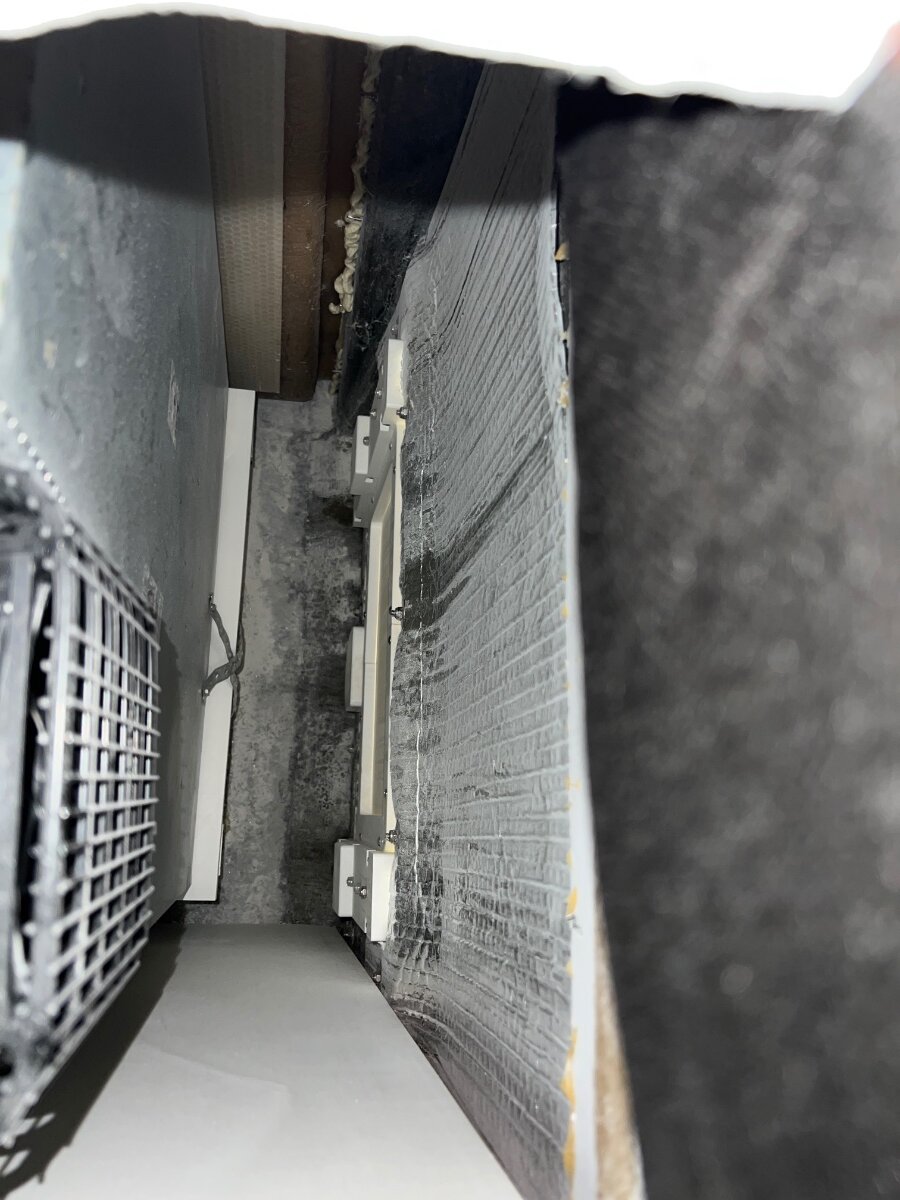
I recently installed the Beech Lane dual fans and was able to run wires from the interior cabinet, above the microwave/Norcold, down and behind both units for the fan control panel/harness and power connections in the upper and lower exterior vent/cover areas, respectively. Access for fishing the wires required folding back the cabinet’s protective mat liner, removing the round access port cover and detaching the AC outlet box (after turning power off at the breaker) that the microwave plugs into, as well as drilling a hole (see pics). Additionally, I had to remove the foil tape and angled aluminum plate that occurs behind the upper exterior vent/cover to enable the wire fishing process; specifically, the fiberglass divide between the two units inhibits passage wherein a visual and physical interaction may be necessary. Regarding your wall switch, if you could get 12V power of appropriate gauge wire to it, then power wires would not have to be fished down to the lower reaches of the fridge for connection. Steps taken in prep to fish wires. There was a passageway found inside the outlet cutout to the lower right, other side of the interior cabinet wall from the microwave power cord, leading to the upper exterior vent/cover area Control panel wires prepped for fishing. Wire loom installed during stages of fish process. Routing completed to upper exterior vent/cover area. Interior cabinet buttoned up! Quick connects used at 12V power connections.
2 points
-
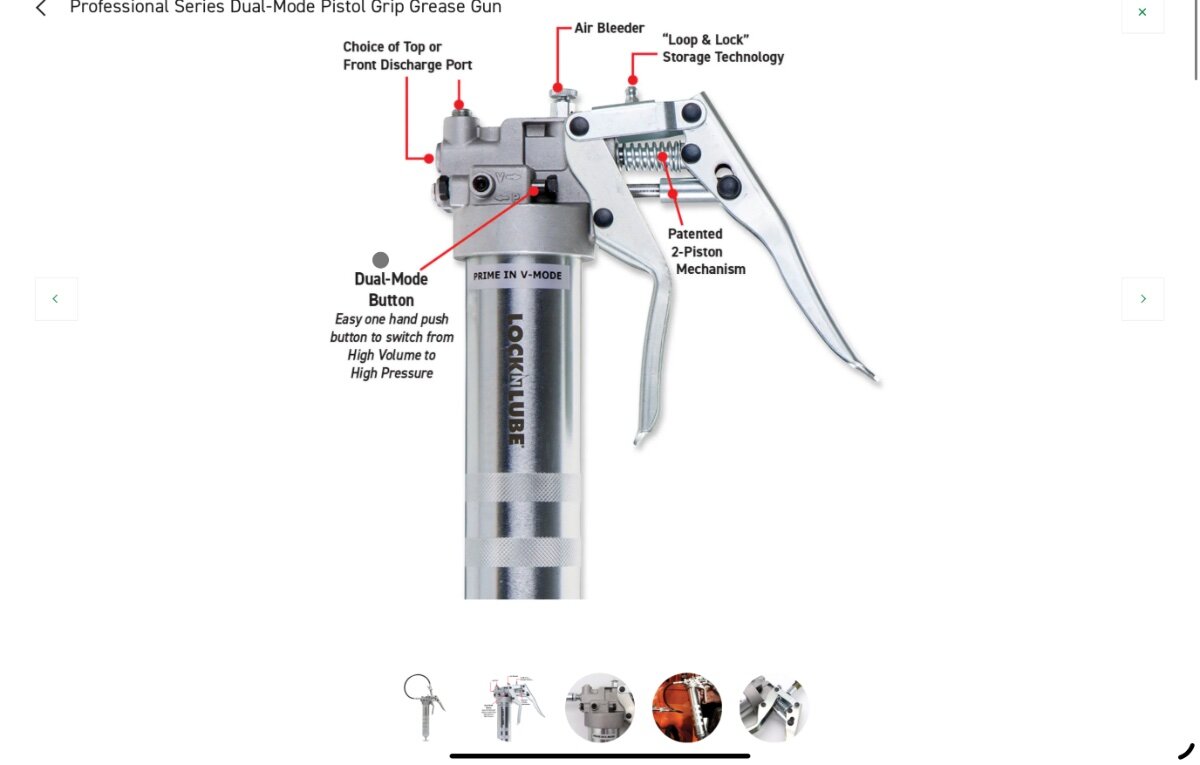
Read lots of good information and experience above. I have never used this but I have thought about it many times with a plugged Zerk. https://locknlube.com/products/grease-buster?variant=32921003327572 This grease gun with high volume vs high pressure mode works well too https://locknlube.com/collections/grease-guns/products/professional-series-dual-mode-pistol-grip-grease-gun?variant=40111323349076 Best, Mike
2 points
-
@DunnYet We also have the isotherm fridge in our 2023 LE 2, and have had problems with interior temps running warmer than we like for food safety (upper 40s). What I found out is that we have to defrost our fridge every week to two week. After defrosting our temps will even out within the fridge compartment , Then as it starts to build frost on the freezer coil our temps will remain cooler on the upper shelf (38) and but start to rise to almost 10 degrees warmer in the food tray at the bottom (45-47). This is with the thermostat set on 4 to 5, the plastic tray below the freezer removed, and we do not currently have an interior fan within the fridge. So, hopefully this help a little.2 points
-
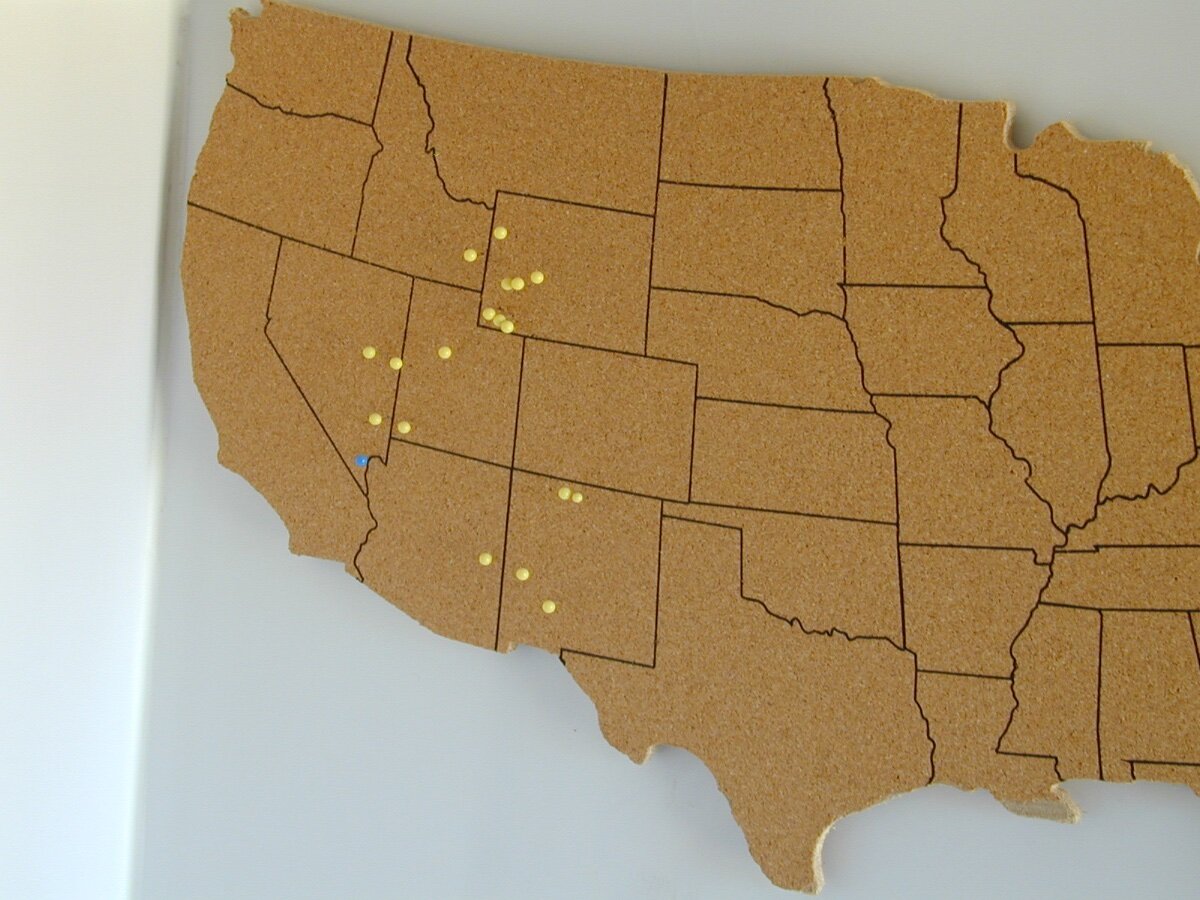
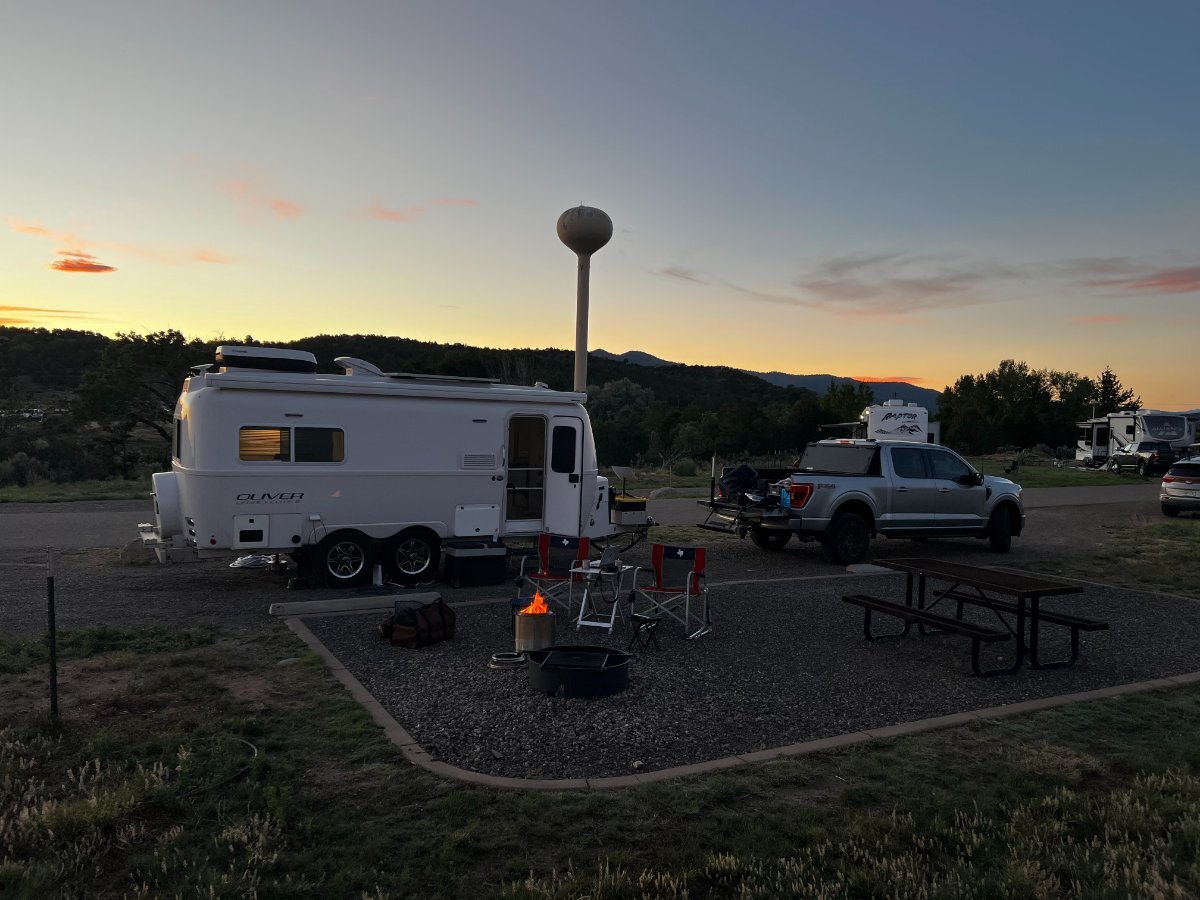
@jd1923 the funny thing is that the only time I have to think about how Reset 2.0 works is when we are camping in it. 🙂 I end up with a running list of "mod this mod that" and "am I doing this right or just expecting something that is not the predicted result." Our loop back to Texas gives us the more Colorado nights - then over to Kansas, Olkahoma, and back into Texas. Enjoying the solo stove nights while we can. But the end result is two more filled in spots on our US Map. 😀
2 points
-
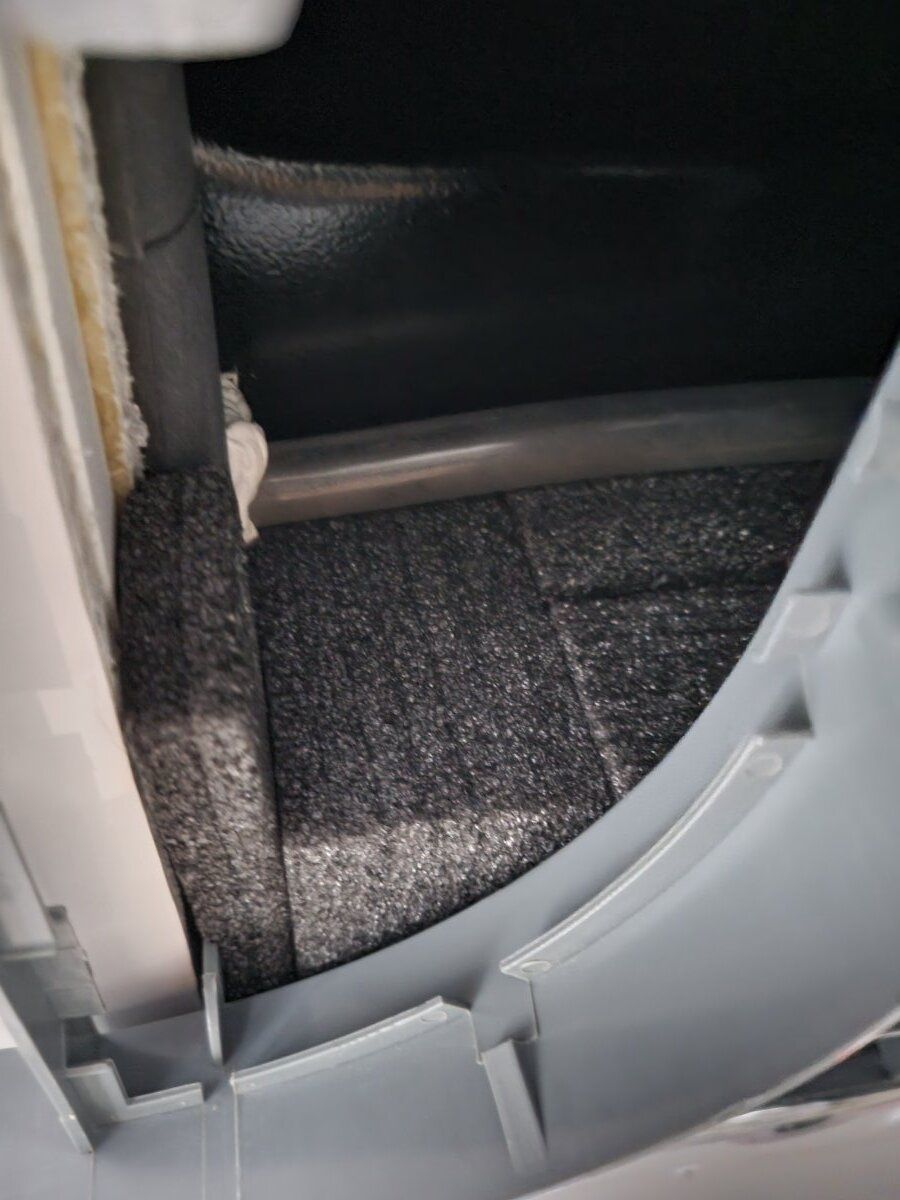
This is my next step, adding 3M Thinsulate insulation to the inside of the bottom outside hull behind the refrigerator as well the microwave. I have already removed the microwave but haven’t figured out yet how to remove the Isotherm refrigerator. This is what is looks like behind the microwave and Isotherm.
2 points
-
Update - We have been in Southern Colorado for the last several days mooch docking with a cousin who has a cabin northeast of Durango. Daytime temps in the high 70's, overnights in the mid 40's. The isotherm attained the food safe range (between 33 and 40 F) the first night we were there and stayed there the whole time we were on 30-amp shore power. I don't want to assume design flaw (as in "Refrigerator will only keep things cold when it's cold outside.") but at first glance it appears that we were just dealing with the fact that the compressor fridge could not keep up with the high temps of Texas and New Mexico. However, possibly a combination of insulation on the back of the refrigerator compartment combined with fan forcing hot air out of the compartment may be the answer. The internal venting still puzzles me. Since our internal temp sensor mounted over the bathroom door shows the cabin at 91F while crossing the Texas prairie, it does not seem like forcing air from the refrigerator compartment into the cabin or forcing 91F air from the cabin into the compartment behind the fridge will make a difference. I don't see how the compressor fridge will work safely without some type of external venting. Makes me wish I had paid more attention to intro to fluid dynamics. Would welcome any thoughts on this.2 points
-
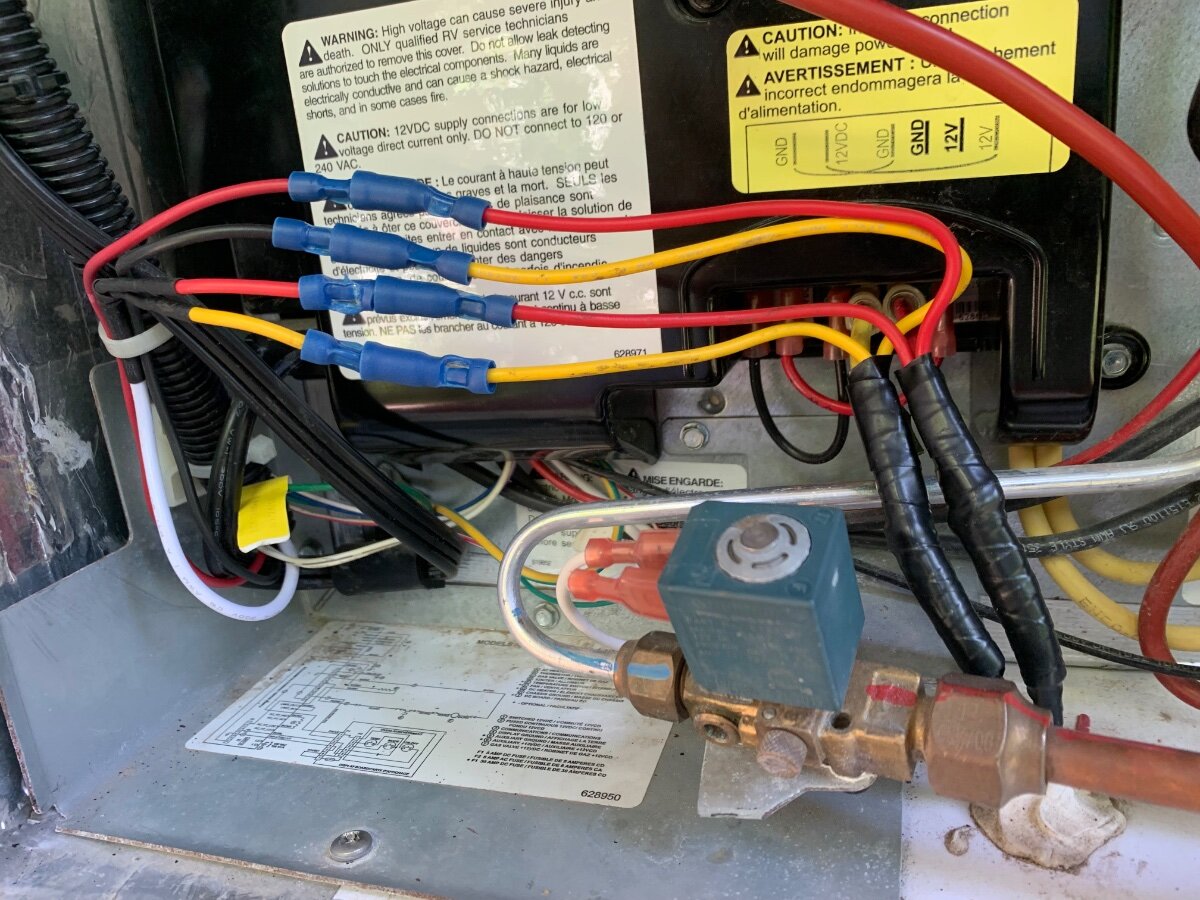
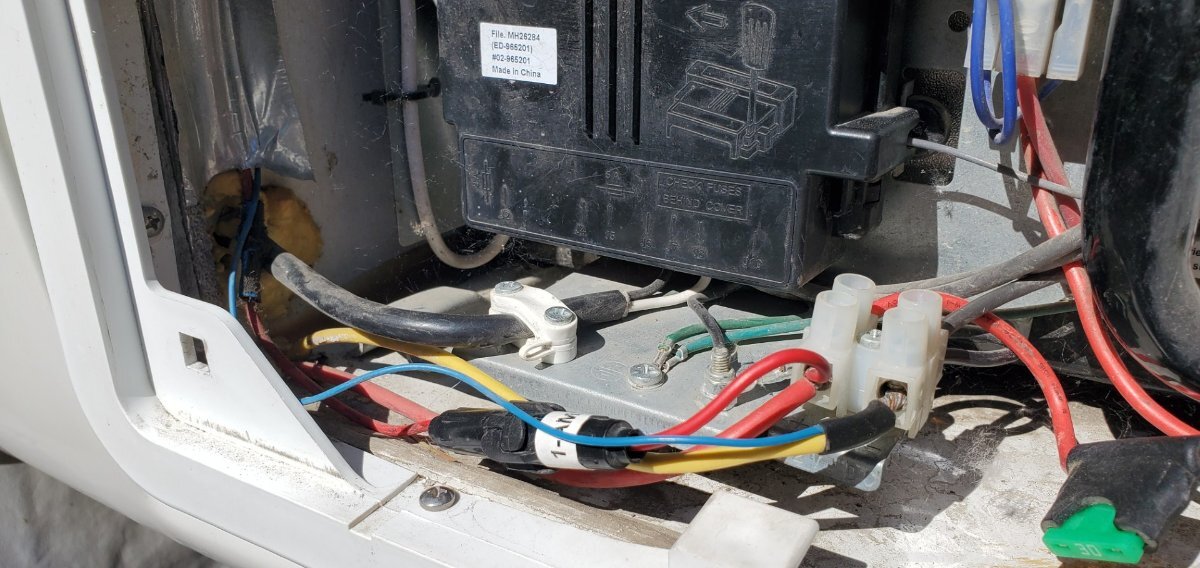
I had the same issue with my aux cooling fan not coming on. Once again, the issue was a loose connection. That blue wire coming off the fan ends up coming out on the left side of the lower refir access panel. Look for the silver tape on the left side of the pic. There it combines with another yellow wire and inserts in to a terminal block (I believe that is what these are called?). In my case the blue wire was loose in the terminal block so I carefully braided the two wires together and reinstalled them in to the block. I bypassed the temp switch to verify all was well and the fan fired up, which it was not doing before. Now whether or not the temp switch is also bad is another story. I hope to test it next trip out. But check that blue wire connection at the terminal block! Good luck. Dave
2 points
-
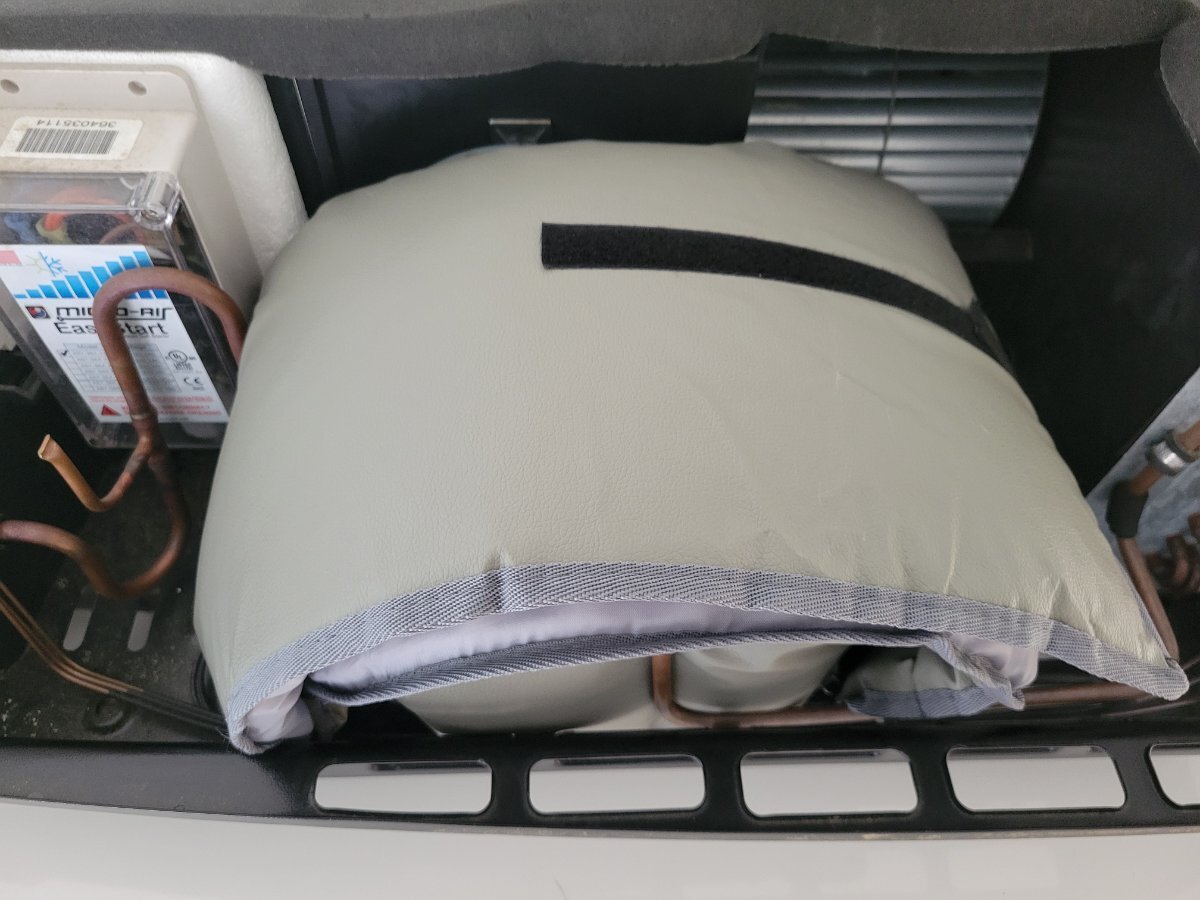
We don't use our AC very often, but when we do it would be nice if it didn't scare the dog and stess-out the cat. I didn't want to buy one of the newer (quieter) models just yet, so I looked into how I could insulate the stock Dometic unit better and achieve a noticeable reduction in noise. It took a 3-step approach, but I got it down to 65dB which is a significant reduction from the 75+dB level before. I took the attached dB reading in the center of our LE2 right under the front of the AC unit. I have attached photos of the 3 items that I added; (1) dense foam insulation to fill the hollow area to the rear of the return air intake vents between the roof-top unit and the ceiling panel, (2) I added a .4" layer of stick-on foam insulation over the very thin layer that came on the inside of the ceiling panel along with another piece of dense foam between the the center sliding vent cover (which is right below the fan motor) and the added layer of foam insulation (I did this so the cool air would be directed out the 2 side vents, and the front and rear vents instead), and (3) I installed an AC compressor noise reduction blanket. We are very happy with results!!! Joe/769
1 point
-
We booked site 71, see you there! I started a new link on adding a cooling fan. Yours would be somewhat different, but worth doing. It would be painful to defrost often on extended trips.1 point
-
Check this post, it is pretty much what prompted the recall. BTW, I find google search better than this forum, this is how I search google....site:olivertraveltrailers.com forum then whatever your searching, ie...."site:olivertraveltrailers.com forum coupler"....in this case I searched coupler...1 point
-
Here's a thread.1 point
-
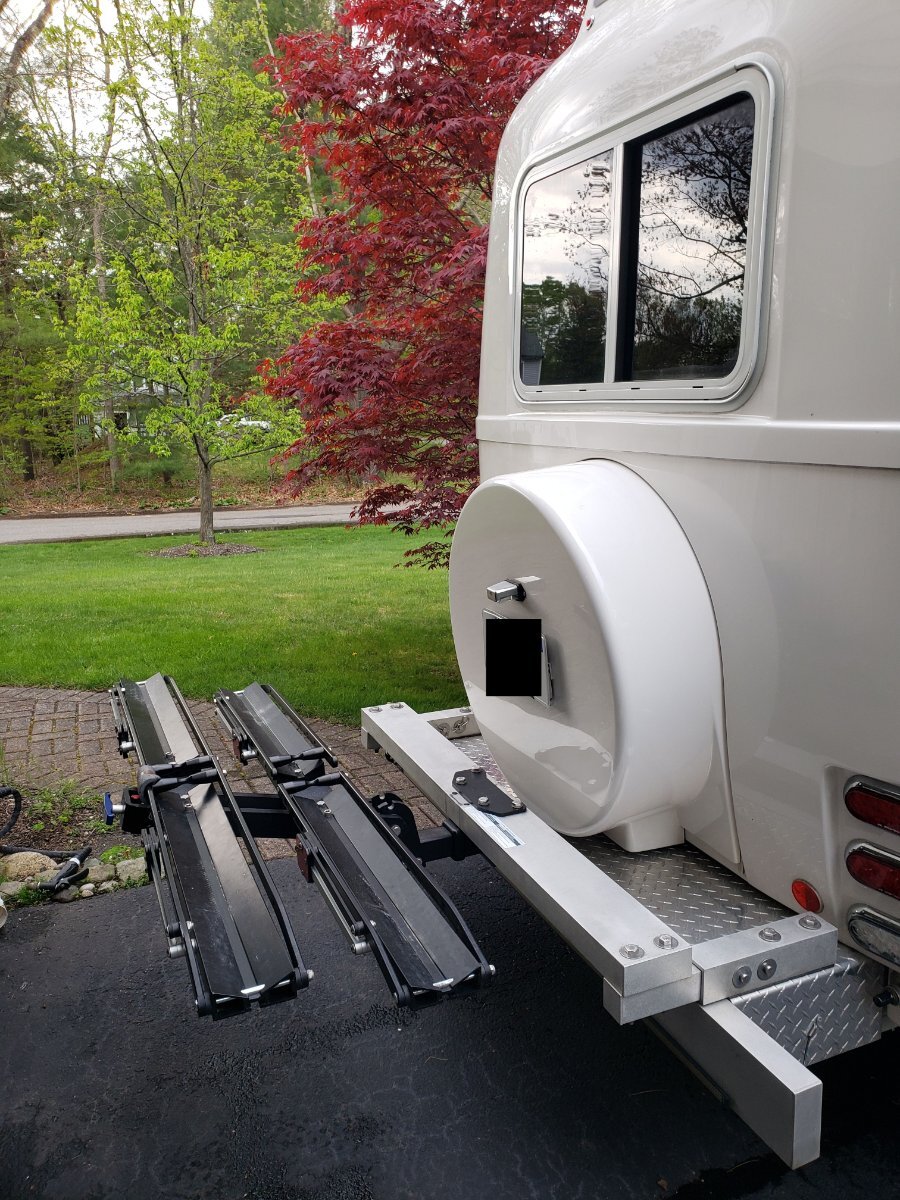
Santana bikes not titanium - mid 90's aluminum. Once we tried tandem...we're not going back. Like you referenced, we can both contribute to our capability yet we're still together...game changer.1 point
-
Absolutely smart to have a checklist - and use it religiously. I've learned this the hard way.1 point
-
or any fridge! Not to worry now until you hit sea level and warmer temps. Enjoy the High Country while you’re there and don’t go to lower elevation, until goin’ home. We were 94 in Prescott today, 115 in Phoenix! I will link my new thread here, soon re a cooling fan for the fridge. That’s all you need, just enjoy the Rockies in the meantime. Stay High and stay cool! Yeah1 point
-
Did some testing today. It's only 95 out, must be 115 down in Phoenix, yuk! Yes, as @rideandfly and @mossemi mentioned there is a simple thermal switch screwed into the top RHS of the condenser. It was difficult to get a reading before the switch on the bottom end, so I pulled both female spade connectors. Voltage readings were odd, most prevalent number was about 4.3V and it read as high as 5.5V and sometimes lower too, weird. No where near 12V and this is a 12V fan. I made a spade jump wire to connect the fan, bypassing the thermal switch. The fan would not run at all even giving it a quick push start. The switch from the light switch panel was working, going from 4.3V to zero and back with the switch. I used the ground from the junction below with the heavy gauge yellow and the light blue wire to the fan. It looked to be connected properly as @DavePhelps had suggested checking. Testing B+ and B- at the junction box read 13.6V which is the same number the Victron app shows for the house batteries. What the heck? What would produce 4V or 5V and not 12V? Is the wiring so old and worn it has become one big resistor? Hope not, which could cause a fire. So, the easy fix for $90 is to replace this fan with the Titan or Beech Lane dual fans that other owners have done. I would not be able to use the switched power since it is not delivering 12V. I could run new wire from the junction below. In AUTO mode do these turn on-n-off with temp? I would mount the control box behind one of the panels, not in the upper cabinet as one post showed unless it can be fished there w/o going through the microwave cabinet, as I just insulated that cabinet for an oven. Can the ON/OFF temp settings be adjusted on these? I would hate to bypass the switch. Maybe I can run +12V up to the switch panel and back down. Any ideas are appreciated as always! Thanks1 point
-
Exactly, this is why I have not changed Zerks to 90s or turned the bolts inside out so the Zerks point to the inside (not crawling under either). I would rather jack up one side, use the air gun and quickly remove both wheels. Inspect each tire and remove any gravel. Check the brake action and tighten adjusters if needed. Check the wheel bearings and repack only if needed. Then without the weight of the wheels and tires, and a basic grease gun pointed straight on, all 8 Zerks take grease easily. Clean off all excess grease and replace caps on the fittings. When this final step is ignored, the fittings can get stuck and then use a thin punch to push ball end in Zerk, remove fitting to clean if really bad. Remount wheels and work the other side!1 point
-
When you break a ZERK trying to grease the leaf spring bolts... they are METRIC. Cost about 25 cents each. Do not have the receipt handy, but bought two, one for a spare. When the top of the ZERK breaks, you can easily remove the threaded part... take it into the Hardware store than has everything... they will look at it and find them. Buy two or more. Save yourself some looking around. I found it 'easier' to remove the each wheel to get a straight shot at the zerk by jacking up each side for access and removing each wheel. The pressure to get any grease into the bolt causes grease to accumulate on the Zerk. Some you may have to remove the bolt as it must be rusted from wear and then clogs it up. Buy eight Leaf Spring bolts and nuts and start from scratch. That will be my next 'adventure'. These bolts that the Leaf Springs are attached are more likely to break than take any grease or attempt to remove them and salvage the bolts and nuts. The grease gun broke and they are guaranteed for life trying to get the grease into the bushings. Got a free replacement and did what I could. A good grease gun is not cheap. The tolerance between the bolt and leaf spring must be tight. More grease came out of the Zerk and Grease Gun fitting... than entered the shaft of the bolt. Next attempt... Buy replacement bolts and nuts and clean up the leaf spring hole, that the bolt goes into. Need to watch a video of someone doing it. The best method so far, for me... remove the wheel. Take a nap and go for the other side. A Big.... PIA.1 point
-
Thanks all, really appreciate it. With a big trip coming up, I was reluctantly going to take the camper to my "trailer guy". Anyway, yesterday I was able to grease all the zerks. Lessons learned and/or reinforced... 1. There is no point in getting mad at an inanimate object, it does not help -- at all. Work in progress.... 2. The 90 elbow attachment is a pain. I realized that if it leaking around the zerk a bit that does not mean it is also not going into the fitting. I think before I was stopping immediately if I saw any leakage. I also realized that it does not have to be totally tight to work. I just tightened it as much as I could. 3. Most of the zerks can be greased without the 90 degree fitting. The primary connector can be a bit off 90% to work. 4. It was hard to pull the trigger and find the fittings at the very top of the axle. I think an old fashion attachment without a trigger would be easier. 5. I am going to change the zerks to 90 degrees. I can't thank you all enough..... Larry1 point
-
Chris, since you're visiting OTT very soon. You could just have them test and fix yours quickly! There should not be a reason to pull the fridge.1 point
-
Thanks to all who have replied, very helpful! Mossey, this is very clear. Made me think yeah Duh, I can catch a ground in the lower section. Seeing the thermal switch makes me think the female spade connector on the red fan wire is connecting to it on the right side of the top opening. I will have time by today or tomorrow for testing the fan. Wonder if I can use a blow dryer to activate the thermal switch. I'll let you know.1 point
-
@Al T from Alberta I missed this when originally posted. Beautiful wrap on the Oliver, and beautiful bikes! Are those Santana titanium? I tried for years to get Deb to ride a tandem, since we ride at such disparate speeds. She's a slow gawker, and I try to at least get my heart rate above couch mode. After getting the Oliver, we got a pair of Gazelle bikes, so now she at least keeps up with the folks walking trails... 🤣 The same applies when kayaking, but there's no way I'd get in the same boat with her, else the sobriquet "divorce boat" would definitely apply. That is, if we both made it to shore alive! 🤬1 point
-
So ...seal the interior slot above the fridge, remove the blocking cover, and fan force out vent through the exterior vent. Sounds like a do-able project. We have both awnings so will come up with a different switch placement. May just put a switch through the (to be blocked) vents above the fridge, that way we can turn it on when we turn on the fridge and turn it off when doing the shutdown process. Thanks very much!!1 point
-
Been working in the Oliver afternoons, shore power connected with AC on. Loud as a diesel truck and on-n-off it starts singing. Must be fan bearing going. Will replace with any non-Dometic model before travel this fall. It is and sounds like an albatross! I would not spend a penny on it.1 point
-
No the Road Trip will work off the quick connect. The regulator for the Road Trip is a removable. You can buy an adapter hose on Amazon with a connector that screws into the same fitting as the regulator used for the 1 lb green bottles. No need to by pass the trailer regulator. Weber, Blackstone, and others will work. There are kits where you remove the grill's regulator so it will work off the quick connect. They are all low pressure. The issue is with high pressure devices like Coleman and other camp stoves. Even if you remove the regulator they will not run at proper temperatures. For those you do have to by pass the trailer regulator. Some solutions is carry a spare tank. Or they make Y connects you can use on one of the trailer tanks. Hope this helps1 point
-
The compressor does make a little extra noise that the blanket helped to dampen a bit. However, it made the least amount of difference of the three things that I did, but every little bit helps! The attached blanket is the one that I used. It was a challenge to get it wrapped around the compressor. Joe/769
1 point
-
Following up now. No bikes, obviously. Tim
1 point
-
Jack up the side of the trailer that the fittings are on that you are trying to grease. This will relieve any pressure being placed onto the wet bolts by the weight of the trailer. That usually makes it much easier to get them to take grease. You may never get it to squirt out both ends of the bushing equally.1 point
-
Nothing better than riding and enjoying nature without the worries of automobile traffic. I compete in 12/24 hour races and recently started chasing records so a minimum of 10k per year is pretty much necessary for me to perform well. Was lucky enough to set a cross Florida record back in May, and still paying a price for it so mileage a little lower since then.. 😂0 points


.thumb.jpg.e34bf01ef7f7d5e99ad31856d45afbeb.jpg)
-
Recent Achievements
-


")


