Leaderboard


Popular Content
Showing content with the highest reputation on 03/17/2025 in all areas
-
One thing I have learned in the short time I have been on this forum. There are a lot of very smart Oliver Owners out there that know a lot about how different systems work. I can figure out the installation of a new AC unit and make it work but struggle with understanding the benefits of one over the other. Curious as to the boards thoughts on this unit as I still contemplate my upgrade from the Dometic Penguin. What I have been able to understand from the little I have found. 1. It should fit pre-existing hole and low profile. .5 inch taller than the Dometic. 2. Inverter ACs consume less power and would not need a soft start and run longer on batteries. 3. Quieter than dometic. 4. Would not be able to use drain tubes. 5. Uses same technology as home mini-splits. Seems to be a pretty new product with little info out there, https://www.turbro.com/products/greenland-13500-btu-inverter-rv-air-conditioner-with-heat-pump https://www.youtube.com/watch?v=8-psxzbpngA https://www.youtube.com/watch?v=rsnWzNLYGOY3 points
-
Most likely. If you want to get an idea about what is required for the Houghton's, it very likely would be similar for the Atmos units as well. The Mod to turn supply air fan on/off with the compressor is just a ACR style relay. I had proposed this long ago and one of the SOB owners ran with it. GSM Bear was very helpful in the process. The Mod to remote the thermistor that controls when the compressor comes on / off is just an extension of the cable of the existing thermistor or just buying one with a longer tail. Normally an easy mod if your trailer has an easy path to where you want to be sensing cabin temp. In the case of OTT's, it was a tough nut to crack. There is EXTENSIVE "Deep Rabbit Hole" posts on those two topics. Some of my thoughts and a lot of others are attached below. Warning: it gets deep into it in the attachments. But in actuality it is not impossible for a talented and courageous electrical tech to accomplish these mods. But as you said, "Such mod would void the warranty so one is for sure at risk. Last thought is that if a person were so inclined to do the mods, I would run the unit for a full season just to make sure it is good to go, then decide to proceed "at risk". GJ Houghton Single Line Relay Wiring Diagram from GSMBear.docxGSM BEAR V2 RecPro Houghton Interior Fan Mod v2.pdfHoughto 3400 Humidity Relay Mod (13 JULY 2024).docx3 points
-
Scott I’ll bring cash to share the cost if Venmo or Zelle, or what ever way people send money does not work for you.3 points
-
Just to clarify, I lifted the following statement from the Sprinter forum: “Gree manufactures both the Eco Cool and Atmos 4.4 air conditioner, they are just labeled under different brand names. They are exactly the same units.” I’ve also read that Tosot by Gree is the same, as well. From what I have learned, none of these Gree units have a “built-in SoftStart”, that was a widely spread misconception which has been dispelled. I personally installed an Atmos 4.4 w/SoftStartRV on my OLEll. The Dry Mode is real; has a forth fan speed, ‘Turbo’; and both a remote and ceiling air diffuser control panel. On some SOBs when ducted, an optional wall thermostat is needed depending on the installation.2 points
-
Hi Derek, Good question, I'm also curious what folks think about the Greenland Turbo Inverter. It could be my top choice except that it’s only rated to operate in temperature ranges from 19.4℉ to 109.4℉. I asked the manufacture if that related to the inside or outside temperature, and they said both. I reached out to them again for more perspective because temperatures over 109℉ are common, and that’s when the AC is most needed. I’m hoping to hear some better explanations next week because that could be a non-starter. Another potentially controversial issue is that the Greenland is designed to slowly ramp the compressor up-and-down - continuously. The starting/running current looks like a smooth sine-wave, unlike conventional compressors that turn on with a large inrush starting current and then a steady run current. The Greenland runs continuously when in use, cycling the compressor from high-to-low to maintain temperature. The conventional AC compressor constantly turns on-off when in use. Our Penguin sometimes does that every 30 seconds. I was skeptical of the Greenland at first, but after more thought I think it’s a good design because it doesn't have frequent starts and stops, and there is less temperature fluctuation. They supposedly have lower energy consumption, and are very quiet at 45db. They come with a remote control thermostat where I’d prefer a wired one to replace the existing one. Another interesting AC is the Eco Cool by Gree. It’s also a heat pump with a built-in SoftStart. The manufacture claims its the quietest. I like that it has “intelligent” dehumidification, a 3-speed fan, and both remote and wired thermostat. The Houghton and Dreiha Atmos are on the table too, they are getting good reviews! From what I understand, the Truma is unavailable for DIY. Cheers! Geoff2 points
-
Thanks Bill, good temporary solution. Our final solution is when we (my son) gets up on the roof and heaves the bee-ach to the pavement so we can install a new A/C! 🤣 Do some of you guys really get somebody to buy these units used?2 points
-
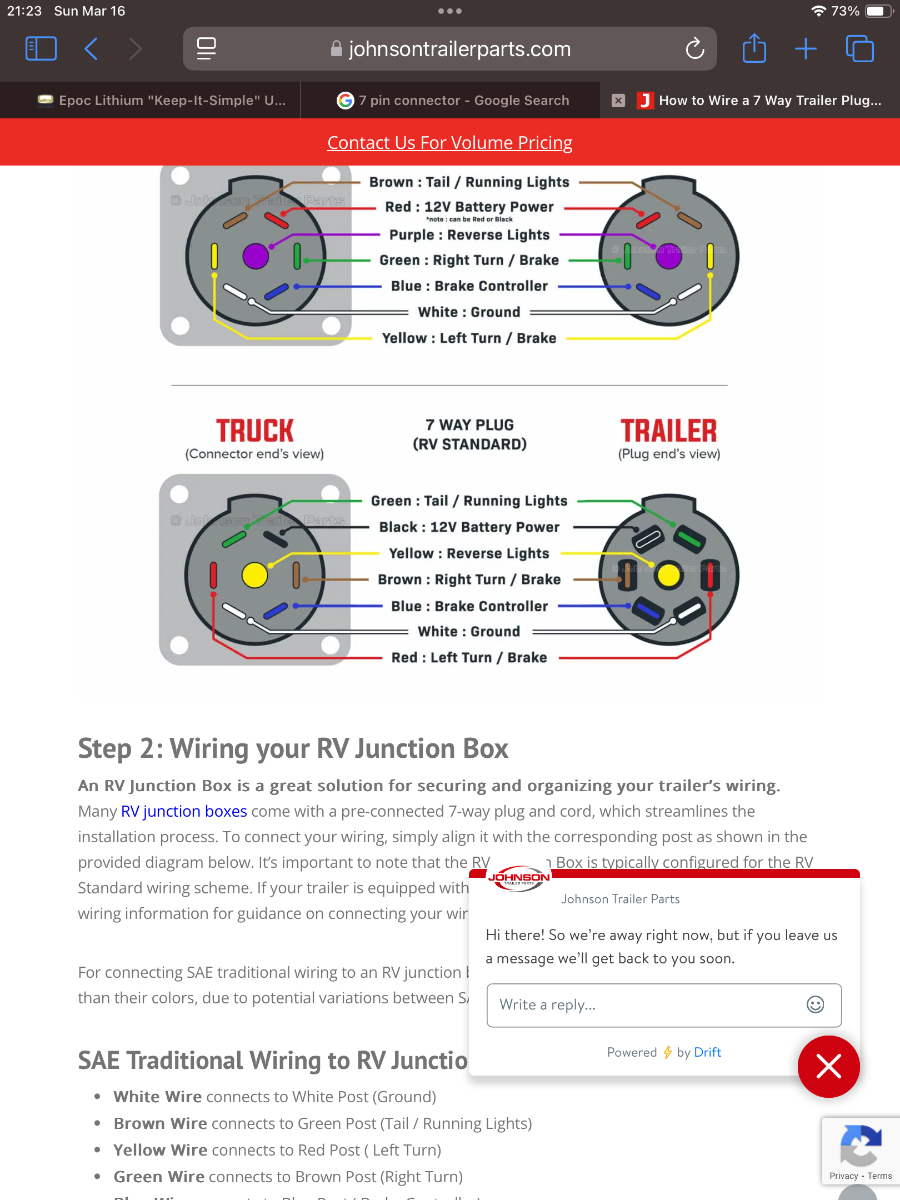
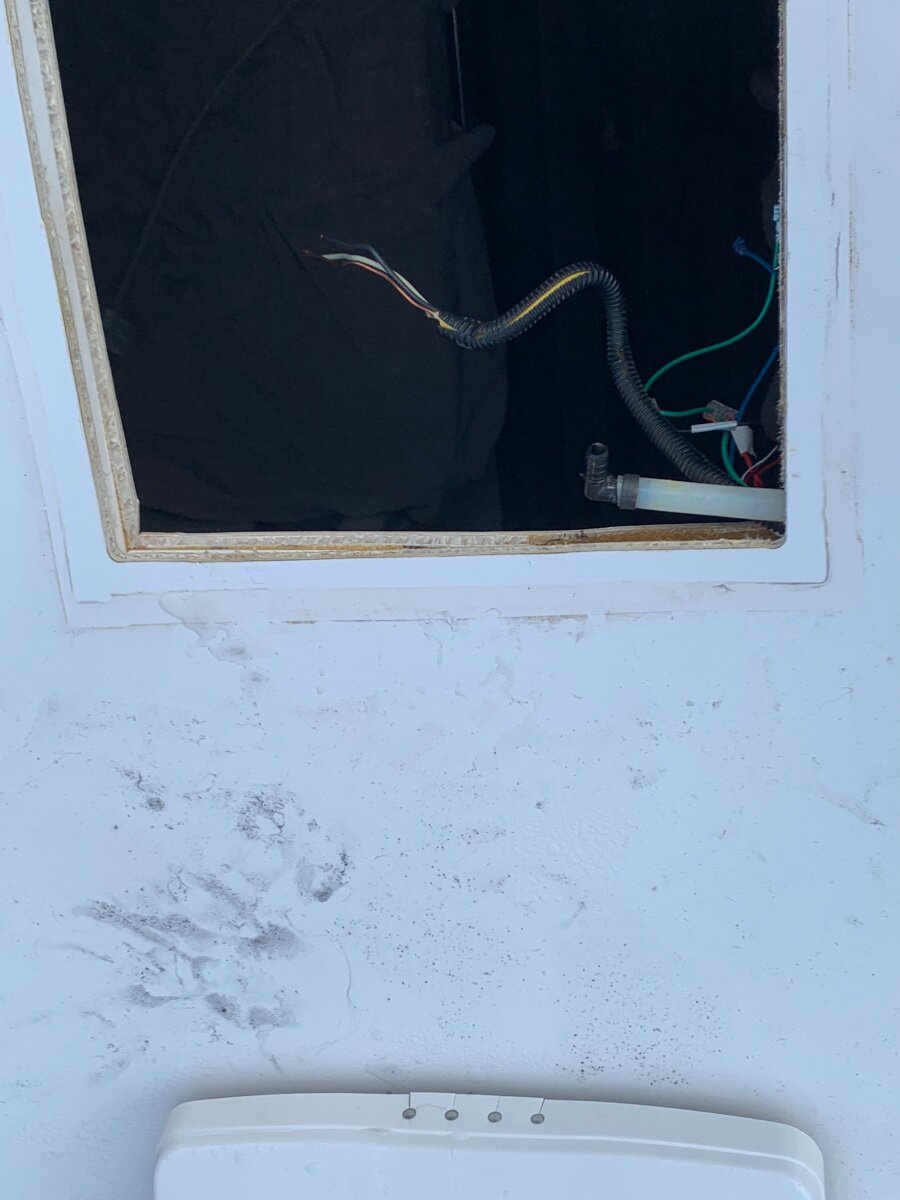
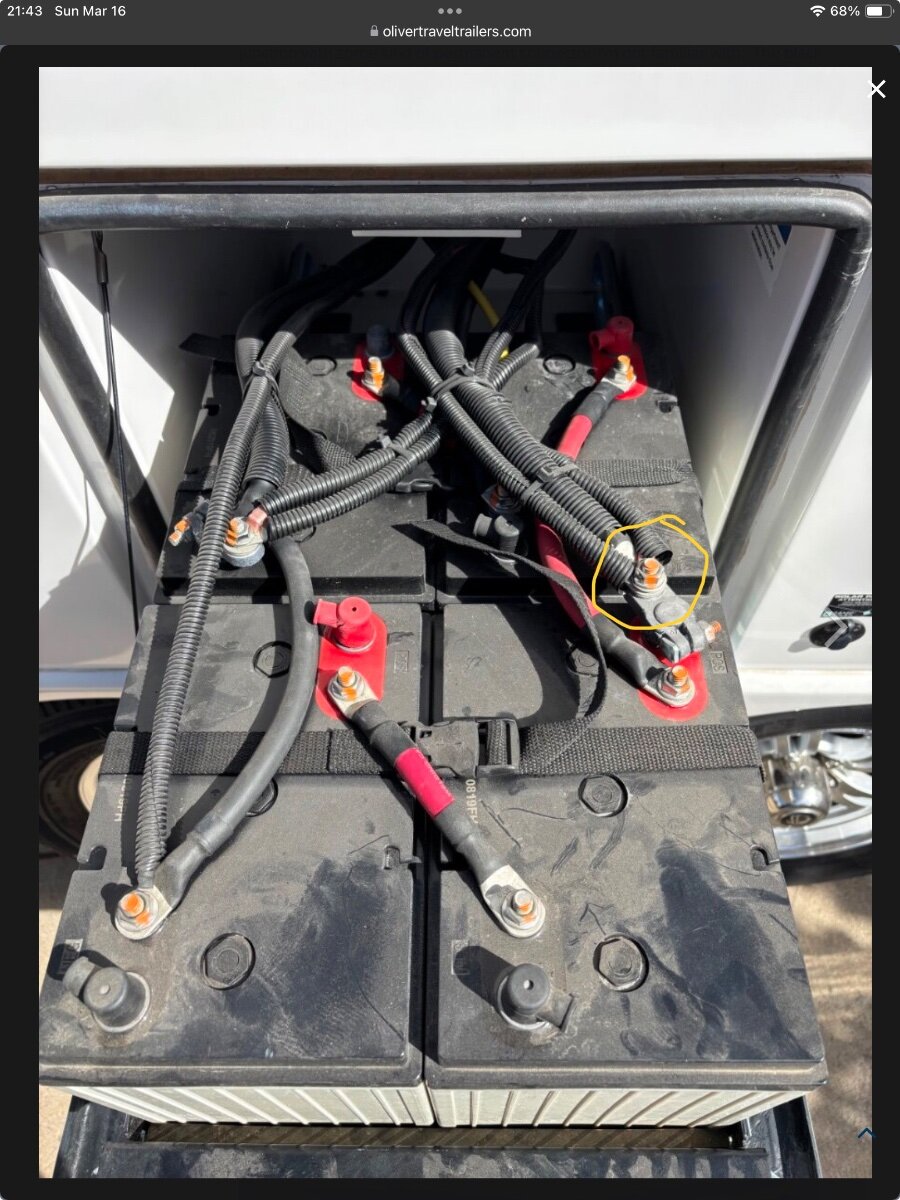
For the 7 pin 12 volt connection no need to disconnect anything under the vanity. Just disconnect the black wire from the 7 pin plug itself. Disconnect and tape the wire and tuck back into plug housing. Below is example of 7 pin plug diagram and how the plug looks when disassembled. Google replacing and rv 7 pin and should find plenty of videos showing how to pull back the plug housing. My battery compartment started out looking like yours but now looks like @jd1923. The smaller gauge wires can be brought inside the trailer by installing additional bus bars but may be more than you have in mind. For ease you can just stack multiple in same battery connections but may need longer bolts then supplied by epoch. If your 4/0 gauge connections seem short you likely have some extra length of cable of cable on inside of trailer under bed. The large 4/0 negative cable should be going directly to your inverter or a shunt if installed. If so you can pull some of the length into battery compartment by loosing the grommet in battery bay. Hope this helps.
 2 points
 -
Will Prowse posted a new video yesterday expressing disappointment in the newer v2 Epoch batteries. From his comments, the new firmware has some major issues. He failed the 48 v batteries, gave the 12v 460 a questionable pass, as it had the old firmware. We are quite happy with our original Epoch 460, installed some time back on the boat. So, I guess I'm saying I'd be cautious about the v2 12v, until such time as Will feels they've corrected the firmware issues. He is my go-to guru for solar and batteries. And, he's the reason we bought the earlier version 460 in the first place....2 points
-
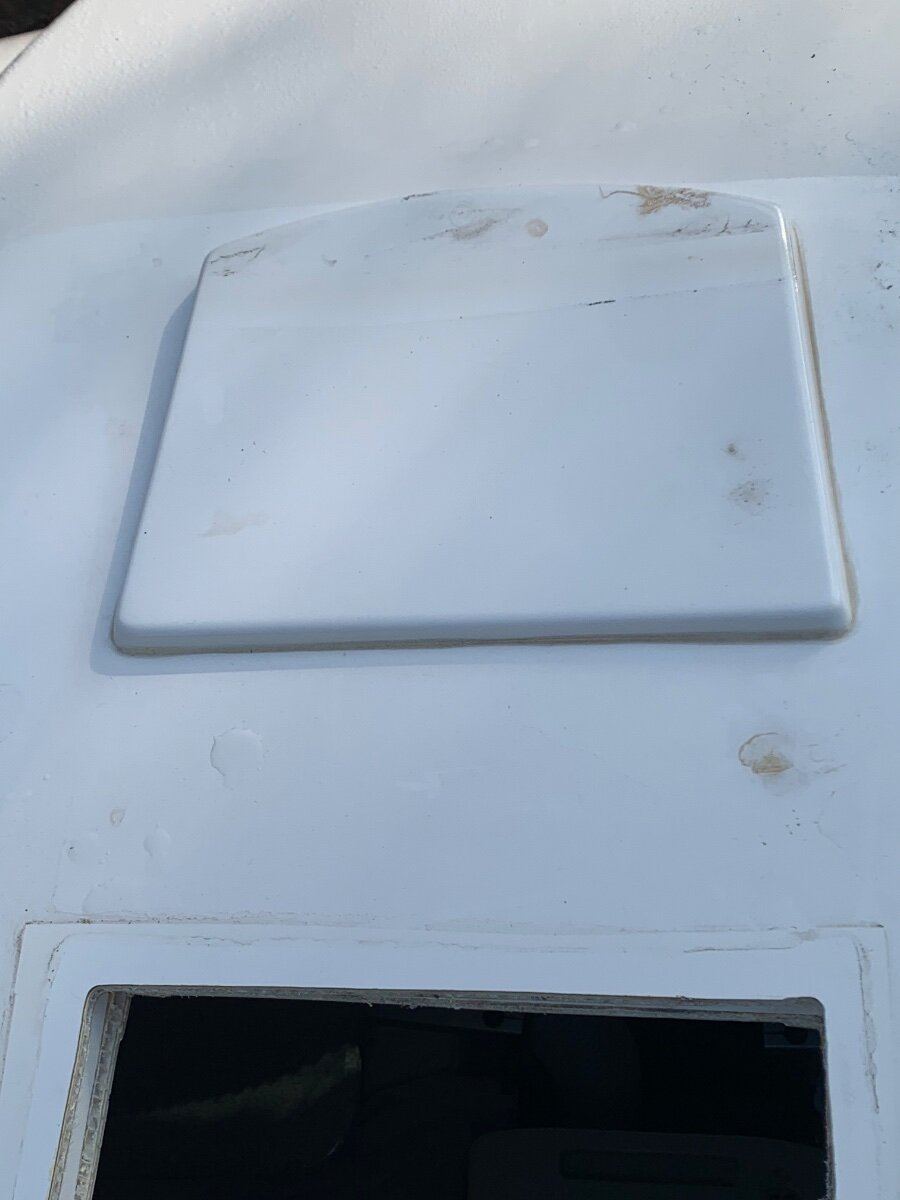
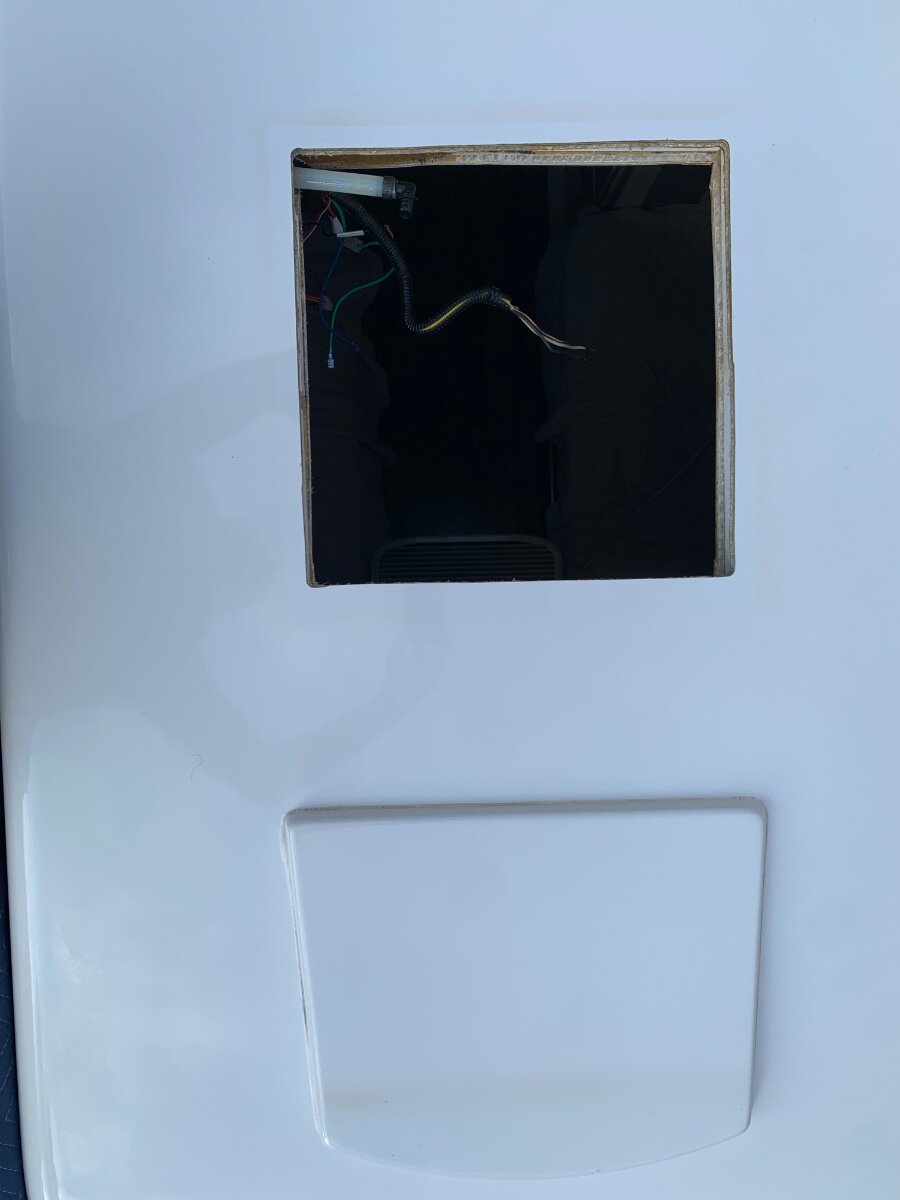
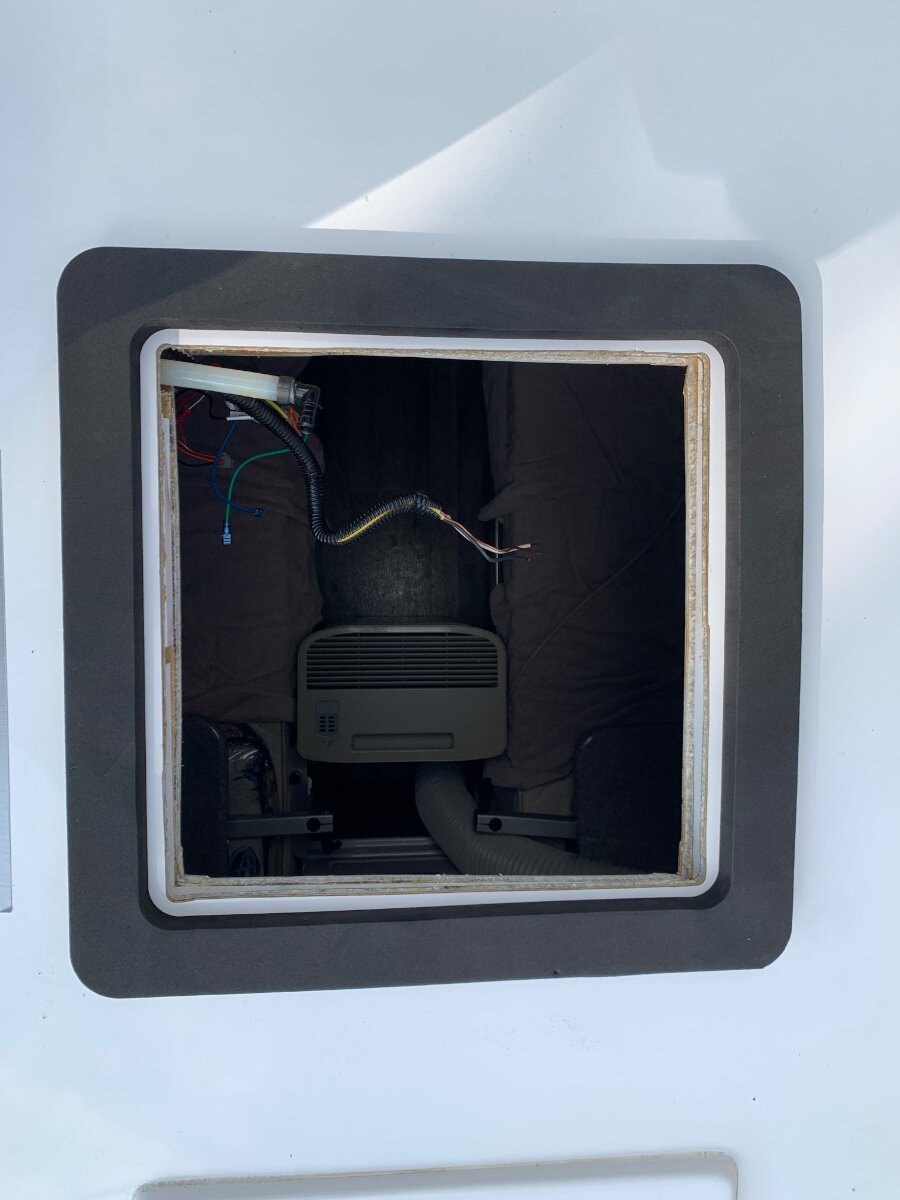
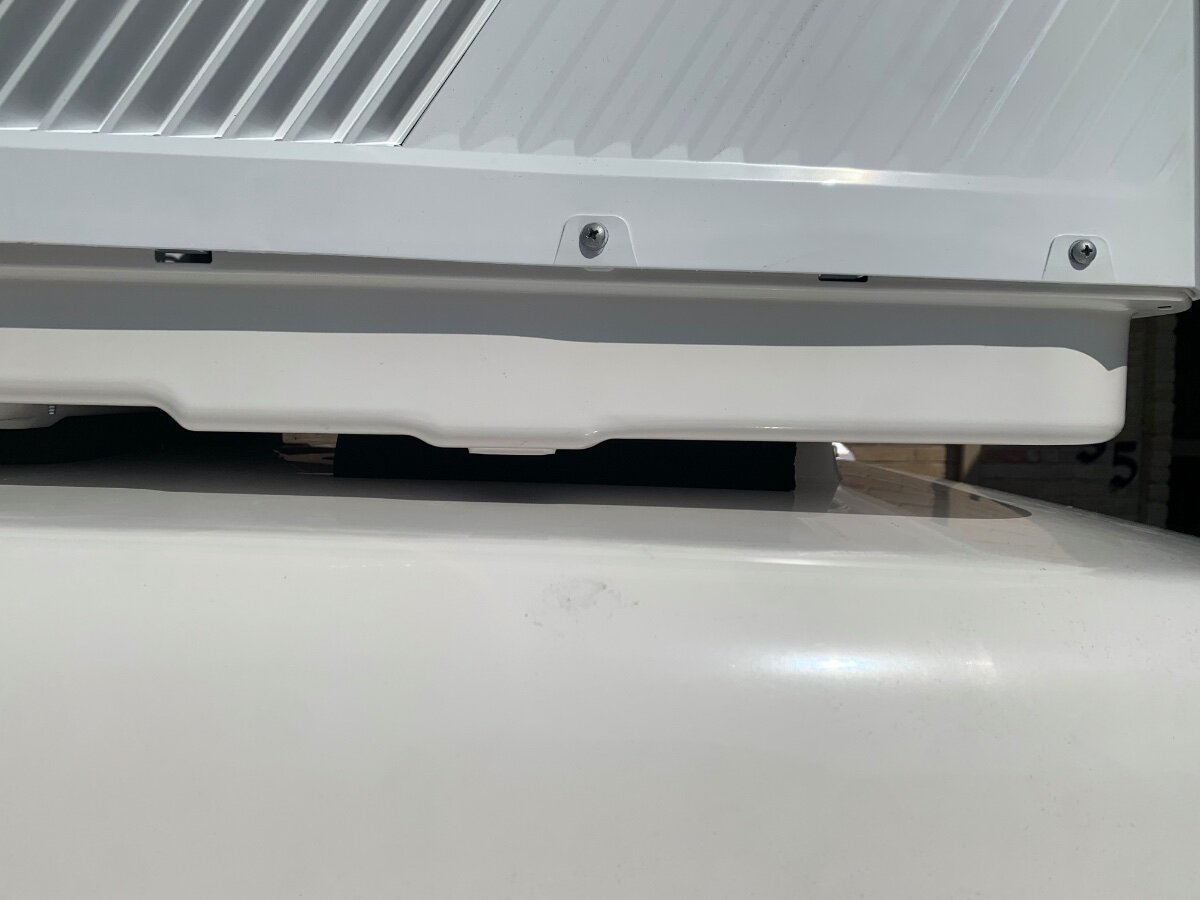
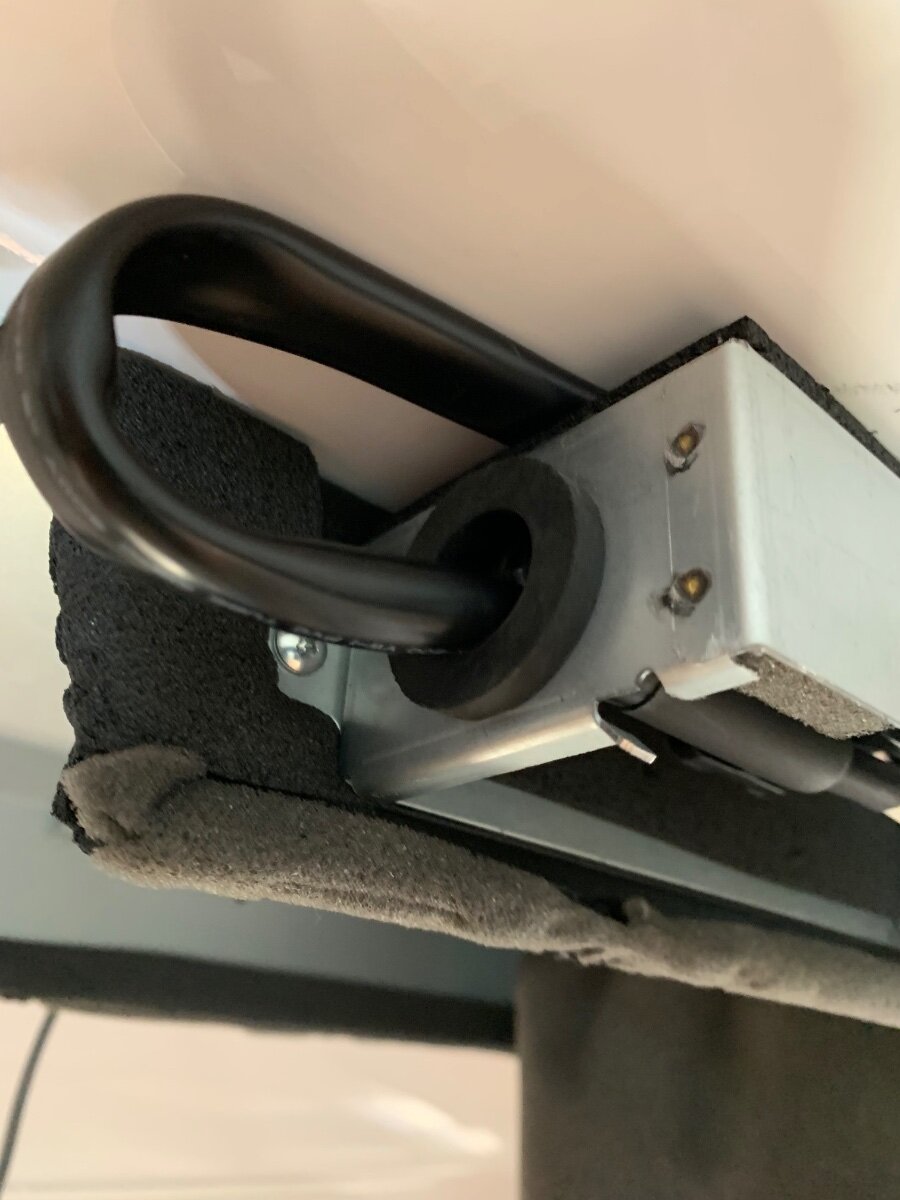
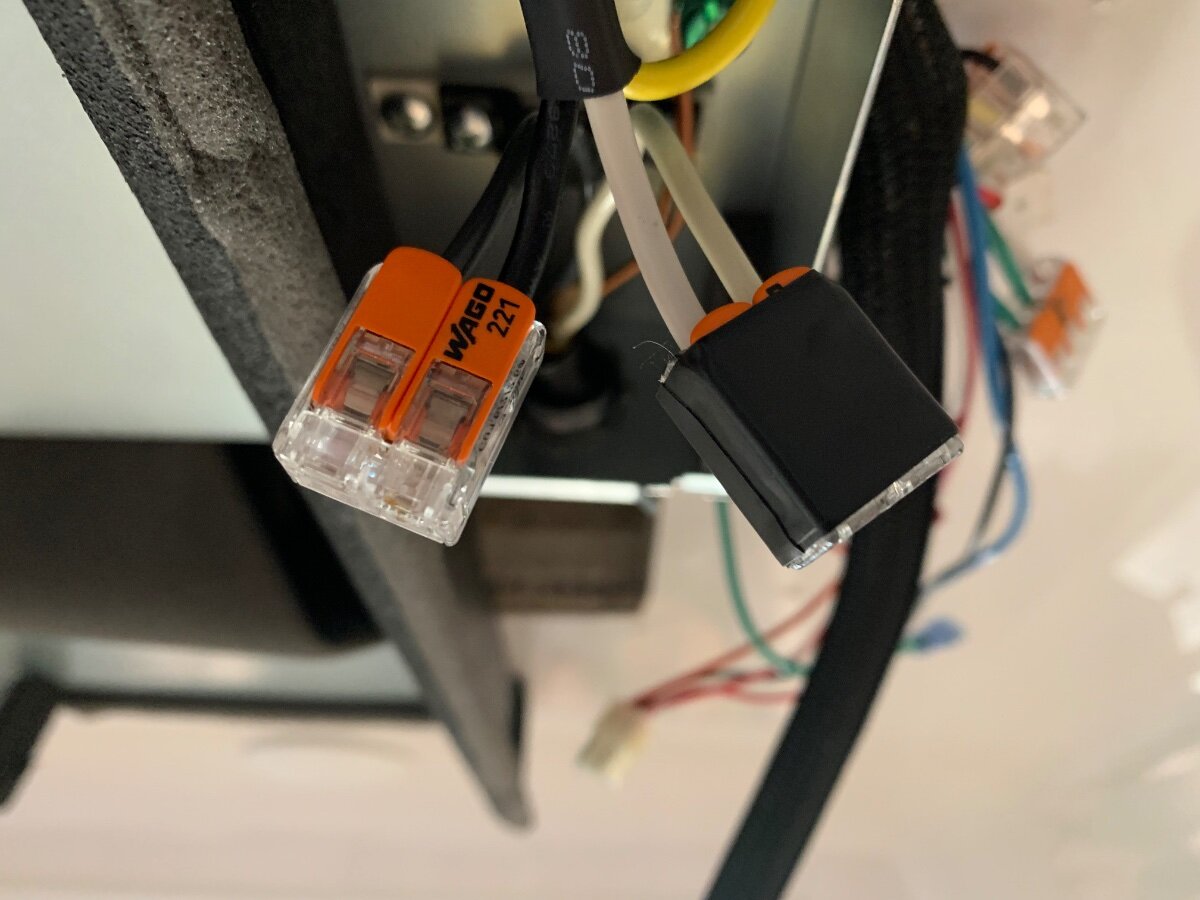
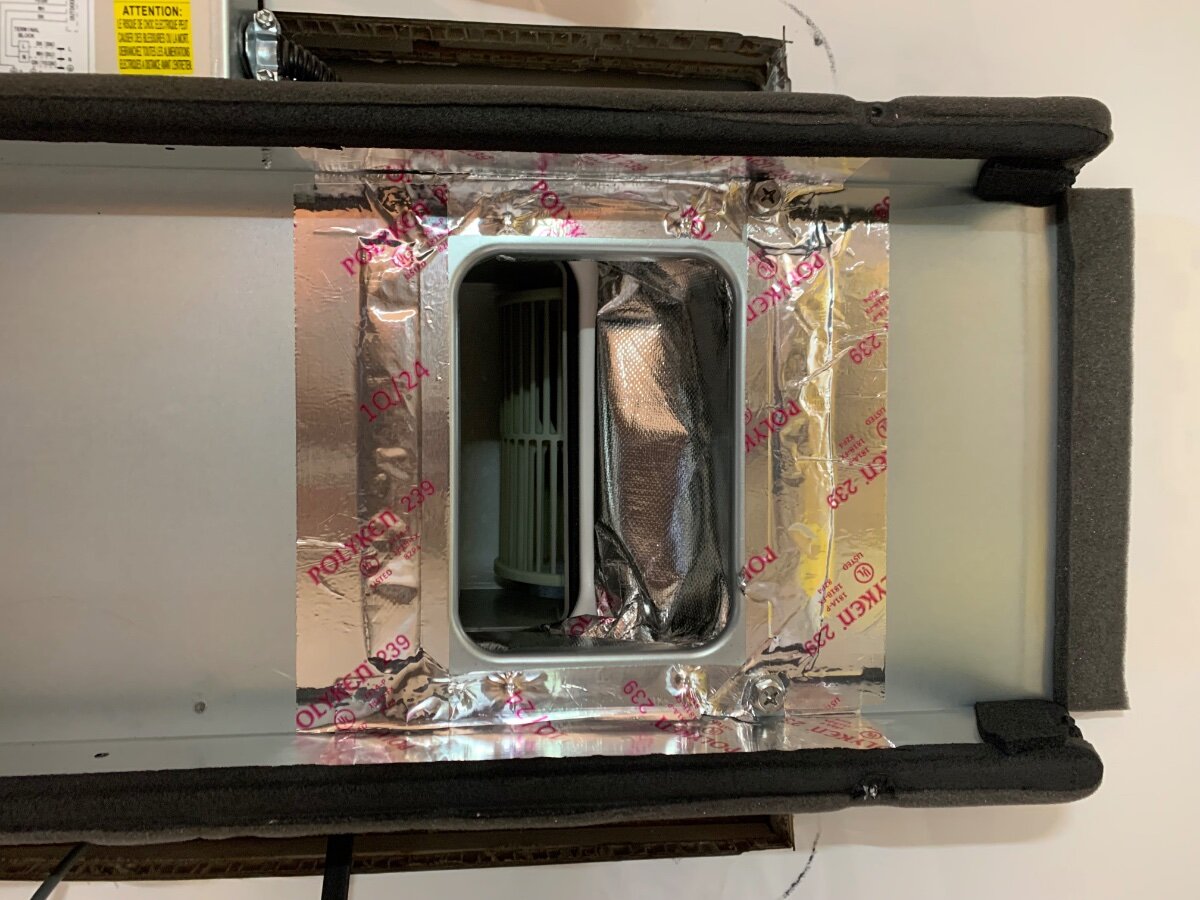
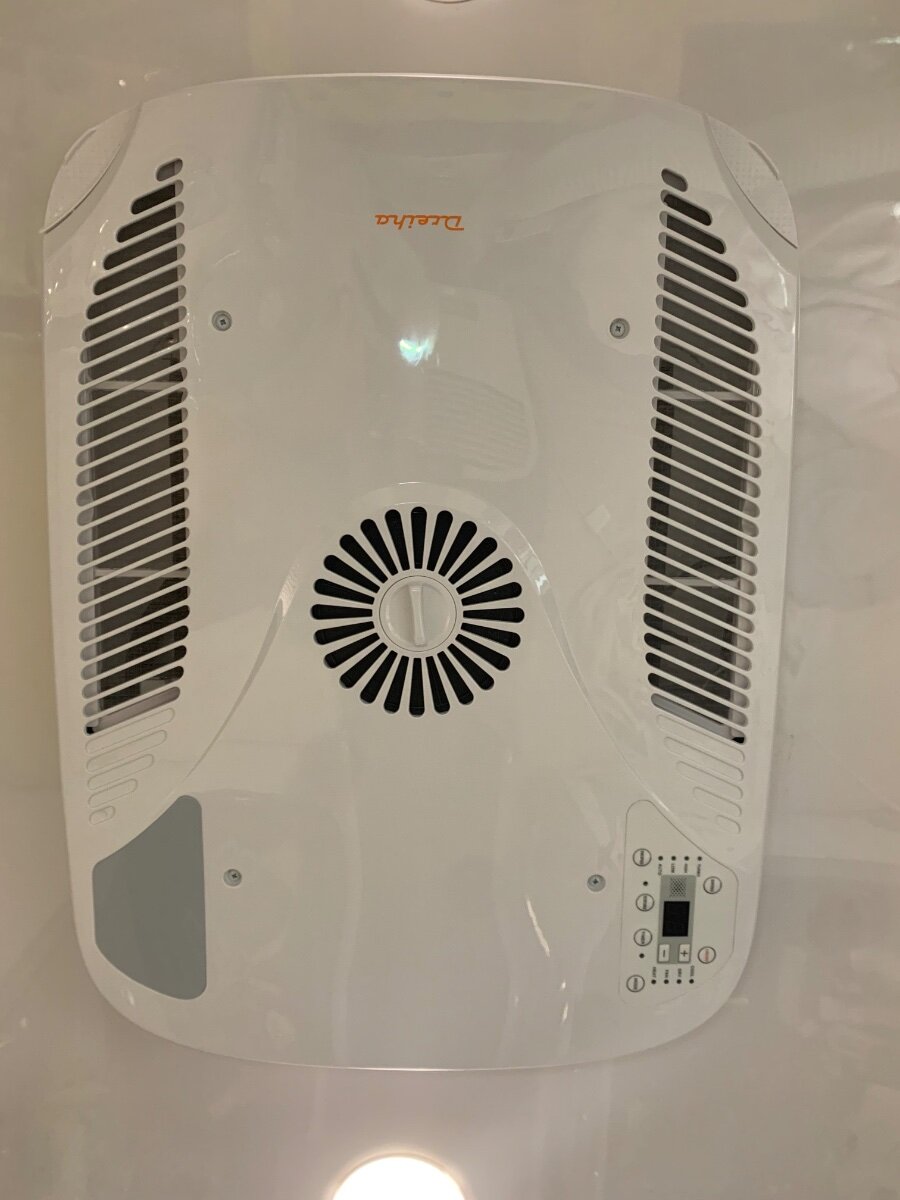
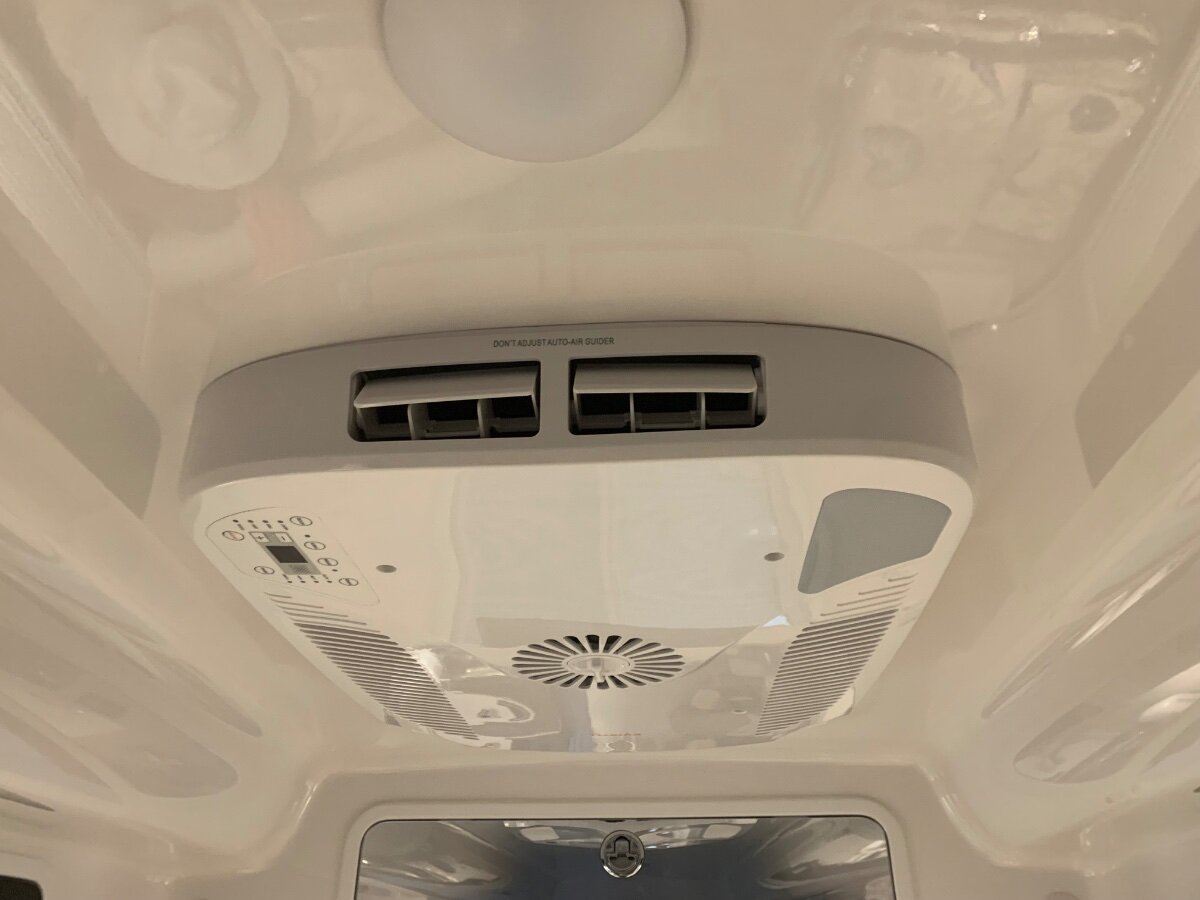
This long awaited swap-mod is now checked off my to-do list! Like many, I tolerated the noisy Dometic Penguin ll long enough; so glad I was finally able to take decisive action with this install. After a couple years of mulling over the various replacement models being marketed, a unit emerged that caught my attention; the newly available Atmos 4.4 seemingly met all of my expectations. I will forego the removal of the Dometic, here is how I proceeded forward: First and foremost, all AC and DC power sources were turned OFF! Scaffolding and equipment/supplies were then staged for Dometic ‘liftoff’ and subsequent Atmos ‘lunar landing’ (only appropriate since I live a couple miles from the NASA Mission Control Center in Houston). Roof area in need of cleaning. Notice the raised fiberglass landing on my year model and that the former condensate drain tube was simply disconnected rather than cutoff. Roof area throughly cleaned and prepped. I decided to adhere the square self-adhesive foam roof seal directly onto the fiberglass and then apply non-leveling Dicor around the cutout perimeter to further ensure the best seal possible. In positioning the foam seal, care was taken to center it as evenly possible, thereby allowing about 1/4-3/8” of exposed fiberglass to lay a bead of the Dicor and finger smooth to finish. Interior view of the Atmos being positioned over the roof cutout. Note the use of the mounting bolts as a guide, as recommended by SDG. Because the ‘rough cut’ edges of the layers of fiberglass (inner and outer hulls, and spacial filler) were inconsistent, I used the foam seal as a reference to accurately center and align the unit; distances measured to each respective bolt. Initially, installation instructions were followed by adhering the supplied straight piece of self-adhesive foam onto the bottom of the unit as a rear support, but it did not make contact with the roof due to relief of the aforementioned fiberglass landing. Alternatively, the foam piece was cut in half and each adhered onto the fiberglass, in like manner as the square seal, along the outer edges of said landing. This adaptation proved very effective in application and purpose, as the last of the next three pics demonstrates. Now that the exterior unit is properly positioned and supported, it’s back inside to further installation. As a side note, I made use of a portable a/c to buffer the heat and humidity of the day! Although my son helped with the heavy lifting and positioning, I cut him loose and completed the remaining tasks solo. Before proceeding, I used foil tape to treat the end of the aforementioned condensate drain tube and secure it to the side. Next the installation of the fabric air plate duct subassembly was started (provided Dreiha Atmos 4.4 Manual details the process). Note I used foil tape on both the upper (at Atmos bottom) and lower (at mounting frame) duct plates, even though most installs viewed applied to the mounting frame plate only. Between the upper and lower duct plate installs, the ceiling assembly mounting frame was bolted in place and hand torqued using a screwdriver only (torque specified in Manual). The AC power connection was very straightforward. The ceiling assembly’s junction box cover was removed, a strain relief fitting installed at one end (the other end had a preinstalled protector) and respective wires routed inside. I reused the Wago Lever-Nuts from the Dometic install, but first tinned the stranded wires of the Atmos lead for optimum assurance in application; electrical tape was used to further secure the Wago connectors. Ground wires were secured per the Manual. The junction box cover was then replaced, DC thermostat wire bundle loom wrapped and tucked away for future use, and ceiling grille fastened in place. . I’m very pleased with this mod, quality of the Atmos and ease of installation! I should mention that SDG preinstalled a SoftStartRV. I will provide an update once the furnace wiring and thermostat mount is completed. A special shoutout to @rideadeuce for forging the way with his install of an Atmos!
1 point
-
Hello All, My wife and I purchased Hull #1553 at the end of February. The trailer is a 2024, Legacy Elite II. We have already been on one trip with it. Love this trailer! Cant wait for the next trip. I have been browsing all the forums and am excited to be part of this community.1 point
-
Perhaps just marketing lingo! True, they don’t come with a. softstart device, but one is needed to run off inverter or small generator to keep from tripping a breaker.1 point
-
I guess technically speaking, it’s correct that Gree does not have a built-in SoftStart, but that might not be the whole story. The Gree website says: “Proprietary compressor technology eliminates the need for an add on "Soft Start.” This seems to be a new industry direction. Good discussion! I’ve been slowly building an AC spread sheet over the last few months and trying to capture information. Sound levels are not usually specified so Its good to hear actual comparisons in an Oliver. I think your probably right about 45dB being too low, some vendor claims are dubious:
1 point
-
CGI Detailing is going to attending this year's Maine Rally. CGI Detailing will also be doing Ceramic Coatings while we are in the New England area, if you're interested in having your Oliver or Vehicle ceramic coated please feel free to reach out to us! or fill out our sign up form https://www.cgidetailing.com/travel Everything you need to know about how we plan our trips should be listed at this link, however if there are any questions don't hesitate to give us a call! (615) 900-0648 Just so you don't have to search for pricing, Here is what we charge for our ceramic coatings! Oliver Legacy Elite II: Starting price: $3,000 Oliver Legacy Elite I: Starting price: $2,500 If you're interested in getting your Tow Vehicle Ceramic Coated as well, Our price for Trucks is $1,200. This includes a $300 discount!
1 point
-
The following should convince all that the Gree Eco Cool and the Dreiha Atmos 4.4 are the same. Gree was selling units with 410A refrigerant summer of 2024 but the manuals for BOTH products cite R32 today, 410A being phased out. Everything about these look the same today! Tosot brand might also be the same: https://www.amazon.com/TOSOT-Conditioner-Non-Ducted-Rooftop-High-Efficiency/dp/B0CDWR5RP9/?th=1 Dreiha Atmos 4.4 Manual.pdf Gree Eco Cool Manual.pdf1 point
-
Yep. Sold mine for $550.1 point
-
I have my DPll 11K listed on my go-tos, FB Marketplace and OfferUp. I’ve brought in thousands of dollars in past listing and ultimately someone will buy this unit. However, typical inquires include ridiculous offers and money-stricken individuals who can’t really afford, but with patience a viable buyer will happily pay the asking price or a perceived ‘bottom line’ price. There is no fee paid for use of these two sites.1 point
-
Thanks Derek, good find! Looking closer, I believe I see three lugs below the nut. If this is what Derek had then it's likely the case. Therefore, no hydraulic crimper tool required.1 point
-
@tallmandan check your connection. I believe as my trailer was you have eyelet terminal connections they are just bolted to auto post style terminals due to your batteries requiring this type.
1 point
-
That is correct, and thanks for explaining another aspect of the bilateral drain design. I read this morning of a video wherein a mod was done to have the fan only run when the compressor is running in Cool Mode. An Atmos owner (not Oliver) stated in the Sprinter forum that he was going to do the mod, but no further report to date. Such mod would void the warranty.1 point
-
For those considering this sale, the 15% offer ends Tuesday 3/18! This is the distributor I went with vs. purchasing from Epoch direct. They have the 15% OFF listed for Epoch (see pic). When I ordered from them, it included free shipping and no sales tax was charged (like saving another 8.65%). Cannot be sure if this is still true. They are a Colorado company, so @tallmandan also living in CO would likely be taxed, but buying from a local company is also a good thing. Looks like everybody is pushing you to buy two 300s! You should be happy with your decision either way! 😂
1 point
-
Consider redundancy also. With 2 batteries you aren’t dead in the water if one fails. With one 460 you would be SOL. Not that these batteries fail that often but it can happen as with all electronics. John1 point
-
Disconnect with use of LFP batteries; a DC-DC charger can be used to charge LFPs when underway, if so desired.1 point
-
I too made a purchase on @Steph and Dud B’s recommendation, and soon found the provided clevis pins to be too cumbersome; specifically the R clips were small and subject to dropping. No bueno! I replaced them with quick release pins, problem solved! I put a formerly used SealLine Dry Park from past outdoor adventures to good use in stowing the tire step inside the Savana van.
1 point
-
Another way to accomplish this disconnect of the charging circuit from the tow vehicle is to simply remove the fuse for this circuit. I know that this is available in F-150 Fords (sorry but I don't remember the exact fuse off the top of my head) and would be marginally surprised if this is not available on other similar trucks. Of course - if you tow more trailers with some that are not equipped with lithium batteries then you might have to remember to re-plug in that fuse on those occasions. Bill1 point
-
I disconnected the black wire from the 7-pin connector itself. Pulled back the connector housing, disconnected and taped the wire and tucked under housing upon reinstallation. The other end is still connected at the bus.1 point
-
Here's a Dexter video about the label and they mention the number etched into the axle. I called Dexter with the SN etched into one of our axles and they emailed a build sheet from that number.1 point
-
Our standard practice has always been to turn the Truma on at the inside control panel when we needed hot water and then turn it off when not needed. This is not a solution to the problem, it just reduces the likelihood of a fire 🔥 when we are not around. We will also add a step to our departure and setup checklist , to turn the outside switch off or on as needed before travel! It’s the best we can do until a repair has been completed. Mossey1 point
-
Agreed. We actually exhausted our nearly 6 year old agms with 2 days of dry camping and to get the front jack lifted I had to plug in the 7 pin cable. That did the trick and was easier than dragging out the generator. It certainly offsets the refrigerator drain on DC setting while traveling between sites. Very glad we have the 3-way fridge to operate on propane while Dry camping. Also glad we have a separate inverter and not the new inverter/charger in which everything has to be run through the inverter. Ours is a 2018 model.1 point
-
Agreed, LifePOH batteries do not require ventilation as they do not generate gas. My comment was intended to clear up what might be a misunderstanding by some readers. Lead-acid batteries generate gases during charging which may vent into the battery compartment, these are corrosive and flammable. That’s what the external vents in the door are for, and Oliver is required to put them there to meet RVIA standards. SeaDawg recommended sealing the external vents, which many of us have done, along with extra insulation. Venting into the basement isn’t required, as you have experienced, but it may help in temperature extremes, as many previous threads have discussed. For example, parking with the street side in full sun in Arizona in the summer @ 115F ambient. All I have done is cut two 2” holes in the sides of the battery box. I’ve noticed it is cooler inside the battery box on very hot days with the street side in the sun.1 point
-
SeaDawg - good callout, not something I'd paid attention to. That said, given the substantial nature of the heavy steel case, I think I'm ok with it. I need to re-check but I think the manufacture indicated no venting necessary ... so, with that, I like your idea of closing off the external vents and the Eze gutter - think I might do that ... thanks for the tip! Also, I really liked the single 460Ah unit and almost went with it ...really liked the bolt down feature and a singly unit would have easily fit the compartment ... but then figured it was a good value for another $200 to gain an add'l 140 Ah (2 x 300 Ah) ... adds another nearly 2+ days of off-grid boondocking to my trips!1 point
-
The battery(ies) could be subject to bouncing around in there? 😬1 point
-
GJ, when I read the OP’s statement that the battery tray would have to be removed to accommodate his new battery, my thought was the same as your original comment. I’m sorry you took it personal and my response compelled you to make a change, that was not my intent. I was actually referring to the differential cost of available batteries in today’s market in an attempt to convey that the choice of battery is a personal preference, and cost is oftentimes an irrelevant factor in achieving one’s goals. Your very rational assessment regarding battery securement based on personal experience and professional engineering background is spot on, as was your closing statement, and much appreciated. However, you lost me at “high amplitude multiple directional accelerations”! ps: edited my response, as well, thanks!1 point
-
Ron: I caringly rewrote my above thoughts at least a dozen time specifically to be kind and respectful. It was also made in the hopes to highlight that the apparent intent to install larger litho's without the supporting and securing battery box tray should not be executed. The idea of having litho's directly sitting in the battery bay may work for a given owner's use. But certainly would likely become a serious safety hazard should their use change. I learned just how rough the Yukon Territory and some Alaska "corduroy roads" are two summer ago. For strictly highway use, unsupported and unrestrained litho's may work just fine. But what happens when that trailer gets sold, and the new owner is unaware of such an install's vulnerabilities? As a Registered Mechanical Engineer I am ethically required to not be silent when I can foresee a significant life and fire safety hazard. Having that much weight not fully restrained and/or supported in a battery box of a mobile application would be a problem. Especially for a mobile application that will be subject to high amplitude multiple directional accelerations. That said, your suggestion for a load spreading and battery restraining "platform" certainly is a suggestion in the right direction. I think it is a great suggestion. But from the perspective of respect and understanding, was it appropriate for you to suggest it? From "The knife cuts both ways" perspective; the answer is no. But from the higher perspective of Oliver Safety and caring for our family members: I think we can agree that both our intents were spot on. GJ1 point


).png.7404c6be61910ea82bbccefa79a74dc6.png)


-
Recent Achievements
-


")


")


")


