Leaderboard


Popular Content
Showing content with the highest reputation on 11/08/2025 in Posts
-
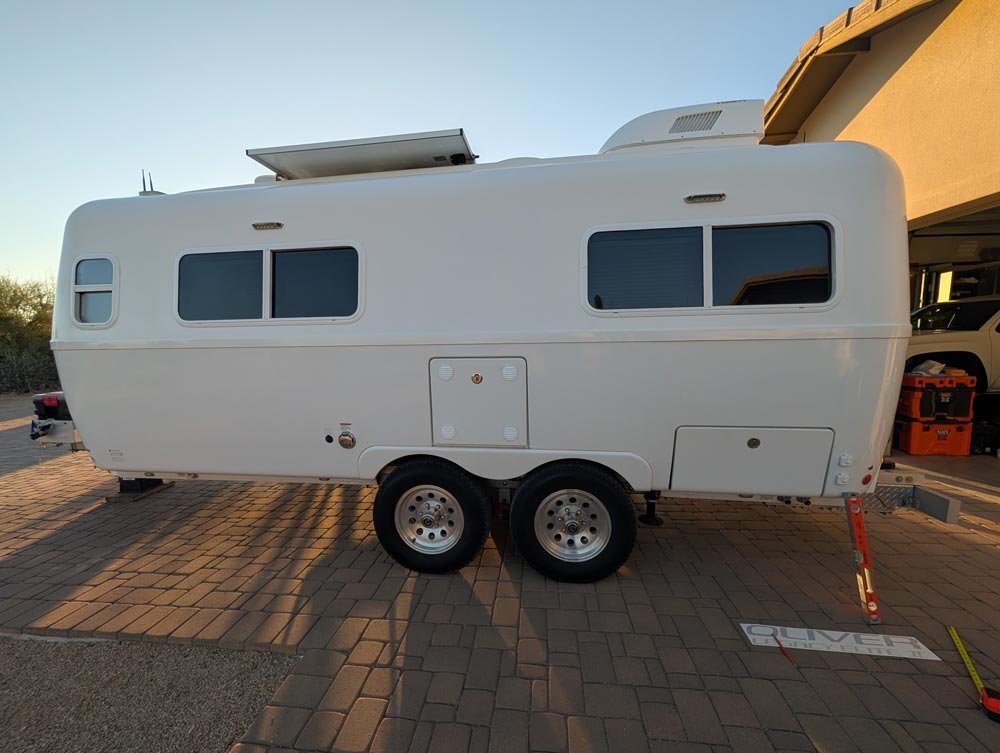
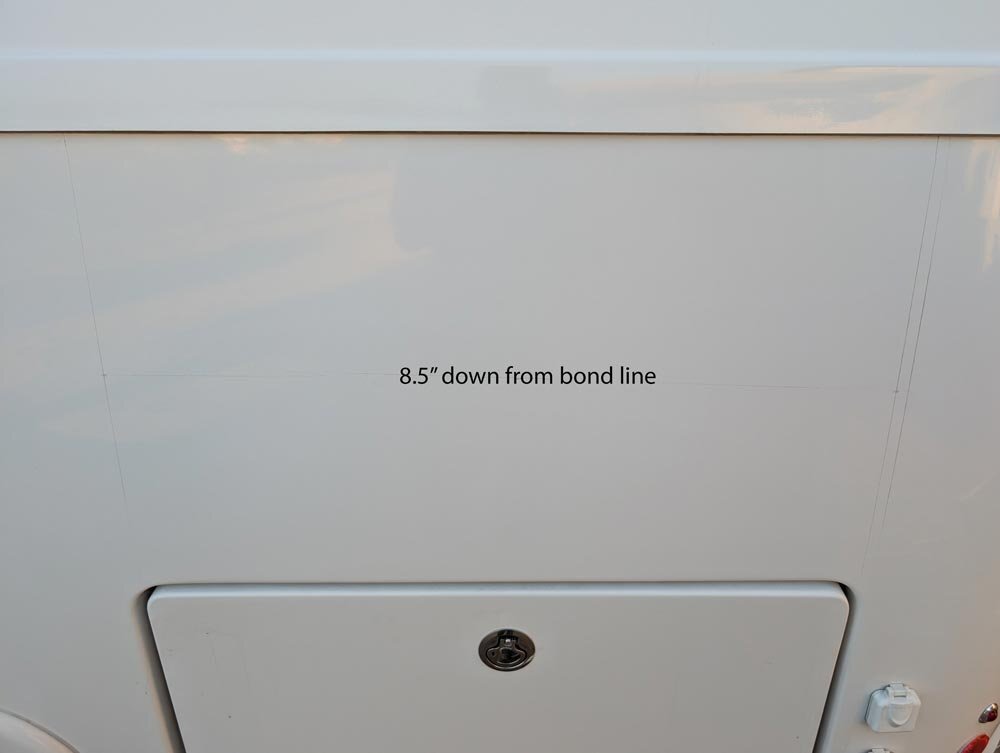
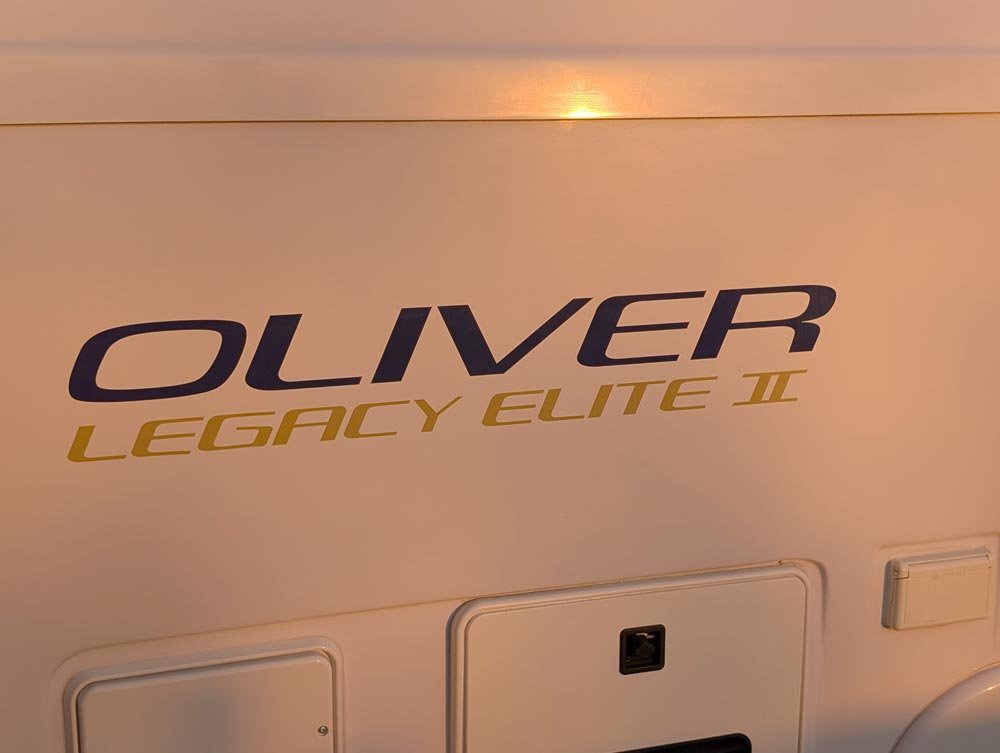
Put the new side decals on. Looks like nice quality decals and went on easily. I clay bared the sides first, then hit them with a 3M 1 stage buffing compound, then wiped and cleaned it before measuring it out. Drew vertical lines about where the doors are below where it goes, then measured to the middle of the bond line and door. I came up with 8.5" down from the bond line and that was the center of my decal placement. $73.71
 9 points
 -
But.., We would like you to take care of your laundry before I/we help again. @ScubaRx, Oliver Elder and Senior Forum Mod asked you to update your profile. That done and add a proper signature with hull #, etc. and then “Welcome to the community.” You have a couple threads started and we do help known Forum Members.4 points
-
On all three of those mountain passes, with a F-150 I DO stop and scan my brake temp's. Not because they were starting into or were in fade mode, but out of an abundance of caution. The Big Horn to DT brake temps were high and a cool down was the smart stop to do. I transverse an 10% gravel road in OK twice a year. With our F-150 I use low range 4WD and lock up the rear axle as well. As you state a larger truck for these roads would be nice for sure. But overall for us the F-150 Super Crew FX4 is overall our best solution. Would love to have a 6.7 diesel with jake brake in the F-150. Just dreaming.... GJ2 points
-
We've had quite the opposite experience in our 2 1/2 years with hull #113, manufactured 10 years ago. Though I have read everything on our Forum since and I do see many more issues in late-model hulls vs. the oldies but goodies! I've worked a LOT of upgrades, but only a few repairs. And every issue I've found is when we were home. 130 days on the road everything has worked, no issues while traveling, knock on wood! I found a breaker wired in the wrong direction. I have issues with how OTT wired things, but no electrical failures to-date. I've upgraded and rewired everything anyway. I recently found OTT forgot to fully weld (tack-weld only) the mount to one stabilizer jack. OTT blamed Barker, but actually OTT makes these welds as part of the standard installation procedure. I made a new bracket with $10 of steel. We also had two small welds fail on the frame, two cross-members were hanging on one side. Local guy welded them for $75. We had a drawer latch fail, the orange colored connector to the slide, just $10 and 10 minutes to repair. Now I have extra parts if another fails. Prior owner complained of a noisy Suburban furnace, so OTT install an Atwood furnace back in 2018. Likely prior owners had worked through other issues of which I would be unaware. The interior panel of the entrance door is lightly cracked, but this is from wind banging the door. This will not happen anymore now that Lippert friction hinges are installed. We love our Oliver as it is now with my upgrades (inverter A/C coming soon)! We purchased a used Oliver at a good price and I do not expect anything out of OTT since it's long out of warranty. Yes, I would feel differently if we paid new price and had 21 issues listed to date. I don't see better quality out there. Even Winnebago, that some consider to be the best, is not better. We plan to keep our Oliver and leave it to our son when we are done with it. Don't want another brand, don't need something better. If I found this crack on our hull, I would leave it alone and just keep an eye on it. Often bodywork on something small is worse in the long-run! They will likely just do something cosmetic, some fill on the surface. Which is fine, but certainly not worth a trip to Hohenwald for me, in my opinion.2 points
-
I'm so sorry to hear that you feel this way and am sorry for the "problems" that you have had with your Ollie. My personal experience with both the Oliver Company and its travel trailer product has not been without "issues". But, those issues were either not Oliver's fault or were taken care of by Oliver with few (if any hassles). Just for my own frame of reference I took a look at the current warranty for Corvettes - it is three years for the fiberglass panels. This does not make your experience of having to deal with the crack in your Ollie, but, at least it is covered under a warranty that is a full two years longer than a Vette's. I also looked at the warranty on Bigfoots and found that it is either three years or five years depending on a number of things (so, it is unclear which it is and for what items). In any case, Bigfoot's warranty is no greater than Oliver's. Good luck with getting the crack repaired. I truly hope that this will be the beginning of a better relationship. Bill2 points
-
Assume that you already know that the "third brake light" is nothing but a decal placed (on the outside) over a red lens?
2 points
-
So, 1 1/2 years since this post, and near 2 1/2 years of Oliver ownership and I'm finally getting to making our Oliver look better! I believe it's better to do maintenance and repair, mechanical and electrical work, before the cosmetic work! I've got a guy coming over today to quote the buffing and ceramic coating work. He runs his own business and has good references. Hope he's reasonable! But I'm not having this kind of work done without all the proper prep work. Doing what I can do myself. Spent half a day, used a half dozen razor blades, and made good headway. Check out all the caulk on the driveway, mostly silicone and some butyl from around the furnace cover. I found a new Atwood furnace cover for only $25 on eBay. Thank goodness I do not have to clean the caulk off those parts, certainly worth the money to replace it. Next step, using light 3M pads and solvent to remove the silicone from the window frames and body around the furnace. The frames are painted or powder coated as I can see aluminum in a couple very small spots. This is the waste from this area only (including the window above)! Four windows, the entrance door, and this utility area, lots of useless gunk. I had three piles of caulk to vacuum up end of day!
1 point
-
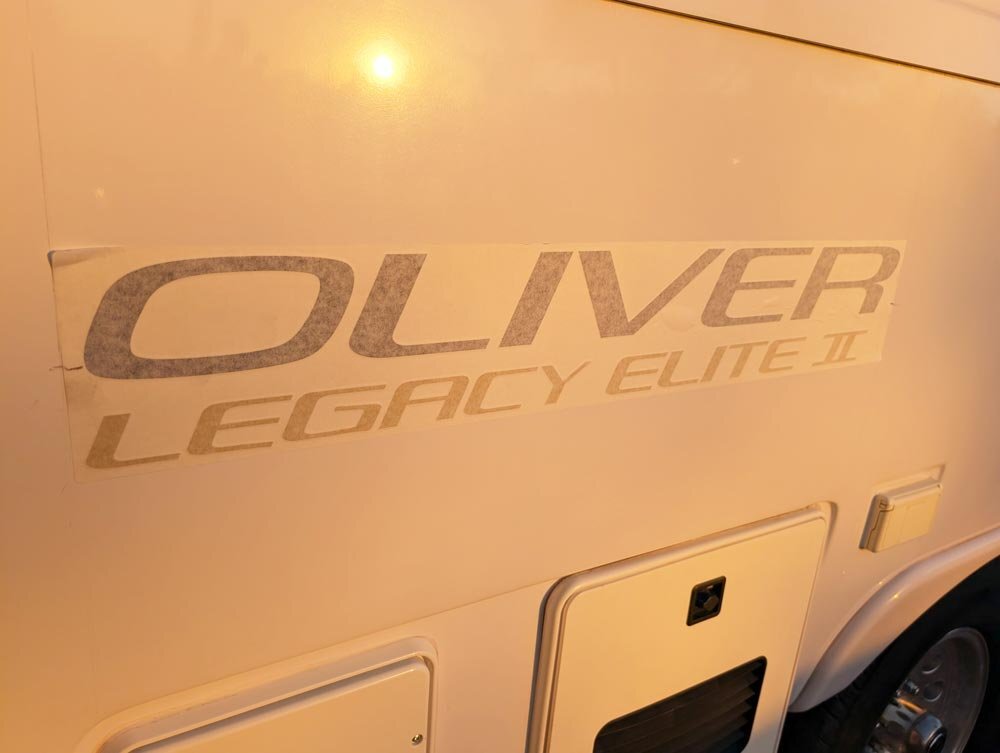
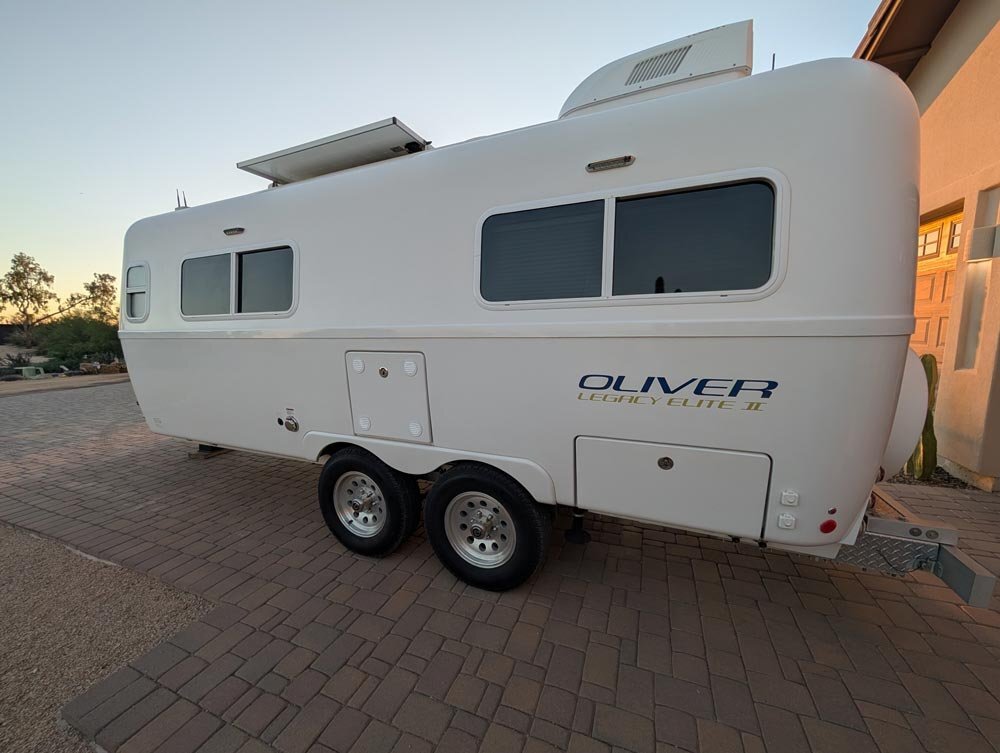
Agreed, it sure does look good. And excellent installation work too! I'll keep my side decals for now (pic). They're in decent shape and they are of the vintage style. I would like to replace the front Oliver logo, not as good in condition. I have time. I'll use Christian's artwork unless Bill @topgun2 is successful in hunting down OTT original artwork. Thanks to both of you!
1 point
-
Looks perfect!1 point
-
Sorry but I don't have one of those "fancy" things. But, I assume that you've submitted a Service ticket? Bill1 point
-
Hull #? Signature? Please update asap...1 point
-
I believe the answer to your question is in your second sentence. You have your warranty claim entered and acknowledged. The schedule is now up to you! The crack ain’t going anywhere! It will either stay the same or grow a little longer. A proper repair can happen sooner or later, it makes no difference. Be cool. 😎1 point
-
My ‘23 Tundra is on the recall list but I’m one of the lucky ones ( so far ) with 60k miles, 30k of which pulling our Oliver and no failure as yet. I’ve heard that they’re starting to address the ‘23s in my area soon. I have done frequent oil changes right from the start, hard to know if that made a difference.1 point
-
Agreed. Although there was a moment when I first posted when I thought I was in the wrong thread. Carry on. Dave1 point
-
The main grounding buss is under the aft dinette seat. It is attached to the frame. Oliver does not supply wiring diagrams to owners. You do know that RV wiring is not like that in your home? The neutral and ground wires in an RV are isolated from each other.1 point
-
Kind of difficult to put a "turtle neck sweater" on the Ollie! 😁1 point
-
Ours is not mounted and it is not a problem for me. It takes a couple minutes to get it out of the case and plug it in to either the Oliver or the Jackery. I like the advantage of being able to put the Oliver in the shade and being able to move the mini to where I get some signal. I am thinking of a small tripod as a mount just to get it off the ground.1 point
-
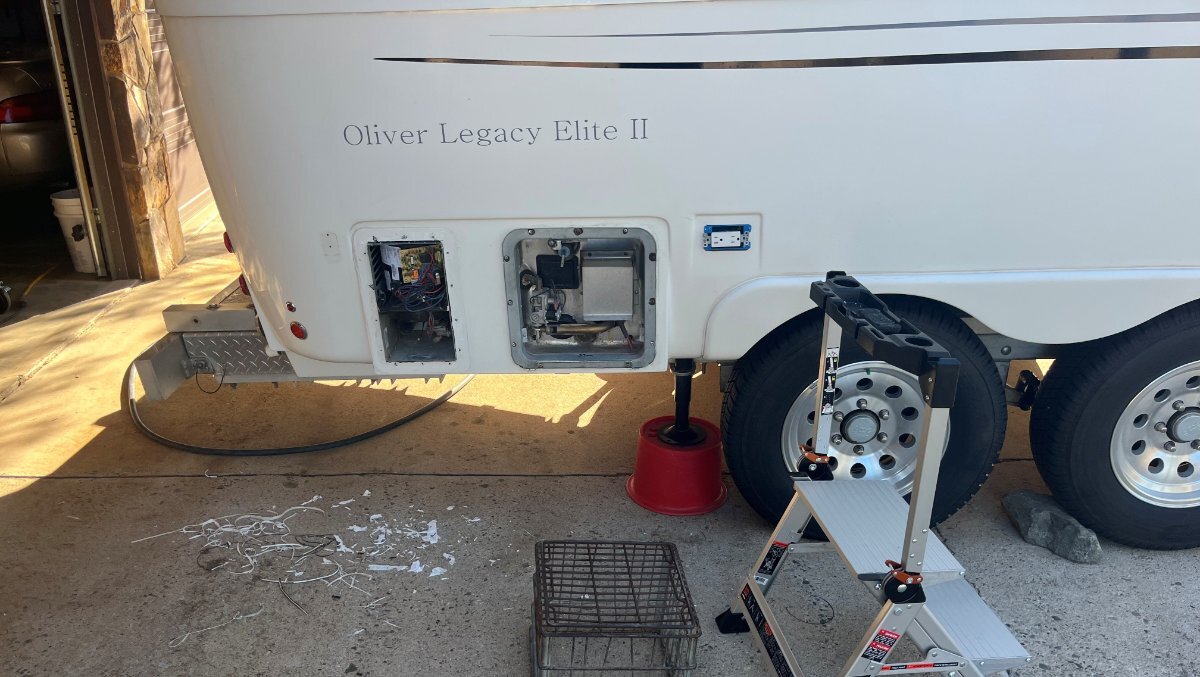
Agreed, E2 means no ground connection. Given you are certain shore power has proper ground (be sure) then it would be within the PI EMS. Make sure ALL 6 connections (3 in, 3 out) are clean and tight. The 4 you see quickly in the picture are the hot and neutral connections. Then look closely at the green wires which are bolted to the case of the EMS (inside top of the case in picture). I can see that one of these could get loose easily.
1 point
-
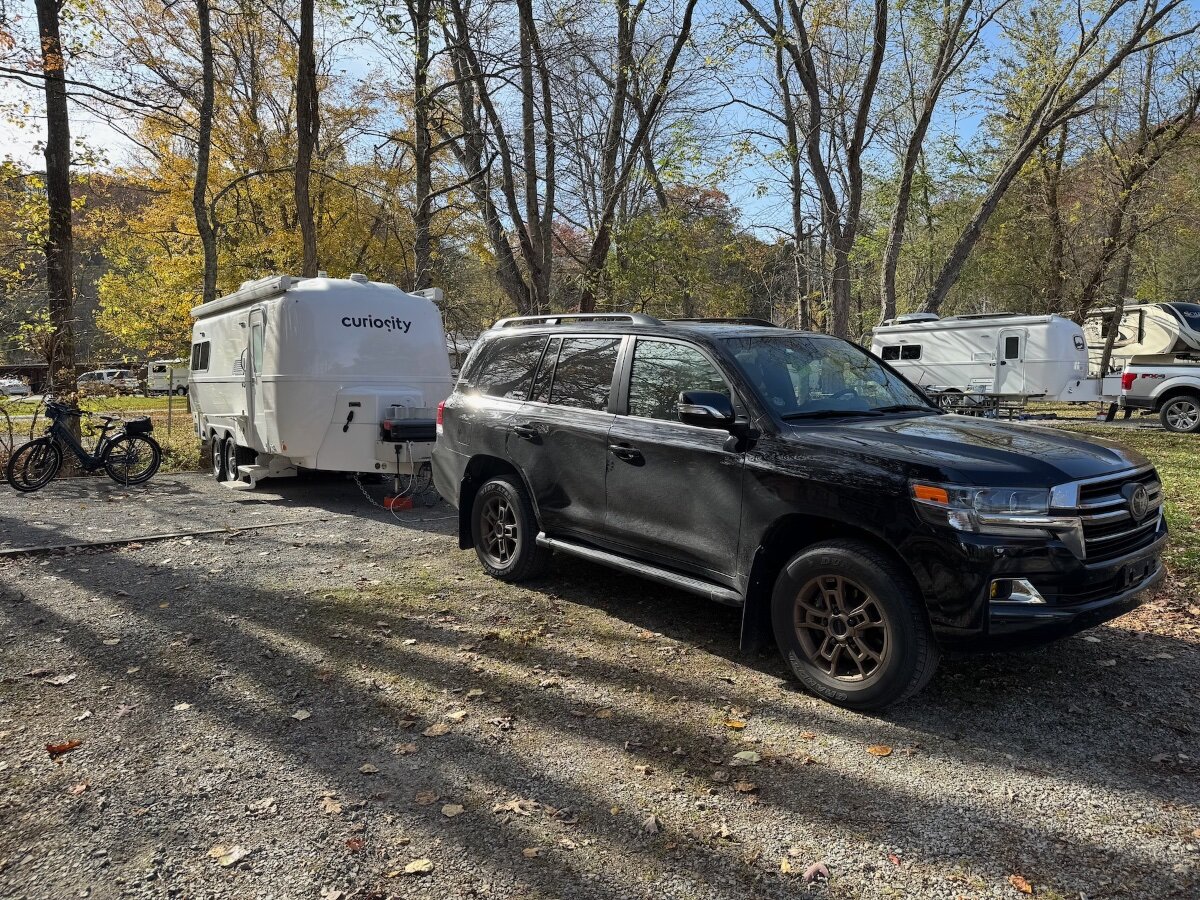
No Oliver logo on the nose would look really strange! We ordered our 2023 naked, and added our own graphic. We've had a lot of people ask what a "Curiosity" trailer was. We've heard "Is that some kind of Casita?", or the guy in Florida who looked it over rally well walking by, but wasn't inclined to chat. He returned the next day to tell me that he'd looked up Curiosity trailers, and that it was a really expensive trailer! No Oliver logo on the nose would certainly seem to cut down on random inquiries and potential sales! Here's a Curiosity brand trailer next to an Oliver at the Hungry Mother Fiberglass Rally. You can barely tell the difference! 🤣
1 point
-
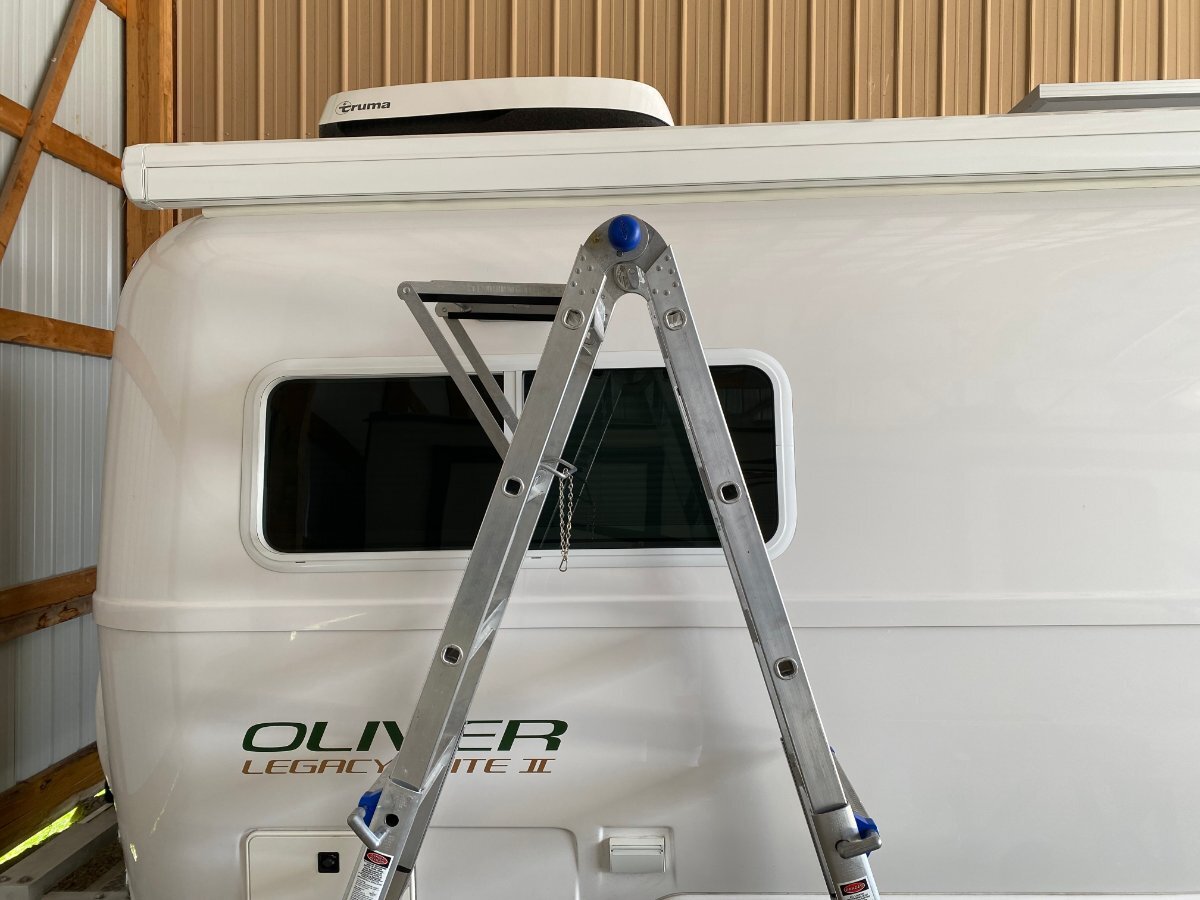
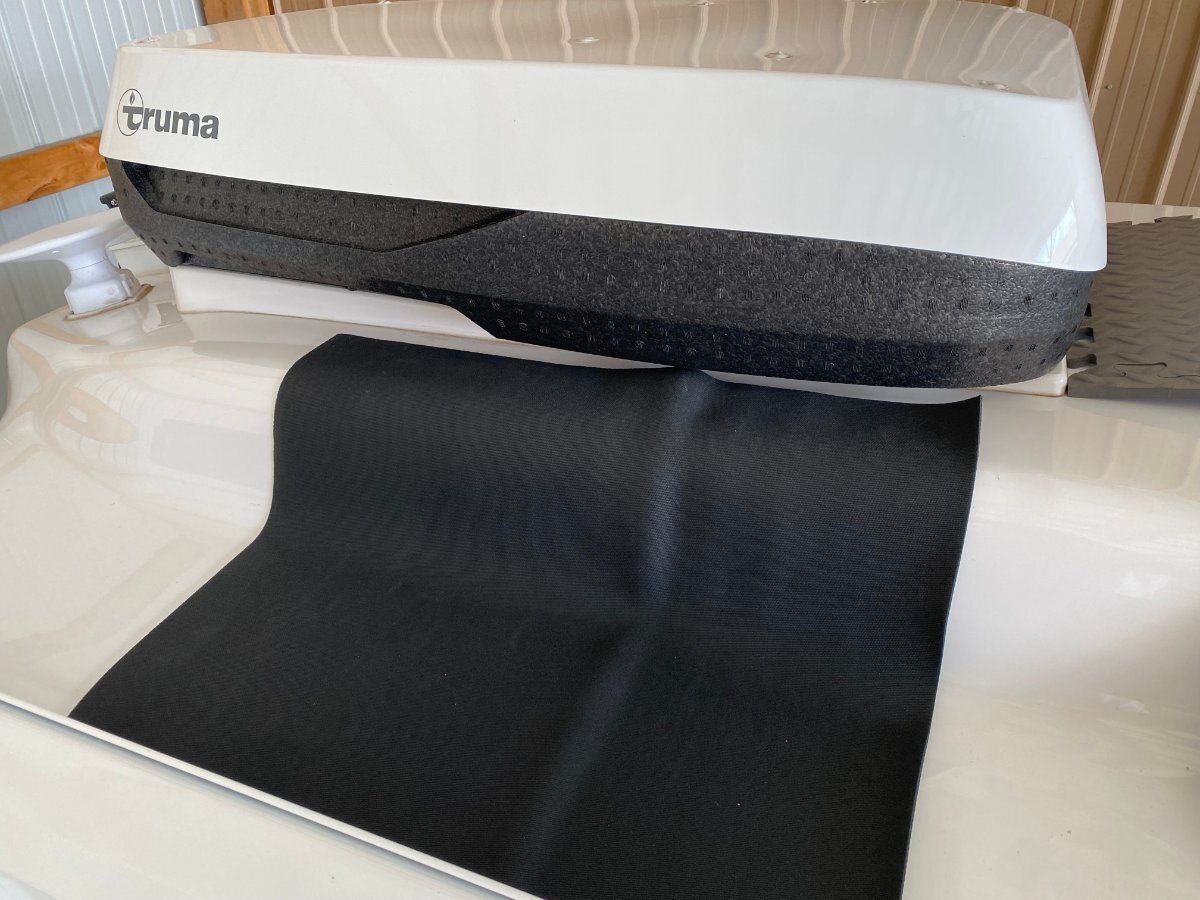
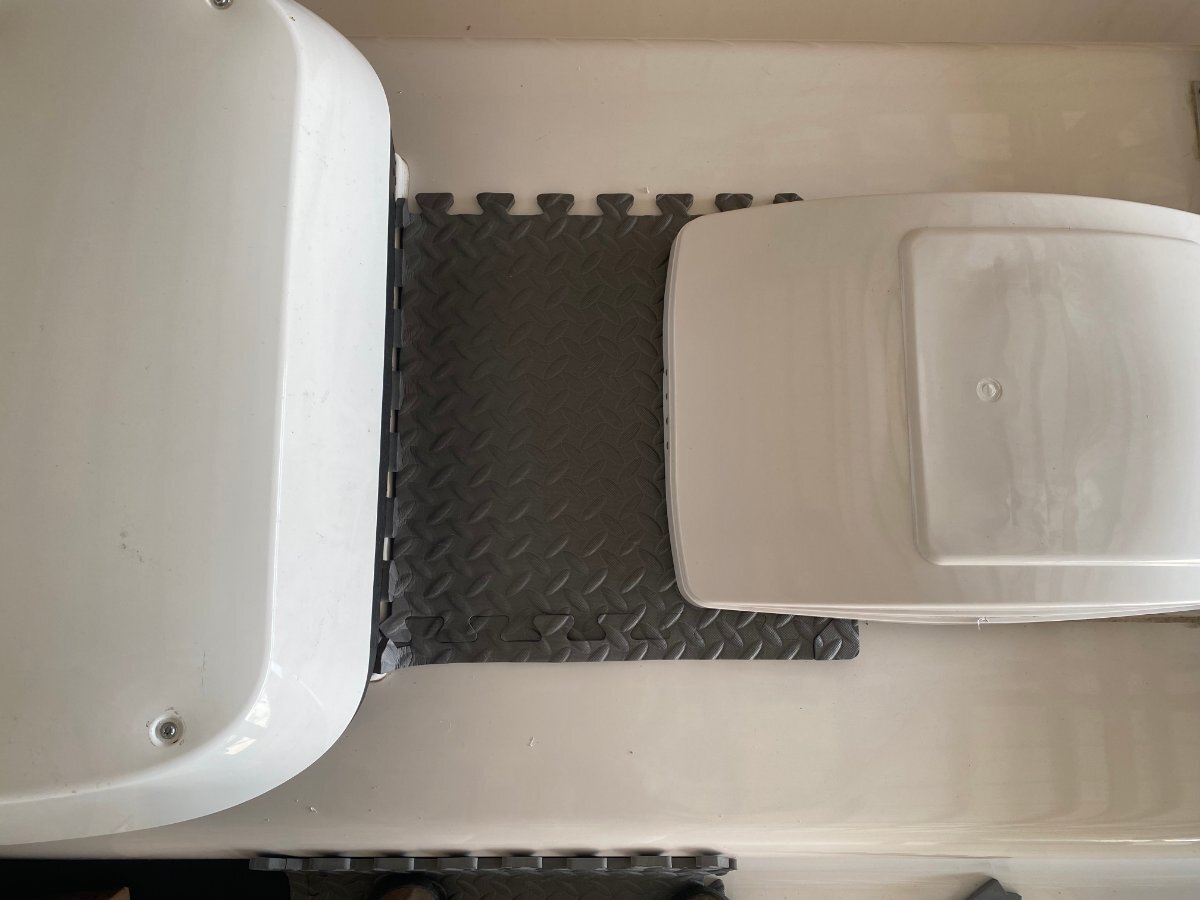
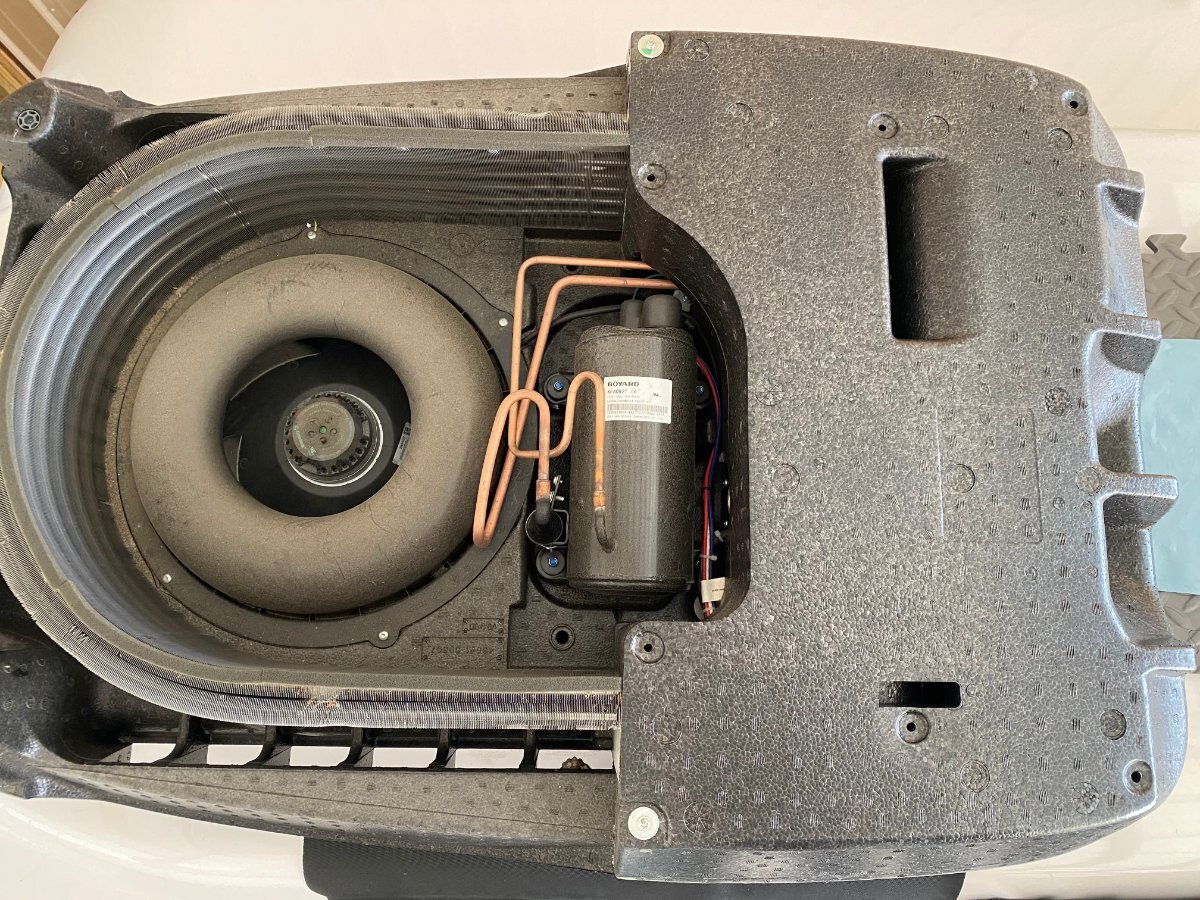
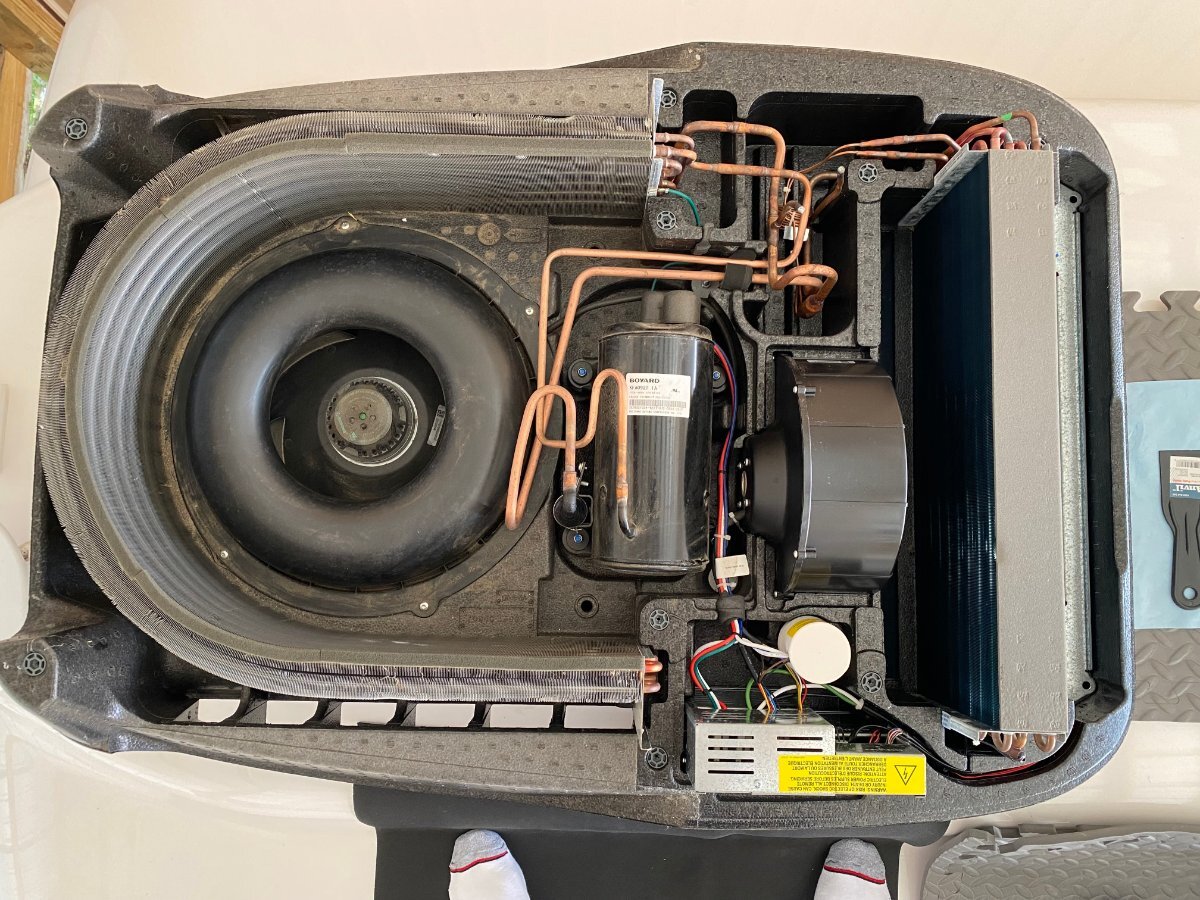
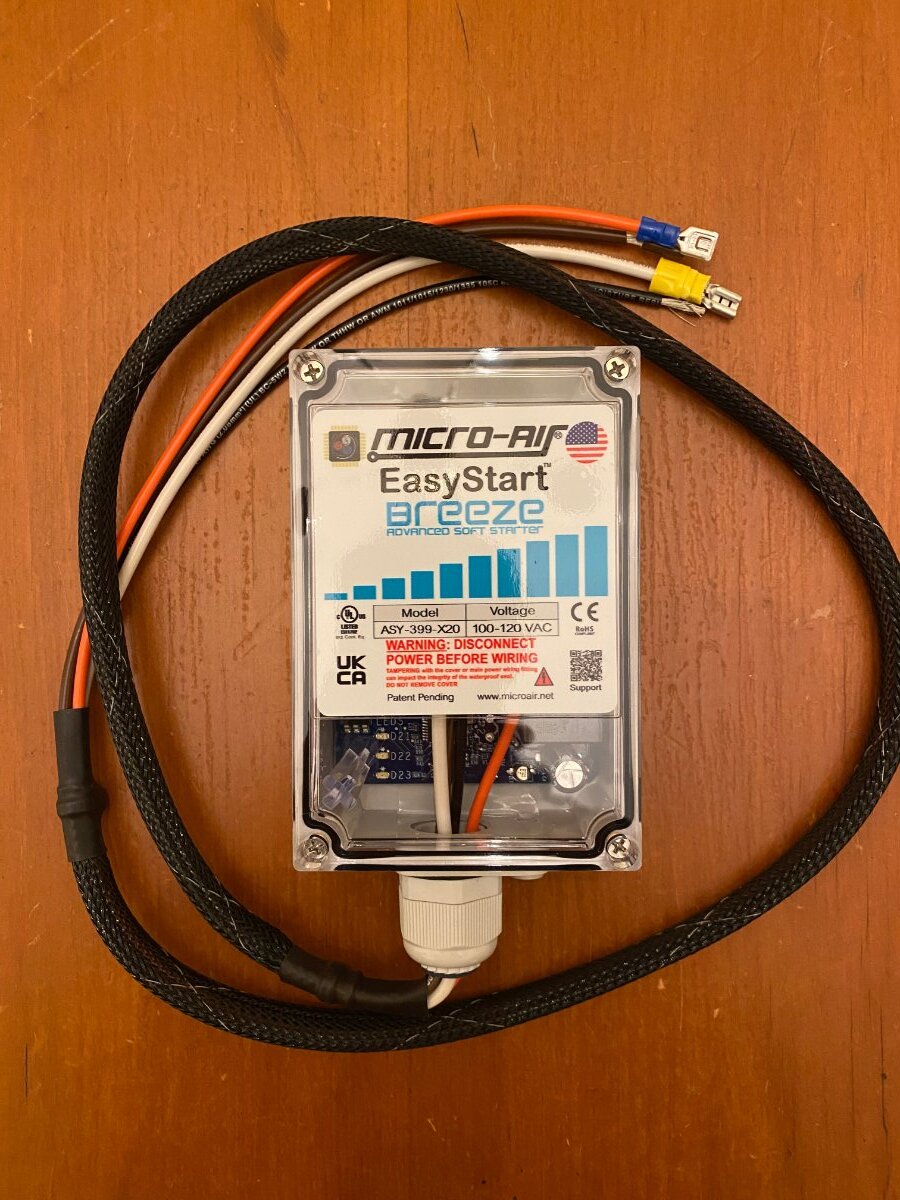
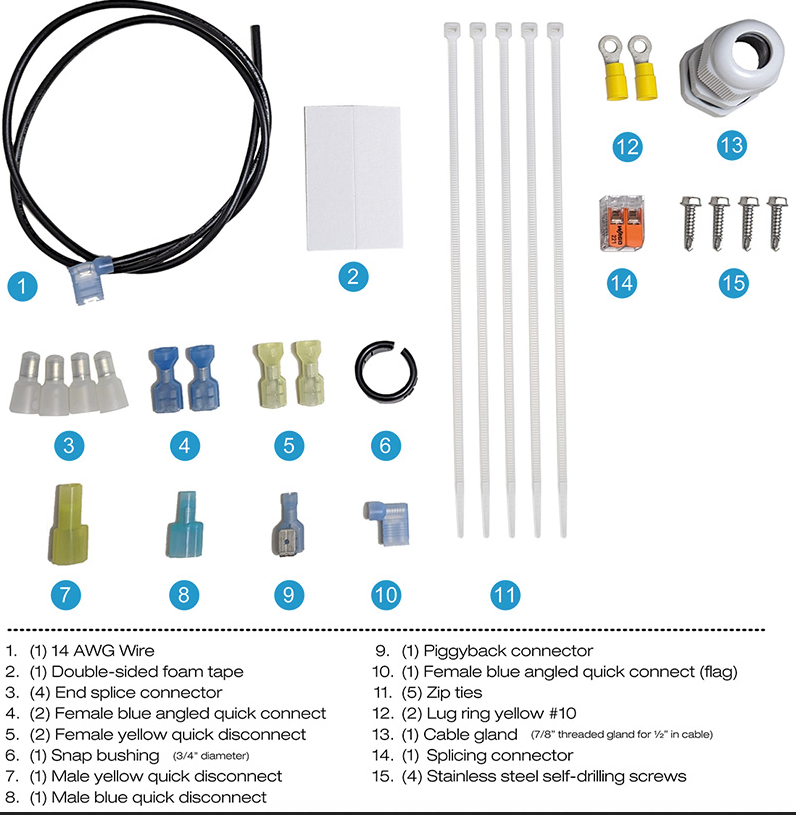
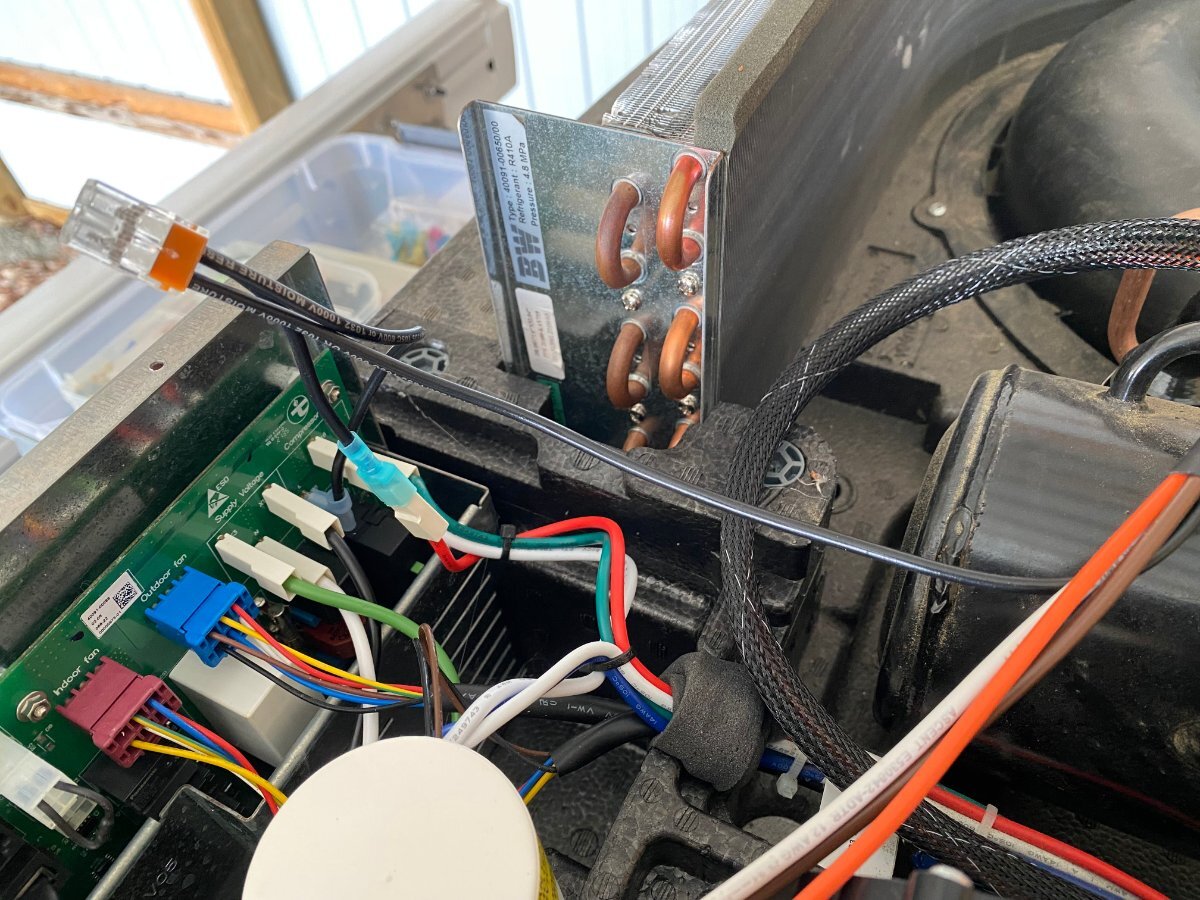
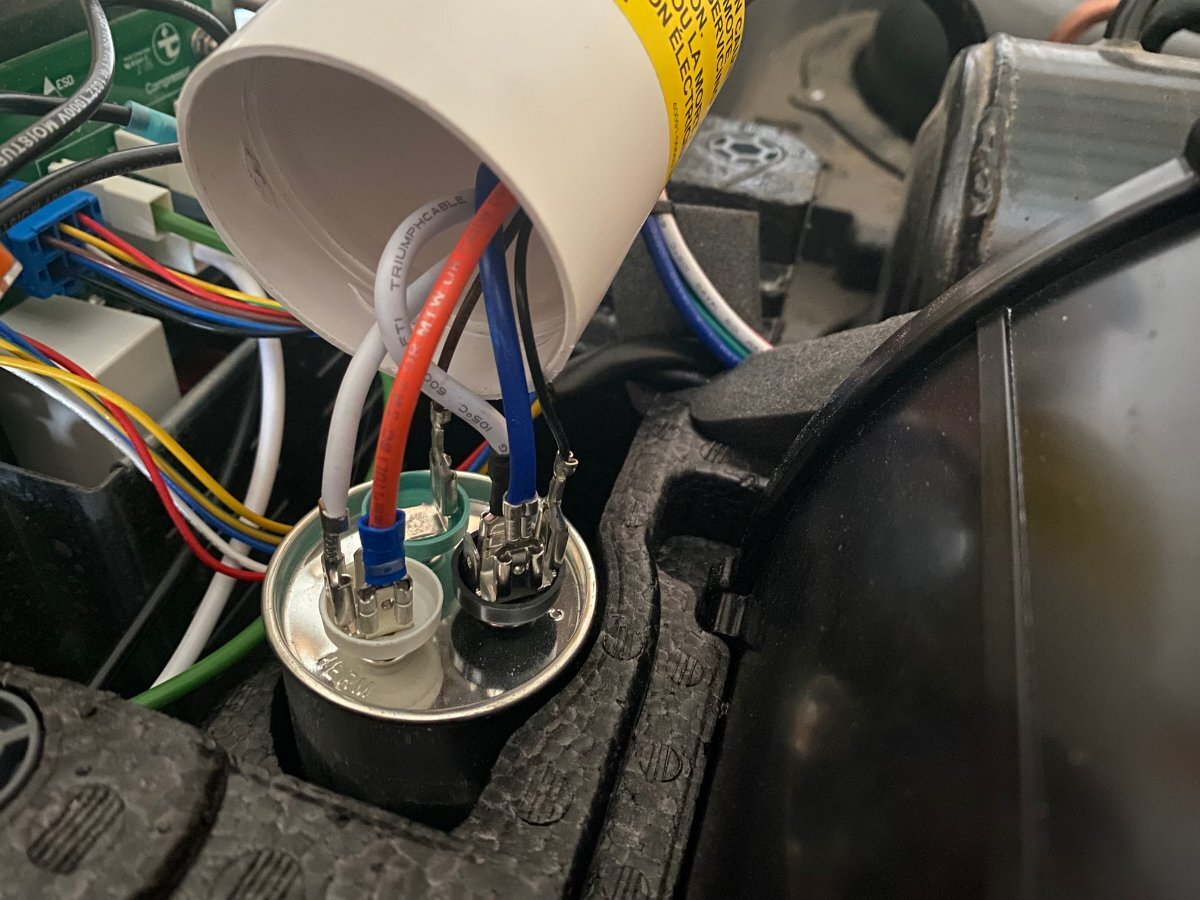
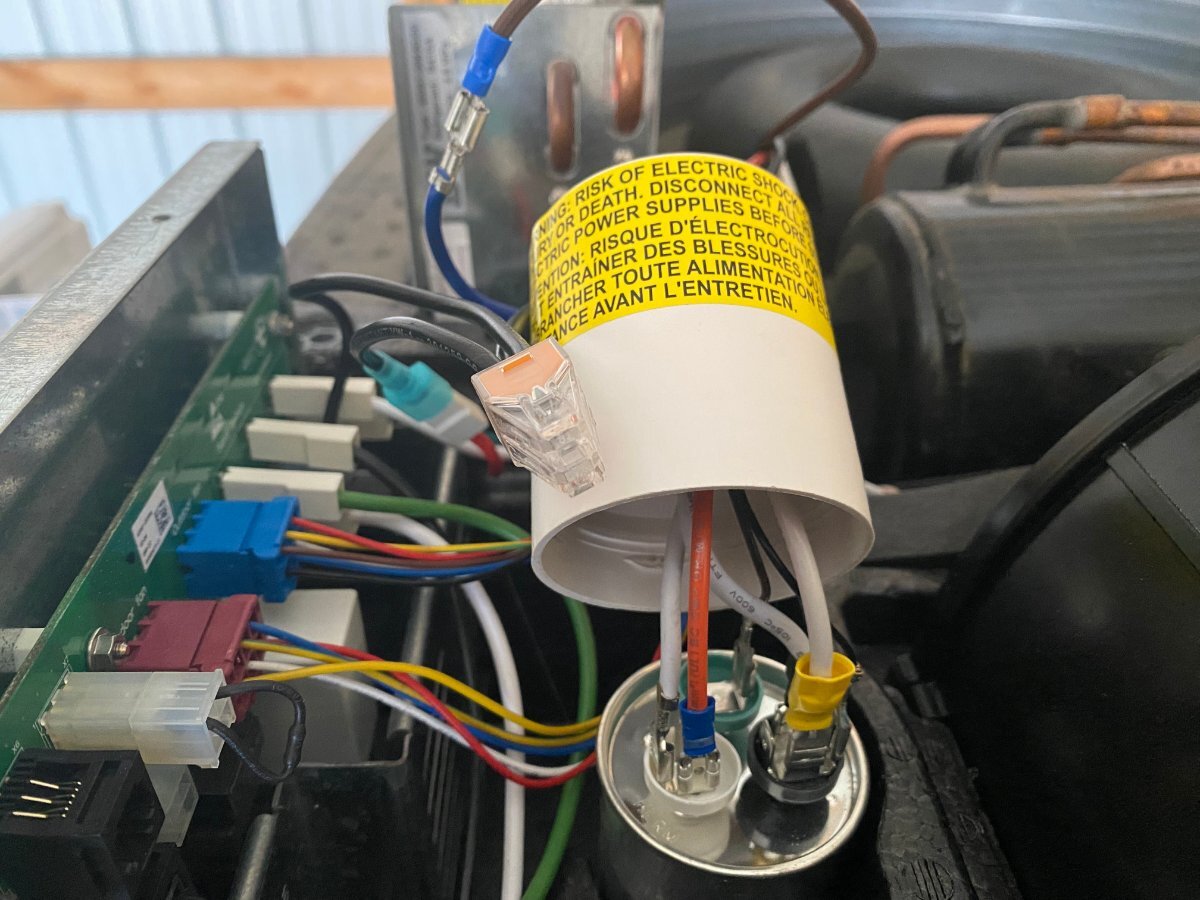
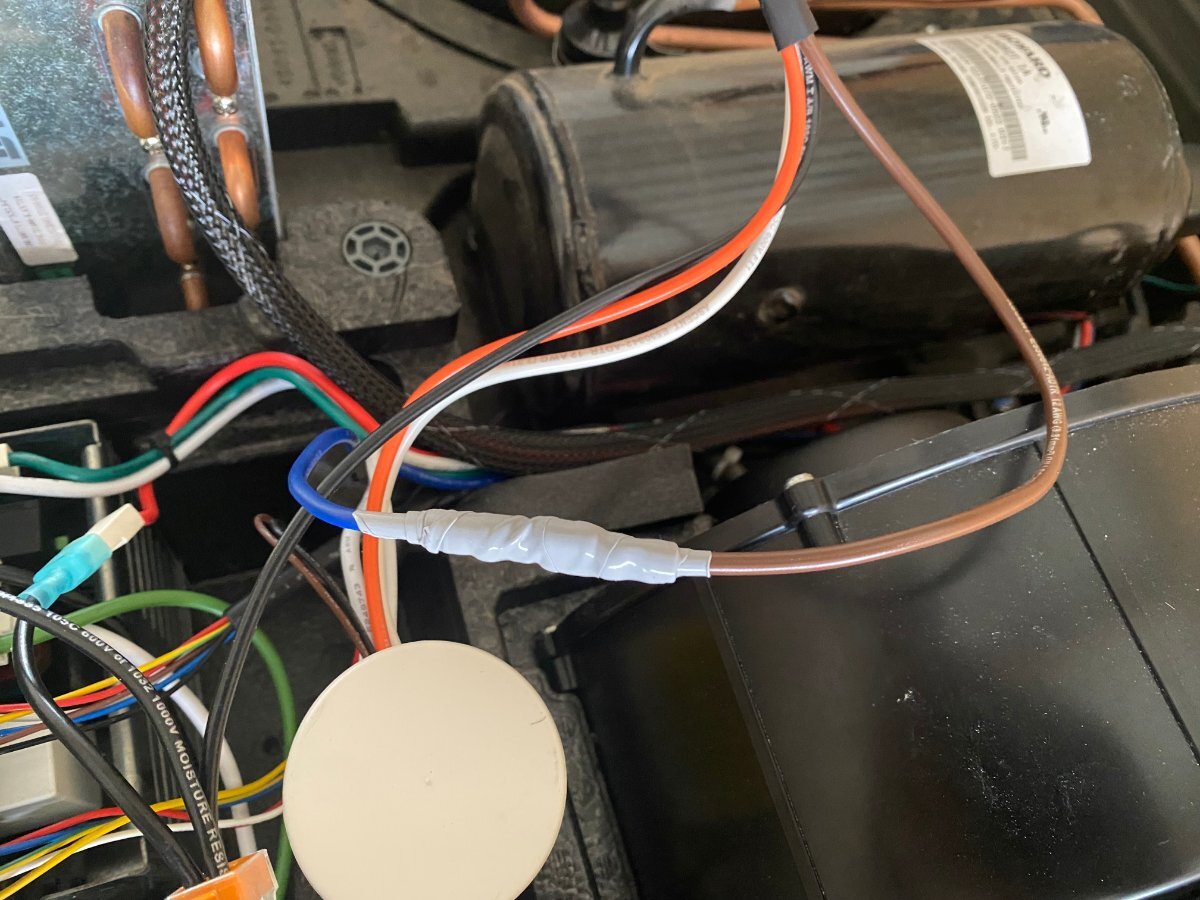
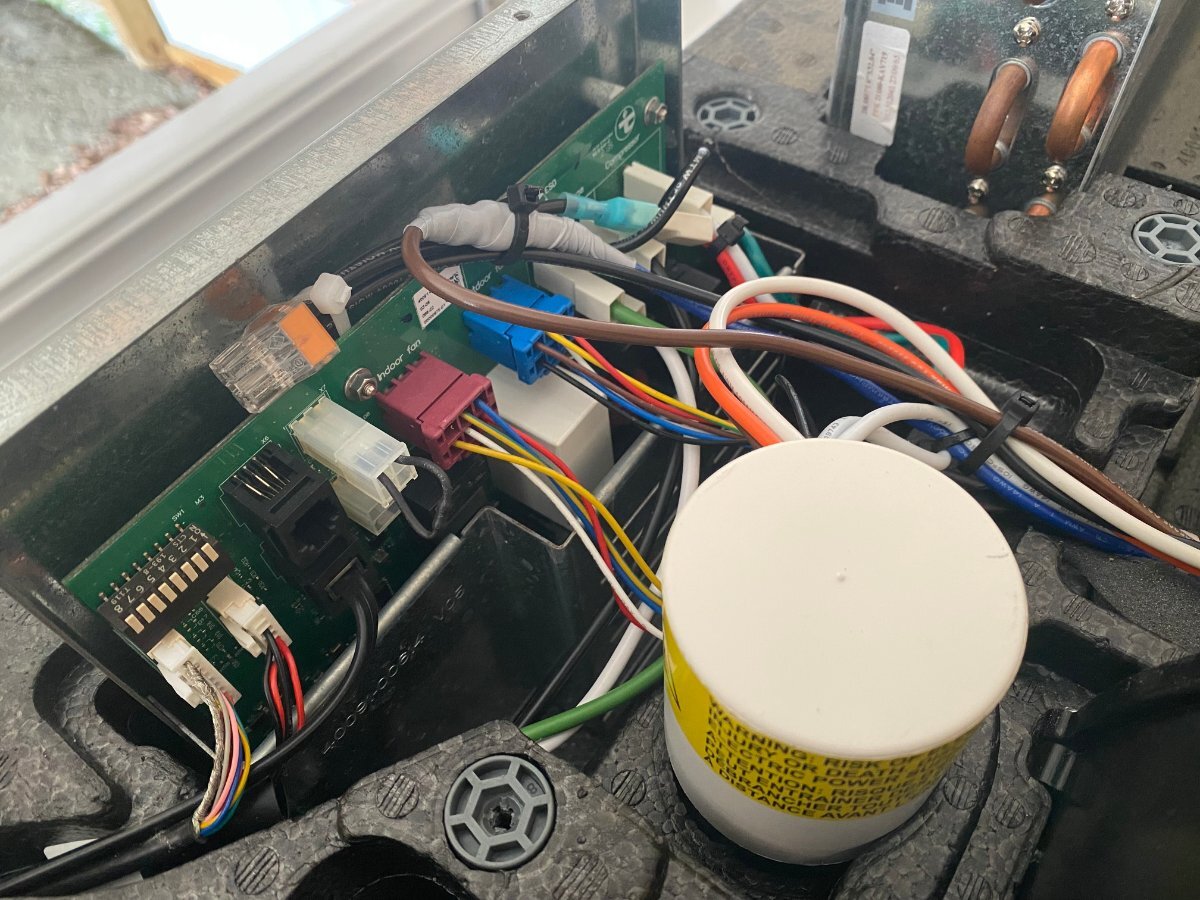
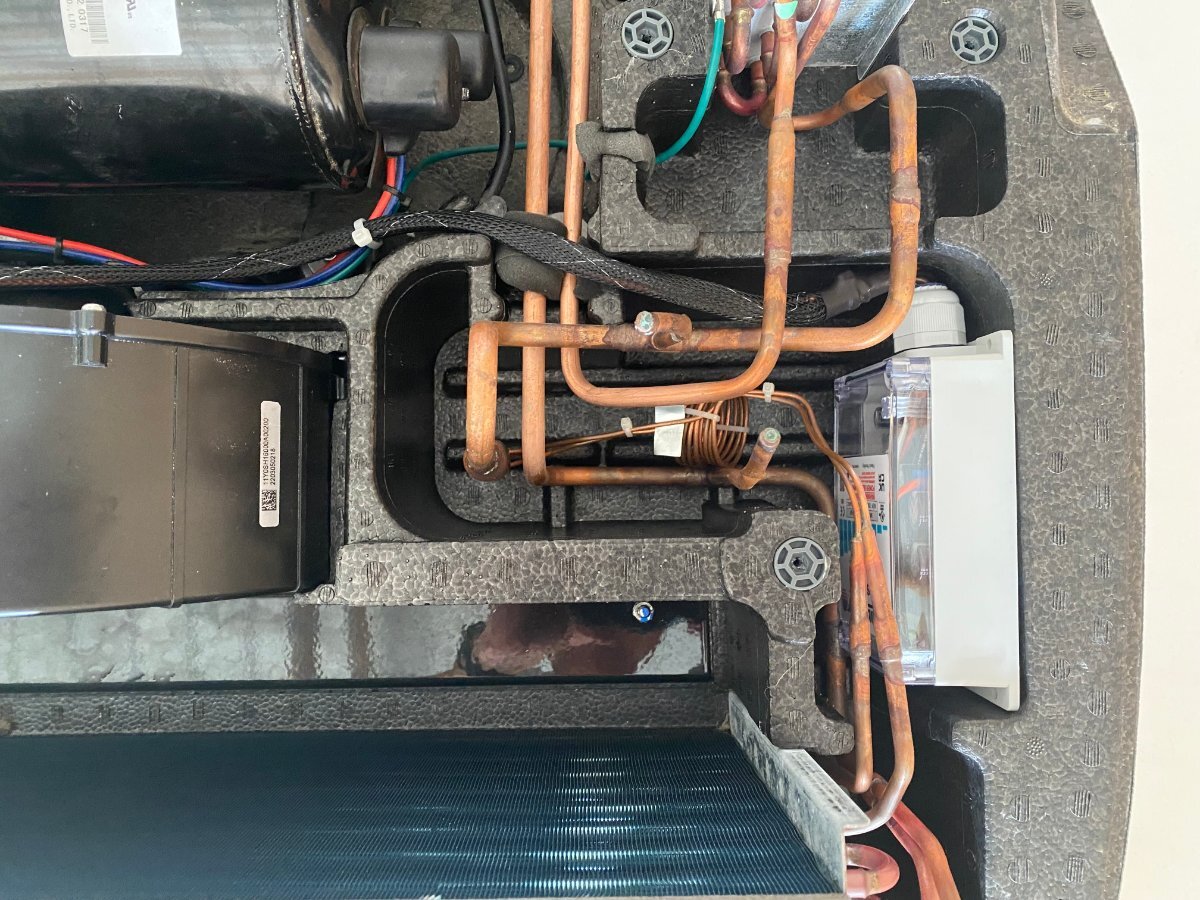
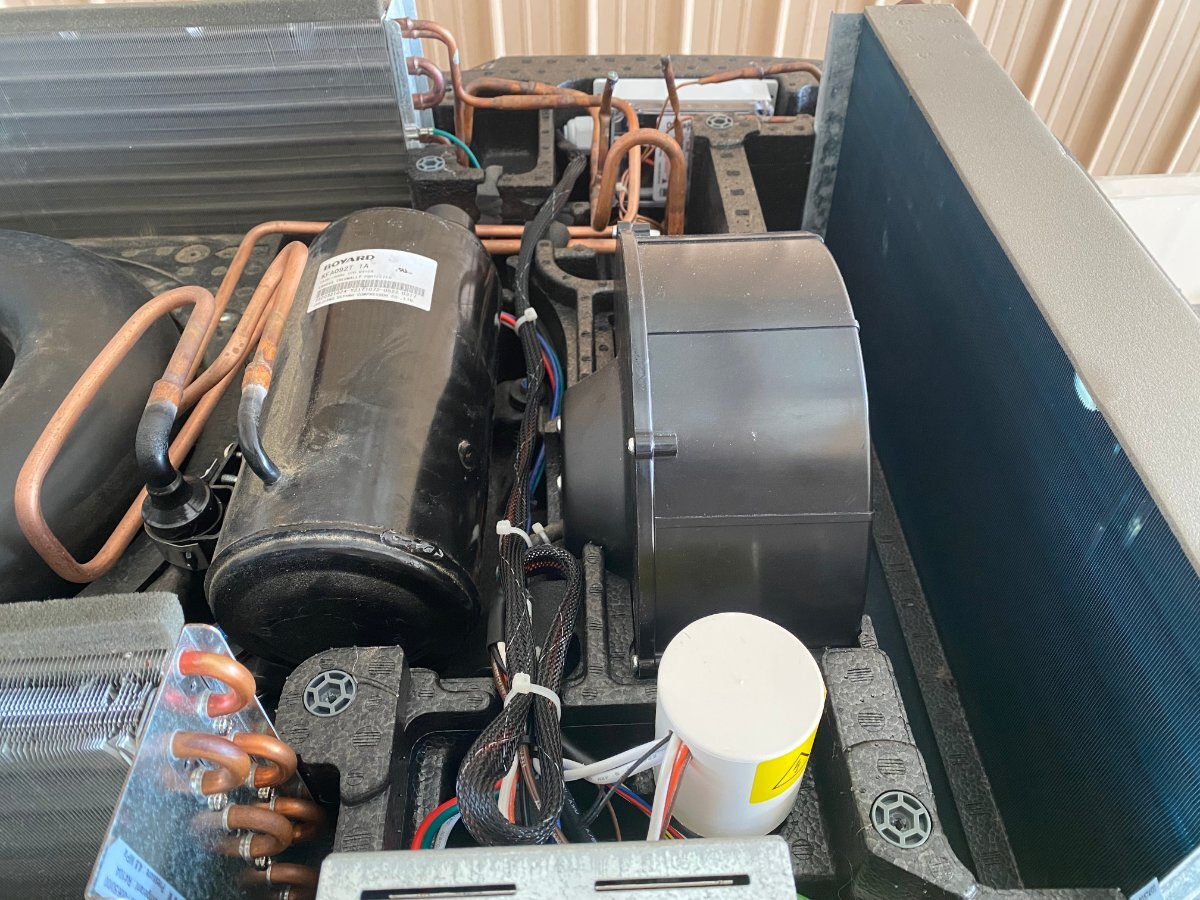
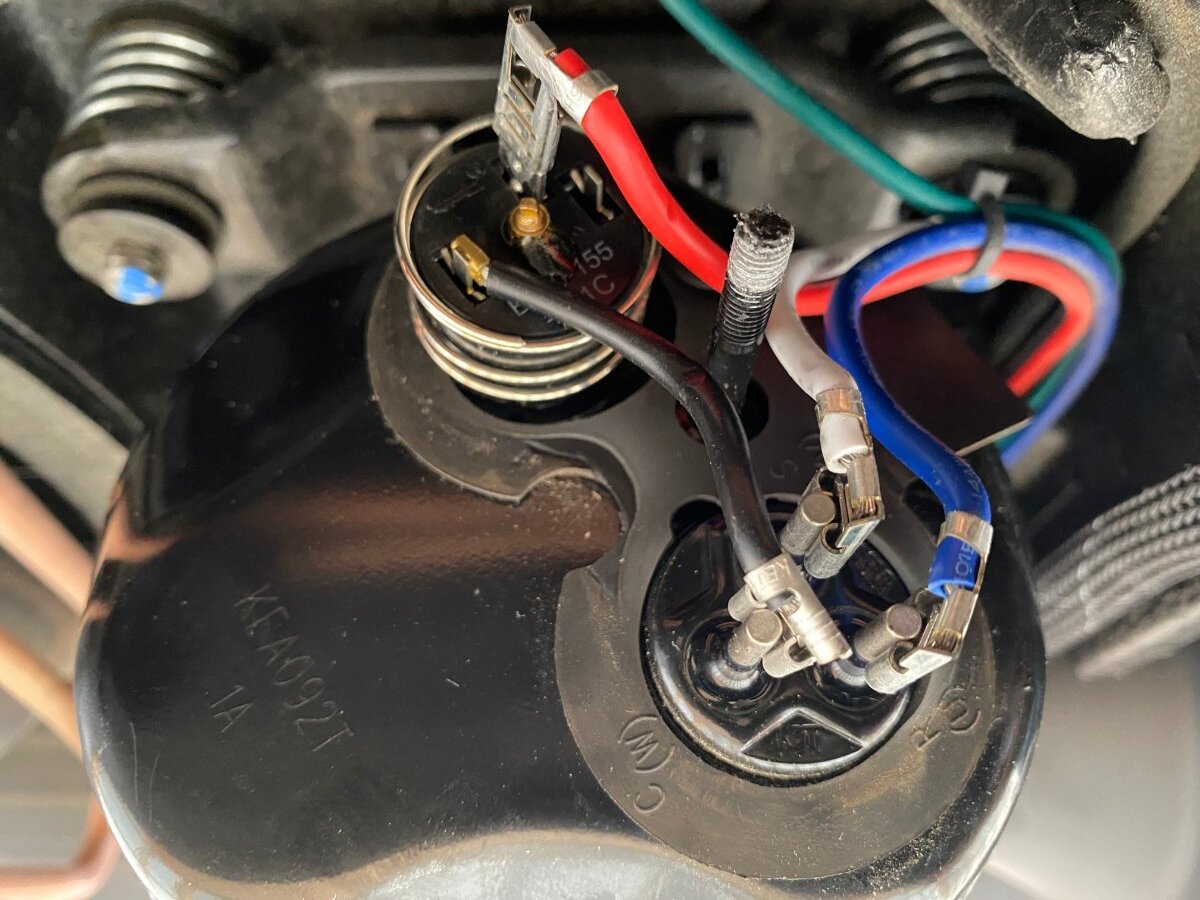
Since purchase of my OTT last year, I had been thinking of installing a MicroAir EasyStart on my Truma A/C. However, I wasn’t sure if it would allow my Truma A/C to run off my Champion 2000W generator, especially since I run it on propane and often camp at elevation. Fortunately for me I met @mossemi at the Oliver Rally last May and it turns out that he has the same generator and like me, runs it on propane. He told me that with the EasyStart, his A/C ran fine off his generator even at elevation. Thanks to Mike for that info. So now you can imagine my excitement when they announced that there were going to be ten EasyStarts given away at the Rally! But alas, I was not one of the winners. However, I met a nice couple from Oklahoma who did win one. And as luck would have it, they had decided not to use it, so they graciously gave it to me! Although I made several attempts, they refused any compensation. So I owe them a big thanks. Below are the details of my installation. First, thanks to @Patriot for previously posting this video: SoftStart Install on Truma A/C I found it to be very helpful for understanding how to remove the A/C covers, where to mount the EasyStart, how to run the wiring, how to get access to the control board and for making connections to the capacitor. However, DO NOT follow the detailed wiring instructions because the video is for a SoftStart not an EasyStart. Next, a couple of thoughts on safety. After I removed the A/C cover I found an old mud dauber’s nest. Fortunately it was not inhabited at the time. But they seem to like that area, so beware. Second, the video doesn’t mention it but you should make sure that the capacitor has been discharged before working around it. Since I’m not a qualified electrician, I won’t comment any further. Finally, I used my 17’ Werner ladder to get access to the roof. The optional Werner platform made this much easier. Also, accessing the roof from the curb side felt safer since the awning acts as a short railing. I used a sheet of rubber tool box liner and a piece of interlocking foam utility mat to protect the fiberglass and provide slip protection. With those additions, I felt safe enough to work in my stocking feet. As shown in the video, the white cover can be taken off by removing the eight screws (covered with lap sealant) with a T30 Torx driver (note that the two screws at the back are shorter than the others). Following that, removal of two additional T30 screws allows the foam cover to be lifted off. Be careful as you work with the cover off because the exchanger fins are easy to dent. Access to the silver electrical box is achieved by removing three T15 screws (one on top, and one on each side). Here’s the EasyStart device that I installed and the universal installation kit that comes with it: In general, I followed the wiring instructions provided by Micro-Air. I will say that I found the generic wiring instructions to be a little confusing (did I mention that I’m not a qualified electrician?). However, I was able to find specific wiring instructions for the Truma (that even I could understand) here: EasyStart Wiring Instructions for Truma A/C Although not necessary, I first removed the cap covering the wiring connections to the compressor motor with an 8 mm socket to confirm the wiring colors at the R, C and S terminals. (I don't know why but this photo is upside down and I couldn't figure out how to change it). I did deviate slightly from the installation instructions in one aspect, as I chose not to cut any wires but instead use terminal connections. That way, if I ever decide to remove the EasyStart, I can put everything back exactly the way it was. So instead of cutting the Red wire coming from the control board, I removed it and installed the provided 14 gauge Black wire with female terminal in its place. I then cut the Black wire and crimped on a male terminal to the portion not used and connected it to the female terminal on the Red wire that I had just removed. Finally, I used a WAGO push-in wire connector to tie these two to the black wire on the EasyStart. Next, after removing the white cap from the run capacitor, I installed the Orange wire from the EasyStart onto the Herm terminal next to the White wire. Then, I removed the Blue wire from the capacitor terminal and replaced it with the White wire from the EasyStart. Finally, I connected the Blue wire that I had just removed to the Brown wire from the EasyStart. Here’s a look at the wiring after everything was tidied up with zip ties: Overall, I’m pretty happy with the installation. However, looking back there is one thing that I wished I would have done and that is to add a bit of HVAC tape to the top of the EasyStart to give some additional support. I’m not sure how well the double sided tape will hold to the foam, especially given the conditions that some of our roads are in. I’ll probably go back and do that at a later time. BOTTOM LINE: After the install of the EasyStart, I noticed a very gradual ramp up of the compressor, as expected. More importantly, I can report that my Truma A/C runs very well with my 2000W Champion generator running on propane, even at 6000’ elevation. Added bonus: Unlike before, I can now run the A/C off my 15 A circuit at home. If you have any questions about this install, feel free to comment below.
1 point
-
Carl, IMO, you're spot-on, brother! Modifications, upgrades, and otherwise enhancements outlined in various levels of detail in this forum are for information purposes and general "better" understanding of what the OTT can do during our collective travels. That said, our "collective travels" are widely different across the spectrum of owners. Everyone has their own "style" of camping with their Ollie - some fancy established RV parks with full connections for the majority of their travels, others prefer full-on off-grid boondocking for most of their trips. The rest of the owners likely fall in between these extremes. So, depending on what "style" of camping you prefer, would dictate which mods suit your purpose of camping. But that's what's so phenomenal about this forum, there's such a wide spectrum of experience and expertise here, one can choose the mods fitting their camping style the best. The discussion about DC2DC chargers are such an example. It's not a "one size fits all" issue, if you catch my drift....1 point
-
What engine? Issue with any SUV is storage. Not much in the Oliver and very little in the Audi. Depends on your style of camping. We like to travel not counting on a picnic table, fire ring…1 point
-
I could not agree more with @ScubaRx. Especially after traversing 10% grades with our TV and Oliver fully loaded and ready to camp. @Emerson if you ever intend to traverse Wolf Creek Pass at 8% grade, or Teton Pass at a 10% grade you will wish you had a whole lot more TV. An engine brake or Jake brake is a beautiful thing. The Big Horn Mountains on our way to Devils Tower are not quite as steep a grade or as high, but still have dramatic inclines and declines. Everyone has to roll with what their own comfort level is. I can say that we never ever had any concerns in the long steep descents in many of the mountain ranges we traversed. Our 6.7 diesel was up for the job and the righ tool for the job. There was no tail wagging the dog with our rig and we never had to pull off because of hot brakes. I would add that using any CAR or SUV would not leave me with a comfort level on the above mountain passes we traveled on. Some of the passes have hot brakes checks as well. If you are towing an OLEII with a car or SUV you could be asked to pull over and let your brakes cool before proceeding down the steep mountain descents. Then factor in the weight you will have loaded in your Audi and your OLE2. Based on our travel experience I cannot recommend an Audi Q7 for a tov vehicle for an OLE2. Safe Travels!1 point
-
Is this the Loctite product you're using? https://www.loctiteproducts.com/en/products/build/sealants/loctite_pl_marinefastcureadhesivesealant.html Yes, it is.1 point
-
Dave: Your quote is amazing. It certainly can apply to many other situations as well. Even our forum. GJ1 point
-
I used a number of sika products, building our house. I don't think I'd try 221 on an Oliver, as I "think" it's greatest use is metal to metal. I'm sure sika has an appropriate product in their lineup. It's a great company. 291 would probably work, but it's an adhesive/sealant, possibly close to 3m 4200. Requires extensive mechanical removal. Polyurethane , elastic. So good for movement. But, replacement, if and when necessary, could be a lot of work. We went with a polyether product, loctite marine fast cure, several years ago, for boats and the Ollie. So far, so good. I think we're 4 years in. Stays white. Decent flex. If you buy from Lowe's or Depot, make sure you read the date code. And, use it all up. It doesn't last long. Not cheap, either, but longevity vs initial price is important to us. The Loctite bonds to everything in our usual realm... teak, aluminum, fiberglass, plastic, etc., as it's polyether based. Whatever you choose, I'd choose something that says "marine" or "for use above and below waterline". I know we don't drive our Ollies on the water, but some of the gulley washers we've experienced make me appreciate marine sealant quality. We use synthetic butyl tape as bedding, whenever possible. Old school, tried and true, eternally flexible. Windows, fans, boat ports, etc. Rooftop appertanences take a beating in Florida sun. After a few days of allowing butyl to set up, we (I should say,usually Paul) trim the edge with a fine bead of loctite, to block uv. Maybe unnecessary, but, it looks good, especially when Paul does it,instead of me. I'm not bad, but he's better. (Give credit where due, right?) Butyl is ONLY a sealant, not an adhesive, so requires mechanical fasteners to keep everything in place. As far as removing silicon residue, I'm not your person. I don't think it has a place in the fiberglass world. We don't use silicon. It seeps into the pores, and is very difficult to remove. Sika makes many fine products. If you find one appropriate for the Ollie (fiberglass, plastic, and metal compatible, decent elasticity/flex, uv resistant), I'd love to hear about it. They're not inexpensive, either, but we've had great experience with some of their products in our home.1 point
-
Man I hear you! And that is a pretty gnarly sealant job on your rear window!😖 I pretty much have to tape everything off on each side of the joint (sometimes, just one side is necessary). It takes time, but gives me the best result. I'll wet tool the sealant before removing the tape. Then a final very light tooling (my finger usually) to take the tape/sealant edge off after tape is removed. It's important not to get too much sealant in the joint or you'll have a mess removing the tape and too thick an edge for the final tooling. The thinner tapes leave less of an edge to deal with. I'm still trying different things to get the clean look I want. I bought some silicone finishing tools I want to try next time I get in to it. Dave1 point
-
This topic having a very high probability of my needing to find the answer resulted in my saving the post in my Ollie KEEPER document. Cut and pasted below: OLLIE CAULKS AND SEALANTS: JEssary Oliver Staff 4 MARCH 2022 (EDTS BY GJ) The Oliver service department utilizes ASI 335 white & clear silicone, Red Devil butyl sealant, butyl tape, and Dicor self-leveling sealant to re-caulk/reseal the exterior of your camper. . Due to Oliver’s double fiberglass hull construction, any leaking water is trapped between the hulls until the water can find an escape point. Those points are typically a window cutout or one of the weep holes in the lower outer shell. Windows being a primary entry point often leads to an initial diagnosis that the window is leaking which is not necessarily the case. During the yearly maintenance, use Acetone for cleanup, and seal the exterior with ASI 335 silicone. Once the silicone is cured, bolts and screws located on the roof then have an additional application of self-leveling sealant to provide an additional layer of protection, again, these areas aren’t typically “seen” surfaces. The additional layer also helps protect the silicone from sun exposure as well as sealing the head of screws and/or bolts. Re-caulk any gaps found. Carefully check roof penetrations and the marker lights. +++++++++++++++++++++++++++++++++++++++++++++++++++++++++++++++++ Sadly my skills with a caulk gun are legendary..... BAD. I to love gaskets as a result. Wow you hit the nail on the head with that one. I have been told that the 2018 marker lights don't streak because the black supplier gasket was eliminated and they were caulked. My 2018 trailer has the supplier gaskets and the black streaks continue to this day. About a month after pick up of our hull 342, I reported the black streaks and suggested OTT get a better gasket. The response was caulking. Hopefully one day we'll have a gasket for these exterior lights because if I caulk it, it would be a visual disaster.1 point
-
We plan to move to Geocel GC28100 Pro Flex RV Flexible Sealant when the original silicone needs replacing. Our rear window is getting close. @DavePhelps outlined the one-time challenge of getting rid of the silicone residue prior to going non-silicone. For those going with silicone-on-silicone to avoid the nasty prep work, be careful of the chemical basis of the silicone being used as it apparently needs to match the original. I found an interesting article on silicone-to-silicone bonding here. Way above my chemistry paygrade!1 point
-
I didn't see an answer to the question of what is the sealant to use on our Olivers? I just inspected the various sealant places on the roof of our Ollie while washing and waxing after we got home. It doesn't look like it needs it yet but I want to be prepared. I have noted and recorded the above recommendations for both the cleaner and sealant. Which brings me to my next point. When we picked up our Oliver in May of 2022... we noticed a poor bead of seal around the rear window and asked them to touch it up. They did, but what they used (there in the pre-delivery bay) dried very yellow and to this day, stands out like a sore thumb on our pristine white Oliver. It is completely different than what was used when building the Oliver. Then a couple of months later we had a service ticket for the bathroom window to be replaced and I agreed to let them send me the parts and materials to replace it. I did so... but evidently got the same "yellow" sealant! When time and UV rays do their damage.... I want to be sure to have a replacement sealant that is "bright white"! For those that have done this, what was your experience?1 point
-
https://www.bestmaterials.com/detail.aspx?ID=20596&utm_source=google&utm_medium=cpc&utm_campaign=(ROI) PMax Shopping - Low/No AOV&utm_id=18030280001&utm_content=&utm_term=&gad_source=4 https://www.chemical-concepts.com/product/american-sealants-0240-cleaner-remover-14-oz-net-weight-can/?utm_source=googleshopping&utm_medium=cse&srsltid=AfmBOop8hPEz53xgukj9M1jJ5fHGXYcHM-KH_hwxWI5aSBtTGkVdMxnFYds (states on back order)1 point
-
We've been using a loctite marine product, with good results, for a number of years.1 point
-
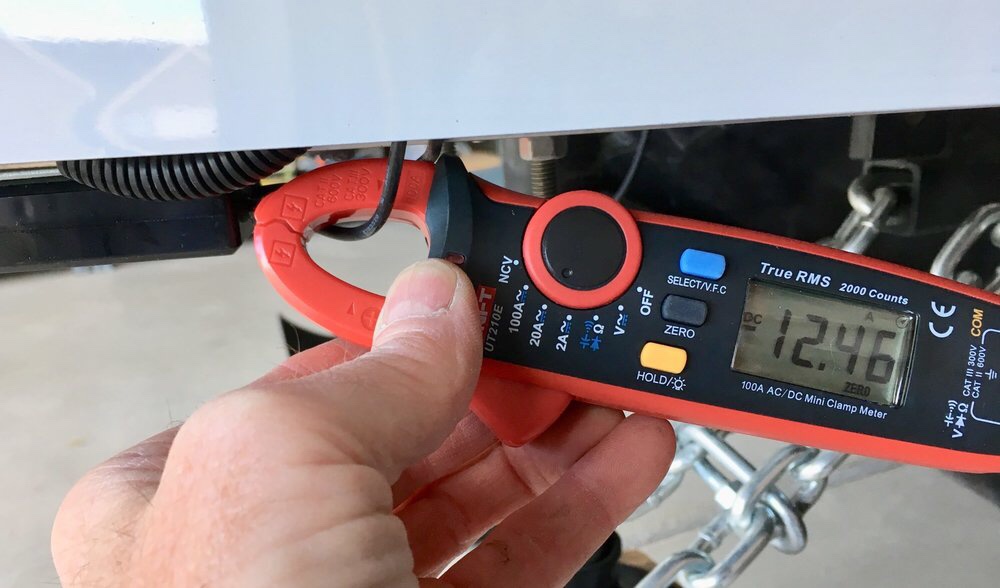
For RV use I recommend this one. https://www.amazon.com/Uni-T-B4Q094-UT210E-Current-Capacitance/dp/B00O1Q2HOQ/ref=sr_1_1?dchild=1&keywords=Uni-T+B4Q094+UT210E+True+RMS+AC%2FDC+Current+Mini+Clamp+M+W+Capacitance+Tester&qid=1609729532&s=industrial&sr=1-1i It does most common measurements like voltage and resistance, but the most useful feature is the clamp on ammeter. You can use it to measure current without disassembling any wires, though they do need to be separated from each other, not inside a loom or harness cover. For checking your electric trailer brakes it is WONDERFUL. I liked mine so much I left my regular multimeter at home, and gave one of these inductive ones to my son for Christmas. Look through this page to get an idea of how it is used for measuring amps. https://olivertraveltrailers.com/forums/topic/2685-how-to-brake-wiring-is-undersized-some-answers-and-partial-solution/ You can use it at home, but really a plug in outlet/ gfci (ground fault) tester with LED lights might be more useful, and it would also be very good for checking a campground electrical post before plugging in.... John Davies Spokane WA
1 point
-
Dave, thank you for this! I have learned a lot from you in several of your recent posts. I did not realize silicone oils would permeate the surface, no wonder if feels like you can neve get it completely off. I have a simple rule, don't caulk anything. PERIOD! I've never caulked the exterior of a house or RV, and I'm not a sailor. One exception, my "rare instance" would be to use GE White Silicone in our bathrooms at home, once when a new sink or toilet is installed, or along a tub. Use a proper gasket, dum-dum (butyl tape) or something to seal the window, the door, the faucet or whatever. When you caulk, the smallest bead possible is all that's required. It should be in the crack, not 1/2" either side of the crack. If I can get back the 100s of hours I've spent, in removing the lazy caulk other POs and installers have added, we could take a long camping trip just to break even. There was a mention of rear windows. Here is ours after a trip, where the AZ road dust shows it well. When our hull went back to OTT service twice, both service tickets listed re-caulking. I wish they just caulked it once when built. I will remove all this and not replace it. I know many of you will warn that I need caulk, or it should be serviced regularly, but not me, not our hull. There will still be enough hidden in the crack after I remove everything visible.
0 points
-
Scuba Rx, that ASI 0240 sounds pretty good. Especially interesting it can be used as a tooling lubricant. I will try that. What I have been using with great success is Debond, and it is even more expensive! So I think it's going to cost you Geronimo John! Debond The big problem with silicone from a refinishing point of view are the oils it contains. You can clean it off with solvents and plastic razors to where the gelcoat looks pristine, but when you spray the surface with water, it still beads up all over. This is caused by the silicone oils having penetrated the pores of the gelcoat. Not completely removing these oils will interfere with the full bonding of any sealant you want to use, including silicone! You have to break out some 1000 grit automotive sandpaper and wet sand it out with the solvent of your choice (in my case, Debond). When it's all gone, I hit it with some finer grit (1200-1500), then a good polishing cleaner. The gelcoat will then look great, and be ready to be sealed, and most importantly, the sealant will adhere to the gelcoat! All this work is why I never use silicones to begin with, except in some rare instances. Also, if you do any finishing in your shop, be extremely careful to keep any rags, pads, sandpaper, or anything that was used cleaning your silicone problem separate and away from your regular shop supplies. Silicone contamination in your shop can be a total disaster for the finisher. Good luck! Dave0 points


.thumb.jpg.e34bf01ef7f7d5e99ad31856d45afbeb.jpg)


-
Recent Achievements
-


")


")


")

