Leaderboard


Popular Content
Showing content with the highest reputation on 06/18/2026 in Posts
-
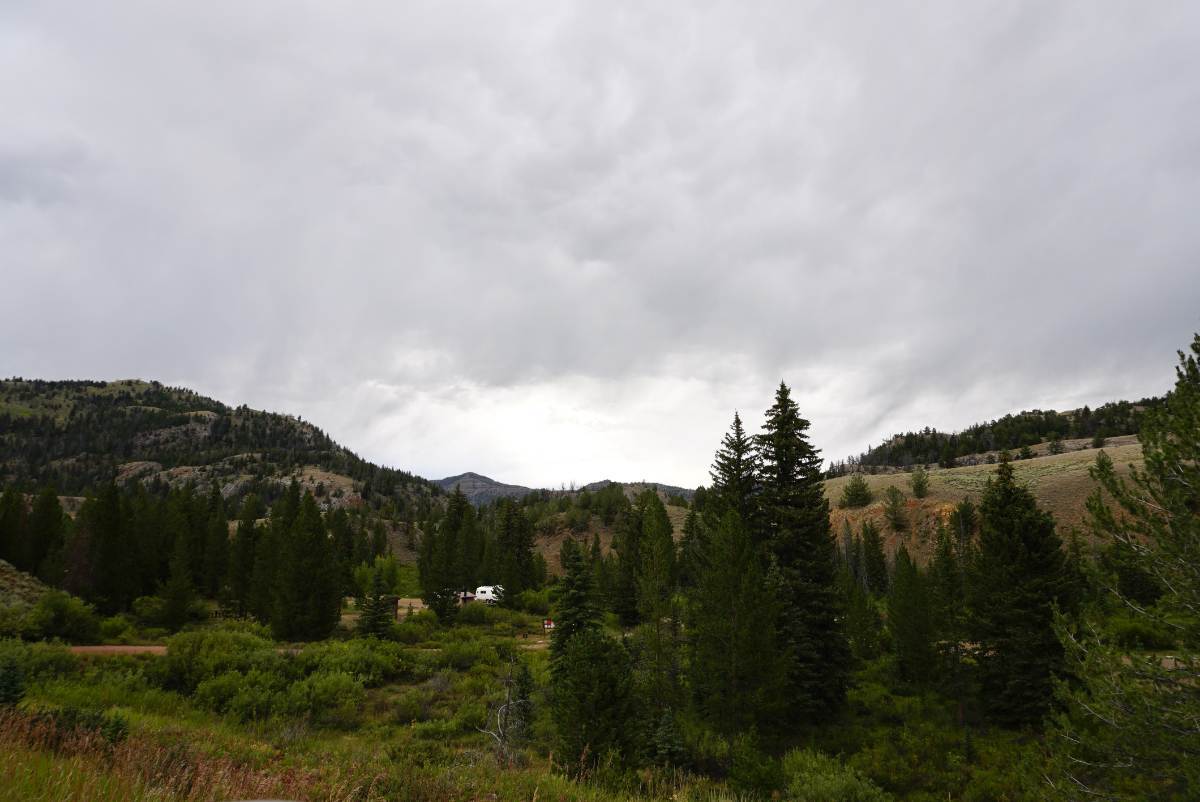
Been camping this week at Mt. Pisgah Campground NC @ 5,000' on the Blue Ridge Parkway. Some mornings were in the 50s and highs 60s to 70s. Their campsites do not have water or electricity, with the Federal Senior card $15 per night. They have hot showers. When it's hot and humid in the lower elevations, we head to Mt. Pisgah campground to cool off without using AC system. There are plenty of places to hike and a drive on the BRP is always nice, too.4 points
-
We really like that campground! Mossey
 4 points
 -
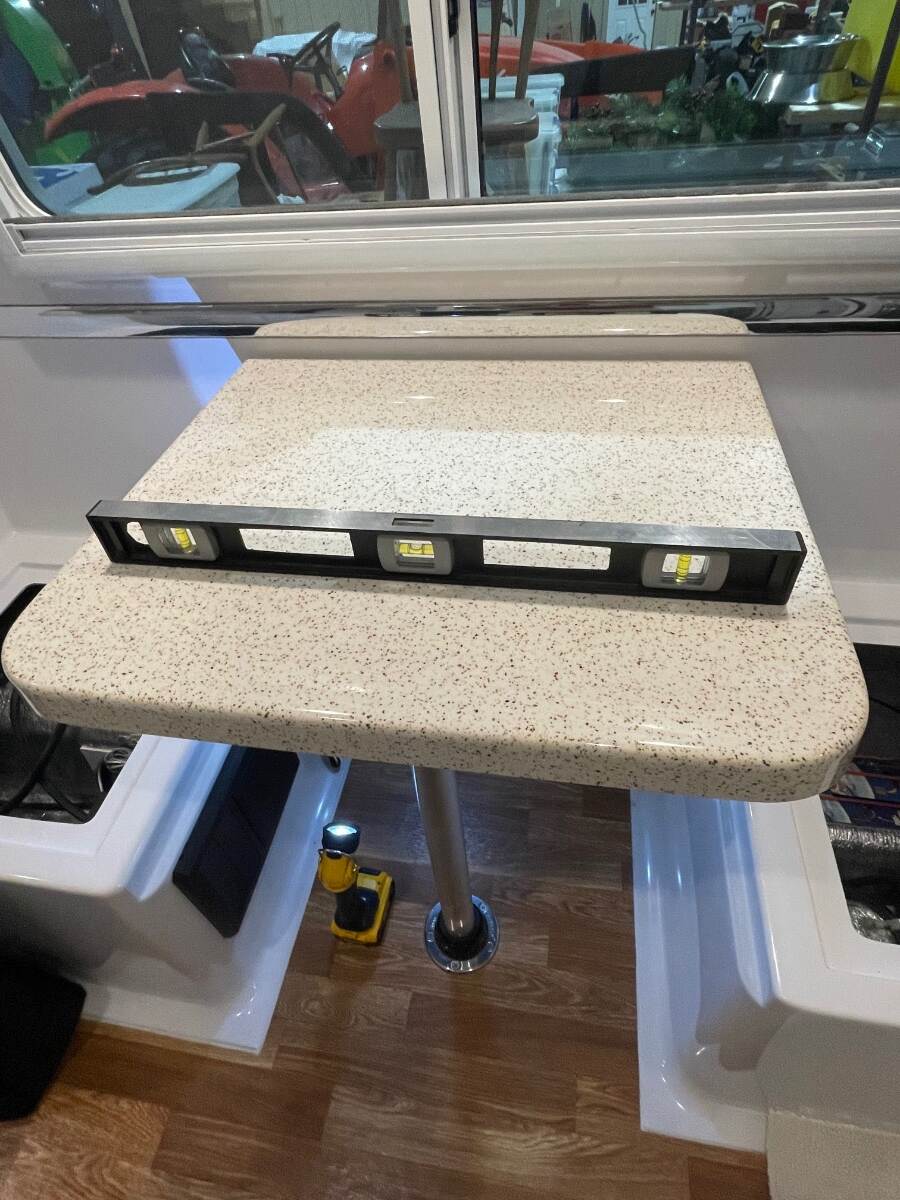
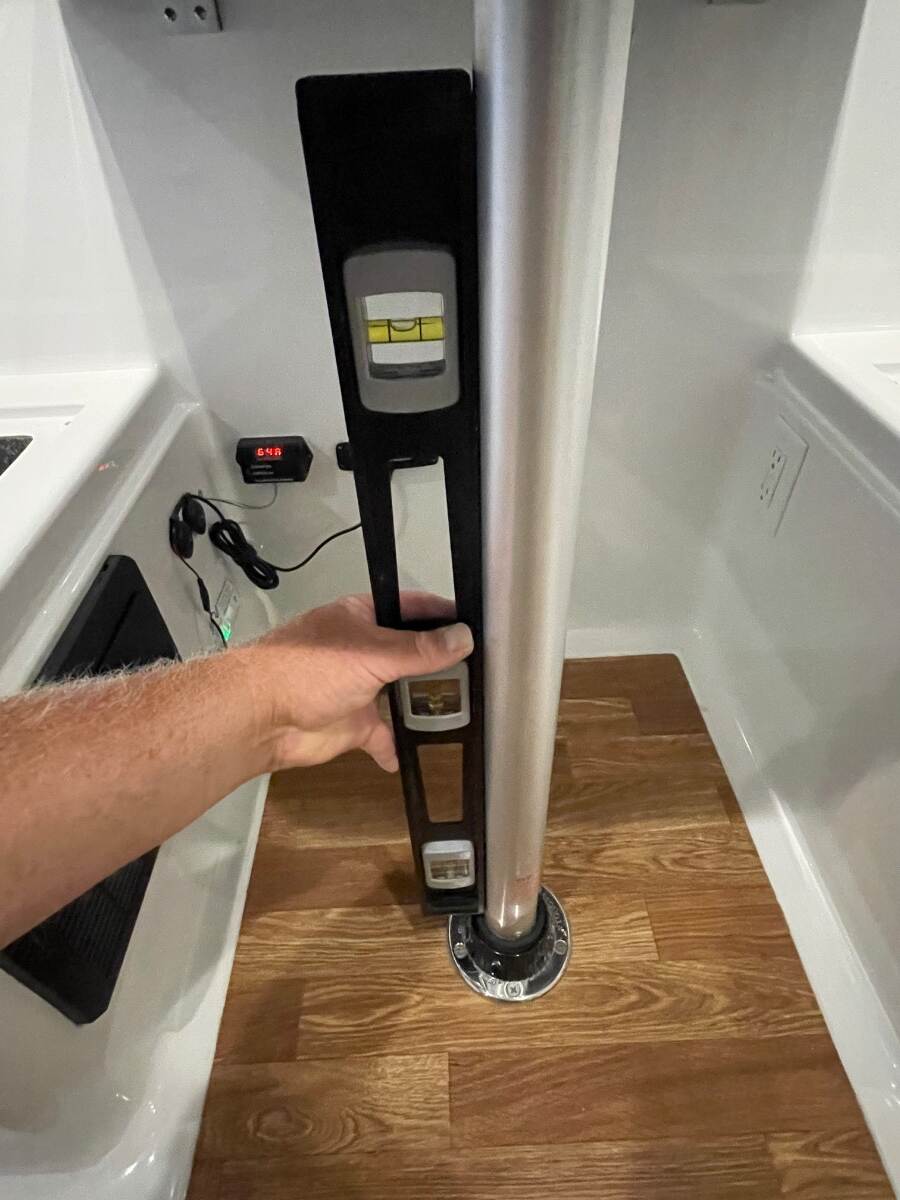
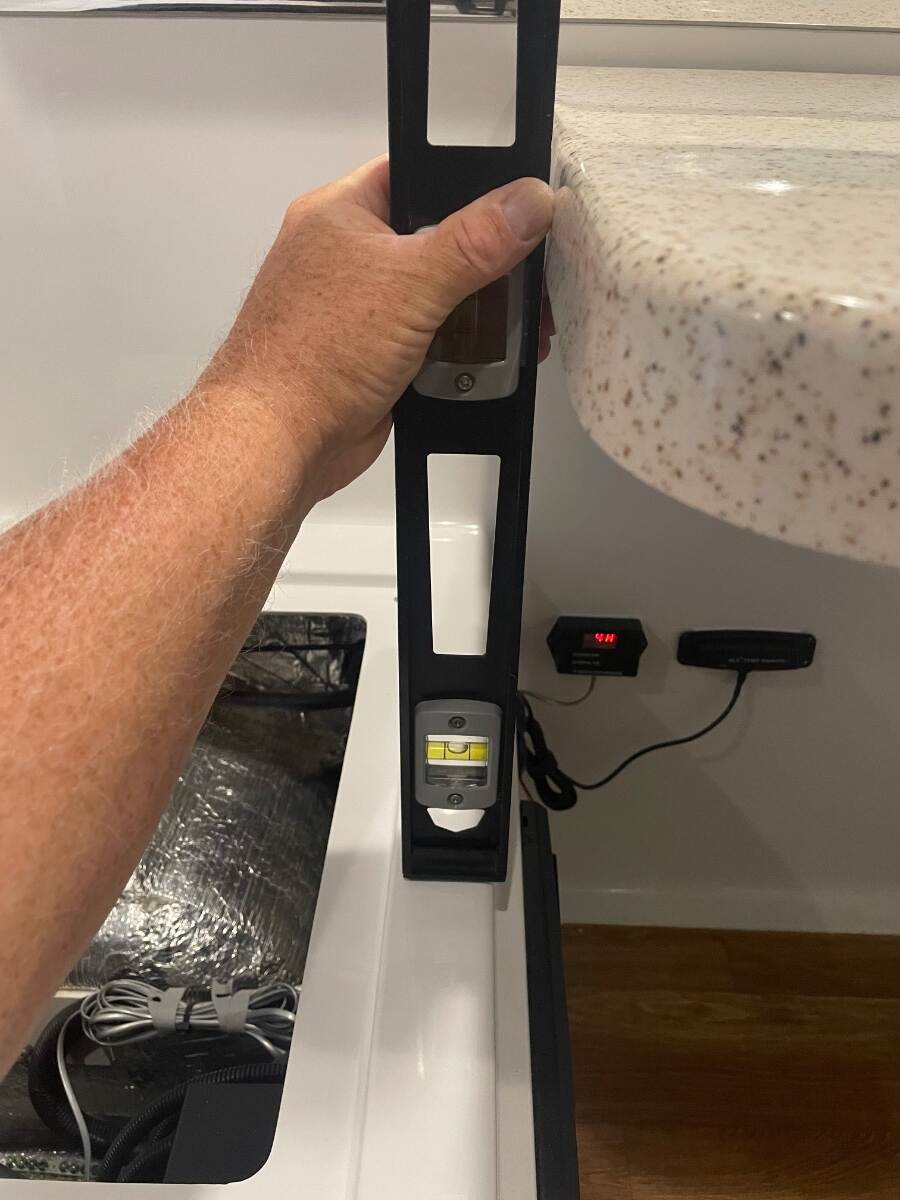
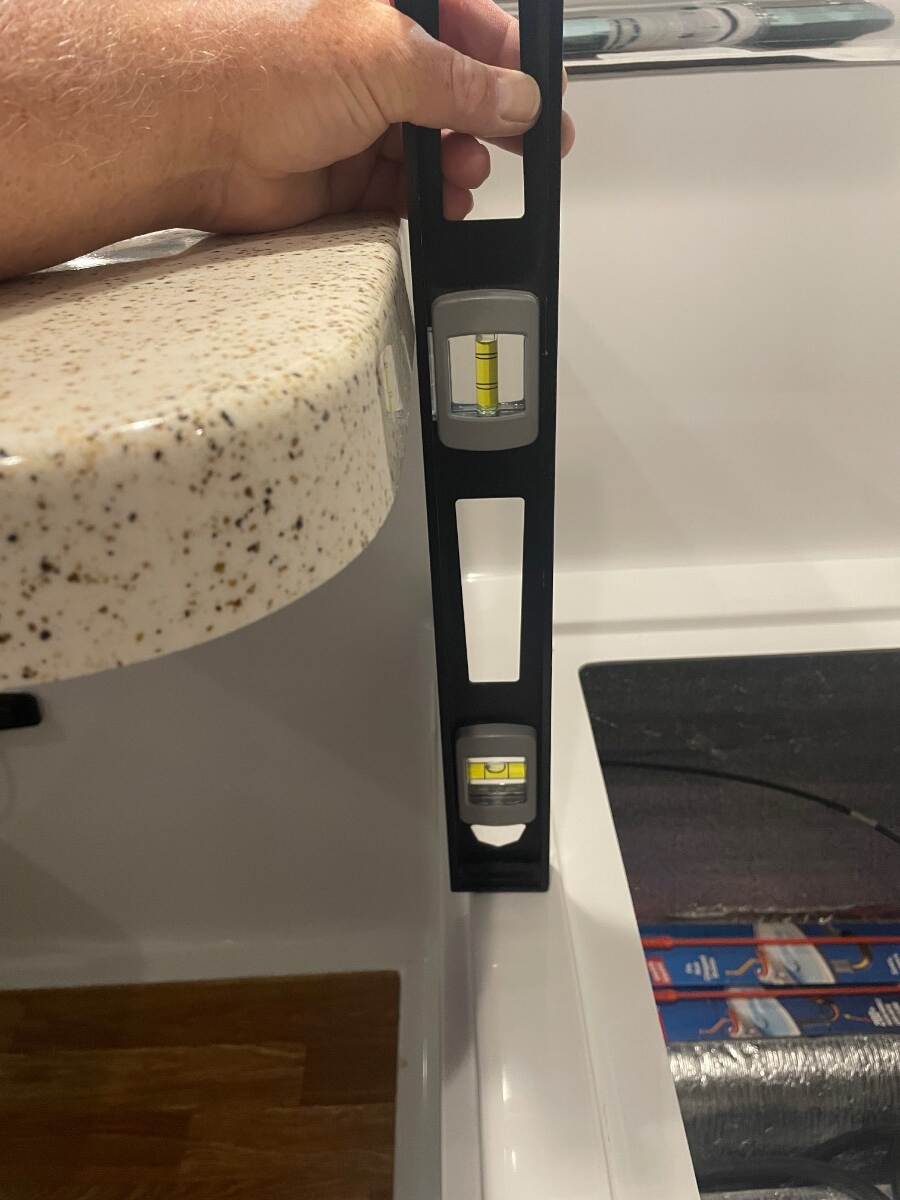
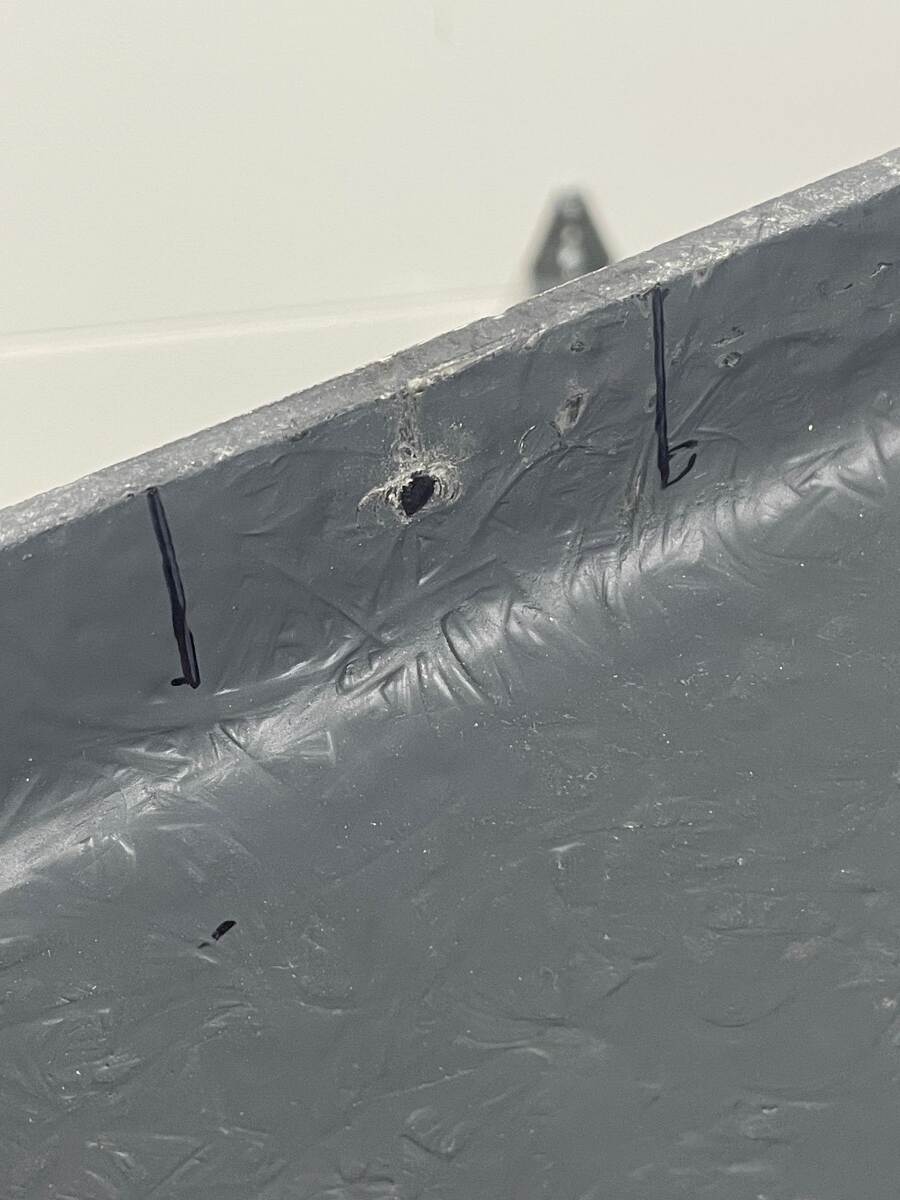
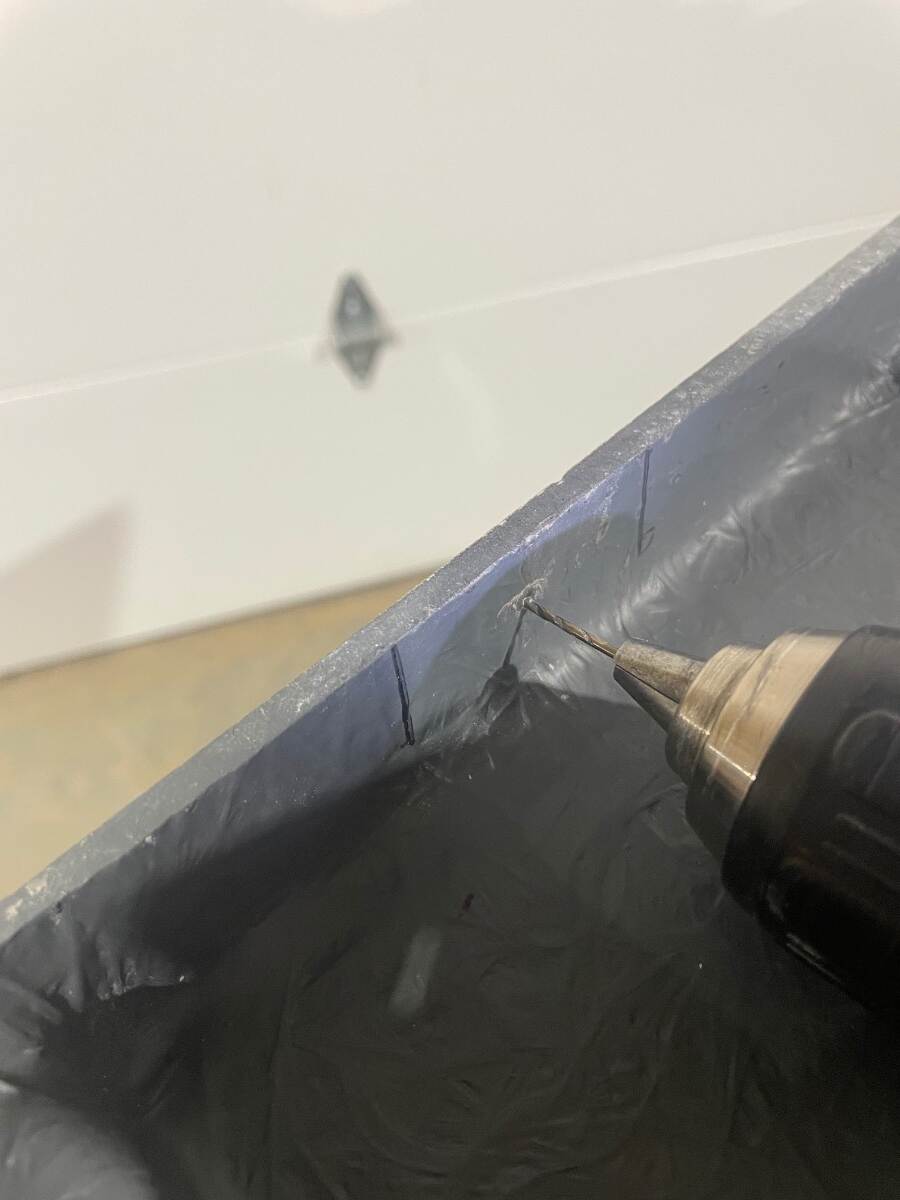
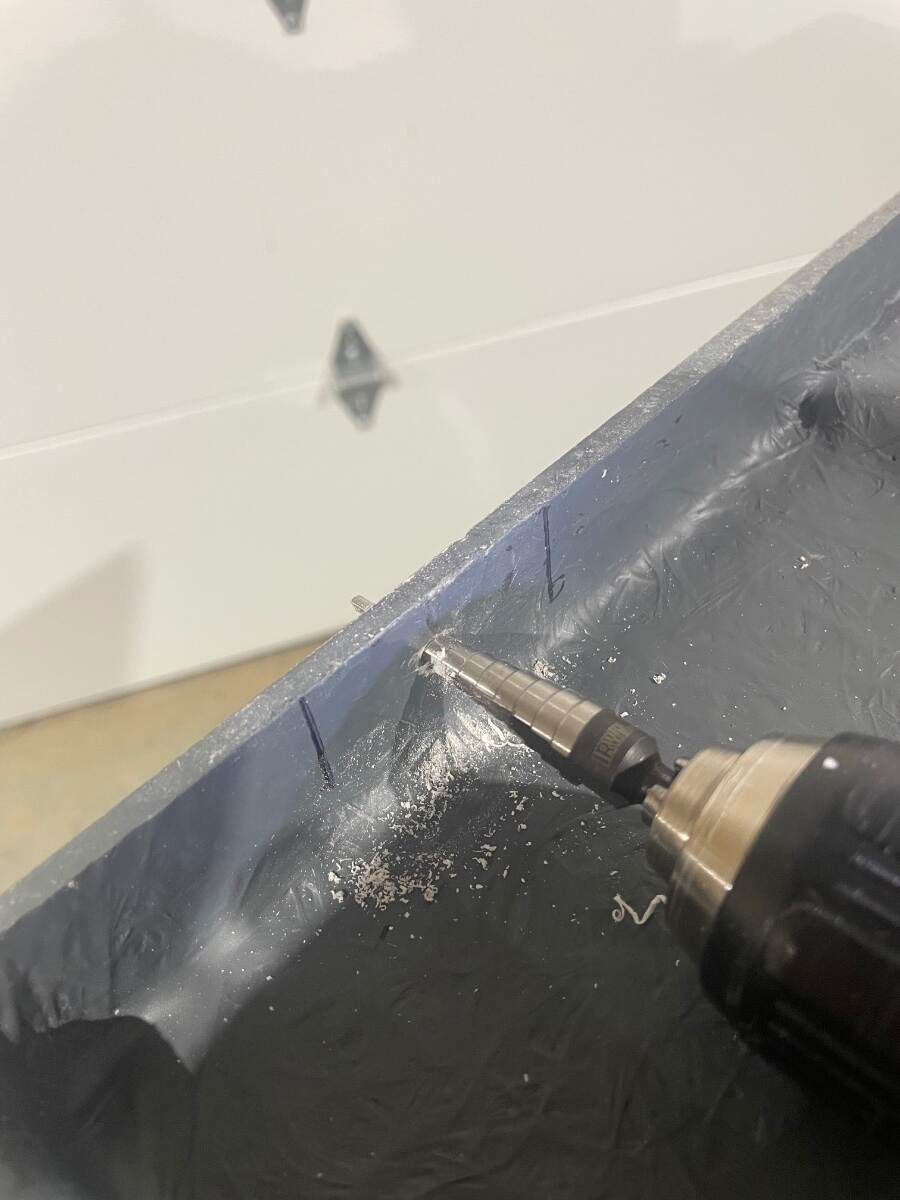
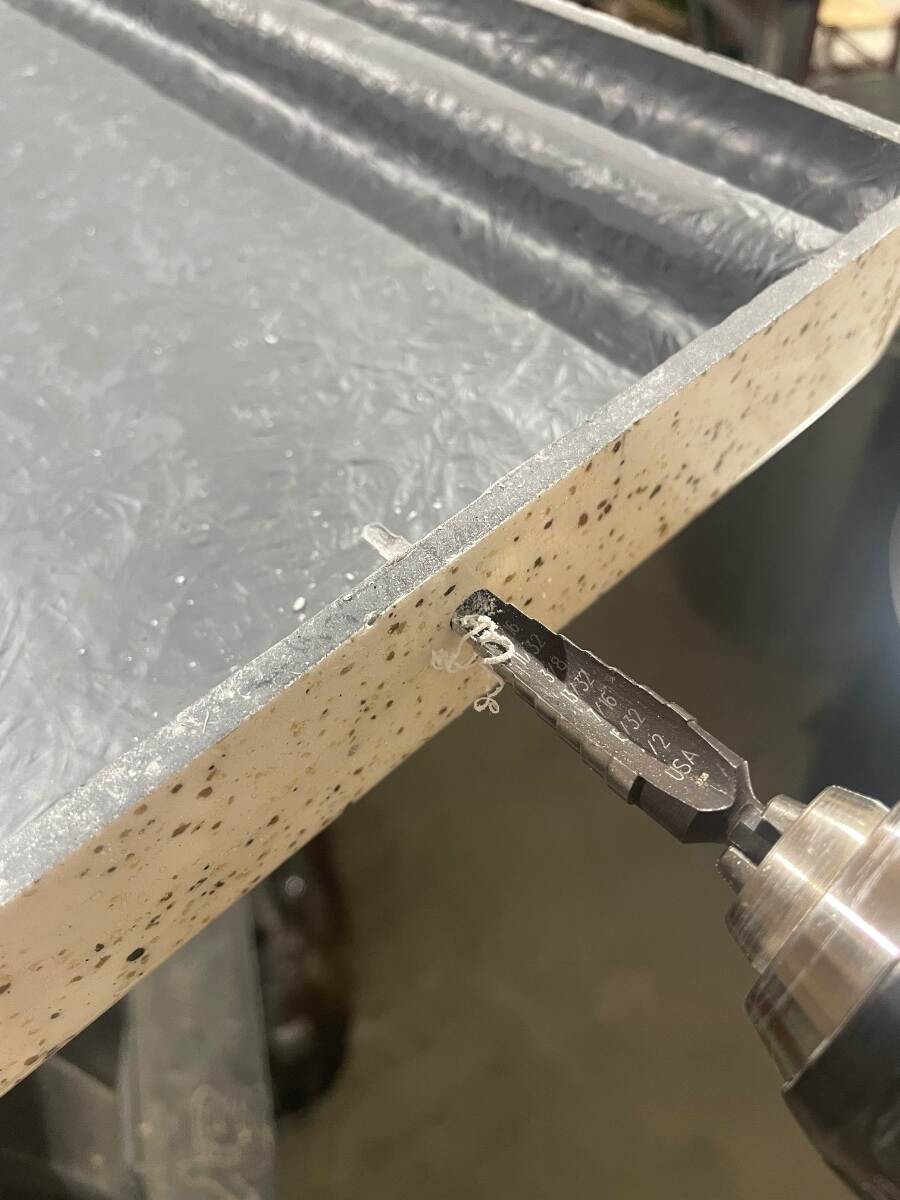
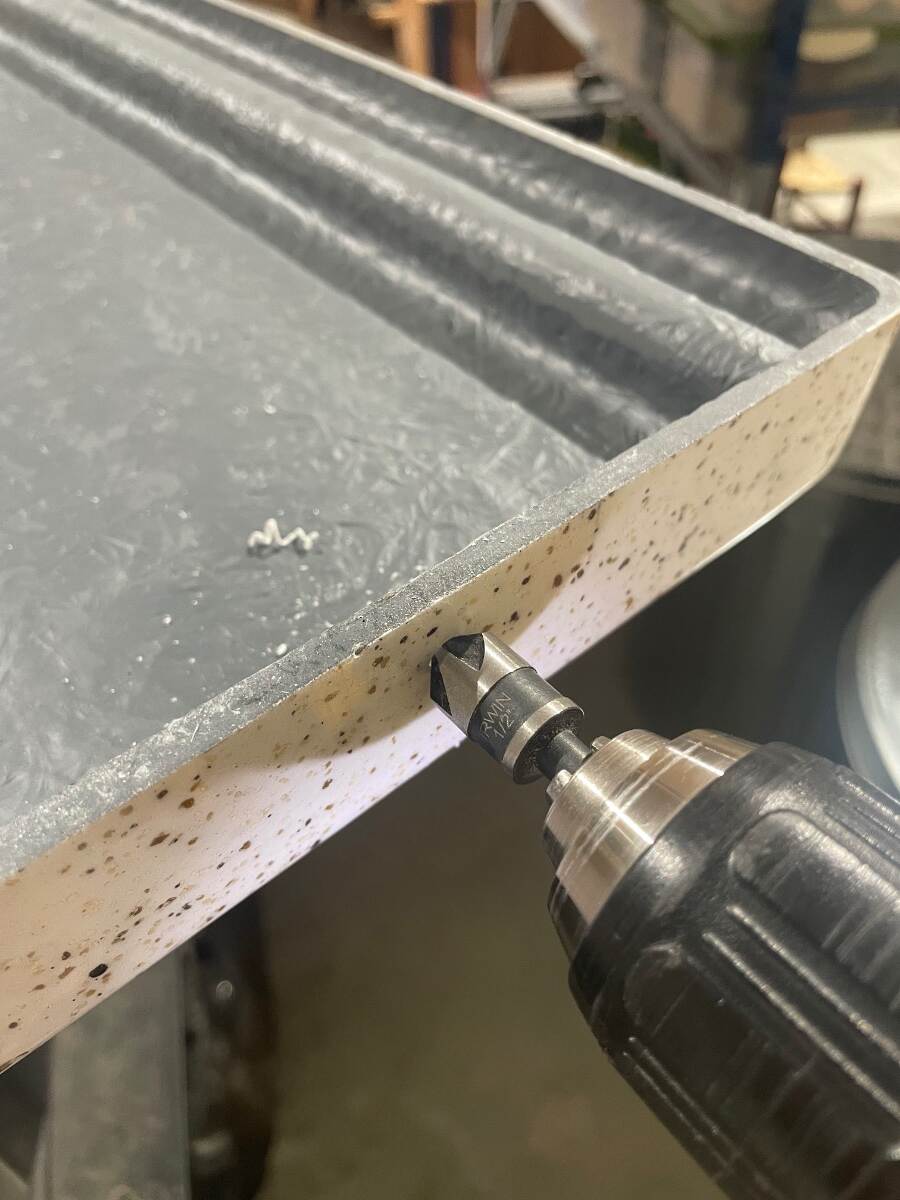
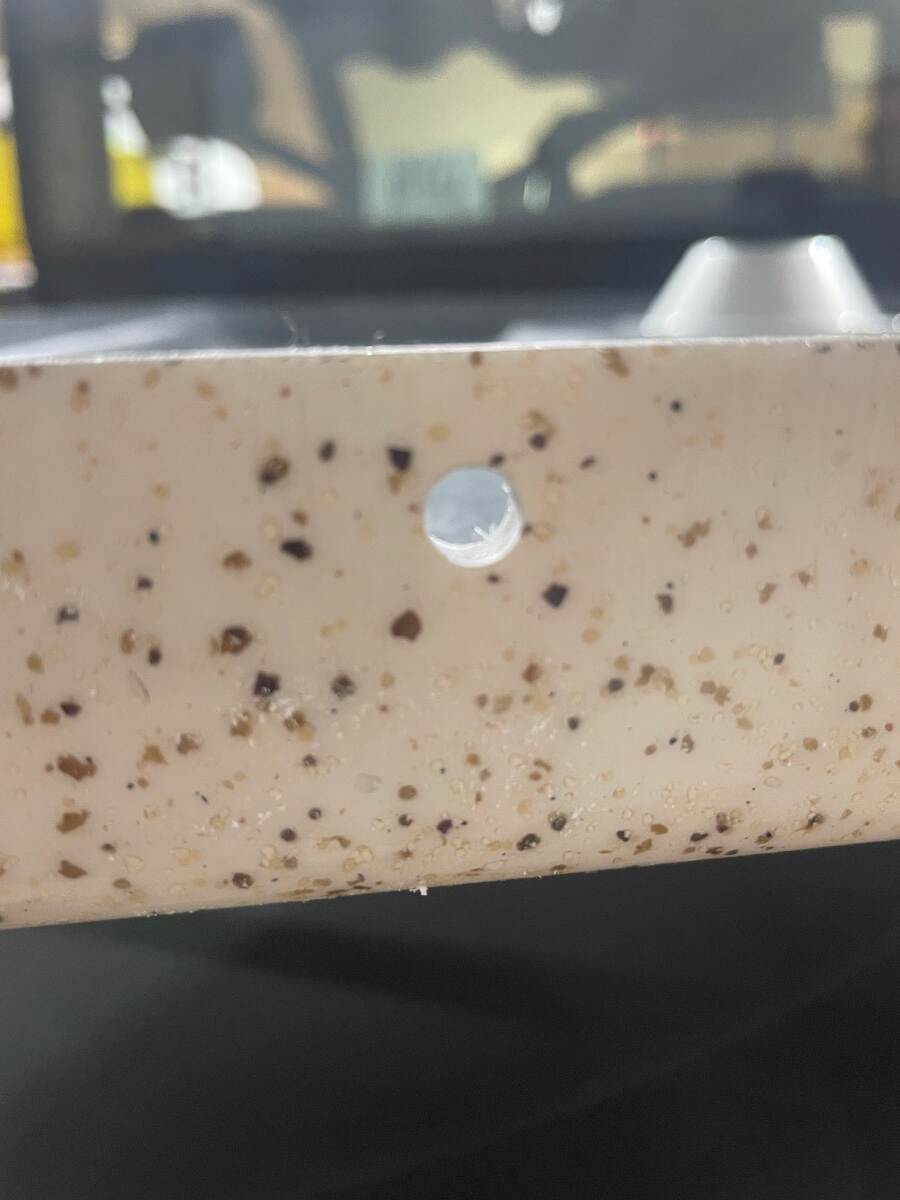
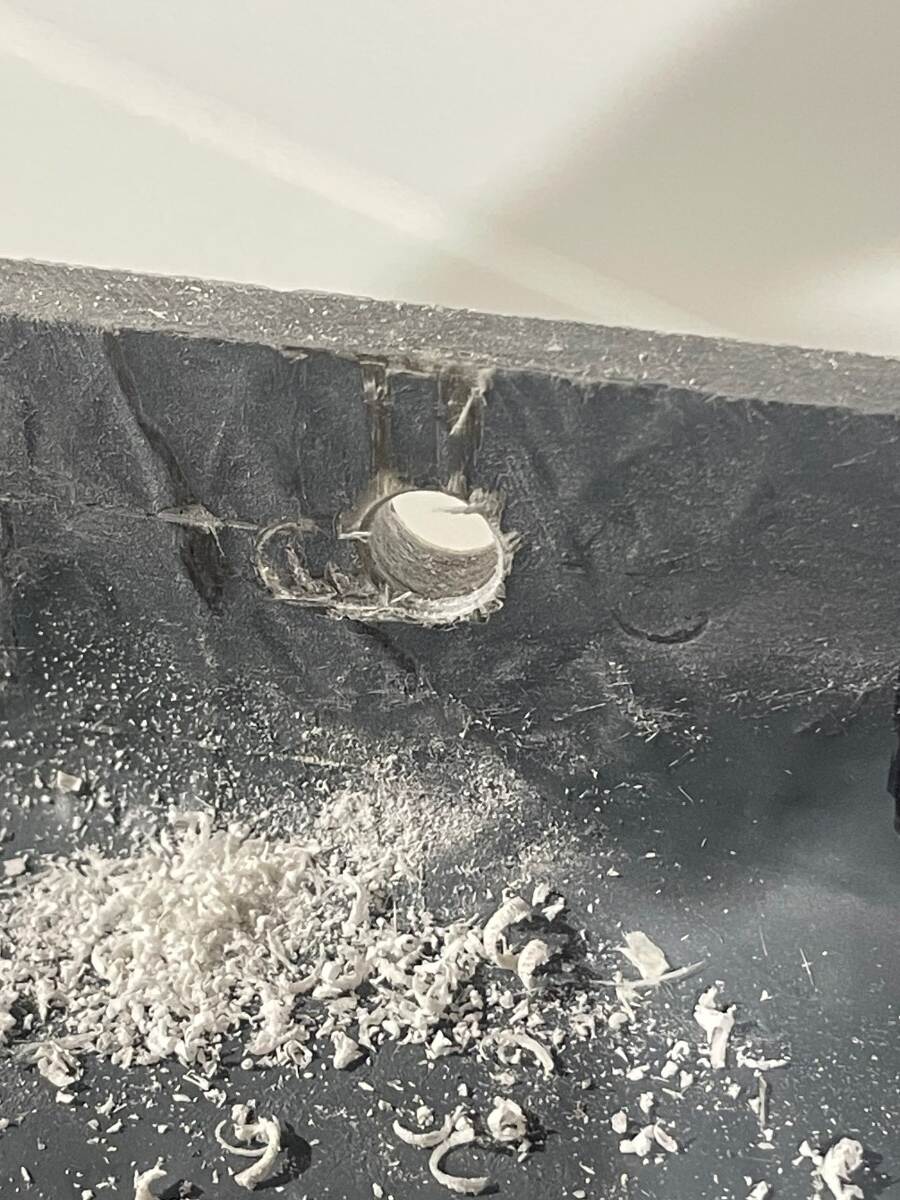
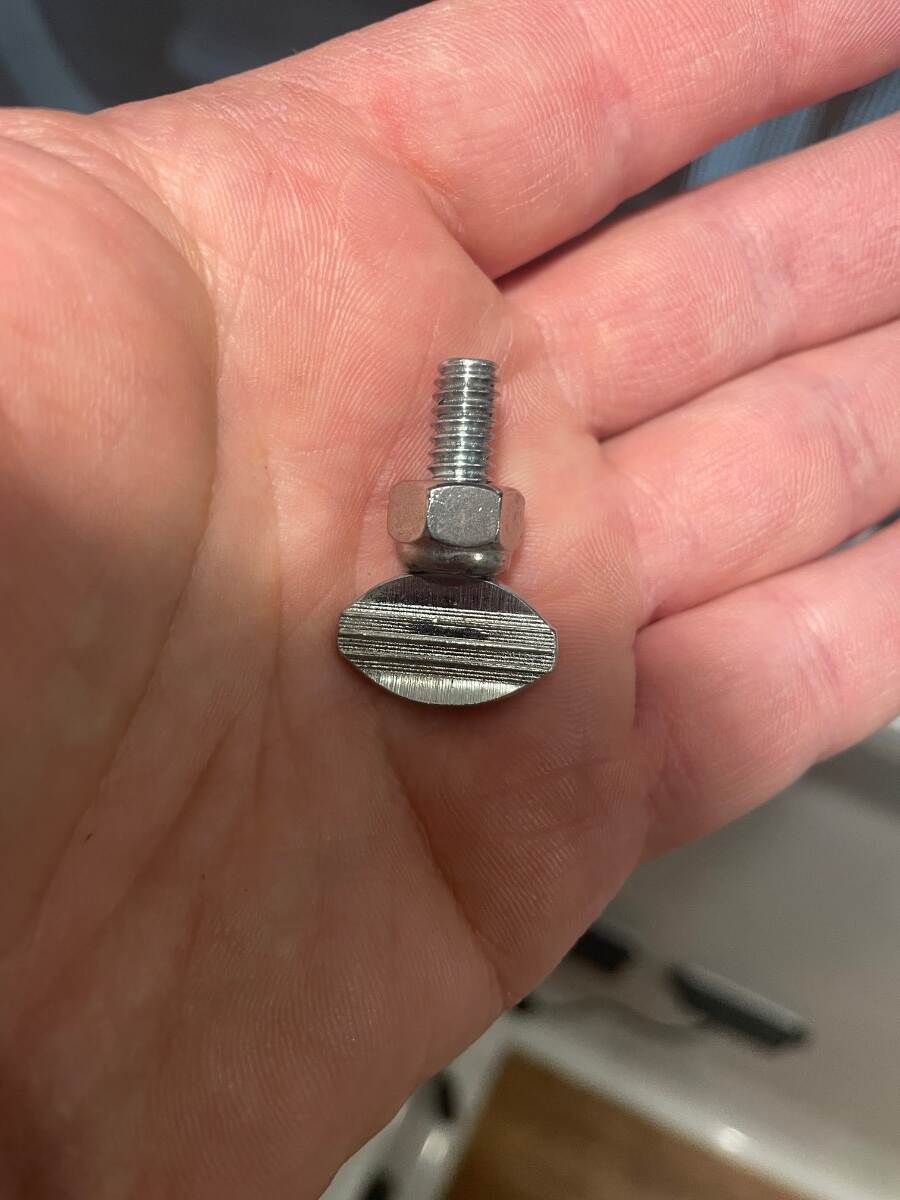
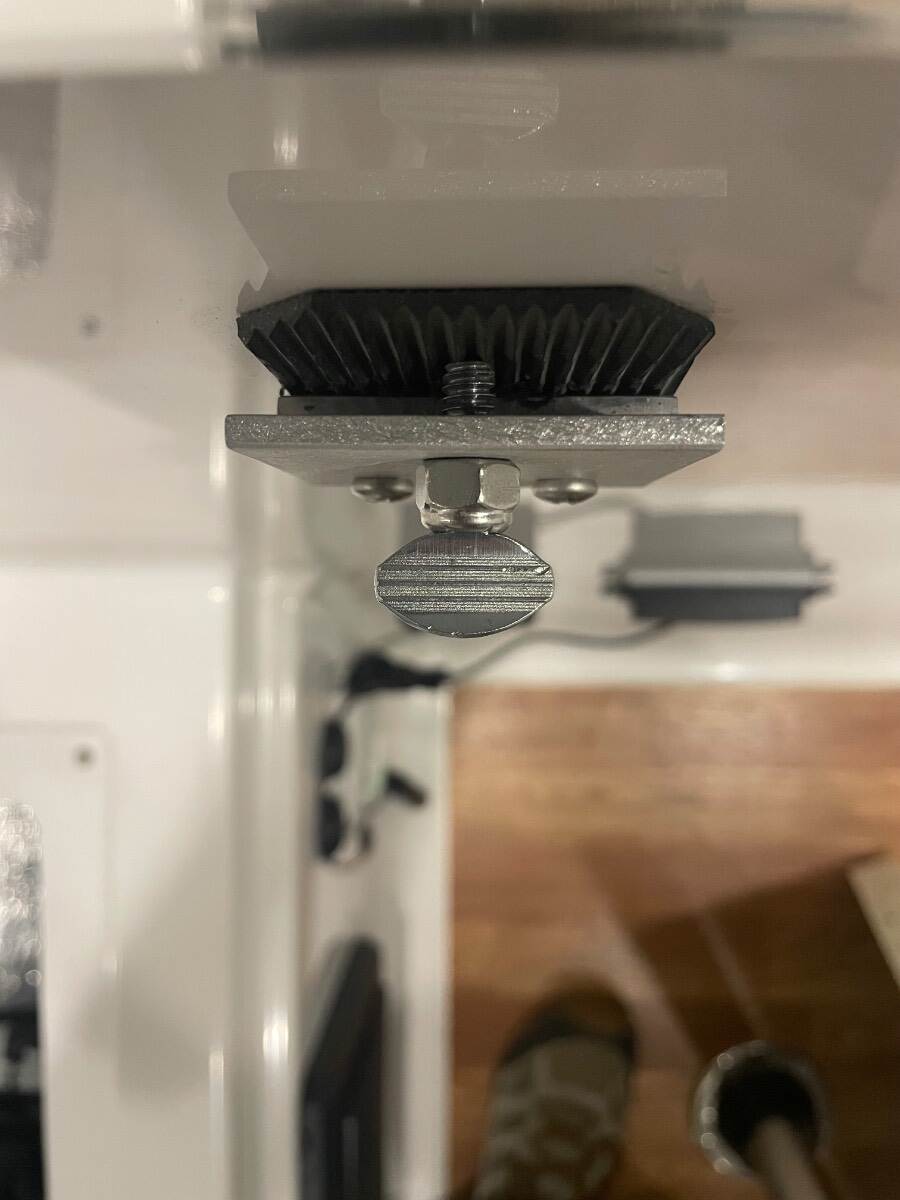
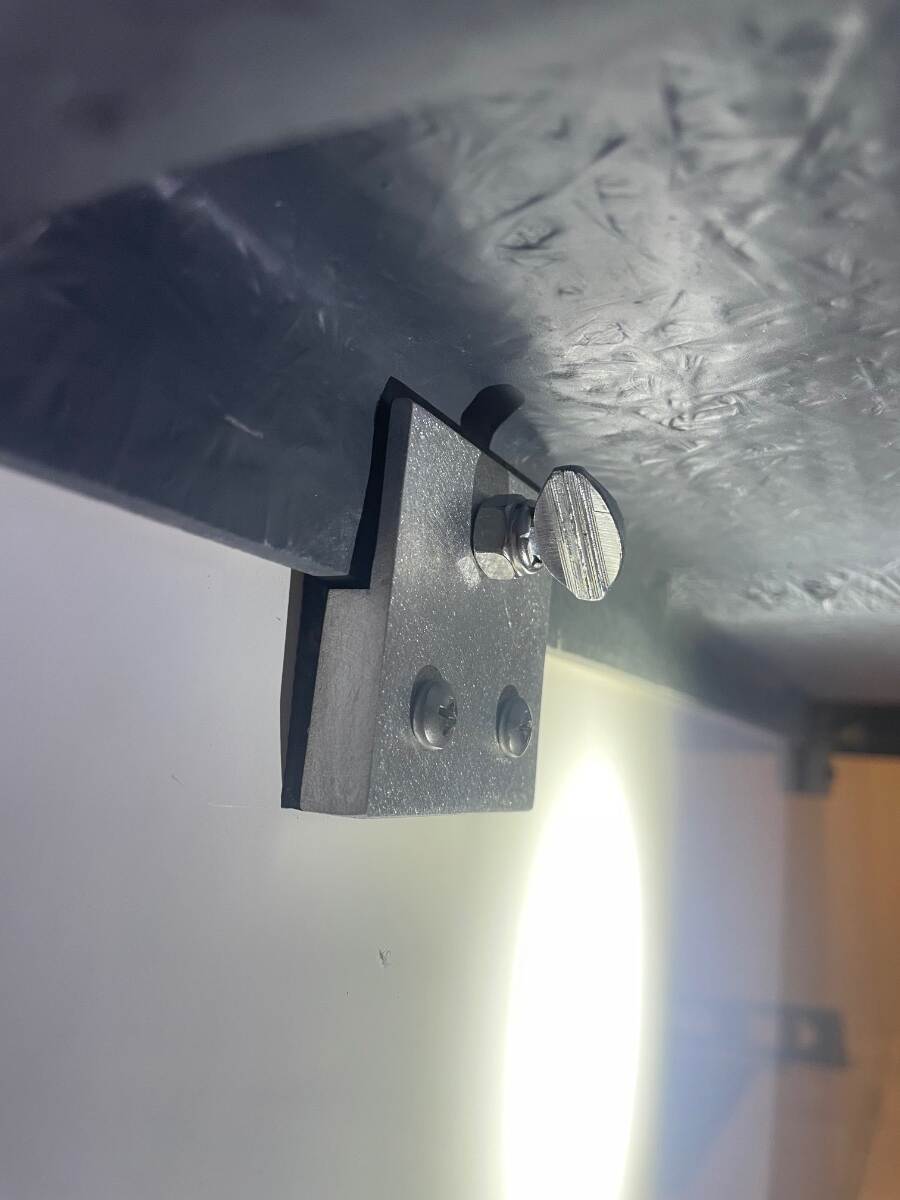
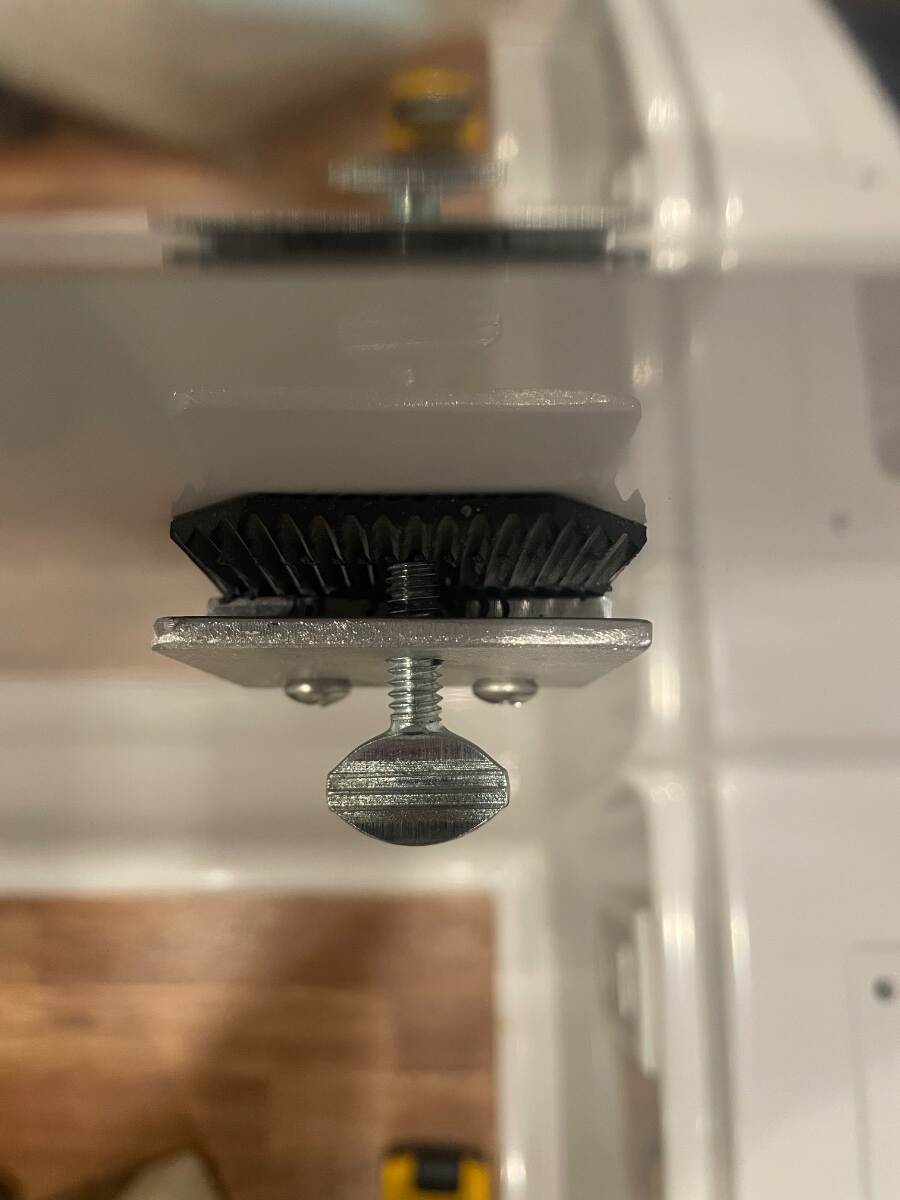
Occasionally I will place my hand on one of the front corners of our dinette table and it will cause the opposite back corner to lift up out of its bracket. I don’t tighten those two thumb screws down too tight because I don’t want to bend the aluminum bracket or break the screws that secure it to the wall. I drilled two holes in the back edge of the table so that the thumb screws would pass through them to prevent the table from slipping up out of the brackets. If you want to do this, start off by leveling your trailer then check to see if your table top is level. Make sure your table leg is plumb. Place a level against one side of the table, plumb it, and see how far the edge of the table falls away from the edge of the seat. Repeat the previous step on the opposite side of the table. I did this to make sure the table was centered between the two dinette seats before I drilled any holes. After verifying that the table is in the middle of the dinette mark the edges of each bracket and the location of the holes. Drill pilot holes using a small bit at very low speed. Enlarge the pilot holes with a step bit at slow speed. I stepped the hole size up to 1/4 inch. Use the step bit again to enlarge the holes on the back side of the table top so that you have a 1/4 inch hole all the way through the table edge. The step bit will chamfer the hole but I used a countersink bit to widen the chamfer. The thumb screws should be screwed in until they just touch the rubber bumper behind the bracket. I found that a 1/4 Nylock nut threaded on the thumb screw backwards made a good stop nut. I used a stainless steel nut because that’s what I had. The Nylock nut was the right height to stop the thumb screw at the proper depth. Finished product. If you find that the second thumb screw doesn’t quite line up with the second hole you can elongate one or both holes with a rat tail (round) file. I did this on hull 313. I don’t know if Oliver continued to mount the table this way so this might not work on tables in newer Olivers. Bill
4 points
-
Last year I visited Horse Creek Campground in Wyoming. If you are really adventurous you can continue north all the way to Double Cabin Campground. It's beautiful there, but I didn't tow my Oliver that far; it's a long rough road.
4 points
-
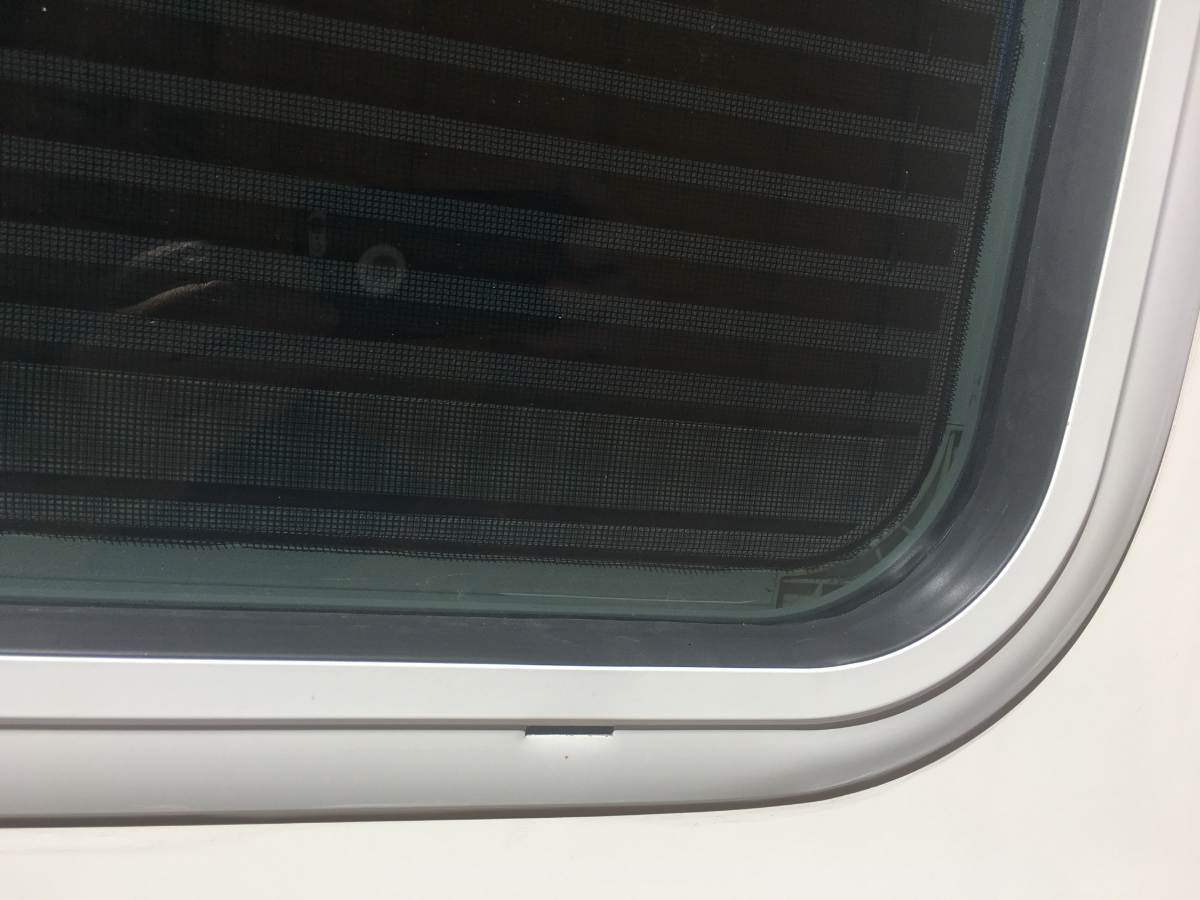
It does appear they have made changes to these over the years and perhaps even more than what is readily apparent with the upside weep holes with black plugs that don't work for squat anyway. Have also looked for replacement 8800 series but they appear to be unobtanium anymore or at least in the size we need and I certainly would not want black frames. No way would I cough up $987 a piece for this flawed design, $230 maybe. The 300 FV series looks much more promising as replacements IMHO. Regarding the 8800 series, anyone can take a garden hose to mimic even a light shower if they have the correct hose nozzle by shooting the water up gently toward the top of the camper allowing the water drain down with some water hitting the windows directly. One can actually watch the water flowing into the weep holes due to the 8º upward tilt. Or you can wait till the next shower put your raincoat on and do the same in real time with the same results as I have. The only way to fix this would be create a miniature awning or flashing over the weep holes though I am not sure how practical this would be, but it might solve the issue… sort of. Amazed you can hit them with a pressure washer, not something I would ever attempt in their current state.3 points
-
We had two leaks coming out at the windows, but in both cases the source of the leak was above each window. Oliver sign on the rear window and street side exterior light over the dinette window were the causes of our leaks. It was a easy fix on the exterior light leak, but the Oliver Sign probably took 1 1/2 days to remove the sign, clean and reseal the sign. Where we store Ollie, we have to tape the bottom window drains while stored, rubber plugs are installed in the top, or Mud Daubers will plug the bottom window drain channels. These 8800 windows with drains top & bottom could be reversed during installation for the window glass to open in the opposite direction. Out of curiosity I contacted Lippert to see what they charge for Lippert frameless 3000 FV 48 X 18 with screen window assembly, they only come with black frames, Retail $986.95. The interior black frame for this window cost Retail $44.95. Download the flyer to see the 3000FV windows in the following link below 3000 windows. https://corporate.lippert.com/products/rv/windows I'm waiting to see what retrofits Oliver will be offering on the frameless windows, not in a hurry for now, just curious..3 points
-
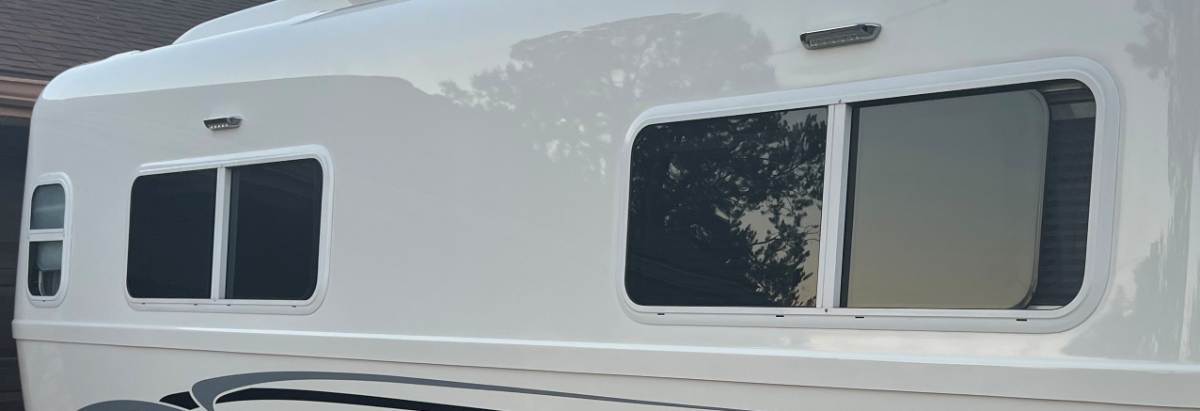
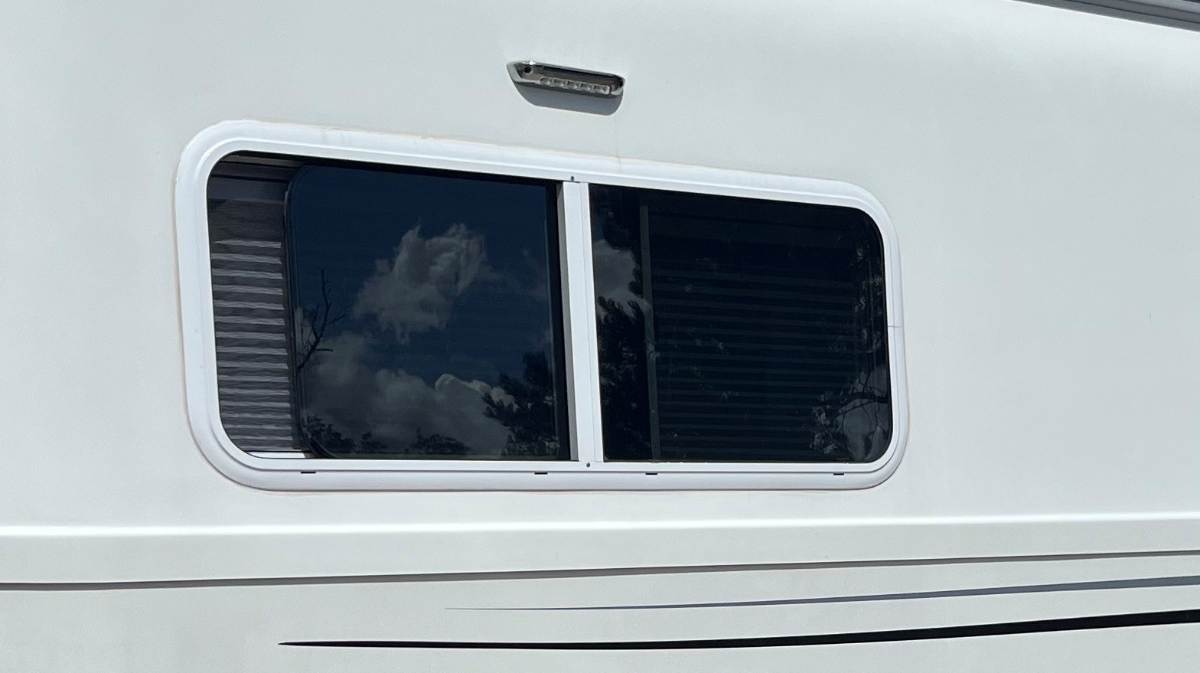
Wondering did Lippert 8800 windows change through the years? The windows installed on hulls #70, #75 vs. our hull #113 and much newer hulls? I posted a couple pictures of ours for reference. I do see top vents on Rob's and Bill's windows that are not on mine! Rob has leakage issues. Others do as well, but we do not. I'm thankful ours do not need repair, but just wondering what's different? Is it the top vents allowing water into the interior channels? I replaced the outer rubber (only). Replaced the white surround with black, sourced from Pelland, if I remember correctly. There was a 1" gap on the old rubber, likely from shrinkage. I cut the replacement rubber to fill the gap and made it 1" longer, cramming the rubber into place on a warm day, knowing it will shrink again in time. This rubber seal protects the moving half of the window from rainwater. I don't have time to handwash the Oliver except to pressure-wash when we return a dirty mess from boondocking. I'll hit the glass straight-on with 3000 PSI water and our pressure-washer is not a toy! Some dirt followed by a fast stream of water will pour out of the window lower weep holes. No water inside the hull ever in doing this a half dozen times. The first couple of times, I asked Chris to be inside, towel in hand, just in case. After twice taking this precaution, I don't bother anymore. If ours were leaking, I would replace the entire window assembly if available. I took a look here and our sizes are not listed. Wonder if they make the 8800 windows to size. Nominal measurements on our hull are 48x18" on the three cabin windows, 36x20" on the rear and I did not measure the bathroom window. I understand it would be over $1000 to replace them all vs. the cost of seals but you'd have a new window with warranty. Or time to get an awning window if you prefer that style! Lippert 8800 Series RV Window - Horizontal Slider | Lippert
3 points
-
Scroll to the top of this page. In the "blue" banner at the top look for "home" and left click on it. At the top of the next page look for "RV Education" and "hover" your mouse over it until a "drop down menu" appears. In that menu look for "Annual Owner Rally" and left click on it. A new page will open. Scroll down until you see "Register for the 2026 Oliver Rally" and left click on it. A new page will open - full it out with the requested information, pay your money, see you there! Bill3 points
-
You can get an idea of the water quality at a campground by looking for places where their lawn or landscaping sprinklers have been spraying and at the faucet, pipe, post, and ground under the water hook ups. If these areas are stained there’s a good chance that the water might not be the quality that you are accustomed to. Bill3 points
-
I have WiFi! But I am taking the evening off from the internet. I’m going to curl up with a good book and watch the Purple Martins and Scissor-tailed Flycatchers do their magic.3 points
-
Jd, thanks for the complimentary words as always! I mentioned the Auto Electric Specialist option because many folks may not know it’s a thing. It’s an ASE recognized field and most areas have them. We actually have three exclusive Auto Electric businesses here in small town Eureka. I also remember at least a couple of them when I lived in the Phoenix area near you. I don’t rule out that the truck has a problem, but I believe it’s the trailer because the dealer cleared the truck, and there were no other trouble codes. Wiring issues were found in the trailer and the repairs made the issue go away temporarily, so odds are that’s the source. Electrical problems can be very elusive, and often beyond DYI electric testing skills. My mention of a possible brake controller problem, or PWM digital interfaces, was merely meant to show that the problem could be almost anywhere, and one must consider that in their repair decisions. After several mechanics failed to find the problem, it’s reasonable to assume it’s not a simple problem to find. That’s why it would be “lucky” to find it with simple tests. My suggested test might find a ground problem, which would explain both the brakes and the flickering lights. However, intermittent problems, high resistance connections and shorts, degraded brake controllers, etc., could all cause similar symptoms, and they can be very hard to find. You'r right about the black wire, I must of had a brain embolism on that one. And I should clarify that the junction box is a likely place for problems to occur, but I’d probably start testing from the main ground bus under the dinette, and work backwards to the truck — only if there was high resistance or an open… keeping in mind that the brake circuit probably branches out separately from the junction box which further complicates testing. Also I didn’t mean to shut-down your emergency brake breakaway switch amperage test idea. However, it’s fed directly from the battery and a completely separate circuit from the TV. In fact, your low amperage readings didn’t compute with expected amperage for 4 brakes, so perhaps the switch only controls the brakes for one axle. Regardless, it’s doubtful that a problem in that circuit would show-up as a TV brake issue. Also, the hot side of the TV brake wire could create similar symptoms if there was a short to ground. That could be even more tricky to find. Some might use a Megger to test the wire insulation… which is over kill for 12v circuits. A jiggle test with a multimeter is the way to go, but it’s hit and miss. Anyway, see how quickly it gets complicated. I don’t like to throw out too much detailed information to confuse people, but I re-iterate that there’s more to it than folks might realize, and that’s why there are so many auto electric specialist’s. Hope that clarifies things! Cheers! Geoff3 points
-
Guessing the 3000FV is so expensive because Oliver's 48X18 is much wider than their 3000FV maximum listed size of 36X30. It's going to be interesting to see how Oliver retrofits older trailers. https://corporate.lippert.com/products/rv/windows2 points
-
Wow! Select the 48x22" window on the Lippert website link I copied above, click Add to Cart, it comes to $230. This number seems very reasonable and what you were quoted for a custom 14x18" size seems outrageous! I wrote above "over $1000 to replace them all" when I was looking at the $230 number. $987 each would not be a direction worth going. BTW, ours are mounted in mirrored directions, left to right, moveable window to the rear, vents/weep holes always down. The outer frame must disconnect from the window assembly somehow to allow for this. Our windows are different from the time of hulls 70-75, to late 2015 when our 2016 model was built.2 points
-
That is kept very clean by camp hosts from Missouri. It is also the only pit toilet I've ever been in that has a separate chair and small rug that can be used for changing cloths, holding a bag (so you don't have to put it on the floor, holding a jacket and/or other stuff. Hopefully those camp hosts are still there. Bill2 points
-
and a pit toilet at Horse Creek cg.2 points
-
Update on Lippert 8800 series repairs due to leaking. The new glazing beads from Steele Rubber products arrived late on Tuesday and I went to work on the first one right away. It became obvious right off the bat the application of silicone spray or equivalent lubricant would be needed due to the new rubber having lots of friction. Once siliconed the seals went in easily yet provided actual connection to the sliding window. The window does not slide as easily indicating good connection thus less water intrusion. Thats the good news. The not so good news is the windows channels still take on water but this is due to the weep holes facing 8º tilt upwards toward the sky due to the Oliver body shape. While installing the new weather stripping seals I also took the time to plug the channel where the fixed window is screwed into that channel preventing water from infiltrating this area. Using rope caulk I jammed both the top and bottom area of this potential place for water intrusion. I also discovered the small black plugs installed into the weep holes at the top of the frames DO NOT prevent water from entering into the top of the window and then flowing down through the vertical channels carrying dirt debris mud etc. The top part of those channels on all of our windows were very dirty and stained. Removed all four from one window and found them to be completely encrusted with dirt and debris. Rather than re-install I decided to caulk those 4 slits and will also do this to the remaining other two windows. I had hoped to completely eliminate any water intrusion but early efforts at re-designing weather stripping were an abysmal failure. Effectively the new glazing bead weather stripping will help but certainly not fix the issue entirely. With this in mind what I will do going forward is carry and smallish portable wet/dry vacuum along and clean out the weep holes using wet vacuum mode. I have tried this numerous times now and it works quite well. Just this morning after washing our awning which allowed some water to flow down the Oliver side and window and into the weeps holes I was able to vacuum some 2-3 oz of water from the curb side window. Struck me as quite a bit of water given that the window only got wet indirectly. But for now its a fix for a flawed design.2 points
-
AND - there are fish in Horse Creek - most are 10 to 12 inches but a very good friend of mine can attest to a 17 inch brown that was a bank feeder is there to be enjoyed. On the "interesting" side - be careful to watch for bears. This same friend came back from there one year and said to his wife, "I'm going to need a bigger gun!". In my opinion - sites 2 and 3 are the best sites. No electricity or dump here but there is water available via a hand pump. Bill2 points
-
Batten down the hatches tonight up there on the Parkway - there is a bit of rain and wind coming up from the southwest over night. Bill1 point
-
Perhaps I am reading the chart incorrectly but it appears you could order a 48x20 as the smallest vertical dimension. It probably wouldn't be too difficult to cut an inch on the top and bottom away from existing cabin to accommodate the slightly larger vertical size.1 point
-
We met Oliver owner “Rob” from Florida at Manzanita Lake in California! Not many Olivers in these parts and it was a thrill to meet you! I was sorry we didn’t get a chance to chat with the wives together. Our camping group was demanding, and then you were gone. I didn’t find your profile on the forum, so here’s a public shout-out, and I hope your trip was great! Cheers! Geoff and Tanya1 point
-
Better loosen up that bolt and asks the wasps back!🤣 (Now, I'm not touching mine!)1 point
-
Well crap wouldn't you know my earlier unit does not have those adjustments to make. However I did discover two wasp nest buried in the awning compartment and one loose bolt on the mechanism. In fact it was almost all the way out. Doubt this has anything to do with adjustment fore and aft for retrieving the awning into its compartment.1 point
-
So they are roughly $5 each, and my shipping was $18. Thanks for the confirmation. Shipping is outrageous.1 point
-
Three that we picked up at Oliver in February of this year were $19.04 including tax.1 point
-
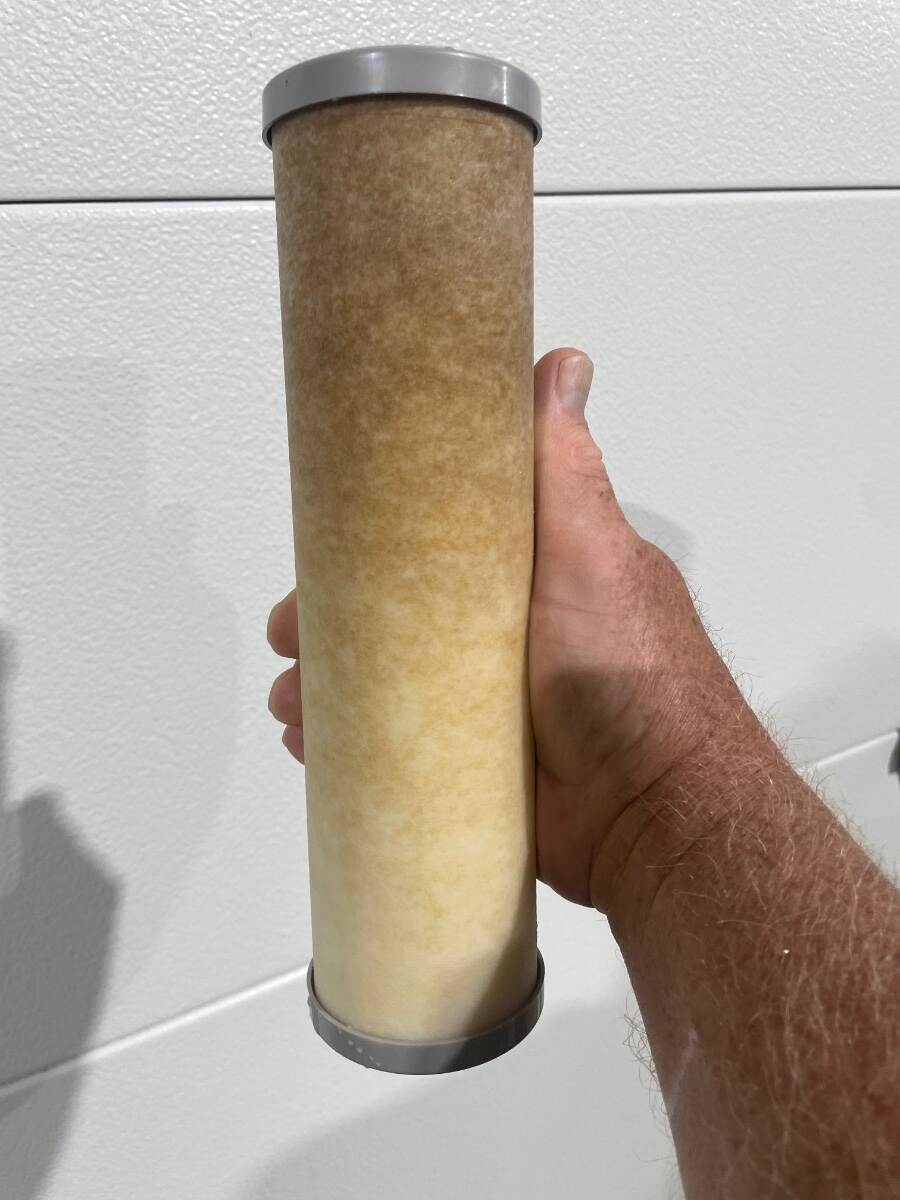
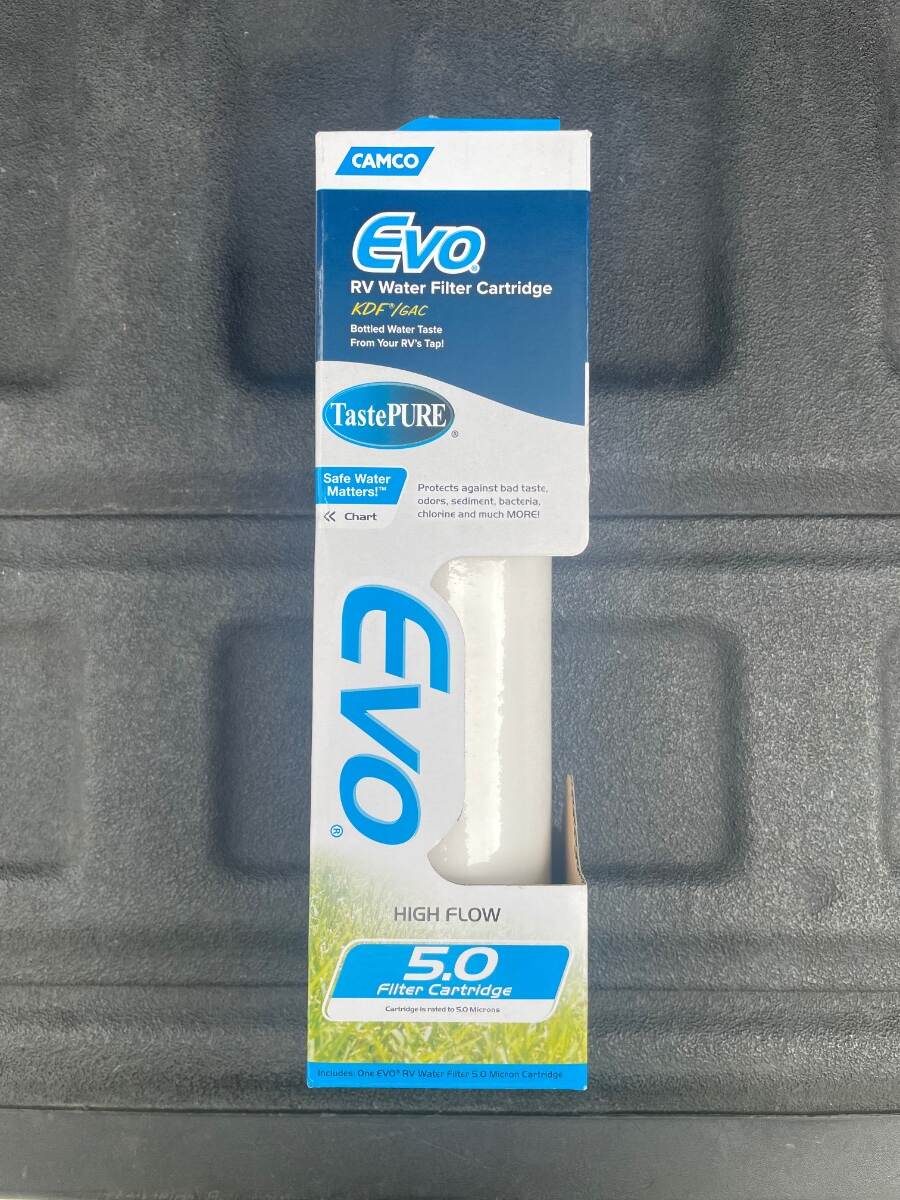
This is a Camco Evo water filter cartridge that has been used on one trip for 20 nights in 6 different campgrounds in 5 different states. We set up for 3 additional single nights in 3 more CGs where we didn’t hook up to the water. I don’t know which CG water caused it to look like this. We don’t drink campground water and sometimes we can’t even shower with it. This is not the worst we’ve seen. The worst case was near Leech Lake MN a few years ago where I had to change the cartridge after 1 night. Those of you using the blue bullet water filters should probably be changing them every few days. Water with high mineral or organic tannins content will stain your plumbing fixtures and certainly your clothes if you wash in it. Bill
1 point
-
Yep, it does. I believe we're in sync now. Thanks, JD1 point
-
Wow, I have gone 70-80 days on our filters. I have never seen the my filters like that. You did get some bad water. We use two standard 10" x 2.5" cartridges. One is a 5 micron filter like yours, the 2nd filter is a 5 micron carbon. I usually change them out yearly. If we are going to be at home for more than a month. I empty the canister and set out the filters to dry. I did try a 0.5 micron filter but it dropped the pressure at the faucet. taking a shower was tough. The restriction is not as bad with the 5 micron filters.1 point
-
Yep, by design a cooktop is basically for quick meals on a skillet. Of course, the more Ahs available the longer you can cook. But as you well understand, all campers should know the limitations of their rigs. You're welcome, Lamar! My goal was to provide you with correct information for your decision making. I'm always very happy to help and this forum is the best! 😎 Steve, I agree with the points you made, but you may be giving OTT too much credit in your first statement. It was stated as more of a "1750 watts with a 2000-watt inverter" simple comparison without full understanding of the dynamics I presented. I would love the be the fly on the wall as @Lamar explains induction cooking usage to OTT Service! 🤣 OTT and all RV manufactures wire microwaves to 2KW inverters all the time along with the 110V wall outlets. My wife uses a blow-dryer after washing her hair. The 1800W blow dryer pulls a hard 1800W which is the same load as the Dometic P2, or FreshJet 5 for that matter. You can't keep the dumb from being dumber, but those of us who are experienced would simply know, don't use the microwave when blow drying! 🤣 Of course, that's with a 2KW inverter. Perhaps Lamar could parlay this poor customer service situation into getting OTT to remove the 2KW Xantrex for a 3KW model. Then pull out the oversized Lithionics and the unnecessary sliding tray and the EI battery bay could house 600 Ah in two 300 Ah Epoch Essentials. Then you're ready to wire your A/C into the inverter circuit as well, and you could do induction cooking with the A/C running. But if you need to run your A/C for more than 3-4 hours, you'd have to scrap the inefficient FreshJet (spec 15A on 115VAC) for an efficient inverter or variable-speed compressor A/C model. Add a 3rd battery and you'd have the system I installed for hull #113, but two 300 Ah batteries is all that would fit in an EI. Now I'm having way too much fun, but it's food for thought! 😎1 point
-
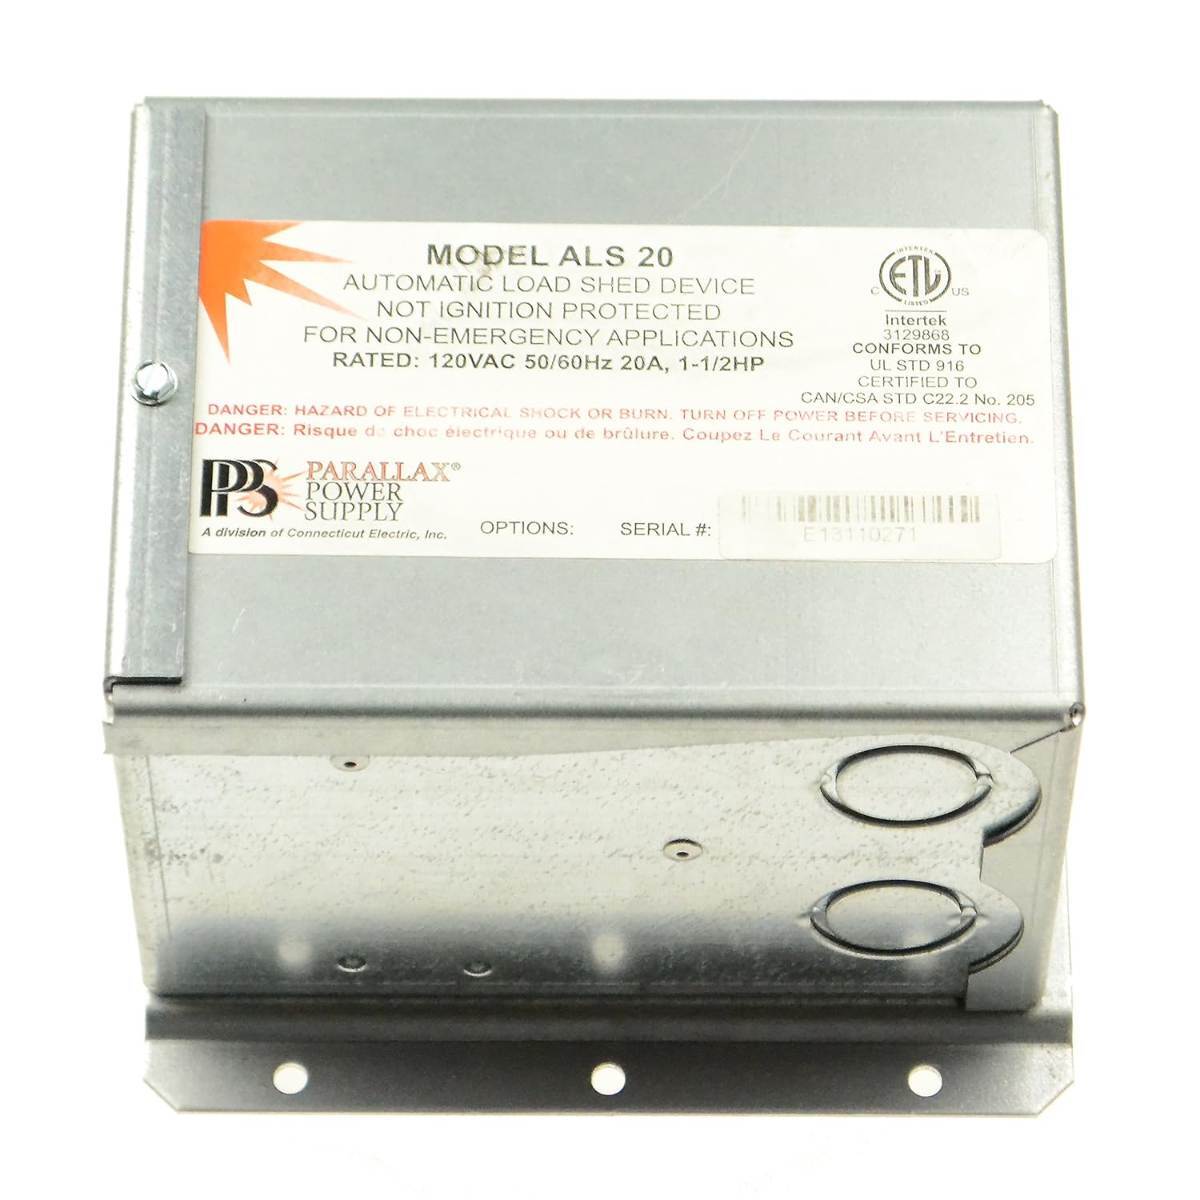
One of our previous 30A trailers had a load shed device that cut off power to the electric fireplace if you fired up the microwave. It wouldn't allow those 2 devices to operate at the same time. When you were done with the microwave, you could use the fireplace again. Oliver could set @Lamar up with something similar for the induction stovetop to protect the inverter. That should make everyone happy. Found this image on the Forest River forum. The topic comes up frequently there.
1 point
-
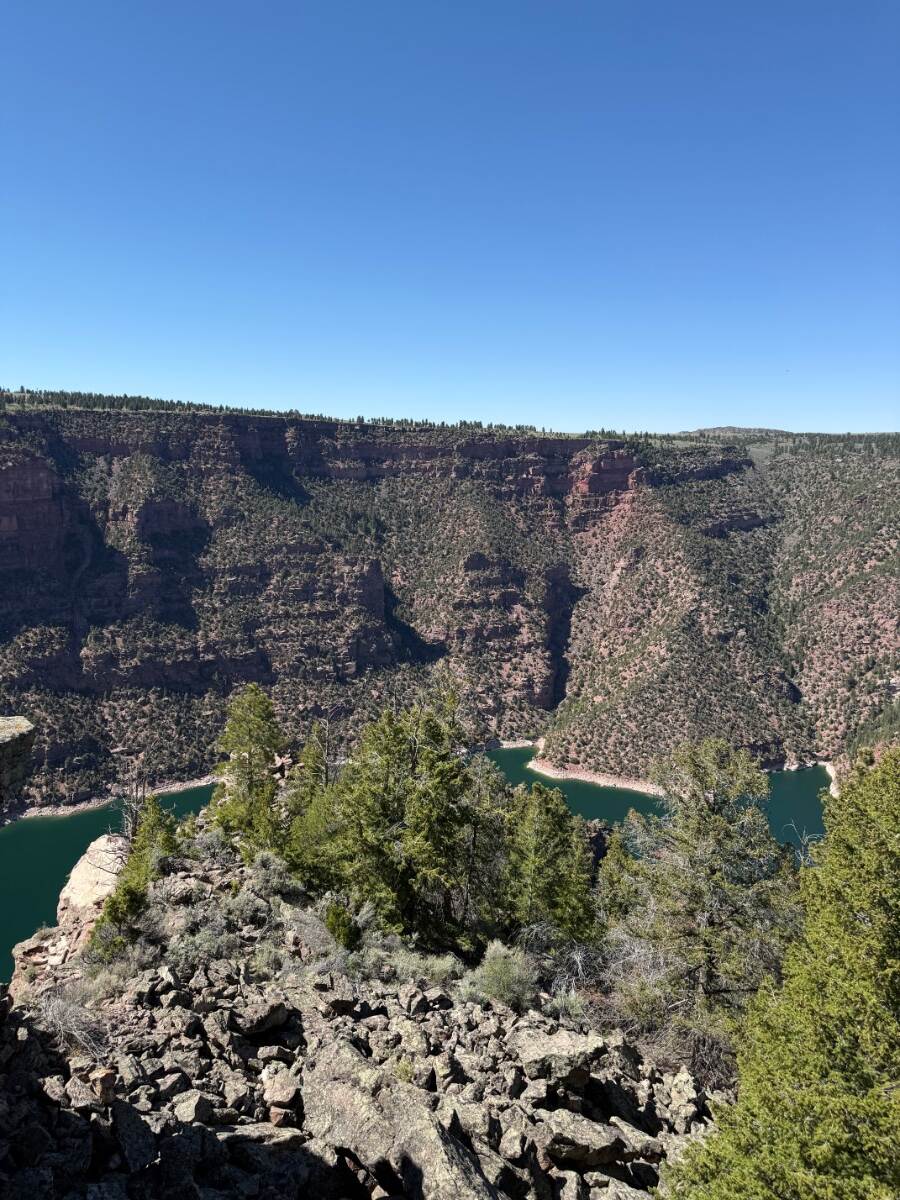
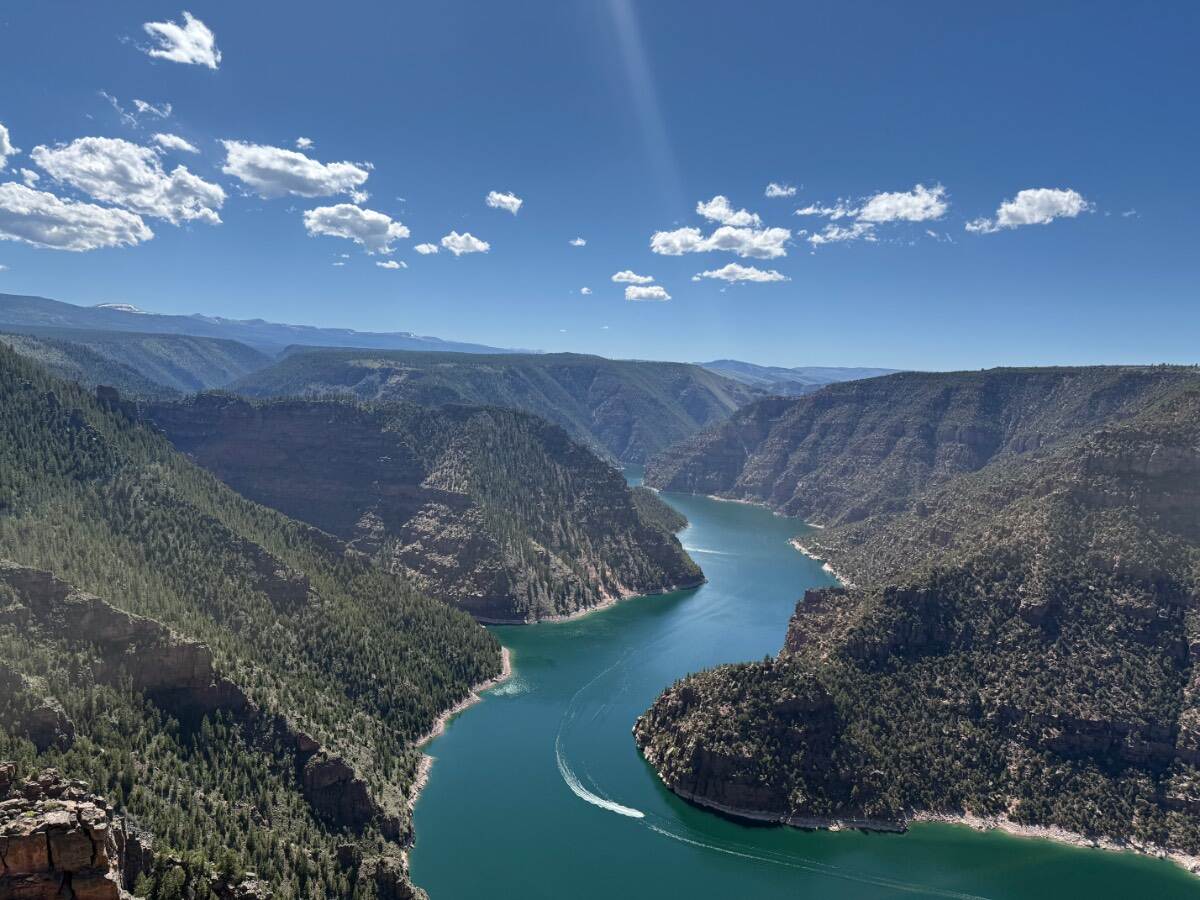
Yes it is! Great fishing if you are so inclined. And not far away there are some sights to see. https://www.visitutah.com/articles/dinosaur-national-monument-flaming-gorge1 point
-
Reset 2.0 (Hull 1364) just spent its first night (with us) in Utah. The Flaming Gorge area is absolutely beautiful. This trips pass list so far includes: Raton Pass (NM) 7,834 ft Monarch Pass (CO) 11,312 ft Douglas Pass (CO) 8,205 ft
1 point
-
Apparently, the snow is in WY this June.... https://cowboystatedaily.com/2026/06/09/merry-christmas-yellowstone-to-get-june-snowstorm-as-cold-front-dips-into-wyoming/1 point
-
Good grief, after washing and cleaning up the Fiamma this morning, now I can't get the thing to retract properly at all. Both ends are stuck partially open. Can't get in touch with customer support at the company either, messages do not go through.0 points


-
Recent Achievements
-


")


")


")
