
ScubaRx
-
Posts
3,296 -
Joined
-
Last visited
-
Days Won
170
Everything posted by ScubaRx
-
This trailer is Hull #004 and was the second 2008 Elite sold. The trailer went to two partners Andrew and Lisa in Lake Havasu City, AZ where Jim and Evon Oliver have a home. The drawers were not original to the trailer at the time of delivery. Jim had a 2008 trailer built for himself, Hull #030 and had his son Daniel design and build some under belly drawers for extra cargo. It appears that these are copies Oliver built for this trailer. After Jim had Hull # 046 "The Beast" built (originally designated a 22 footer, but now identifies as an Elite II 23-1/2 footer) he had larger under belly drawers added to it. My old records show that this was the only trailer built and labeled as a 2010 model, but I believe I remember @CRM stating his was sold as a 2010 model. All this was happening either during or after Oliver officially stopped trailer production in 2009, so this information was gathered during hectic times and is unclear and subject to error. As far as I know these were the only examples of trailers with the exterior drawers. If anyone knows of others let me know, I'll add this to my master list of Oliver Ephemera.
-
As you are the fourth owner, that may well be the case. I have pictures of yours and another being built for Jim Oliver in 2009. Jim was adamant about there being no such thing as overkill and I know he put 5200 pound axles and the larger five leaf springs under his. Being as all the current models were Elites (at that time) and the only axles and springs they would have had on hand would have been the HD's, I just assumed that yours were too. Jim named that trailer "The Beast" and it had full extension drawers mounted under the hull between the steps and the front axle. Edit: @CRM has located a photo of the underside of Jim's "The Beast." It had four leaf spring packs rather than five so now I wonder if the axles were 5200 pounds when originally built.
-
Yes...I assume you're actually referring to the welded on U-shaped hangers rather than the shackle.
-
Your Hull #045 does not have 5 leaf springs?
-
43 pound/feet. The shoulder of the bolt will bottom out on the hanger, make sure it has done that then tighten. DO NOT attempt to use the nut to pull the bolt into place. It will strip the nut and ruin the wet bolt.
-
Bite the bullet, and buy the one with the charger, battery and case. Especially if you plan to carry it with you on trips. Exchange the coupler for a LockNLube and you are better than good to go. All neat and tidy in a case that won't allow the grease that will inevitably ooze out, collect dirt to get onto everything else you will be carrying. This would not be an issue if all your trips are short and you're always back home before it's time to grease up again. Our average trip is >5K miles, so our GG usually makes the trip with us.
-

Replacing shocks when upgrading leaf springs
ScubaRx replied to John and Debbie's topic in General Discussion
This would be unacceptable to me. When I decide I want/need something, I want it today or, at most, Amazon Prime quick. While installing our Alcan Springs, I discovered that two of my last set of Monroe's (bought from Amazon, about $40 each) had lasted less than two years. Needing to replace them that day, I went in search of a new set. I was unable to locate a full set locally but O'Reilly Auto Parts told me they could have a full set by the next morning. I decided that was quick enough. The only downside was they were about $60 each. After checking with Oliver, I was told that they charge $68 each, so I figured that was OK. When I went to pick them up the next day, I was pleasantly surprised to learn that a life time replacement warranty was included in the price. It is available to the Original purchaser as long as they own the vehicle. Additionally, you do not have to keep up with your receipt or proof of purchase if you have a (free) online account with them. Just bring the old shock back and it is replaced at no cost. I called around to the other local auto part players and they all stated the warranty was the Monroe provided two years. -
After updating our tow vehicle from a 1500 to a 2500 and now a 3500 HD truck, I changed out the old 2"-7000 pound Bulldog coupler to the 2-5/16"-12000 pound version. Like Mountainman 198, I sawed off the shank of a 2" ball. I inserted the ball into the old coupler and welded it in place. I also welded down the locking lever. Just leave this hitch attached to your unattended trailer to slow down any potential thieves.
-
Nobody was ever sorry he bought the best there is.
-
Yes , you need a truck, a real truck. Not a SUV. The bigger the truck, the better. For most people, a 3/4 ton (2500) is enough. Personally, I’d want the diesel. You said money was not an issue. If you need/want more cargo capacity, get a 1 ton. Then, you can take almost anything with you and it’s not a whole lot of money difference between the 3/4 ton and the 1 ton any way.
-
Have you looked inside the EMS box under the dinette? Pull the top off and check the wiring inside for a short. It will be obvious if there is one.
-
If the hot and ground are shorted you'd be able to see that by testing for continuity at the pins on either end of the cord. It could actually happen if one were to crush (run over?) the cord on a hard surface like a concrete campsite pad.
-
Your incoming voltage is fine. Earlier you stated the the Klein showed, "they all were indicating hot/grd rev" Does the readout on your onboard show any errors? Look under your dinette seat at the back side of the power inlet (where your external power cord plugs in) and make sure all the wires are tight and not burned. Also examine the inside of the inlet (from the outside) to make sure there is no scorching which would indicate an overheating due to a poor connection. Unless there's direct short in the plug or inlet port, I done understand how the hot and ground could be reversed. Keep posting until we can work this out.
-
Utah's Mighty 5 next spring (from FL)
ScubaRx replied to Dennis and Melissa's topic in General Discussion
Personally, I would swap from the South Rim of the GC to the North Rim. There is a world of difference. -
Just so I understand...You were plugged into a power post at a campground. Everything was working fine and all of a sudden everything just stopped working. When you used the Klein tester, were you at the campground, at home or both? At home your 30 amp power inlet on your house has always worked in the past?
-
Grab your springs, order some new shocks, put some ice on the lobsters, throw it all in the truck and head south. We'll get them on. We don't "suggest" you to buy anything like the HH folks do. I might as well make a cardboard sign that says "Will work for food!"
- 800 replies
-
- 11
-

-

-

-

-
Problem was solved on 08-01-2024, but here we are, all still blindly answering.
-
To actually check the wiring, it's much easier to just pull the head unit out of the wall. Remove four screws behind a pop off trim ring and just pull it out. If it's like mine there's not enough wire to set the unit down on the bed so you'll need something on the bed to support it while you check the rear connections. While you're back there, make sure everything else is plugged in securely. Also make sure the previous owner was not using that area for an easily forgotten hidey hole.
-
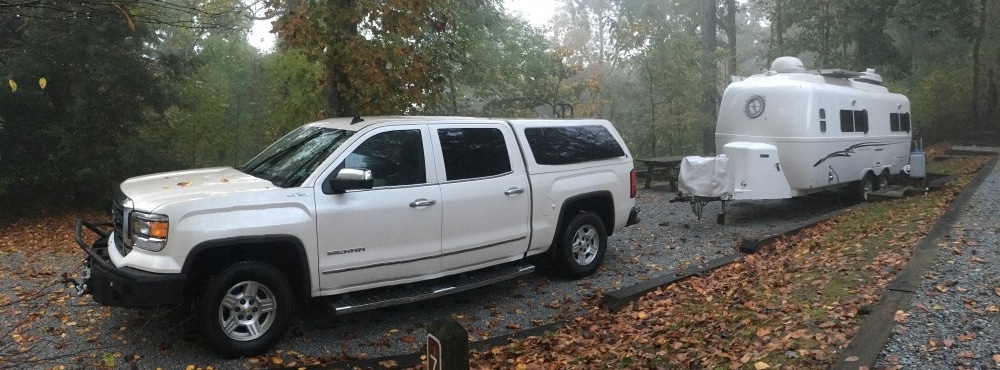
I didn't, thus the next three trucks: 1500-->2500-->3500.
-
@Mike and Carol Your pics look remotely familiar. These were shot in 2008...

-
New axles may not fit all older sub-frames
ScubaRx replied to Wayfinder's topic in Mechanical & Technical Tips
2014 LE2 #50 SC 50.5" D52 Original axle capacity & Alcan spring & Disc Brake upgrades This is my trailer but I went out and measured the spring centers as 50.0" -
_________________________________________________________________________________________________________________________________________________________________________ No, but I can from this one... And just how did your dog get into this race?
-
Elite 1 - What are the Solar Panel Dimensions?
ScubaRx replied to Dirt Duff's topic in Mechanical & Technical Tips
L shaped. -
Please explain your motivation for wanting to de-rate these springs.