bhncb
-
Posts
467 -
Joined
-
Last visited
-
Days Won
6
Everything posted by bhncb
-
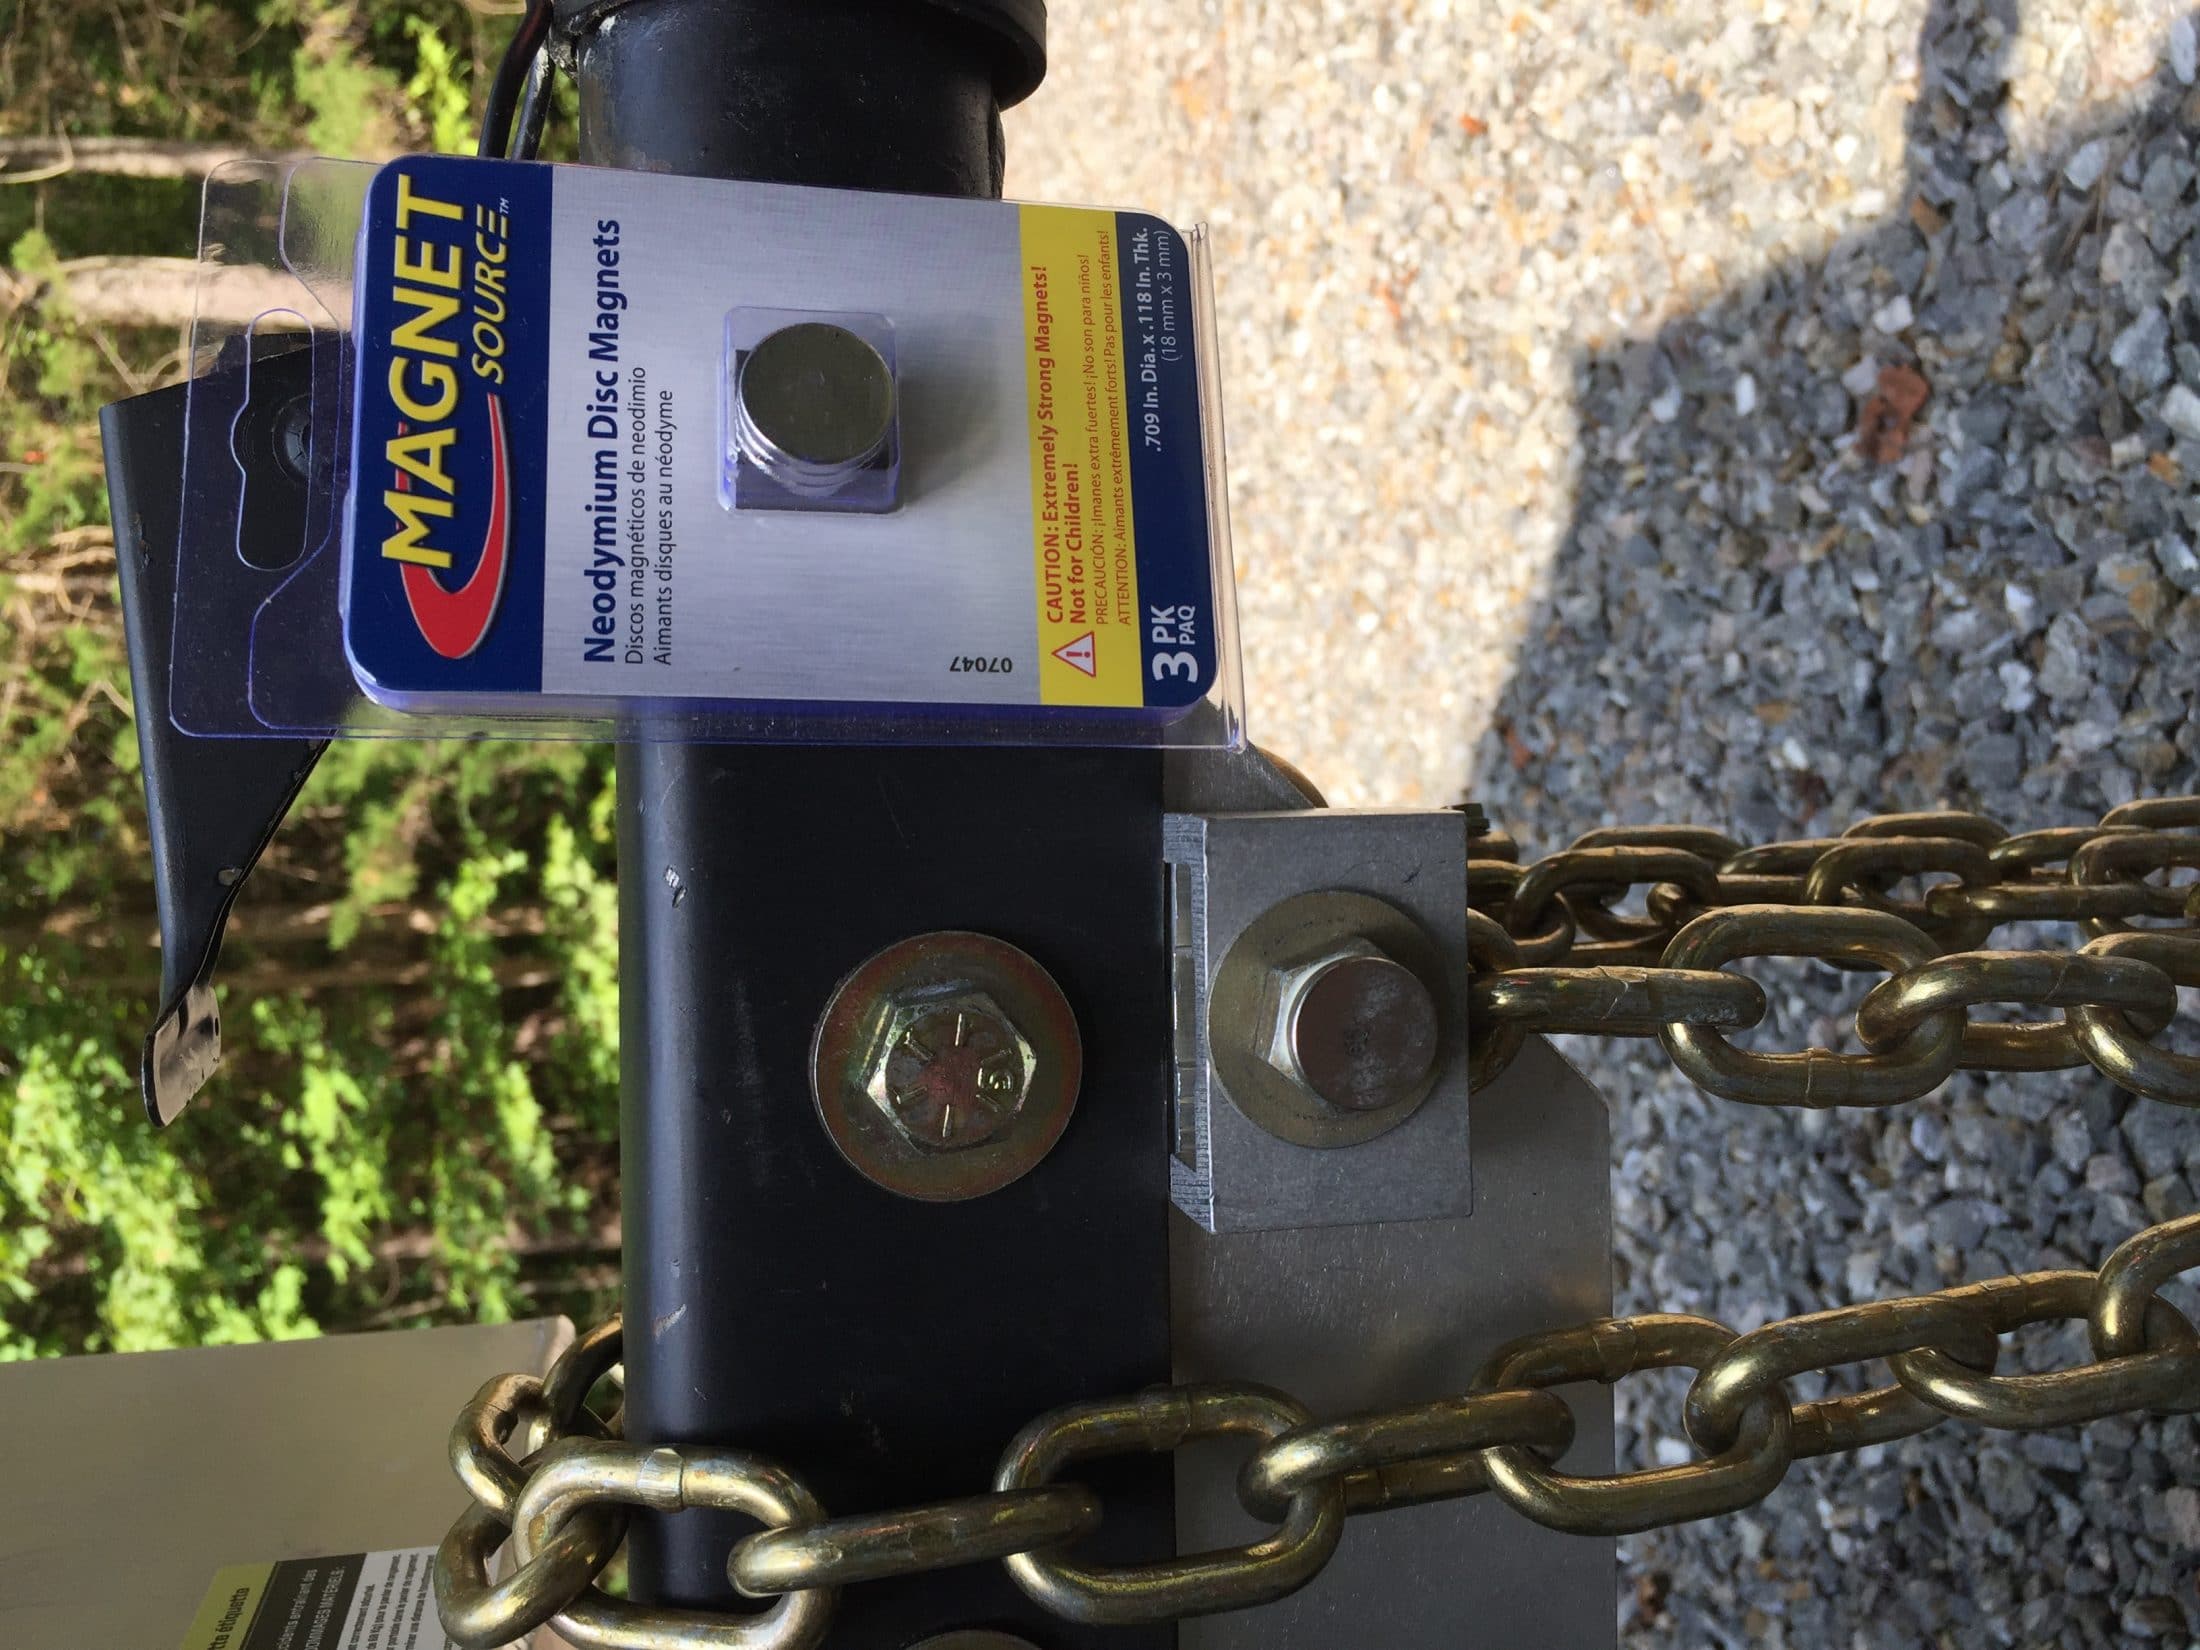
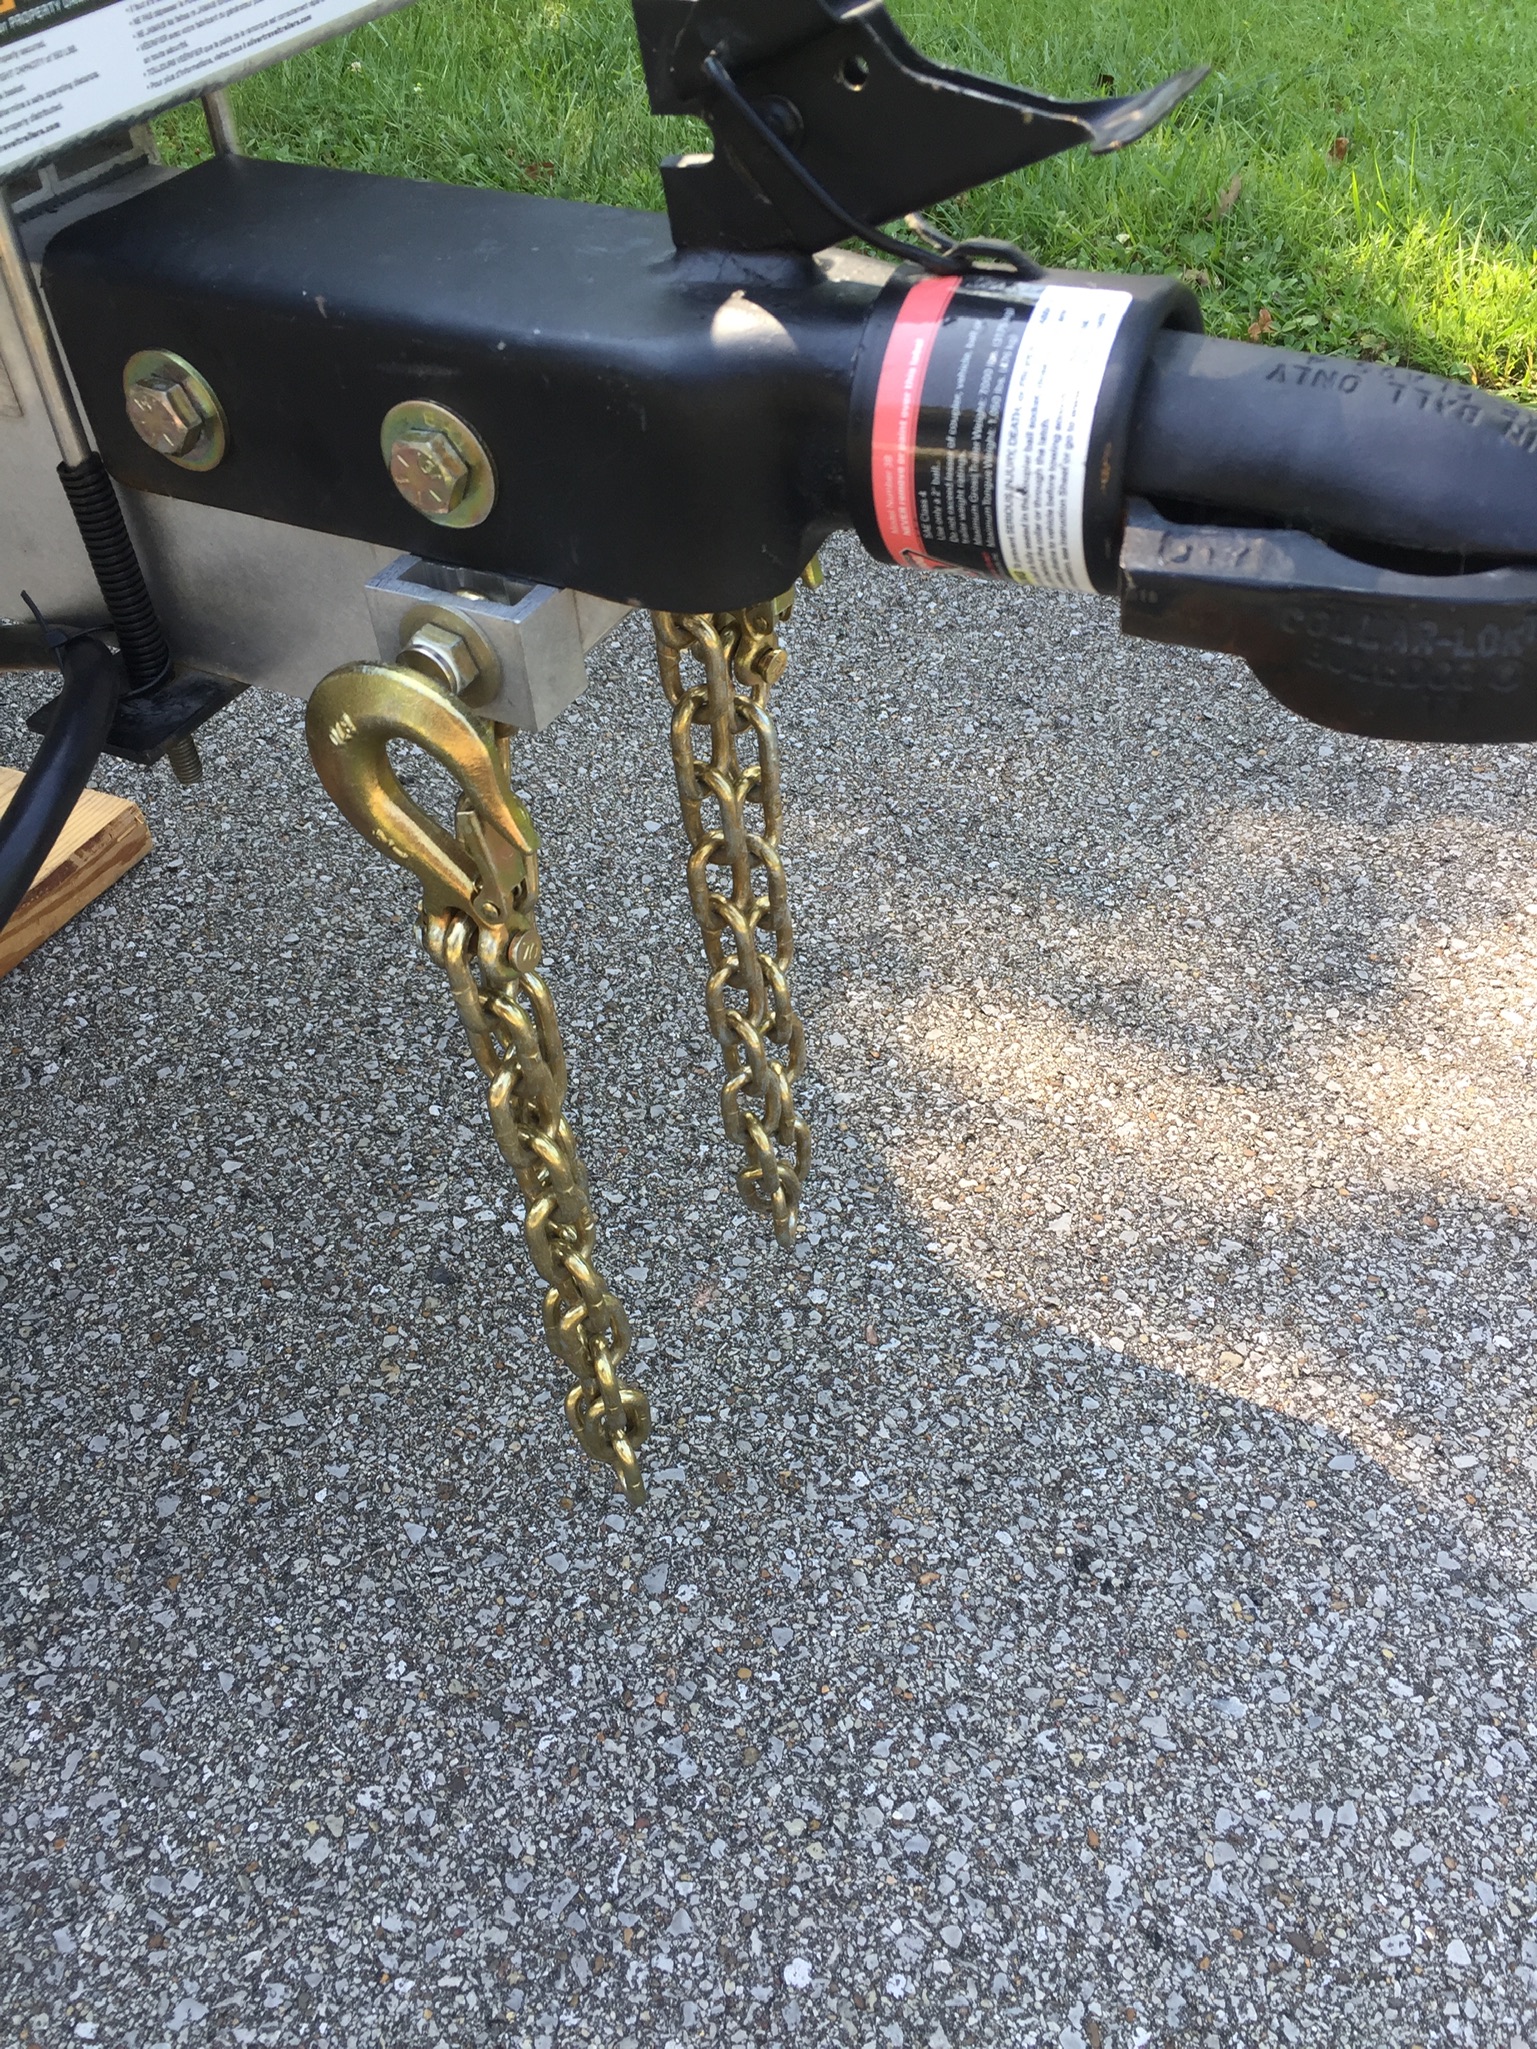
In the first picture, is that some weld flash inside the bracket that shows the rub marking. The marks on the chain links in second picture don't appear to lineup. Ask for a new bracket.
-
Hold the cover in place and turn counter-clockwise until you feel/hear the threads engage, then turn clockwise until snug.
-
In the event of a coupling failure, crossed cables will not hold the tongue up and prevent it from digging in.
-
How to stabilize the front of an Elite II
bhncb replied to TenRing's topic in Mechanical & Technical Tips
I've heard the X-Chock helps prevent side to side motion. https://www.youtube.com/watch?v=qlXsECP9_ok -
Assuming there isn’t a recurrent blockage in the pump inlet lines, try replacing the screened washer in the rear inlet with just a plain washer. If that doesn’t help, disconnect the flex-hose at the pump inlet filter and set the two valves to direct flow to/from the rear inlet. Use 30-50 psi compressed air at the flex-hose end to reverse clear the line. It may be possible that there is a connection leak allowing air to be sucked into the rear inlet line but that would have affected your previous sanitation efforts as well.
-
The Hehr p/n is H109-376. It comes in both black and white so be sure your source will permit you to specify which. I order Hehr parts from Pelland Enterprises pellandent.com (aka rvwindow.com). Great service.
-
Michelin stopped producing the LT225/75-R16 LTX tires last April. Cooper (Goodyear) is one of only a few other choices.
-
Shreds of Plastic in Water Pump Filter
bhncb replied to Spike's topic in Mechanical & Technical Tips
Your quickest solution Cash may be to use the winterizing procedures to draw a gallon of white vinegar into the entire system and let it sit for a few hours. Then flush until taste is gone. May need to repeat depending on severity of the calcium build up. What ever solves your problem, your next priority should be to obtain a water softener. -
To avoid further confusion, the Dexter axle owner's manual list all their part numbers for each weight axle. Take all the numbers for a 5000# axle, go to Rockauto.com, and do part number searches for each of these Dexter numbers. The returns will list comparable manufacture's parts. Most if not all the specs will list country of origin. If "Made in China" bearings are undesirable, select the US made Timken brand bearings and National seals.
-
To answer your original questions: The fresh water fill line enters the tank on the back side near the top right corner. This line does have a backflow check valve hard plumbed at the water inlet. This check valve has a 2-3 psi crack pressure that would have to be overcome, so gravity feeding through the fresh fill inlet might be difficult. Depending on the height of your aux tank, it might be possible to gravity feed through the boondocking inlet and backfill the tank through the pump pickup tube. There is no backflow prevention in this path. You would just need to open both valves on the left side of the diagram. But again, the height of the aux tank would be key and need to be higher than the plumbing elevation. I'm onboard with the others that suggest just treating the aux tank as boondocking source. To me, it seems better to transfer the water to the main tank rather than demand pumping from the aux. The water temperature will be better maintained and you won't have to disconnect and reconnect every time you want to move your tow vehicle.
-
Check your truck owners manual. I know the F250 lists only a couple of towing circumstance when it might be advisable to turn it off. When using a WDH isn't one of them. Andersen’s advice seems a bit dubious, like not greasing the ball.
-
Yep they’re just some magnets (see picture) I found at a local hardware center. Put a dab of Marine Tex epoxy and centered on bolt heads. They work better than I expected.

-
The hook and chain grade and size can vary depending on the rating target. The grade 70 x 1/4" I used are rated for 7-12K trailers. A Grade 30 X 3/8" or grade 43 x 5 /16" might be similarly rated.
-
The switch needs to be free to rotate so it can adjust to the angle of pull by the cable. Best to replace the screw.
-
Looks like they put the wrong label on your PDC door, one for an Elite I maybe? The last two 20 Amps are for 12V/USB outlets. #6 is for the dinette outlets above the LP/CO detector and #7 is for the curb-side night stand (twin bed model). That second 7.5 (#5) feeds the basement light.
-
Someone may have though they were disconnecting the main 12V feed, like many do when winterizing. I'm guessing you don't know what that is however.
-
That is a manufacturing defect that likely occurred when the opening for the stove was cut. I'd guess the counter top was still a little "green" when the opening was cut and air got between the gelcoat and substrate. OTT will replace it, just ask.
-
I'm a bit confused on a couple of points. 1. The lug on the short jumper attached to the outer battery, the one under the inverter cable you attached, used to appear upside down in previous pictures. What did you do that changed it to right-side-up? Ideally it should be the way it was so you'd have a little more flexibility in aligning the inverter cable on top of it. 2. I heard you to say in earlier posts that the inverter cable seemed to be too short to reach the outer battery post. Can the battery tray still be opened all the way? Other than this, good job. Just re-secure the flex sleeving and call it a day.
-
Great. Be sure to post a picture when you're done so we can critique your work.
-
Referencing your last photo of the eight battery terminals: On the positive post of the inner rear battery, there appears to be another terminal stacked on top of the short jumper lug. This is the connection to the main 60 Amp breaker in the street side bunk access. Look at this cable inside the battery box and see if there is enough excess to reach the outer rear battery positive post.
-
First of all, that tester is for AC circuits and has not use for trouble shooting this problem. You need either a DC voltage meter or tester. The evidence of the loose cable having been previously connected is the ring around the hole on the lug, which is from the kerf nut serrations. Since the lug on the loose cable appears to be in a right-side-up orientation, it was previously installed either directly on a battery stud or on top of another lug that is orientated upside down like the one on the short jumper connected at the outer rear battery positive terminal. If you're not comfortable tackling this, by all means wait until tomorrow or whenever your RV specialist is available. If it were mine, I would reorient the short jumper between the positive posts of the two rear batteries so the upside-down lug is on the inner battery stud. Then stack the loose cable lug on top of it. Secure kerf nuts on both batteries. (100 in lb if possible) I sure hope the mystery gets resolved.
-
One last for the night. It might have been attached to the inner battery terminal at the other end of the jumper. Same electrically. However, that jumper should be flipped over, or reversed end for end, so the upside-down lug is on the inner battery. Then your loose cable goes on top of that lug.
-
Sorry for the post overlap. I see in your latest picture that they are AGMs. The cable should be on top of the short jumper going to the rear inner battery. Who worked on this last and why?
-
That cable is the positive feed to the inverter. The other end goes to the 250 amp ANL fuse located in the rear dinette access. Hard to see in the third picture of the batteries but it most likely should be on top of the other lug on the terminal just to the right as you're looking at the picture. Can you provide a broader view of this area. Also which battery option do you have. AGMs?
-
Voyager's 7" Digital Wireless Observation System
bhncb replied to Foy_Mirna's topic in Mechanical & Technical Tips
Appreciate the details of how the camera is installed by OTT. I'm getting ready to replace my camera and was specifically concerned about that grommet. Now I know what to expect and suspect the job will go much quicker. Regarding the screws: The camera housing is cast aluminum. If you are going to use stainless steel screws, be sure to as a minimum to lubricate the threads with an appropriate anti-seize to combat galvanic corrosion. Best to stick with the supplied screws though.