topgun2
-
Posts
7,755 -
Joined
-
Last visited
-
Days Won
464
Everything posted by topgun2
-

Our Oliver Galley gets a new 3 quart insta pot.
topgun2 replied to Patriot's topic in General Discussion
Is there a model of the instant Pot that comes with the person that does the cooking? I like to eat but after a day of fishing I'm usually not in the mood for slaving over either an Instant or not so instant Pot.🙃 Bill p.s. Yes - I know that there are those that use these things like a slow cooker (but faster). -
YouTube Video Series Tips/Organization/Products for the Oliver.
topgun2 replied to Katjo's topic in Introduce Yourself
Katjo - And, inquiring minds want to know, where did you get the edging? Bill -
Arriving at 2pm on Wednesday will tend to make you a bit rushed. You will have to check-in, get to your site, set-up, then get over to registration and then get up to the Lodge. Of course all this assumes that you want to be at the cash bar that usually opens at about 4pm as Steve Morris points out above. If something were to happen (i.e. you are delayed) you can always register late (even on Thursday) but, you will still want to make it for dinner that usually starts at 5 to 5:30. And, certainly you will want to be there for the door prizes that usually start right after dinner. Bill
-
Opening Up Storage Space Under Bath Sink...
topgun2 replied to MAX Burner's topic in Ollie Modifications
For eight years now I've been waiting for something to go wrong in that vanity area so that I'd have an excuse to go in there. I'll keep waiting - for now. But, more insulation and more storage and a different shower setup are very enticing. Certainly a nice way to make lemonade out of lemons! Bill -
Don't be nervous. Given the size of the Oliver, there are numerous places that one can camp. Yes, if you plan to be in and around popular places at the height of the "busy" season, you will want to make arrangements well ahead of time. But, for all "normal" camping there are still plenty of places to kick back and relax. Bill
-
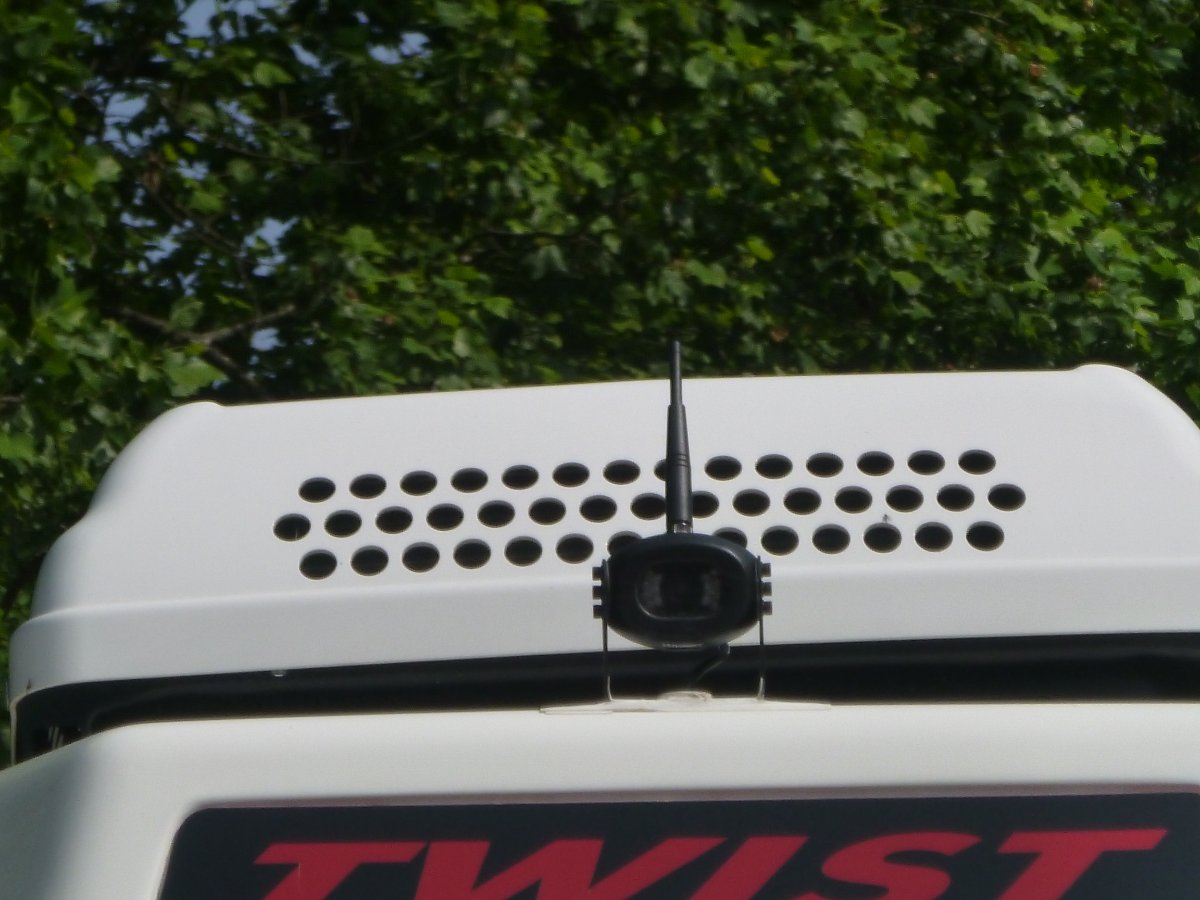
Good question, Mike. I'm not sure of the model number but it is the camera without the "hood" over the top and the antenna comes straight up off the back of the camera housing. Does the picture below help?

-
Unfortunately, my ASA Voyager rearview camera developed a leak which cause moisture to collect inside the housing. This, in turn, caused the camera view to be "foggy" and/or virtually non-usable. Via email I contacted ASA's customer relations area and they advised me to send the camera in to be examined. I removed it from the Ollie, boxed it up and put it in the mail 6 days ago. Today, I received a new camera via FedEx. That is what I call great service!. Unfortunately, ASA didn't include a tech in the package to do the re-install! However, that process has got to be a bunch easier than getting the old one off the Oliver in the first place.😊 Like Oliver, these guys take Service to the point it should be and this makes what could have been a very disappointing situation into an almost pleasant one. Bill
-
Discount Tire refuses to sell me LT tires for my trailer
topgun2 replied to John E Davies's topic in General Discussion
Same here 6 months ago. Bill -
Other than having to stand on your head to operate the switch, I see no reason why it wouldn't work in that position 😇.
-
The last year I was there they had no room in the main open air shelter for at least half of the attendees while eating the potluck dinner. There were no "regular" camp sites left so they had campers in the "overflow" area (i.e. a field with no facilities). Please do not take my comments in the wrong manner. The campground is very nice as are the people that own it. The attendees are all friendly and as I mentioned above, the couple that organized the rally are really nice folks. The regular camping sites are relatively nice for a commercial campground too. Simply way too many people for my taste. Bill
-
Great site for a rally and really nice people organizing it. I attended for the first 3 or 4 years but have not been back due to over-crowding. 😒 Bill
-
Ya won't even know that the Ollie is behind you with that beast!.
-
Repositioning Water Pump Switch/LED in the Head...
topgun2 replied to MAX Burner's topic in Ollie Modifications
Where there is the will there is a way. 😇 -
Welcome! There are a few owners here on the Forum that do carry bikes on a rack with covers. At least one of those - Patriot_- is very happy with the arrangement he has put together. Many of us have owned other RV's with some being 5th wheels. And, of course we had to address those same questions you are now dealing with. In the end most of us chose the Oliver's size due to the ease of towing and its ability to easily fit in virtually all camping spaces. It appears to me that you will also have to make some hard choices when you finally decide that your long trail riding days are over. Good luck! Bill
-
The good news and the bad news - When I dim the lights, ALL lights (interior and exterior) dim. There are times when I would prefer to only dim either the interior or the exterior. However, this has never bothered me enough to rewire it. No - I do not know the answer to this. If I had to guess, I'd think that the touch lights are the "problem", but, the guys that would probably know are located in Oliver Service. Bill
-
I have a dimmer on my Ollie lights - like THIS one. Bill
-
You can get an idea of the diming effect by looking at the pics and video at the Amazon link provided above. Bill
-
I think that you are on the correct road with this one. Did Oliver send you just he 12 volt outlet or a combination 12 volt and USB? Your comment about disconnecting the adjacent USB is a big clue I think. God luck! Bill
-
Wal Mart for certain and possibly Amazon.
-
The rumor is that this same tactic was employed in reserving sites for next year's Oliver Owner's Rally. Very disappointing if the rumor is true.😒 Bill
-
Backup Camera Location
topgun2 replied to Wandering Sagebrush's topic in Mechanical & Technical Tips
I didn't use this type of camera mount because the camera is within reach of passersby. That means that anyone can tamper with it and/or can get "snagged" on it with clothing and/or other things. Bill -
Backup Camera Location
topgun2 replied to Wandering Sagebrush's topic in Mechanical & Technical Tips
Yes - my first rear camera was/is located in the spare tire cover. There are a couple of issues - mounting and rainy weather. Mounting - the spare tire cover is not perpendicular to the ground. Actually it is off by 6 degrees. So if you mount the camera without making any adjustments to account for this, the camera will be pointing too far down towards the road. If you compensate for the entire 6 degrees you will probably find that the camera is now pointing too high. I made a "puck" out of a material called Delran (similar to nylon) that is easy to work with and cut it at a 4 degree angle. Thus when mounted on the tire cover you obtain a net 2 degree downward view which is about perfect. The second issue is rain. With the camera mounted in this relatively low position (versus the "normal" roof mount), the camera gets more road spray in wet weather. However, when it is not raining the I prefer this lower view for backing into campsites. A third issue with the lower mounting position is in heavy traffic you can not see as far behind you because the guy on your bumper blocks most if not all of the view. Given the above - I now have two rear cameras.
-
On all three of the Ford F-150's I've owned that came with the Ford brake controller, they were set at either 5 or 6. On gravel or rain slick roads I could back that off to 4 or 5. Bill
-
Strainer - stopper What ever! You da man! waste not, want not.
-
And - now you can use that lid as a strainer!😇