Leaderboard




Popular Content
Showing content with the highest reputation on 06/21/2017 in all areas
-
Overland, The dip tube that is in the picture is designed to go all the way to the bottom of the tank and sit against the bottom. It is designed with a bit of extra length to accommodate tanks that may be slightly different from the normal overall depth by dropping all the way to the bottom in any of them. If you look closely, you'll see the end is capped. This particular style sweat cap was picked because it is flat on the end and has rounded smooth corners. In other words, it is very kind and won't dig into the bottom of the tank. All of the water enters around the perimeter of the cap, not the end of the pipe. The cross-drilled pickup holes were drilled tangent to the inside surface of the cap. If you add the diameter of the pickup holes to the thickness of the cap wall, it comes to just under 1/4". The top of the holes are 1/4" or less, from the inside surface of the tank. This arrangement will pick up water down to about 1/4" deep and do it consistantly in any tank it is installed in. As mentioned earlier, mine began to get some air at 6% tank level, but ran until the gauge read 0%. At that point it was sputtering, but still drawing enough water to drink, but not to shower. There are four holes. The surface area of all four holes added together equals about 1.7 times the surface area of the inside of a PEX fitting. Allowing for the vena contracta of the flow through those four holes, the restriction is still less than each PEX fitting used in the rest of the system. I also chose to install brass fittings and a brass PEX ball valve. These have slightly larger holes through them than the factory plastic fittings. So, the pickup holes have no affect on the flow rate compared to the stock pickup. But if the holes were bigger, we could not get as much water out of the tank. This was the only way I could think of that had a consistent pickup depth, could be installed in any tank and always end up with that same depth (with no measuring or possible installation error). It is totally accessible and serviceable, even with the water tank full. It does not affect the original pickup fitting, or the original tank drain piping. And it ties into the existing piping at locations that are accessible, which makes the work much easier than it might have been. If debris enters the tank at some point and clogs one of the pickup holes, it will still work well. If more than one hole gets clogged and a restriction is noticed, the dip tube assembly can easily be removed, without draining the tank, cleaned and re-installed. You cannot do this with the stock pickup tube as originally built. BTW, any restriction that reduced the flow would put no extra load on the pump. They are designed to run fine with a wide range of suction head pressures and they are just diaphragm pumps, which are very tolerant of flow restrictions. These pumps can run dry or at full pressure constantly without damage. They can draw from full or nearly empty tanks without damage. The first thing you might notice with a clog is a reduced flow at the faucet with the pump running. This is the same thing you might notice with a clogged aerator in the faucet, it's the same effect as when the faucet is only partially open. Until my system started drawing air at about 6%, I could not detect a difference in the pump sound or the flow rate compared to before the modification. Then it pumped the air and the water to varying ratios until the tank was pretty much empty. This kind of tank, with wide and shallow dimensions, requires a non standard kind of pickup. It won't get every last drop, but I think it's the best we can do. Having tanks of this shape is a real advantage because they take up so little room, are protected from freezing and are not outside where they could get damaged. Fortunately, the corner of the tank and its piping are right there below the cover under the bed. In the past, I wanted to do some work on the water tank in my Fleetwood, but found it was nearly impossible. This is relatively easy and I was inside instead of underneath. The biggest problem here is making the emotional leap of deciding you are going to make a hole in the tank and then spin welding on a fitting. Once that hurdle is over it is just a matter of doing some PEX and fittings. I think the future ones will have a larger tank fitting bushed down to the 3/4" dip tube assembly. This will help with screwing the fittings together and give a larger hole to vacuum out the tank if needed.3 points
-
HMD - Assume that you are aware that the Oliver can be ordered without the microwave. That space could then be used to store your oven and Oliver will give you a credit for the microwave that is not installed. Bill2 points
-
When are hull numbers assigned? At the start of the manufacturing process? As they roll off the line? I assume the hull numbers are not associated with the size of the trailer. IE, there is no #25 single axle and #25 dual axle, right? Thanks, Brad - Santa Fe, NM Hull number ???, (Guess I'll find out when I pick up July 6th. :)1 point
-
Hello Ollie Family! Last Saturday my husband and I had the pleasure of seeing an Ollie in Ocala, FL. (Thank you Walter!) We were smitten & after a couple years of RV shows & lot visits (welcome to Disney World, ugh) we knew this was the one. I have scoured the forums & am so pleased to read all the nice things said about the Oliver company, the Oliver RV owners, & the Ollie in general. Retirement for us is December 2018 & we plan to plan to place an order in about a year. Our first big trip will be May of 2019 to Alaska (with two big mutts) to visit our son. In the meantime, we have a lot to learn & are thankful you're here to teach us!1 point
-
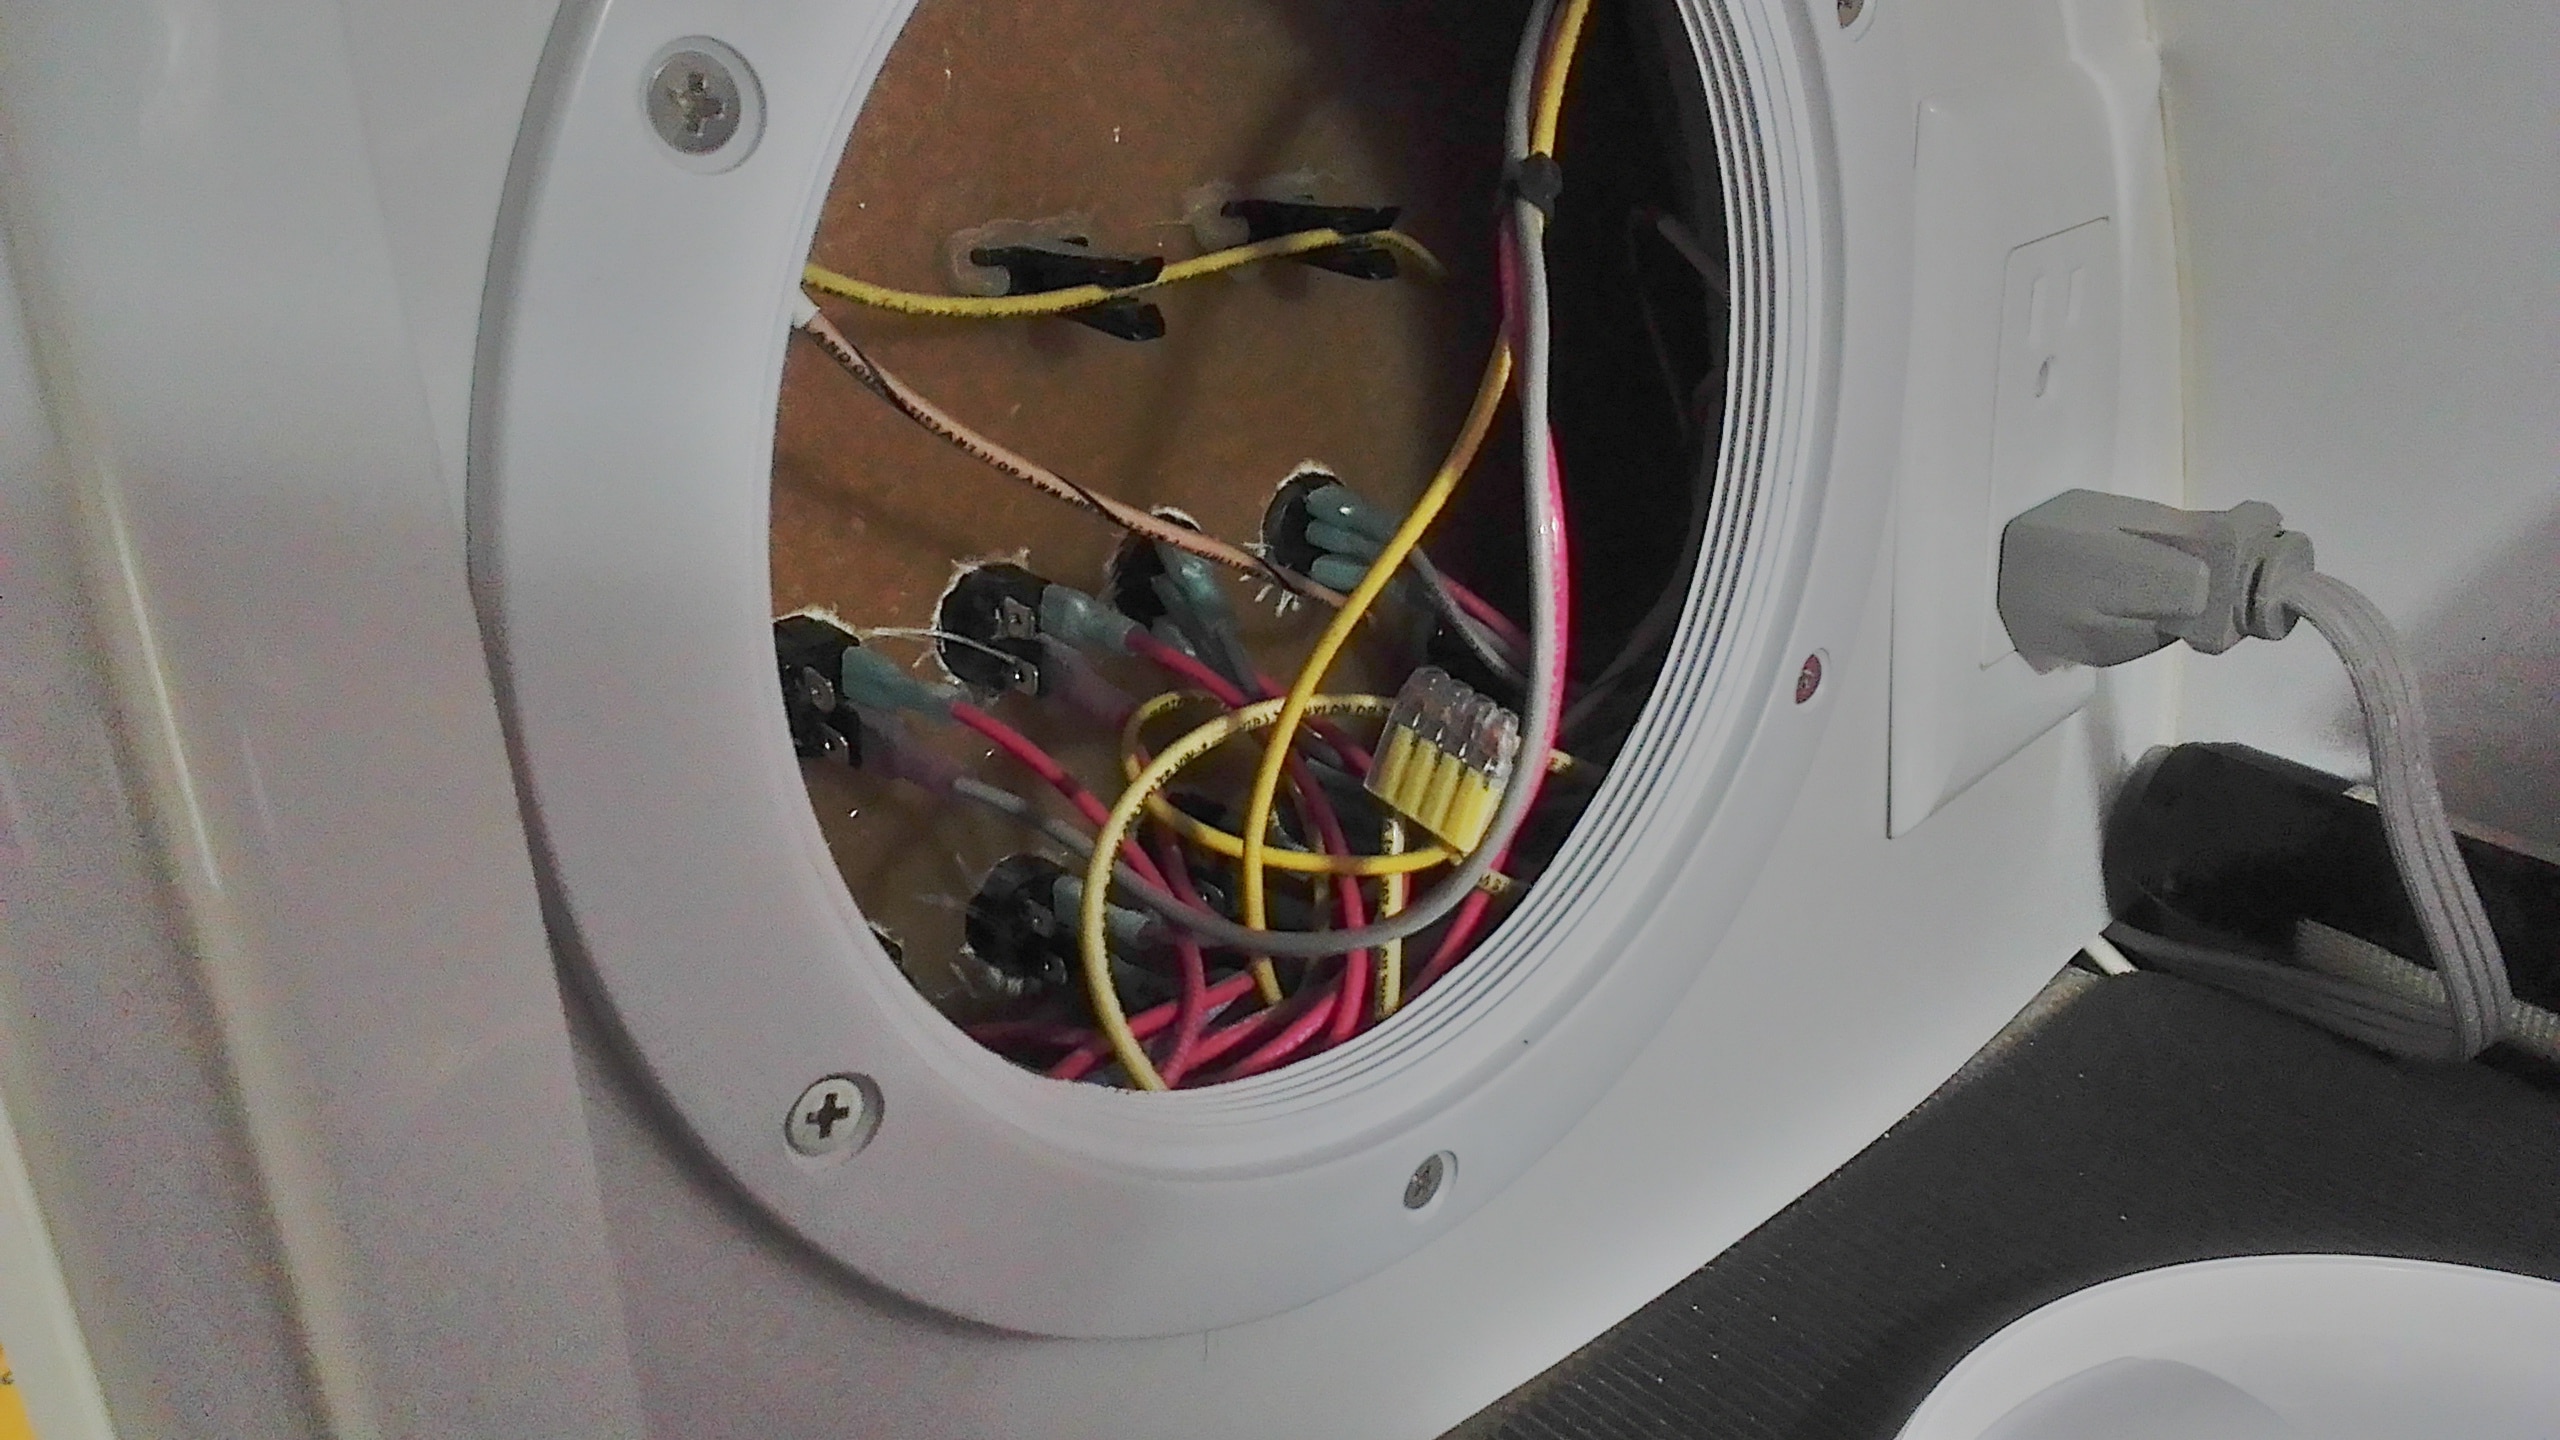
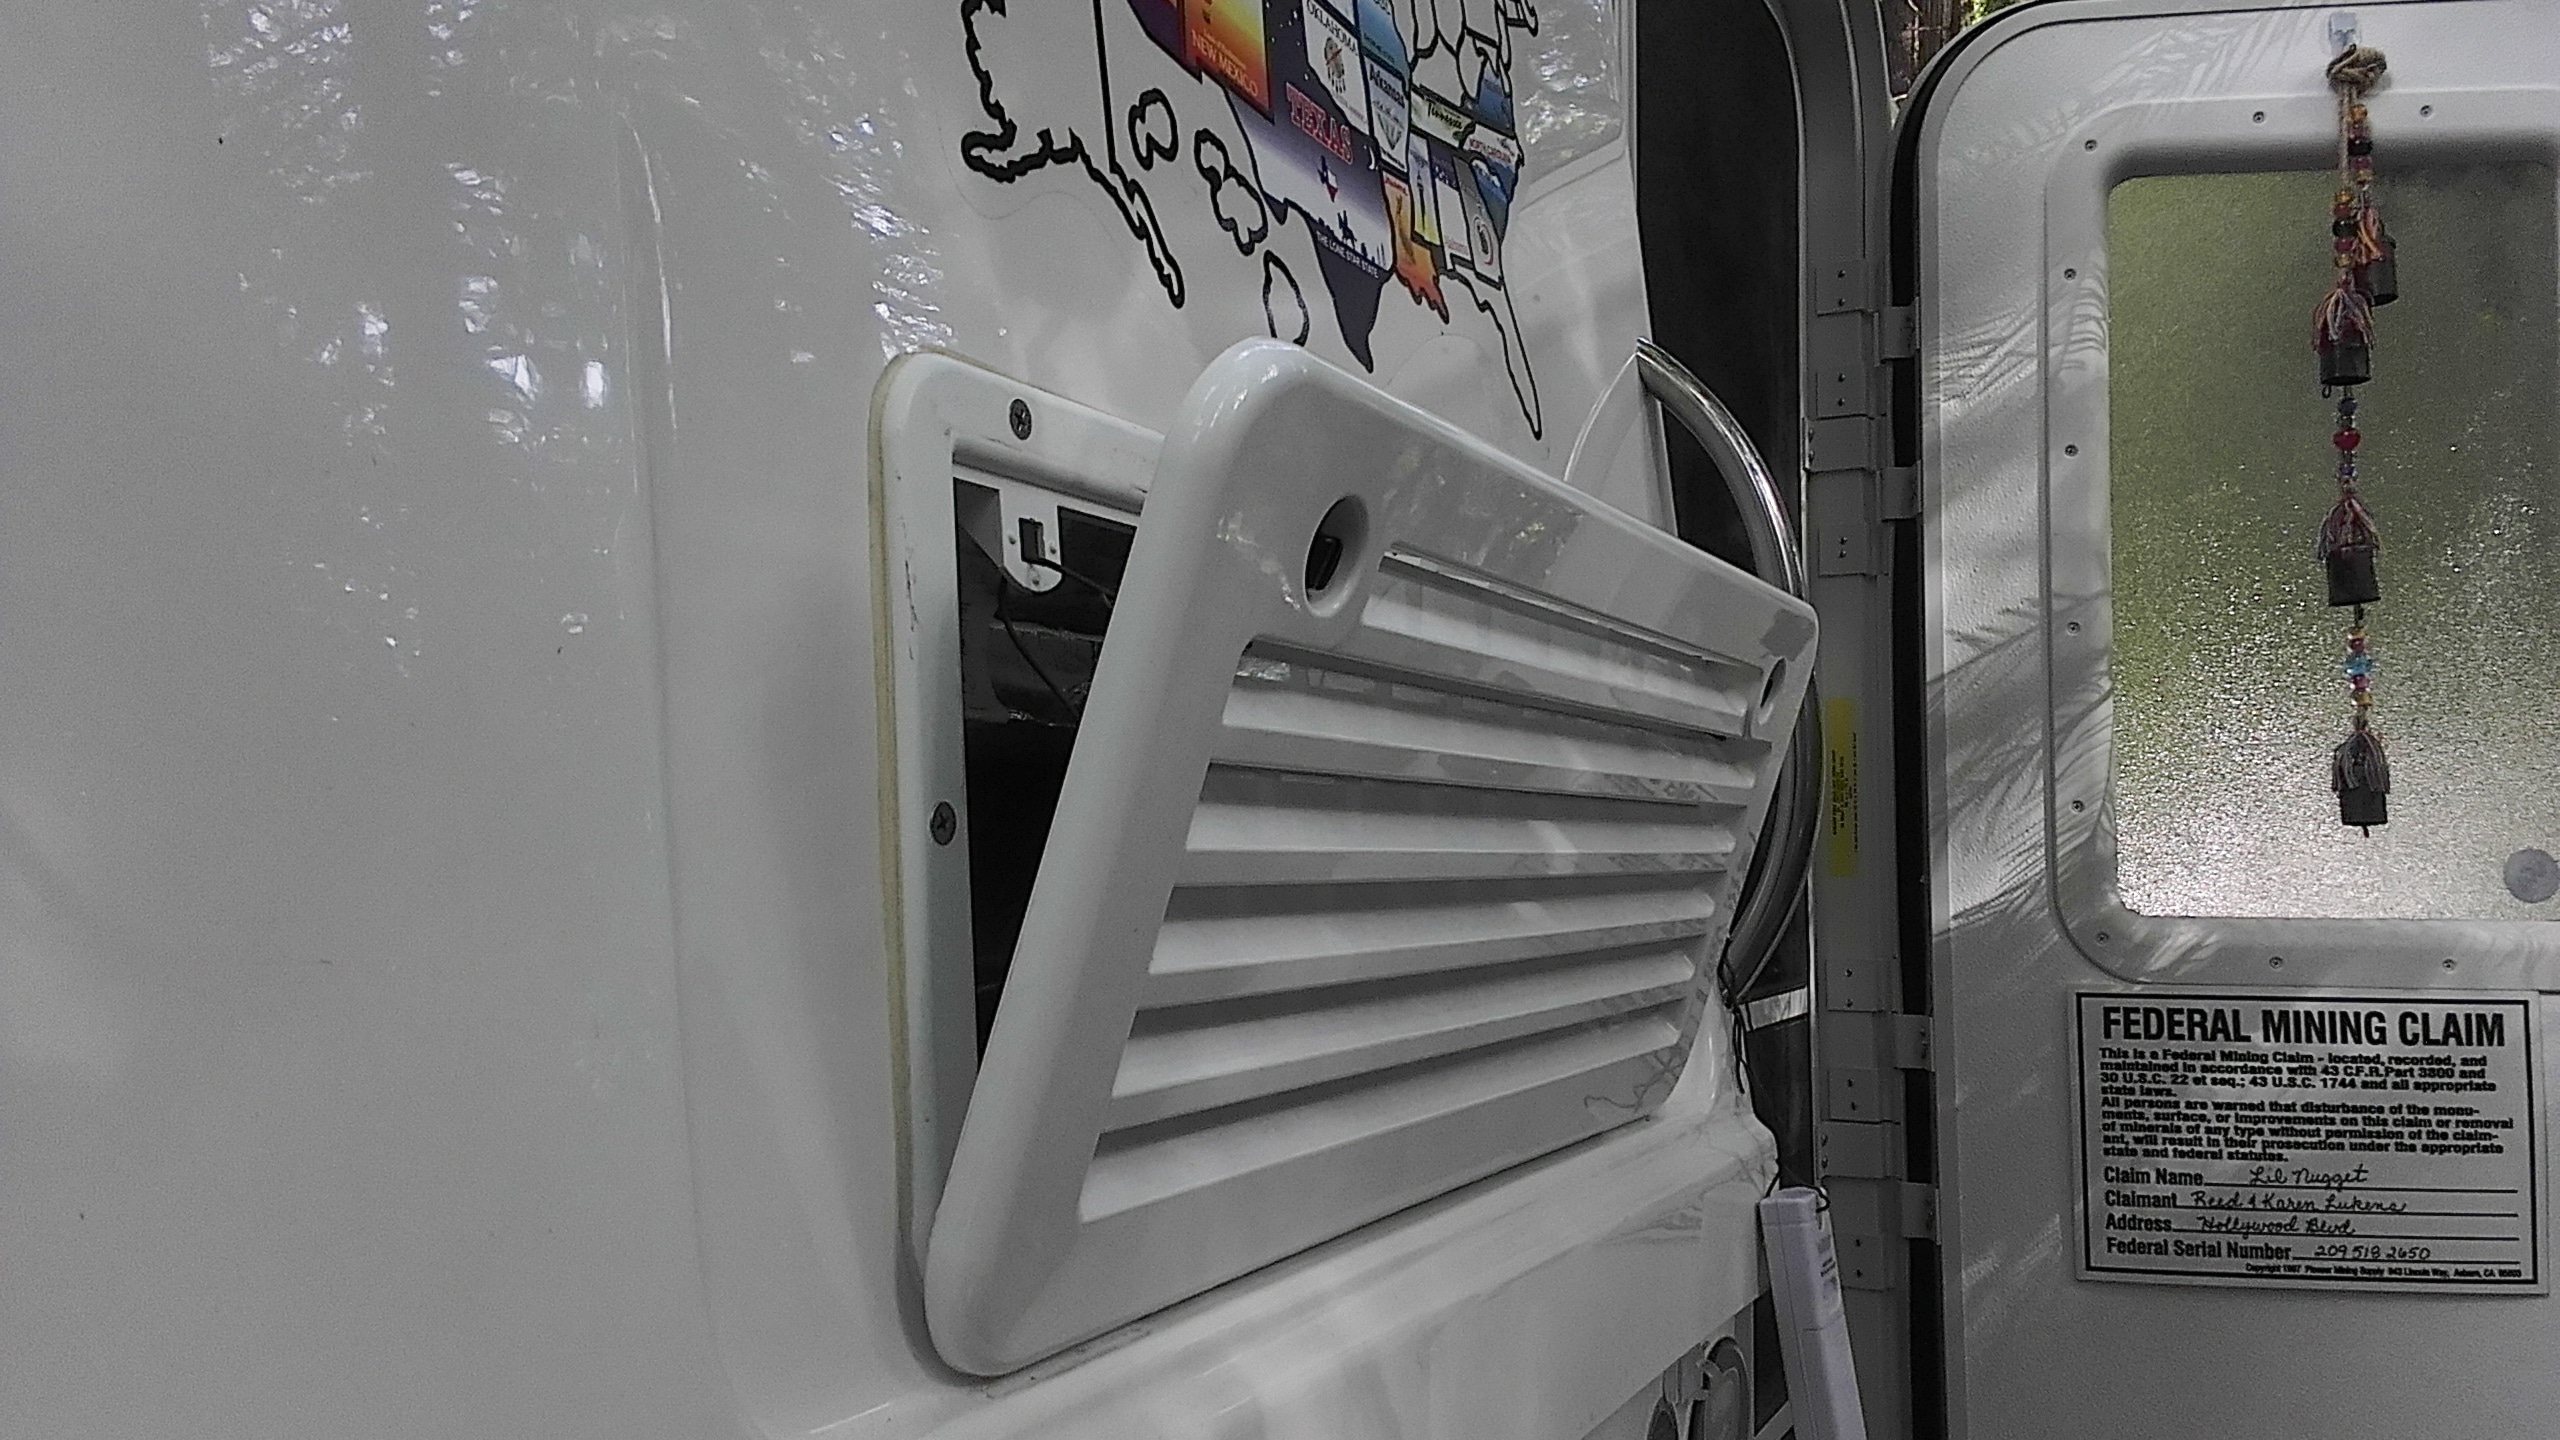
We got the Micro-Air Easy Start installed today and was surprised to see it recommended to be just held in with double sided tape. But the install was quick and easy after we got the Dometic cover off... Once again stripped out screws were installed into the cover making it a pain to get apart, but all's well that ends well and I don't need to go up there every day so that's done. The only problem now is that since we're boondocking, we don't have any shore power to plug into, so that won't get tested until next week... Then... The fan went out on the fridge and we had to trace that out... After running a jumper everywhere and testing everything, it was a simple fix. The spring in the fuse socket had been over compressed at one time and it wasn't making the connection. It worked fine when we picked it up but somewhere in there, the fuse wasn't touching the spring clip, so it couldn't get power. As I was going thru everything, I pulled the cover off of the switch and checked it and this was the first time that I had ever taken that cover off so I snapped a pic. So now, in 92° weather today, the fan is working and it should keep the fridge down at a working temp, I guess... I keep the fridge door by the fan cracked open so no heat can get trapped inside of it anyway, and that so far has really worked well :) Reed
 1 point
 -
If anyone is interested, the Breville Mini smart oven fits perfectly on the bottom of the pantry...if you get the urge to roast a chicken, just saying1 point
-
JBM, much thanks for the update. Do you have the service bulletin number handy. I want to get this done and be able to be specific with Ford. thanks again Scotty1 point
-
https://camelcamelcamel.com You add the Amazon item you are interested in with your "target price" and it keeps track of price changes, which you can view on a chart. It will alert you by email if the price gets down to your target value. It's pretty useful if you can wait weeks or months before buying. If you need it right now, all it does is tell you whether or not the item was priced competitively. John Davies Spokane WA1 point
-
Since my hull number was assigned and advised to me shortly before completion I assume that the assignment happens close to the time that the VIN number is requested and received. Since the VIN # is not assigned until after the trailer has been weighed and that doesn't happen until after the trailer is fully constructed with all of its options and propane tanks installed, one can only assume that the trailer is virtually complete and off the main production line. As far as I know - you are correct regarding the hull numbers - there are no duplicates. Bill1 point
-
That's correct. It appears Ford may have FINALLY fixed the problem.1 point
-
Simon: Sheila and I have now made two trips towing our Elite II (hull 217) with our 2017 GMC Yukon. Small gas V-8 with 6 speed automatic transmission. In tow-haul mode we get 14-16 mpg in flat country, slightly less in hill country. Generally do 65 mph +/- 5 on interstates @ 2100 rpm. Plenty of power & could tow at higher speeds if desired. Tow rating 8,200 lbs. We use an Andersen WD hitch and believe it helpful with the softly sprung Yukon. Best regards, SailorsAshore1 point
-
I met a couple of women from the Netherlands at Canyonland National Park last summer. They rented an RV for an extended trip around the Western U.S. They told me they enjoyed boondocking in Utah because they could use the outdoor shower without anyone watching. So one solution is to camp where no one else is camping. :) Seriously, I think your research will pay off. I started to research the subject last year and found these: https://www.rei.com/product/101407/kelty-blockhouse-privacy-shelter https://www.rei.com/product/882468/nemo-helio-pressure-shower These aren't really enclosures for the existing outdoor shower included with the Elite II, but you may want to consider setting up a completely separate shower facility. I've camped a lot since I picked up my Elite II in March, 2016 and I haven't used the indoor shower very often. I like to camp in National Park campgrounds and many have indoor showers. State Park campgrounds often do as well. Although I rarely camp in RV parks, when I do, I pay attention to the descriptions of the bath houses in the reviews. When I'm boondocking, I sometimes use the outdoor shower without fear of being observed. I keep my towel handy in case someone arrives in the vicinity!1 point
-
I have something like this I use when I am out with my tear drop. https://www.rei.com/product/101407/kelty-blockhouse-privacy-shelter1 point
-
ShallowGal, congratulations on your upcoming retirement and welcome to the Oliver family. You are right, it is a great company and Oliver owners are a great group of folks. Someone here should be able to answer your upcoming questions. Mike1 point
-
Many use a pickup to tow their Oliver, but an SUV works better for us for our non-trailering needs. Additionally, a pickup would not fit in our garage. I searched the Trailer Life Towing Guides and looked for vehicles with significant towing capacity. After a lot of research we purchased an Audi Q7, which has which has a maximum permissible trailer weight of 7,700 lbs. The car is really nice, and it is a dream in pulling the Oliver. We have pulled the Ollie up steep hills, and the car has plenty of power. Don commented on decreased cargo capacity of an SUV compared to a truck. While the cargo in cubic feet is probably less, the access is better in an SUV, since you can get at stuff from either the rear hatch or the side doors. That is an advantage. On our last trip we got a roof box, which gives us much more cargo room, and the advantage of two distinct storage domains. Certain things are stowed in the roof box, others in the car, making it easier to find things. David1 point
-
This conversation has been going on for a number of years now with many people wanting a convection. The Oliver answer has always been the same - the is simply not enough room to allow for one and meet all standards without a significant design change to the Oliver. Therefore, the answer has been to seek other methods - dutch ovens, electric toaster ovens, etc. Bill1 point
-
There's an idea! Plus we could hang out by the river, enjoy the Pine Nut Mountains and remember why it's so nice to be out in the great outdoors. In fact, we could probably host twenty or so right here! Tonight, I'm sitting here after 8:30 PM. Up on the porch and looking at the incredible Nevada sunset. Frogs are croaking, the sky is orange, the scent of sage wafting as the sky darkens. It's magical. A warm high desert breeze slides down the mountain after hot day. We call it the "evening performance" as the sun shadow crosses the eight mile wide valley and the day concludes. It's all worth planning the day around. So, with a barbeque, some great conversation, plenty of room to set up and the incredible Nevada sky, all while doing a few tank modifications, I'd say Yeah!!! We'd have Ollies till the world looked level. And everyone would be able to have more water when it was all done. It's the kind of experience you read about, with incredible Nevada and high desert scenes and stories. Too bad our coyote doesn't live here anymore or you'd all have her sitting in your laps and wanting to start a game. Can you imagine a Nevada sunset with a coyote in your lap? Now there is a western scene! I'll probably sit out here for a while yet. Our dog Gogo, is surveying the yard. Chiming clocks remind us once in a while. The frogs make me wonder about frogs in the desert. Venus will appear soon as the moon waits for the right moment, beyond a distant horizon, to show up. A fading bit of orange, silhouettes the mountains north of us and I'm reminded of why I went for this place to begin with. Enjoy.1 point
-
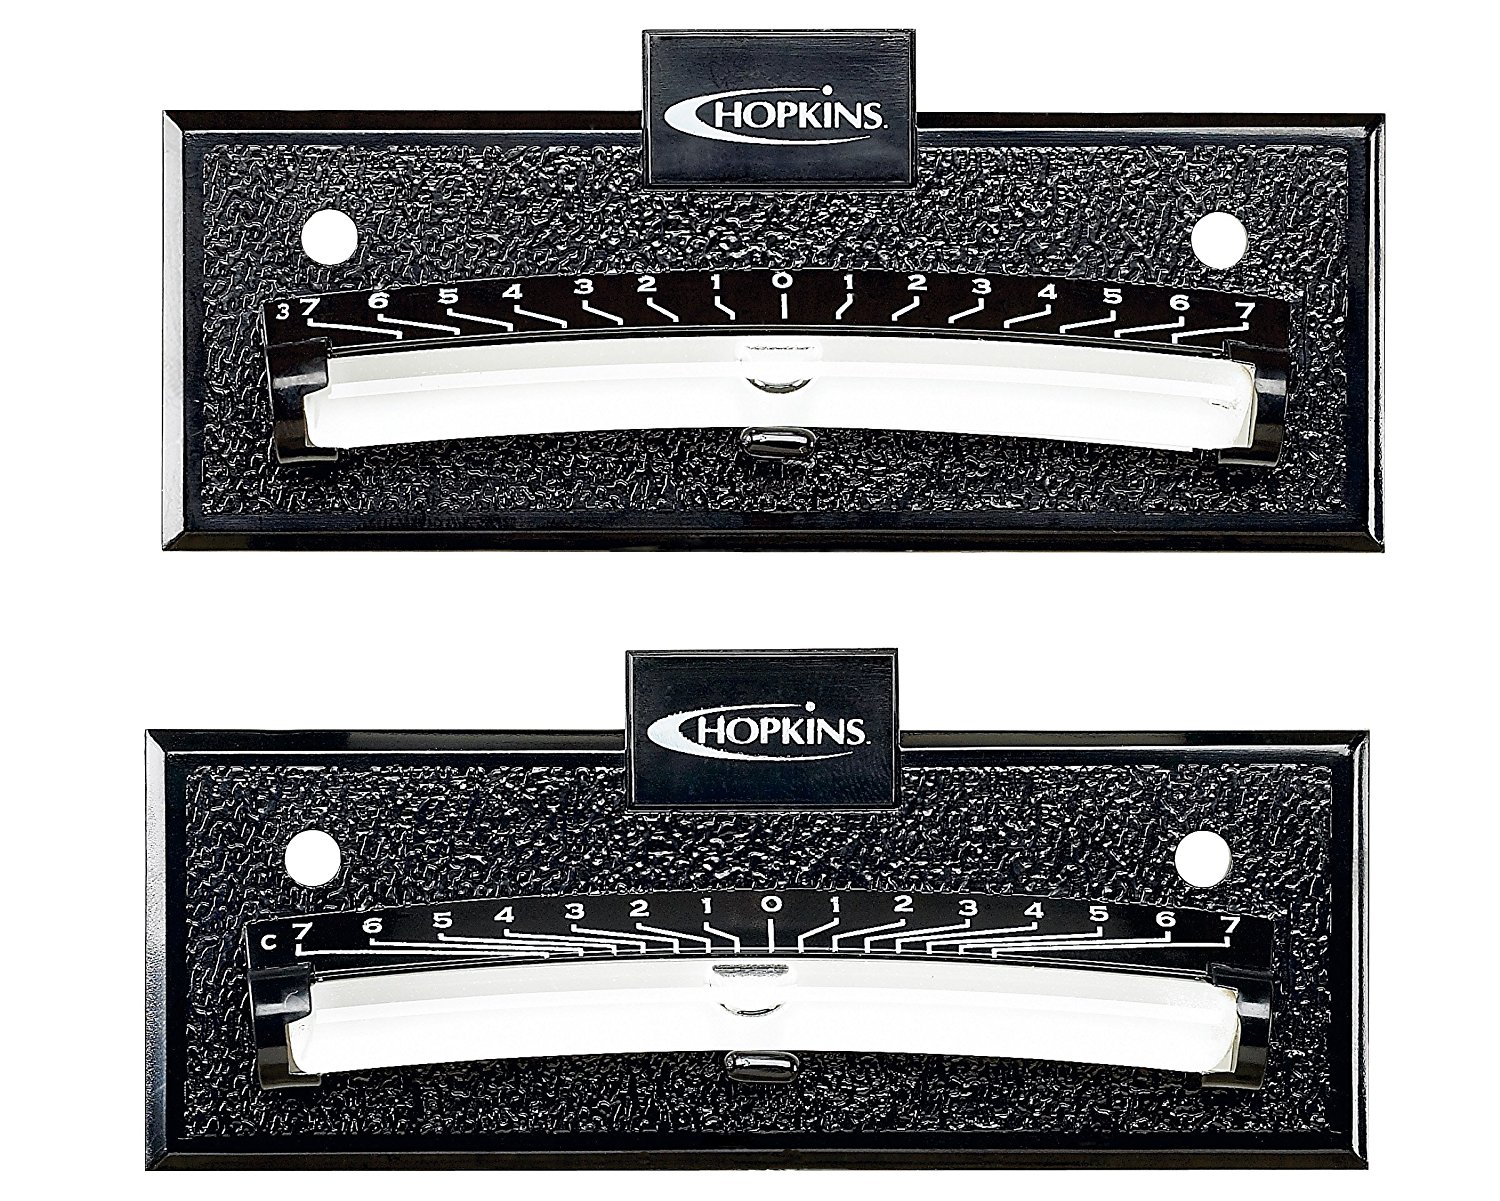
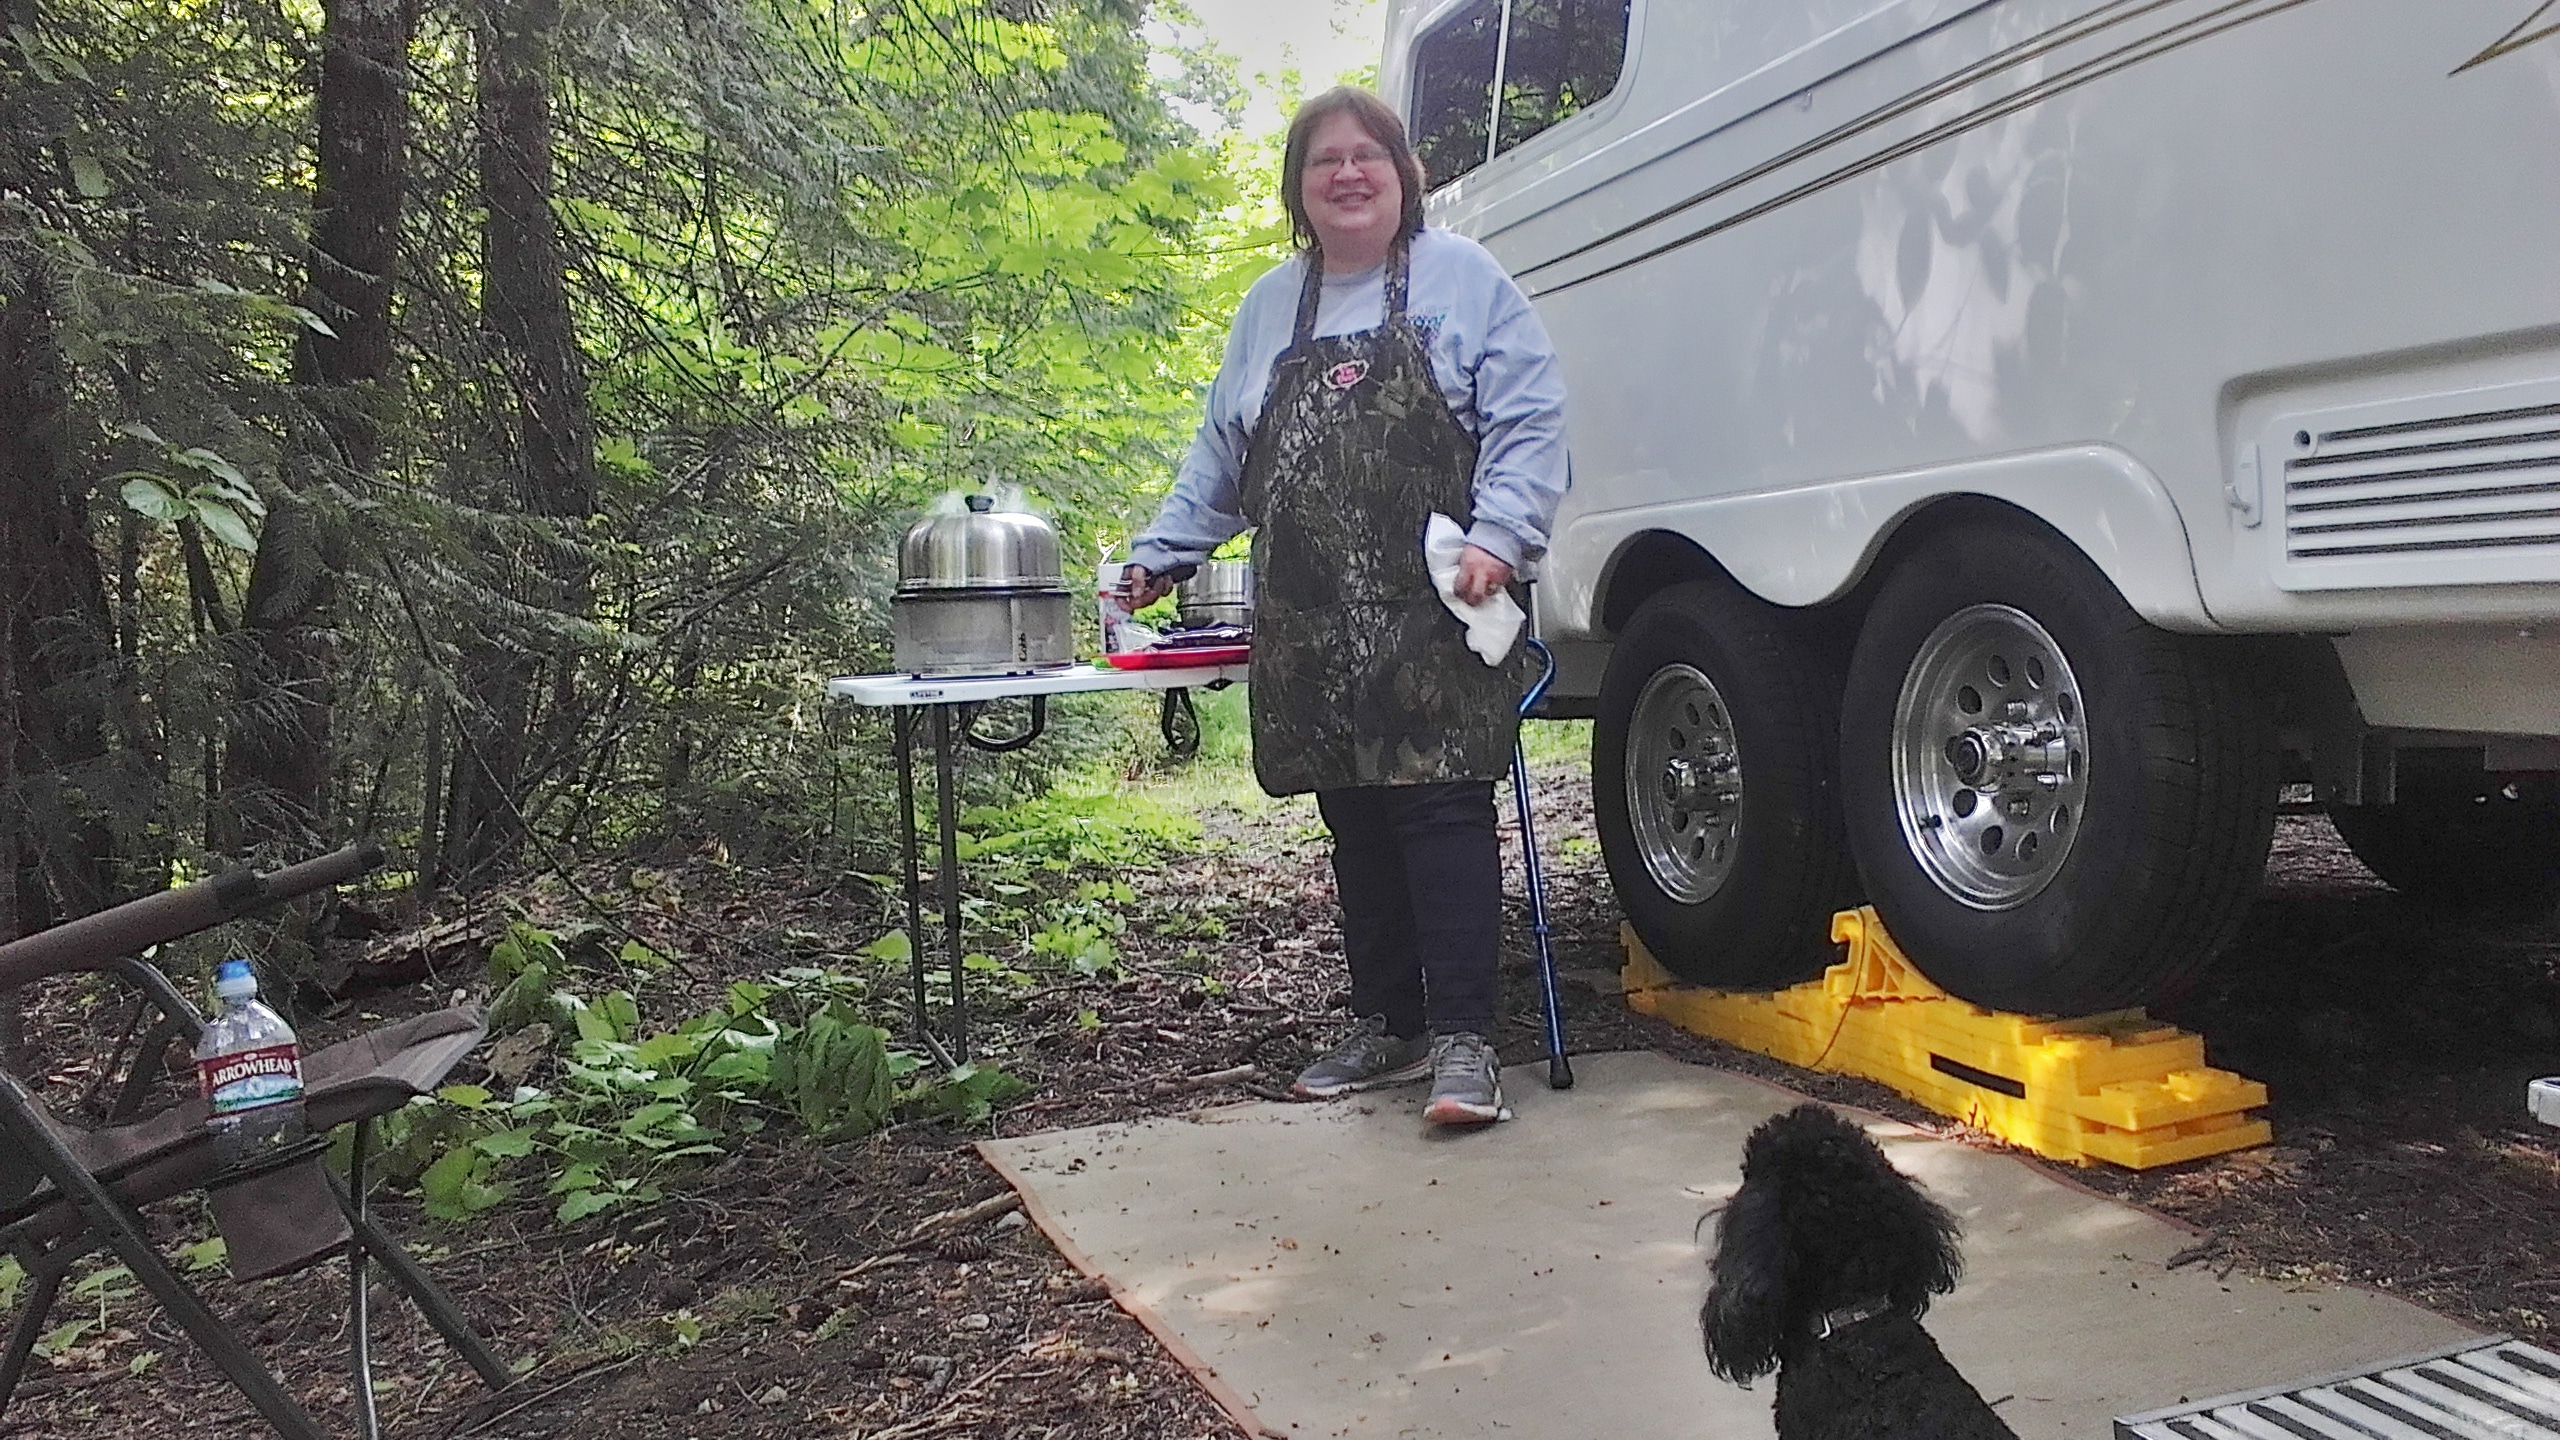
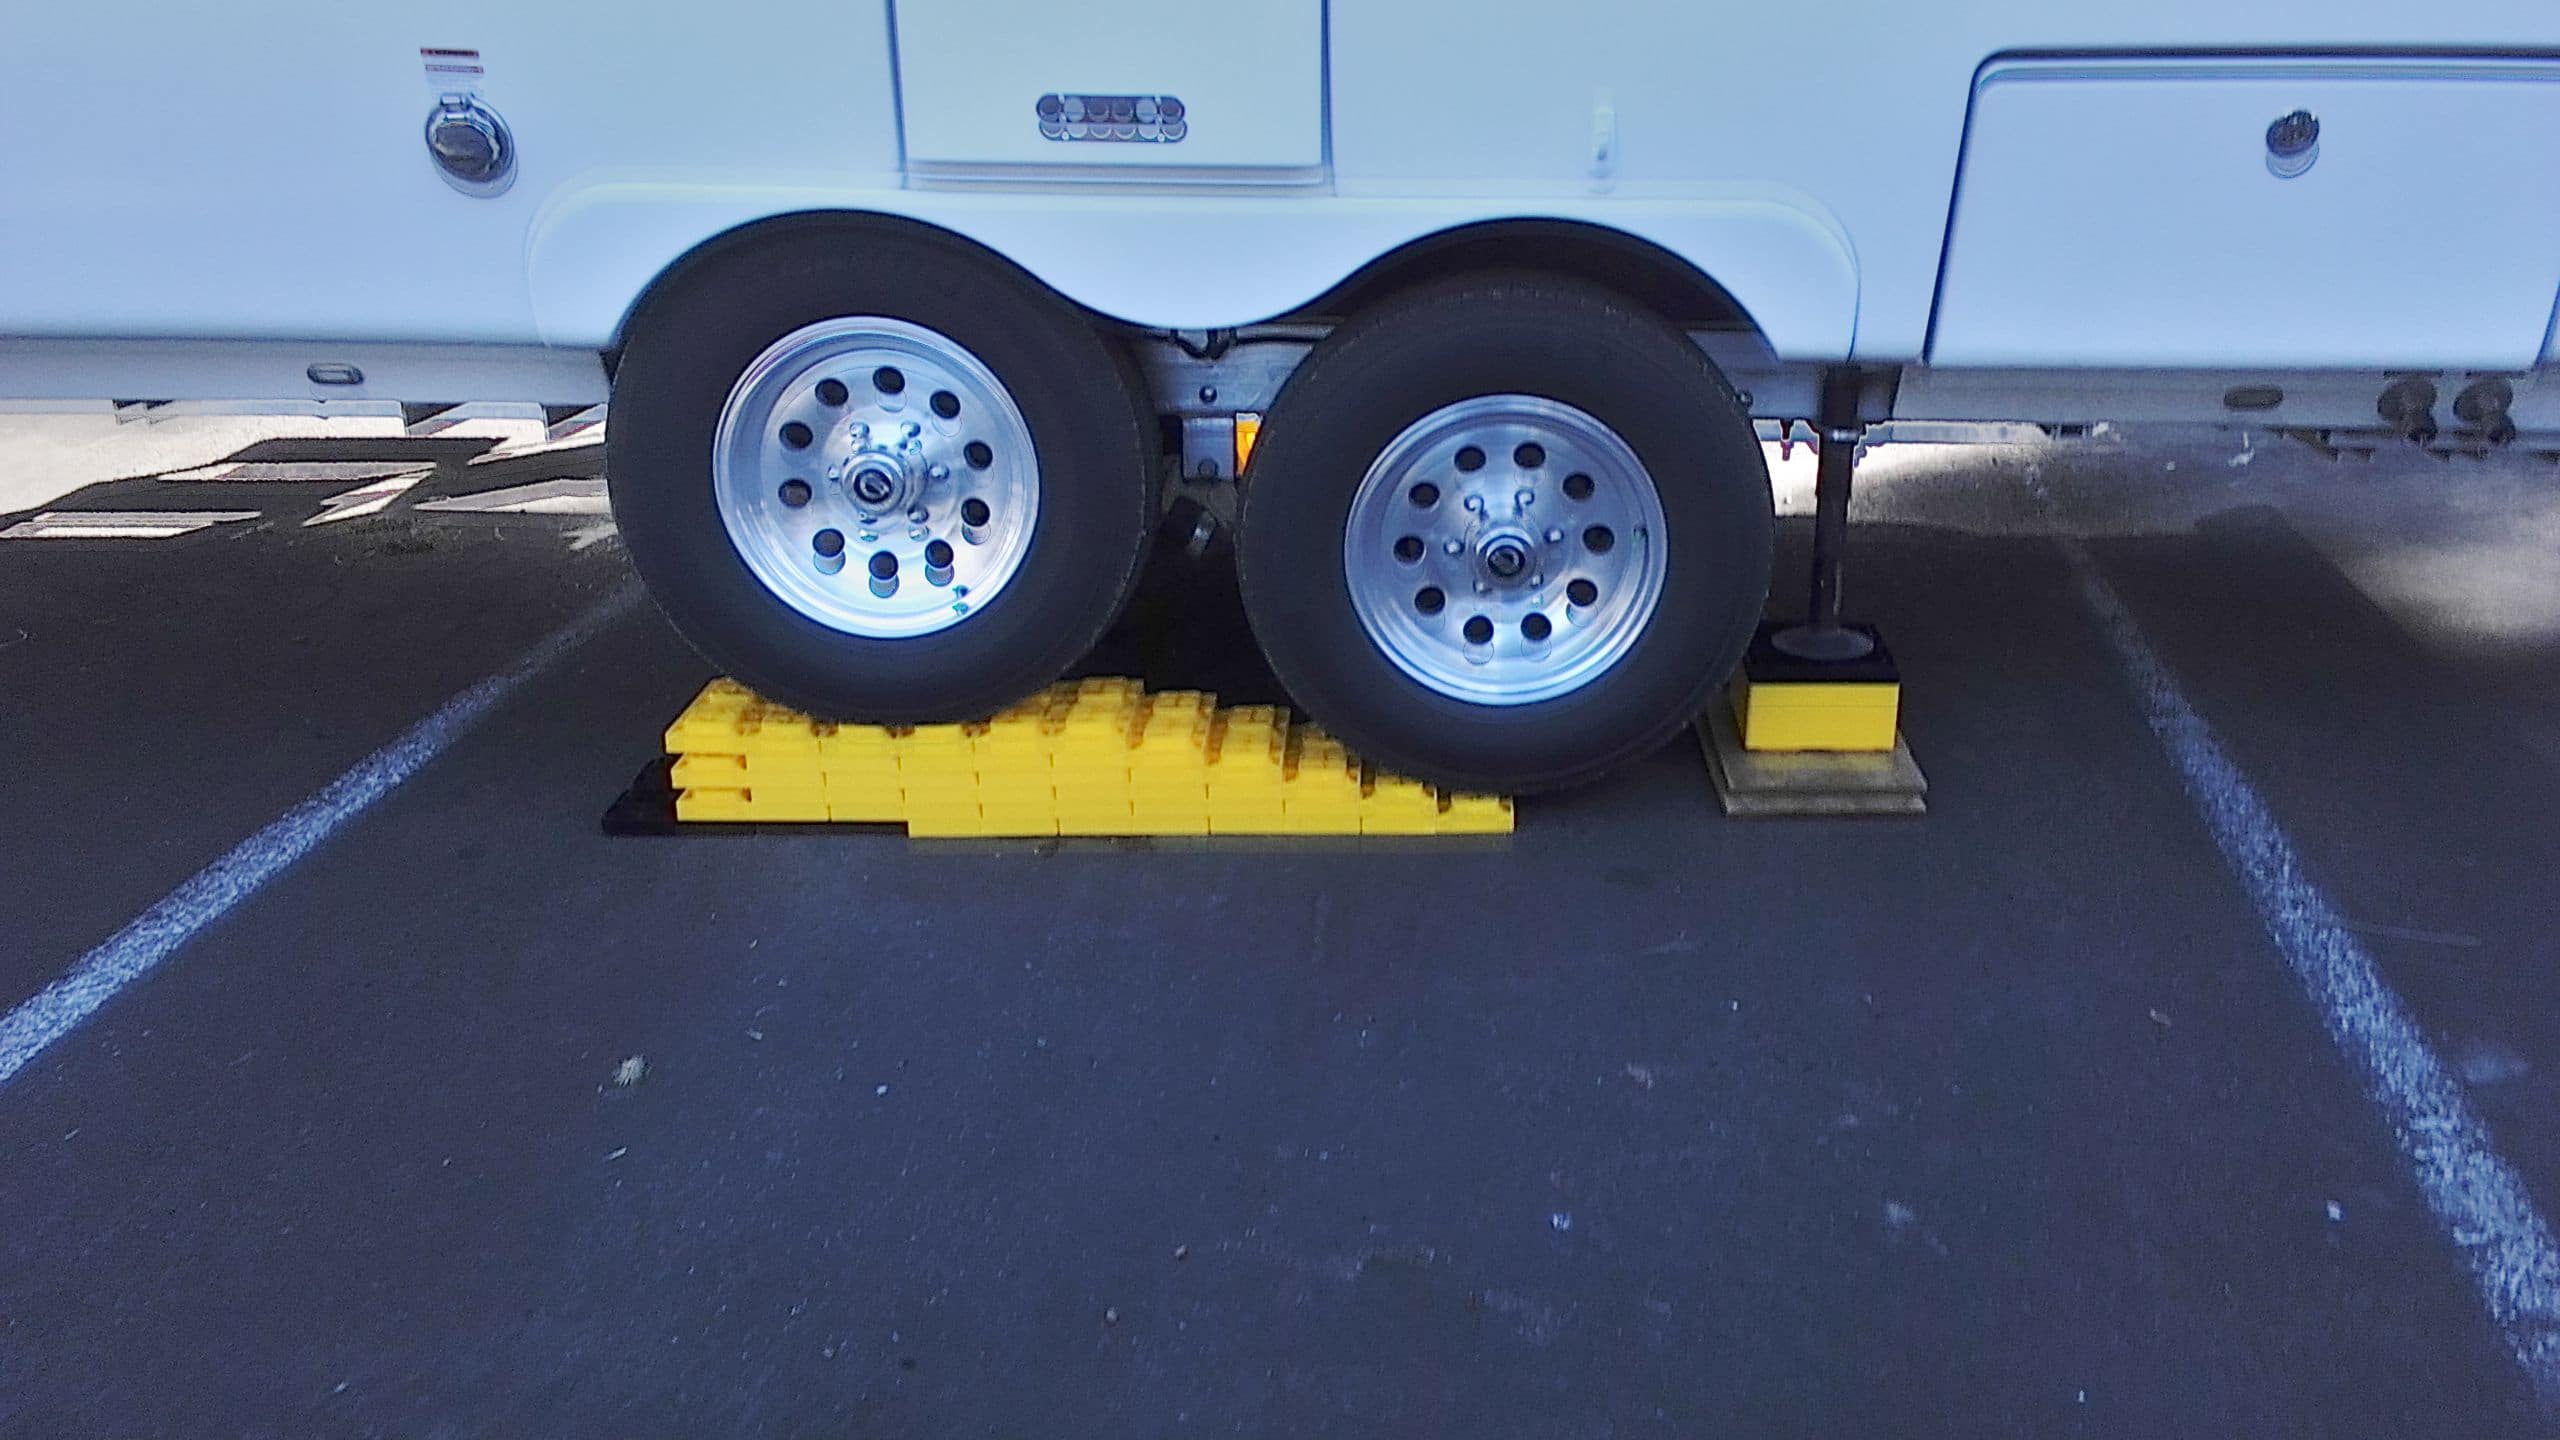
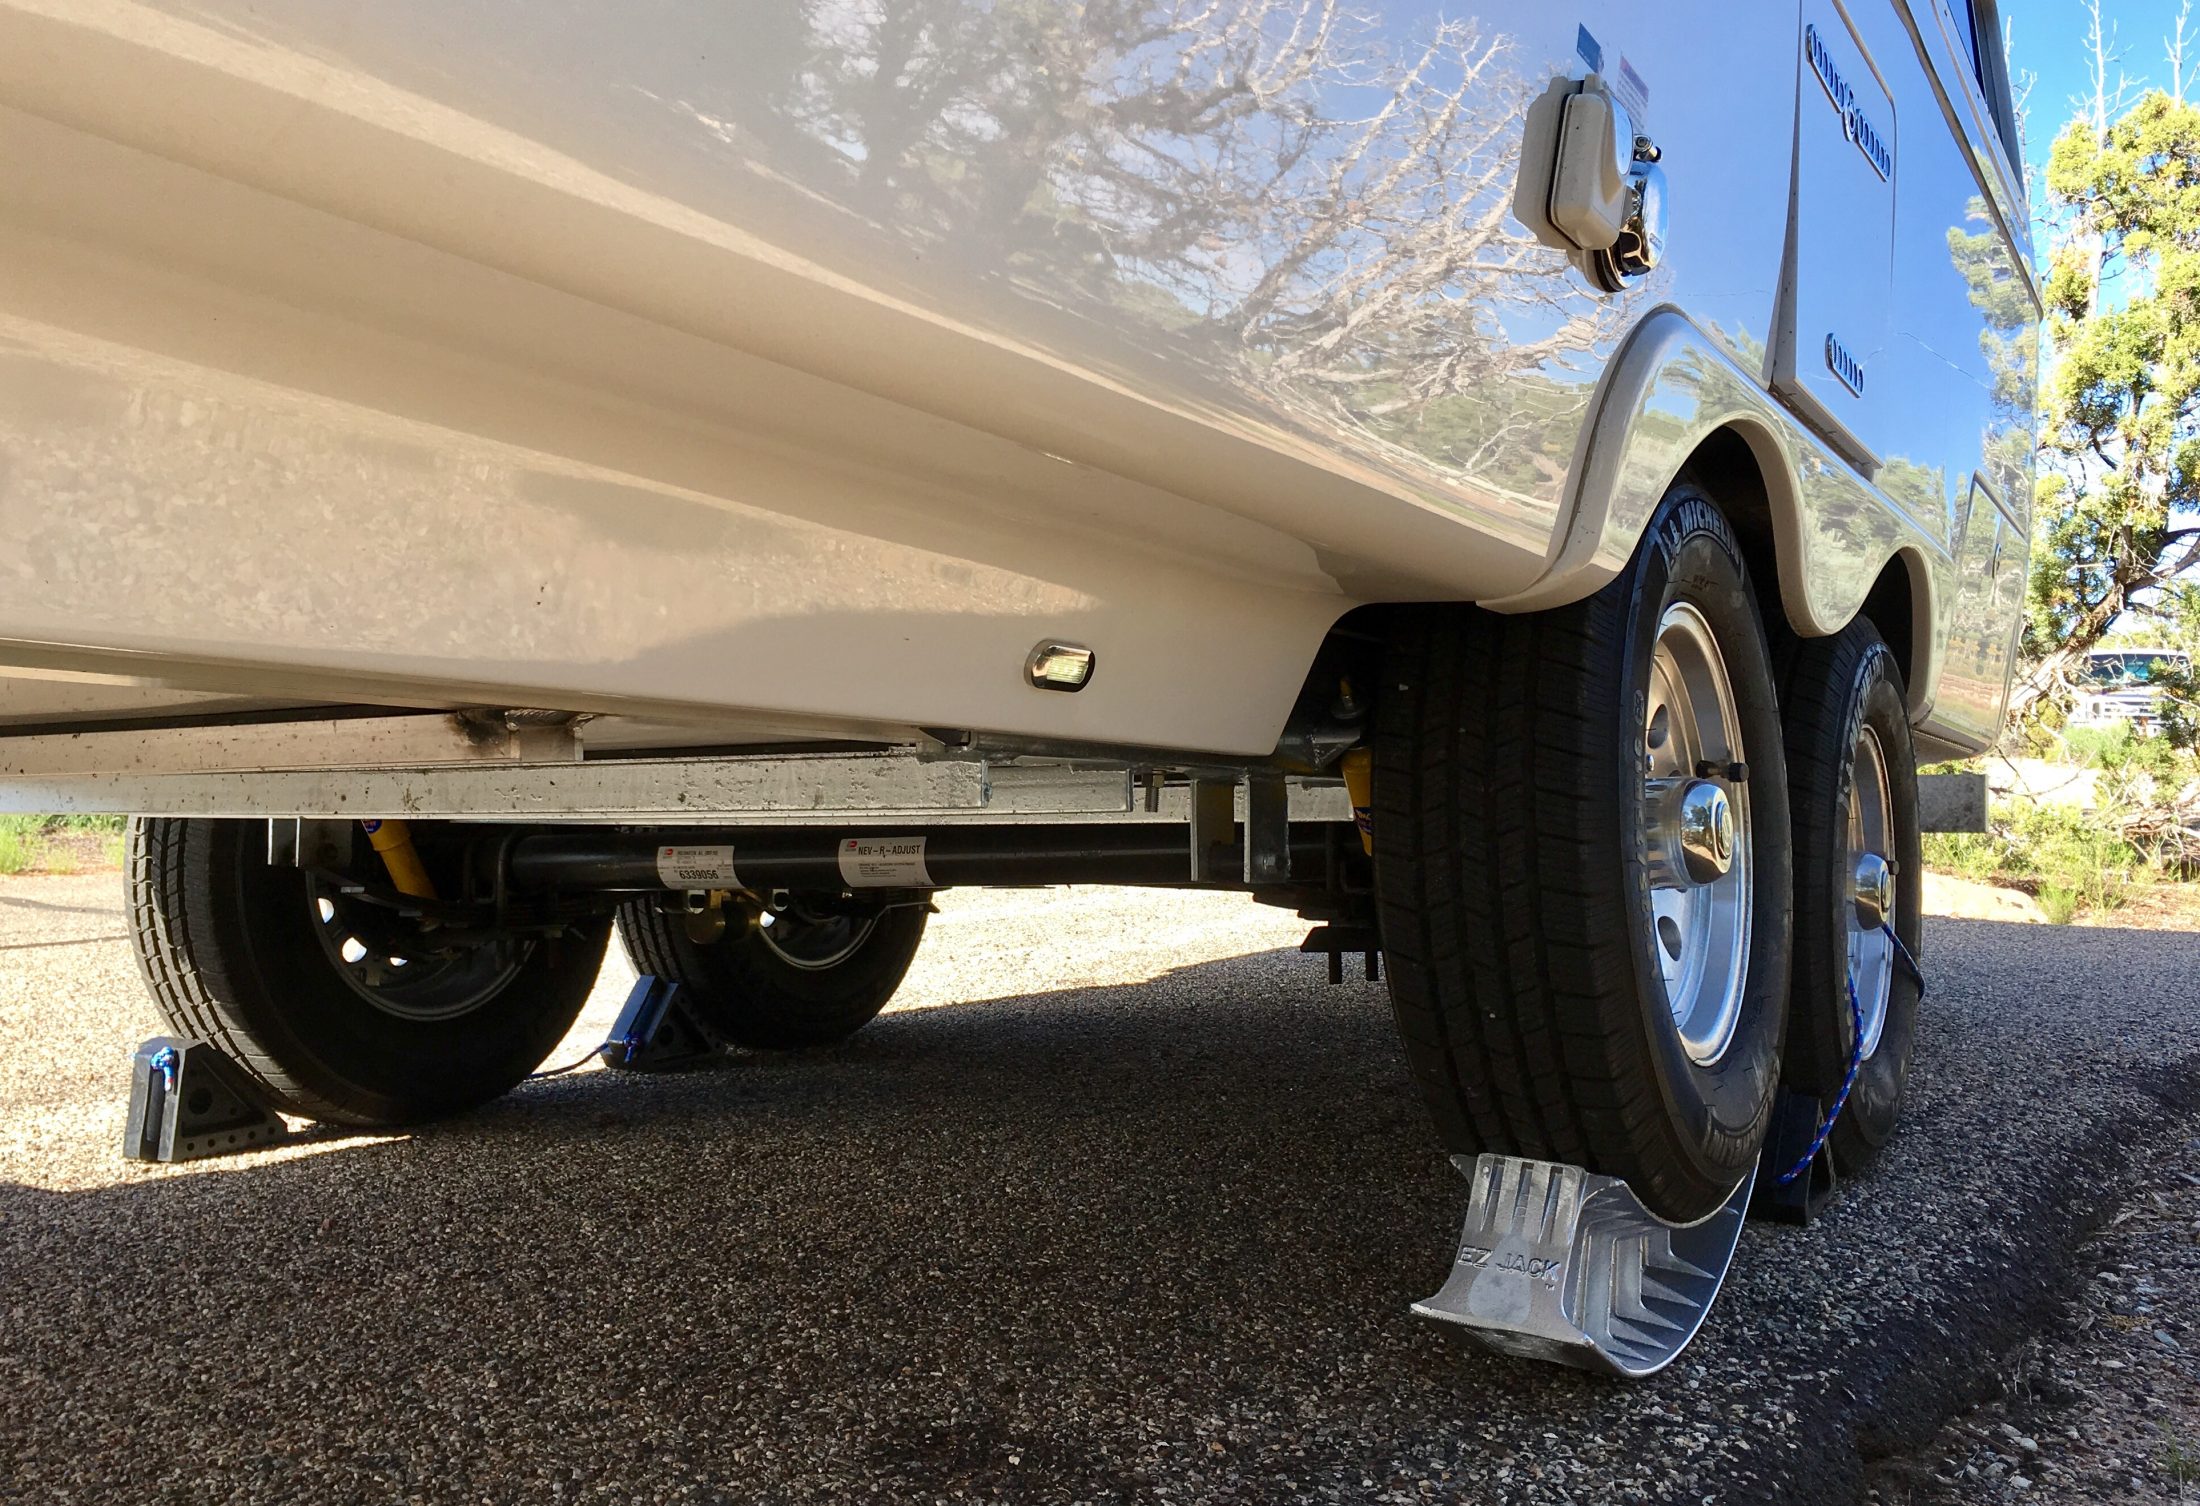
Let's start by making it as easy as possible, and that comes with the right Level on the front of the trailer. Walmart, Camping World, Amazon all have graduated levels. I can see really good so I use the Hopkins Graduated Level and have it placed where I can see it in my rear view mirror. For my tow vehicle, right below the seam is perfect. These levels are numbered, and when the level has the bubble sitting on say #3, that means that you will need 3 blocks under the tires. I try to get it with in an inch and then use the rear stabilizers to level it out the rest of the way. When installing these levels, one is marked for the side to side level and the other is marked for the front to back, so be sure that you put the right level in the right place. I bought 3 packages of them and have the one in the front, one behind the door when it's open, one below the bathroom window and another in the storage compartment, above the outside shower. This way, no matter what side I am putting blocks under, I have levels that I can see. Then I have 2 inside, one over the bathroom door and the other above the switch panel to the right of the kitchen. If you are using the store bought blocks, then keep using them and don't get discouraged. You can just put blocks under the tires and not make a ramp. Right now we have one trailer on top of a 7 high stack, where we started out with 2 blocks, then put 4 blocks 3" in front of the first stack. Then our friend pulled onto the 4 stack and we put 3 more for a double stack of 7 under both of his tires. For extreme cases, you will need up to 4 sets of the 10 block stacks, because you will need enough to raise the stabilizers also. Basically, if you want to get it right the first time, then the levels are the key. You will want to take your trailer to a really level parking lot and use at least a 2' long level along the seam to get the trailer as close to perfect as you can. You want it on level ground for this so that you won't have any frame flex at all. Level it and check the level on all 4 corners of the sides and front and rear. Once leveled, take out your new Hopkins RV levels and place them accordingly. Then just use them every time and before long, you will have it right the first time, every time :) Lot's of times I will use a full stack of blocks under each stabilizer and the front jack to keep set up time to a minimum when pulling over for one night. Reed
1 point
-
This is quick and easy to use and I hate mine with a passion. I'm going to sell it. You just set it in front of the low front tire and drive forward. But it is huge and sharp and horrible to store. I would rather carry a bunch of 2x6x6 and/ or 4x6x6 wood blocks and stack them as needed under the jacks. They transport MUCH more efficiently and aren't heavy. The Anderson version of this is plastic and not as heavy, but it is still an extremely inefficient shape to carry around all the time. You can buy a single piece of lumber at Home Depot and cut it into everything you need. Cutting a 2 inch one is easy, cutting a 4 inch thick one takes more time and effort since a standard circular saw won't do it in a single cut. John Davies Spokane WA
1 point
-
An Open letter from Oliver Travel Trailers Dear Members of The Oliver Travel Trailer Online Forum Community, Over the last two weeks we have seen an increase in people addressing quality and build concerns on our online forum. First off, we want you to know that when we fall short of your expectations, then we fall short of ours. We are dedicated to producing a quality product that can be passed down from generation to generation. Oliver Travel Trailers is different in many ways from other manufacturers. One of these ways is our transparency with our customers and potential customers. This is why we have our own forum. We would like to thank you all for your feedback. New and potential customers may not be aware that we monitor the forum and listen in an attempt to learn from the members. We are always striving to make improvements and take care of any and all issues that arise. We are far from perfect but will continue to get better, always working to build the highest quality travel trailer available. With that being said we want all of you to know we have heard your concerns and recently implemented a new 3 stage quality control inspection to our build process. This is just one of the ways we are aiming to be the best in the industry. Tanks have been a recent hot topic on the forum and we want all of you to know we are currently working with an expert in the industry to see what we can do to improve current designs. We will update you as we learn more. Wiring appearance has been another topic that we are addressing by working with component manufacturers to improve quality of appearance and function on all wiring harnesses. As we improve and implement changes we will share these improvements from time to time with our customers and on this forum. We have always gone above and beyond to fix any issues our customers are having with their trailers and will continue with your help to make Oliver Travel Trailers the very best. Again, we would like to thank you for your feedback. In the future, we kindly ask that if you have a problem or concern with your Ollie, please call us directly so we can help you. This will provide us the details we need in a timely fashion and expedite our course of action. Of course, if you ever feel we have not done enough to fix or improve your issues once you have brought them to our attention then by all means feel free to address it on the forum. We are confident you will find that given the opportunity Oliver will take care of you and improve our product at the same time. We will never be too big or too busy to do the right thing. Sincerely, The Oliver Family1 point
-
On the subject of "interior cleaning" - I've asked a number of people what they use to clean the interior of the Oliver. Vinegar and water, Windex and several different brands of spray cleaners have been mentioned. A number of years ago I tried a product called Interior Detailer. There are several companies that make the stuff and it can be found in the automotive department of many stores. You simply spray it on and wipe it off. It leaves no streaks but does leave a smooth almost wax like finish. It even works on the shiny "glass-like" parts. Bill1 point
-
Thanks for the post, here is that vac: ... https://smile.amazon.com/Decker-BDH2000PL-Lithium-Vacuum-20-volt/dp/B00IOEFBKS/ref=sr_1_2?ie=UTF8&qid=1496927660&sr=8-2&keywords=black+and+decker+vac+pivot I too have been disappointed in B&D stuff in the past: it just didn't seem well made or durable. I did buy a 20 v lithium hedge trimmer three years ago and it has been simply stellar! It is easy to use, very powerful, with a long battery life (and most important, no memory effect like nicads, which are garbage IMHO). I have hammered that trimmer and it just keeps going. They have made some QC changes, it appears. While I don't have any problem with lithium batteries around my garage, I am a little more hesitent about storing them long term inside the trailer. Do you worry about a lithium battery fire? Do you keep it plugged into the charger constantly, or do you remove it when not camping? Is this style vac available in a corded version? How does it handle long hair (wife) and fur (labdradoodles)? Thanks, John Davies Spokane WA1 point
-
Thanks GrayGhost! I bought this Black & Decker on your recommendation alone and I'm not sorry. This little booger will suck a golfball through a garden hose. I spilled salt in my trailer not realizing what was in a jar. It will easily suck up grains of salt and anything else. It's easy to clean the B&D too. It does occasionally take filters though. I can still get down on my knees and do the floors if need be but if you are too old and decrepit you might want a vacuum with a long handle. This one folds up very small too. To me it's an all around great vacuum for our Ollie. Thanks again for letting us know GrayGhost!1 point











-
Recent Achievements
-