Leaderboard


Popular Content
Showing content with the highest reputation on 01/21/2019 in all areas
-
Shurflo also sells rebuild kits, if you don't want to carry an entire pump. I think the only thing not in the rebuild kit is the motor, but I also think there's more than one 'kit' so be sure of what you're buying . I figure that if my pump goes out, I'm not going to be in the mood to rebuild it then and there, plus I think the full rebuild kit was almost as expensive as the pump itself. Here is the pump - https://www.amazon.com/SHURFLO-4008-101-A65-Water-Pump-Revolution/dp/B00W5GCQC2/ref=sr_1_2?keywords=shurflo+4008&qid=1548082733&sr=8-22 points
-
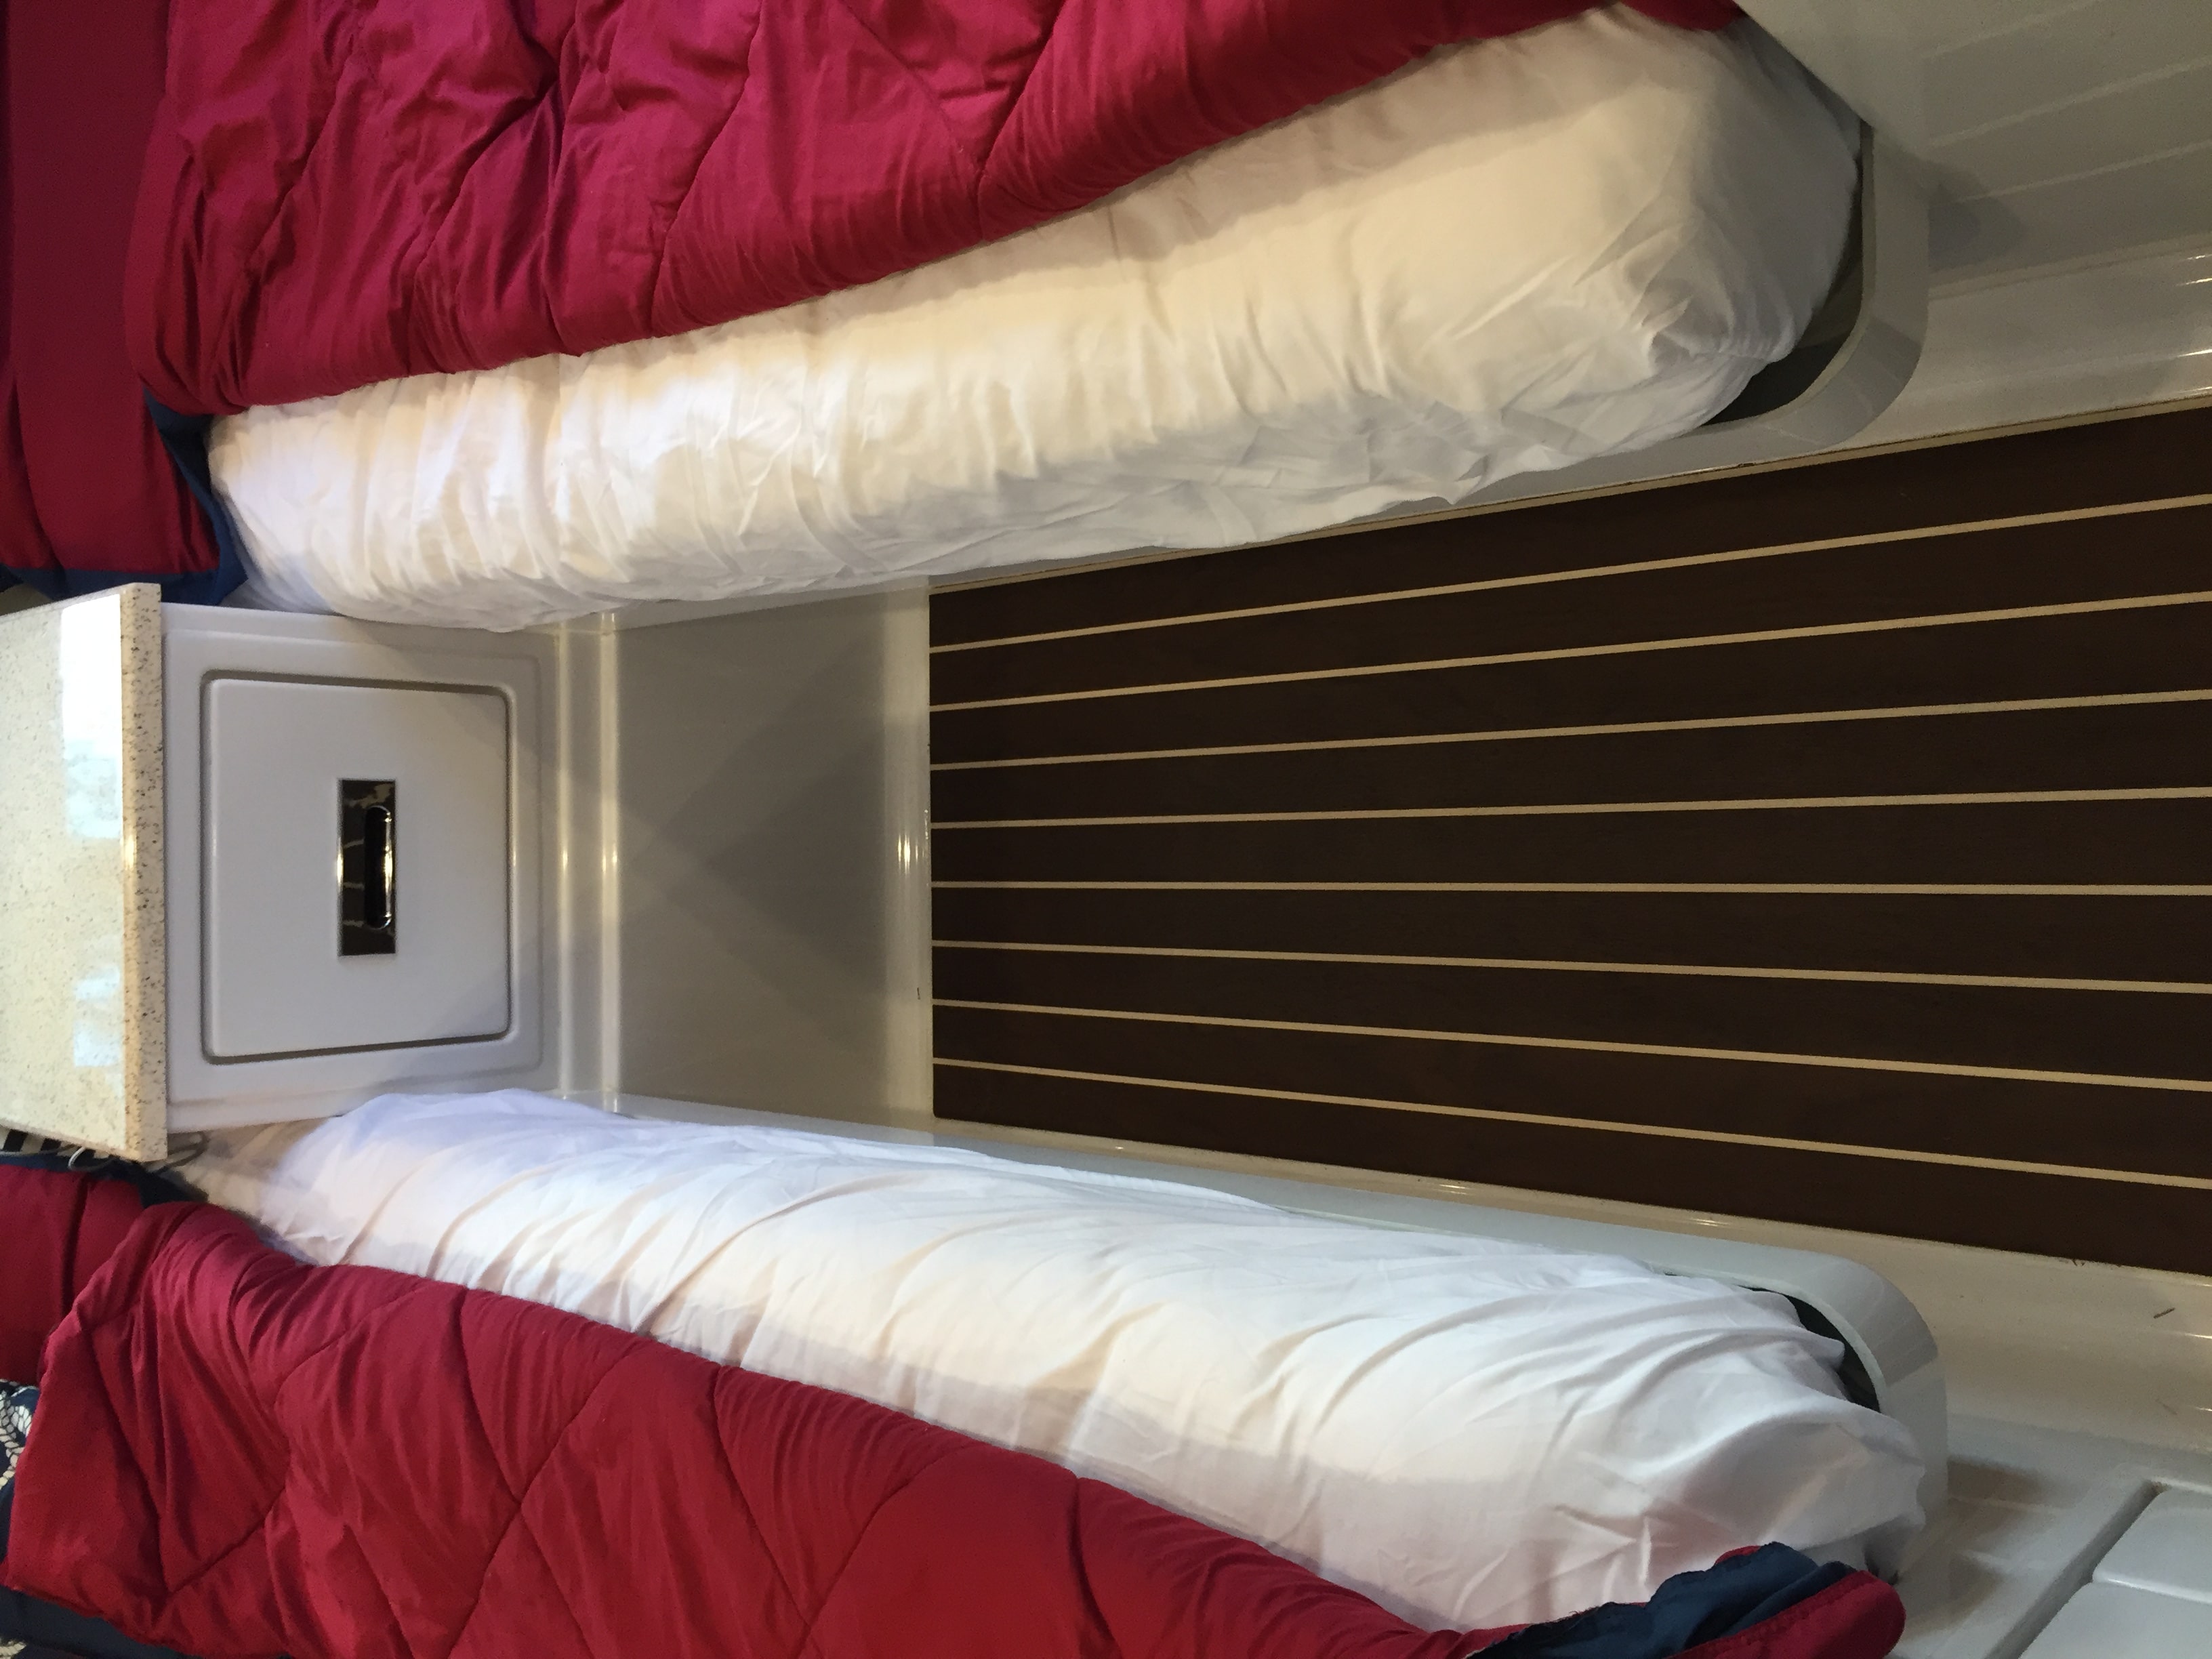
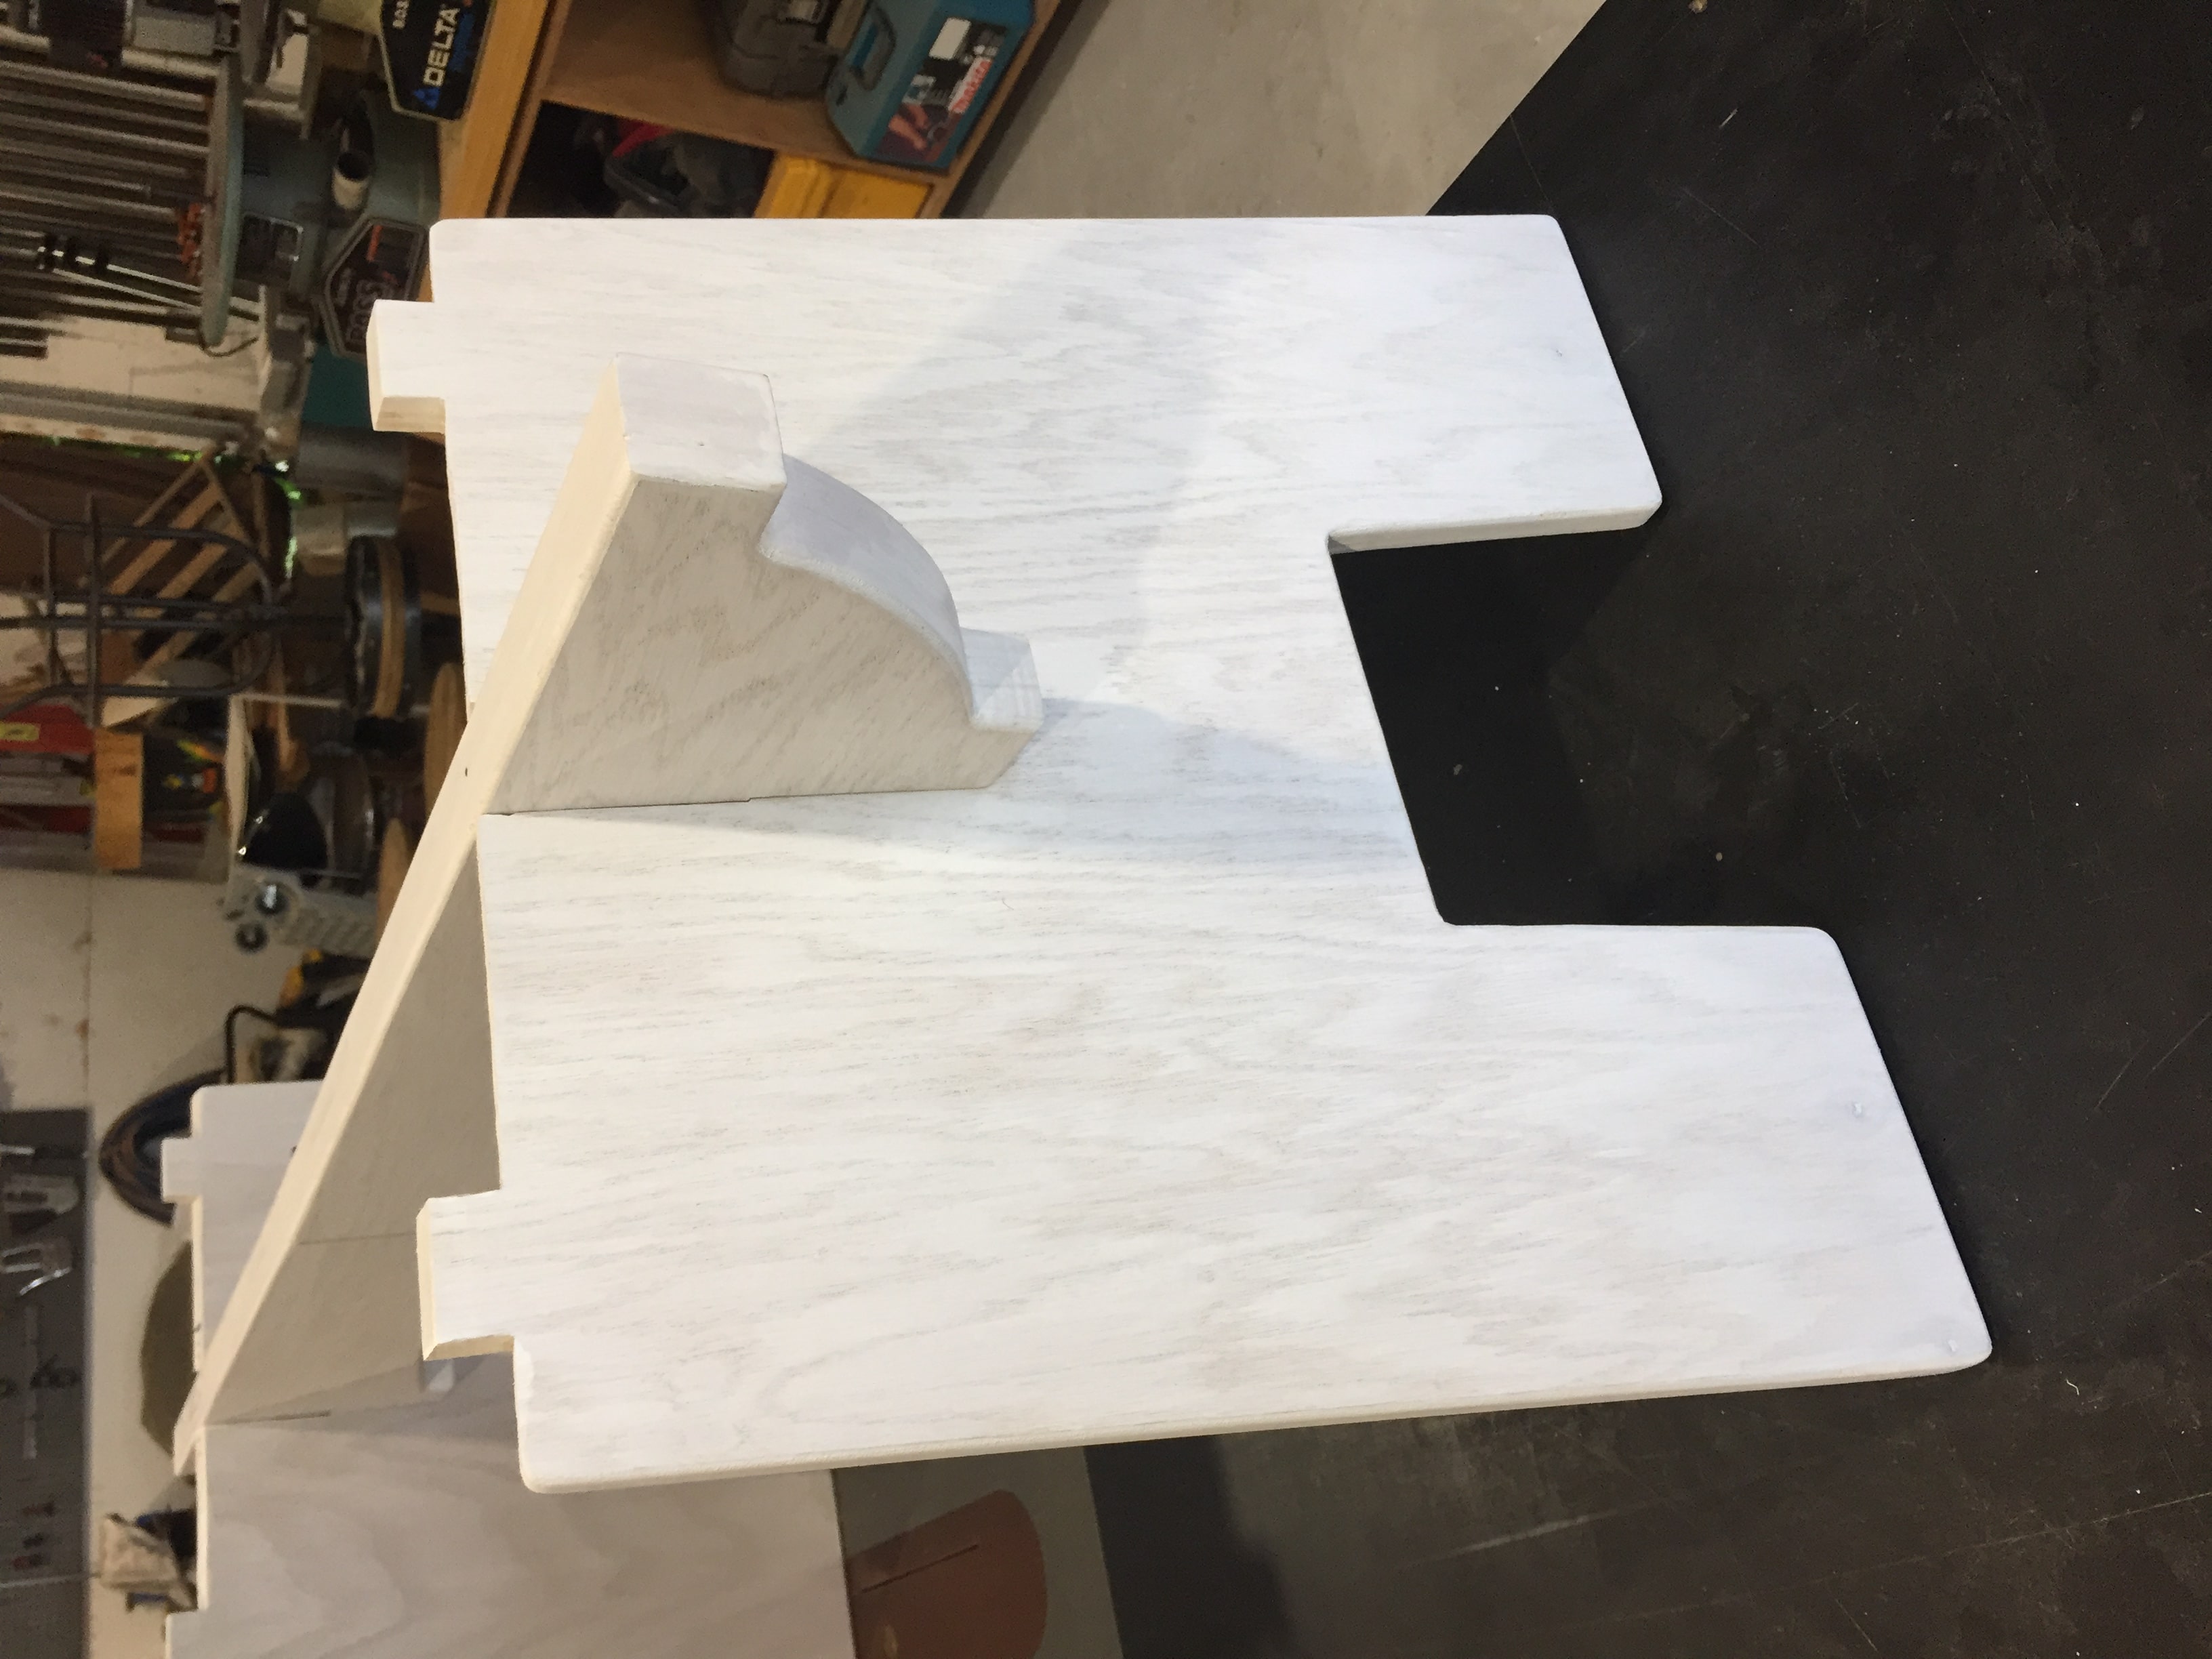
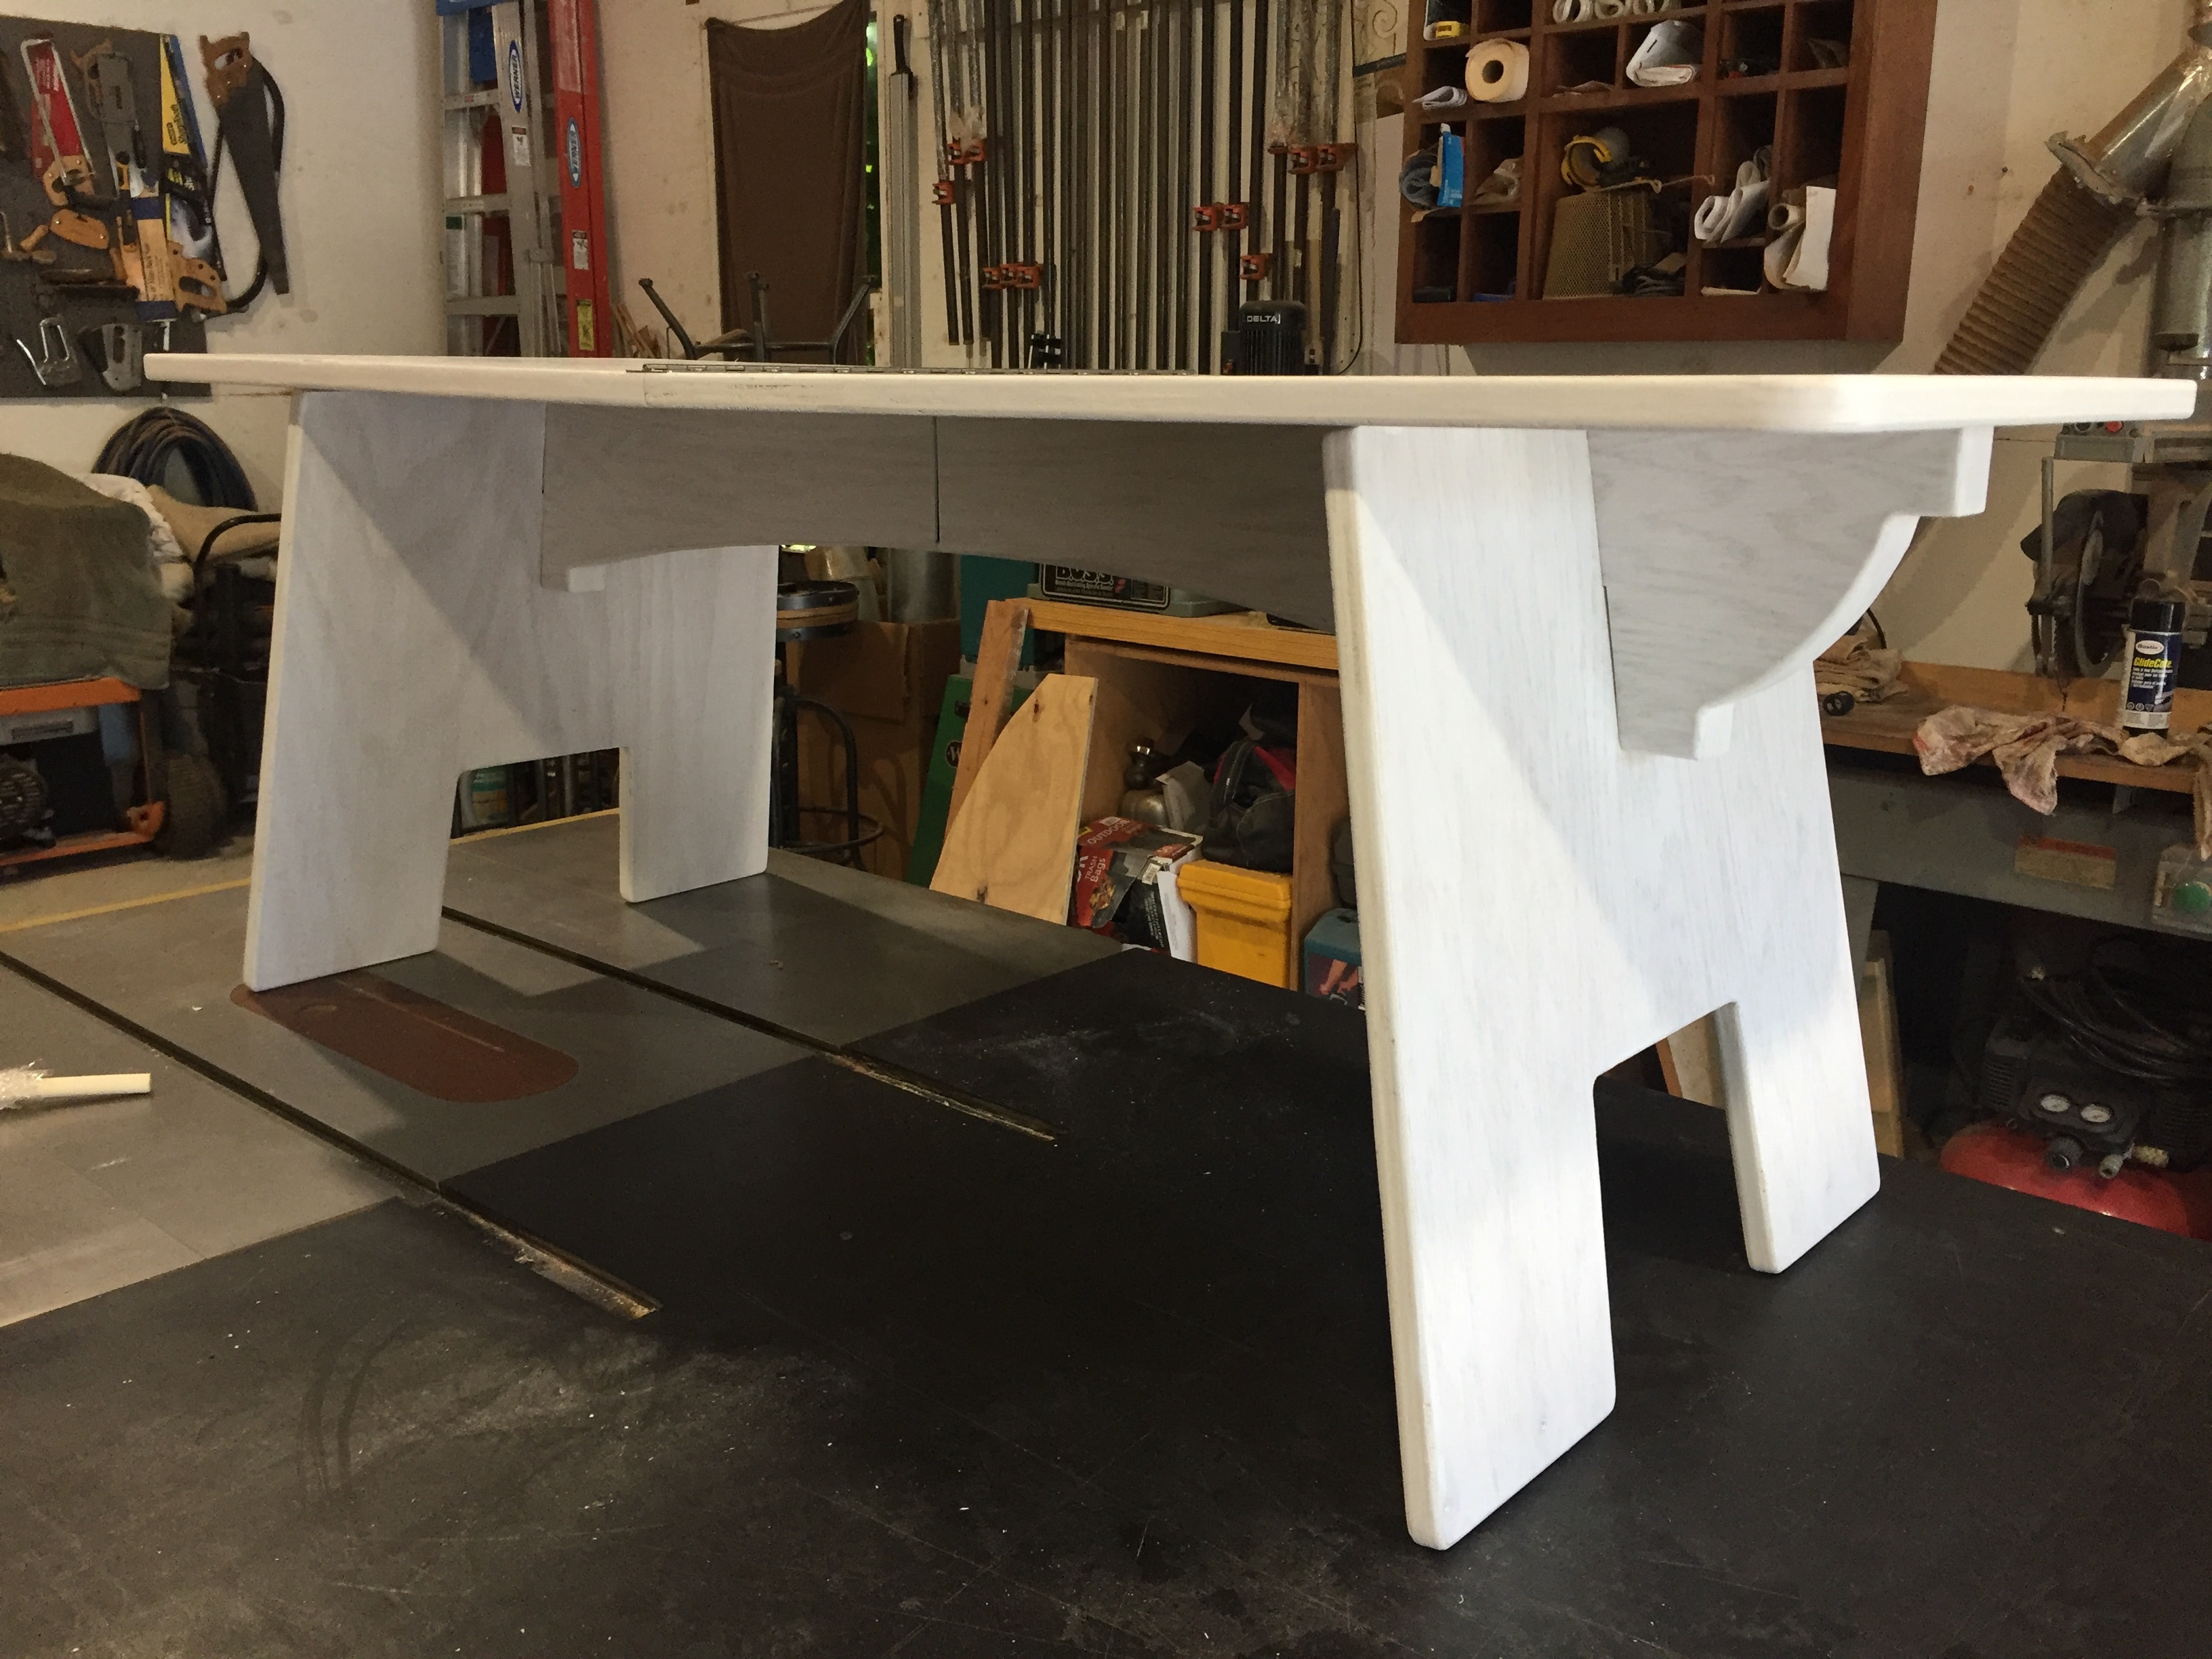
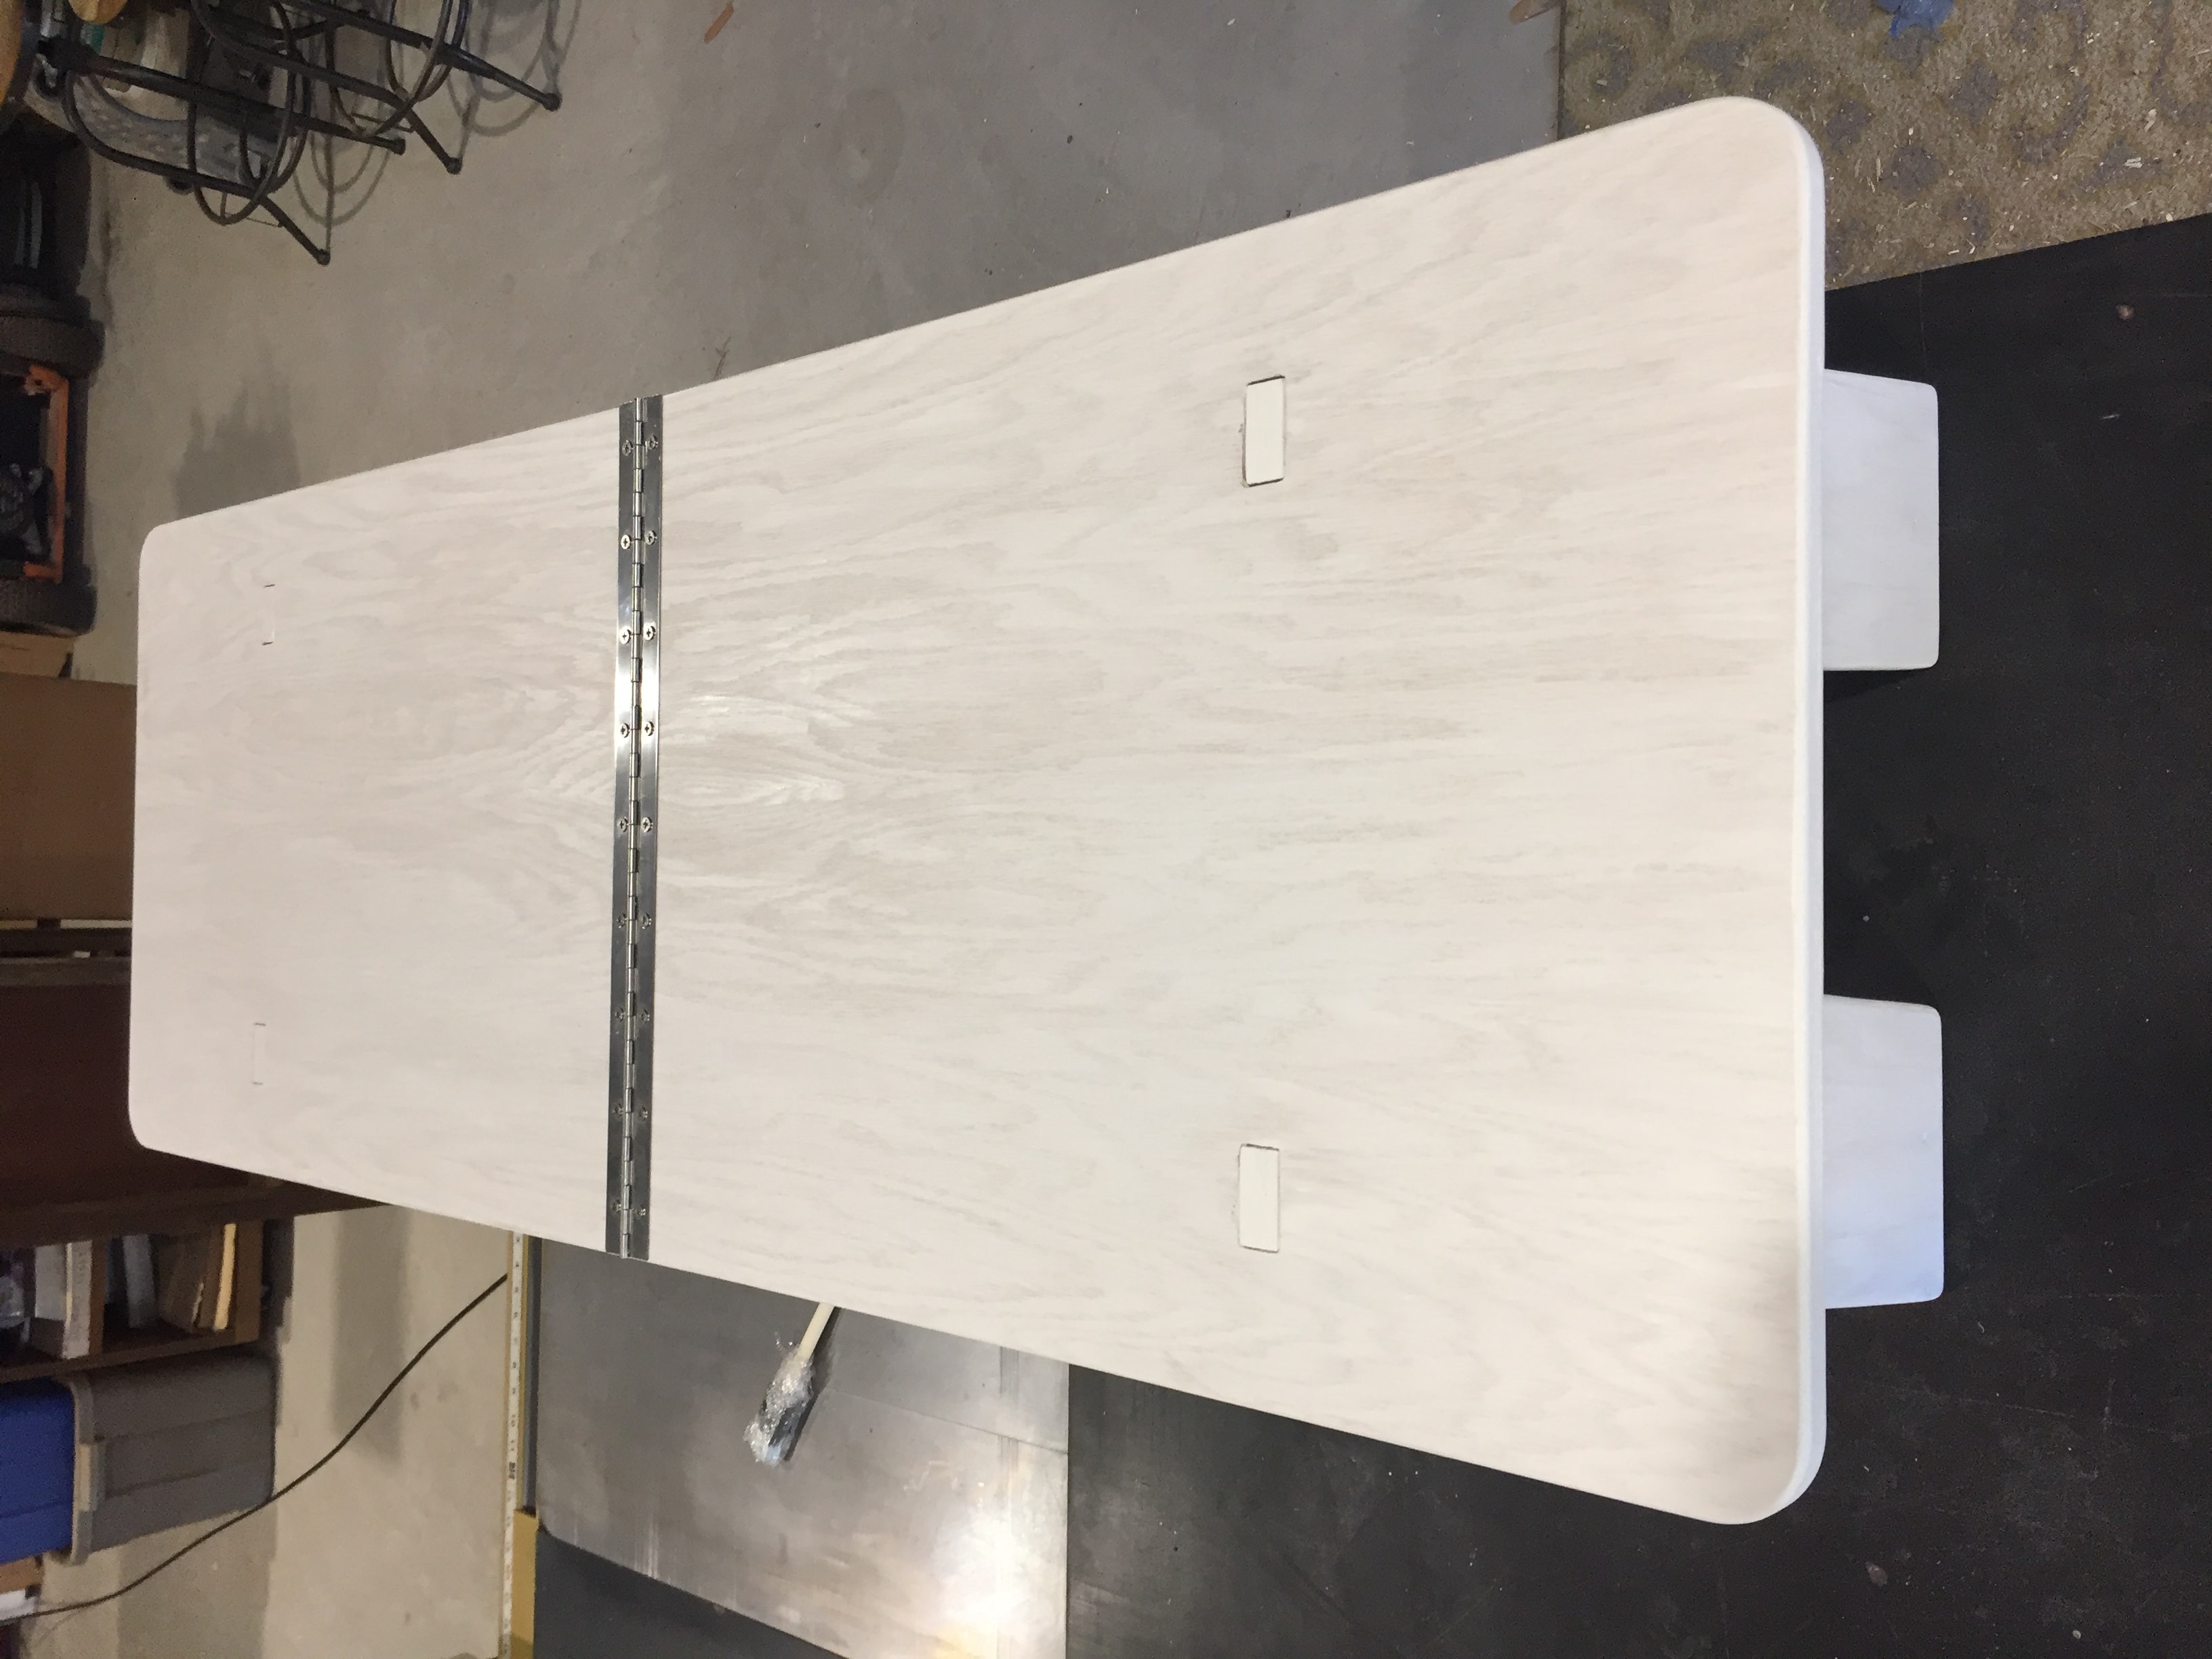
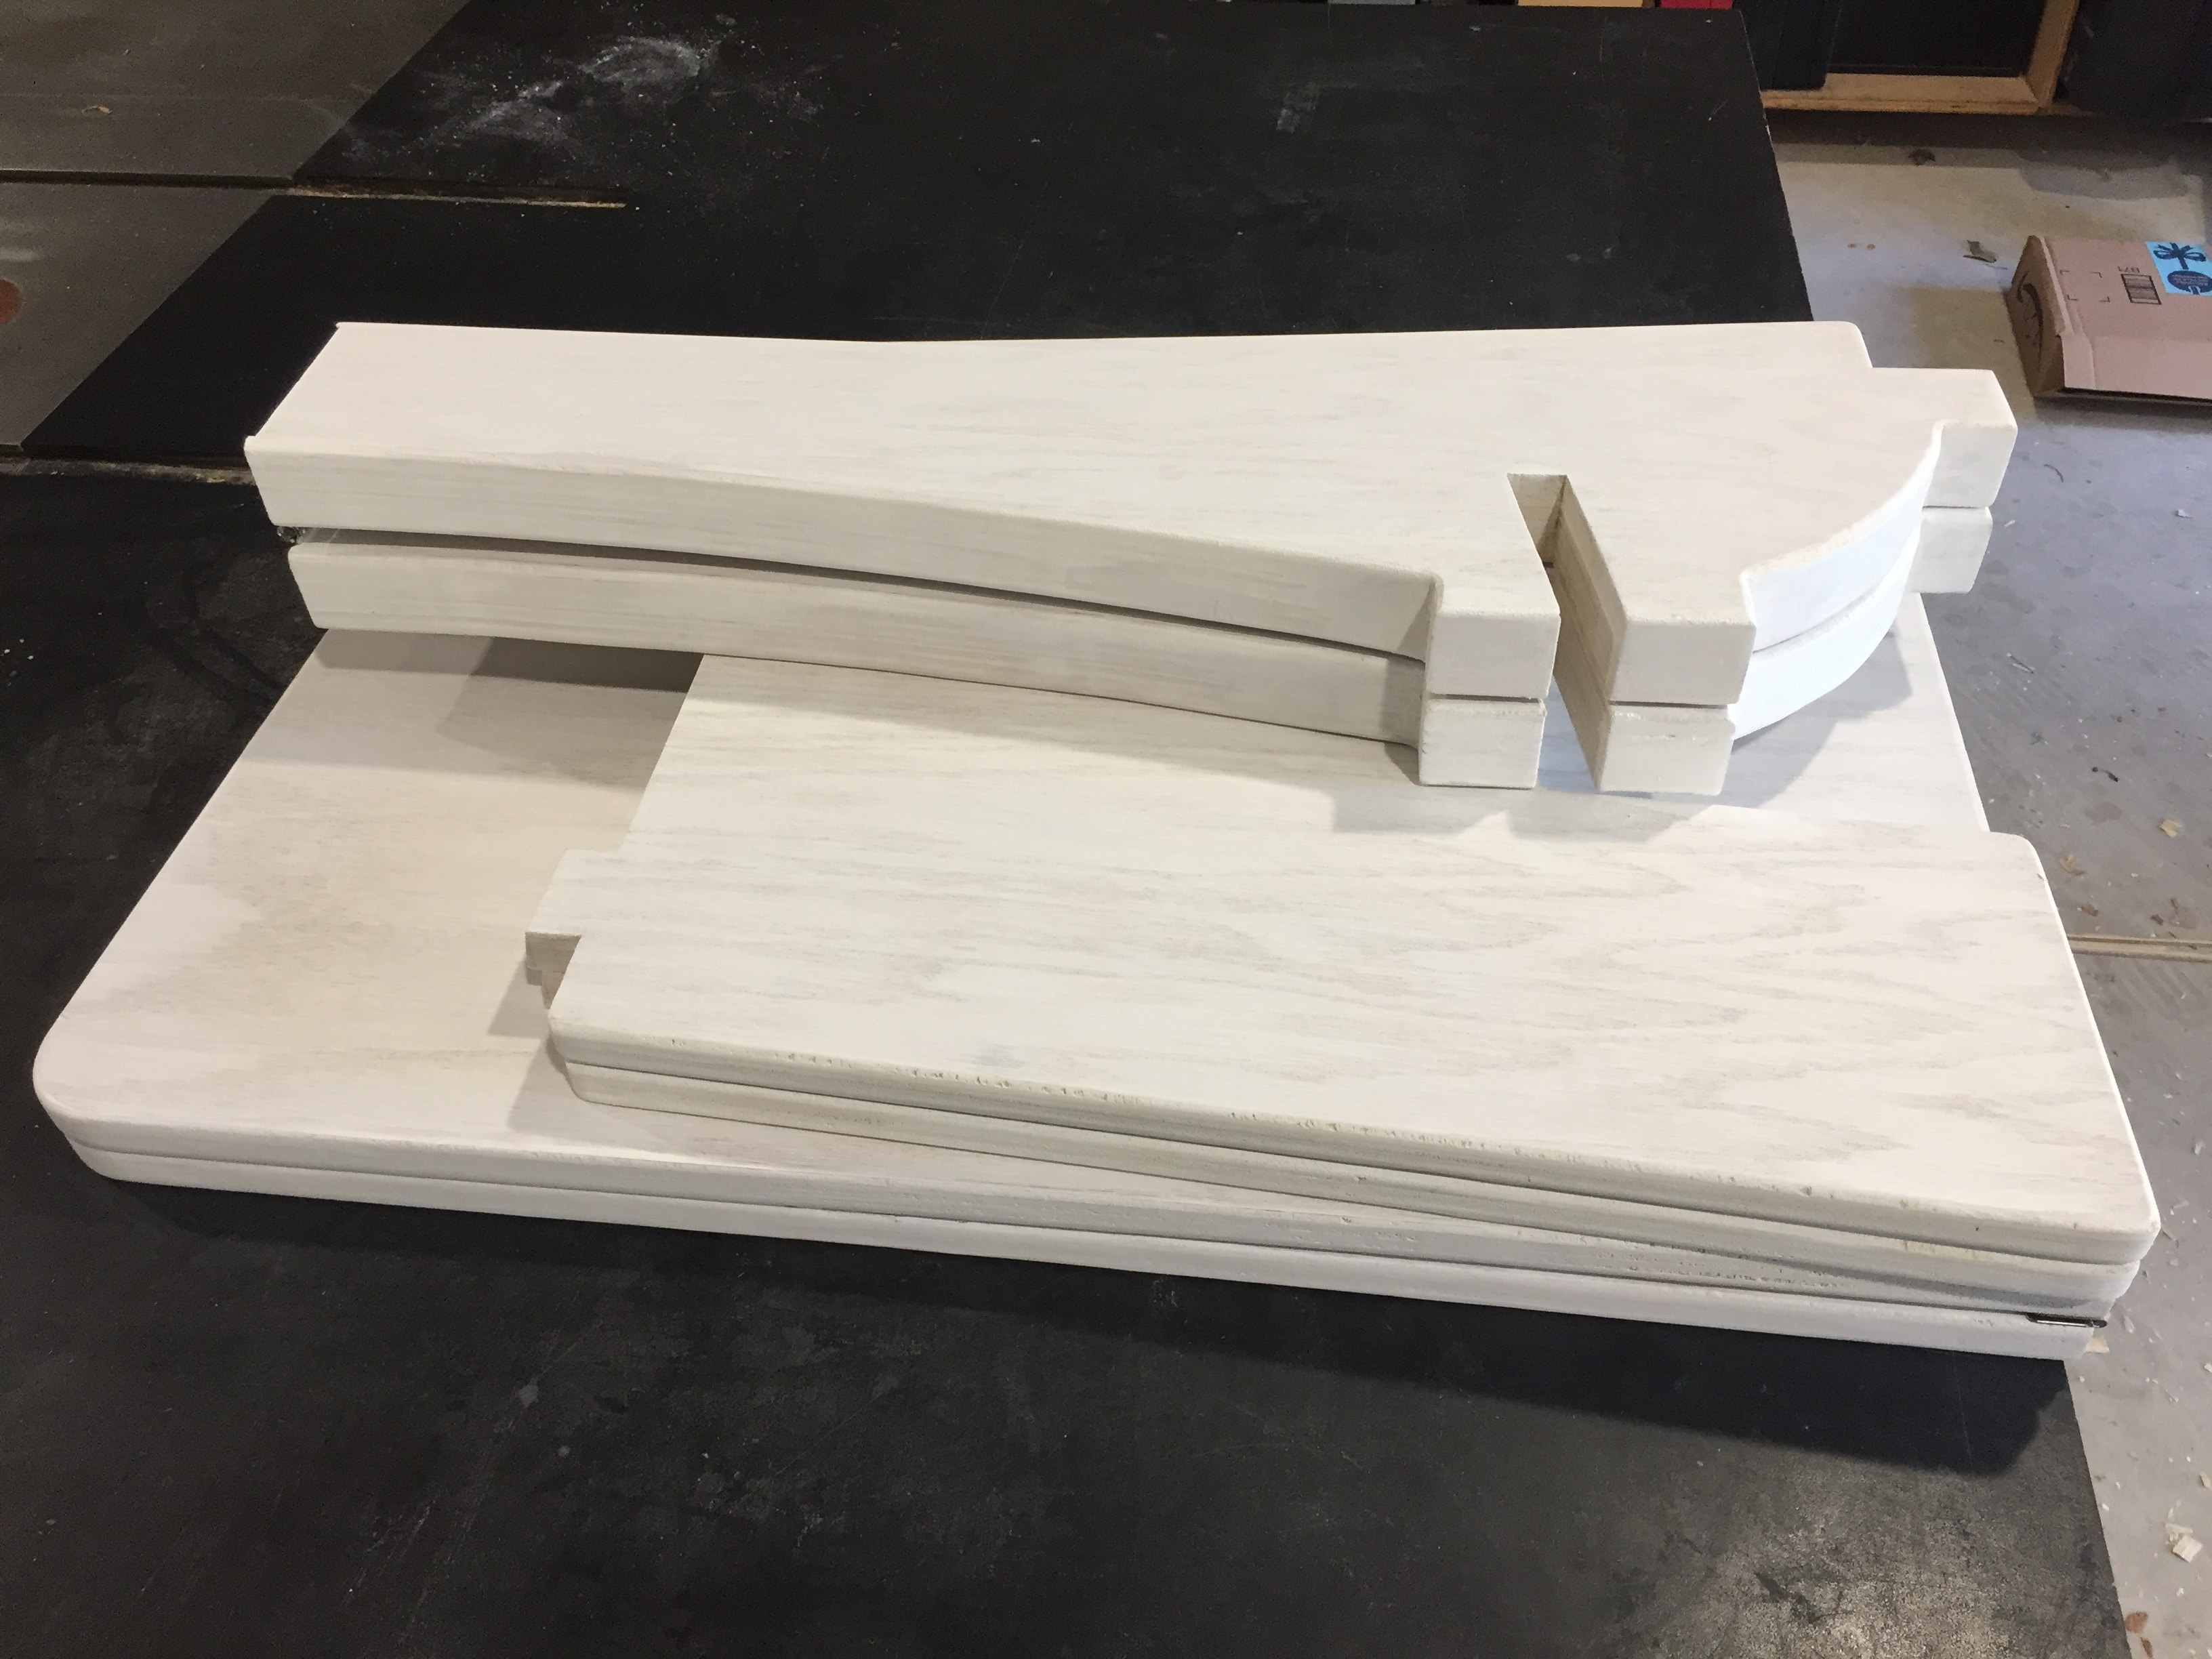
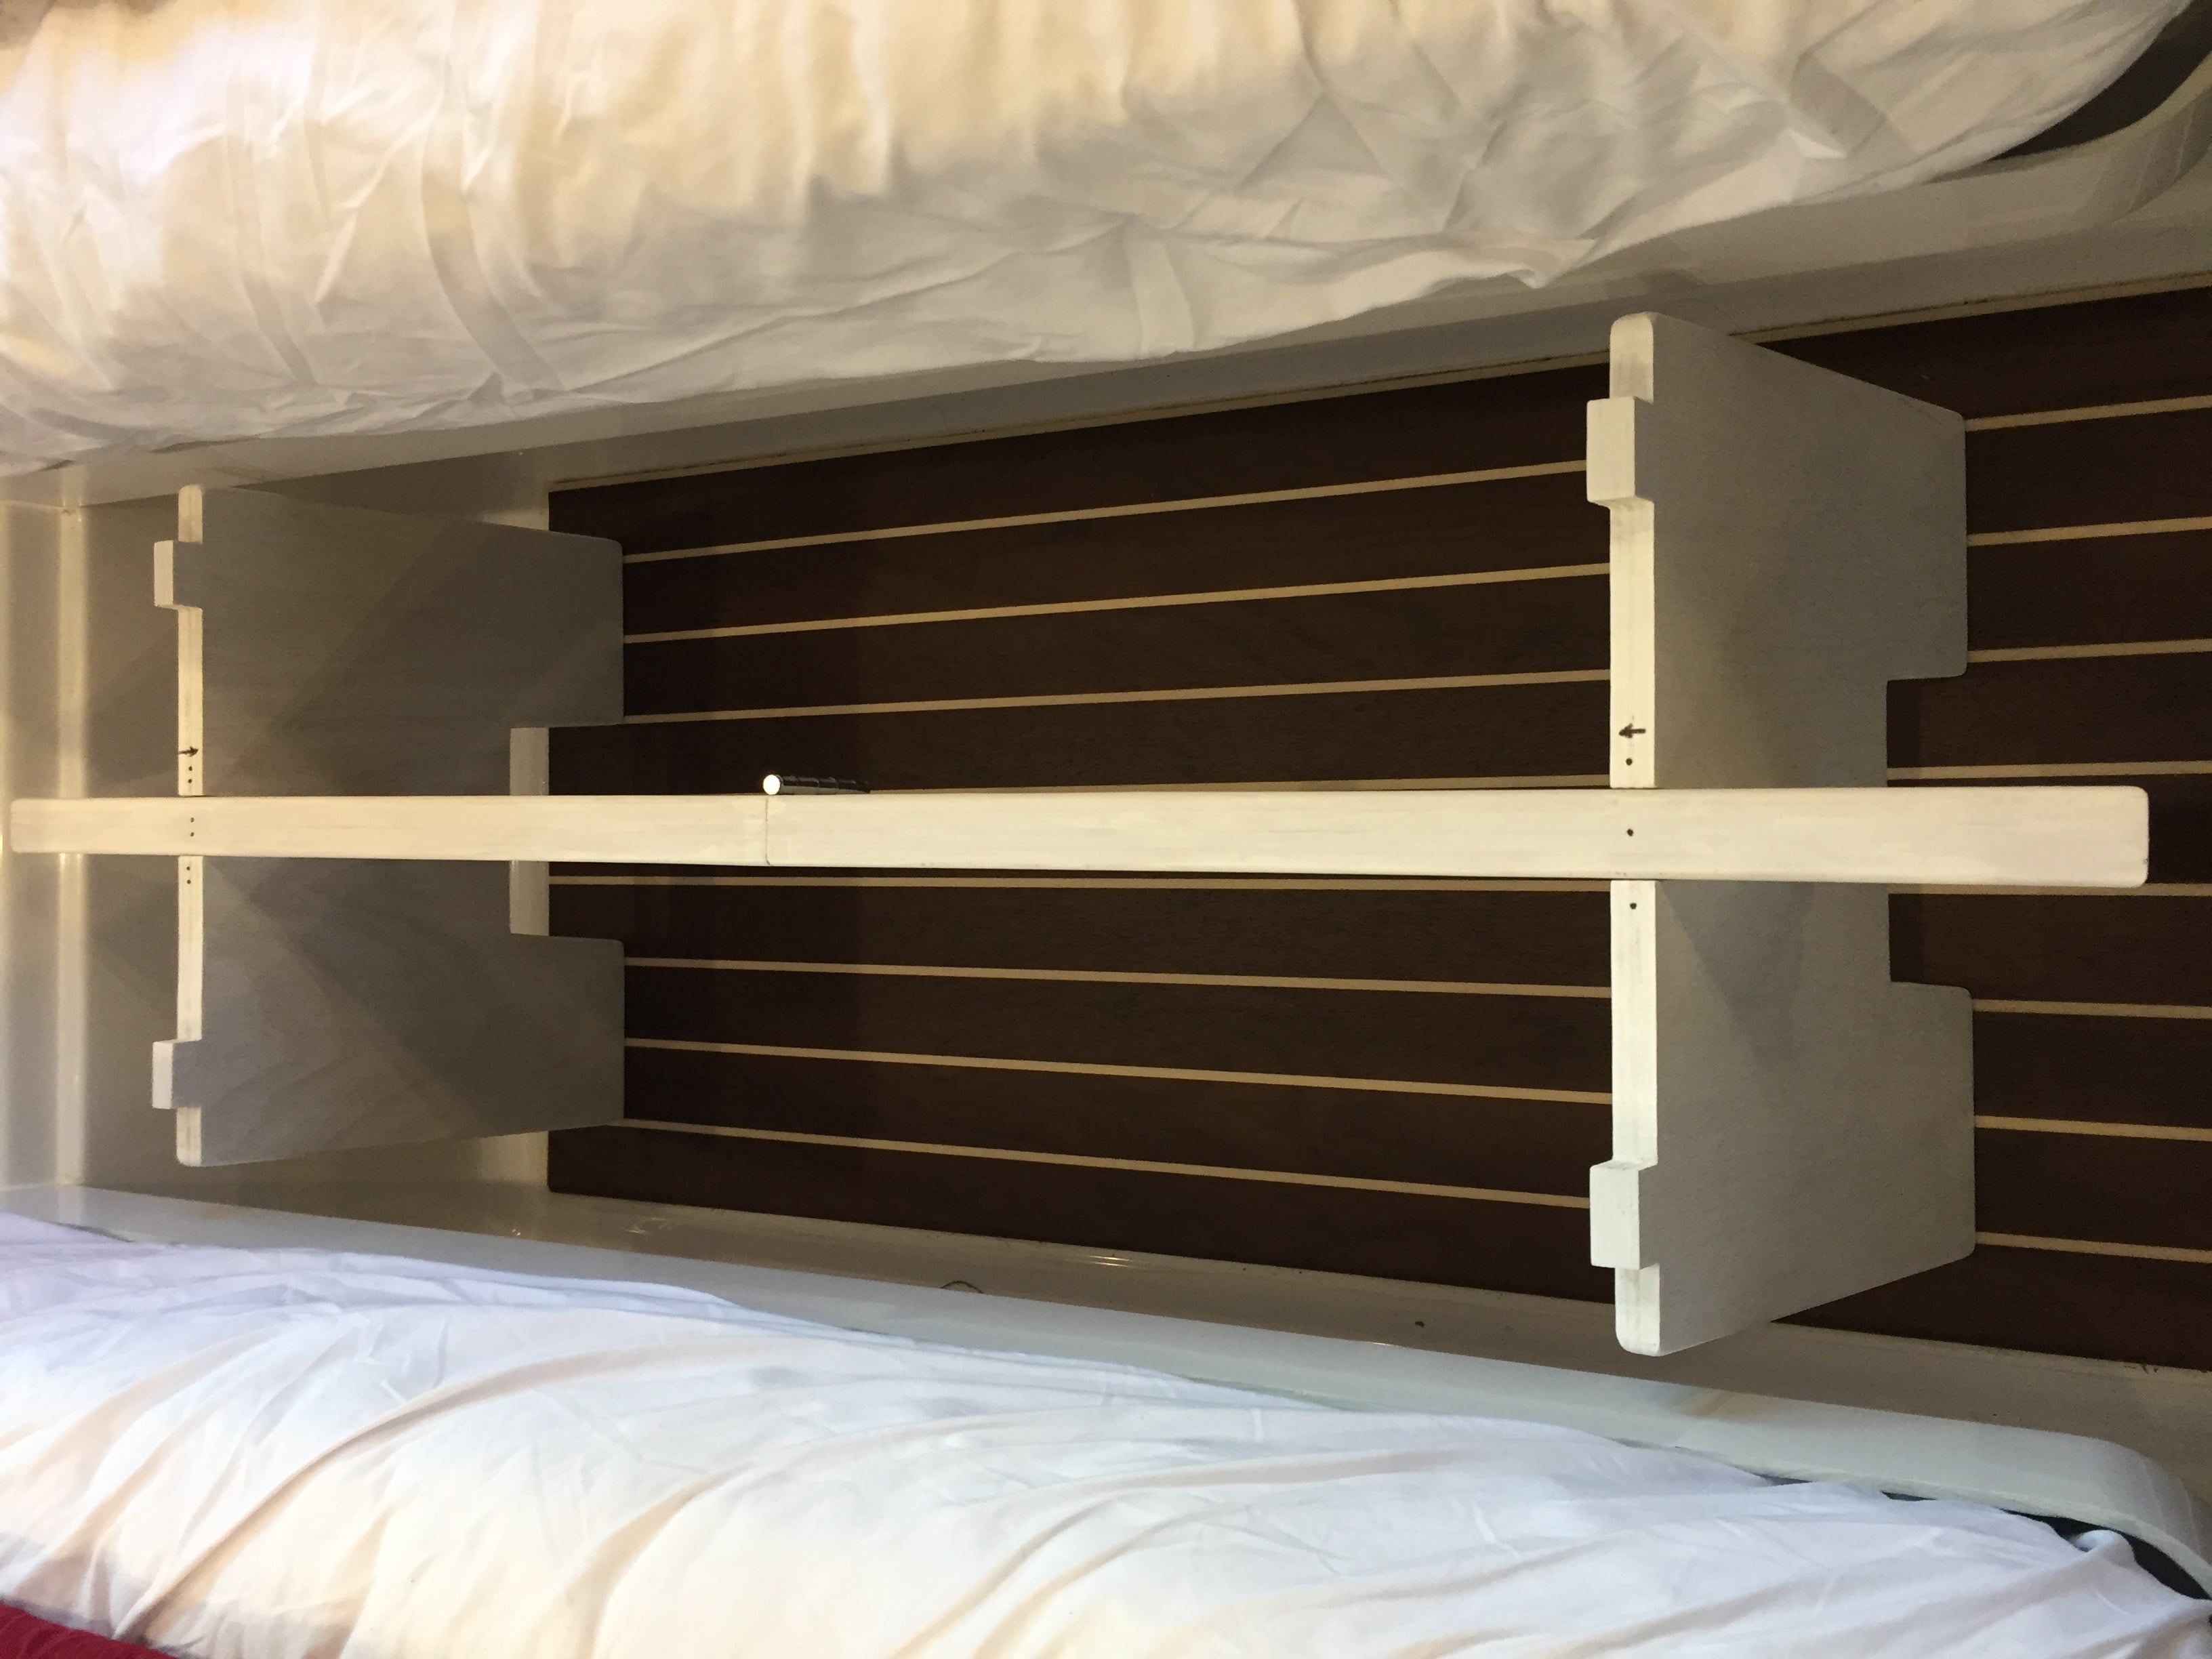
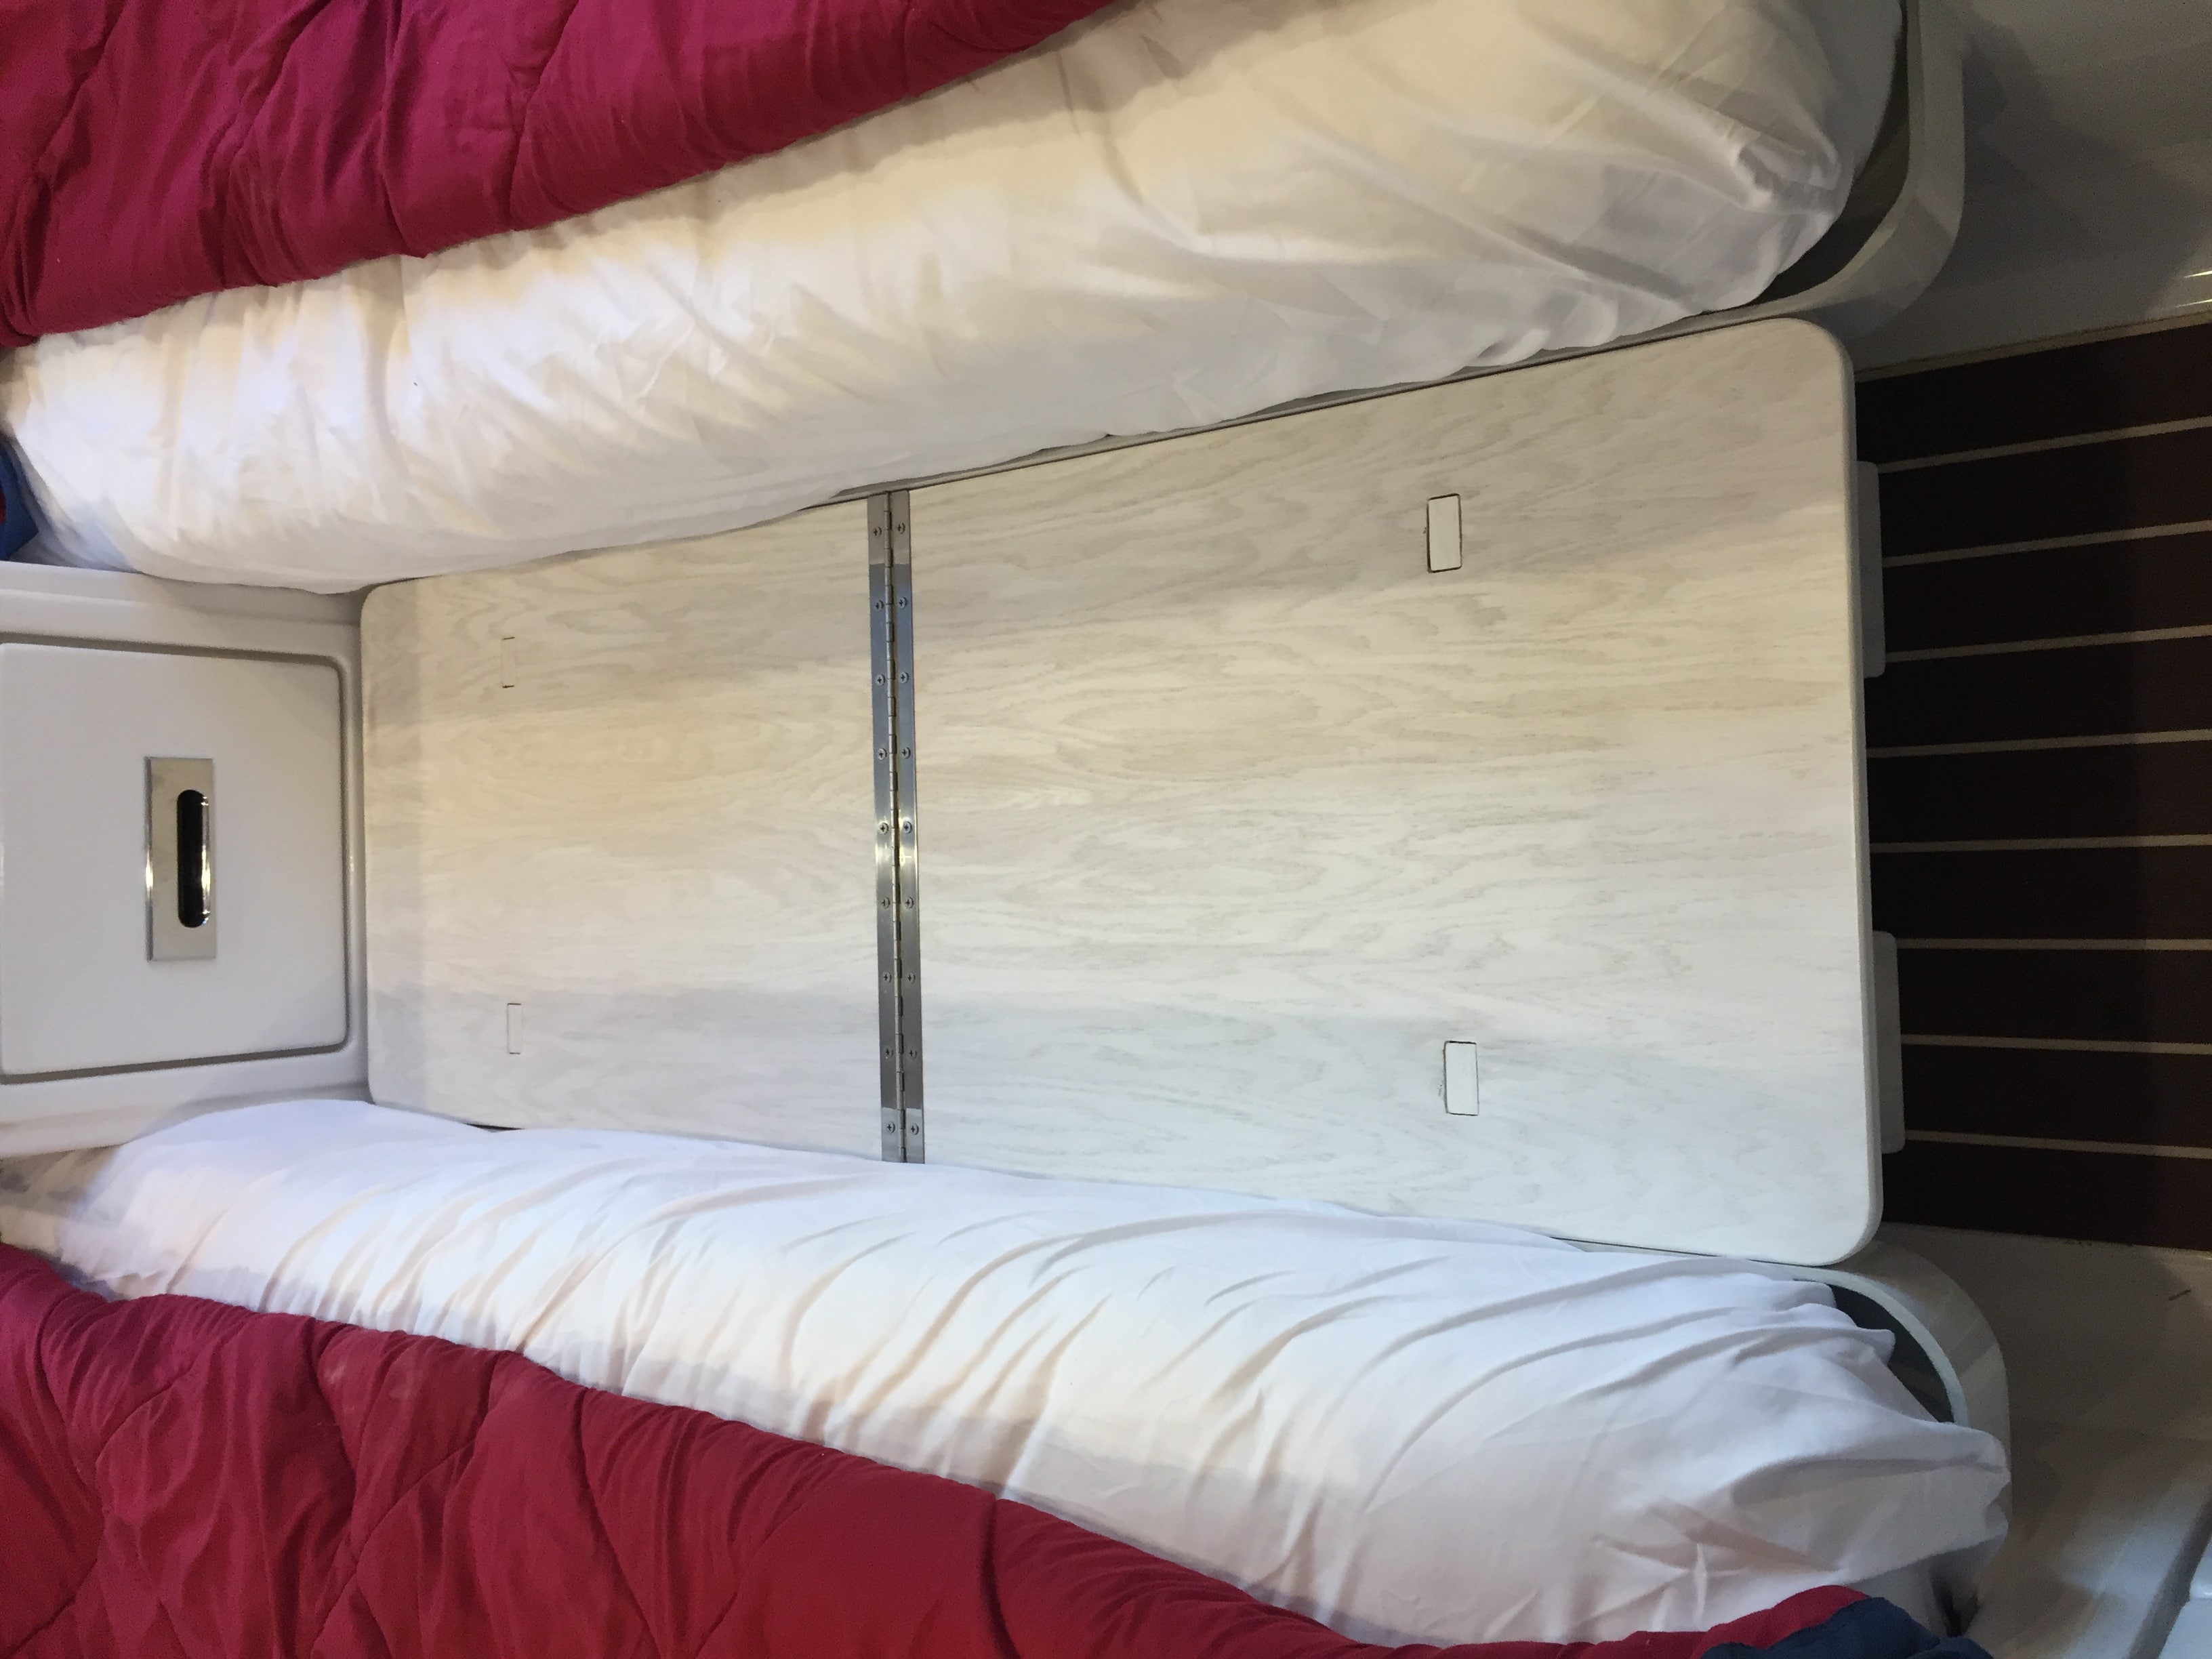
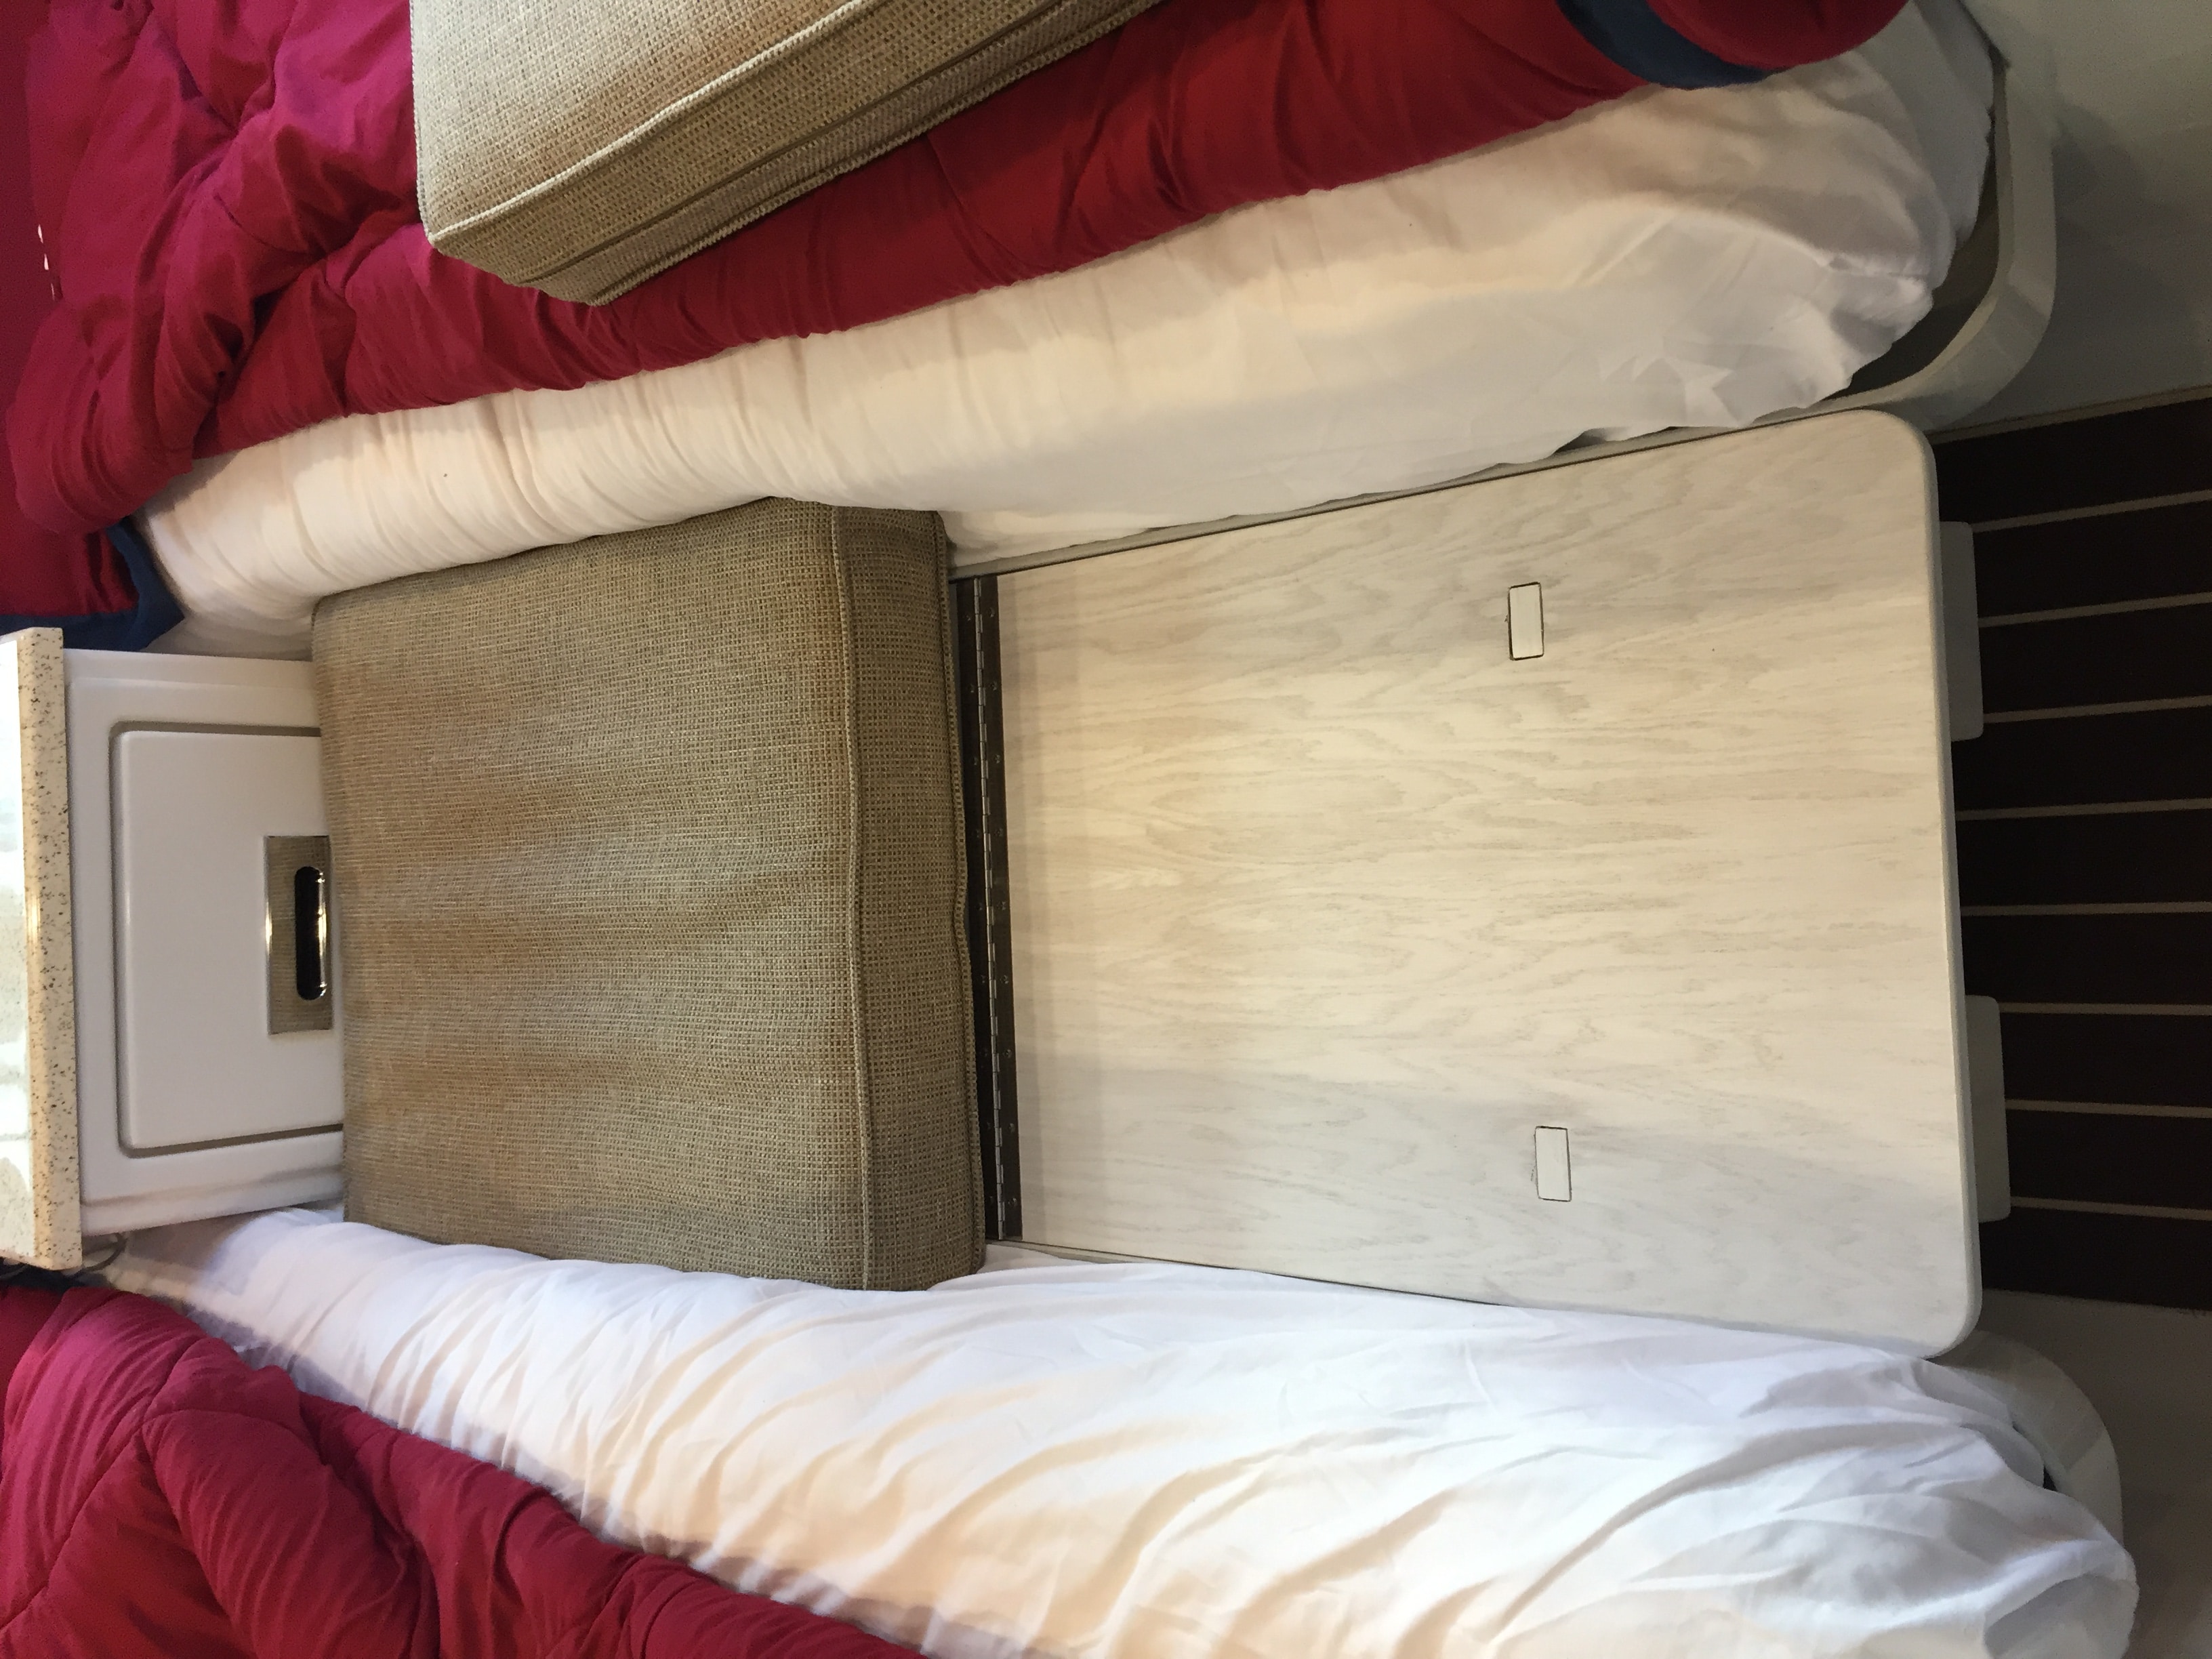
A new Oliver owner asked if I could craft a platform providing additional sleeping area between their two twin bed configuration. The project got my curiosity going and would require a fair level of planning to do right so just the kind of thing I love. I had seen other owners do similar things by adding a board across the two bed risers that hold the mattresses in place but, I discovered from talking to Oliver that, these risers are not designed to take a great deal of downward pressure. The design I came to is strong yet, light weigh while transferred the weight load to the flood and not on to the raisers. Two legs pieces interlock into a thick center strut, provide weight distribution and “horns” on the top of the legs lock the top board and legs in place. This is a large platform - 50” in length by 18” in width and 18" in height, it needed to fold-down for storage, stainless steel hinges allow the center strut and top board to fold to a compact package - 25” x 18” x 6”. Spring loaded latches secure it together when in use. Space is always a premium in our trailers and leveraging the dinette seat cushions which, fit perfectly, meant an additional cushion was not a requirement. Note: depending the height of your mattresses the level of the platform can be made taller or shorter. We have 10" mattresses and the customer has 7". Complimenting the Oliver interior lead me to select cabinet grade oak plywood with a white mike paint finish to show off the wood grain and match the interior. Also a nod to Frank Lloyd Wright for overall design esthetics never hurts. If you're interested in more sleeping room for your twin bed configuration or have a pet that likes to sleep with you but just not enough room for Fido at your feet, message me, I’d be happy to craft you one too.
 1 point
 -
Thanks Overland! I was shooting for 3/4" on the center strut in my original prototype but, it was not sturdy enough for my liking. I ended up laminating two 3/4" pieces together to get the rigidity I wanted. Last thing I wanted was it to collapse on someone sleeping or getting in & out on the bed.1 point
-
Great work, as usual. I wonder if the center beam could be made of plywood to make it thinner and the whole thing storable under the mattress?1 point
-
OOPS! Sorry about that - original post is edited! Should have read curbside! Bill1 point
-
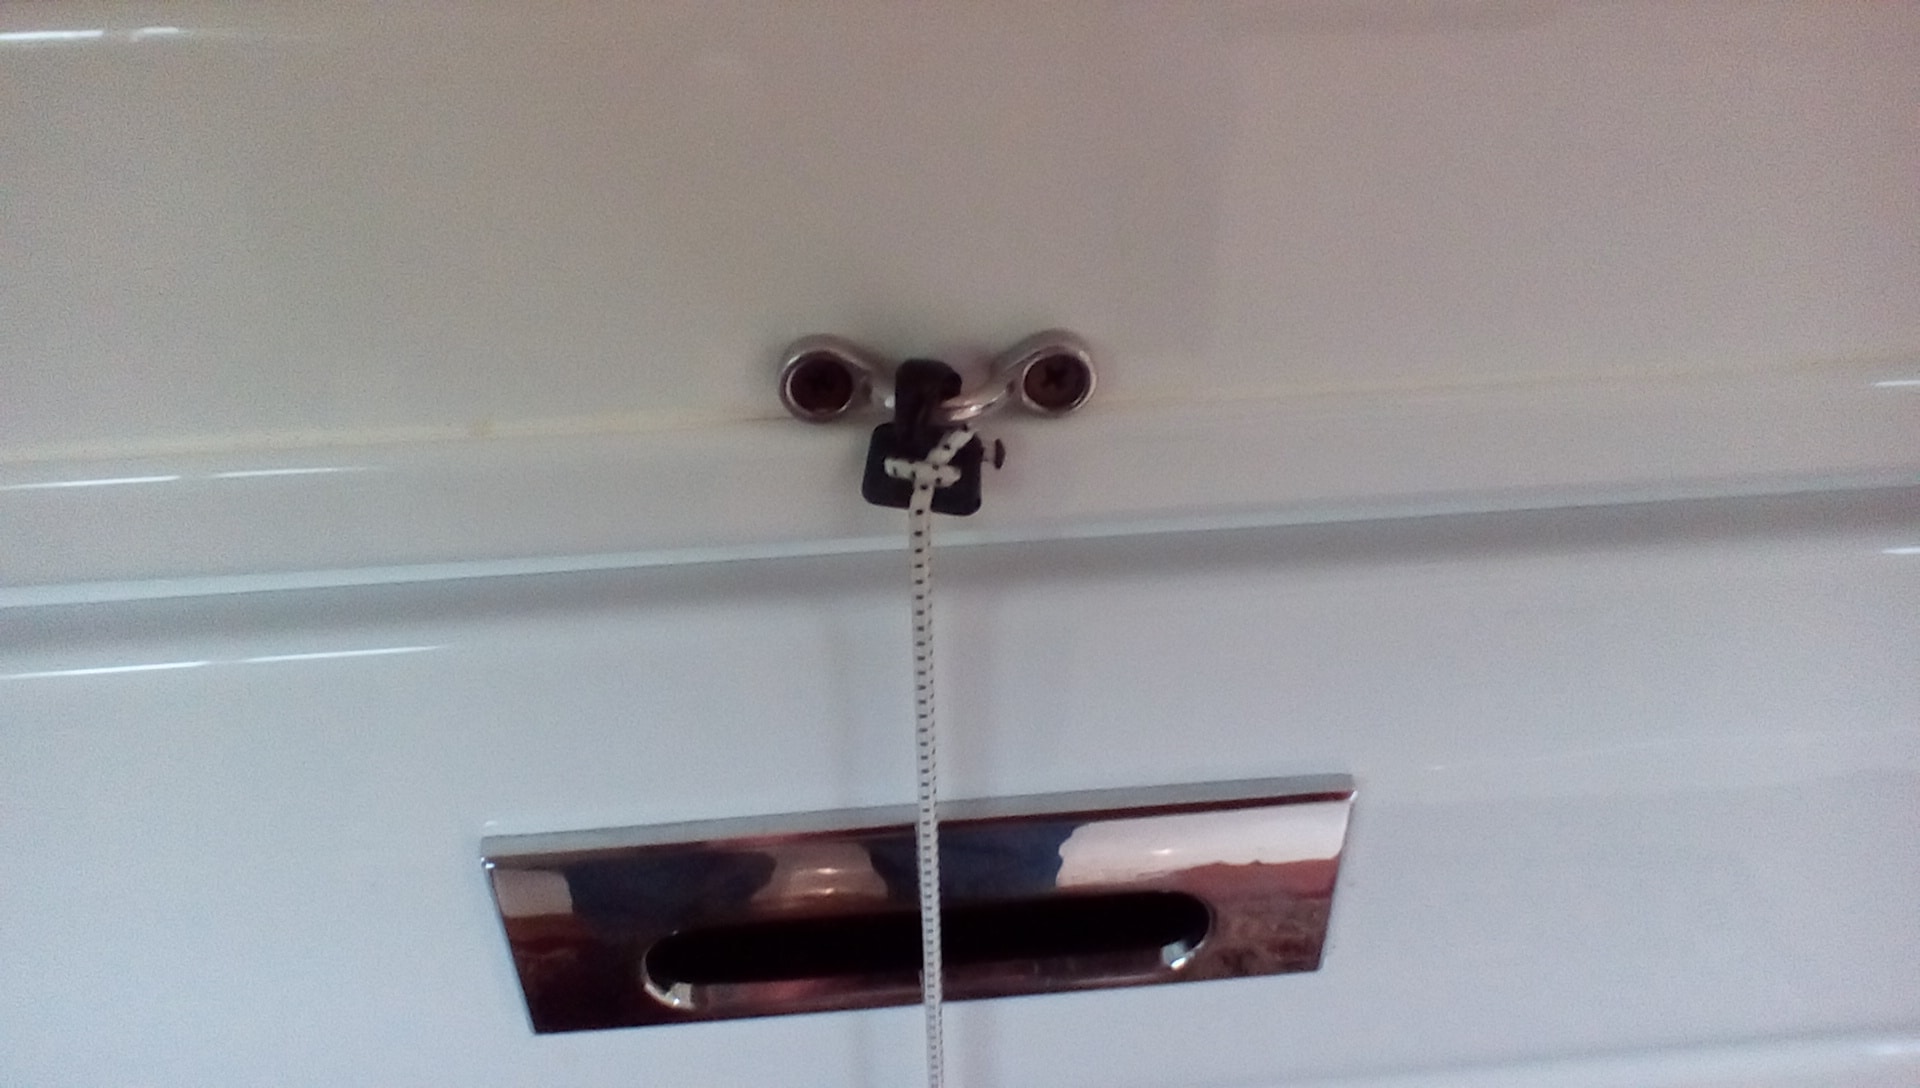
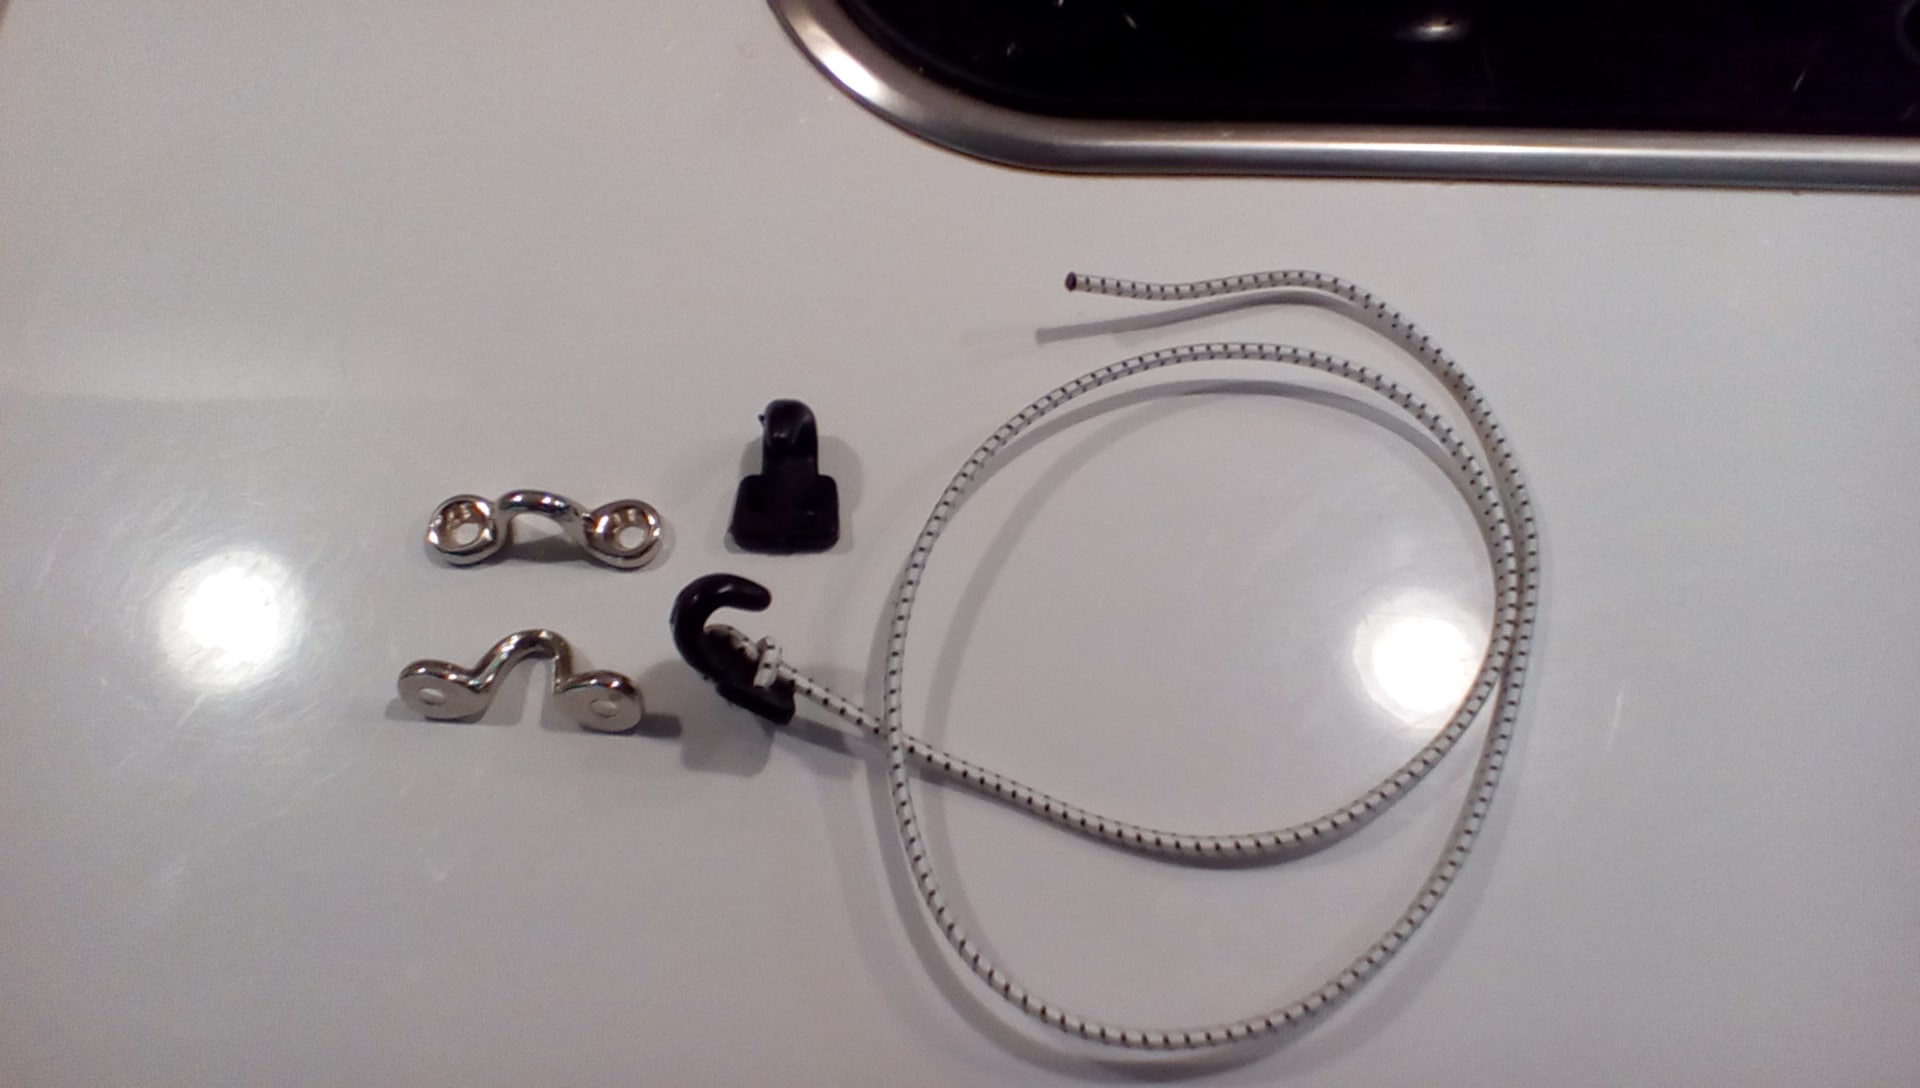
There was discussion on here awhile ago about drawers opening while underway. At that time the factory was also using real short screws to attach the drawer glides. Under certain circumstances the drawers would end up in the aisle, and usually something would break. A search of the forum should show several methods of preventing. We got our supplies from a fabric outlet that carries material for boat upholstery. We used about 1/8" shock cord. Underway it just pops on. When stopped they coil up real small and fit in top right drawer. In the 5500/6000 miles since installed we have had no further incidents where we have had to repair a drawer...
1 point
-
Hello all, I just saw a possible solution for securing the drawers. The solution is shown on a Youtube video at about the 7:45 mark. One could choose a different material to coordinate with the interior finish of the Oliver. Perhaps the folks at Oliver would consider such a modification utilizing compatible material ....1 point
-
Our water pump is located on the CURB side of the trailer under the bed.1 point
-
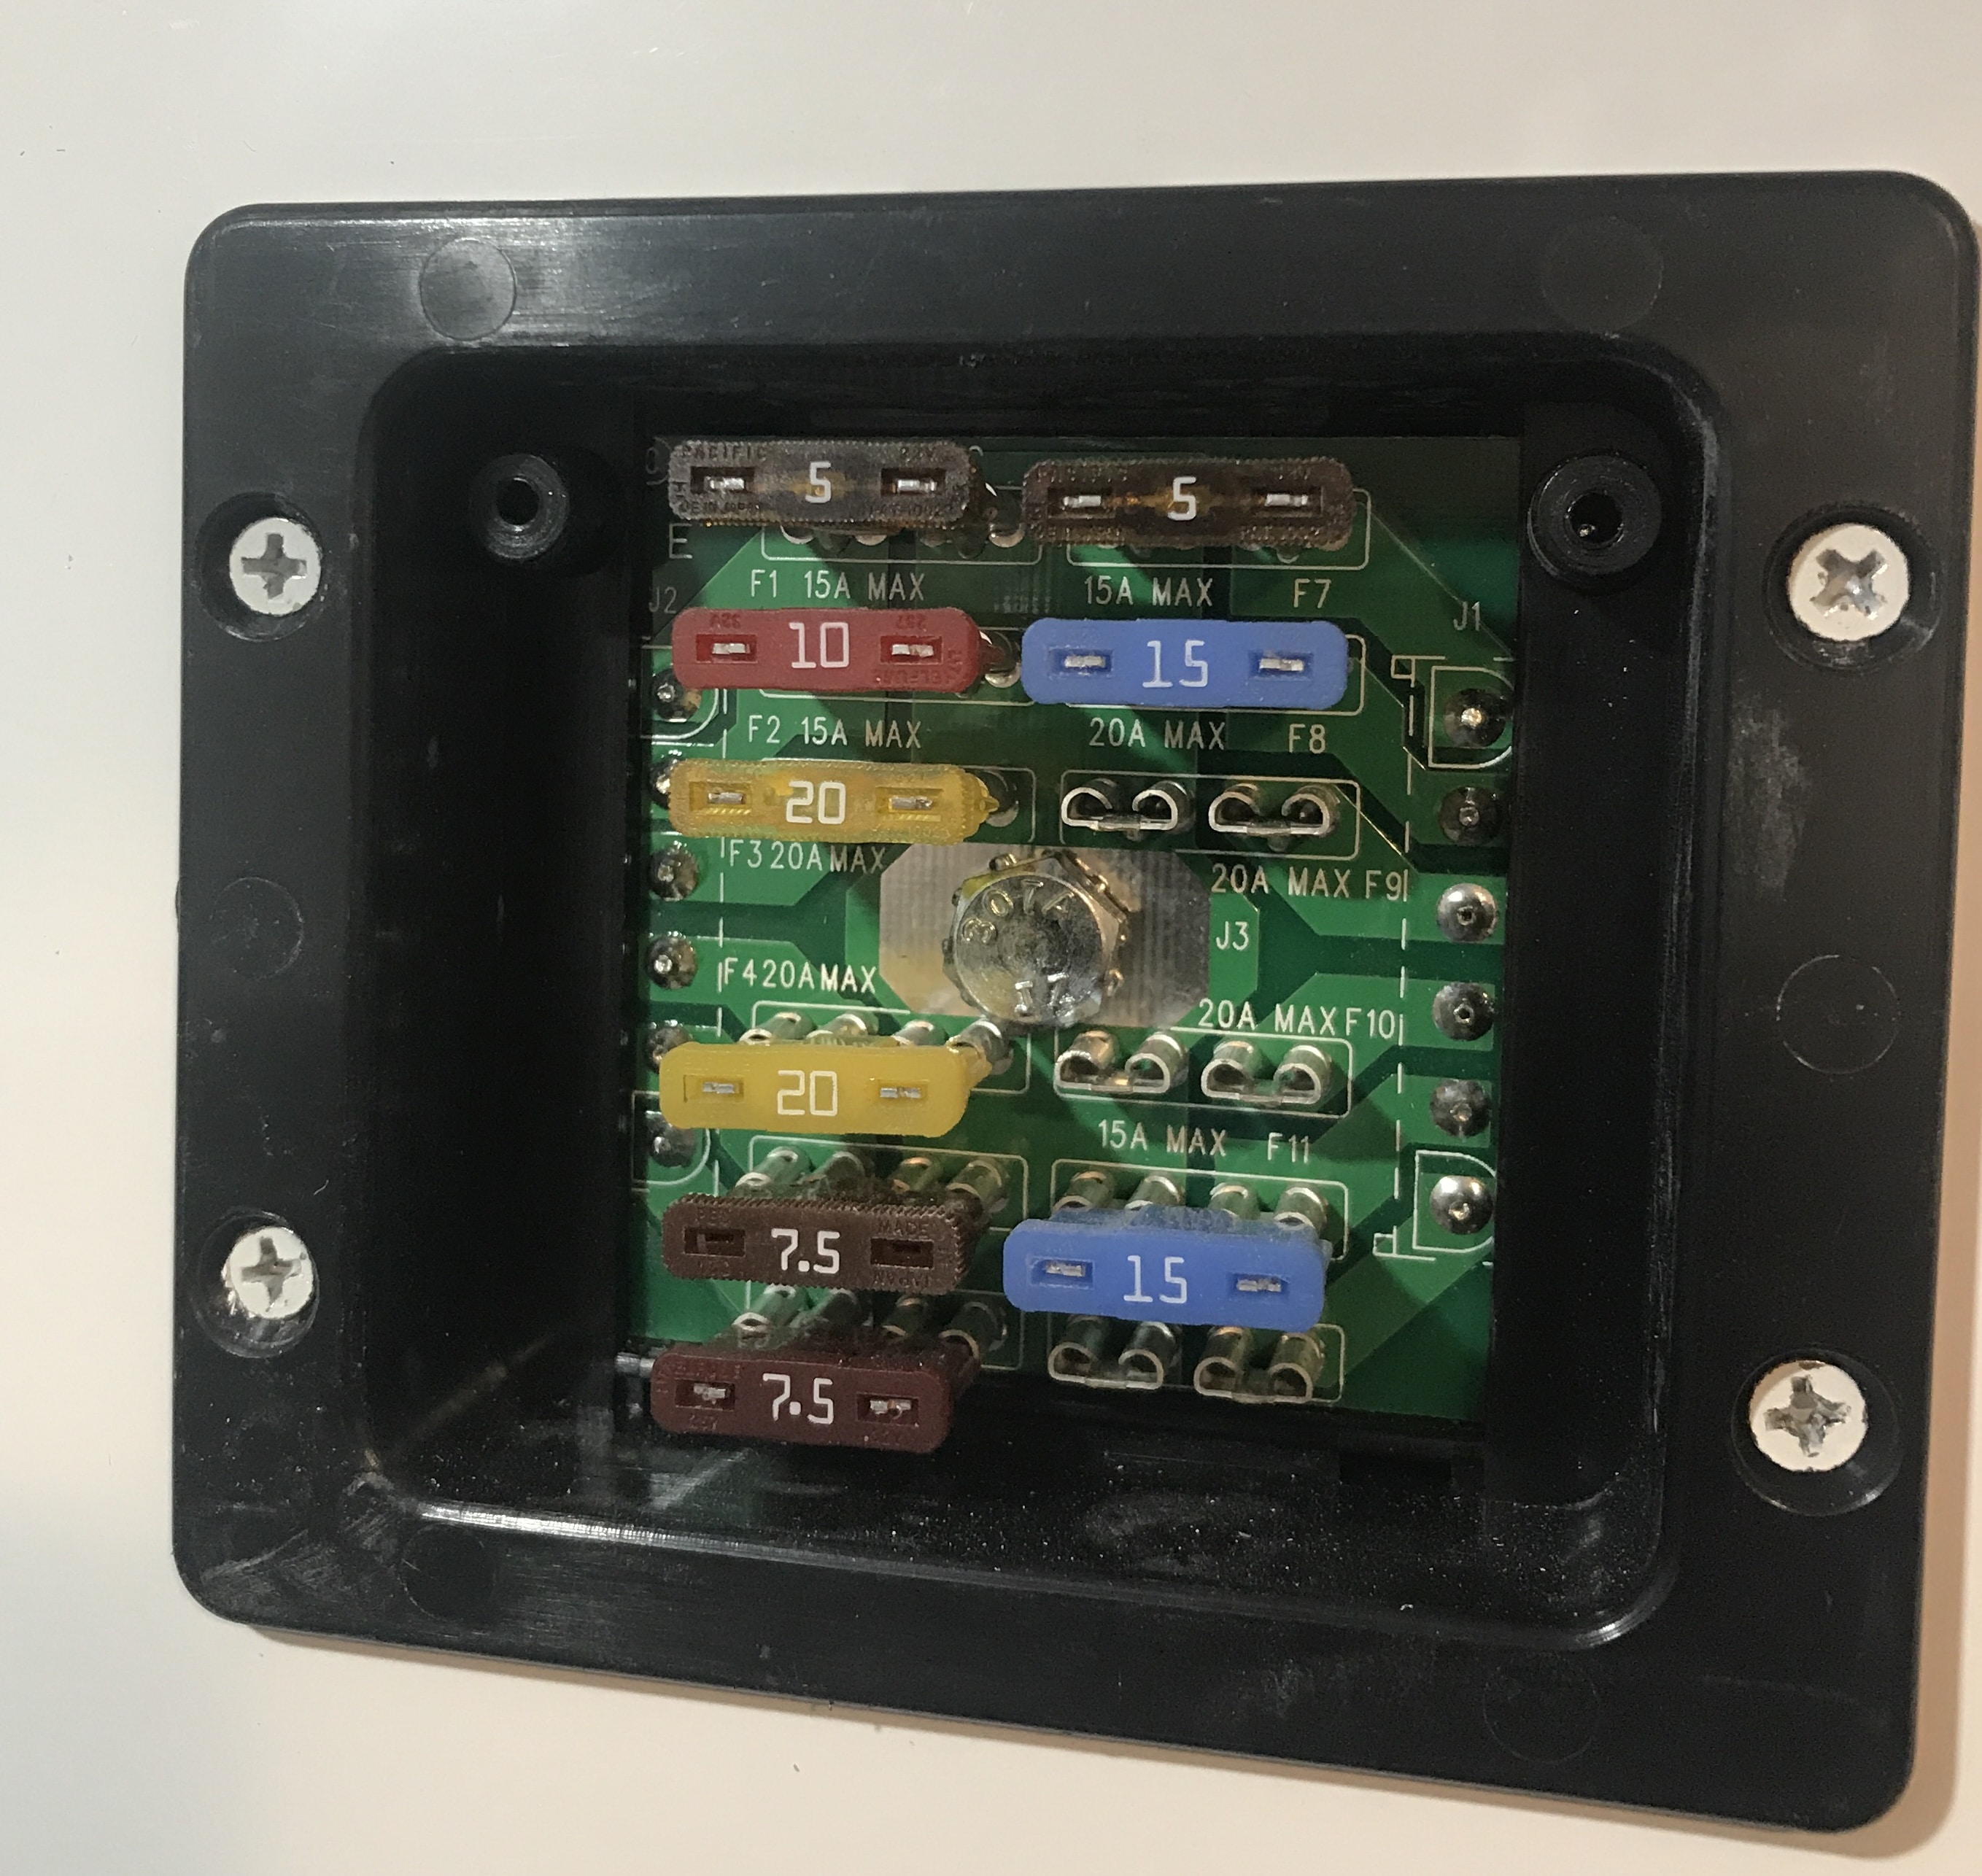
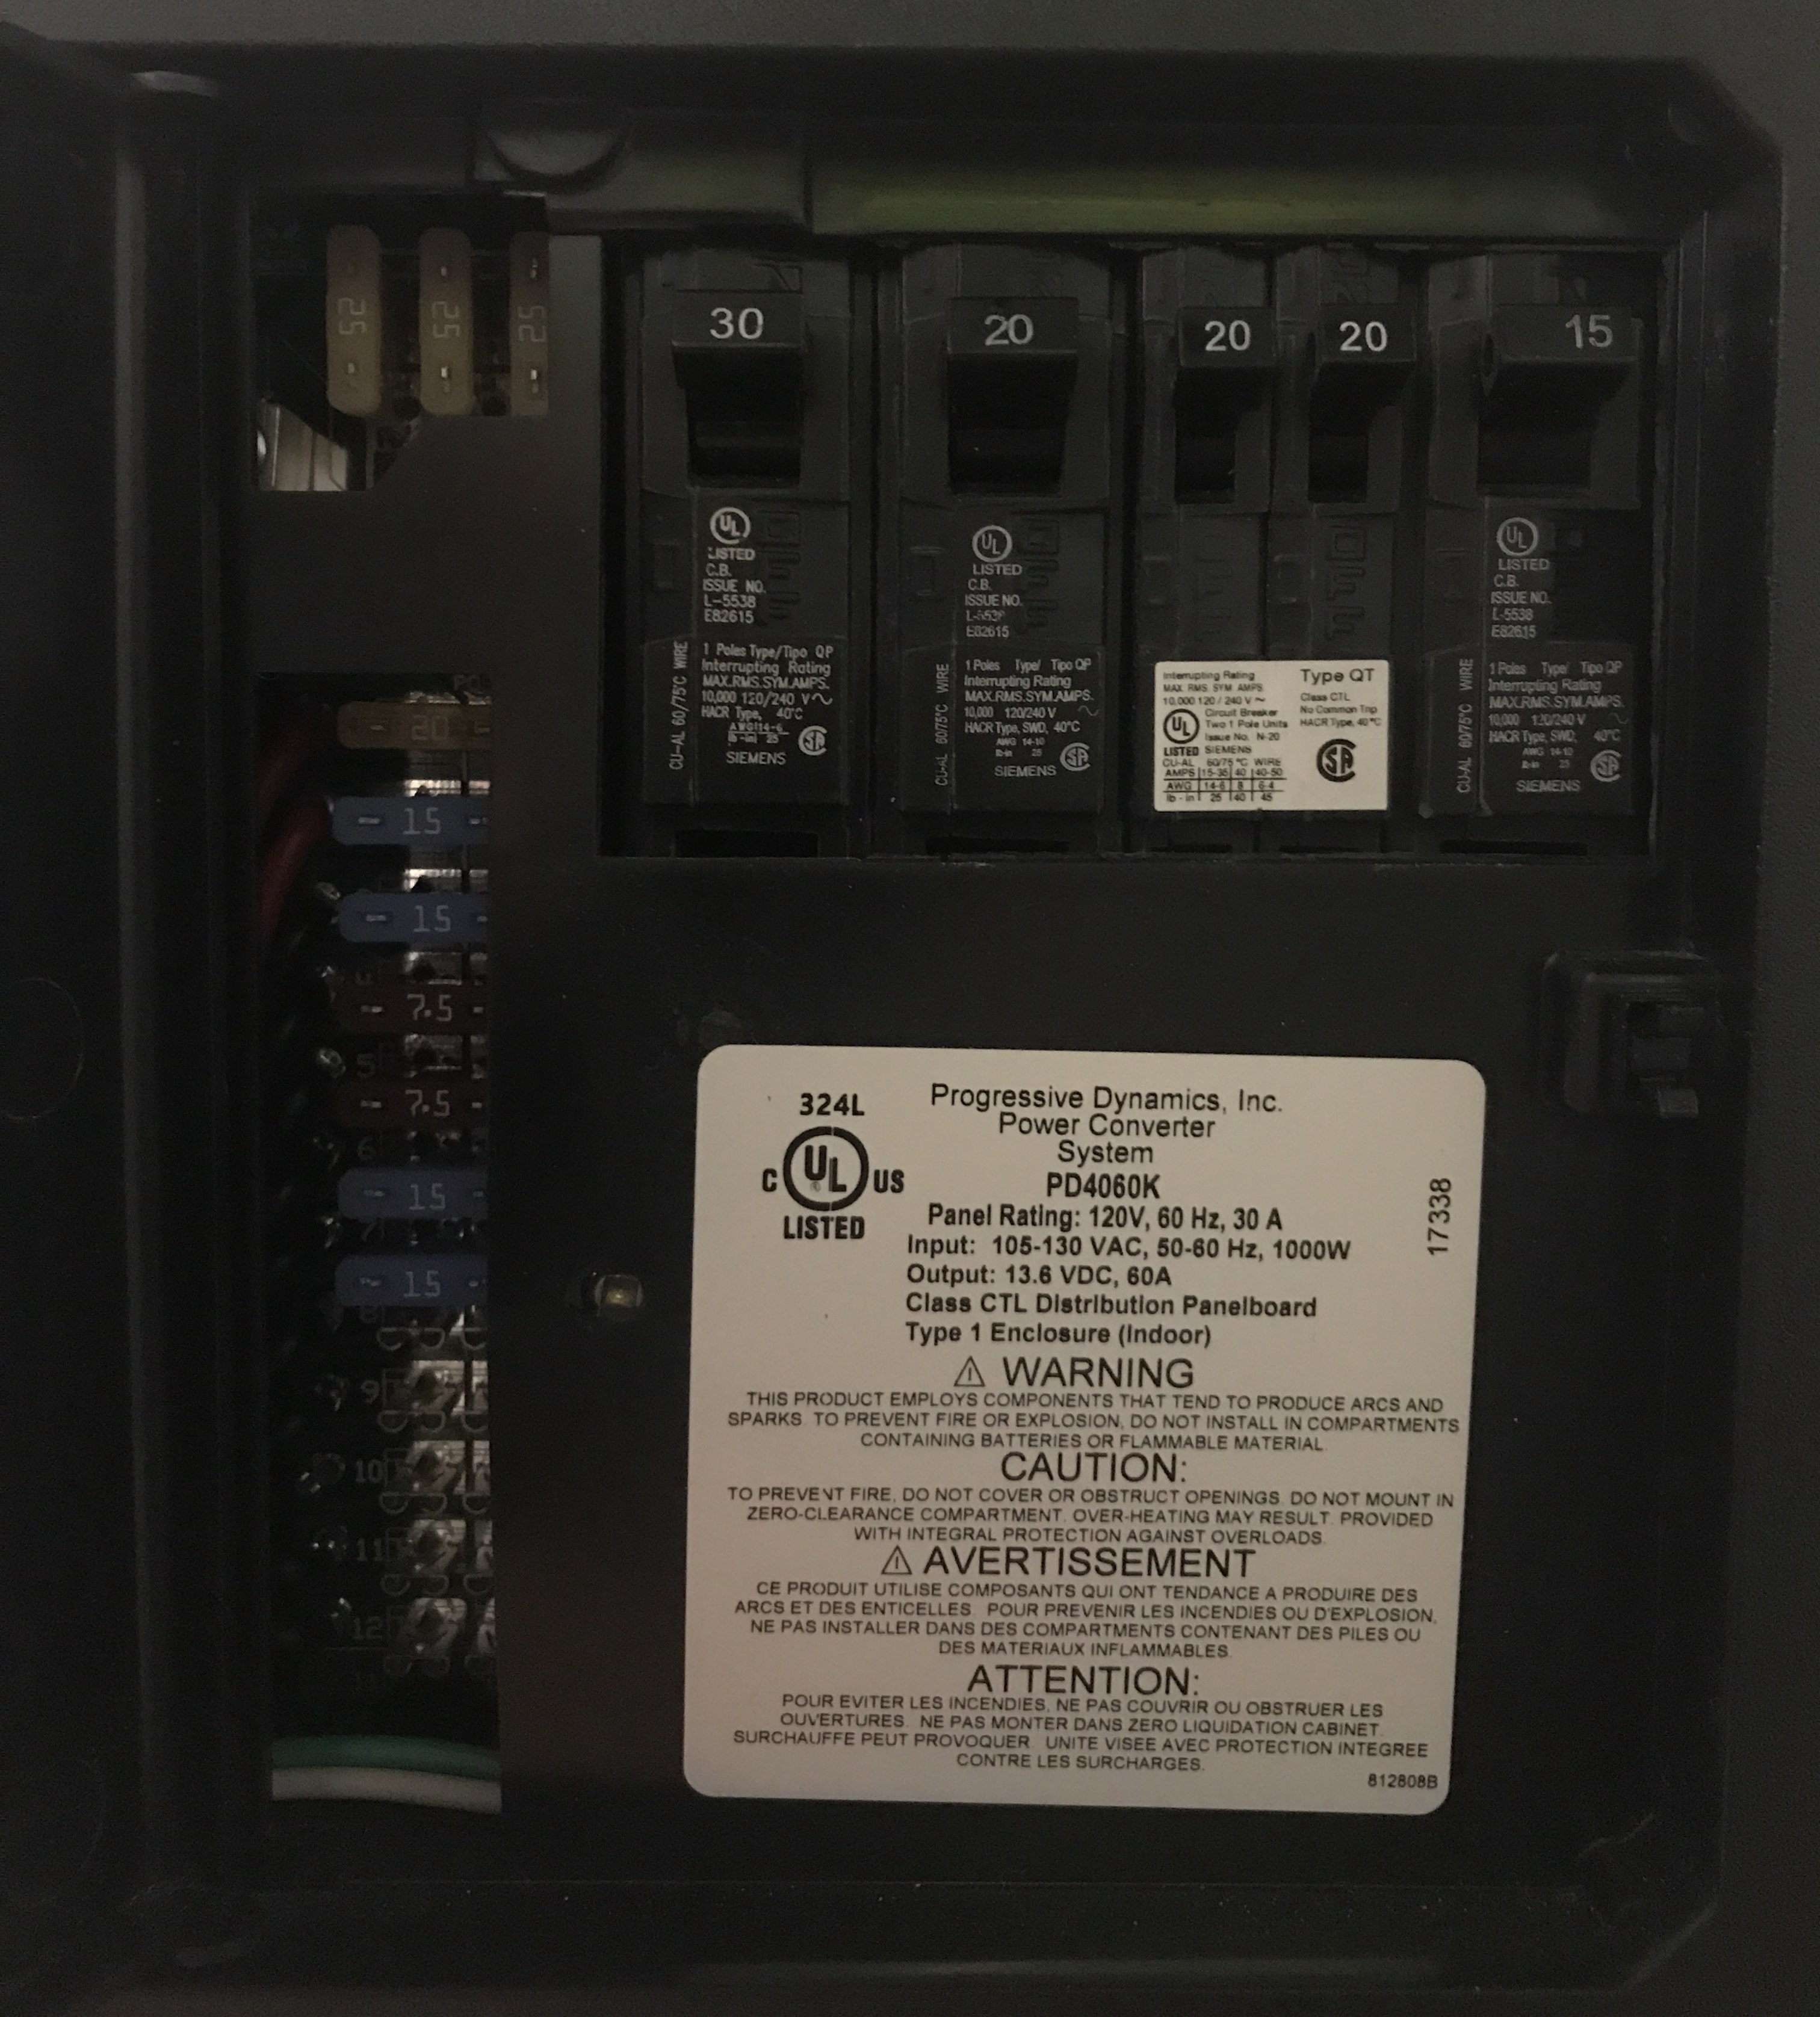
Agreed 100%, it is easier to swap the pump assembly, and repair the bad one later and use that as your spare. If the pump quits you will not be in the mood to fuss around with diagnosing things. But always check for 12 volt DC power at the pump connector before changing parts, it may just be a blown fuse., which only takes a couple of minutes to change. If you carry spare fuses.... John Davies Spokane WA1 point
-
After several experiments with leveling, we have found this process to work for us, allowing us to set up quickly: 1. Check the lay of the land to estimate the best place to place the trailer tires. 2. Place the trailer there and check the side-to-side level with a Stanley 42-324 24-Inch I-Beam 180 Level on the bumper. 3. If one side needs lifting, roll back or forward a foot or a little more to place the Andersen levelers under that the trailer on that side. 4. I roll up on the Andersens while my wife observes and then checks the level telling me to pull forward, back, or stay put. 5. Once, level, we chock with two Camco 44414 Wheel Chocks and one CAMCO 44652 WHEEL STOP CHOCK. 6. We use four or five Lynx Levelers to form a block for the stabilizer jacks so the jacks do not have to reach the ground and, if we make a big error by driving off without retracting the jacks, we don't damage them. 7. Use the front jack to level front to back. It is interesting that we found the best place for us to place the level when doing this is atop the top refrigerator vent cover. It can be set in place by placing one end in the handle used for entering and existing the trailer. 8. Use the rear stabilizing jacks to fine-tune the side-to-side leveling. Also interesting, when ascertaining how level we are, is that we hang a dog leash on a suction hook right by the door. It is easy to see how level the trailer is front to back by how parallel it is to the side of cabinet holding the microwave and refrigerator. In addition, if the bathroom door can stay open at about a 45-degree angle--not swinging street side or curbside, open or close--we are confident that the trailer is level.1 point
-
John, Does the regulator you recommend continue to regulate pressure even when the flow is zero? I've looked at the regulator you linked (and a lot of the same type on Amazon) and they do not say whether the regulation continues to work at zero flow. If not, then the connections downstream of that regulator (possibly within the rig if connected to the city water inlet) are going to see unregulated pressure at zero flow.1 point
-
that looks great!1 point
-
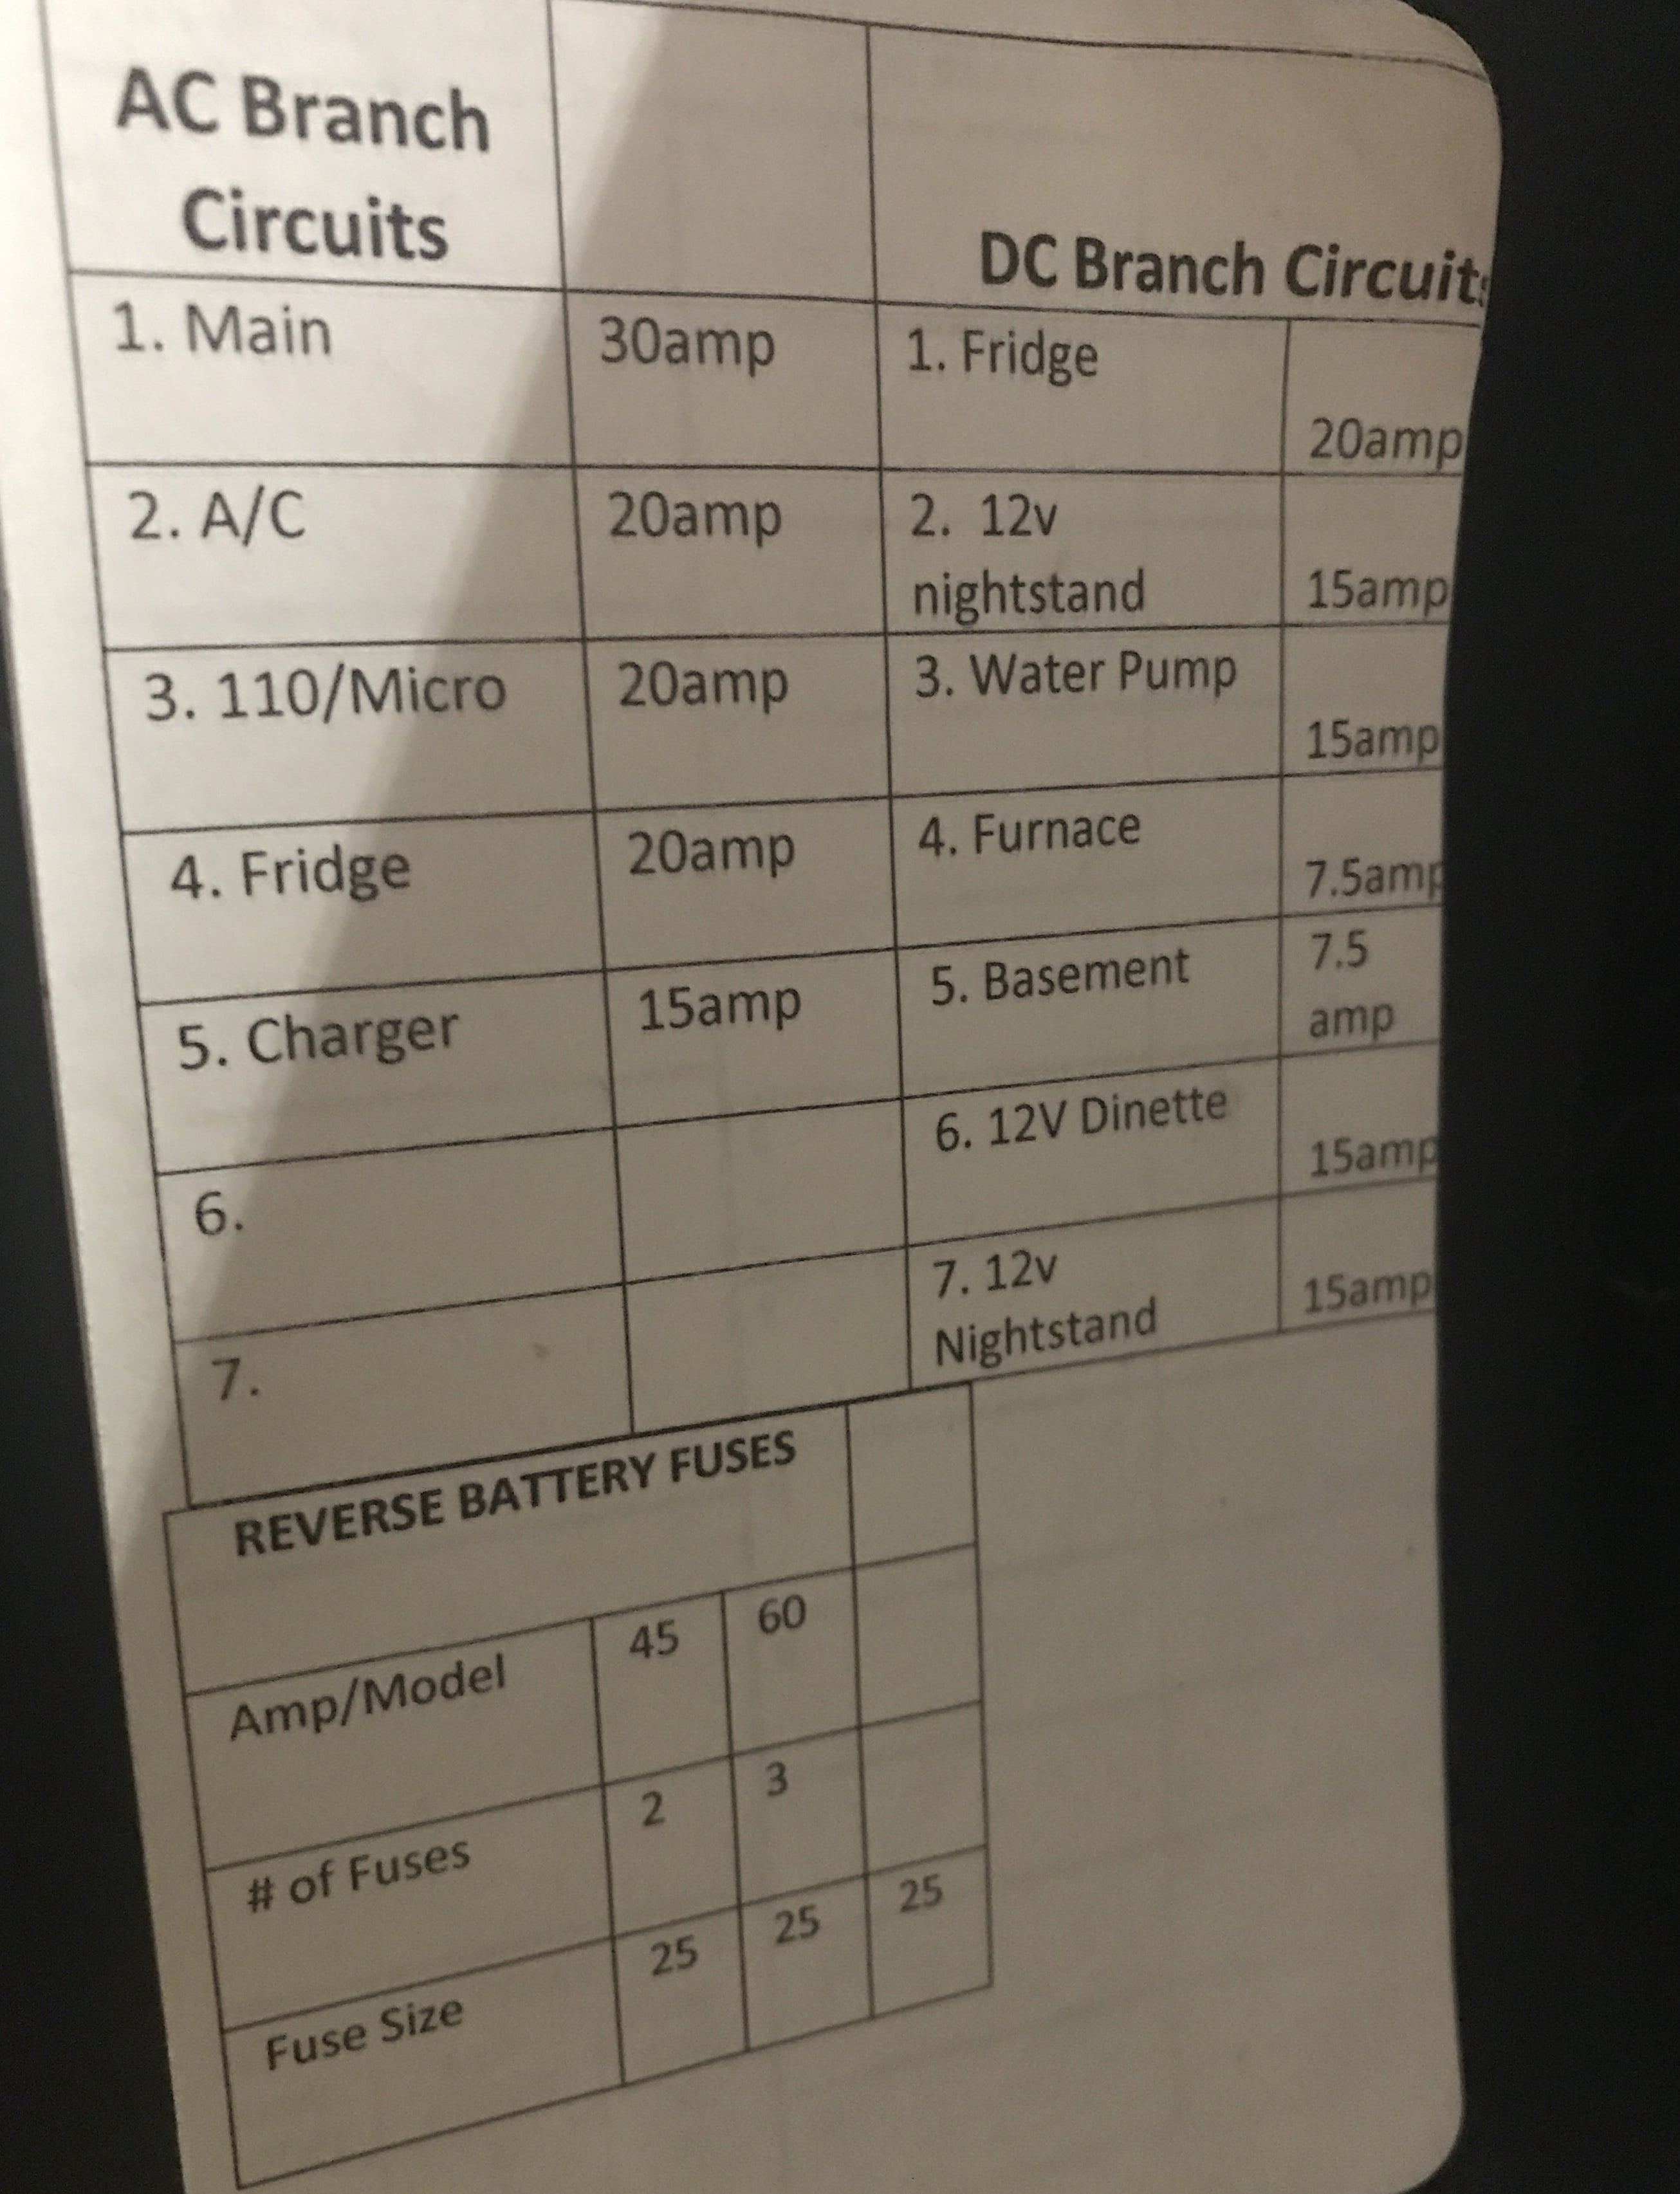
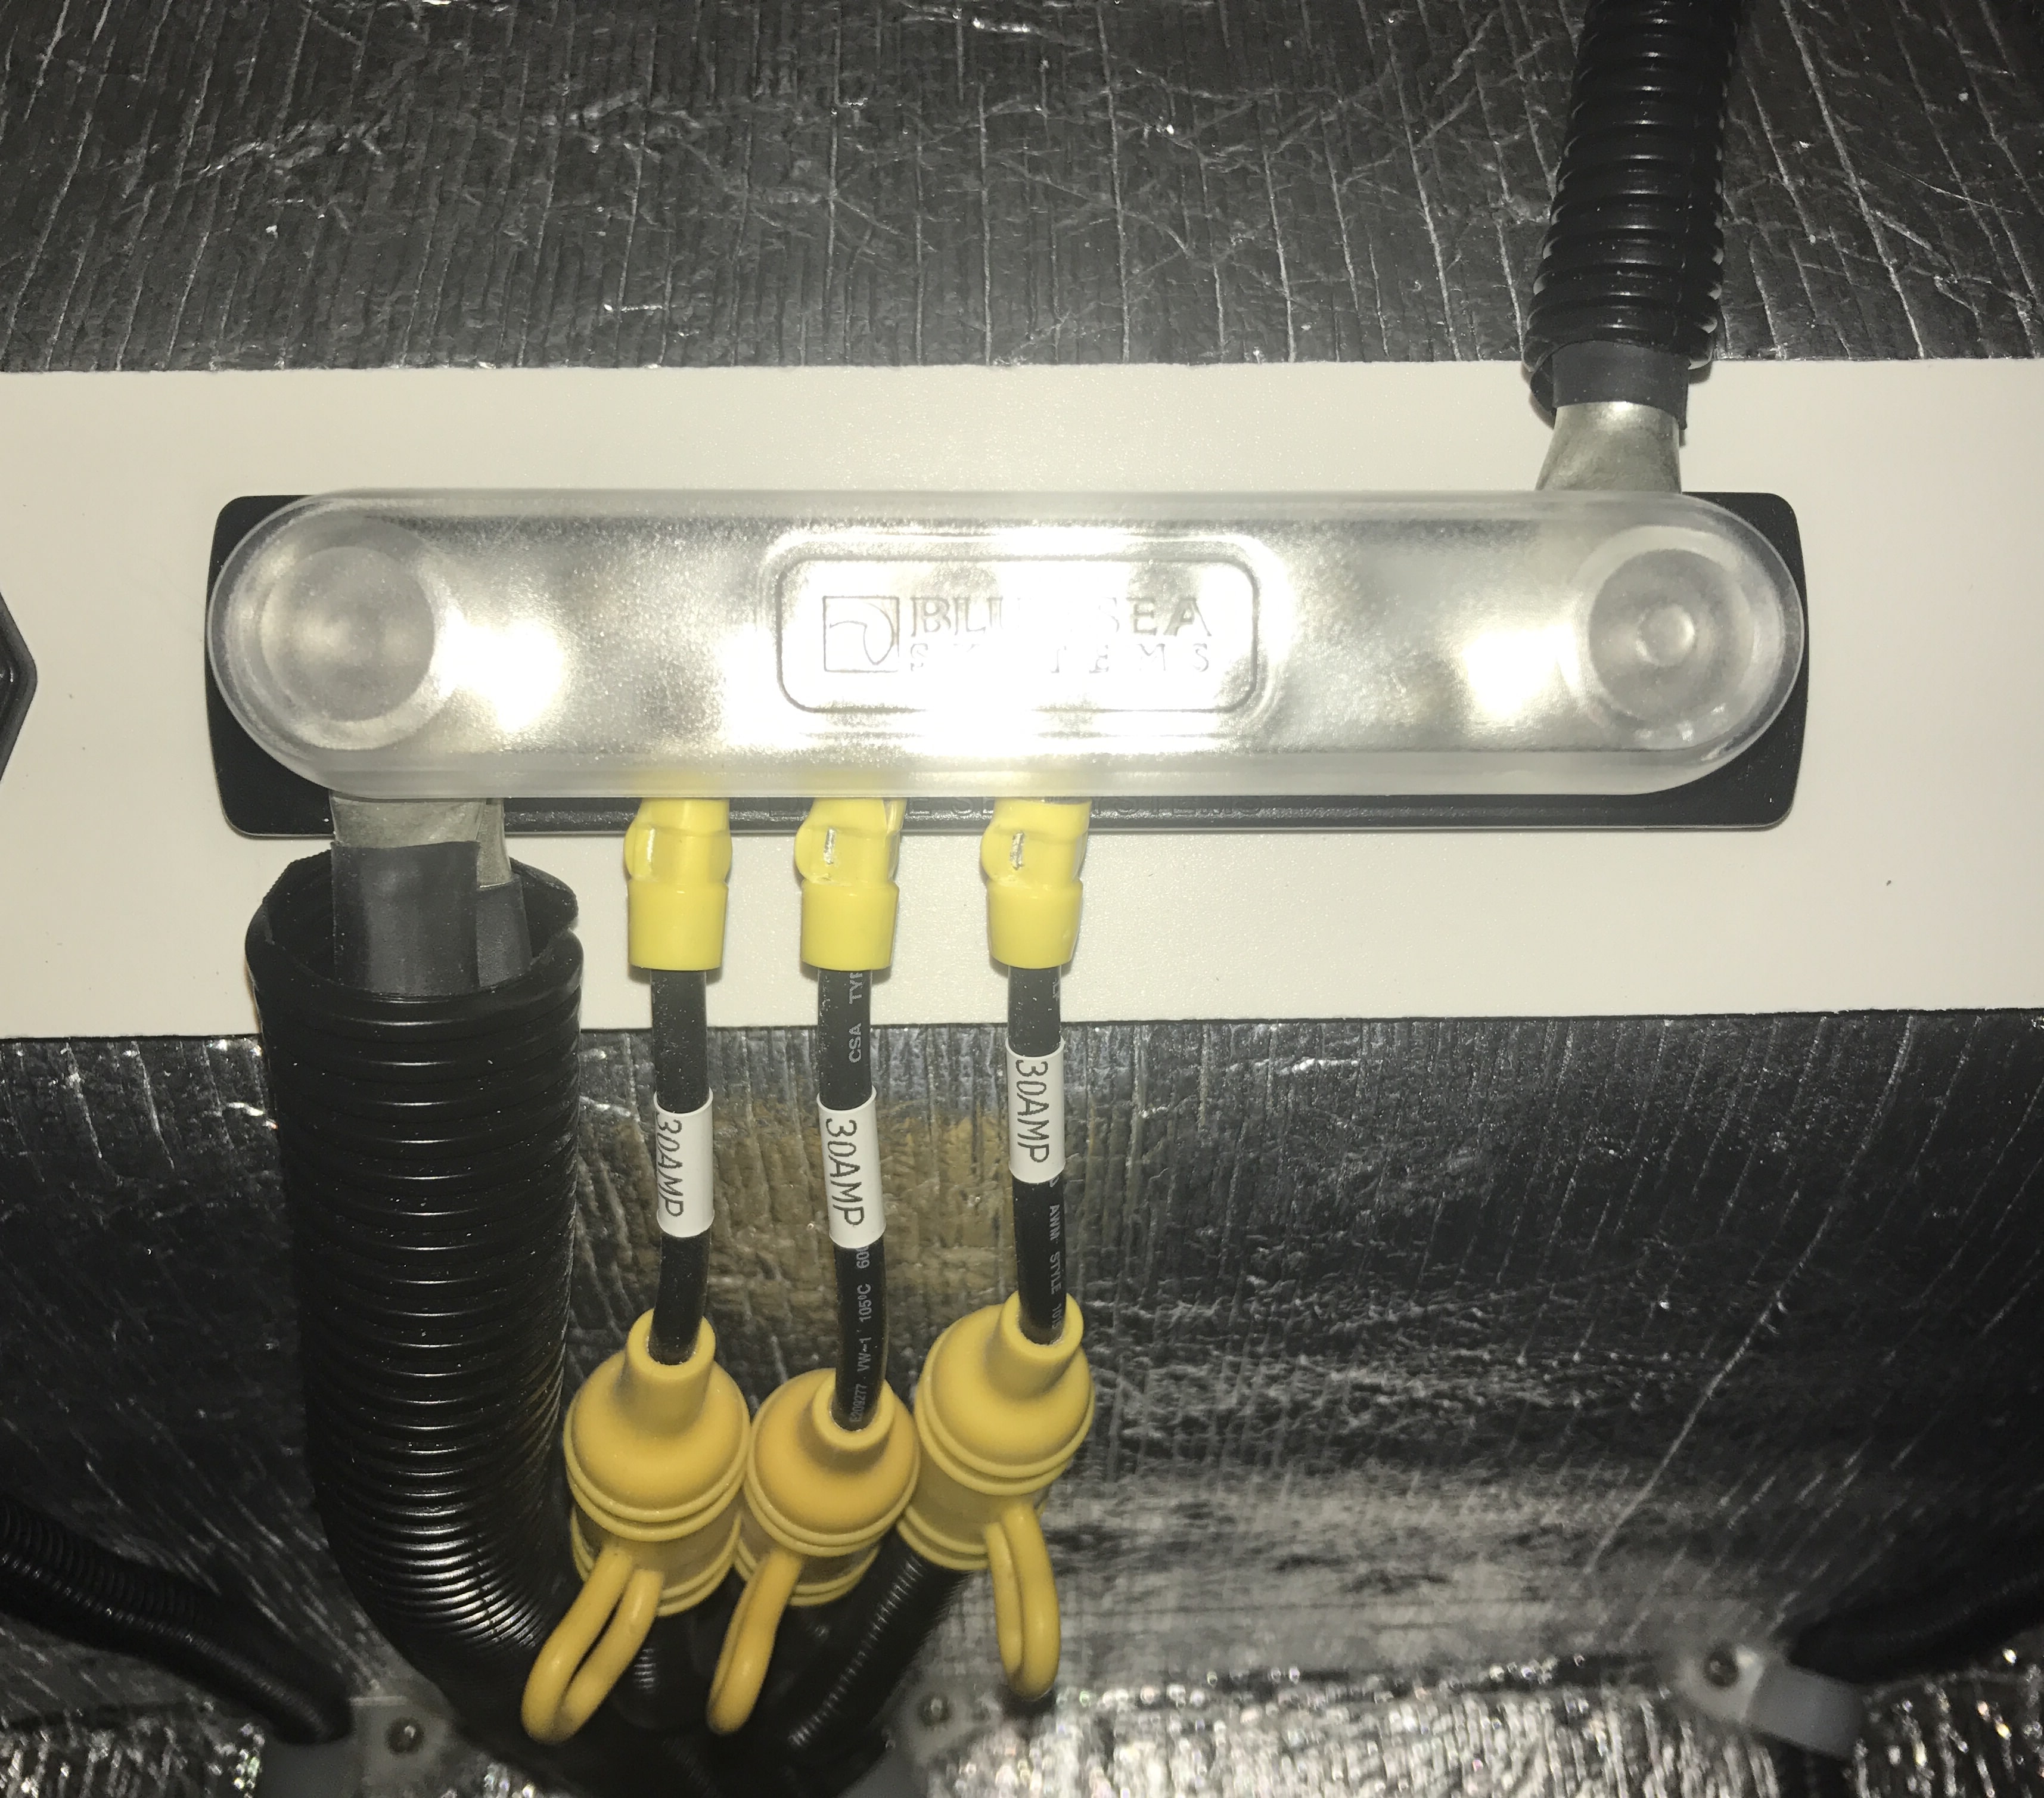
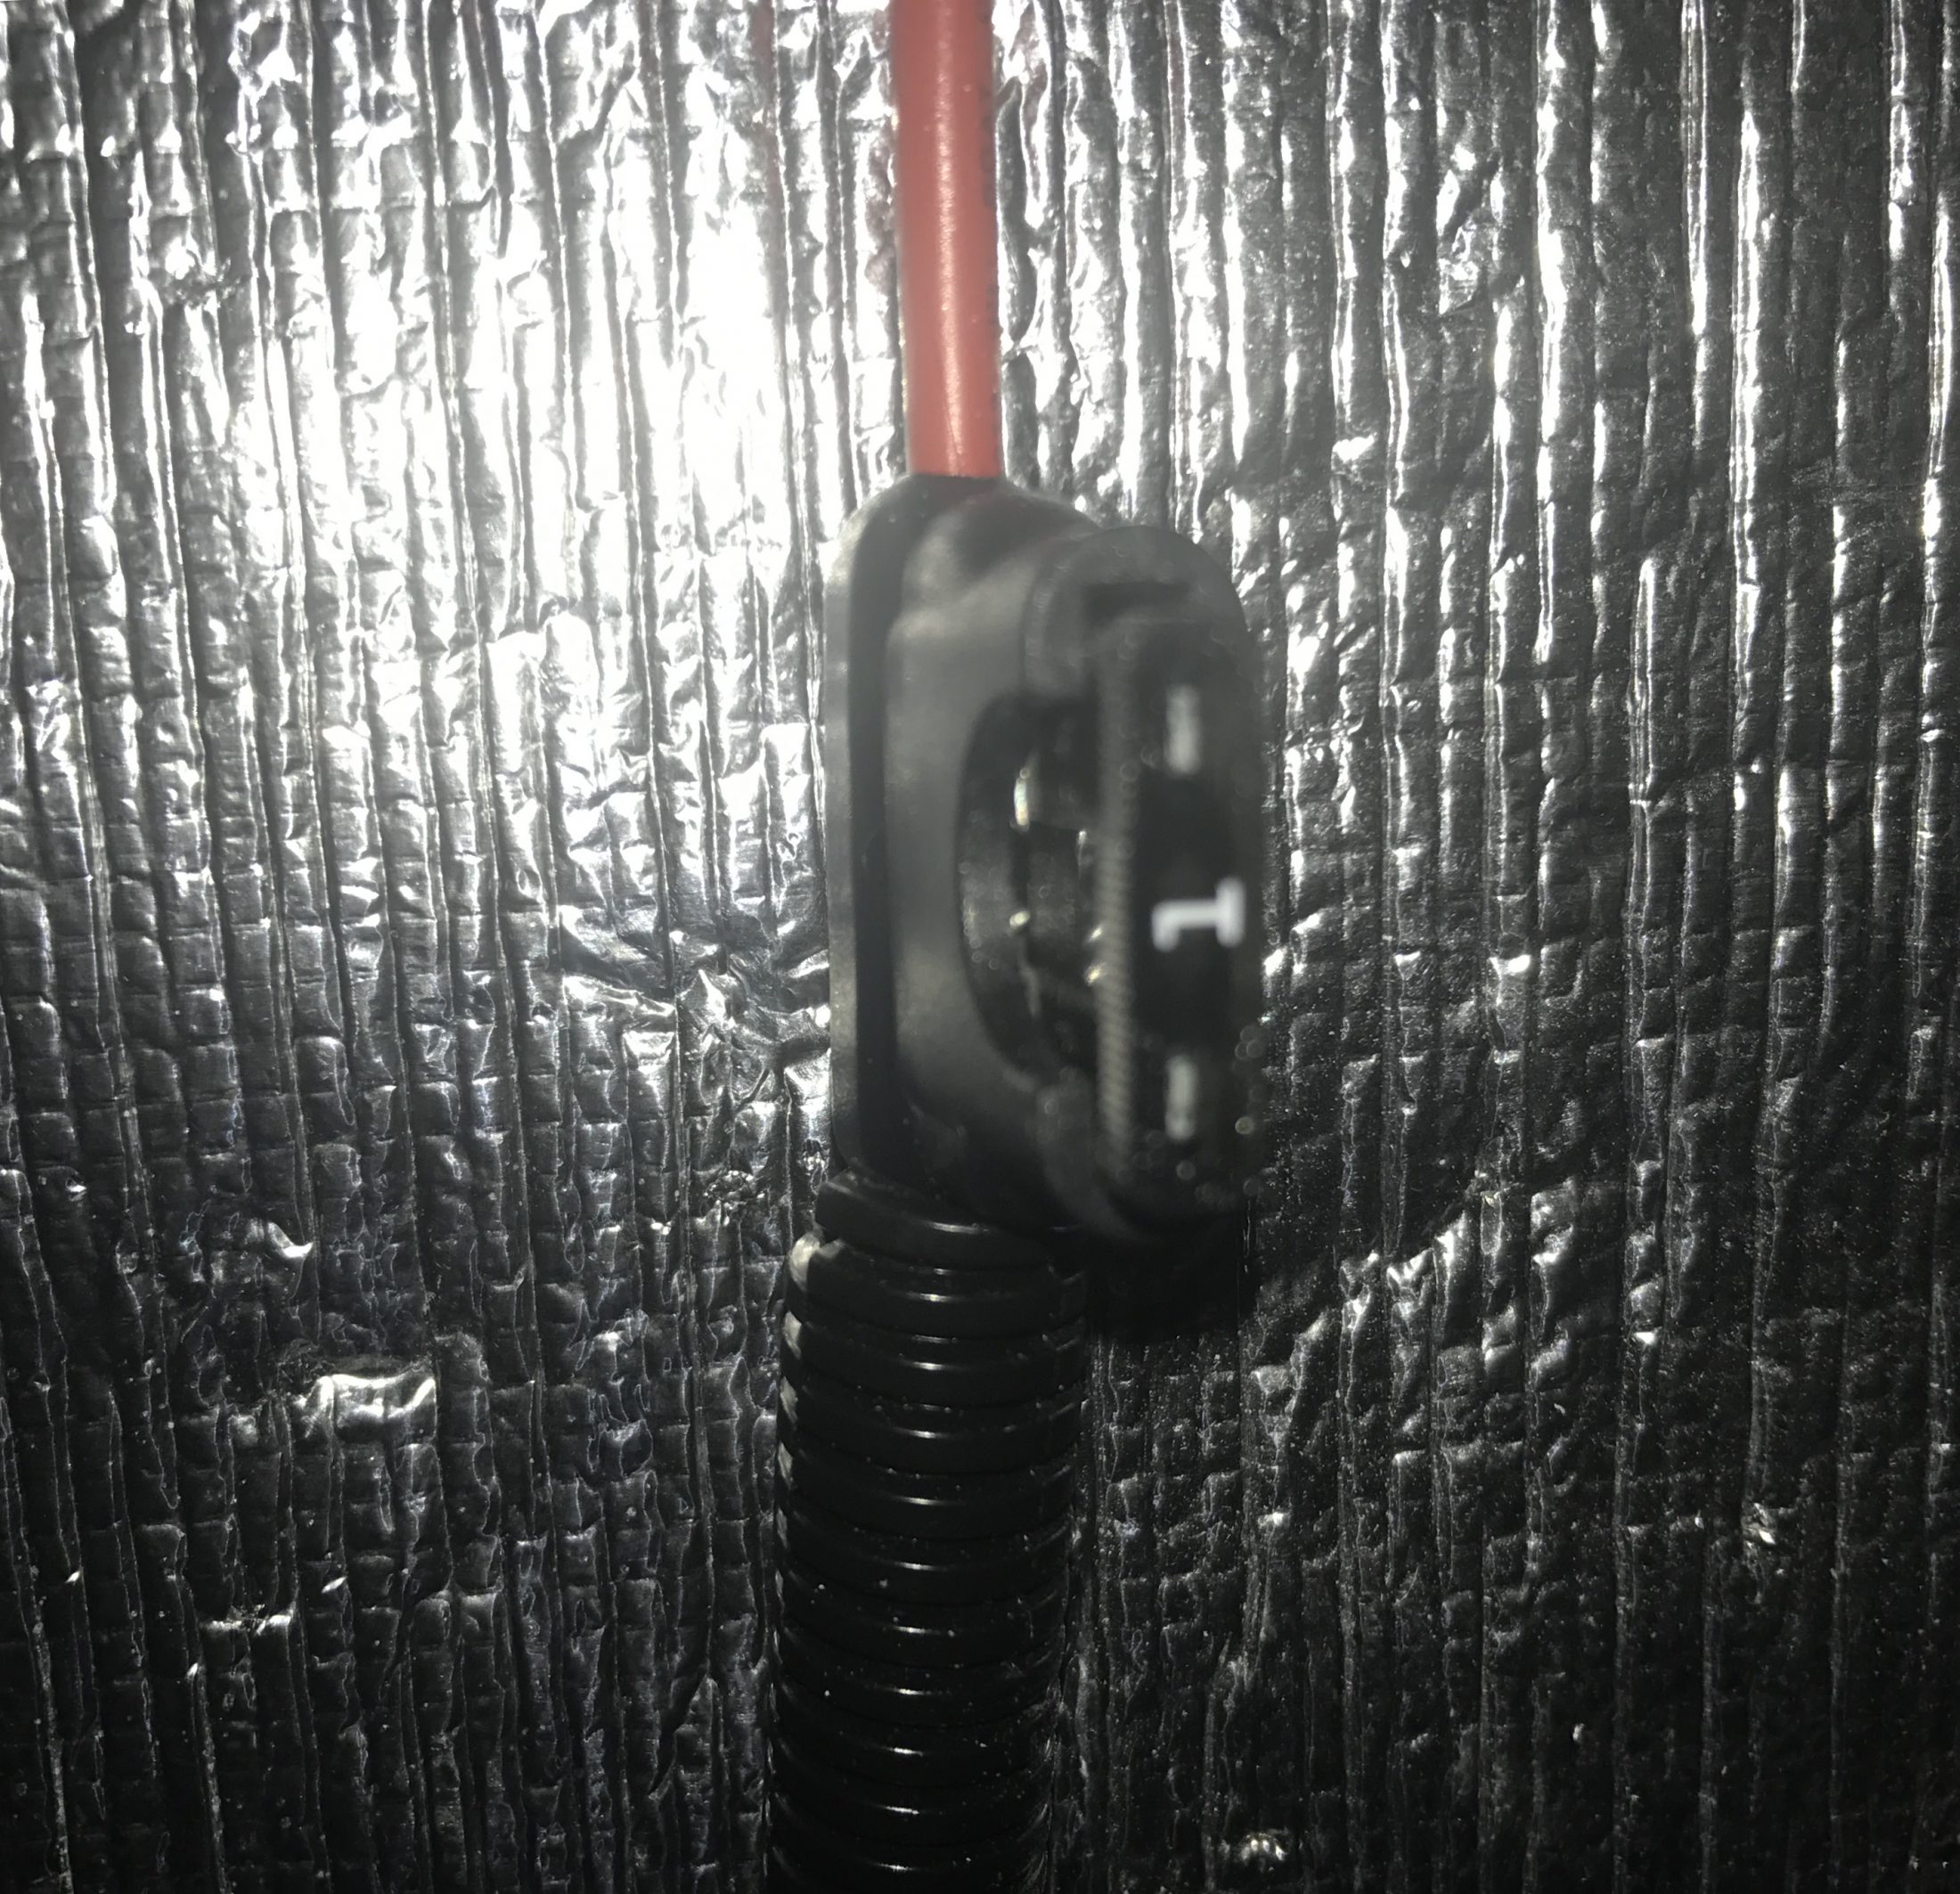
In the back attic Under the dinette Jack fuses under street side bunk. Also one more of these below the front jack. Also under street side bunk, CO /LP detector 1 amp fuse
1 point
-
John Davis had a nice retro fix for that same issue1 point


-
Recent Achievements
-


")


")


")


