
Leaderboard




Popular Content
Showing content with the highest reputation on 05/23/2020 in all areas
-
This short video was just published. It highlights the small town of Brevard, NC which is located just southwest of Asheville, NC and is a short distance from the Blue Ridge Parkway. Perhaps it is really not so different from so many places in this great country but it is where I call home. https://www.youtube.com/watch?v=x2b8EkeQn1c&feature=youtu.be Bill4 points
-
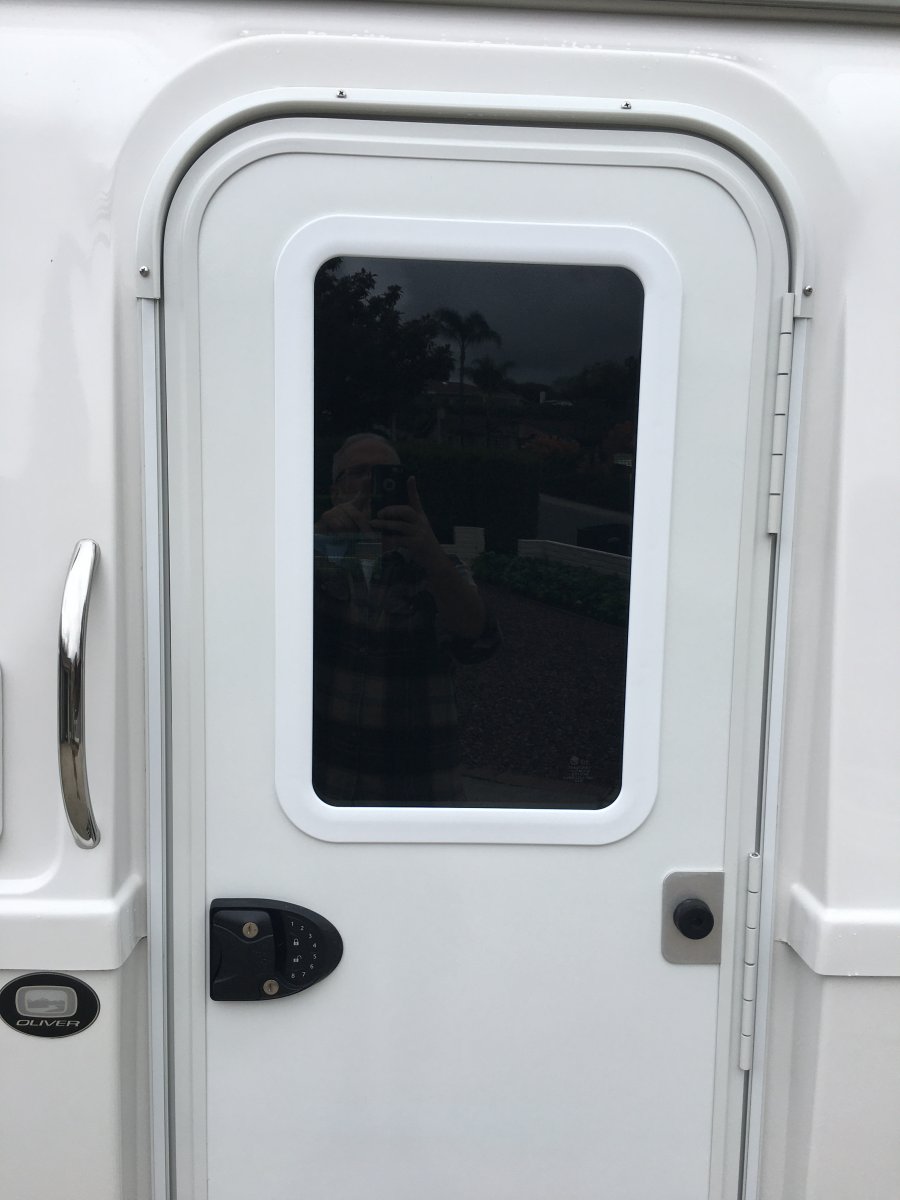
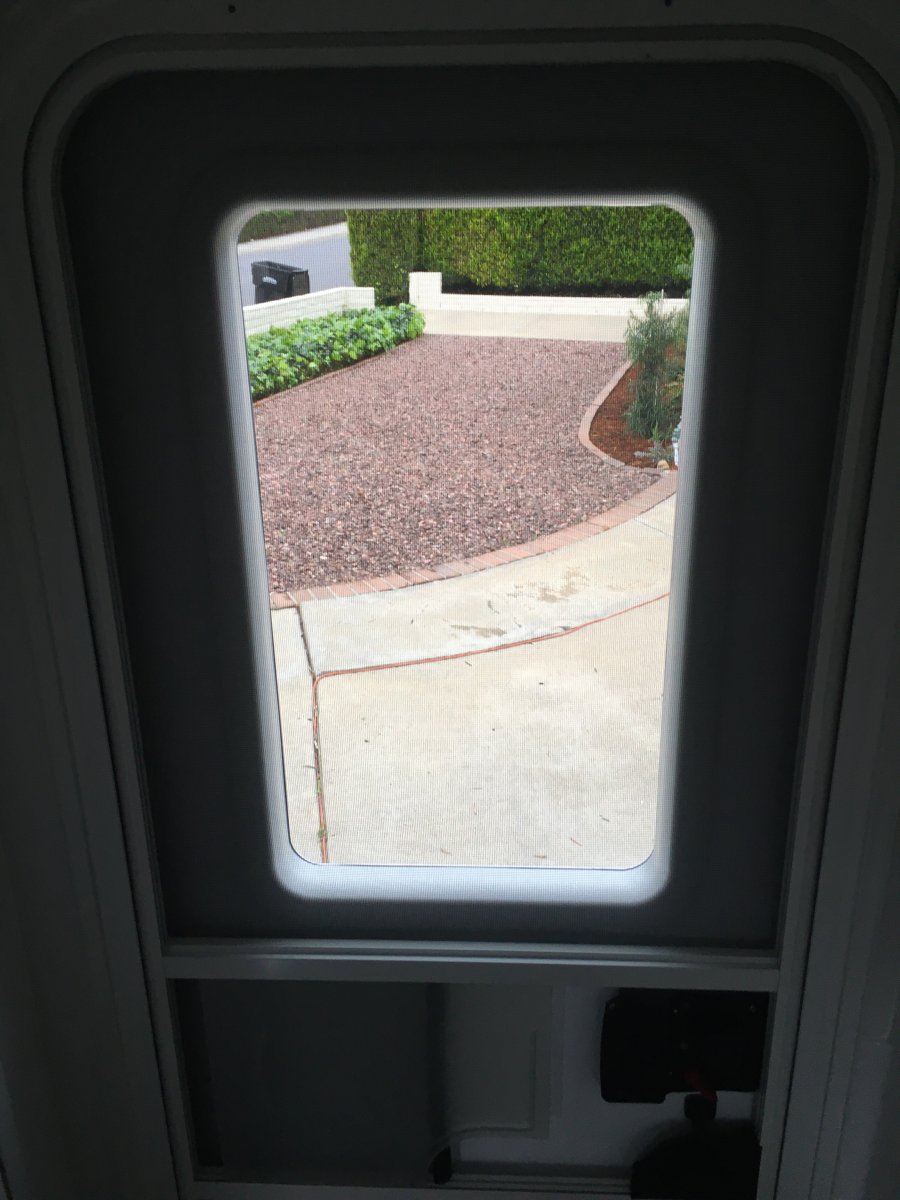
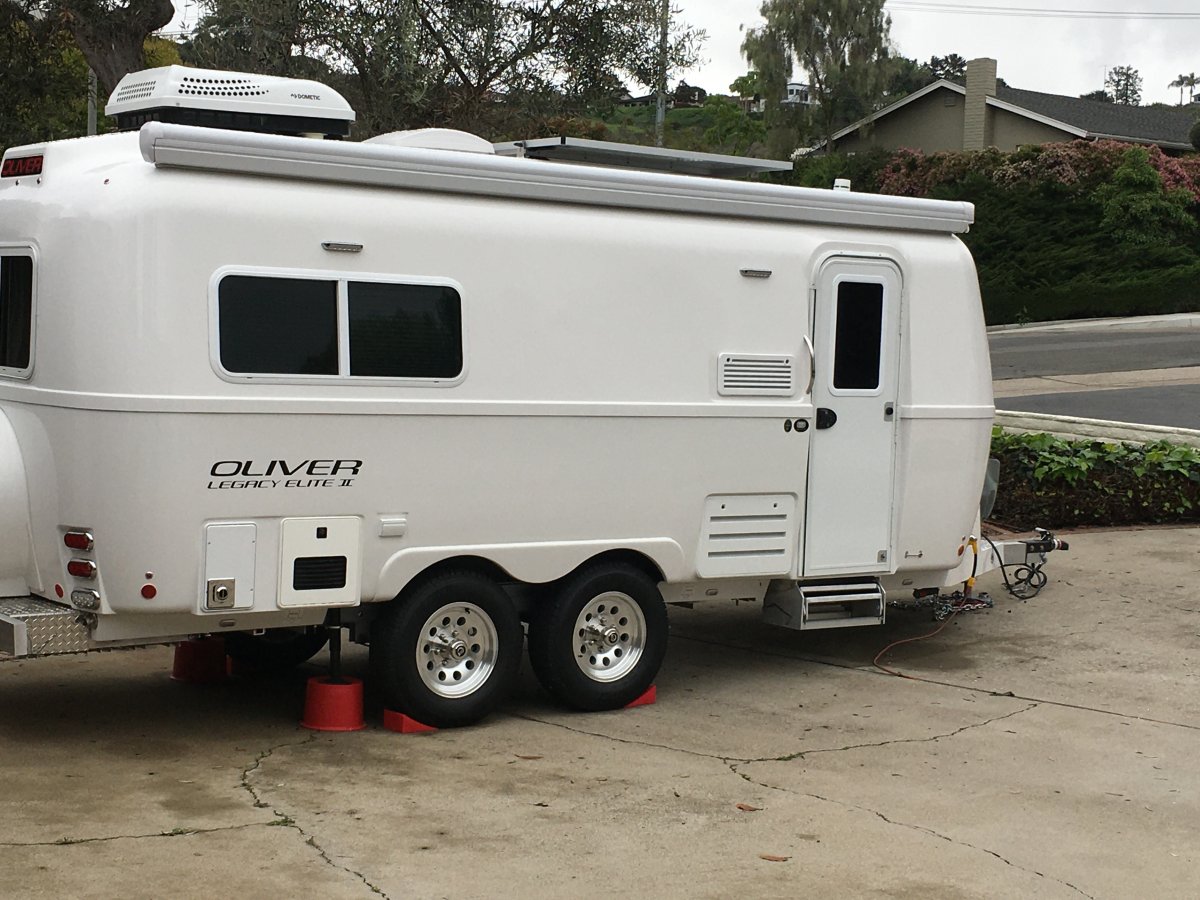
I did the install of this new window and shade this morning. The only item that is not covered in the instructions concerns the safety glass "label" that is etched into the new tinted glass. This label side of the glass should be placed toward the interior of the Oliver. I chose to place it in the upper left hand corner thinking that it would be a bit less apparent there as opposed to the lower right. I also made sure that I taped the exterior frame very well before starting the install since I was working by myself AND, if I could manage it, I didn't want to have to remove the exterior window frame from the door (this not only saves some work but doesn't disturb the existing seal on that part of the window). This worked well other than my being a bit nervous that somehow the tape would not hold and I'd drop both the frame and window. The new window fit exactly like the old with no gaps and the shade fit very tightly to the edges of the window. Now I am able to see outside the door with having to open the door and I can adjust the shade (open/closed) from the inside without opening the door. Bill4 points
-
So these were the two brass connectors, and you can see the full split down the length of them. Oliver was very responsive and got me the parts quickly. I finally got around to changing them out yesterday. It was a tight spot to work in, but honestly the most frustrating part was trying to wrap the plumbers tape around the threading of the intake in such a tight space - that stuff twisted and stuck to everything but the threading. Took about 2 hours total, but we are back in business. Thanks everyone for your input.
 3 points
 -
topgun2, I’m glad you finally got that window and shade installed. Did you beat the installation expiration date? I know it must have been close.😅 And you’ll probably catch more fish this summer, cause the trout won’t be able to peek in the window and see what type of flies your tying. Mossey
2 points
-
We were able to reach out to Calmark covers and ask how they recommend cleaning the cover. We hope this helps anyone owning a Calmark. Here is there reply- Thank you for checking with us on the proper way to clean and care for your cover, I have attached some sheets on cleaning the fabric, I also included a stain chart as well. Normally, you can gently hose down your cover to remove any surface dirt. You can use a Dawn dishwashing fluid and a rag or soft bristle brush. Then, gently rinse with water again. It is NEVER safe to put your cover in a regular or industrial washing machine. They can damage the fibers of the fabric and remove items that the fabric was originally treated with, such as those that protect against UV Rays, mold, mildew and the overall water resistance. There is also a company called 303. They make a biodegradable product used to clean Sunbrella. They also make a spray that you can use to retreat your cover for water resistance. It is a good idea to clean, then retreat, about very 1-2 years. For a specific type of stain or spill, please refer to attached chart provided by Glen Raven. DeAnna Martinez Sales/Customer Service CalMark Cover Company (800) 838-72362 points
-
Yup Landrover, it is a great place for a Lobster rally!!! Once this Covid 19 is under control we would be able to do something like that. This is a great area; beach, boat launch, several lobster pounds near by and the Pemaquid Light House. Lots to see and do. We have a converted lobster boat in the harbor and see the lobster boats fishing all day from the house. There are campgrounds in the area (one on our street) and we could host one or possibly 2 Ollies in the barn driveway. We go camping in the winter down south as I cherish our summers here. If folks are in mid-coast Maine please feel free to contact us. We are about 1 hour north of Portland. We feel very fortunate. Thanks2 points
-
We often want to be able to look out our door window, as it is the tallest window in the trailer and would be the easiest to look out of while standing. (I'm 6'5") After wishing for a clear window on the door for some time, I decided to trade it out for a smoked see through window. The glass was ordered through the LCI, the OEM of our windows. ($44.95 for the tempered glass and $20.95 for the 16 very overpriced "window keys" require to remove the interior window frame.) The installation was simple and we think the mod is great. We love that we can now see out the window and use it all of the time. I am reaching out to share the mod for anyone who may be interested and ask for ideas for a innovative window treatment that aren’t easily found on the internet. Thank you for any ideas you may have! Andrew
1 point
-
Landrover - I didn't take any pictures of my install because I thought that it was already fairly well documented via the video that is linked on the Zarcor website or this one: https://www.youtube.com/watch?v=KV441-B4gMQ If you need any additional info, just PM me. Bill edit - forgot to mention - there are 16 screws in the inside frame of my door window - these screws are what holds the outside frame, inside frame and window together with the door "sandwiched" in between.1 point
-
Bill, I’m glad your window was a good fit, like I mentioned I had to shim mine up about 1/8”. It’s been one of the most useful mods! Mike1 point
-
sgcausey - While the CalMark cover is not waterproof, it is fairly water repellent. Given that, while it does "breath" I'm sure that the airflow through it is not very good. Therefore, I have never left any vents (MaxAir or bath) open while in storage. However, to control humidity inside the Ollie I have used a combination of a product called "Damp-rid" along with a renewable desiccant (renewed by plugging it into a 110 outlet a couple of times over the winter). I also make sure to use crumpled newspaper in the fridge and leave the fridge and bathroom doors open, and I remove my sleeping mattress but leave the dinette cushions in place. With these precautions I've never had any odors. Bill1 point
-
I have seen Sir Mossemi's set up, it is a good one, and I have thought about a similar set-up. I considered building the lower section out of appropriate sized aluminum tubing, and mounting a 2 bike assembly, on a hinged "wing" that protrudes over the doghouse. I settled on putting my carbon road bike inside the camper top, mounted appropriately, and the two MTB's on the "semi "Oliver rear bike rack in the rear. I am trying very hard to refrain from making stuff "better". I'm on to baking sourdough bread on a grill - now that has benefits. Happy Trail all.1 point
-
If the speaker issue is when watching TV check the cables on the back of the television. We had one come loose and we lost audio on one side. Mike1 point
-
A wire tracing tool can be invaluable for isolating problems like this. This exact one is available with different branding from other sources like HD and Lowes. https://www.amazon.com/Sperry-Instruments-ET64220-Installers-Must-Have/dp/B00279JLBQ?ref_=fsclp_pl_dp_4 Clip the positive and negative leads to the speaker connections in the plug from the back of the radio and the speaker should reproduce the tone generated by the transmitter. With careful adjustment of the receiver, you should be able to isolate a faulty connection point. But, since there are only two crimp terminal points (quick connects at the speaker and butts in the harness behind the radio), just give them a yank. Also, before you remove the radio head, pull the fuse for USB/12V outlets above the bunk. If these connections should come loose in the process of pulling the radio, they may short out . In any event, check these terminal crimps while you have access.1 point
-
1 point
-
I spent 20 year of my career as a business partner and the VP of Sales and Marketing at Yakima Racks. Hopefully I can add some value to this conversation. To begin, the Yakima engineering team never liked mounting bikes to the rear of trailers. This was unpopular with the engineers because of the long fulcrum and the leverage at the bumper of a trailer can act like a launch. The further the bikes are extended behind the bumper the more dramatic the effect. The forces here are magnitudes greater than anywhere else you can attach gear to your rig. Anytime your trailer bucks or goes through a dip, the forces transferred to the bike/gear system are much greater than any other location. The bumper of a trailer is appealing because your gear is mostly out of the way and the access is really convenient. Unfortunately, the back of your vehicle is the absolute worst place for your bike’s drive train. Your chain and gears suck up girt like a magnet. Given other reasonable options, I would recommend to transport your bikes at a different location. There are many good brands/products available that can be safely secured your rig/trailer. If you want to mount bikes to the Oliver, I would favor the front of the trailer example provided by shallowgal in an earlier post vs the rear of the trailer. Below are the some general pros and cons for other locations you may consider securing and transporting your bikes and / or other gear. Top of your SUV/truck/camper shell • Bugs come into play on the front facing parts but the good news is the drive train will remain much cleaner than rear of the vehicle • Accessing your bikes on top of the car can be challenging • The forces on the bike and the rack system are modest • The bikes/gear is out of the way • Need to be mindful of overhead clearances • Allows for the option to transport boats and/or most other gear, even your solar panels • Theft security is modest Bed of Pickup with camper shell • Reasonable access to your bike • High function, low cost attachment systems available • Minimum of forces on bike or system • Can be a valuable space hog • The space is not as clean as you may think.. it’s hard to seal the tail gate on many trucks. This can be a tough location to keep your bike’s drive train clear of grit if you spend any time on gravel • Best theft security Open pickup bed with rack system that bridge over the bed • Functions much like roof racks • Does not impact pickup bed storage space • Easy access to your bikes and gear (standing in bed) • Bike drive train will remain reasonably clean • Bugs come into play like a roof rack • The forces on the bike and the rack system are modest • The bikes and gear are out of the way • Need to be mindful of overhead clearances • Allows the option to transport boats and/or most other gear, even your solar panels • Theft security is modest Rear of SUV / front of trailer • Does not impact other valuable storage space • Easy access to your bike and gear • Might hinder accessing rear of you vehicle • The forces on the bike and the rack system are modest • Terrible environment for your bike’s running gear • Theft security is modest Front of car (front receiver hitch application) • Most viable for larger trucks but are an option for some ½ tons and SUV’s • Does not impact other storage space • Easy access to your bike and/or other gear • Able to carry other gear • Can hinder accessing to engine / under hood • The forces on the bike and the rack system are modest • Bugs are in play • Bike running gear will remain reasonably clean but this is a tougher environment that the top of your rig • Theft security is modest1 point





-
Recent Achievements
-

















