Leaderboard


Popular Content
Showing content with the highest reputation on 04/01/2022 in Posts
-
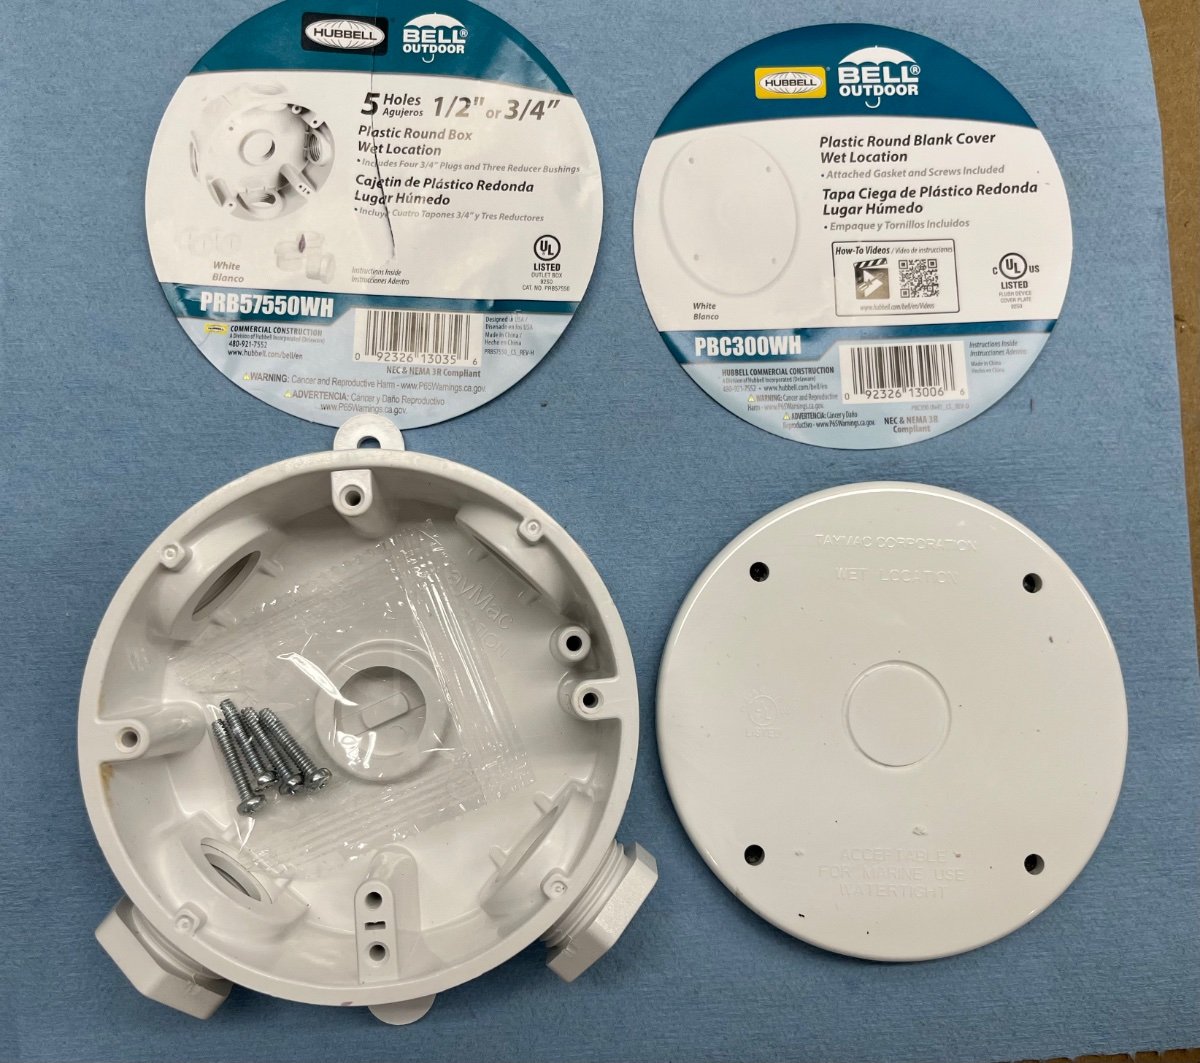
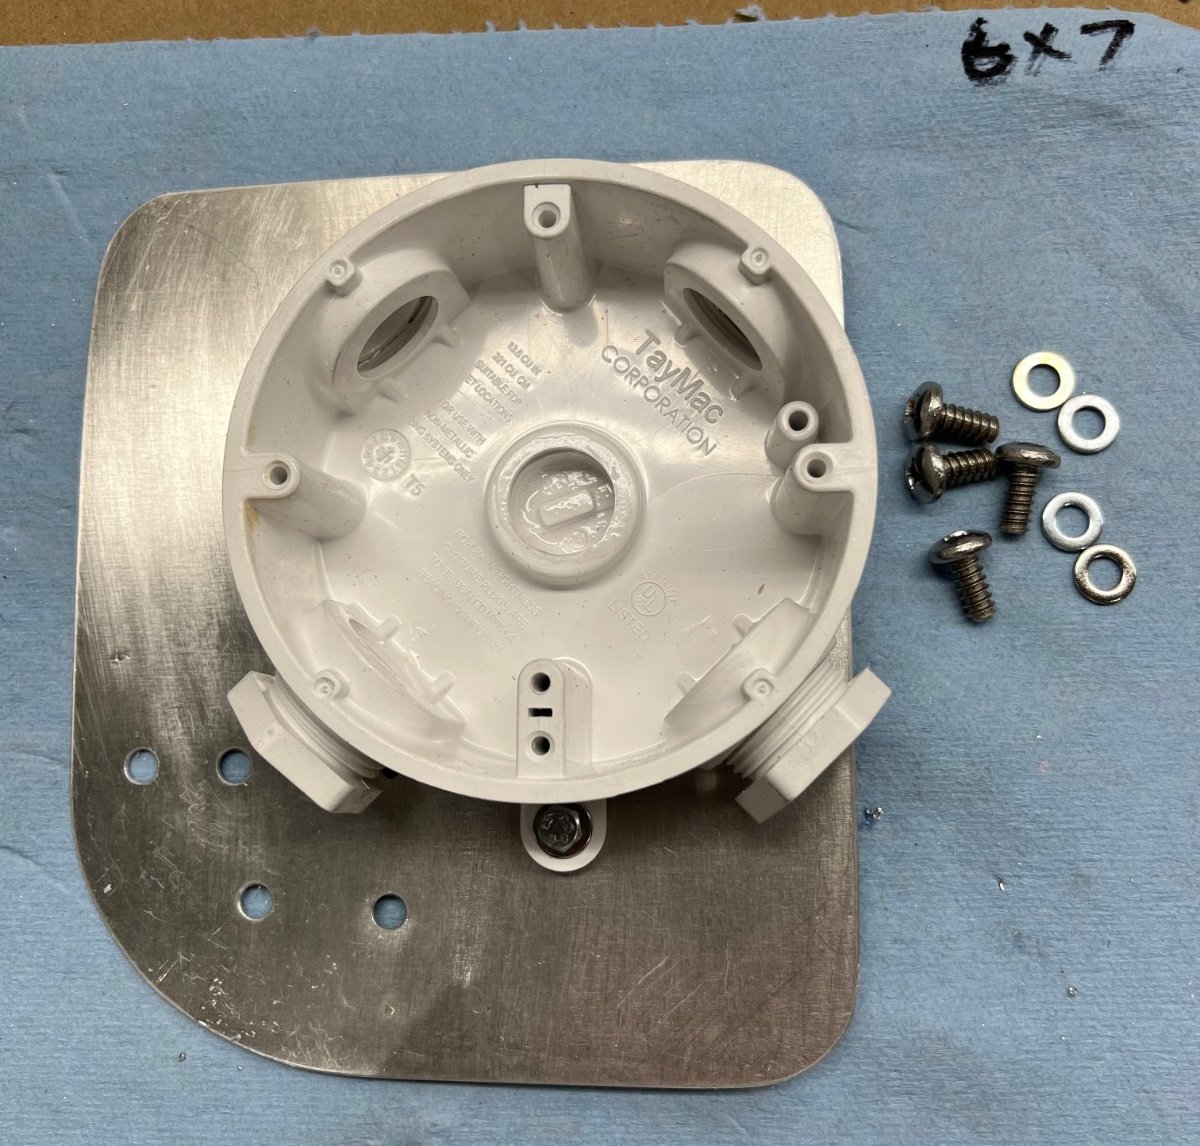
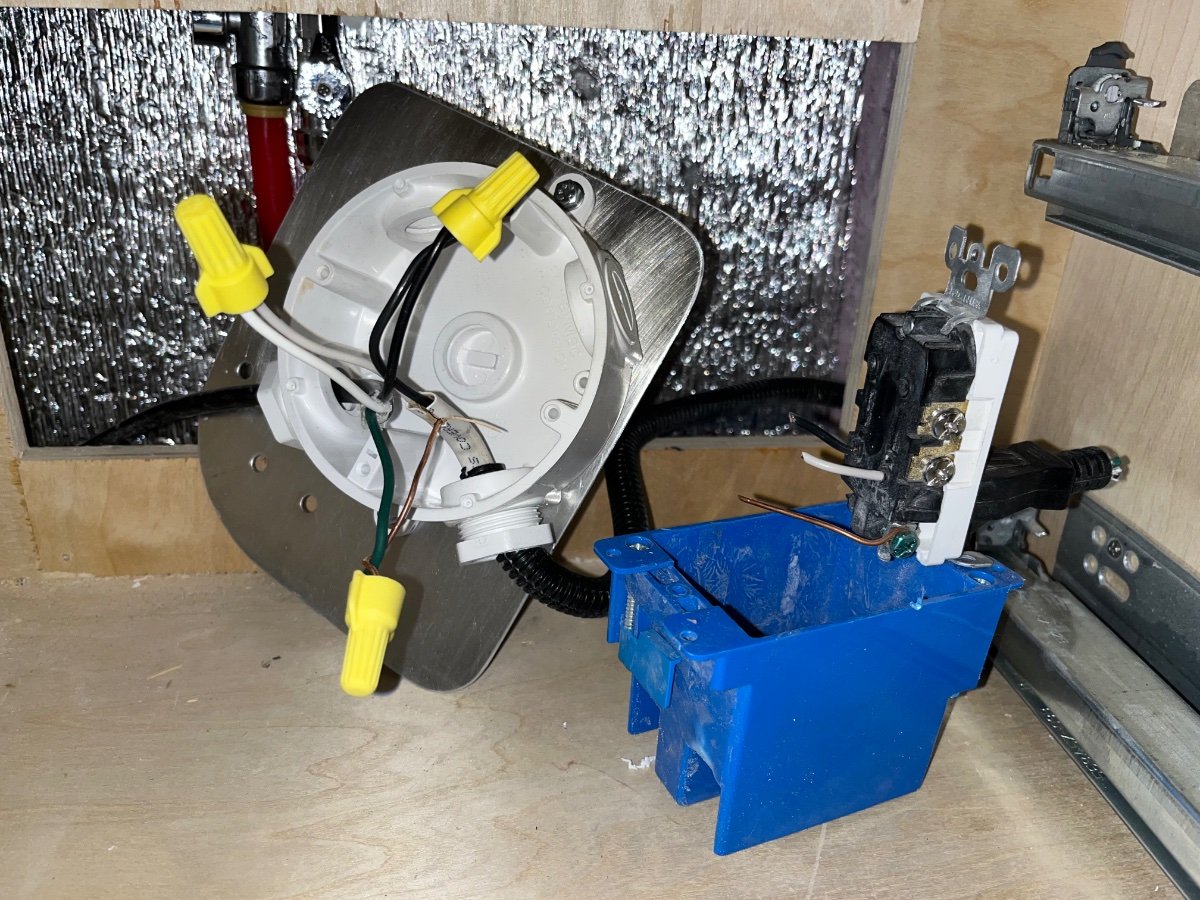
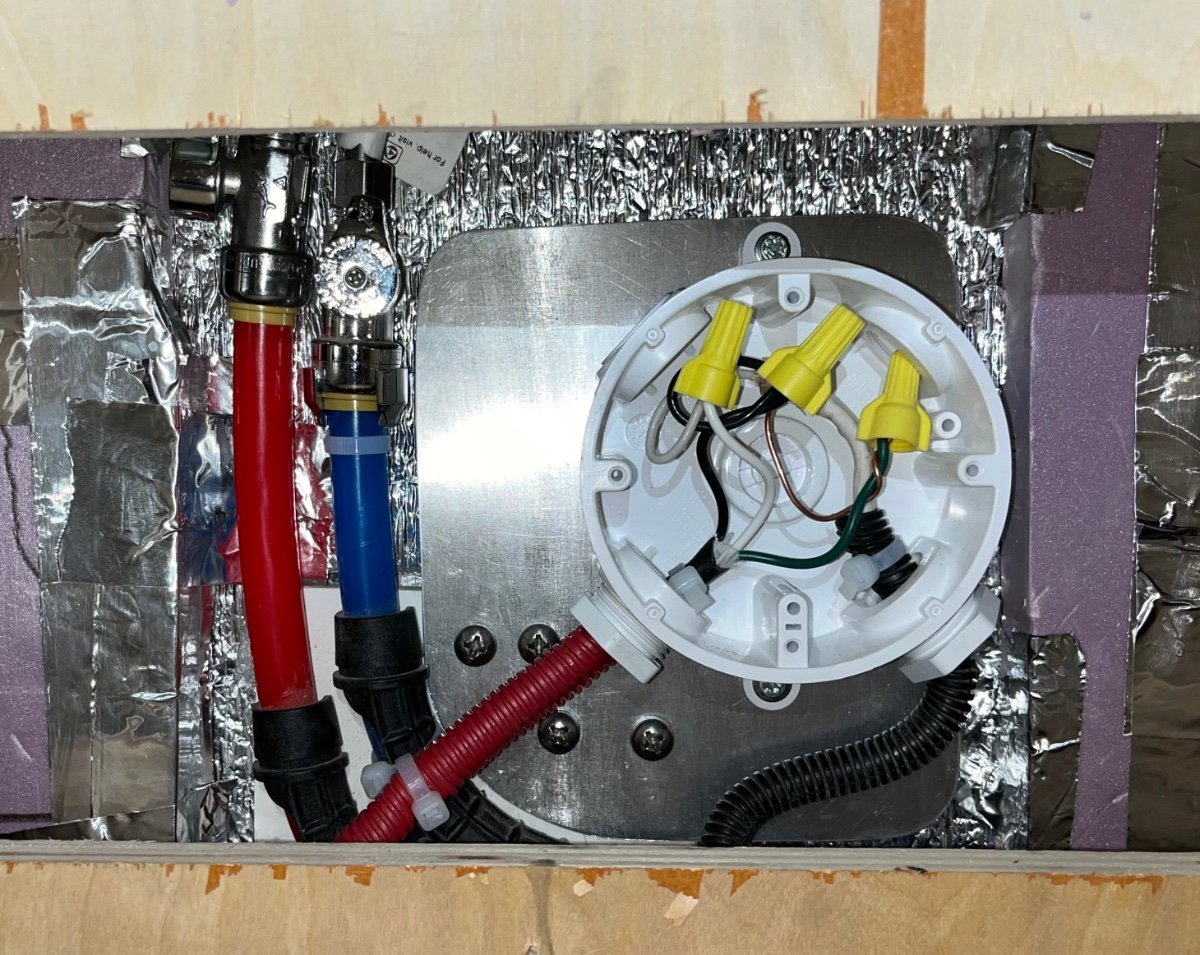
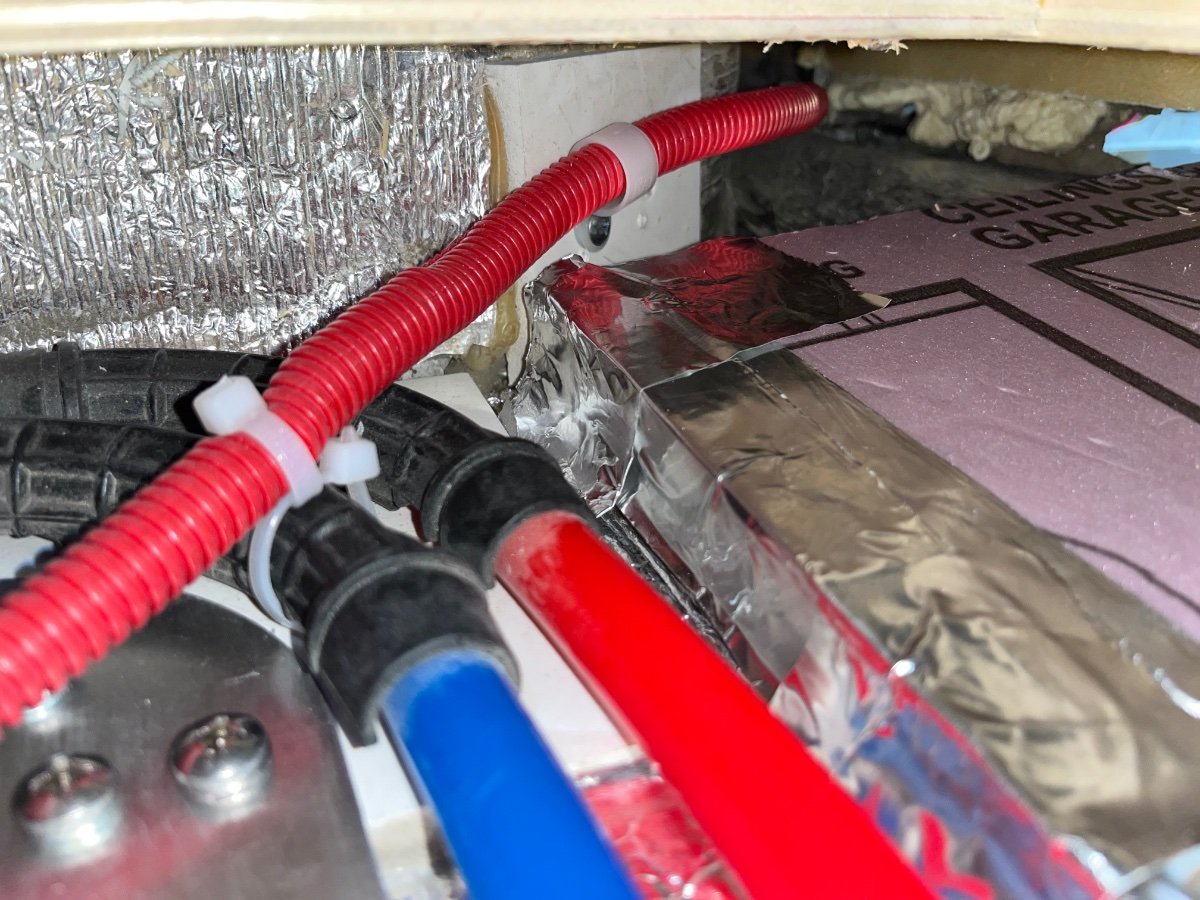
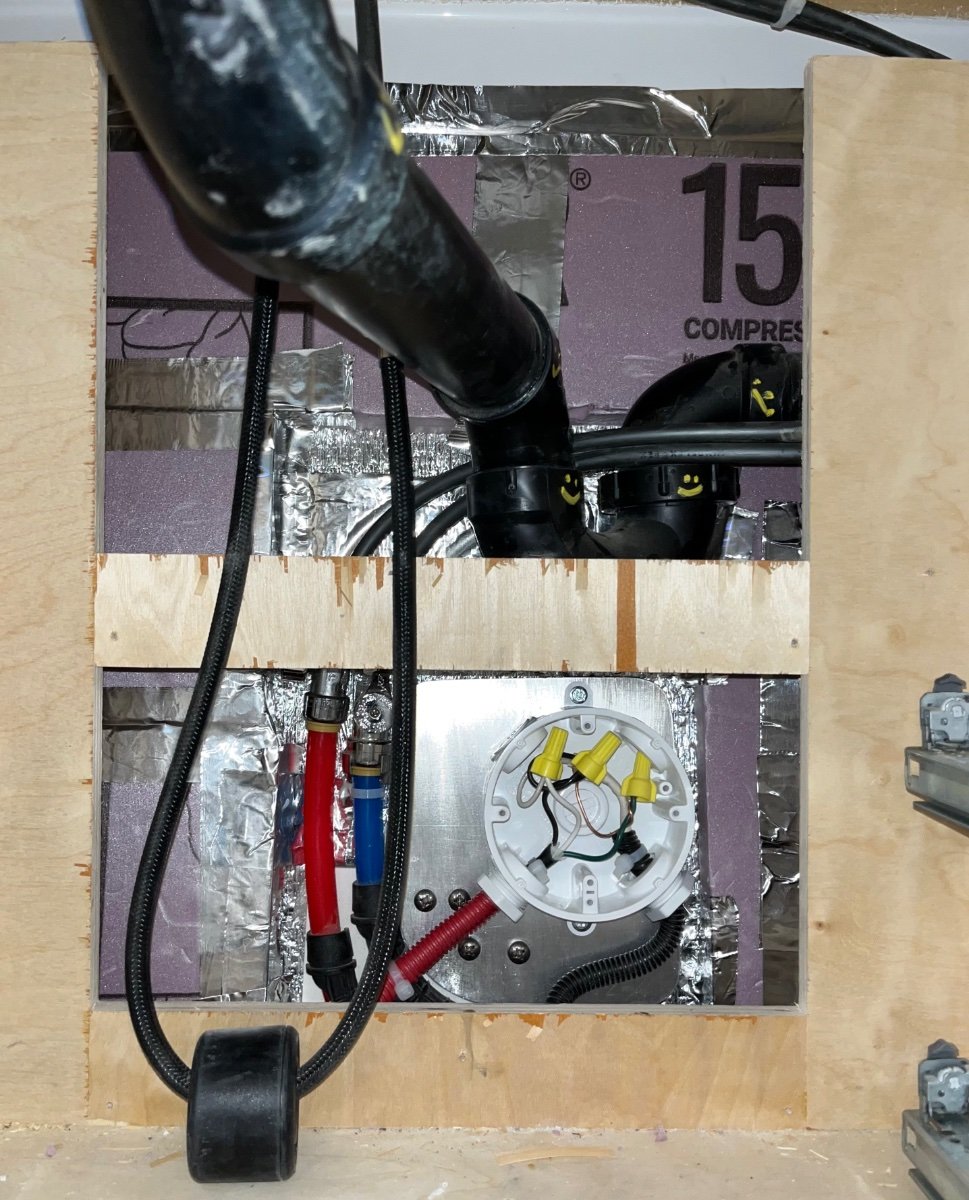
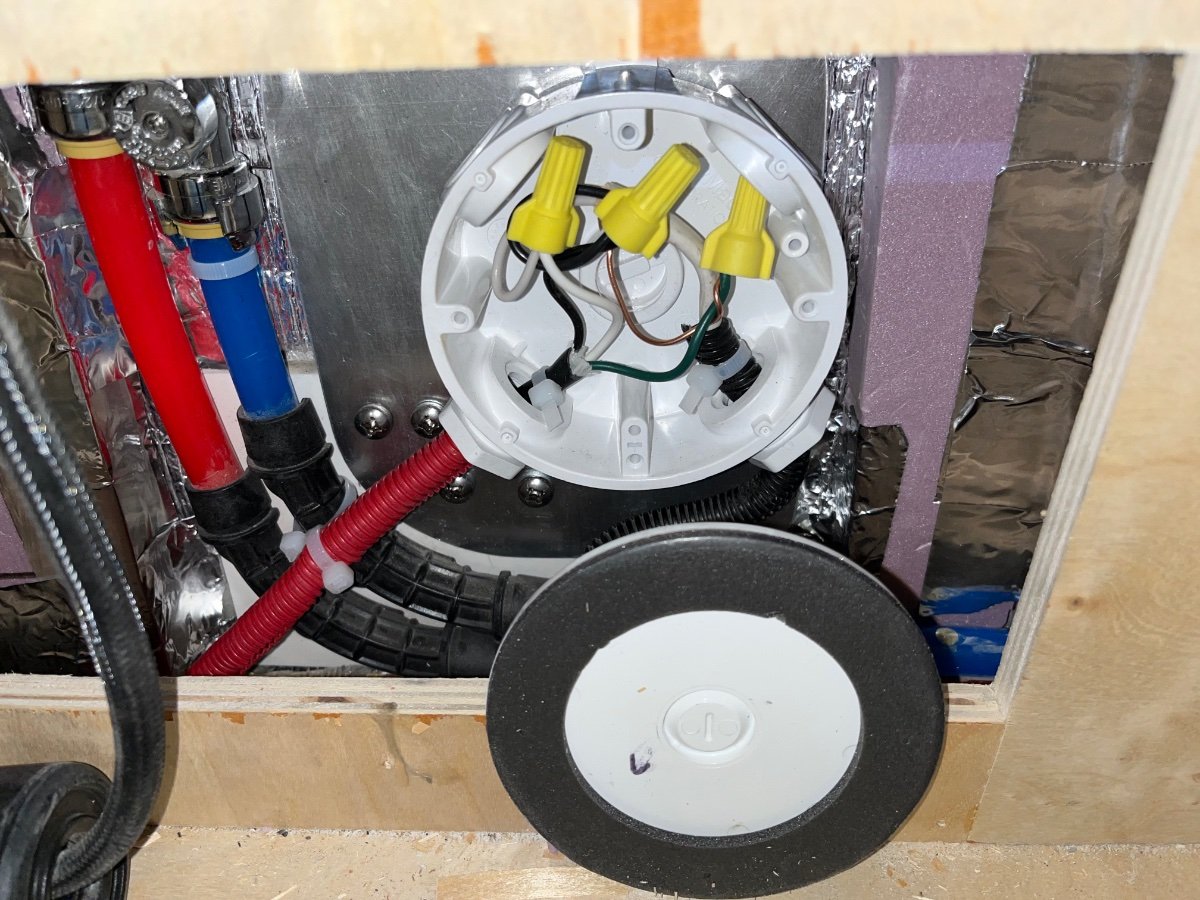
re t Fabricate a bracket from 0.050" aluminum sheet, that will allow you to attach the box to the existing hose support. After installing the blank plugs and two threaded ports, seal them from the inside with PVC cement. Remove the outlet cover, outlet and the blue box. (The lower outlet screw hole was stripped, so the screw just spun. I bent up the outlet, cut the wires and removed the two screws holding the box to its support block.) Reroute the original wires to the new box after cutting and stripping the ends. This shows the new j box next to the old parts. Afer CAREFULLY joining the wires, install the box plate onto the water hose mount. Secure the inside of the each of the two harnesses with a nylon tie. Leave the two bottom holes unsealed, water cannot get in that way. Install split loom and secure the fridge power wire to an existing hole in the original outlet mount. This pic is rotated! The finished j box. Note that this shows the additional 1 inch R5 insulation I also added to this area and under the range top. Black to black, white to white, green to bare ground. Label the cover before installing it! I think this should be done at the factory, they could simply install a larger HDPE block and attach the box directly to that. EDIT: I submitted a Service Ticket with this request. I will update this thread with any new info. John Davies Spokane WA
 3 points
 -
THIS is getting eggcruciating!3 points
-
If I were in your shoes - I'd call the Sales staff and ask the question about height making sure that they know that you are ready to place an order given the information they might provide. Good luck! Bill3 points
-
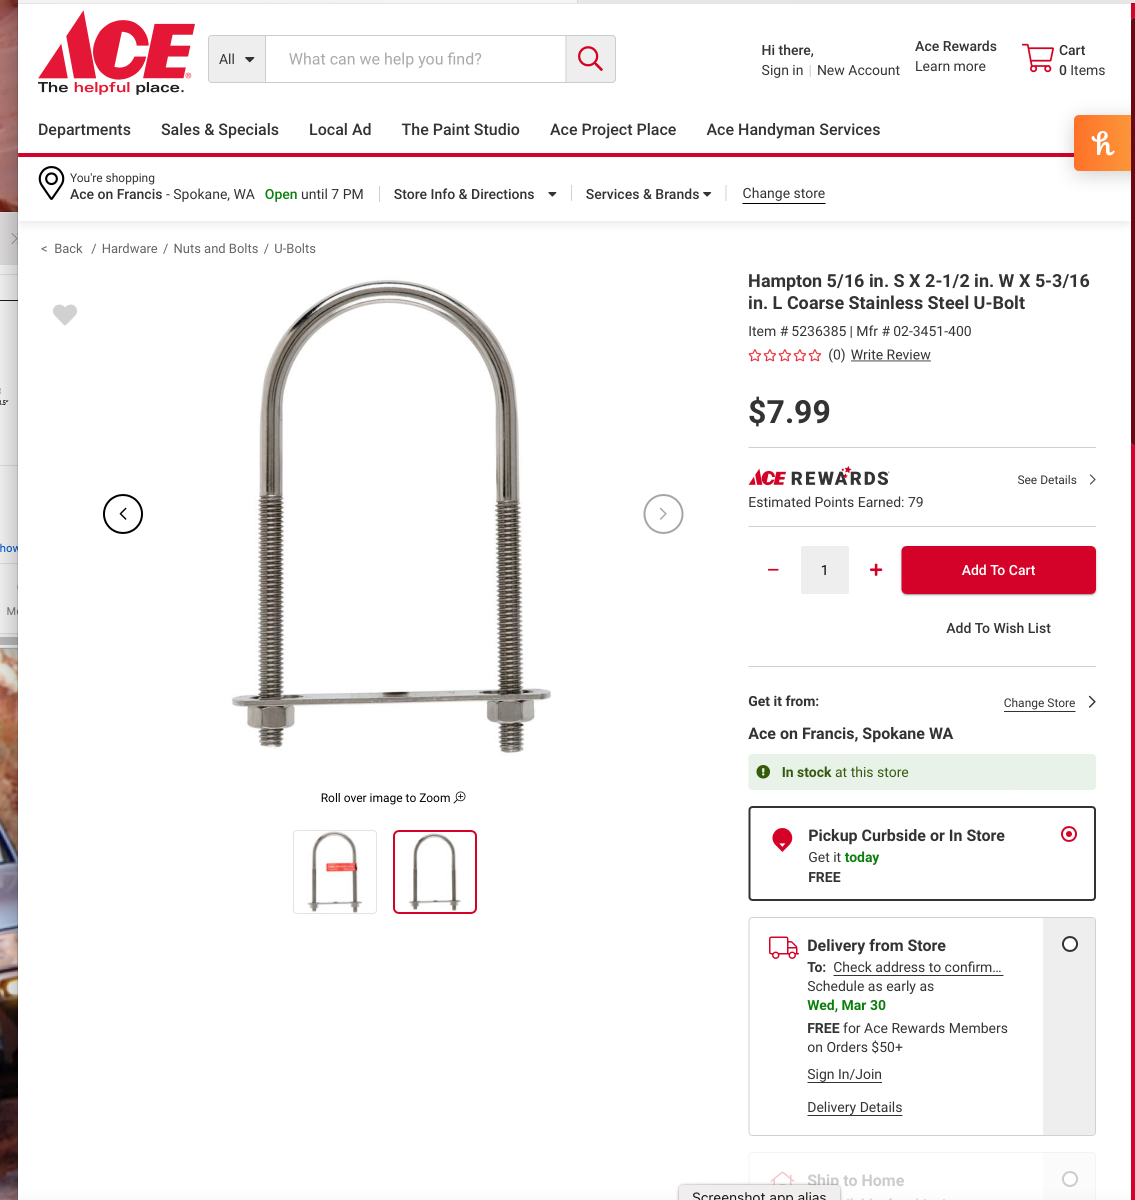
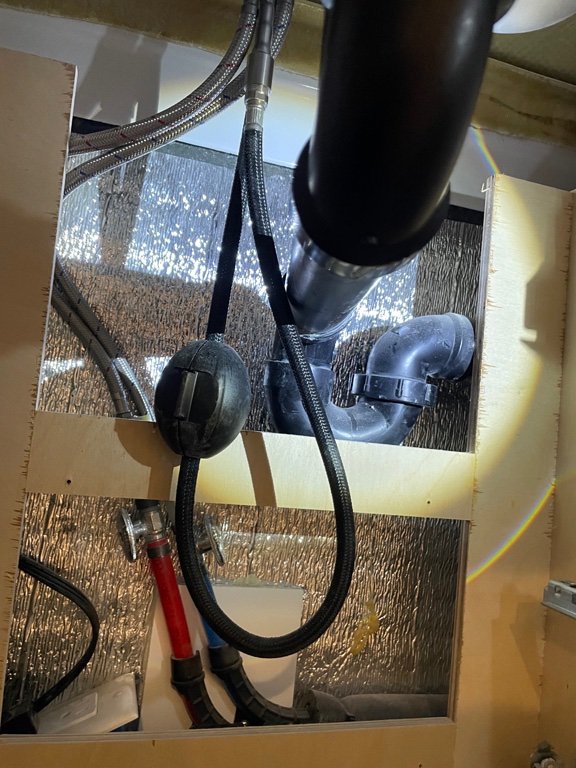
I opened up my sink access panels for the first time in five years (Yeah, I know!) and found the black pipes just flopping around, there was zero support between the sink bottom and the grey tank itself, many feet away. Video: Oliver Legacy Elite 2 Sink grey pipe With that much possible movement, it really stresses the glue joints. I decided to use a ubolt and a 1 inch spacer, to remove all motion and also to keep the down angle so water would flow properly toward the tank. (If I moved the pipe hard up against the back of the cabinet, the angle was UP..) I slid 3/8" automotive fuel line over the ubolt as padding, and a 1" thick piece of HDPE material, the same stuff Oliver uses throughout their trailers. I also replaced the plain nuts with self- locking ones. SORRY, some of these pics are coming through rotated...! This shows the tee piece and the 1/8" plywood access panel removed. This shows how it goes together, using a scrap of pipe. Use the legs to locate the holes in the wood: Use a 90 degree square to draw the center of those lines. The legs need to be cut off, anything longer than this will mean you don't have enough room to install it into the holes. Finished, the pipe is drawn up tight against the wood, no movement! This shows the slight down angle of the pipe, in reference to the wood cross piece. John Davies Spokane WA
2 points
-
Hello All... Don't have it yet...but it,s coming (June 15th) ! Love to hook up with all the great people who have Olivers! We are from the Pacific Northwest (Bellingham) Just us and "Emma"...(sweetest Black Lab you will ever meet!) Look forward to the adventure.2 points
-
Don't remove them. They're springs. Put the top edge of the screen back in place, then place the lower edge in position. Push up on the lower edge a little to compress the upper spring clips a bit, then gently pop the lower edge into place with the heel of your other hand.2 points
-
We don’t rely on the bath vent for much heat. I’ve had the panel under the sink off a couple of times (for other things) and didn’t see any kinks in the duct. I haven’t felt like tracing it back to the furnace. We keep the bath ‘door open and our electric heater by the nightstand blowing toward the bath. If we don’t have shore power we still keep the bath door open and it stays comfortable with the furnace. Mike2 points
-
We just purchased a Garmin 780 RV GPS and look forward to testing it on a camping trip later this month:2 points
-
Eggsactly.2 points
-
Normal Configuration This is the configuration that the valves will be in most of the time. This will allow for use of the plumbing system when connected to city water or when using the water pump to pull from the onboard fresh water tank. Boondocking Configuration This configuration utilizes the rear water inlet and water pump to pull from an external source. It will then pump the fluid directly into the onboard fresh water tank. You can set a 5gal water jug below the water inlet with a 2ft or shorter hose to refill your fresh water supply. You can also use this to sanitize your fresh water tank. Winterization Configuration This configuration also utilizes the rear water inlet and water pump to pull from an external source and push the fluid directly to the plumbing fixtures inside your camper. You can use this to winterize the camper by pulling RV antifreeze into the plumbing. You can also use distilled white vinegar to decalcify the plumbing lines & fixtures. CAUTION: NEVER mix bleach & vinegar! You should never perform the decalcification and sanitization together. Mixing bleach and vinegar causes a toxic chlorine gas. Visit the Oliver Service Portal for more helpful articles!2 points
-
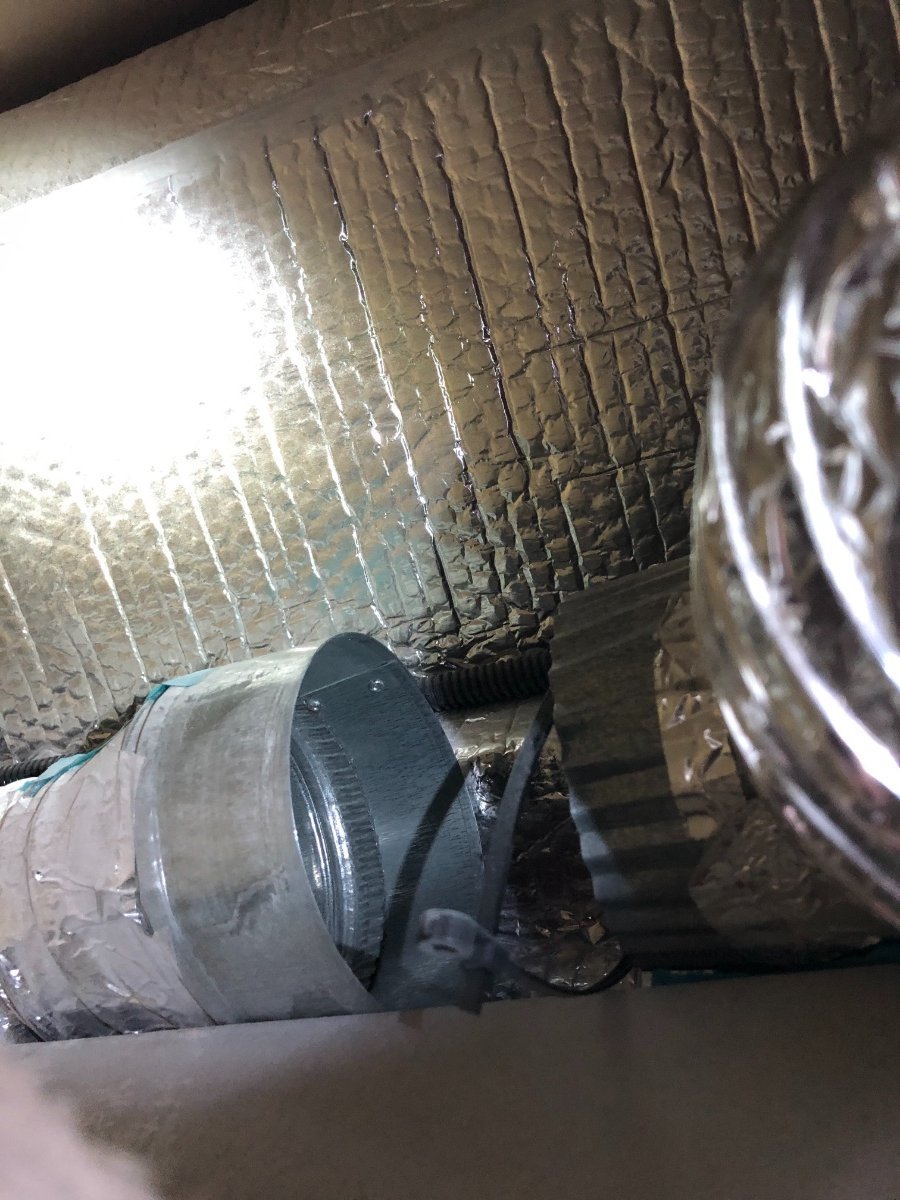
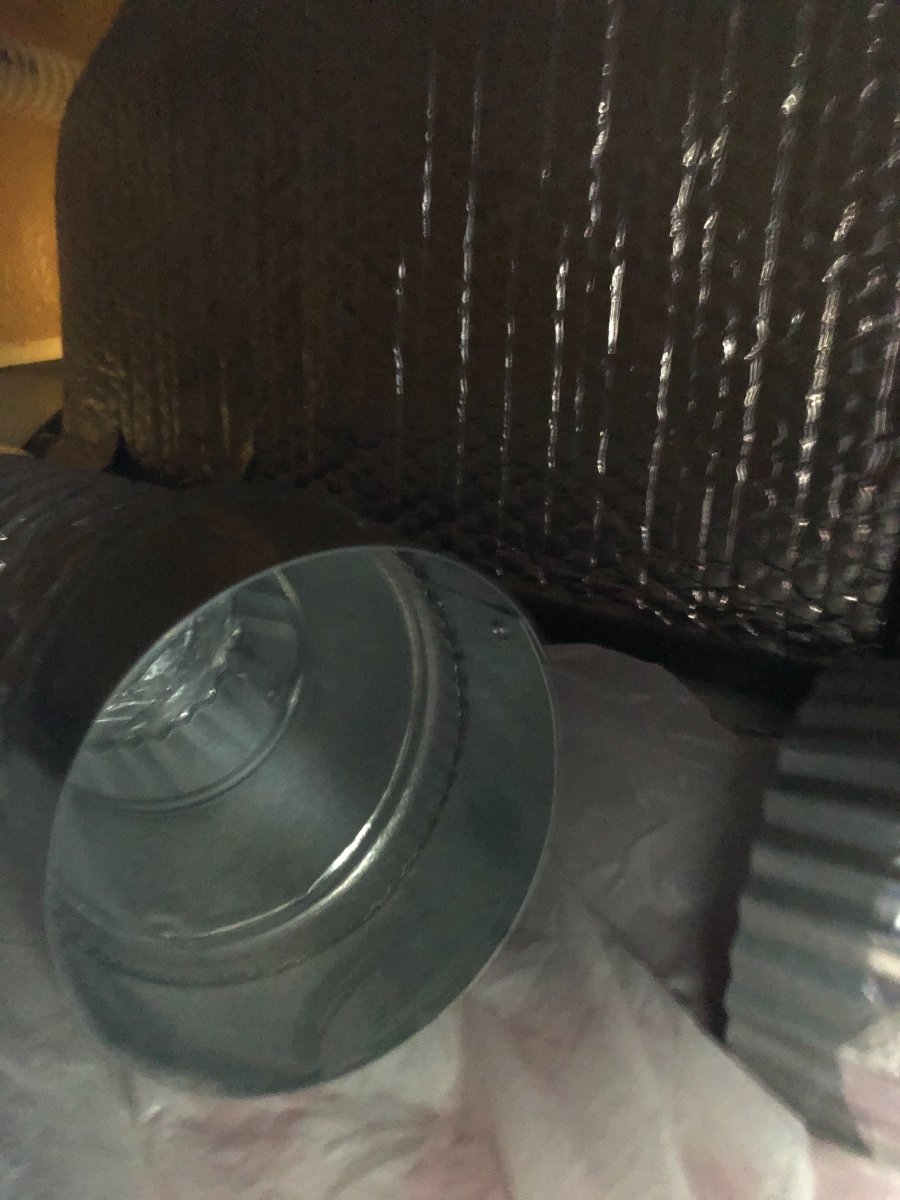
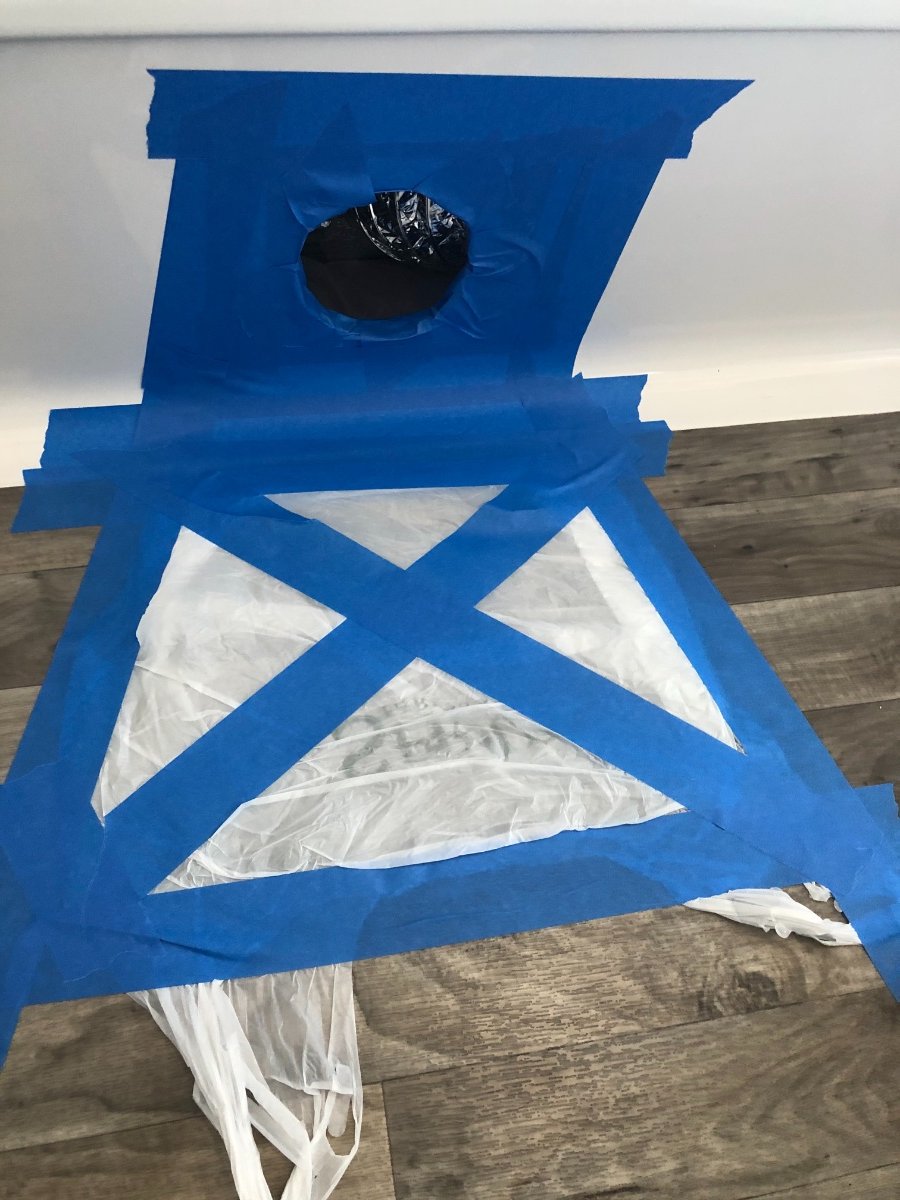
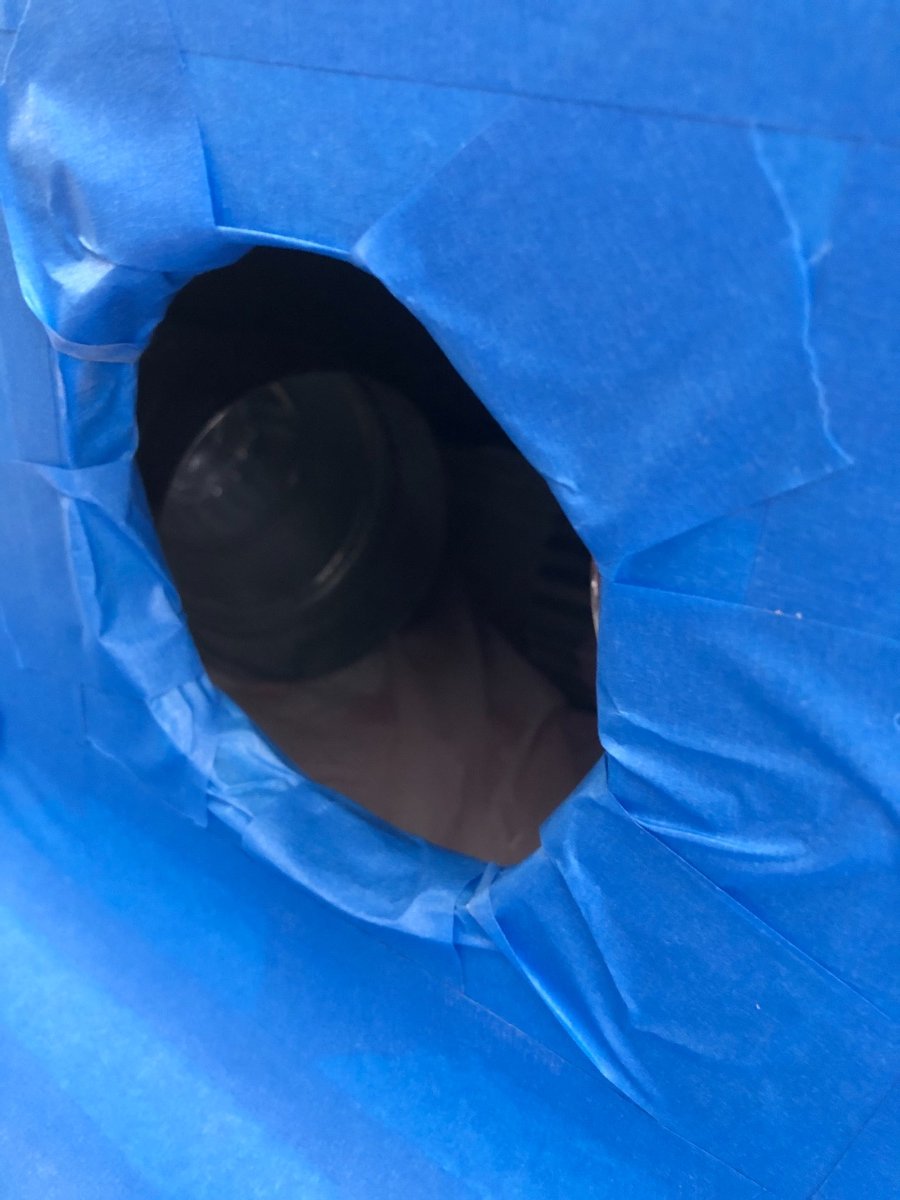
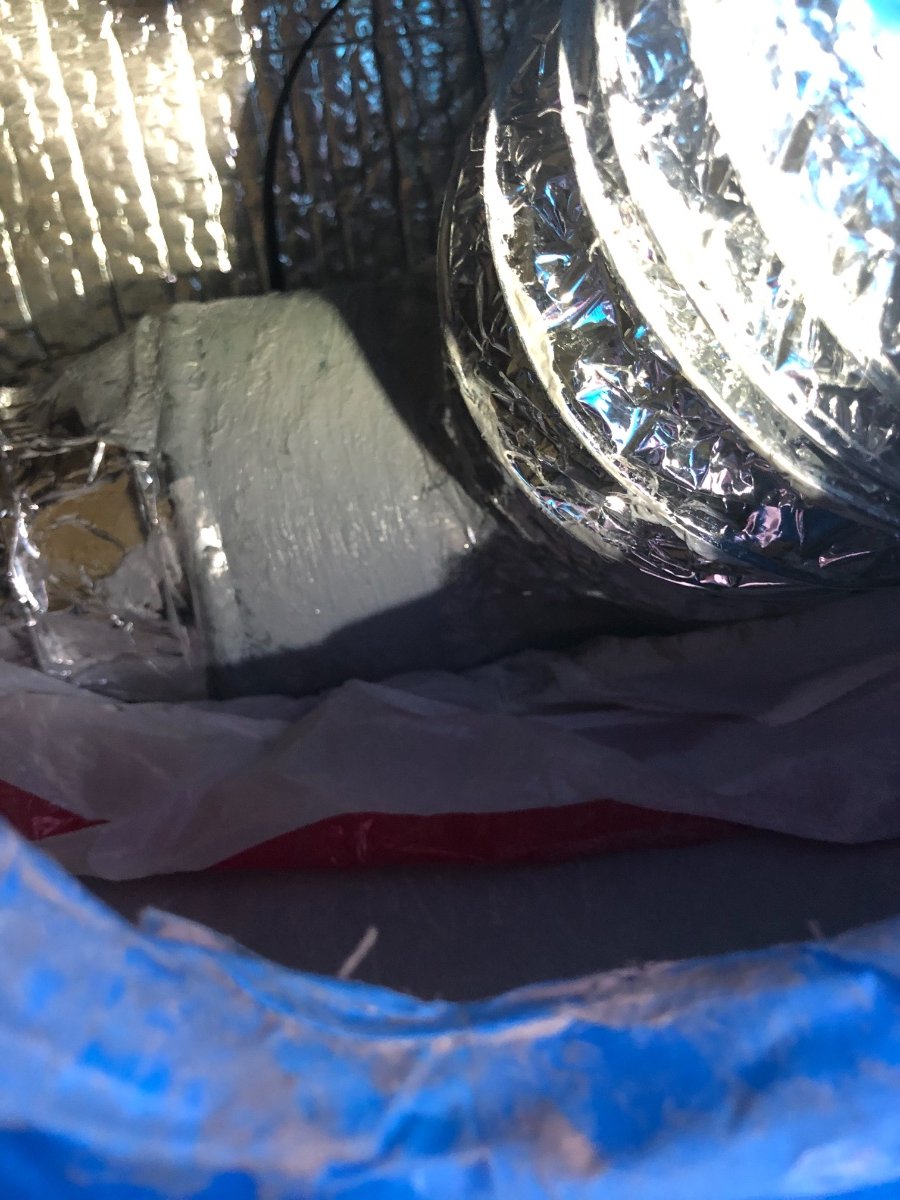
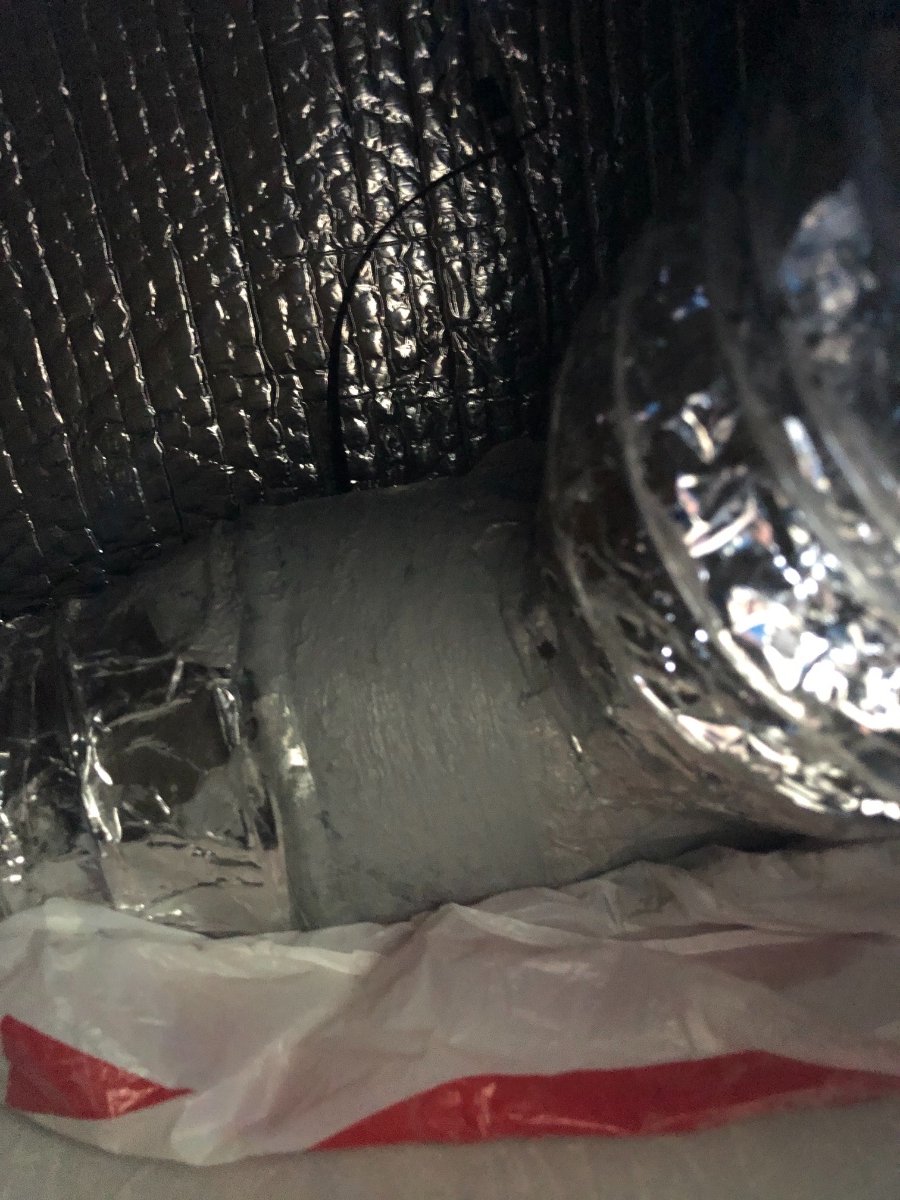
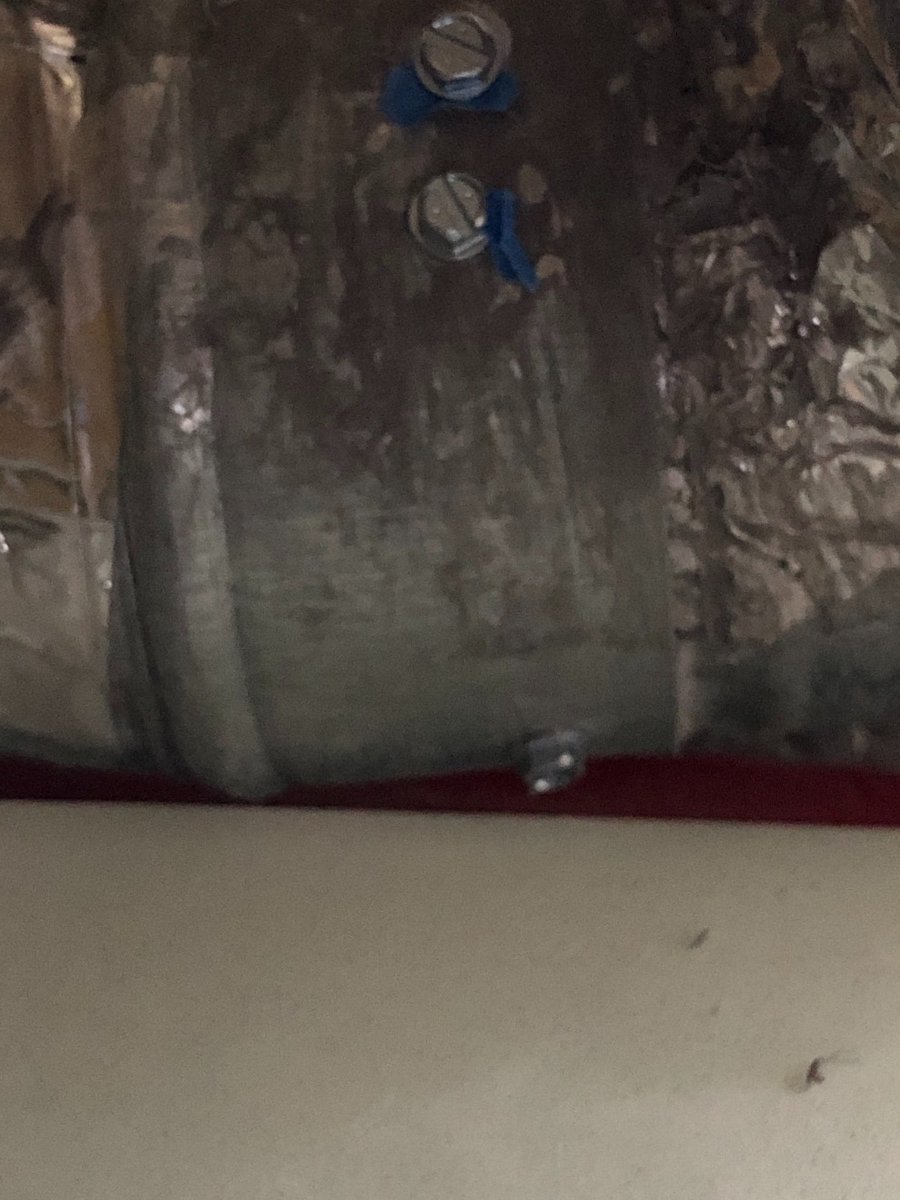
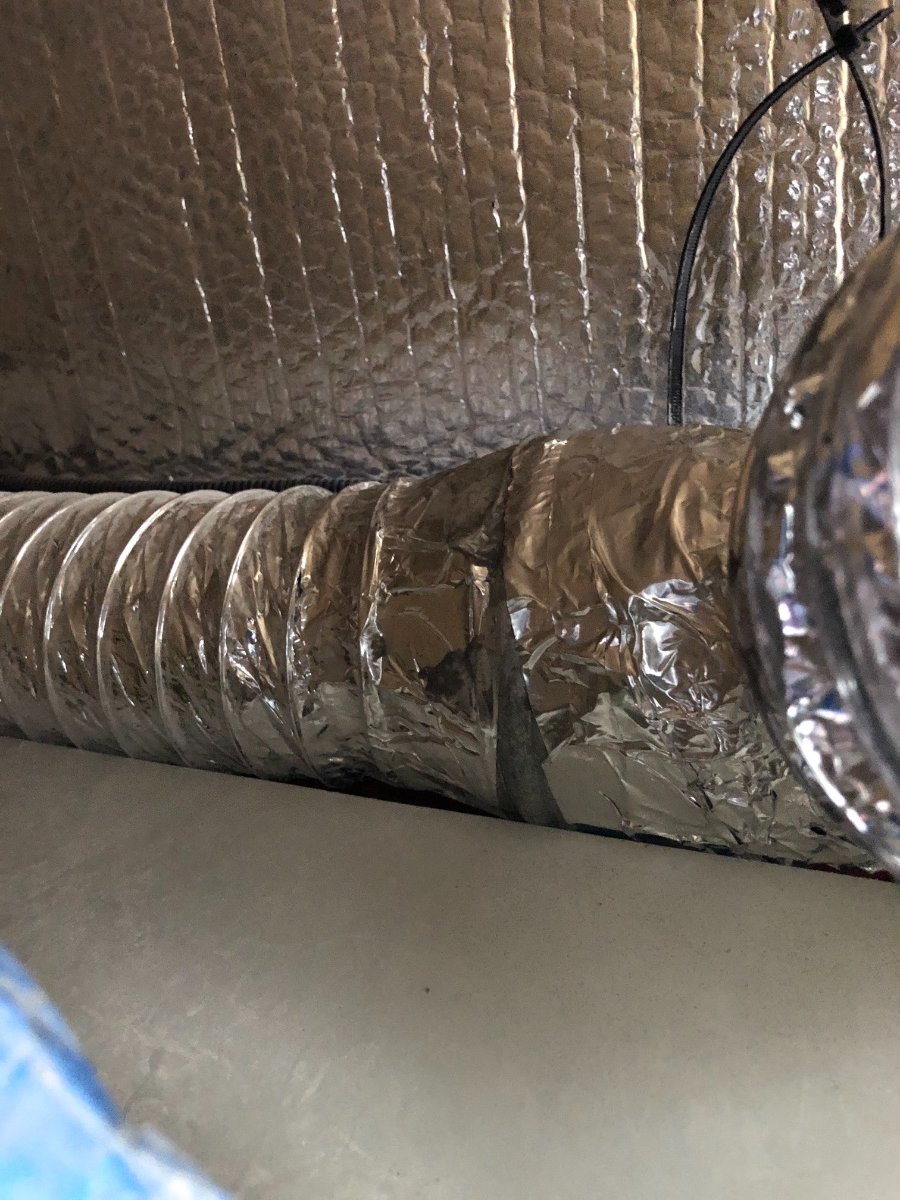
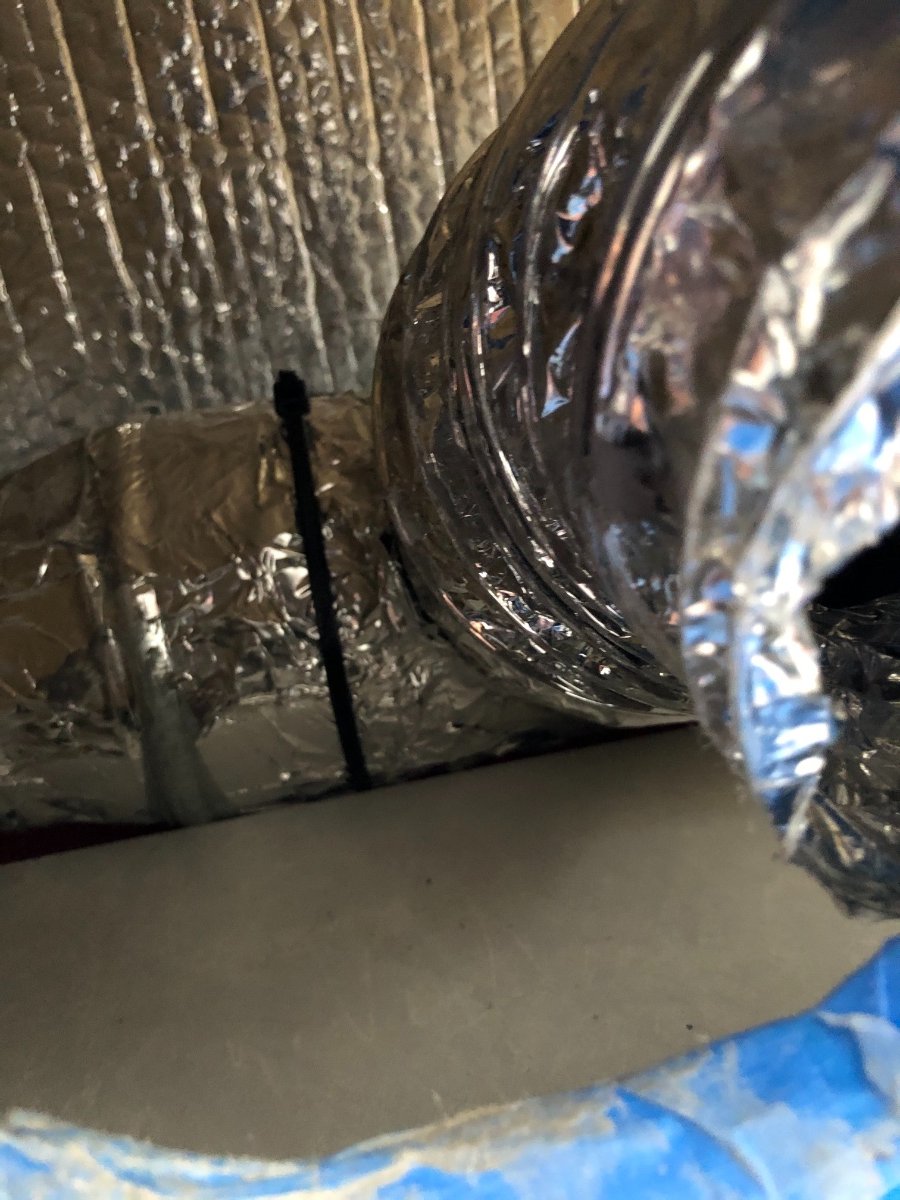
Hi Everyone! In the past, I've seen talk in the threads regarding the low flow from the furnace to the bath vent, well, I experienced that too. Here's what I found after a little detective work... Well no wonder! It helps when you connect the duct together. Yes, it was never connected, no wonder I only felt a very faint breeze from the bath vent. This shot was taken looking toward the kitchen sink, directly under the galley sink. The only way I could access this was to remove the plastic vent cover under the galley sink to connect the duct together. If this had not been possible, then the ONLY way would be to destroy the cabinetry to gain access to it. This was my first view, not touching anything and snapping this photo after I gained access. As you can see in this shot, there is no duct sealant or sheet metal screws, only a lone zip-tie that could not have possibly held this together properly. Notice, I put a plastic bag underneath to get ready to apply duct sealant. This blue tape was on the duct in two locations, possibly to note that this needed to be corrected before this area was closed up? Prepping the floor so I don't get duct sealant all over the place. Here's a look inside through the vent access directly looking at the disconnected furnace vent. The proper solution... three (3) sheet metal screws to follow. Keeping it neat and clean and getting a good bond. All dry, ready for the sheet metal screws... Due to the extreme limited space and only able to work with one hand, I had to tape the screws to the vent and use a hand driver to get the three sheet metal screws in the vent. It was impossible to access the other side however this is more than sufficient, especially with a generous application of the duct sealant and what is to follow... Ah yes, after the duct sealant completely dried and three sheet metal screws, I wrapped the joint with real duct tape and finished it with a fresh zip-tie to complete the surgery. And there you have it ladies and gentlemen... mission accomplished! I later purchased some inserts for the vent ducts that allow me to open and close the amount of flow that I want from the furnace in the bath. I simply adjust the two in the galley to my desired comfort and I'm a warm, happy camper! BTW, the awesome folks at Oliver Travel Trailers were very kind and reimbursed me for the materials, so we're both delighted with the result! For anyone experiencing low/no flow to their bath, this is the very first place I would look. Simply remove the vent cover under the galley sink, carefully disconnect the duct and see if your distribution tee is properly connected. If it is, I would strongly recommend the adjustable registers that can be purchased for these vents, my Ollie did not come with them. You only need two (2) for the sink vent and the bed vent. They are approx. $10 ea. When I run my furnace, I adjust them and can get a good flow of warm air in the bath. Problem solved!
1 point
-
When I took my first camping trip with the new to me Oliver I was thrilled with the experience it gave me, and as I added more trips I started a mental list of things that I could tweak or add to the Oliver that would make that experience even greater. Today's post is addressing one of the items on that list concerning the windows and how they are limited to only being able to be open in fair weather conditions. Because they lean inward at the top of the window they can create problems in rainy conditions whether the window is opened or closed. When closed they have to deal with all the water that runs down from the roof and sidewalls, this can overload the drainage holes in the window frames which can result in getting the bedding wet. Many Oliver owners have installed rain gutters to help alleviate that problem, but there's still the problem of having the windows open while it's raining to mitigate high humidity or that closed in feeling. What I came up with for a solution I'm calling window eyebrows. I created a list of design parameters or considerations that I wanted to hit for this project. The first one was I did not want to alter the Oliver in anyway, that included the drilling of hole to mount the eyebrow to the windows, this really slowed my project down. I'm the type of guy that builds it in my mind before the prototype is built, I went through many different design ideas before I settled on this one. I designed a mount that clamps into the window frame and to spread the load out over a larger area I utilize three of these mount per window. The mounts are inserted into the window frame and the screw on the bottom is tighten which draws down the 5/16" diameter rod in the tapered slot which then spreads the mount to engage the ribs that are formed into the window frame that hold the rubber molding in place. I inserted a still picture in the following video showing that process. To remove the mount you have to take that screw out with the 5/16" rod and there is a hole on the bottom where that same screw is inserted and when tighten it releases the mount. The eyebrow itself is made of 3/16" thick x 5" wide x 29" long aluminum which has 3/4" of the outer edge turn down. I used a neoprene edging trim bought from McMaster-Carr along the length that mated with the Oliver, my hope was that it could be pushed tight enough to seal the water from coming between the eyebrow and the side of the Oliver making for a easy instillation. When I tested this in the rain it looked like it was going to work but after about ten minutes I noticed each window developed a drop of water by one of the mounts and it would fall and hit against the screen about every couple of minutes. So plan B I was forced to use a 1/4" wide weather strip tape between the neoprene edging and the fiberglass wall of the Oliver. There was one more problem, I had to incorporate a drip edge to the eyebrow to keep the water from following around the edge and falling towards the window. This eyebrow is fastened with two stainless steel 1/4-20 button head hex drive screws to each of the three mounts. This makes for a quick install or removal of the eyebrow, Here in Minnesota we had a warm up and it rained one day so that is all the testing I have been able to do, so time will tell if all is well with the design. As far as the rigidity of the eyebrow I'm extremely pleased you can literally grab onto them and push and pull with no flex of the eyebrow. EYEBROW.mp41 point
-
This is easy, it just takes a few nylon ties. Remove the drawers by squeezing inward on both of the orange brackets and lift up. Remove the screws holding the flip out sponge tray. The following pics show the space with the wood tee and the thin plywood access panel removed, that is not needed for this mod. Sorry, the first two pics are rotated and I cannot straighten them out! Does anyone know why this happens? The faucet hose has a big weight and hangs down at random over the top drawer.,..,,\ The blue clip secures the two sections of the quick release coupling. At least one owner had their hose come open and it leaked long enough to trash the wood underneath. This tie method will prevent the clip from coming off until you want it to. There is another vertical tie hidden on the far side. This hose can leak if the oring seal fails or the two halves separate. It would be prudent to inspect this area annually! If you are hooked to city water, it can leak like crazy and you won't know until you see water coming out from the hull drains, and maybe all over the drawer contents. If you are using the 12 volt pump, it will alert you by cycling rapidly IF you do not have the accumulator (mine does not). If you have an accumulator, that will mask the leak to a degree!. This is the first time in five years that I have looked in here, it was completely dry. John Davies Spokane WA
1 point
-
FYI on Hull 505 - the spray hose doesn't have a coupler, just the pull our faucet in a loop back to the fixture. My next project will be John's most excellent rewire of the Fridge Outlet into a waterproof box!
1 point
-
We've seen this several times, with several different posts, recently. (And, a number of times in the past, especially with Apple phones.) Fortunately, we have @topgun2 always available to reconfigure. 😀👍1 point
-
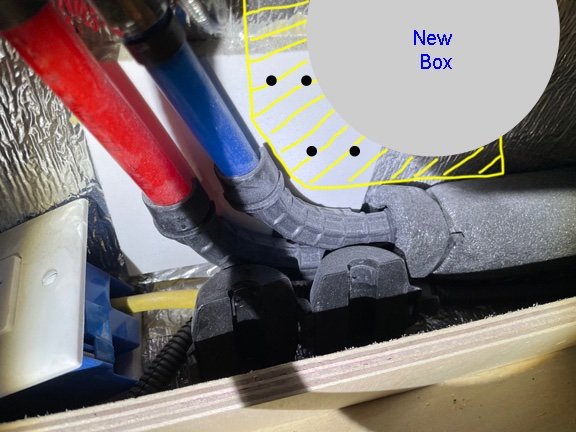
John, Very slick to install that metal plate then mount the junction box to the plate. Am I interpreting correctly that you have have 4 screws securing the mounting plate to the water line backing plate? That should hold it pretty well as long as the backing board stays attached to the sidewall. Here's what I see inside my hull 505 with my impression of what you did: (*new backing plate yellow, mounting screws black, new box grey) As to your earlier post about the sink and the water coupler, my unit has no blue coupler on the pull out hose. The hose comes from the faucet, makes a loop back up to the nozzle with no coupler, but it does have a weight. I'll do the mod you just showed before I leave on our next long trip. Craig
1 point
-
JD - I rotated your pics for you but let me know if they are not in the correct orientation and I will further adjust them. Bill1 point
-
Note: For the most up-to-date information please visit Nature's Head Website For how to use your new compost toilet, please see attached user guide or visit Nature's head website to download the manual. Troubleshooting Fan is not working Ensure the power cord is securely fastened to the fan located on the side of the toilet. If the power cord is securely seated at the fan, use a volt meter to test for 12v power. Place the positive lead inside the power cord while touching the negative lead to the outside body If you are getting power to the fan but it is not operating, you would need to replace the fan. Contact Nature's Head at 251-295-3043 or sales@natureshead.net with test results and they will ship a replacement fan directly to you. Contact Oliver Service and we can contact Nature's Head on your behalf to get a fan shipped directly to you. If you are not getting any power at the fan, Check the fuse for the fan. Depending on your year model, the fuse will be located either in the 12v fuse panel, and should be listed, or in-line at the main 12v breaker located under the street side access panel. If the fuse is good but you still have no power at the toilet power cord then it is most likely a wiring connection and would require service. Contact the Oliver service department for further assistance. The below information was captured from the Nature's Head Troubleshooting page. For a full list of troubleshooting, please visit https://natureshead.net/troubleshooting/ Should the Fan run all the time? If using the toilet full time, using the fan full time will enable the compost to process faster. If you are NOT going to be using the toilet for 10 days or more, unplug the fan, as the compost would tend to become too dry and hard. Do empty and clean the urine bottle before leaving. https://natureshead.net/troubleshooting/ Agitator Handle Hard to Turn If the compost gets dry, the handle may not turn easily. Adding used coffee grounds results in added moisture and keeps the compost loose so that it mixes better. https://natureshead.net/troubleshooting/ Compost is Too Dry If the compost is dry or hard, add some water and turn the agitator after the sphagnum peat moss has absorbed the moisture. Compost is Too Wet If too wet due to prolonged diarrhea, add a small amount of sphagnum peat moss. If wet due to excessive condensation, also add a little spagnum peat moss. Make sure excessive wetness is not due to someone urinating directly into the compost section. This can also contribute to an unpleasant odor. The compost area should have only a musty smell. If a sewage odor is present, please contact Nature�s Head for consultation. How Often should you Empty the Solids Bin The time frame for to empty the solids bin varies with number of people and the time period. Generally 2 people full time empty approx. 3 weeks, additional people will shorten that time. The toilet is designed for 1 to 4 people full time. If using just weekends with 2 people, that can extend time to 2 months or more. Just a couple of days of non use extends the period of time. Usually, the level of the compost will not increase; if it does it will be minimal. When to Empty Liquids Bottle It is best if you do not leave the liquid wastes in the tank for extended periods. While everyone is different, some urine will smell bad if allowed to sit for extended periods. Does Compost work in cold temperatures Composting works from 55 degrees and warmer. The warmer it is, the faster it compost. When the temperature drops to freezing, the compost will be dormant until heat is introduced into the area. How to Remove Buildup in the Liquids Bottle Empty the bottle. Add 1/4 cup of Lemishine Detergent Booster per gallon to the bottle and let it sit for 24 hours. Another suggestion is to rinse the bottle, add vinegar and some pea gravel. Shake well and the buildup will break loose. 1162068337_NaturesHeadCompostToiletUserGuide.pdf
1 point
-
CB - I camped at Blue Spring for about 15 years in a row while attending "Bike Week" in Daytona. It really is a nice place! However, that's not why I'm answering 😄. I've not had that screen out since last Spring - but - from what I remember you don't remove those clips since (I think) they are what holds the screen in place. As you have already found out - this is not all that easy, either removing or re-inserting. Try positioning the screen as close to its final position as you can, squash the screen and bottom clip into the track and then (either with your finger or something thin and flexible) squash the top spring/clip into the track while pushing the frame of the screen out. Hopefully that will "pop" it back into place. Of course I'm assuming that your screen is like mine and that was not changed when Oliver changed the windows. Good luck! Bill p.s. once it pops back into place you can then "slide" it into its final original position - this is also not that easy but it will go.1 point
-
Please do call the sales staff, and if you get any information, please share! The Oliver website says "specs and features may change," so I, too, am curious if the interior height will change. (That, of course, would require new plugs and molds.)
1 point
-
An eggstensive list...1 point
-
P.S. I should have mentioned above: Stay away from the Rand McNally RV GPS. I understand that they have recently stopped supporting their RV GPS units even though they continue to sell them. See THIS Video on YouTube. Bill1 point
-
Someone should be making a list of these1 point
-
John - There are threads here on the Forum about the relatively new Garmin 890 (which I have)(simply type 890 in the search box). In this Garmin - along with several other models related to RV's - they allow you to input the size of the tow vehicle along with the size of the RV. This is then used by the Garmin to determine which roads just might not be suitable for that specific combination. However, they do not ask for things like engine size or even the specific model of tow vehicle. This means that even though your combination just might be the same length as mine, yours might have a smaller engine which would possibly make towing up certain grades a bit more difficult than I would experience. I'm not aware of any GPS device that takes ALL factors into consideration. Having said this - the Garmin does do a good job relative to height restrictions, narrow roads and road grade warnings. I wouldn't be without mine! Bill1 point
-
Rumor has it that the new Elite will be the same height as the Elite 2. Shorter but the same height.1 point
-
Normal Configuration This is the configuration that the valves will be in most of the time. This will allow for use of the plumbing system when connected to city water or when using the water pump to pull from the onboard fresh water tank. Boondocking Configuration This configuration utilizes the rear water inlet and water pump to pull from an external source. It will then pump the fluid directly into the onboard fresh water tank. You can set a 5gal water jug below the water inlet with a 2ft or shorter hose to refill your fresh water supply. You can also use this to sanitize your fresh water tank. Winterization Configuration This configuration also utilizes the rear water inlet and water pump to pull from an external source and push the fluid directly to the plumbing fixtures inside your camper. You can use this to winterize the camper by pulling RV antifreeze into the plumbing. You can also use distilled white vinegar to decalcify the plumbing lines & fixtures. CAUTION: NEVER mix bleach & vinegar! You should never perform the decalcification and sanitization together. Mixing bleach and vinegar causes a toxic chlorine gas. Visit the Oliver Service Portal for more helpful articles!1 point
-
You're eggaggerating! 😁1 point
-
It will be an eggsistencial experience.1 point
-
Emma's going to love the Ollie! Hopefully you have been reading all that you can in the Oliver University and here on the Forum. June 15th really is just right around the corner. If the Oliver is your first camper then you might want to take a look at a new YouTube video by "Keep Your Daydream" concerning the "stuff" you will need when first starting to camp (This One). Let us know if we can help you in any way and welcome to the Family! Bill1 point
-
Hey Lee, welcome to the group! June 15 will be here before you know it. You can tell from our map that we haven’t been up to your neck of the woods but it is high on our list! Mike1 point
-
Welcome and congratulations! I not anywhere near that part of the country but hope to visit that part soon. Scott1 point
-
GG - Nice job. As an update - I've had mine installed in my 2017 F-150 for over a year now and I could not be happier with it. This thing is rock solid holding the fairly large Garmin 890 and I find the USB ports I added (similar to GG) to be very useful for my Garmin InReach mini. If you remove the rubber mat in the Ford before drilling and installing the Built Right Shelf then the shelf can be removed (if you sell the truck or decide that you don't want it there anymore), the rubber mat replaced and you will never even know that it was there. Bill1 point
-
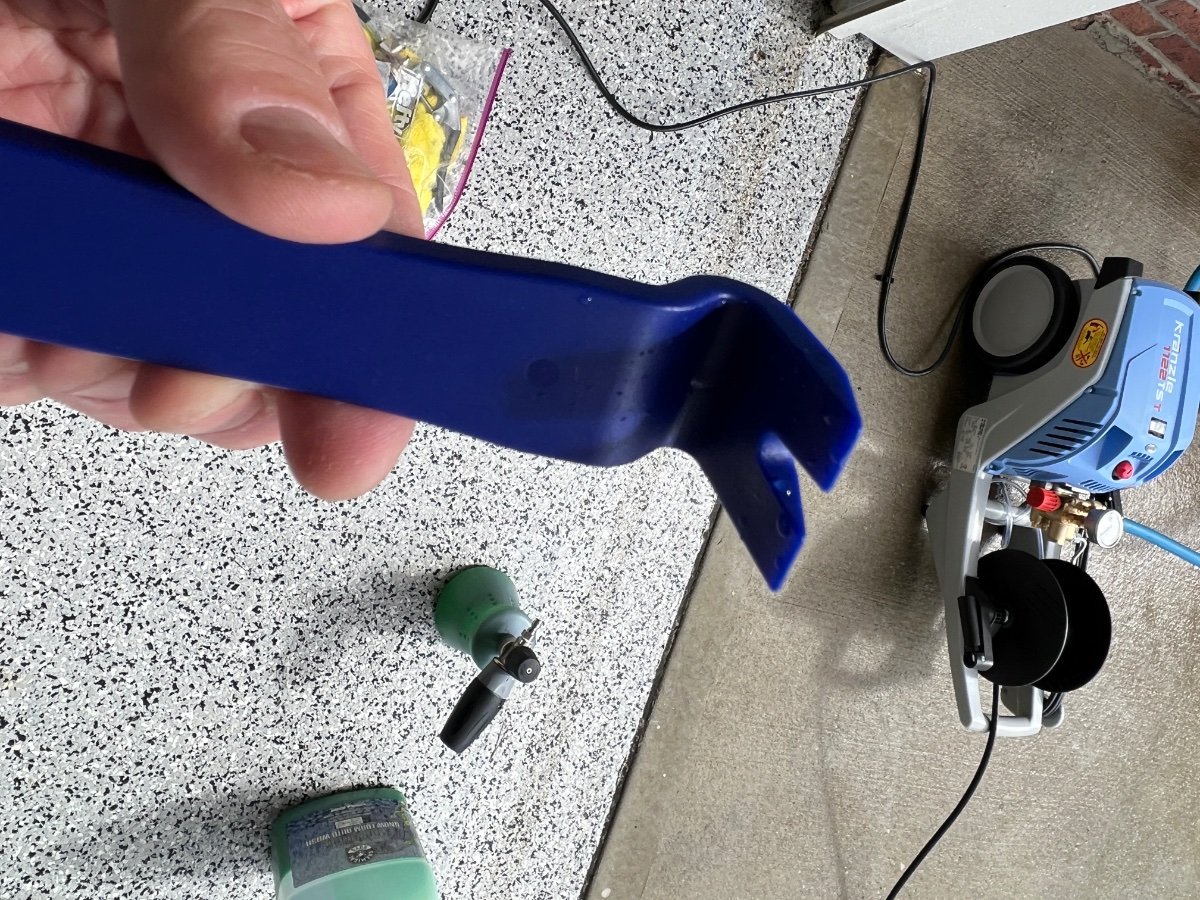
The Girard awnings have the same type of seal. I removed mine today. It left some residue behind that I removed with an auto trim removal tool.
1 point
-
Are you talking about handheld GPS or dash mount for a vehicle? If you're talking about handheld for hiking, etc. also get a compass and learn how to use it with paper maps. Never bet your life on anything with batteries. In fact, get a compass and maps either way. You can get lost on back roads, too. We've all seen the stories about people who take a wrong turn on a forest road and can't get themselves out. A $25 compass and some practice with it before you head out is good life insurance.1 point
-
There are a number of these types of checklists available here on the Forum that can be found via the "Search" function at the top of this page. You might want to start with one of THESE. Bill1 point
-
I just want to share my experience that I had with the Yamaha EF22iS 2200 watt. I bought it for the same reasons you stated but was disappointed when I found that it could not start my easy start equipped AC unless it was left in full throttle mode. My older Honda 2000 watt had no problem doing it in eco mode. I went though all channels with Yamaha and they were of no help. What I understand is the Honda has a larger horse power engine even in the 2000 watt model. So the Yamaha lacks power to get the AC started from eco mode. So I bought the Honda 2200 and it works perfectly. Hope this help you with purchase of a generator.1 point
-
I've thought about the need for a 30 Amp generator - thinking primarily that I'd be able to charge the Lithiums faster - however, that's not true in our case. Our 3000 watt inverters are configured to charge the Lithiums at 100 Amps, which requires about 11 amps of 120V power, so a single Honda/Yamaha 2200 is plenty of generator to charge the batteries at full speed. In fact, a generator that can deliver 15 amps sustained at 120 volts can deliver ~150 amps (in theory) sustained at 12 volts. Your 1800W toaster will require (1800W / 12V) nearly 150 amps, which a single 2200 can also support. Just don't charge your batteries and run your toaster oven at the same time unless you have 30 Amps - and even then it's gonna be borderline for something like a charger and a toaster oven. Bottom line - I don't see the pressing need for more than a small, 2200 Watt generator at this time - and whether or not it has a 30 Amp plug is not a differentiator when it comes to generators.1 point
-
I hitch Ollie to my truck and set the TV parking brake.......and pocket the keys! At least I know if my jacking skills fail me, it's not going to go very ....far other than down.1 point
-
I just saw the following notice for late model Ford truck and since a fair number of Oliver owners have this truck it might be of interest: Ford is also recalling 391,836 2021-2022 F-150, 2022 Ford Maverick, Expedition, Lincoln avigator, F-250, F-350, F-450 and F-550 vehicles because a towed trailer equipped with an electric or electric-over hydraulic brake system might not brake. Dealers will update the integrated trailer brake control module software. Ford has 67 reports of improper function potentially related to the issue but no reports of crashes or injuries related to the recall.0 points
-
Not a good one, so far. 🙂 We picked up VellOllie last November and she's been under wraps until yesterday. When we took the cover off, we noted that about two feet of the seal on the rear street-side was hanging loose, as well as about a foot on the front curb-side. We're going to attempt to re-attach today with some alien tape (unless someone has a better suggestion). We get lots of afternoon showers where we camp, so having a dry patio/entry is one of our favorite things -- and one of those things we missed dearly with our awning-less sprinter van.0 points


.jpeg.d6e61b473ac28225d828f6918a7fb595.jpeg)
.jpeg.bca5ad26b7a62f7dee543fa252fb605a.jpeg)
.jpeg.5e41a2798b252f2cbec92c4af37418f5.jpeg)


.jpeg.5e6c53ae5e52b4e3ec06eac651715942.jpeg)
.jpeg.7950bd0eeb6d10e7cd3fe4aaedf5c66f.jpeg)


-
Recent Achievements
-


")


")


")


