Leaderboard


Popular Content
Showing content with the highest reputation on 04/30/2026 in all areas
-
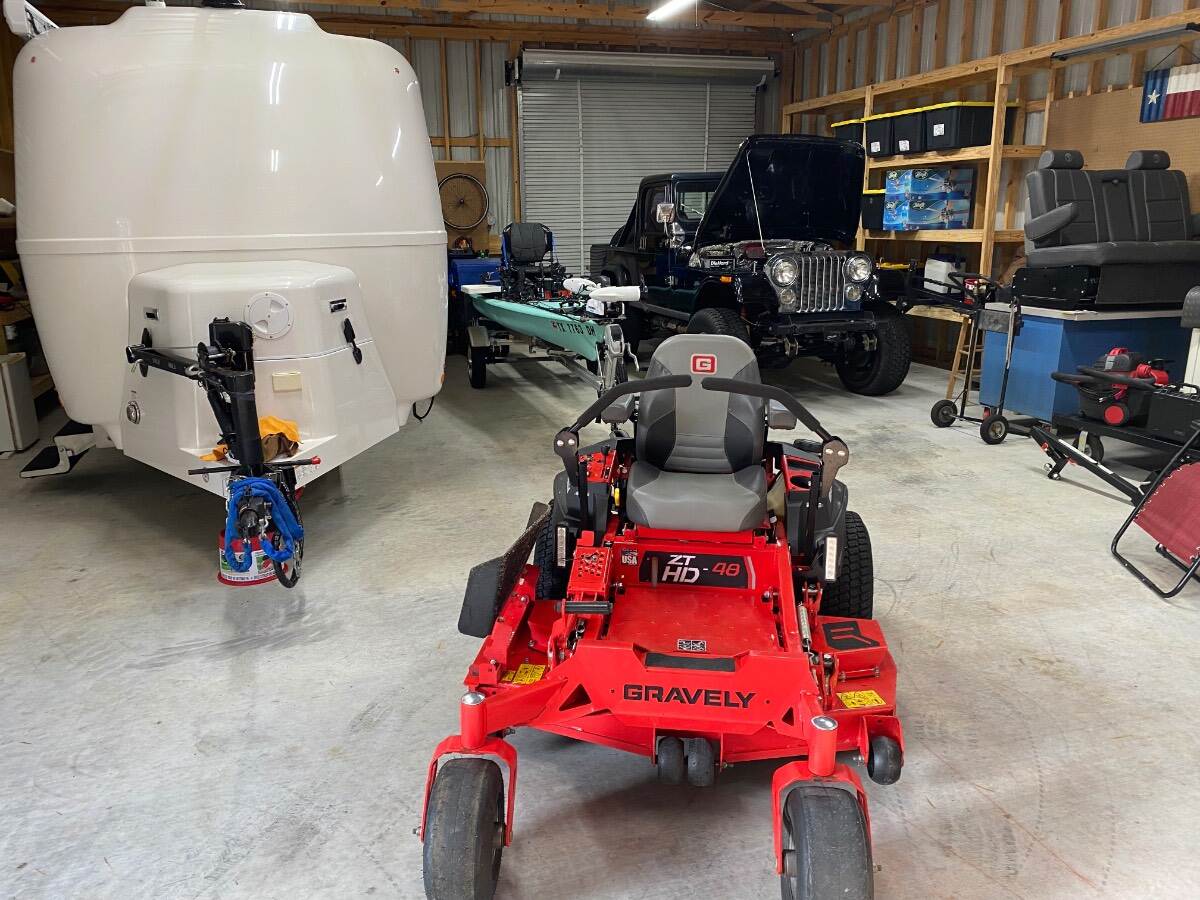
The wife refers to it as the “man barn” for my “man toys”!
 3 points
 -
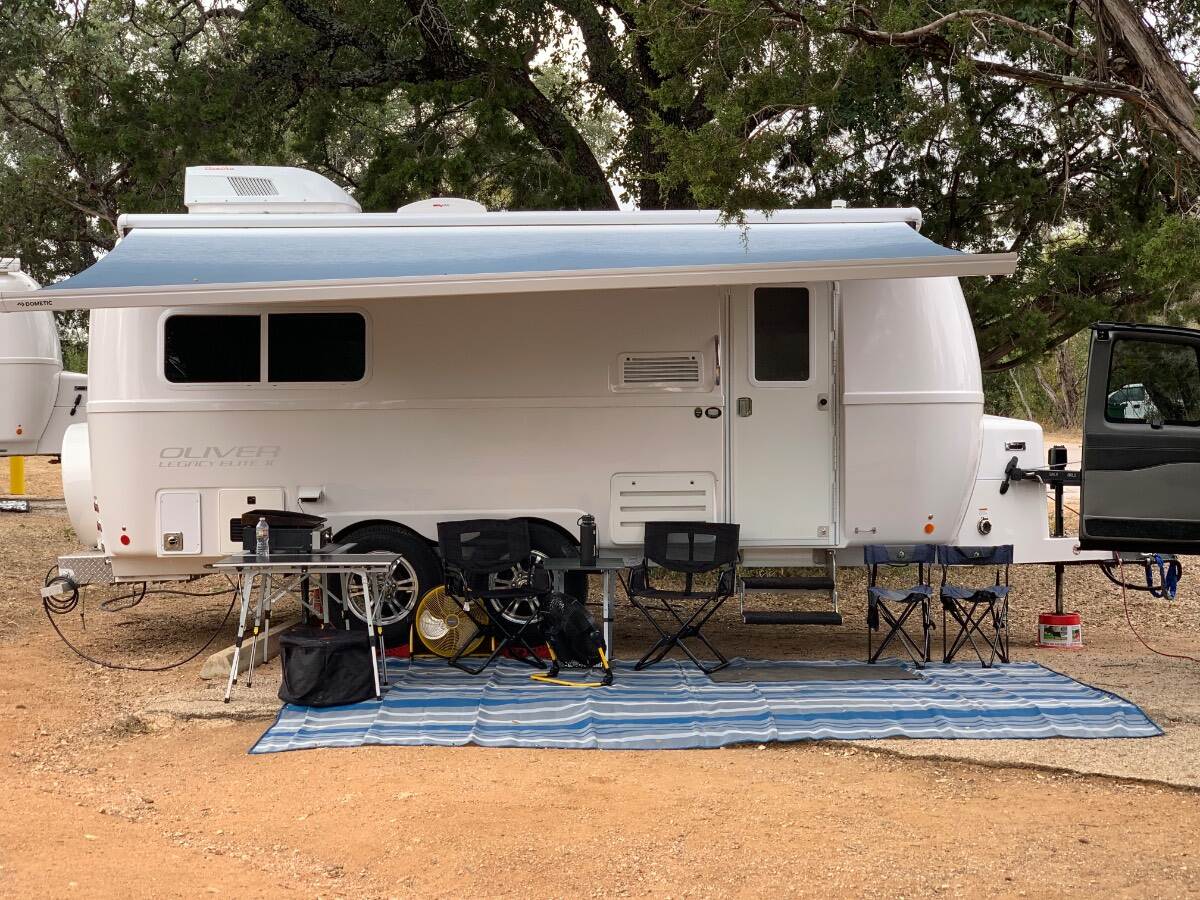
I have extended the awning out a few feet during rains with no issues, the only benefit to be able to keep the windows cracked for fresh air. I really like the CGEAR sand-free mat for a porch treatment. I have even hosed it down a few times with no mud problems, and routinely use the blower to clean leaf and other debris. I place a neoprene mat at the foot of steps, as well.
3 points
-
Living and camping in Wisconsin and Michigan, I completely agree with your post. See my recent post concerning that big hole in pre-2024 Olivers for the refrigerator venting. I also agree with your comments concerning the Imperial Outdoors' trailers. That said, I decided I am too old to want to camp out in 10 degree and below weather 99.99% of the time - might have been ok when I was 30 years old. The logistics of winterizing and dewinterizing make winter camping less desirable for me. Running and heated water is important to us. And we just don't want to be sitting around the outdoor campsite at 20 degrees nor cooped up in the trailer for any extended time. Even my dogs agree. So, the Oliver works for us and probably most folks, even though it is not a true 4-season camper in my part of the world.3 points
-
I thought about that as well but non of my bolts had the flats lined up exactly. I don’t think that when the cross holes are drilled they are in any particular position. I don’t remember who but someone on the forums had a supplier of rings with a 12 point pattern on the inside diameter that looked similar to a boxed end wrench. These rings would be placed over a bolt and welded all around. This would hold the bolt securely in place.3 points
-
Oh yes we do! We have the 5-leaf packs. I replaced all the spring packs, shackles, wet bolts, and U-bolts this week , surprisingly it wasn't too difficult doing it myself. It's nice to have that job behind me though. I know one person that has a 2022 Elite II ( with less than 5000 miles) and one person who has a 2024 Elite II that had flattening spring packs. They have preemptively changed theirs out with Alcans. As others have said, Alcan is great to work with.2 points
-
I totally agree on this one!! We had our curb-side rear spring break on our last trip. I ordered complete sets from Alcan and replaced them yesterday. I expect things to break while dragging the trailer around the country and I'm good with that and actually enjoy fixing / improving things when that happens but I don't expect something as critical as the suspension to break under normal usage. In my opinion that's an unacceptable failure, costly as well as a potential safety concern. From the number of failures on new as well as older trailers the build requirements need to be respecified.2 points
-
PS SWEET BARN! And Ollie too of course! GJ
2 points
-
That would be Geronimo John. See this thread for “Hex Head Capture Washer”. https://olivertraveltrailers.com/forums/topic/3665-dexter-axle-loose-bolt-at-the-equalizer/page/2/2 points
-
You got this right! Dan is new here, but there are 20-some failures written up on our Forum posts. When you read the title of this thread, I should have more posts than you. Since I've actually installed "Made in USA leaf springs" and wrote posts about my installation, maintenance and performance observations! 🤣2 points
-
That’s good to know. Quiet and cool!1 point
-
If you live south, and have the Dometic Penguin II A/C installed, the Oliver is also merely a 3- season camper! Any season is good when the A/C is OFF! 🤣 First real trial of our Furrion Chill Cube, camping in the Phoenix Valley this week. We turned it on yesterday at 3 PM, been running since. In start-up it pulled 50A on 12VDC. Was down to pulling only 16A, 40 min later. Overnight it was whisper quiet using very low amps. I estimate <25A per hour daily average. Like our friend @FloraFauna, we’re not going on any winter survival trips! This 3-day trip, we ran the A/C, our Suburban HWH (largest power draw -120A) and the Dometic fridge ALL on battery! Still have 50% SOC as we’re breaking camp today. 😎 Yesterday the Victron shunt read 67% SOC. I looked at Chris asking, “you know what that means?” 67% of 900 Ah is equal to 100% SOC when we had our 600 Ah battery bank! Those of you who recently upgraded 300 Ah Battleborn to 600 Ah Epoch, next time you read 50% SOC on the shunt, just smile knowing that was your 100% in years past! So cool…1 point
-
Yes, other than a slight recess at the bottom of the door to prevent water intrusion.1 point
-
This is all you need. Figured out where you want the wet bolt opening. Weld a little 1/8” x 1:4” x 1” tab perpendicular to the shackle to the inside of the bolt head. Install the bolt in position and only the nut only should spin when torquing. I’ll turn mine some while greasing, prior to torquing maintenance. Mine are all still clean and straight. My thought is Ken’s got that way from less torque. They would not bend if held square. As often as I’m doing regular maintenance, I’m not going to worry. If they look bad years later, I’ll buy a new MOR-Ryde HD shackle set and replace them. 😎 https://shopmorryde.com/products/heavy-duty-shackle-kit1 point
-
All good points @FloraFauna couldn't agree more.1 point
-
Well, after seeing this, the first thing I'm going to do is weld two strips of 1/8 steel to each side of the hole to hold the bolt from spinning once installed.1 point
-
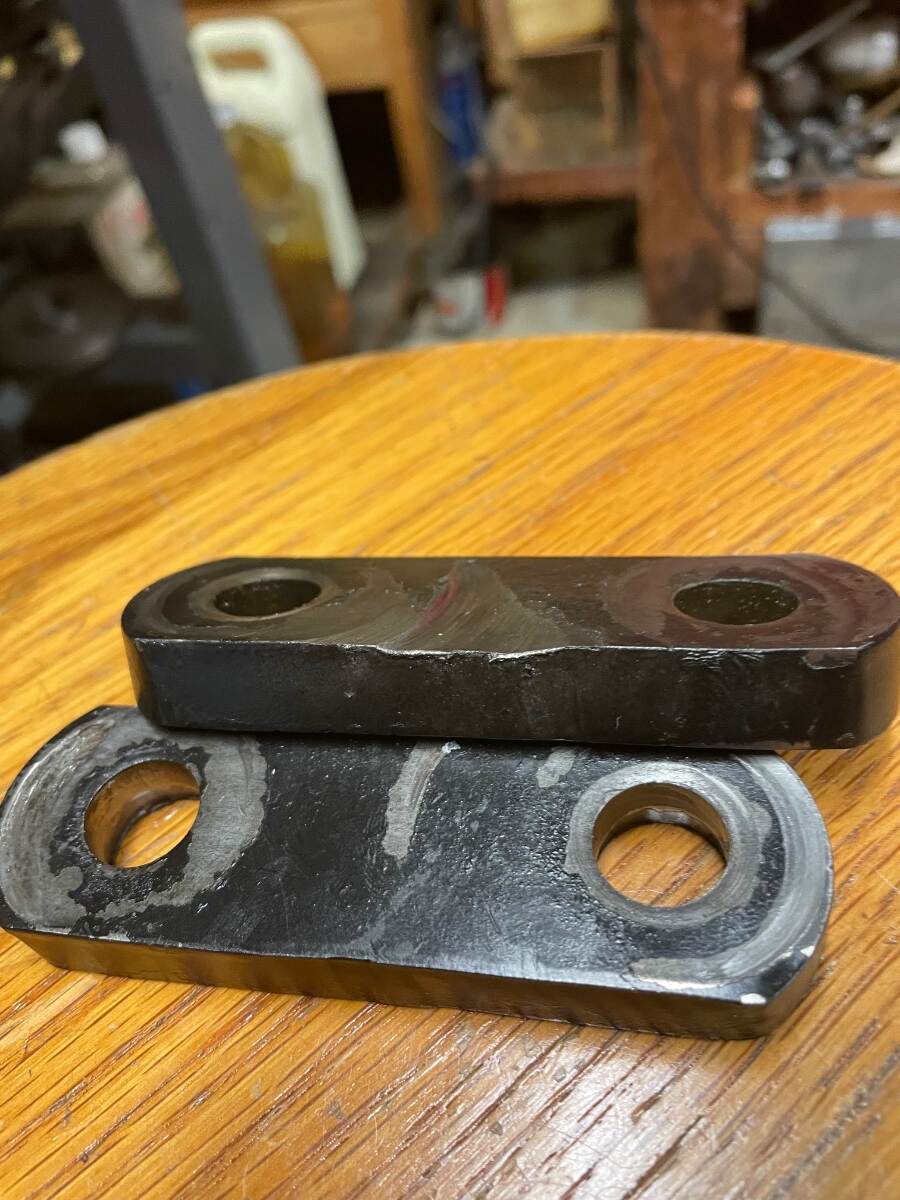
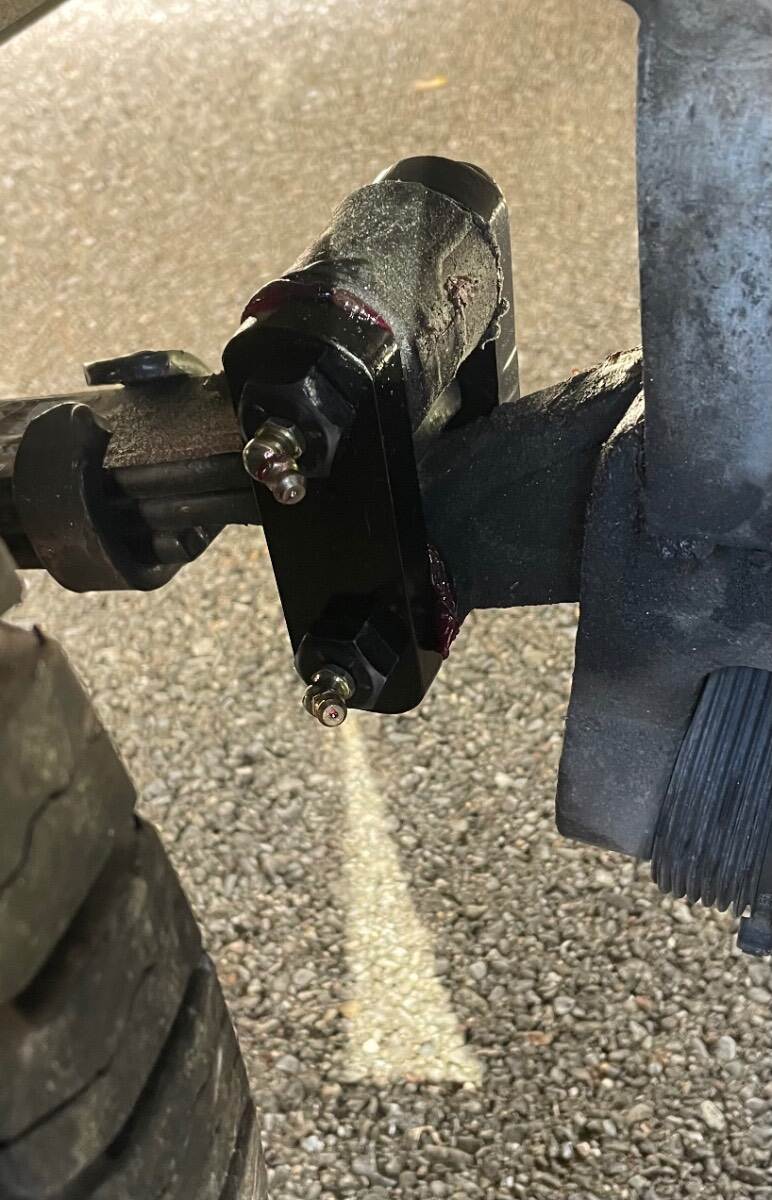
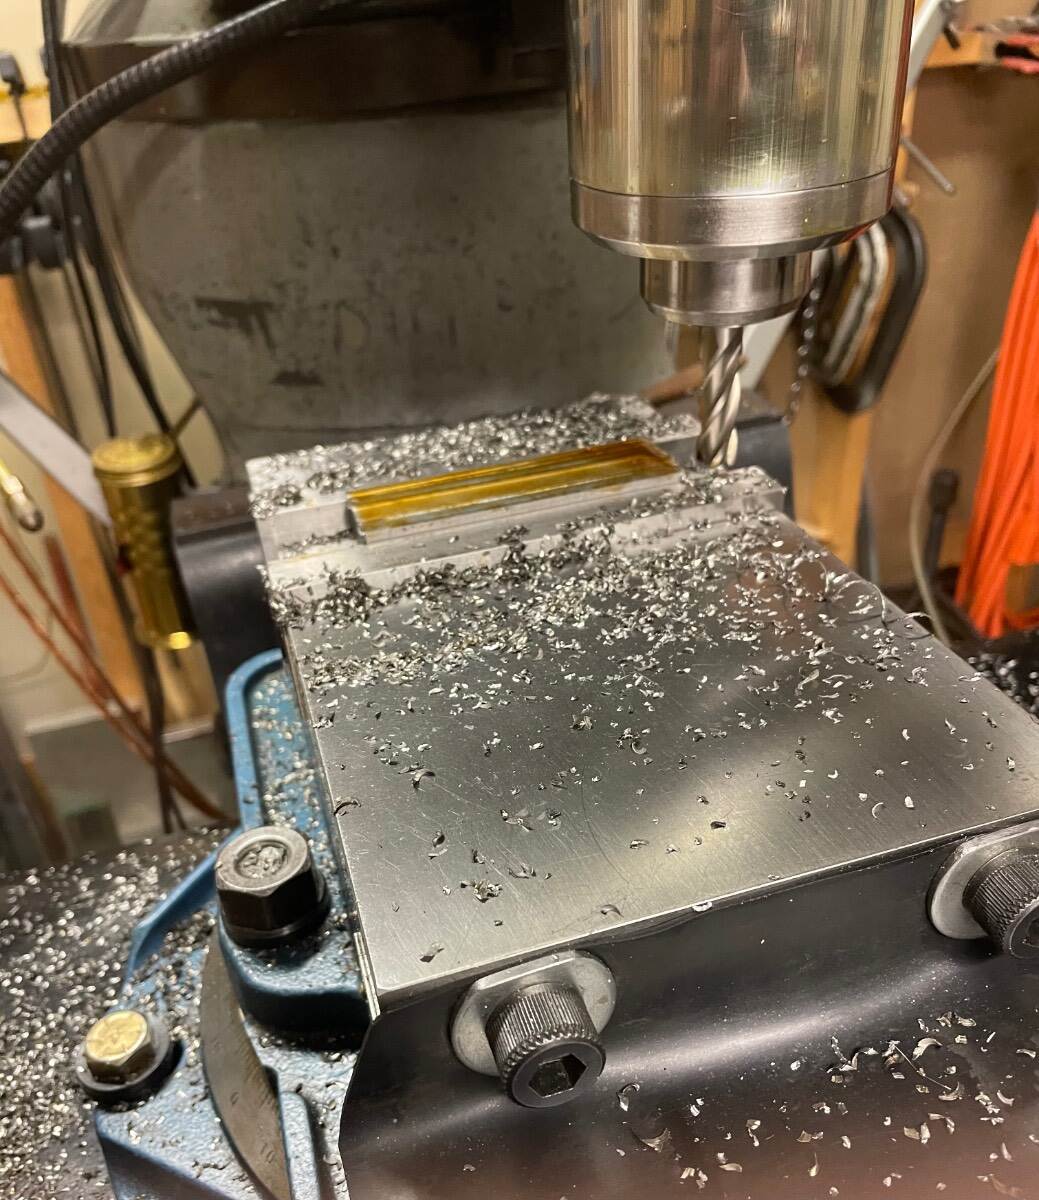
Yes, I had one shackle that had both bolts rotating freely. I only have a few thousand miles on the new spring set but the holes were still wallowed out some. The original plates have punched holes so they are naturally just sloppy clearance holes perfect for bolts or rivets but not so good if a press fit or close accurate fit is required. The original grease fittings were straight so I couldn’t tell that they were rotating until I replaced all of the fittings with 45 deg fittings. One of the side plates was very worn so I made a new one with close fitting 9/16 holes which allowed for a fairly hard press fit for the straight knurled bolts. The 60 ft/lb torque suggested by Alcan in my opinion is way too high being that the bolts are not shoulder bolts. I basically just snugged them up at 30 ft/lb and will probably leave them there. I too had the shoulder bolt vs straight bolt conversation with the Alcan folks while I was in Grand Junction. Contrary to what some folks have been told……I was told to make sure to hold the bolt head stationary with a backup wrench while tightening the shackle nuts and not to allow the bolts to rotate. Anyway? Whatever…. The first photo is of the original worn side plates. The second is of the finished parts installed and the last photo is of me making 1/2 inch thick plates out of 5/8 thick stock. At some point I will probably make all new plates maybe with recessed bronze thrust washers. 🤔
1 point
-
I agree. I went with lower torque numbers. Instead of the Alcan recommended 65 ft-lb on the EZ Flex and 80 on the ends, I went 55/65. Of course the U-bolts must be 90 as specified. The Alcan shackles and wet-bolts are not the quality of their leaf springs. I believe they cut the shackles and likely outsource the bolts. Ken’s @mountainoliver shackles have already bent some, bolt holes buggered. He made new shackles in his machine shop, drilled tighter fitting holes. If I were to do this again, I’d certainly buy the Alcan 5-leaf pack springs, but buy a full new HD EZ Flex kit, including shackles and wet-bolts. I had to get new EZ Flex centers anyway which should be replaced if more than a few years old (the center bushings will wear off angle due to the design).1 point
-
Here is my unscientific take on the insulation of the Oliver. Over the last few days I've been doing some mods to our EII, new ceramic toilet install, new bath faucet and shower head etc. With the rather coolish to cold weather we have been having through the month of April I hooked up to house/shore power to run an oil filled portable heater running at 900 watts continually for the last several days. Early morning temps outside this morning were at 32º (according to the Weather Channel) with frost on the roofs in the hood. Temp inside the trailer was 47º. The actual temp according to our exterior house thermometer was 37º indicating a max difference of only 10º from trailer interior to outside air. If taking the WC temps as the gospel then there would be a difference of 15º, neither one being very impressive. That same heater installed in any one of our basement rooms (insulated with 1.5 inches of sprayed foam) of our house would have turned the room into a sauna or near about. Conclusion: the Oliver is not a 4 season camper. It might be along the southern perimeter, ie FL, TX, AZ, SOCAL etc but not further north. This isn't to say you can't camp in some cold weather as most of us have at one time or the other. Keeping even a moderate temp in freezing winter weather will tax the system seriously requiring huge amounts of propane to keep the furnace running nearly non stop. In summary at best I would describe the Oliver as an extended season camper but certainly not four season. The notion that the Oliver has an R value of 18 is pure bullocks. Oliver is not alone in this regard as there are many manufacturers stating four season camping specs but fall far short. Recently I was at a local RV dealer that sells Emperial Outdoors RV which truly are four season ready. The salesman I talked with related a previous winter day when the temps were bitter cold (-22º) and the Emperial Outdoors RV setting in the sun was measuring about 40º inside without a furnace running. Even if the story was wildly exaggerated which I doubt that is a massive amount of difference between an Oliver and a true four season camper. In our EII the bottom half of the inner shell was never insulated with the Propex material making the insulation issue potentially worse. In summary the Oliver is an excellent travel trailer (not without some issues) but the company should not be promoting it a a 4 Season camper which is really is not. Not even close IMHO.1 point
-
For those of you that have the upper refrigerator vent to the left of the door but a refrigerator that doesn't require it, you have a big thermal hole there even with the Oliver supplied insert. The Oliver-supplied insert is simply a thin piece of plastic with no significant thermal barrier. I plugged mine with a piece of foam caulked in, then put the Oliver insert over it and the Oliver vent cover over that. Otherwise, cold air pours in between the hulls. I can try to find my pictures if anyone is interested but it is a simple fix to an easily overlooked thermal opening between the hulls.1 point
-
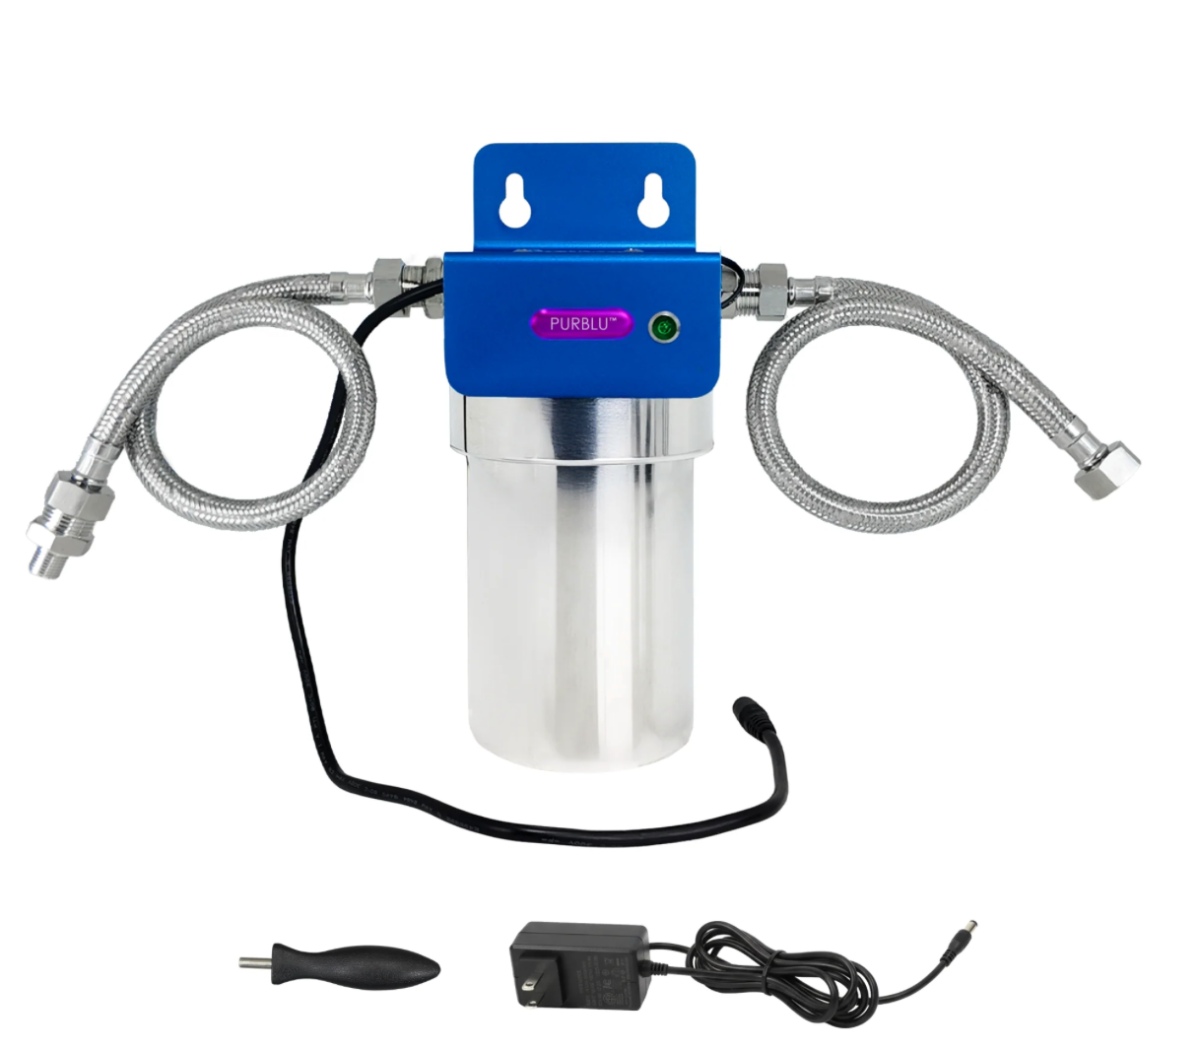
Great solution - I love the Blutech stuff. We’ve got the filter unit with UV, and the softener and iron tank. For inside the camper I’ve thought about adding that but don’t like drilling holes. But now they’ve got a new solution for hooking into your existing faucet. When the Black Friday deals come around this year I’ll probably pick this up.
1 point
-
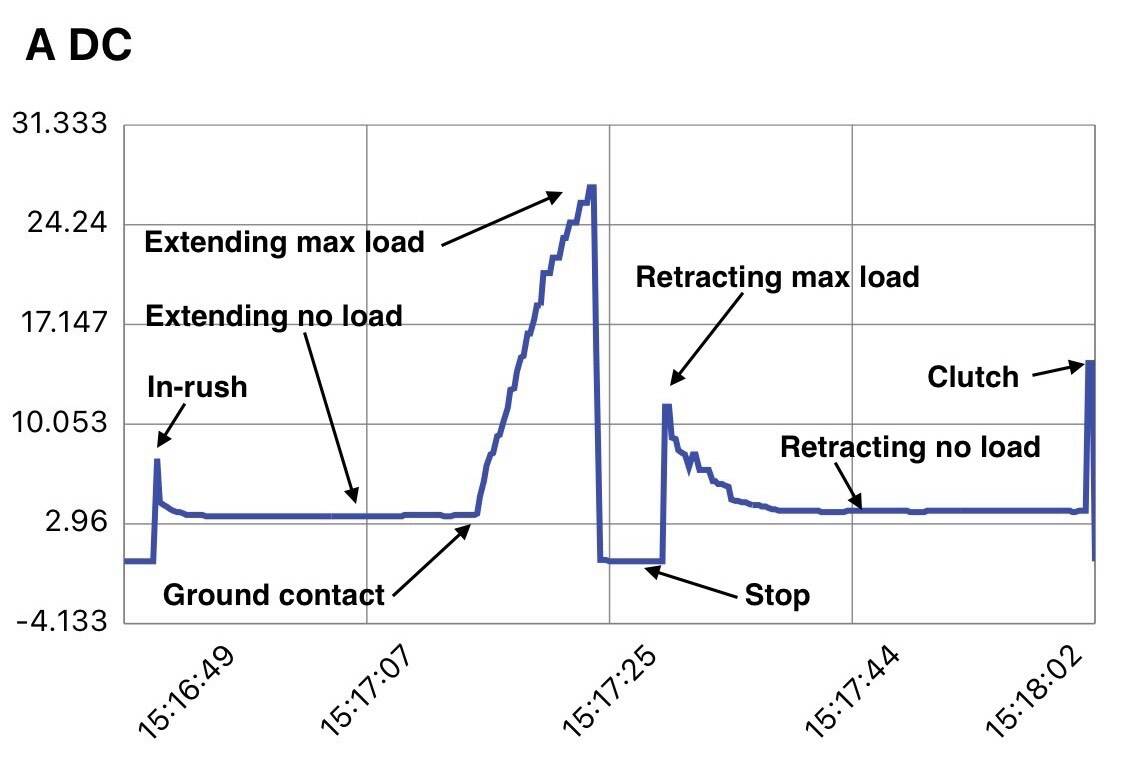
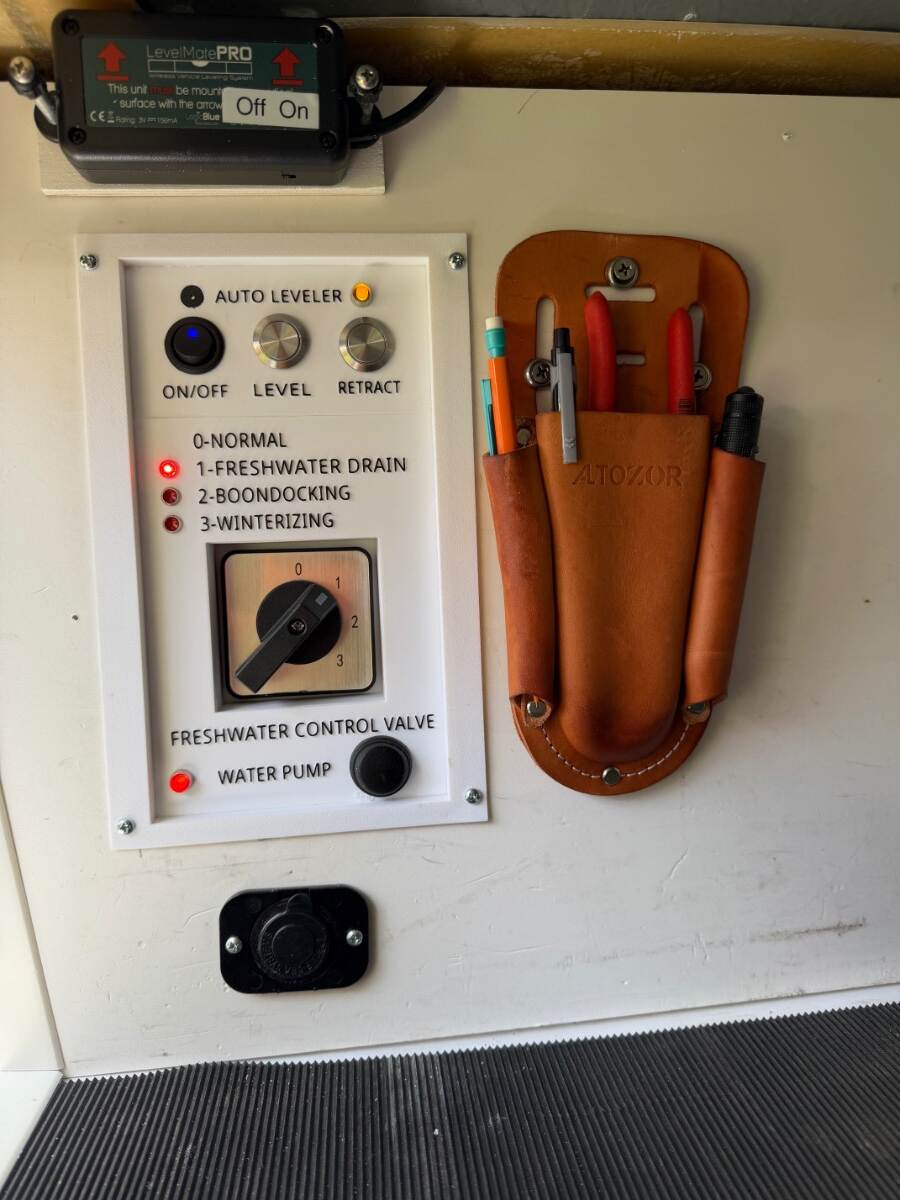
As far as I can tell, I’ve made the first automatic leveling system for the Oliver’s Barker stabilizing jacks! Maybe even the first 3-jack leveling system on a travel trailer! It’s simple to operate, safe, and works great! I built the leveling system as a novelty for my own entertainment, so I’m only posting it as a interest item not a recommended project. In reality, manually leveling with the electric jacks is already easy, particularly with a LevelMate, so automatic leveling isn’t really needed. There are even warnings that the jacks are stabilizers, not to be used for leveling. However, I believe the warnings are more about liability than capability, as long as the jacks are used within reasonable limits. I'd been thinking about an auto-leveling project for a long time, but was deterred by the thought of modifying the jacks with fiddly proximity sensors or revolution counters as used in conventional leveling systems. I didn't want to alter the jacks for a DIY project that might not even work. But then it dawned on me. The only time I really needed to know the position of the jacks, is when retracting them to their parked position. I wasn’t interested in returning the tongue jack to the truck hitch hight like some systems offer. So this led to a revelation that automatic leveling could be done with nothing more than current sensors mounted in a control box rather than on the jacks themselves. This was only possible because of the Barker jack’s mechanical clutch. When the jack reaches the end of its travel, the clutch activates with a distinct clack-clack sound. It was likely that clutch engagement would produce a unique current signature that could be used to detect when the jack is fully retracted. A plan was developing, but I needed actual amperage values for proof of concept. Fortunately I had a data logging ammeter, and the chart below illustrates the results for one of rear jacks starting from its fully retracted parked position. The jack was extended through free air until it touched ground and began picking up load, maxing out when the wheel lifted off the ground. Then it was retracted to the parked position until the clutch actuated: I didn’t include the tongue jack chart because it's far less dynamic — it's always under load, and the clutch doesn't normally actuate during leveling. The clutch only comes into play after trailer is hooked up to the TV and the tongue is manually retracted. The amperage results confirmed that current sensors could work, and beyond detecting the parked position, they could also be used to distinguish the different leveling phases: rear jack extension until firm ground contact for stabilizing, and then transition to "roll" leveling if needed. Completion of the rear jack phase could then trigger the tongue jack phase to handle "pitch" leveling. The amperage chart became the basis for the circuit and software design. No proximity sensors. No revolution counting. No permanent modifications — just two wires to each jack, a component box, and a control board. Sounds easy, but this was only just the start of a long process to perfect the system. I hope someone finds this interesting! Cheers! Geoff
1 point
-
Very impressive! My head hurts.😉1 point
-
I just upgraded my Furrion S rearview camera with the S+ and a 7-inch display. Huge improvement in resolution, features and display brightness over the original S and 5-inch display that was OEM (and basically worthless)!! The S+ camera slips into the old S housing so no mounting of the new housing on the exterior of the trailer and no rewiring needed. Since my TV is GM with the trailer camera functionality, I seriously considered going the way of this original thread instead, but my GM screen is small, and I can mount the 7-inch Furrion screen partially over the rearview mirror which isn't useful when towing and retain my TV display for the TV cameras. And again, no rewiring was necessary. (I thought I saw a prior thread where someone else did this upgrade but could not find it.)1 point
-
Roger, I have a very simular issue but harder. If the approach is level, carefully checking clearance is easy. Mine had a foot tall "ramp" that would kick the rear of our Ollie up about 5" as I backed into the lean-to enclosed area. I removed the gavel floor took out a couple inches of dirt and re-graveled. Still no go. Then I hauled back all that dirt, and a bunch more, and made an elevated area 20' long and 10' wide "Table" in front of the barn door. So I back Ollie up onto the "Table" and then it was an easy back into the "Ollie Cave". Hope yours is a level entry. GJ0 points


.thumb.jpg.e34bf01ef7f7d5e99ad31856d45afbeb.jpg)


-
Recent Achievements
-


")


")


