
ScubaRx
-
Posts
3,307 -
Joined
-
Last visited
-
Days Won
173
Everything posted by ScubaRx
-
This doesn't sound right, your water heater should not be heating to the point that it pops the pressure relief valve. We had one of these in our first Oliver Elite. I couldn’t tell that it made much difference in decreasing the run time of the pump. I still have it with all the hoses and fittings in a box somewhere. If you install one, you need to have EASY access to the air fitting so that you can fill and check the pressure without jumping thru hoops.
-
 Doubtful, since Oliver buys these tanks with the fittings molded in.
 -
Is it the Furion or the Jensen head unit and are you using an HDMI cable
-
Personally, if I leave someone a message and they've not returned my call in two hours, they're getting a return call. After two weeks, surely you've realized it has slipped between the cracks. Perhaps I was not clear earlier, Oliver had a breakdown in their phone system and NO MESSAGES were getting through. They disappeared into the ozone. For about 10 days. None. Now call back on the provided number. If they don't return your call in a timely manner, call me. 662-255-0181
-
That number should be used for all past, current and future service questions. I do not have Jason's email but convention should dictate that it's Jessary@olivertechnologies.com I realize some folks like emails and texting but personally, I'd sooner eat a frozen possum! There is a communication tracking system being developed that Scott can review and yes, Richie still works at Oliver.
-
There have been some changes in Oliver's service structure as of this week. Effective immediately, the number for scheduling service or ordering parts is 866-205-2621. This number will be answered and/or monitored by Jason Essary. All calls placed to this number will go to Jason's desk. After five rings it will transfer to his cell phone. If he is unable to answer immediately, leave a message and he will return your call. These changes are due, in part, to a recent problem with their VoIP system which resulted in calls to the service department going to an inoperative number thus not being answered. The outage occurred without Oliver having knowledge of it for a few days. They wish to apologize for all inconveniences that were incurred by the owners. Please do not call Richie Carroll's cell phone any longer to request service. The goal here is to have service requests responded to in a more efficient manner.
-
I am at the factory and have spoken to Scott about these issues.
-
I would expect that Oliver figures if you order a kit you are smart enough, have the proper tools and are able to do the job yourself.
-
Looking good, ladies.
-
Yeah, I wish I'd thought of that.
-
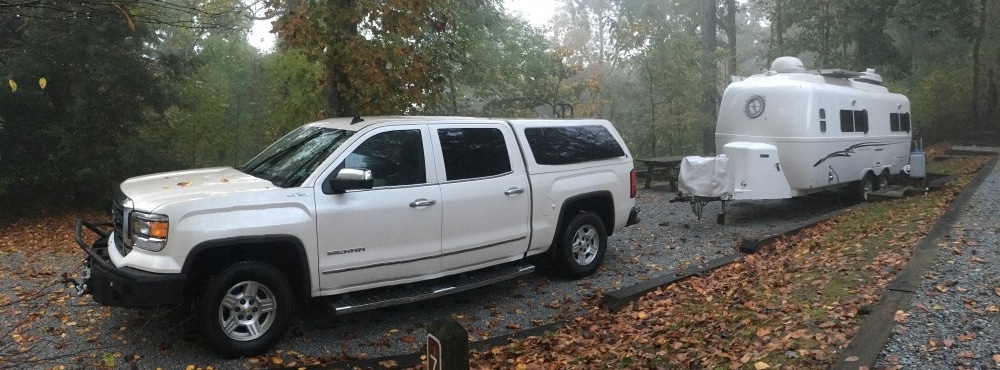
This is our new tow vehicle. Top speed is only about 30 mph and the mileage sucks but it will pull a stump out of the ground! An Oliver pulling an Oliver. What could be cooler?
-
I've got a beautiful Leer topper painted to match that truck. It was on our previous Sierra
-
Hey that looks like our truck. Very nice. You'll love it. Did you get the brown or the black interior?
-
It is with great sorrow that I tell you of the passing of Robert Partee Sr. For those members that did not know Robert, he was the first sales manager for Oliver Travel Trailers. He was personally involved with the production and sale of all the original trailers produced in 2008 and 2009. Although Robert left Oliver a couple of years ago, we remained in communication with each other. Everyone please remember Robert's wife, sons and family in your thoughts and prayers. I will greatly miss you my friend.
- 12 replies
-
- 10
-

-
Brad, I sent you a text with all the contact info for the folks that make the blinds.
-
Yep...
-
Solar Capacity - What is offered & needed
ScubaRx replied to wdw0528's topic in Mechanical & Technical Tips
I agree with Sherry, out of the last 200 or so nights on the road, we have been plugged in 10 times. For four nights at Pete's house going to and coming home from Quartzsite, for four nights in Boise, ID while we attended a wedding, when we used a commercial RV park to be close to the family and for two nights at the Sales Office while we drove up into KY to view the eclipse. We "only" have 300 watts of solar. We average about 50 amps of usage during a typical evening after the sun goes down. We are generally back to full by 2 PM the next day. This is all with the Blue Sky system. 420 watts of PV would most definitely be plenty but probably unnecessary unless you are using more than 100 amps per night. On a related note, we really like camping for free and the time we spent at the RV park in Boise was expensive. We made up for it though, as we were able to sneak away from Pete's house before he woke up and got outside to collect his fee! -
We always let the fan run constantly. Especially with the AC, the fan does not go on and off with the compressor, but it is the same with the heat strips.
-
Fuses, you really can't have too many. I carry at least a few fuses for everything that needs one with the bulk of the collection being 10, 20 and 30 amp ATO blade type. I also recommend a few 30 amp slo-blo glass type for the jacks. This will tell you more that you every wanted to know about automotive fuses. I also carry a spare water pump and an extra head for the rear jacks. These are by no means necessary but I have them so.... I lead a group of FG trailers on a trip earlier this year into the Utah back country and one of them had a water pump go out in his trailer. He spent the best part of two days sourcing and installing it. I would have given him my extra but he had left to search for a replacement before I heard about it.

- 9 replies
-
- 4
-
-
- spares
- spare parts
- (and 2 more)
-
John Sandy reminds me so much of our white Timber Wolf we had back in the late 80's and early 90's. Her name was Marabou and she was an amazing animal to own. She rarely barked but did she ever love to howl. We would often have a "group" howl. It got to the point that all it took to get her started was to pucker my lips, close my eyes and throw my head back. Seeing Sandy has brought back many fond memories.
-
When to winterize our Oliver with antifreeze?
ScubaRx replied to LenandPen's topic in Mechanical & Technical Tips
L&P, you would be fine at those temps to just place a small electric heater inside during the night. As to your question of when, living in the deep South, I don't go to the extent of actual full-blown winterization. I just blow out the lines. Malcolm Monlezun (a forum member and very experienced RV'r) lives outside of Denver and would be able to share his knowledge of using RV antifreeze. I think he may be on the road currently but hopefully he can chime in here.- 3 replies
-
- 2
-
-
- antifreeze
- winterize
- (and 3 more)
-
Propane quick connect... problems, self install?
ScubaRx replied to Mainiac's topic in Ollie Modifications
On all the later models I have inspected, the gas line running the length of the trailer on the starboard side terminates with a plug. This would be where the stern gas fitting would be connected. -
Accents? We don't have no stinkin' accents!
-
Solar Capacity - What is offered & needed
ScubaRx replied to wdw0528's topic in Mechanical & Technical Tips
I designed the solar system installed on the first Elite II built (mine.) I decided I wanted to use Blue Sky Equipment because it looked like the best on the market. It was good looking, had a ton of features and allowed you to really customize the system to best suit the end user. A downside of all this was, with its four levels of menu options, it was and still is complicated to set up and it overwhelmed a lot of the early owners that chose to have the solar option installed. At that time (2013), the most cost effective panels were 100 watts each and I chose to use two with them to be mounted on the roof. I also chose the Blue Sky 2512iX-HV Controller and the Blue Sky IPN PRO Remote Meter with current shunt. In less than a year, 160 watt panels were the same price that we had paid for the 100 watters we originally used so they started installing two of them for a total of 320 watts. This was the equipment that became standard for Oliver’s solar package. I added a third 100 watt panel to my array so I now have 300 watts and it works perfectly. Having 320 watts could only be better and it is my personal belief that that is sufficient. We have never failed to achieve a full charge the day after using our usual overnight average of about 50-60 amps. Usually we are back up to full by 2 PM. We have the 4x6V Trojan AGM’s. I know other owners with the 320 watt Blue Sky System have had very similar or better results. I agree with Reed on the Zamp system not being an ideal choice. The decision to switch from Blue Sky equipment to the Zamp equipment was prompted by the service manager a couple of years ago (he is no longer with Oliver.) When I questioned his decision about making the switch he stated to me that the Blue Sky system was "too complicated and the owners did not want or need to know all the information that it provided !" He apparently thought a "simpler" system was in our best interest. The solar package can be added after the fact. I am currently assisting another owner in installing a Blue Sky system. Oliver has agreed to add the panels (to the roof) and wire them to the controller and remote meter, that we will install beforehand. Oliver realized early on that customers that did not initially buy the solar package might decide at a later date that they just had to have one. Installation on a completed trailer entails some difficulties. Running the rather large wires, mounting the rooftop panels and fishing the wires from the roof down to the controller are just a few. Their forethought has made the job much easier. There are backing plates molded into the roof so that the panel brackets have something to attach to besides just fiberglass. There is a wire chase molded into the roof to allow you to run wiring between the shells. Some of the solar wiring is already in place for this very scenario. -
Jason I see the sidebar at the very bottom of the page. That's not a bad place for it if you know where to look. It does not take up any real estate down there. We could rename it the bottom bar.

