mossemi
-
Posts
1,781 -
Joined
-
Last visited
-
Days Won
43
Everything posted by mossemi
-
Thank you for the additional details. The more details you share, the more impressive your modification becomes! Mossey
-
Wow! That’s a very nice installation and your antenna mount is exceptional. I do love your creativity. Does the PEPWAVE antenna require a ground plane or is it built in? Thanks for posting your successful modification. Mossey
-
I only have a few months and about 1500 miles with a hanging shower head, so for me it’s just an excuse to use another noodle. Mossey

-
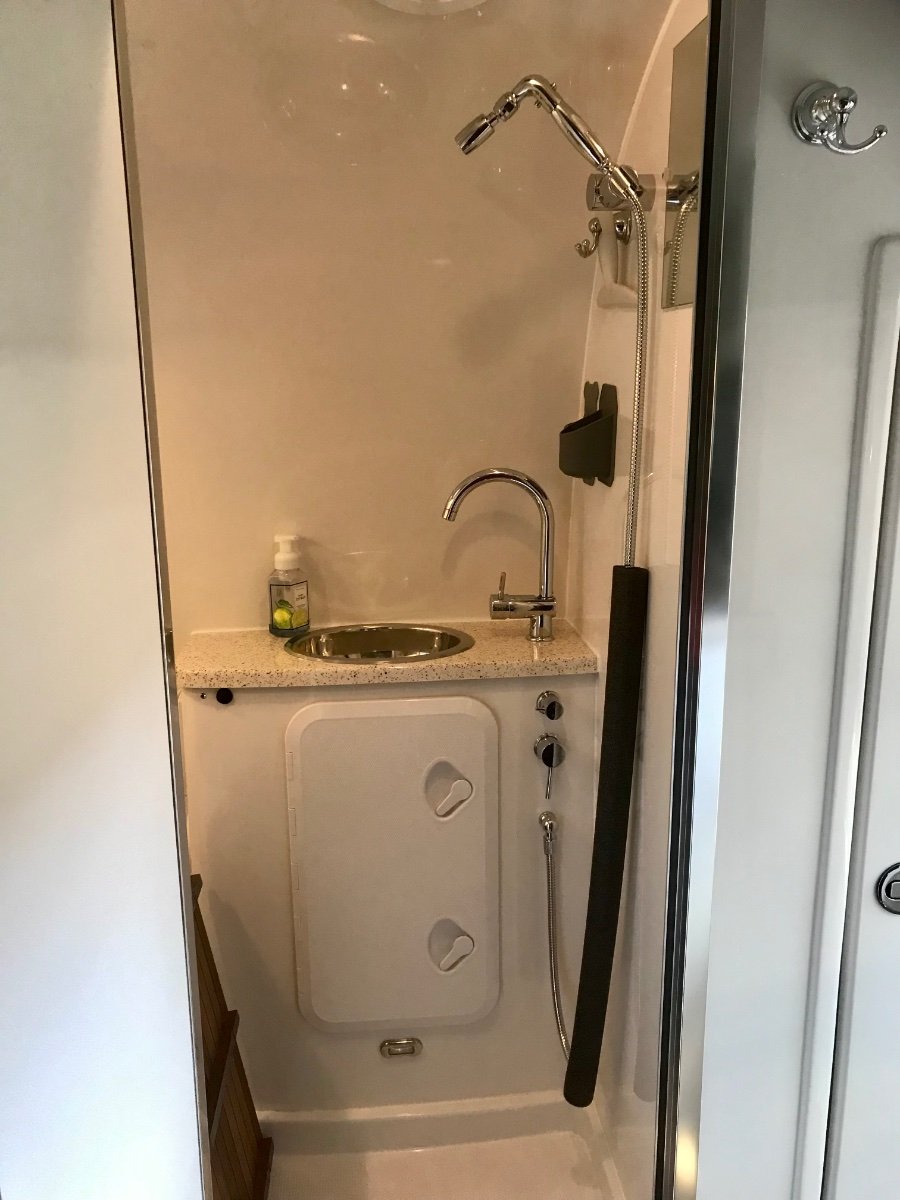
My Seaflo hatch was listed as 12x24". My existing hole was wide enough but not tall enough. So I enlarged the hole with a multi tool. I also used nuts and bolts to attach it. The curve of the vanity face required careful tightening of the hatch. I constantly checked the latch’s operation as I tightened the hardware. The sides will have a little more gap than the top and bottom and that’s why I used the butyl tape, which has a little more body than silicone caulk. Mossey
-
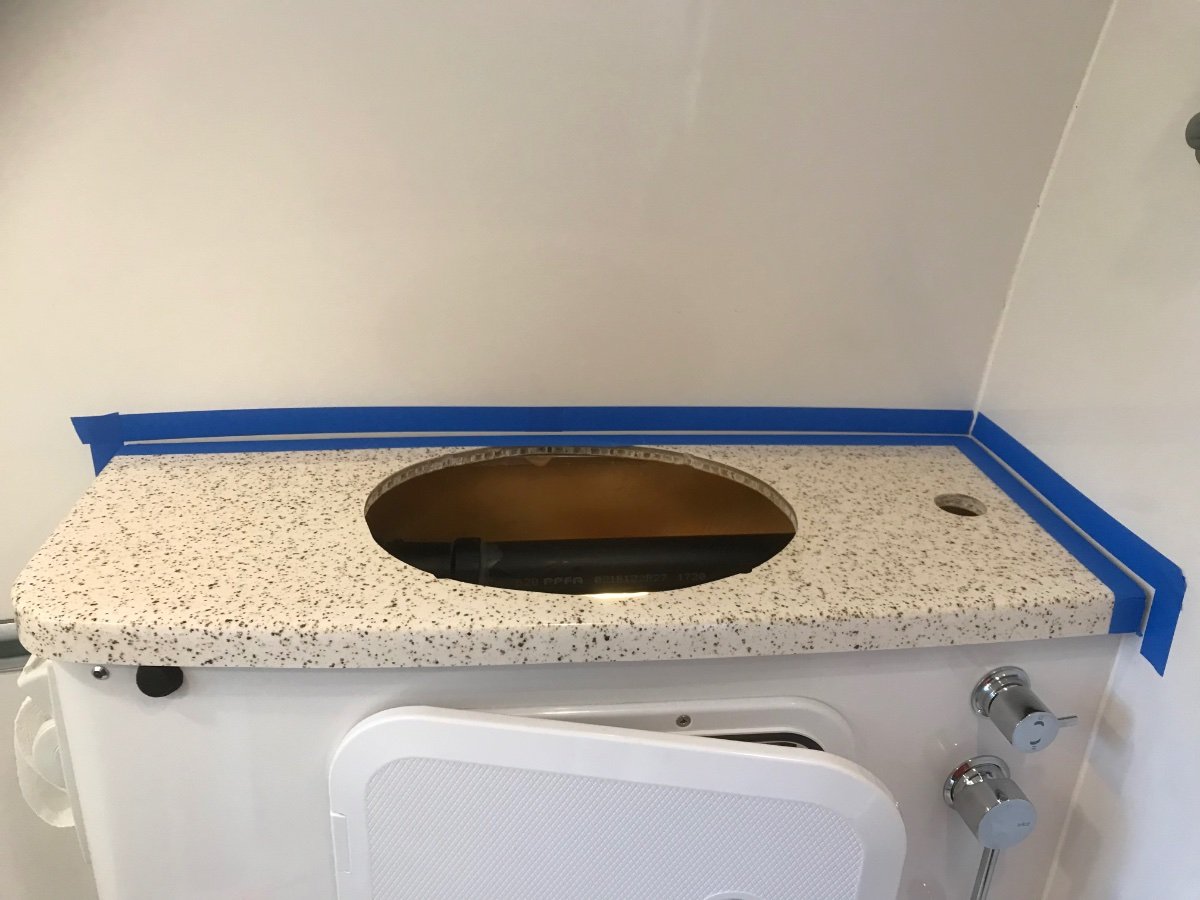
I covered the area to be drilled with blue masking tape. Then I did my layout on the masking tape and then used a hole saw and drilled in reverse. Worked pretty good with new drill bits. Mossey
-
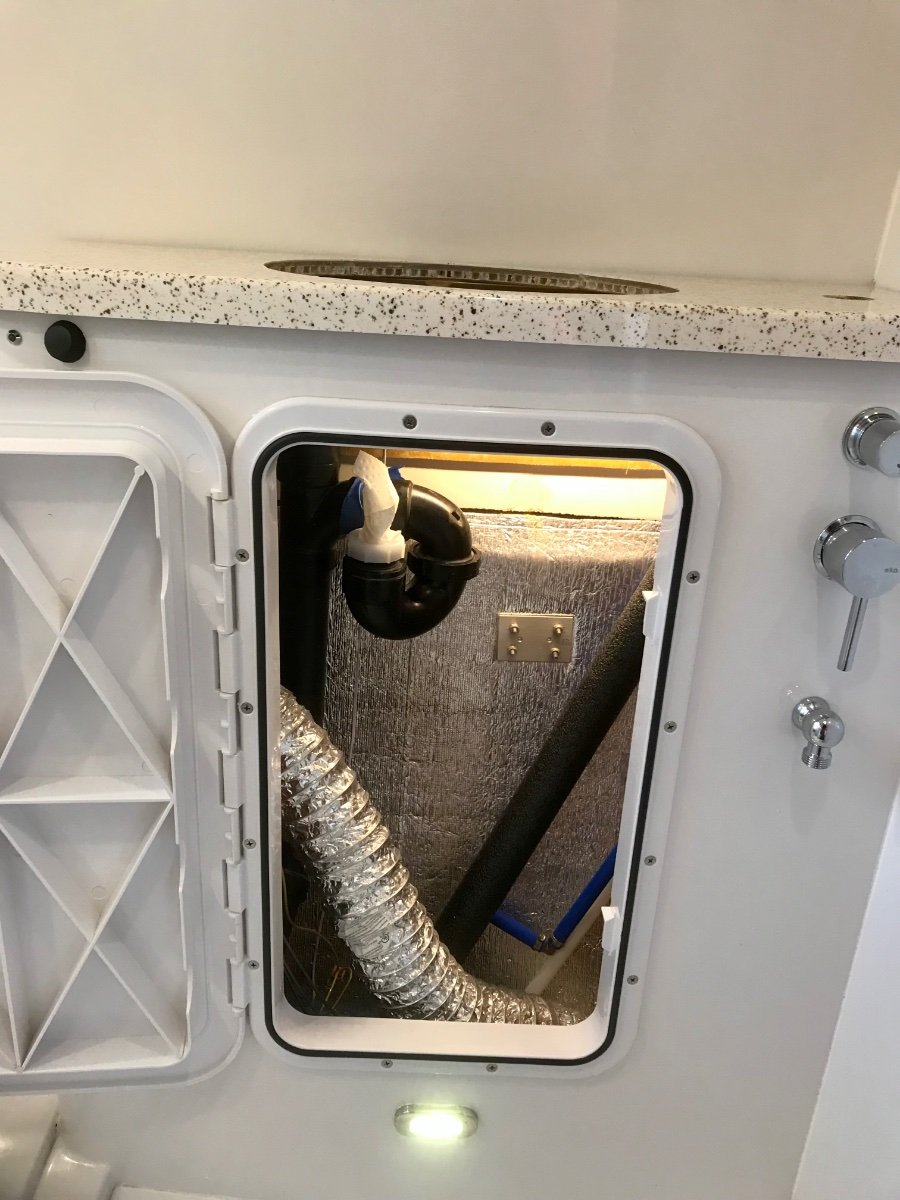
This photo shows the stock LE2 bath plumbing that matches my 2017. The red and blue PEX lines exiting the right side of the photo go to the faucet/shower fixture. The blue PEX exiting the left side is the toilet supply as the text in the photo SNY SD UP posted indicates. Mossey
-

Bathroom vanity towel holder caulking alternative
mossemi replied to Frank C's topic in Mechanical & Technical Tips
Tooletries I think I have 5 white ones and 4 grey ones and 2 black hooks. The white show a little dirt but it usually washes off. No dirt on the gray or black ones. No tears, fraying or hard water, soap scum spots or discoloring. Ask your wife if she has any silicone hot pads or maybe a dish drying mat. If so, she’ll vouch for how tough they are. If she doesn’t have any silicone kitchen products, maybe you can kick the tires with silicone hot pad at the nearest kitchen gadget store. They are very robust. Mossey -
Bathroom vanity towel holder caulking alternative
mossemi replied to Frank C's topic in Mechanical & Technical Tips
FrankC, the above link will also take you to the post Connor77 referred you to by NCeagle. Mossey -
Bathroom vanity towel holder caulking alternative
mossemi replied to Frank C's topic in Mechanical & Technical Tips
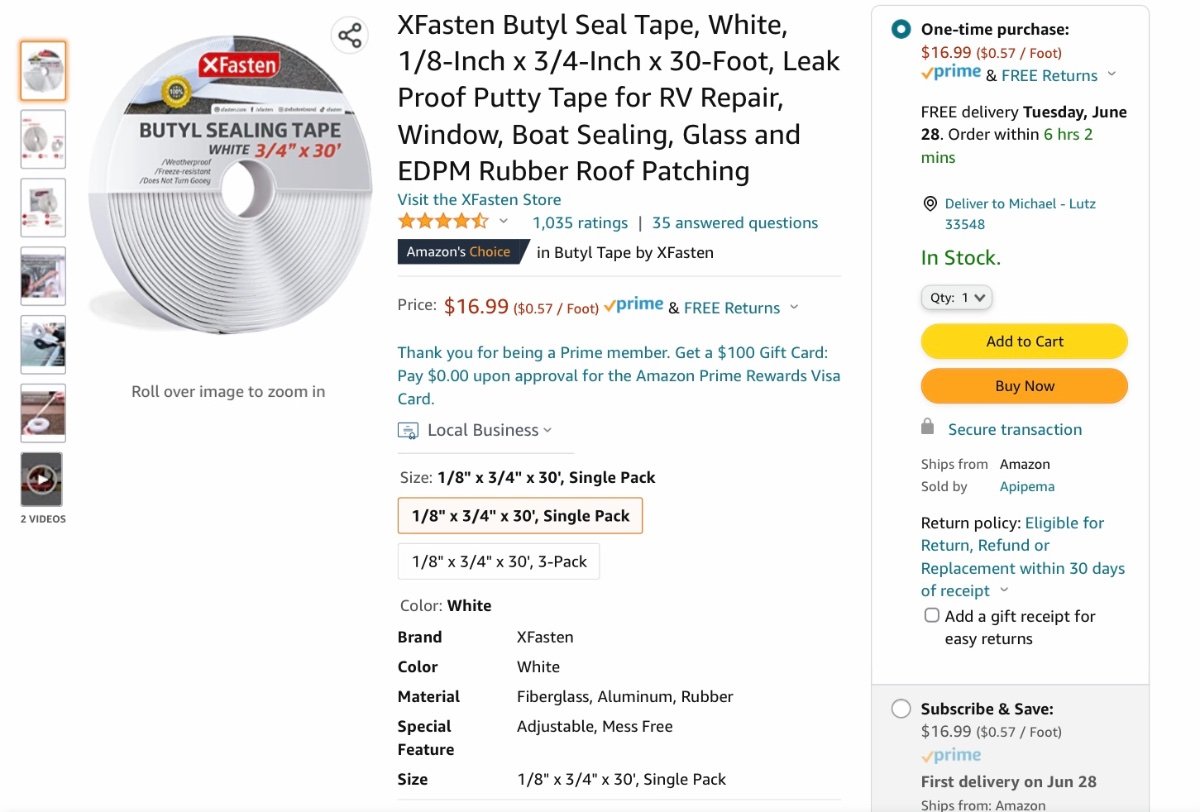
This is the product I used to seal the bath vanity deck hatch when I replaced the stock vanity access cover. Mossey
-
Towing with vehicles that really don't do the job safely
mossemi replied to Trainman's topic in Towing an Oliver
Would you provide the towing and cargo capacity of your Ram 1500 for guidance purposes? Mossey -
Looking for the best way to change out the bathroom faucet
mossemi replied to Markmck's topic in General Discussion
That’s just an area that could use a pool noodle! Mossey
-
And a pretty good one too. Mossey
-
Do you have a fuse? If your in Florida, stop by. If not, I can send you one. Mossey
-
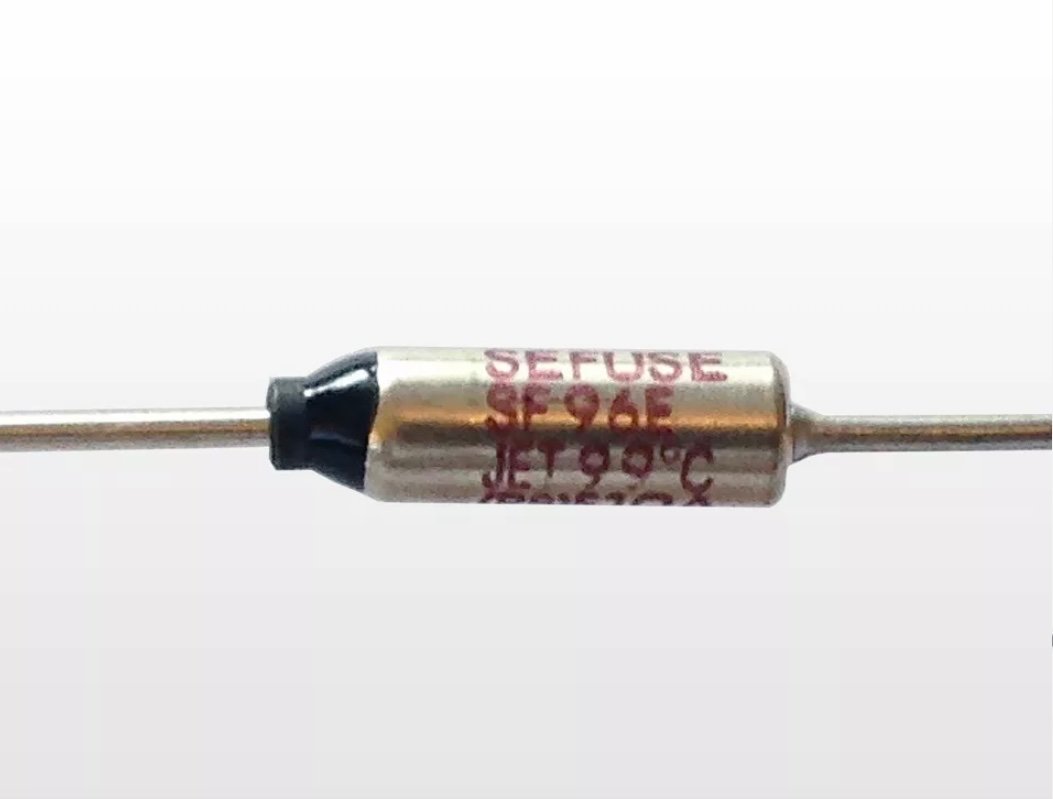
The fuse is the fat part of the wiring in or near the fan assembly. The fan is also the best place for voltage, just check on both side of the fuse. The MaxxAir fan runs on the same circuit. Is it working? The thermal fuse looks like this. And if I remember correctly, it is enclosed in shrink wrap. Mossey
-
Furrion Vision S rear Camera mount mod
mossemi replied to Patriot's topic in Mechanical & Technical Tips
I think you need to adjust your camera. I use mine extensively for lane change planning and execution in either direction. Mossey -
Some more of that Yankee Ingenuity. You da man! Mossey
-
Thanks John! I am beginning to understand the way Oliver is handling the DC side of the Xantrex. And I might be able to help someone else. Mossey
-
Thank you for closing the loop on your issue. That information will help someone in the future! Mossey
-
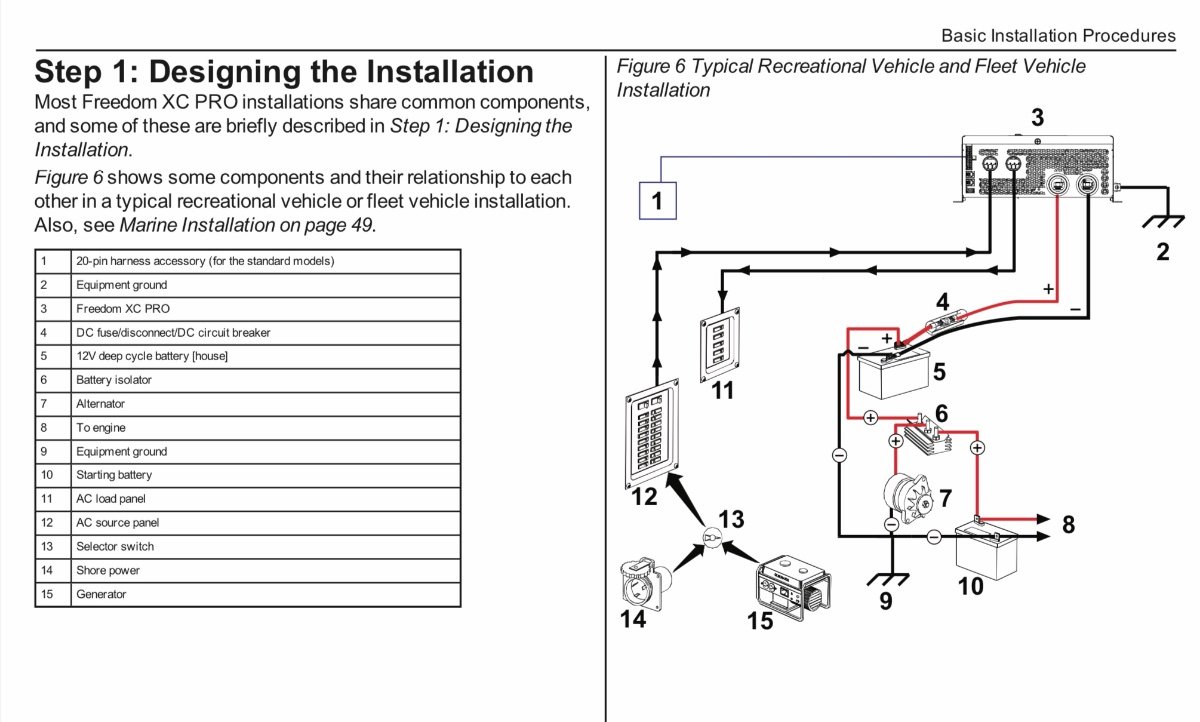
Hey John how’s it going? Have y’all been camping since the rally or are you hiding in the air conditioning like I am? I’ll jump back in and ask for more information. I still haven’t heard back from Katjo concerning my 4/0 cable lug question, so I’ll ask you if you are saying that you originally had a 4/0 cable connected to the frame ground stud and running straight to the battery negative? If so, that may be a wiring change to accommodate the Xantrex Freedom XC Pro series of charger/inverters. I know you have done extensive work to your solar setup and although I haven’t seen the work you have completed, your comment leads me to believe that you have installed a battery shunt. Maybe I should approach this from a different direction and ask if you have a Xantrex Freedom XC Pro and if so, what is the difference between your original installation and the drawing below? Mossey
-
BATHROOM VENT OPENING WHEN ON THE ROAD
mossemi replied to Minnesota Oli's topic in Ollie Modifications
I guess that is called "Yankee Ingenuity" in Connecticut.😄 Mossey -
These lights should be very close to a direct replacement but would require cutting the old wires and splicing these in. There are two version's, screw mount and spring mount. If you have the correct size hole, the spring mounted lights are very easy to install, but my lights are screw mounted. I am not sure if ITC is the brand of interior lights Oliver is using or not, but my porch lights were/are ITC brand. Mossey https://itcshopnow.com/collections/rv-products
-
I hear you loud and clear! Mossey
-
We have a Land Cruiser. I am presently trying to talk myself out of the new Tundra. The cargo capacity numbers are a little hard to come by, mostly because I am really interested in the hybrid. As they become more common, there will be more information available. All the dealers want to talk about is how expensive they are going to be. So we are biding our time or I should say that I am, she doesn’t really care.
-
I very rarely, if ever offer anyone advice about spending their money, but I will offer myself as an example. I bought my used Toyota SUV in 2016, knowing that I was going to buy an Oliver LEII, which I did in 2018. The reason for choosing a Toyota was based upon past experience and I like dependable products and it has a towing capacity of 8100 lbs and a cargo capacity of 1295 lbs. That’s not a lot of capacity in the grand scheme of travel trailer towing, but we make it work. What I didn’t know was that I would need a weight distribution hitch. But my Toyota owners manual states that it is required if it used to tow any trailer weighing more that 5000 lbs. I trust Toyota’s engineering, so a WDH is part of my towing equipment. I compare the Andersen WDH to shoes. I love wearing flip flops, but when I’m cutting the grass, I’ve got my boots on. So if my tow vehicle requires a WDH, it’s incumbent upon me to learn how to use it. So please do not let anyone scare you away from using the Andersen WDH if your tow vehicle requires it. And please verify the towing, cargo and tongue weight capacities of any vehicle you are thinking about purchasing. Do not trust someone else’s assurances that a given vehicle will be just fine towing a travel trailer. The capacity information is posted on each vehicle, usually on the drivers door jamb. Happy hunting, Mossey
- 68 replies
-
- 10
-

-
@Mike D. thanks for the clarification. Maybe Katjo will comment on his picture and let us know if the 4/0 lug in his picture was original or part of the recent repair and what the other end is connected to. Mossey