Geronimo John
-
Posts
2,330 -
Joined
-
Last visited
-
Days Won
66
Everything posted by Geronimo John
-

2019 Oliver elite ii lithium upgrade.
Geronimo John replied to Gene G.'s topic in General Discussion
Ditto. Love our Battleborns. But knowing what's out there now, as posted many times by many owners, the cost of three of them (300AH) and the cabling could lead me today to another larger single battery. PS: In addition to the SOC capability, our 2019 OE2's do not have a master 350 amp shut off switch. Yes there are lots of opinins as to where to mount it, but 95% see the need to ba able to stop the source of power in an emergency QUICKLY. So please add that to the need to do list. Below is John Davies' approach. John Davies Master Battery Switch.docx Note that his install was for 200 amps and inside the cabin basement. I suggest using the 350 amp version as it is higher than the fuse in the 4/0 cabling. Also, I suggest mounting it in the battery box to not delay exiting a smoke filled trailer in an emergency. Get out and shut it off outside. Always grab your fire extinguisher and have it handy. But get the family out first. -
2019 Oliver elite ii lithium upgrade.
Geronimo John replied to Gene G.'s topic in General Discussion
I'm with TopGun2 and Mike & Carrol in using a minimalist approach. JD's approach is a good start for cleaning up the cabling and that's good too. If you want to do a 100% upgrade to current technology then there are 2 in 1 Charger/Converter units, computer interfaces with gizmology way over my Pea Brain. So I'll leave it to you to respond back as to your goal. Several of us though like keeping things simple. Personally I LIKE have seperate charging and inverter systems. The combo units, best one is Victron's, is in our opinion overkill in the gizmology zone. Have a blip and you could lose both 120V and 12V capability. Is our world if we lose one, we are still in business in many ways. I suspect that our 2019 hulls were built with the same PD Converters. They likely have the same LI switch that can work with many Lithium Battereis. If you are in the less is better group, then reusing the Converter is a good cost reduction... if you have the switch on the PD mother board. Below is one of my DIY's on this topic. Up to about two or three years ago, the #1 Litho battery was the Dragon Engergy Battleborn's. Now as stated above thee are some higher power density units with good quality too. Finally, if you desire info for minimalist approach, you for sure need a way for keeping track of your SOC. If so, send me a PM and I can provide you with some handy info. So, welcome to the OTT Family and good luck in your project. Geronimo John Progressive Dynamics PD4045 LiCSV Upgrade.docx -
I agree with both posts. I use Consumer Cellular, mostly out west. They use AT&T towers. Their customer service is second to none, and I am very pleased with their connectivity. If you are going to be doing a lot of Off-Grid Boondocking and need multi-media connectivity, or have emergency medial communication needs where WiFi is weak or non-existant; then Star Link seems to be the way to go. LOTS of great install info here on our forum. Like Lithium Batteries, I'm in "Absorption Mode" for the Star LInk topic myself. GJ
-
Music to my ears! Add to that the 20V Impact tool and lug nut socket for off/on of the wheels... Gosh, I already have the kit on board. thanks GJ
-
This ???? Is hard for me to believe that its the same OE2 MaxBurner and I saw last summer up above Alpine AZ. Are you SURE that your Detailer didn't snuck in and swapped out your 2017 for a new one? Seriously nice job. GJ

-
Cold weather propane question
Geronimo John replied to Brian H.'s topic in Mechanical & Technical Tips
Another error we have seen is confusion about the change over valve "ON" orientation. Get wrong and you will have simular frustrations. GJ -
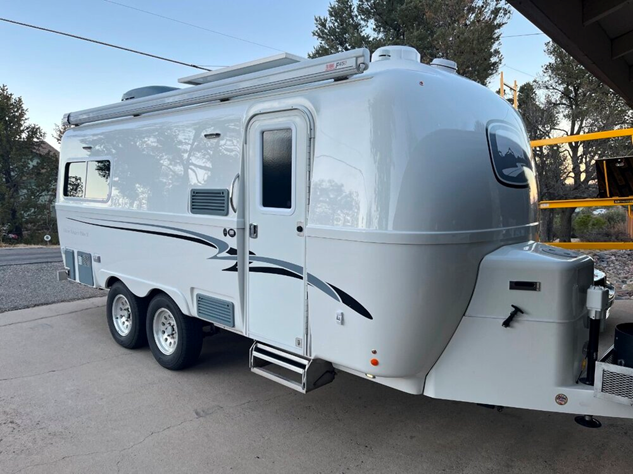
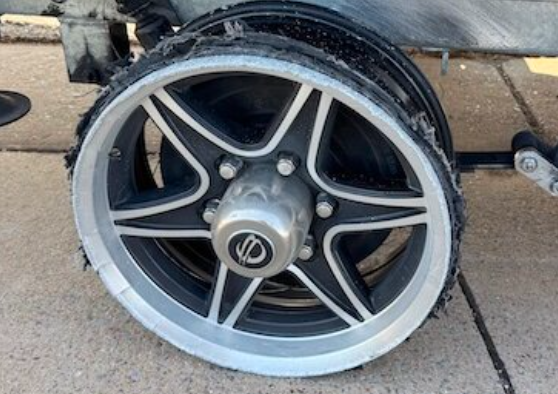
Changing tires in the wild - lessons learned
Geronimo John replied to John and Jodi's topic in General Discussion
Lots of good reminders and recommendations in this thread. There are two more: First, a good TPMS is essential for our trailers. Consider it SAFTEY Required. Secondly, if it hollers at you, immediately turn on the flashers and slow down to buy time. Find a flat spot to address whatever is amiss. Slowing down may likely turn a steel reinforcement wire nightmare into just a wobbling tire event. Great thread! GJ -
Changing tires in the wild - lessons learned
Geronimo John replied to John and Jodi's topic in General Discussion
JD: Which one do you recommend at Summit? GJ -
Run 12v System w/out Batteries in Oliver 1
Geronimo John replied to GeoffChapman's topic in Mechanical & Technical Tips
I personally would hook a jackery to the battery cables in the battery box for maintenance purposes when winterizing with the house batteries removed. GJ -
Changing tires in the wild - lessons learned
Geronimo John replied to John and Jodi's topic in General Discussion
Jon and Jodi: What manufacturer and model of tires did you have trouble with? GJ
-
SDG air conditioner installation
Geronimo John replied to mountainoliver's topic in Ollie Modifications
Roger, that was my thoughts as well. For a multi-speed inverter with the ability to slow down both fans to meet an infinate number of settings (Humidity/Temperature/Desired Supply Air Fan), a Cielbo would seem to be not necessary. However, for RV A/C unit that has multiple supply air fan speeds (Most Do) AND a mult-speed compressor (Cheaper to make than an Inverter style Air Compressor, i.e. an "Old Style" Unit), then the Cielo system would likely be a wonderful mod... so long as it does no harm over time due to so many restarts to the unit self and the soft start system if employed. Of course that's my hesitance and cause for a pause to access for unintended consequences that generally pop up over time. GJ -
SDG air conditioner installation
Geronimo John replied to mountainoliver's topic in Ollie Modifications
Interesting. GJ -
Changing tires in the wild - lessons learned
Geronimo John replied to John and Jodi's topic in General Discussion
As a new member of the forum, welcome aboard! Lots of great owners out here with a many tons of knowledge that's way over my head as well. Especially in electronic gizmology. So please don't be shy in asking questions and then follow-up's when necessary. I can guarantee one, if not several, of the owners is an absolute expert on the topic du jour. Travel safe and enjoy every day, Geronimo John -
SE from Stanley a bit is Moore Ideao. Home of the L7 BBQ. Guaranteed the best BBQ sandwich I have ever enjoyed. And I'm from Texas. Just a few miles further is Moore, ID. The King Mountain Glider Park is active in the summer months with all kinds of Hang Glider, Paraglider and Sailplanes flying the beautiful mountains. 8 miles further in Arco is a free dump station. I spend a month there eash summer, so if heading that way holler so we can cross paths. GJ PS: If you only have time for one of those, get the L7 BBQ sandwich. It's a monster. Yummy.
-
Agree totally. For those not familiar, here is a site with pictures of the lodge and area: https://www.grandcanyonnorth.com/gallery So sad. GJ
-
Changing tires in the wild - lessons learned
Geronimo John replied to John and Jodi's topic in General Discussion
Once I had to get out a drill and make a hole so I could get the plut into the leak. Wasted an hour trying to do so before the light bulb came on. I also have had leaks in the main tread area that took three plugs to slow them down. Even with three, it still leaked, but slow enough that I could get off the mountain by re-airing up twice. Good idea to have an air compressor of some sort! GJ -
A different refrigerator fan option
Geronimo John replied to Snackchaser's topic in Ollie Modifications
I hate mubdobbers and wasps! This idea is a good one for that size bug. Inexpensive too! We run our fans 20/7 for months at a time. I have two new fans to replace my smaller ones. I'm thinking blocking off most of the top vent with 1/8" thick white plastic, and making two fan size holes to allow the fans to discharge directly outside. No screen needed there for this approach. This would eliminate the circulation effect that occurrs in a more open design where air can come out of the fan and circulate back into the fan's suction side. Sort of a "Ducted Fan" approach. Below I like the idea of using this screen all across the bottom vent area and using an inexpensive home A/C filter as a bug stop to the outside of the screen. The above vent being powered and sort of ducted will likely improve air flow actually out of the refer box area. That would over come the static resistance of the screen and filter below. Combined nearly all bug proof, not just my two worst friends mentioned above but smaller ones as well and areduce someof the dust that gets sucked into the refer backside. PS: I keep a fresh can of Wasp Spray in my front storage box for "encounters" of the worst kind. GJ -
SDG air conditioner installation
Geronimo John replied to mountainoliver's topic in Ollie Modifications
From a M.E. perspective the smaller unit was intended to run longer than the 13.5 units thereby better controlling humidity and pulling less power. A good thing. But it gives up high temperature condition performace (ability to reach set point) and cool down time as trade offs... as you well know. Pretty much of that logic line goes out the window with the advent of the Inverter units. They can cycle output down/up as needed for all applications under those for which they are not undersized. They control both humidity and temperature to set point. Brilliant! I suspect that OTT will be going that direction once there is a bit more experience with them and the reliability issues, good and bad, shake out. That's part of their good conservative approact to significant changes I think. As the inverter refergerator topic continues to matue, I'll be looking at the owner opinions in a couple more seasons as my Dometic 3-way ages and my confidence in the air separation from the cabin and the refer side deteriorates. Likewise with the inverter A/C units. Wish the Houghton was an inverter, but it's not. Lucky that I and others were able to do the two Mods. So I'll likely hold off an A/C upgrade to let this topic mature. Especially if the Ceilo would work well on it! I appreciate all the Owner inputs about the Cielo system and their experiences using it. GJ -
SDG air conditioner installation
Geronimo John replied to mountainoliver's topic in Ollie Modifications
For those with an older technology (Not Inverter) I seem to have understood that the Cielo would just shut down the power to the unit in the mode when humidity "give back" from the Evaporor Coil is an issue. But if you have more recent design (Inverter A/C), the Cielo independently controls the (Inverter (Compressor Speed), Condensor Fan, and the Supply Air Fans) to meet what ever humidity and temperature settings are needed. Is the above done by the same model of Cielo or different ones? How does it do so for both types of unit when they all likely have different mother boards? Almost sounds too good to be real. But so many of us really like what it does it must be magic! GJ -
Installing Pioneer Inverter AC
Geronimo John replied to Treasure Coast Vault's topic in Ollie Modifications
A farm back-hoe bucket worked best for our Houghton install. Also, the Dometic if still running will generally fetches $500 to $600 on Craigs List. So don't do what one fellow did that HATED his DOMETIC P2: Tossed it over the side. Which likely is not legal due to the refergerant rules. GJ -
OR instead of getting all that hardware, you could invest a few hours and get you some of these: ; ; ; ; ; wait for it......; ; ; ; ; ; ; ; ; ; ; ; ; ; Gotcha! I was forwarned by a very wise Sea Dog (I believe) in 2018 that some day I would get older and wished I had got my Ollie with 20 # tanks. I did on both topics. GJ
-
We have the standard awning without wings. I like to move the picnic table half under and half outside of the awning. then I use three tie downs from the awning to the table itself. For week plus stays with tables, it beats collecting three each 3 gallon buckets of rocks for dead weights... much faster too. GJ
-
Thanks Mike. It is obvious I am a Mechanical Engineer. Fortunately June is a Masters Electrical Engineer and a IT Professional. So I'm the slow one in the gizmology world of these type of machines. But power I do get!. Gathering the base level info lets me ask less stupid C.S. questions though. Many thanks for your posts! GJ
-
Alcan spring kit sprung stiffer or is it bad roads?
Geronimo John replied to taylor.coyote's topic in Ollie Modifications
Should we not get contrary documentation, it pretty much validates the Dexter assessment that the Dexter PR4B 1750# springs are undersized for our full time loaded 6000# class trailerls. Does any OE2 owner in your situtation know if the OTT installed 5200# axles on the OE2's came with the Dexter PR4 2400# springs or something different? Would be really good to know this. thanks GJ -
Alcan spring kit sprung stiffer or is it bad roads?
Geronimo John replied to taylor.coyote's topic in Ollie Modifications
Bill: Lucky you to have the 5200's for free. I am going to "Assume" you are not a 5%er. If not, I get a second strike. With your super good 5200's and BEEFY brakes, and likely the Dexter 5 Leaf springs, I do not recall a single post where the 5 leaf springs on 6,000 pound class OTT's have failed. (Somebody please correct me if my memory has gone on strike in this. If so, please provide specifics.) I would continue to inspect them every season checking for flatening out of their curve. But then that would be smart for every owner to do, even those with Alcan's. 🙂 GJ