Rivernerd
-
Posts
963 -
Joined
-
Last visited
-
Days Won
18
Everything posted by Rivernerd
-
By "ac fans" do you mean your air conditioner? If so, that could explain the substantial draw down on your batteries. Our Truma AC pulls about 1100 watts when the compressor is running.
-
I expect this works fine if you only camp in warm weather. We sometimes camp in cold weather, and depend on the propane furnace to keep the trailer warm overnight. I prefer to know before retiring to bed that we have sufficient propane in the current tank to run the furnace all night.
-

Xantrex Inverter Issues? Try a Hard Reboot
Rivernerd replied to Rivernerd's topic in Mechanical & Technical Tips
I am keenly interested in the results from the hard reboot of your Xantrex inverter. Please post on this thread after you have completed the process. -
When returning home from the Oregon Coast this April, my wife and I boondocked at a Harvest Host site. That cold evening, we tried to heat water for hot drinks in the microwave using the inverter, but it shut down after just a few seconds. We were surprised and disappointed, because our Lithium Pro Package with Xantrex Freedom XC Pro 3000 watt inverter should enable us to use the microwave on inverted power for at least a few minutes. It had been a cloudy day so we got minimal solar recharge, and with our Nordcold fridge running on DC while on the road, our battery State of Charge was down to about 74%. When we submitted a service ticket, Jason Essary confirmed that we should be able to run the microwave on inverted power at 74% State of Charge (SOC), and much lower, down to 25-30% SOC. With Jason's helpful guidance, I then spent dozens of hours trying to troubleshoot the electrical system, both on the DC and the AC sides. The inverter/charger was charging as designed, and would run 120V appliances that pull up to 1100-1200 watts (including the Truma air conditioner, which pulls 1100 watts with the compressor running), but loads greater than 1400 watts (like the microwave or a space heater on a high setting) caused the inverter to shut down. Nothing we tried solved the problem, including replacement of the Optifuse 300A inverter breaker, which Oliver sent to me under warranty. I also spoke with a Xantrex customer service rep (after45 minutes on eternahold) who assured me the problem could not be with the inverter, so it must be in the trailer wiring. Jason then authorized me to engage an RV service tech at Oliver's expense to try to find a solution. But that was right before I had planned to use the trailer boondocking at the Lochsa River the week of May 15. I decided to engage a tech after I returned home. But while camping (and running the Lochsa river during the day) I happened to mention the inverter issue to another RVer. He asked me if my inverter is a Xantrex. Yup. He then told me he had been advised by an RV service tech to do a "hard reboot" of his Xantrex inverter to resolve a similar issue. He explained that this involves disconnecting both the positive and negative DC cables from the inverter, and leaving it at least overnight, then reconnecting. I determined to give it a try after I returned home, as it would be relatively easy to do. To my surprise, the "hard reboot" solved the problem. My tests have confirmed that we can now run the microwave on full power (1540 watts) for 4 minutes or more at a time, at SOC levels down to 35%. So, the Xantrex customer service guy was wrong--the problem was with the inverter. And, the solution was relatively easy to implement: turn off all batteries, and ensure that shore power is disconnected (so there is no power to the DC cables), then disconnect the DC cables from the inverter and leave at least overnight. I left mine disconnected for 3 days. Then reconnect, and turn the batteries back on. If your Xantrex inverter is not performing up to spec, try a hard reboot.
- 61 replies
-
- 17
-

-

-
I use the Mopeka tank sensor system. It sends reports to an app downloaded onto my phone. It works well. About $70 from Amazon. https://www.amazon.com/AP-Products-024-1002-Propane-Indicator/dp/B01C5RQKJA/ref=asc_df_B01C5RQKJA/?tag=hyprod-20&linkCode=df0&hvadid=312067194179&hvpos=&hvnetw=g&hvrand=12444925943405525704&hvpone=&hvptwo=&hvqmt=&hvdev=c&hvdvcmdl=&hvlocint=&hvlocphy=9029558&hvtargid=pla-492064932214&psc=1
-
Black Tank Flush Backflow Valve
Rivernerd replied to Mike and Carol's topic in Mechanical & Technical Tips
Please forgive my ignorance, but why the white hose through the bathroom window and into the toilet? Is the Oliver-installed flush valve below the window not good enough? -
Are you logged in? The system won't let me "Like" unless I am logged in.
-
I am not Craig, but I did live in the Seattle area for 35 years. Any time between July and September will be fairly crowded, because July and August are the sunny, dry months on the west side of the Cascades. On average, the fall/winter/spring rainy season begins around mid-September, and lasts until the 5th of July. And, schools usually start in early September, right after Labor Day. To minimize crowding but maximize the chance of good weather, I would go the first couple of weeks of September, right after school starts but (hopefully) before the 9-month drizzly/cloudy season begins. If your sojourn will last longer than 2 weeks, you will encounter more competition for campsites in August (before school starts), and a lower likelihood of good weather after mid-September. Hope this helps.
- 10 replies
-
- 2
-
-
- army corp
- state parks
- (and 1 more)
-
Question about the backup camera monitor
Rivernerd replied to shhQuiet's topic in Mechanical & Technical Tips
When our Elite II was ordered, we, too, wanted a larger monitor. Anita Johnston advised that a larger monitor was not an option. So, we decided to go with the factory-installed backup camera, but reserve the option of upgrading to a larger monitor later. Now that we have "lived with" the 4" monitor that comes with the backup camera system Oliver installs since last November, we are happy with it. It provides a clear view of the area immediately behind the trailer. Yet it occupies less dash space, and causes less visual obstruction of the area in front of the tow vehicle, than a larger monitor. We feel no need to upgrade to a larger monitor. -
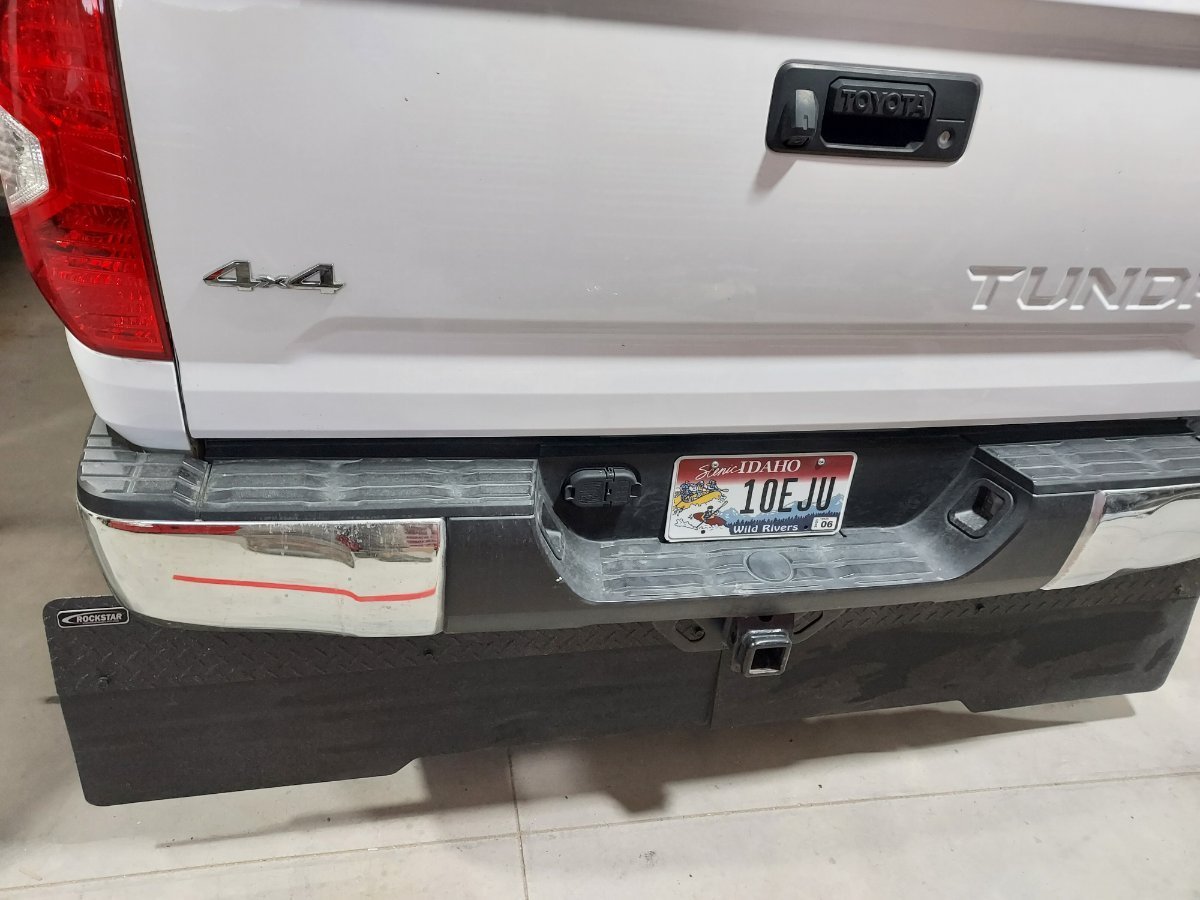
We also chose Rockstar mudflaps for our 2019 Tundra. We like that the assembly covers the full width of the truck. On our Tundra, the Rockstar is mounted inboard of the bumper, placing it closer to the rear wheels. See attached photo. No visible chips yet on Hull #1291.

-
Truma CP Plus Corrupted Display
Rivernerd replied to Rivernerd's topic in Mechanical & Technical Tips
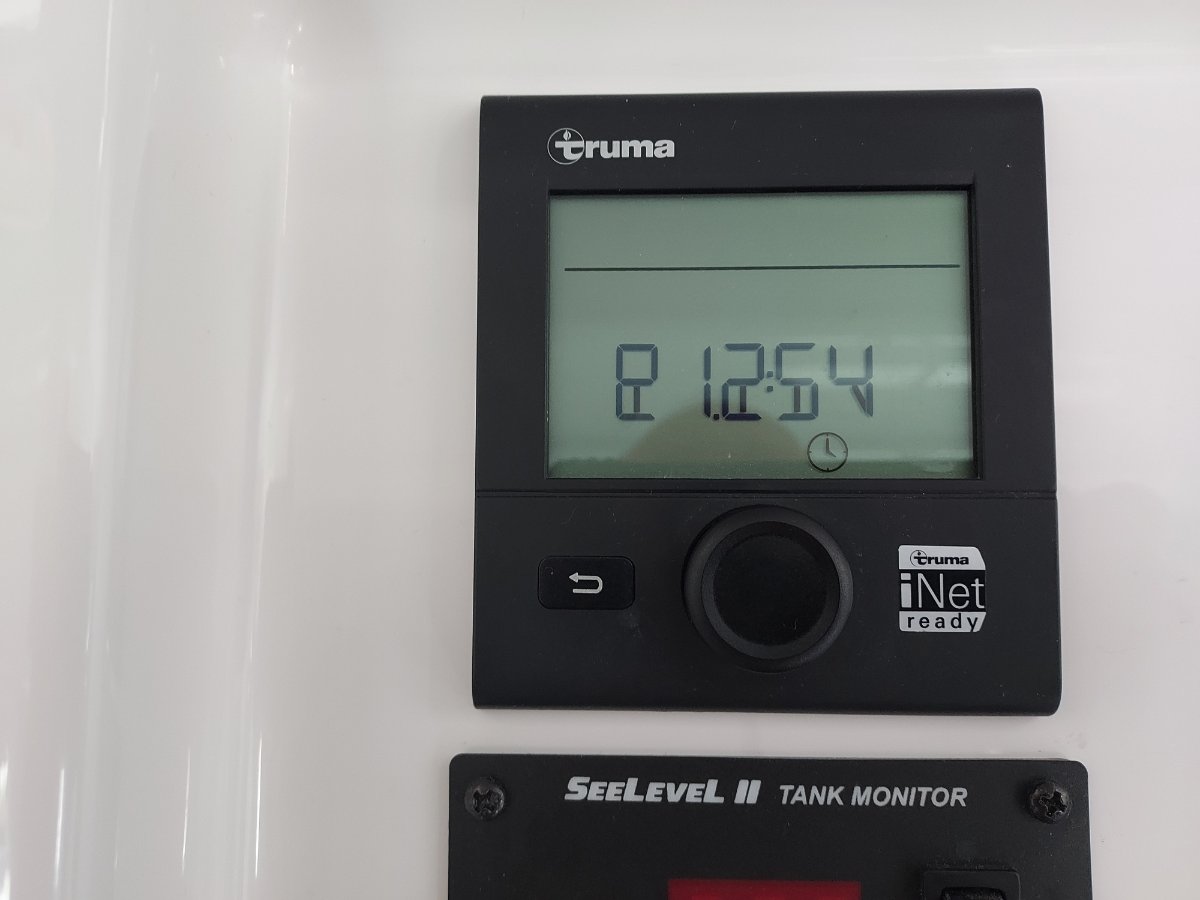
While camping I tried: (1) turning the CP Plus off, then on again and (2) turning off all 3 of our batteries, then turning them off again and (3) doing a Reset following Truma's instructions. None of the three methods worked. So, once I got home, I submitted a service ticket. Since I wasn't using any of the Truma appliances at home, I turned the CP Plus off. A few hours later, Hannah Dowdy from Oliver responded to my service ticket by recommending a Reset. I decided to try that again. To my surprise, when I turned the CP Plus back on, the display read correctly! No Reset was required. It would appear that turning the CP Plus off, then waiting several hours, resolved the display issue. Hope this helps if anyone else encounters this quirky issue. -
The Truma CP Plus wall control display in our Hull #1291 has become corrupted. See attached photo. It should read: "P 12:54", denoting 12:54 p.m. Since we took delivery of the trailer last November, the Truma CP Plus wall control has worked well to control the furnace, AC and Aquago water heater. The display was always crisp. But, on a recent trip, the display suddenly appeared corrupted. Has anyone else had this issue come up?
-
You get what you pay for. I tow our Elite II with a 1/2 ton Toyota Tundra, with tow package and an Andersen WD hitch. The experience is totally acceptable. But, we have to watch payload carefully, and I can sure tell there is a trailer back there on the road, especially on curves. But, when I eventually replace the Tundra, I will look hard at a 3/4 ton Chevy, Ford or Dodge (the only options presently). Why? More worry-free camping, less scrimping on payload, less stress when towing.
-
Here is my advice: don't do it. The forces on anything cantilevered off the back end of an Oliver trailer are much more than you might think. Even if you had the factory-installed hitch, attaching a generator platform to that hitch, and hauling a generator there, would be unwise. Find another place to haul the generator, like in your tow vehicle, as we do.
-
My how-to video for cleaning the weep holes and tracks
Rivernerd replied to Wayfinder's topic in Mechanical & Technical Tips
https://www.pellandent.com/RV-Window-Seal Pull your flexible seal, then match the profile with the one on the Pelland Enterprises web page to ensure you get the same one. -
In our experience, twice, it allowed water to enter the cabin. I believe this is because the air conditioning unit is mounted over a large hole in the roof, and is not internally sealed. Truma relies on external, not internal, sealing.
-
After I recently submitted another service ticket noting leakage under the Truma Aventa air conditioner, I was referred by Jason Essary to Truma. Truma recommended sealing those countersunk holes with silicone sealant. Once on the roof, the sealing process took about 15 minutes.
-
Agreed. It makes no sense, particularly since green glue costs more than either PVC or ABS glue. But, our Hull #1291 has that same strange mixture of PVC fittings and ABS pipe. No plumbing inspector of my acquaintance would pass it. In Idaho, for example, only one transition from PVC to ABS is permitted per drain line. PVC is commonly used for Drain Waste Vent (DWV) pipe assemblies in the Eastern USA. ABS is commonly used for DWV pipe assemblies in the Western USA. I don't know why, but that is what I see. But no state I am aware of allows the two types to be mixed throughout a drain line. I wonder if the rules don't apply to RV manufacturing? That said, as long as the correct green transition glue was used, a drain line with PVC fittings and ABS pipe should hold up fine. That is why I did not raise it as an issue when we took delivery of Hull #1291. I did note one place where insufficient glue was used on the top of a DWV joint, but I chose to address it myself when I got home. Properly adding glue to a partially-filled DWV joint requires preheating the joint with a heat gun. Much like "sweating" or soldering copper pipe, if the joint is preheated, then the glue is applied, the glue gets sucked into the void to create a proper seal. Unsure if Oliver would use this method, and since the void was on top of the pipe, I just chose to do it when I got home.
-
They are colloquially called "Ferncos". They should be available at any hardware store that carries plumbing parts. They are code approved for Drain Waste Vent (DWV) connections, like the one in your photo. IF you can move the pipe enough to achieve full insertion into the female flange part of the fitting shown in your photo, you can glue it with ABS glue. ABS glue is available at any hardware store. Buy the smallest can you can find, because it has a short shelf life once opened. Place a shop towel or 2 layers of paper towels under the joint to catch any drips, then daub glue on both the inside of the female flange and the closest 1" of the pipe, then immediately insert the pipe into the female flange and hold it in place for 30 seconds. The glue will take hold by then, and you can let go. IF the pipe won't move enough to allow full insertion into the female flange part of the fitting, using a Fernco is better than trying to glue the joint. Just be sure to measure the outside diameter of the pipe, and buy the right size to fit that. It looks like you can pull the pipe far enough away from the fitting to enable you to slip the Fernco coupler completely onto the pipe. Once the Fernco is on the pipe, then slip the end of the pipe as far into the female flange part as you can. Then slide the Fernco coupler back toward and over the flange so the coupler is centered over the joint (as best you can). Then tighten the hose clamps until they are snug. If you tighten with a slothead screwdriver about as tight as you can, that should be about right. If you use a nut driver, be careful not to over tighten, or you can strip out the screw in the hose clamp. Good luck!
-
How do you import images from the FXC Control app on your smart phone so you can post them on the forum? I have not been able to figure out how to do it.
-
Thanks for taking the time to test, and report your results. It is very helpful to me! I recommend you submit a service ticket to Oliver. Your results suggest that using your microwave even at 99% state of charge is resulting in inverter shutdown. The more service tickets submitted for such issues the better educated the Oliver service department, particularly Jason Essary, will be about the issue. They may, indeed, have gotten a bad batch of circuit breakers. Jason has been very responsive, and really cares about getting to the right result for the customer. I have requested a replacement inverter breaker. I hope it is not another bad one!
-
Well, I ran the test yesterday. At 99% State of Charge on our 390 Ah battery bank (per the Lithionics app), the FXC Control app (the one from which SteveCr's screen shots were taken) showed about the same DC amperage being drawn, but 12.1V (as opposed to his 12.5V) under load. Although the inverter was seeing 12.1V, it did not shut down during a 4-minute microwave test. I expect that is because State of Charge was at 99%, which yielded a voltage before application of load at 13.2V. So, I then put a multi-meter on the DC inverter inputs to measure actual input voltage under the 1500 watt load. It read 12.24V under load vs. 13.1V with no load. To determine what impact, if any, the Optifuse 300A inverter breaker had on the impedance, I tested voltage at the breaker input stud under 1500-watt load: 12.53V. I concluded that the Optifuse 300A inverter breaker causes a voltage drop of 0.29V (12.53V-12.24V) between the battery bank and the inverter inputs. This seems high to me. It makes me wonder if the Optifuse 300A breaker is defective. Has anyone else checked this out? And, do any of you engineering types see a flaw in my methodology?
-
My LBCO level is set at 12.1V, per Oliver specs.
-
Yes, copper. No, the lugs are aluminum. That is the way Oliver built it. And, significantly, many other Elite II owners with the same package report no issues. You cannot plug directly into the inverter. The inverter output runs through 12 AWG solid copper Romex to the 120V main panel, which has multiple circuit breakers. There are two 120V circuits with receptacles that the microwave 15A cord can plug into, both wired with 12 AWG solid copper Romex: (1) the dedicated microwave circuit and (2) the GFCI protected general receptacle circuit. Whether I plug the microwave into either circuit, the results are the same.
-
Makes sense to me. There are millions of vehicles on the road much smaller than both our tow vehicles and our Olivers. 18-inch tires don't work well on small vehicles, like our Subaru Outback. I, for one, am not worried that I won't be able to find good 16" tires for my Elite II in 8-10 years.