Leaderboard


Popular Content
Showing content with the highest reputation on 06/30/2017 in all areas
-
I can be a bit eccentric at times and the our name is right there with me. Last year a proposal by a British government agency to let the Internet suggest a name for a $287 million polar research ship seemed like a good idea to them at the time. Enter one James Hand, a public relations professional and former BBC employee, who submitted "Boaty McBoatface." Well the Internet went nuts and people voted it to the top of the list. In the end, the suggestion to use the name for the mother ship was not followed and the Minister for Universities and Science, announced that the Boaty McBoatface would be used for the submersibles aboard the now named Sir David Attenborough instead. That bring us to naming our Oliver. I mentioned the story of Boaty to my wife and she loved it. For days we riffed on it, with her delivery "Roamy" and me adding Mc Roadhouse. The graphics were done by my brother and we are adding a Est. 2017 Foy & Mirna icon to the upper right space. But wait, there's more. Back from Hohenwald and Roamy parked, we headed to the DMV to paid our taxes, get our title and tag. The woman who was serving us asked, "Would you like a custom tag?" My wife and I looked at each other and said together "Can we get Roamy?" The DMV Gods smiled and she said "Why, yes you can!" Thanks for asking!
 4 points
 -
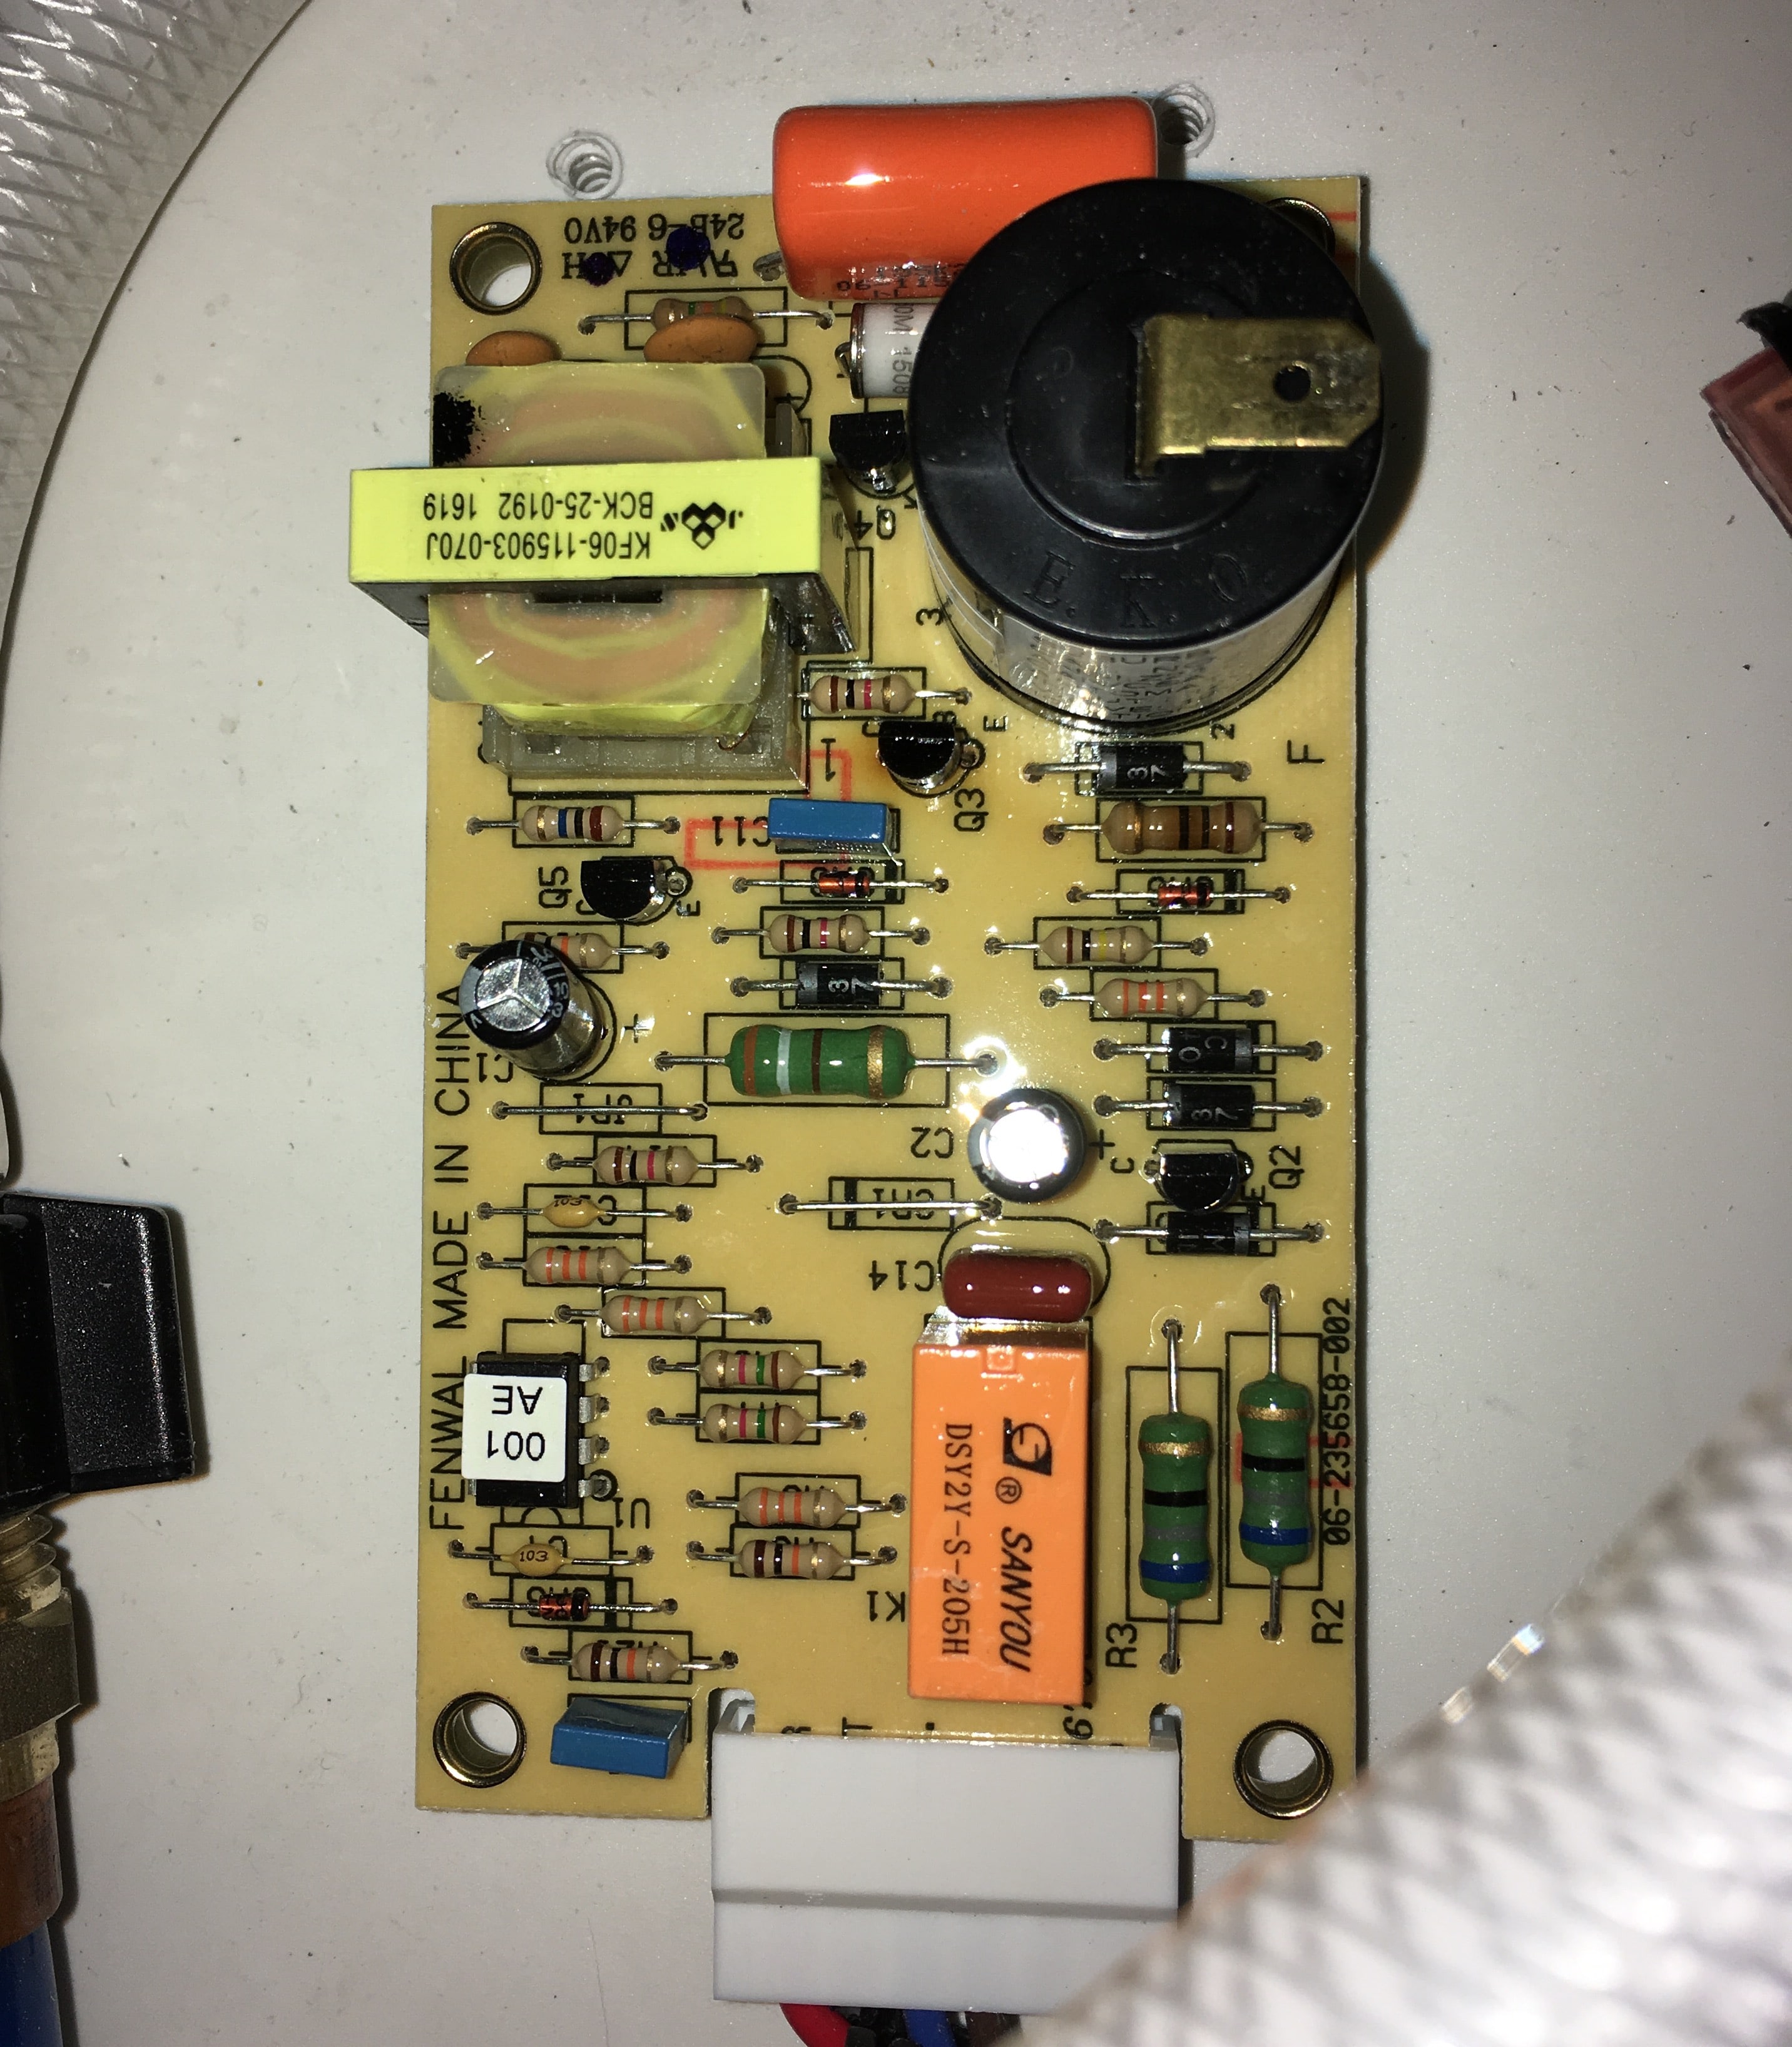
My water heater quit working on gas a couple of days after delivery. I did some basic troubleshooting and determined after ten minutes that the ignitor was not firing. The system would cycle on and off three times, then lock out with a solid red light. The overtemp switches were not tripped, and there was gas, which I proved by carefully sticking a long camp stove lighter in the burner hole. I clicked the lighter and the flame POPPED and whooshed out and burned all the hair off the back of my hand. Check, there is gas! Note to self: do not do this again... I called Jason at Oliver Service and asked if he could send me a replacement board so I could install it myself. He told me that they do not warranty the appliances and I would have to take it to an RV dealer for repair. Fine.... I found a new OEM module on Amazon for $79, and also a much better aftermarket one for about the same price, but it would require a new plastic cover. https://smile.amazon.com/dp/B0002MG2IK/_encoding=UTF8?coliid=IY2Y0Y0X7RVZF&colid=1X5H11EH41351 https://smile.amazon.com/dp/B007HRVXY6/_encoding=UTF8?coliid=I3LZPCEN833TPC&colid=1X5H11EH41351 Since it was going to be a warranty repair, and I am a confirmed cheapskate, I scheduled an appointment at a local shop in Spokane. They told me it would be three weeks before they could see me, and that they stocked a lot of boards for the Suburban heaters, so most likely they could fix it while I waited. I told them that I would be surprised if the job took more than fifteen minutes, and access to it was great. Three weeks later I showed up, checked in, watched with concern as they took Mouse away, and then I waited. Half an hour later I was called into the office. "The board is bad." ME: "Right, I knew that and I told your tech." "In order to do this under warranty we have to order a replacement board from Suburban, and it will take two to six weeks to get here, do you need the water heater to work before then?" ME: silence, counting to ten very slowly. "Sir?" ME: "I do need it to work on propane. Is there an alternative?" "We can install an aftermarket Dinosaur Electronics board, it is a much better part and has a five year warranty, and we have plenty of those in stock since the Suburban boards fail so often." ME: Sinking heart. "How much would that cost?" "The board is $129 and the cover is $10, and it will be $279 total with labor." ME: "I wish this was mentioned when I talked three weeks ago. Just put it back together and I'll order the part from Amazon and fix the heater in two days." "OK, fine, that will be $50 plus tax for the diagnosis." As I left, the tech who did the work told me quietly, "I left your old board on the floor at the entry, and I also left a used one that was in our junk box. We strip stuff like that off old water heaters when we scrap them. It will probably work fine for years. They sure did build your trailer nice!" I was floored and relieved, and my faith in mankind got a very small boost. I thanked him and left with Mouse, feeling a lot better. I got home, plugged in the board and the heater fired right up. Woohoo! My old (brand new) board that failed (water pump is to the left): The underside, showing the bottom of the fried resistor. The white foam strip goes on the PC board and keeps it off the mounting surface (the water pump and manifold assembly plate). If I had the notion, I could have replaced that resistor for less than a buck.... I don't know how I should feel about the dealer, their parts prices are _over_ MSRP and they sure try to screw you, but then the tech went way out of his way to make things right. He could have got into trouble with his boss, too. Moral of story: unless it is an expensive repair or you can live without a part for a long time, just fix it yourself or have a buddy do it for you. I hope to never go back to a dealer, ever. There is no way I was going to leave Mouse there, and then have everybody start crawling around inside, looking. John Davies Spokane WA
3 points
-
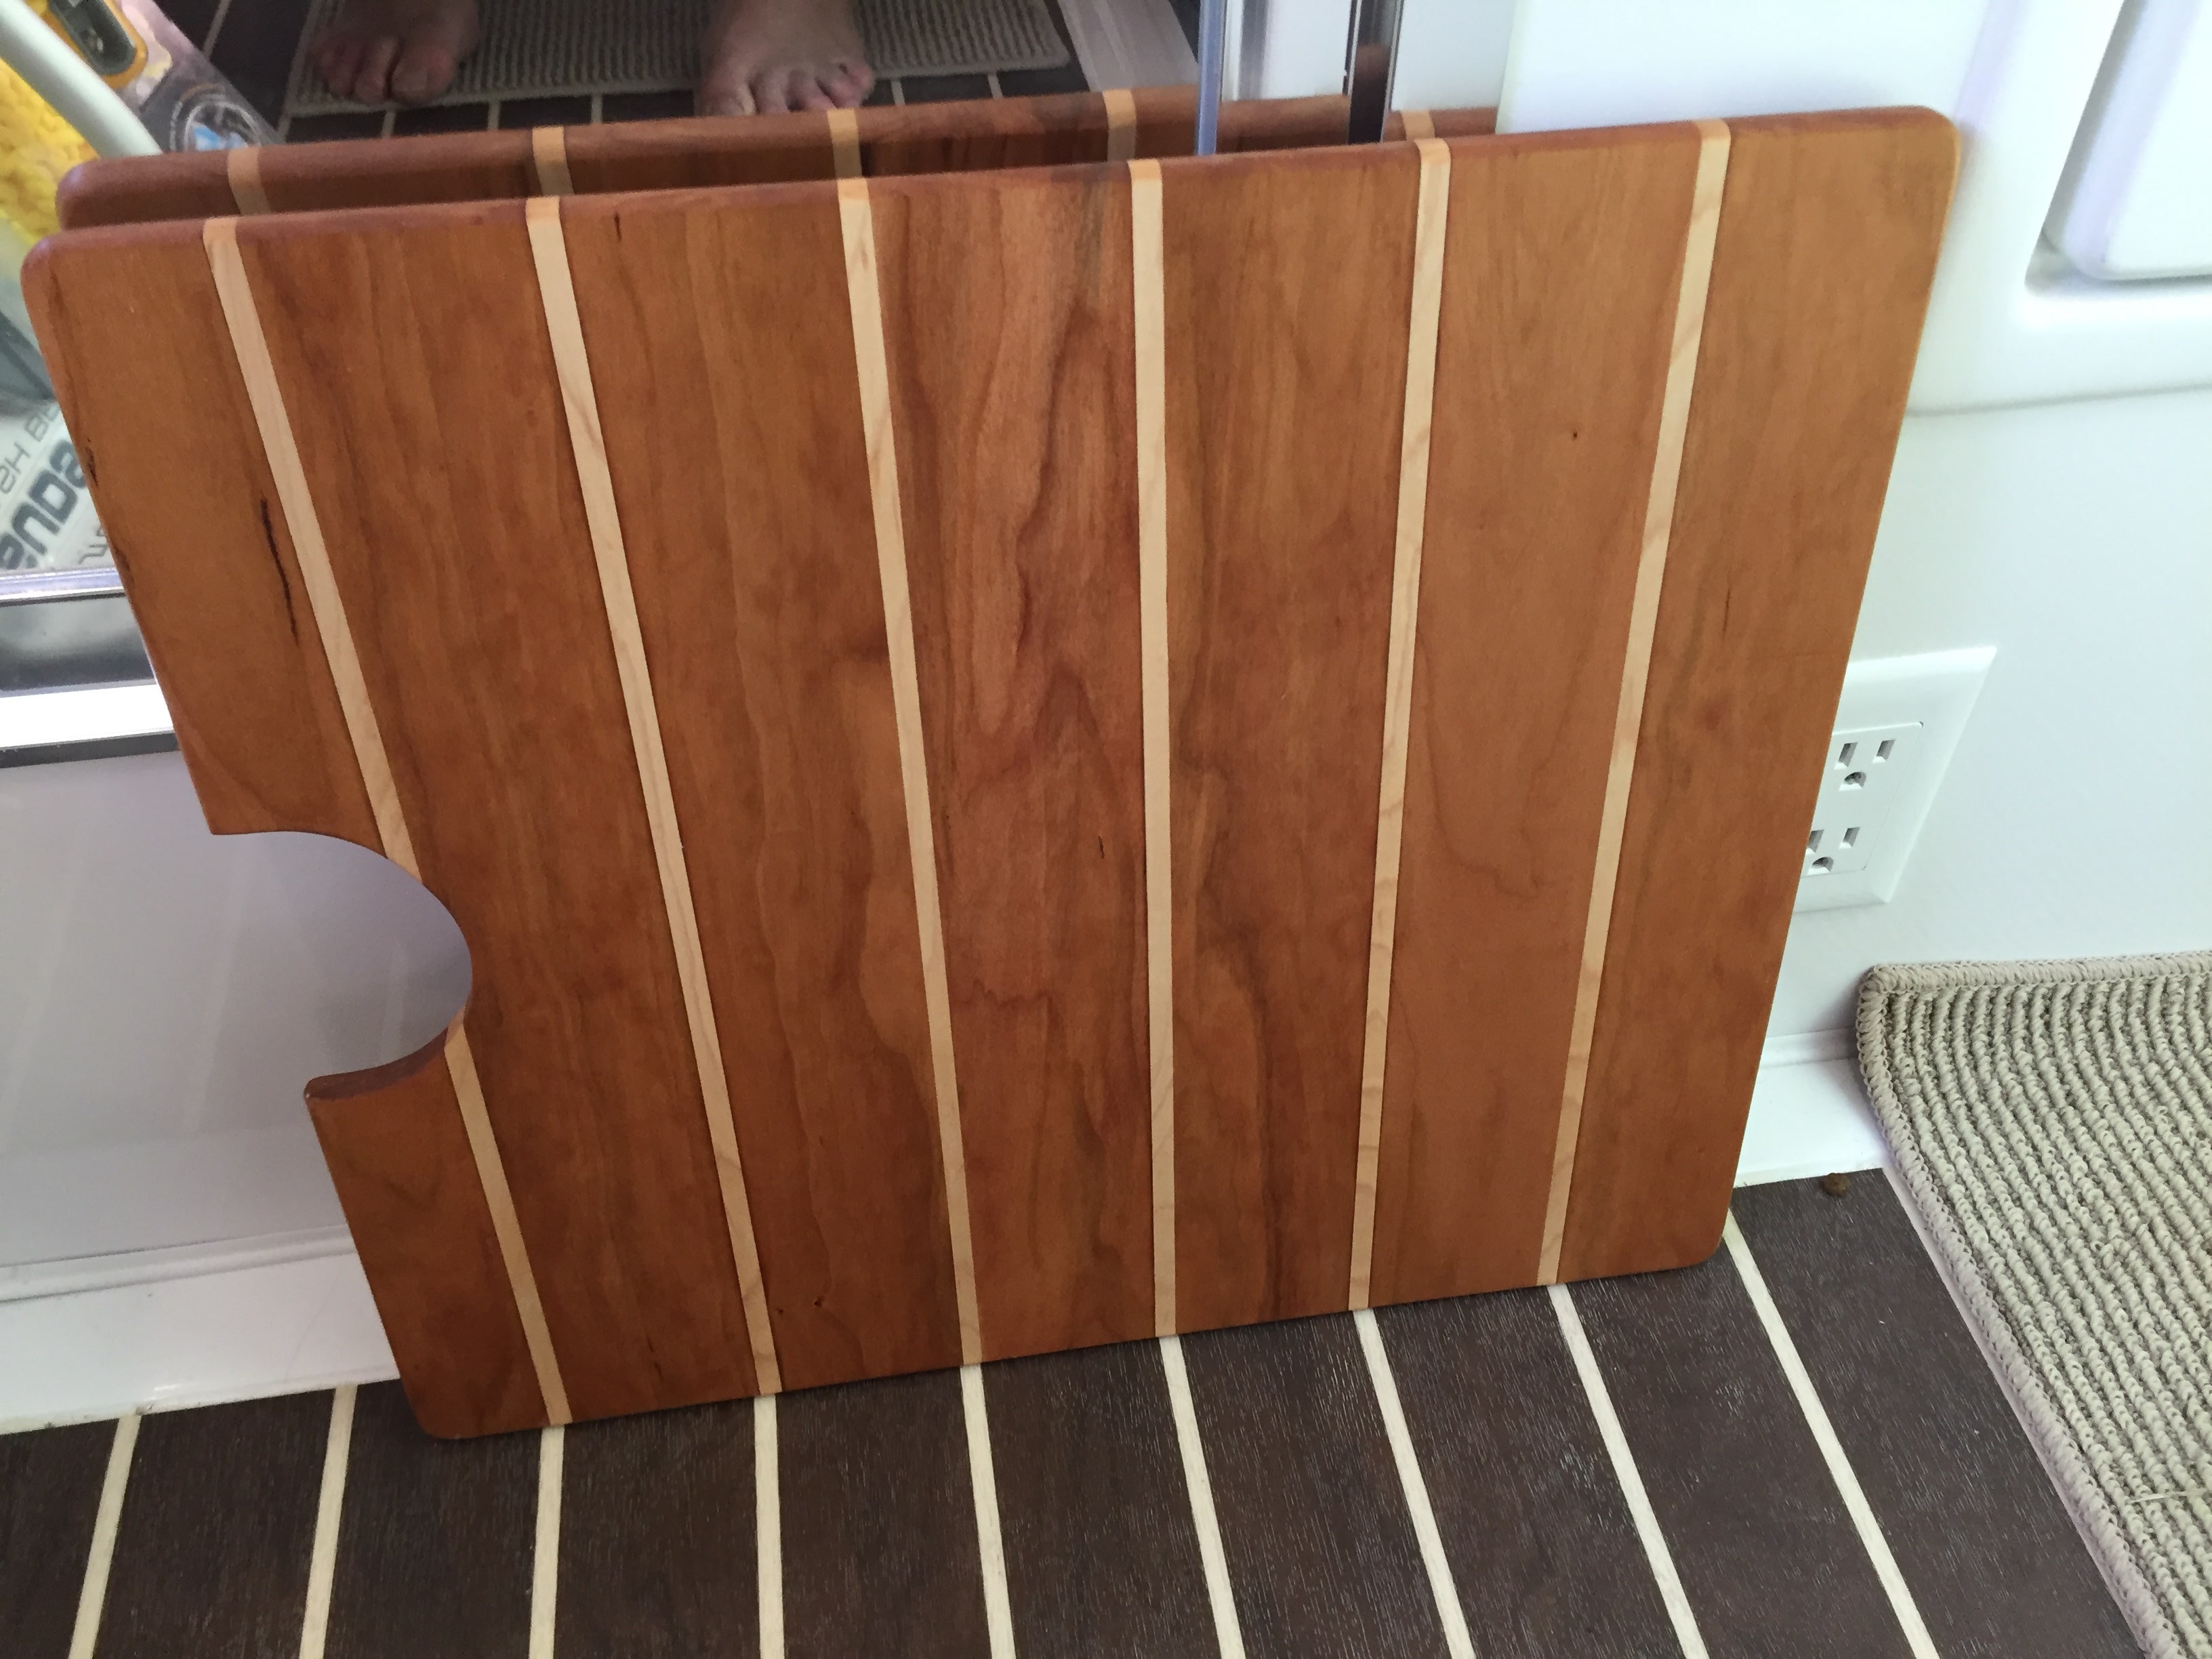
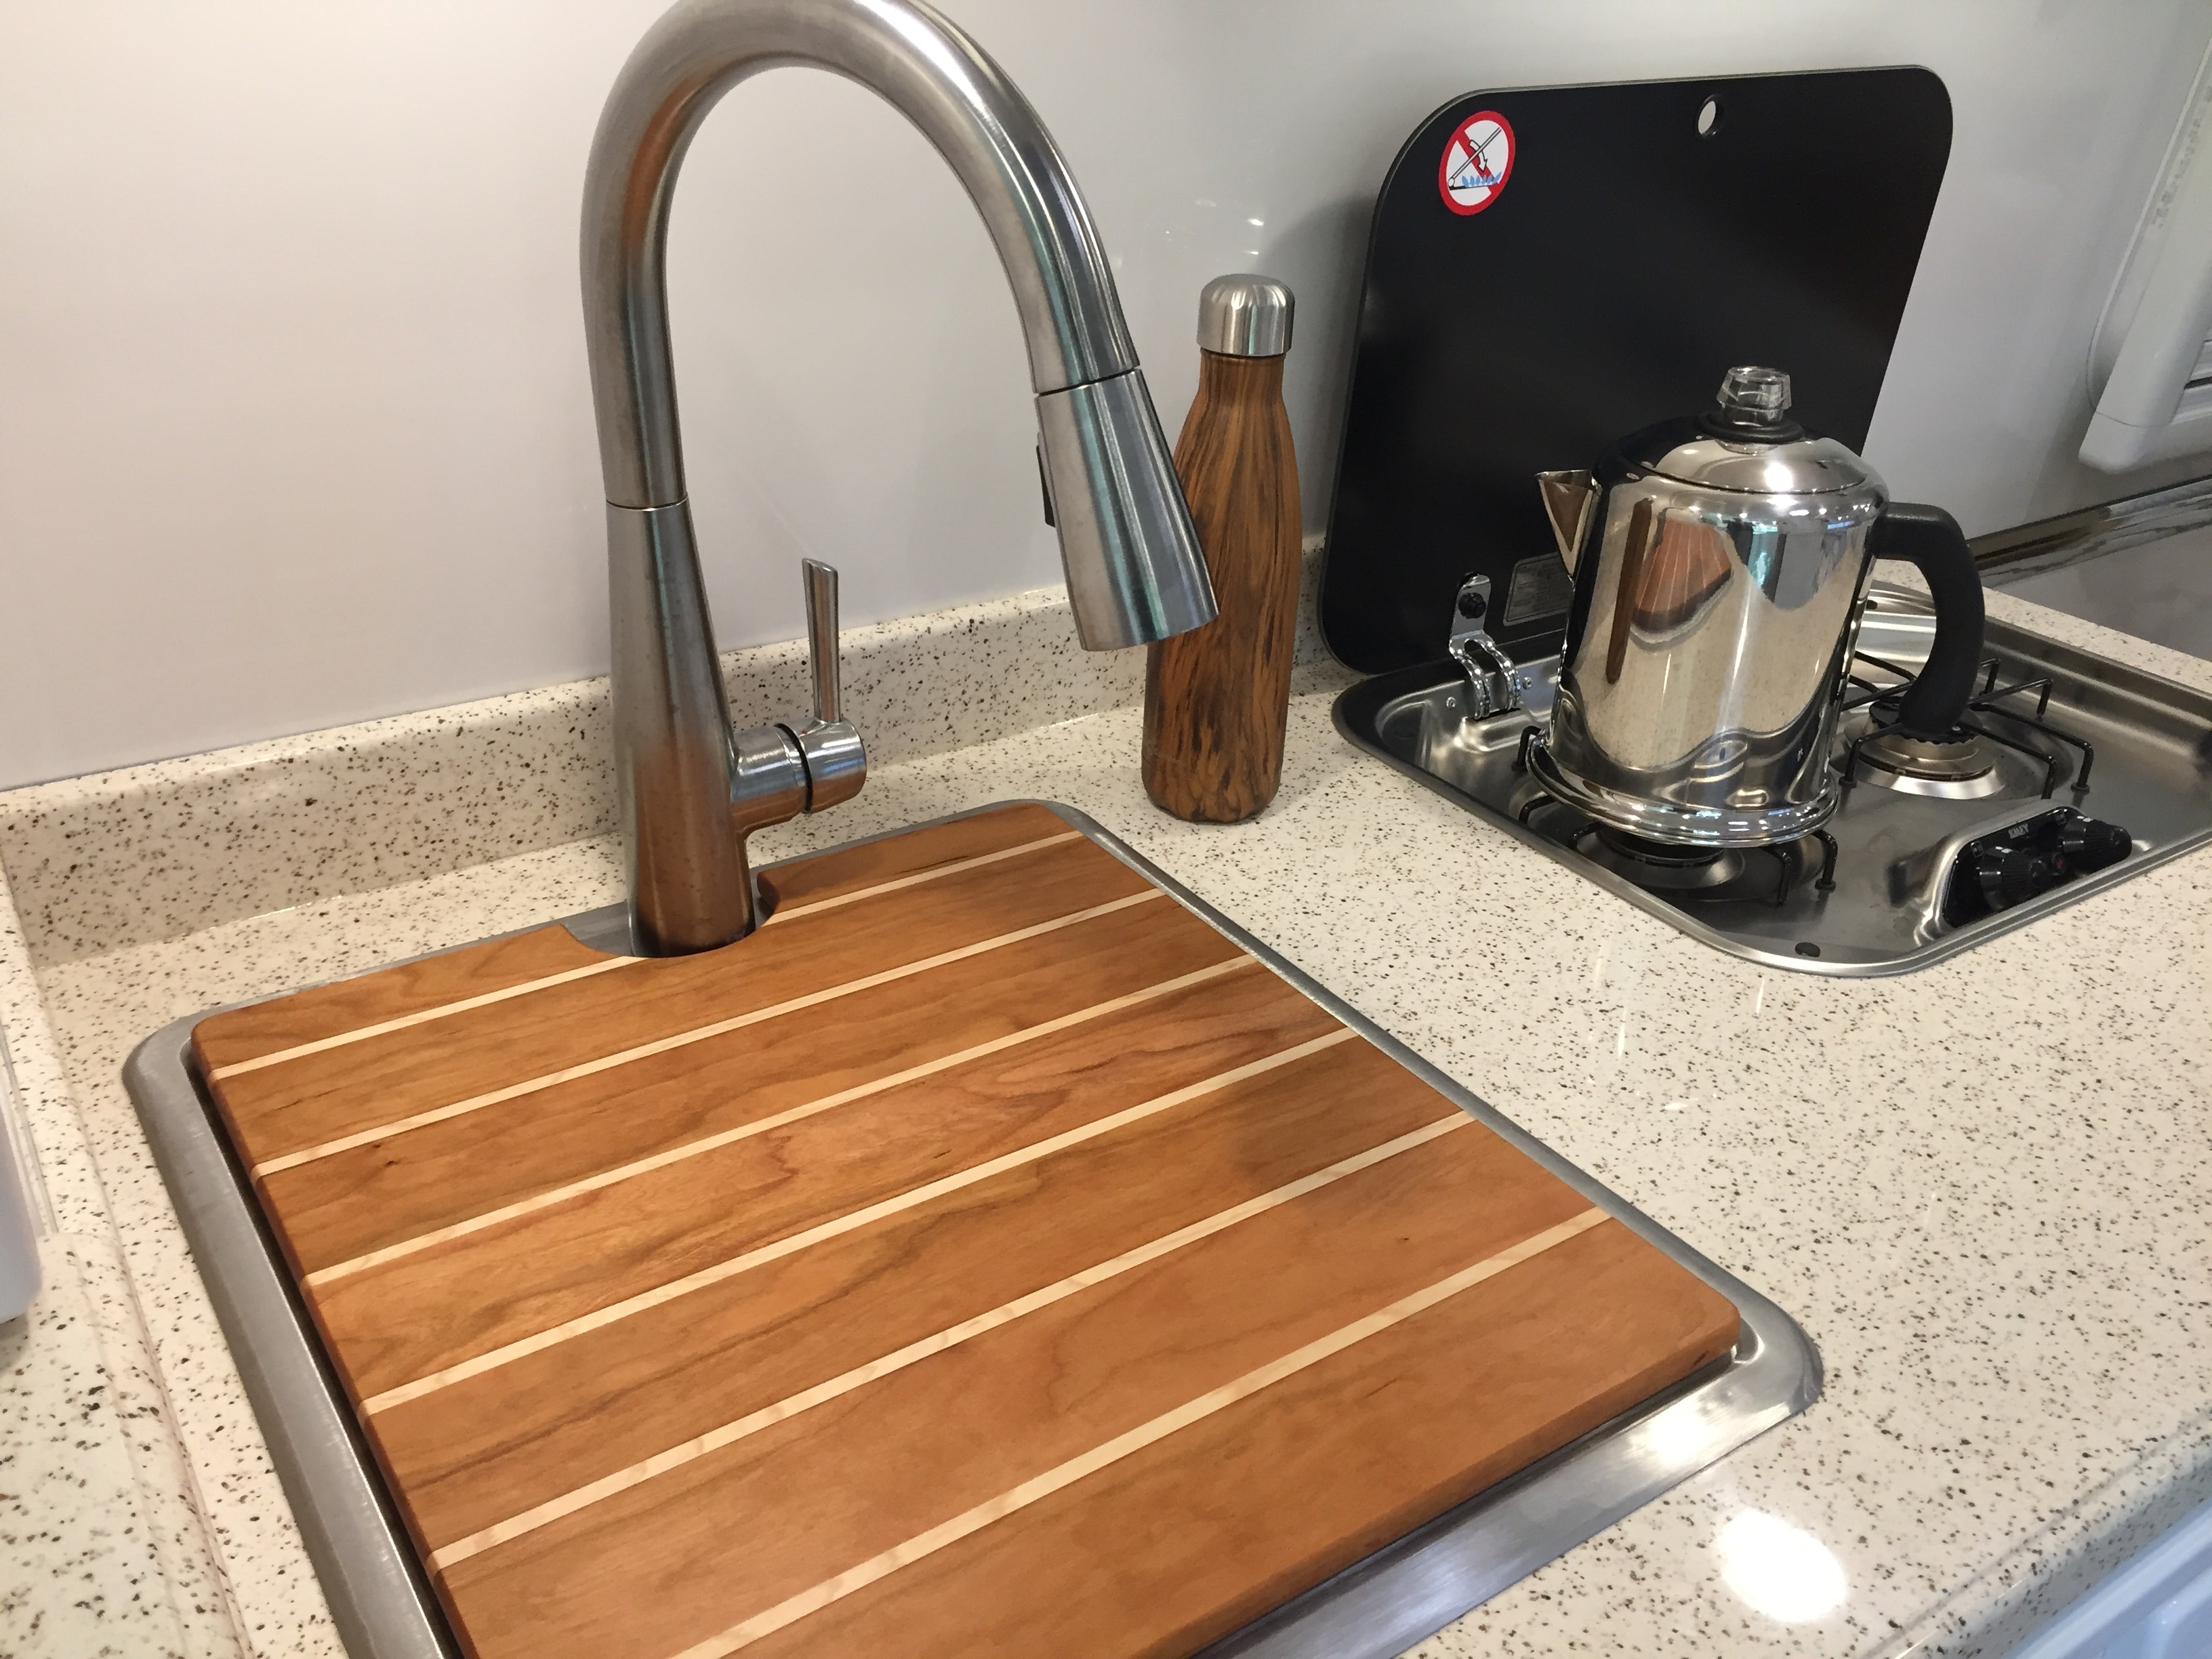
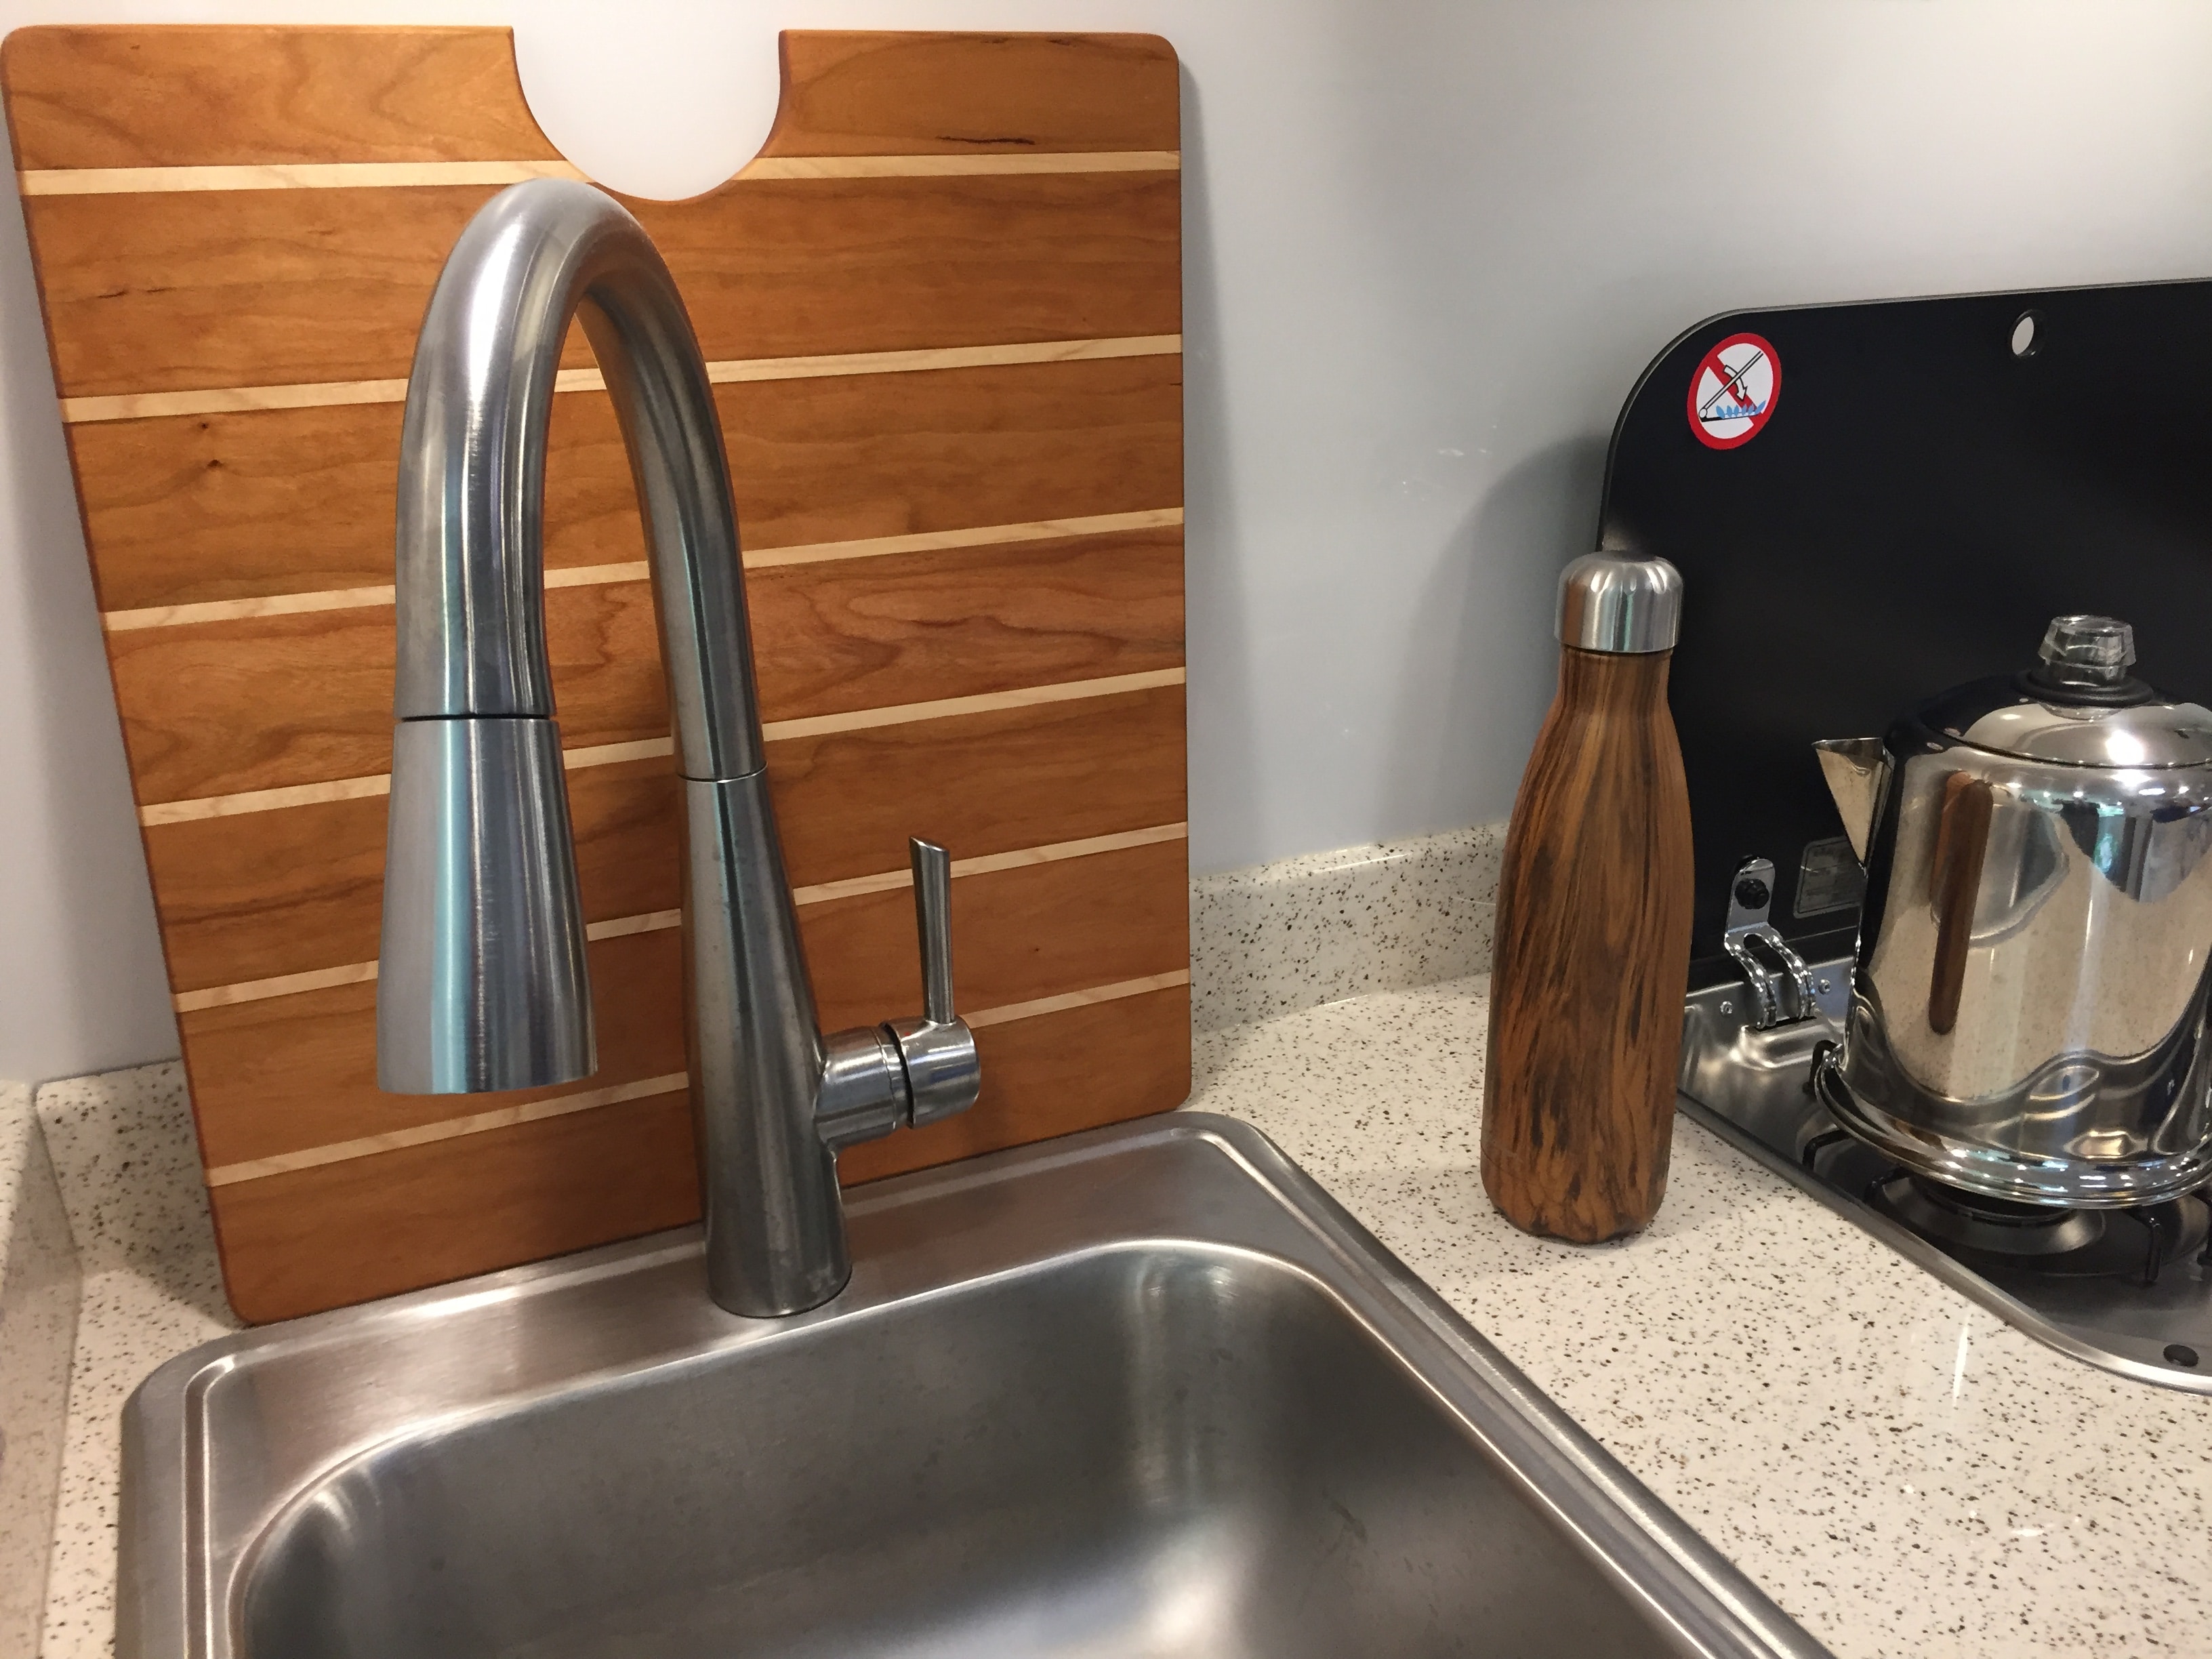
With "Roamy" home and in his storage place, I thought back to our first week of camping as we headed back to Florida from Hohenwald. We had wonderful times gazing out the windows at nature with morning coffee, dinners under the awning with fireflies and really peaceful nights of sleep. Being newly retired, I am still learning to slow down and relax so, this morning I decide to head out to the shop and build our first upgrade. So much for relaxing! Space being a premium, I want to give us some extra kitchen counter room by making a cutting board that would fit over the sink. In fitting out our Oliver we selected a flooring which emulates the deck of a sailboat. I wanted the cutting board to match that look. So with some quick measurements 2 5/16" for the darker strips and 1/4" for the lighter strips, I turned to the sink to get the overall dimensions inside of the raised aluminum band around the sink - 15" by 17". Looking over my wood supplies, I knew rock maple would be a great match for the narrow strips but the darker wood would be a challenge. I decide on American cherry knowing it would darken with age. Couple hours of milling, cutting, gluing, sanding and a few coats of mineral oil, my first upgrade was ready to use. Pictures below.
2 points
-
That is EPIC! I have to admit I'm a little upset that they didn't go with Boaty McBoatface. I'm glad someone of your eccentric nature decided to refrain from being too serious. YOLO (You Only Live Once) as the kids say these days! Great name!2 points
-
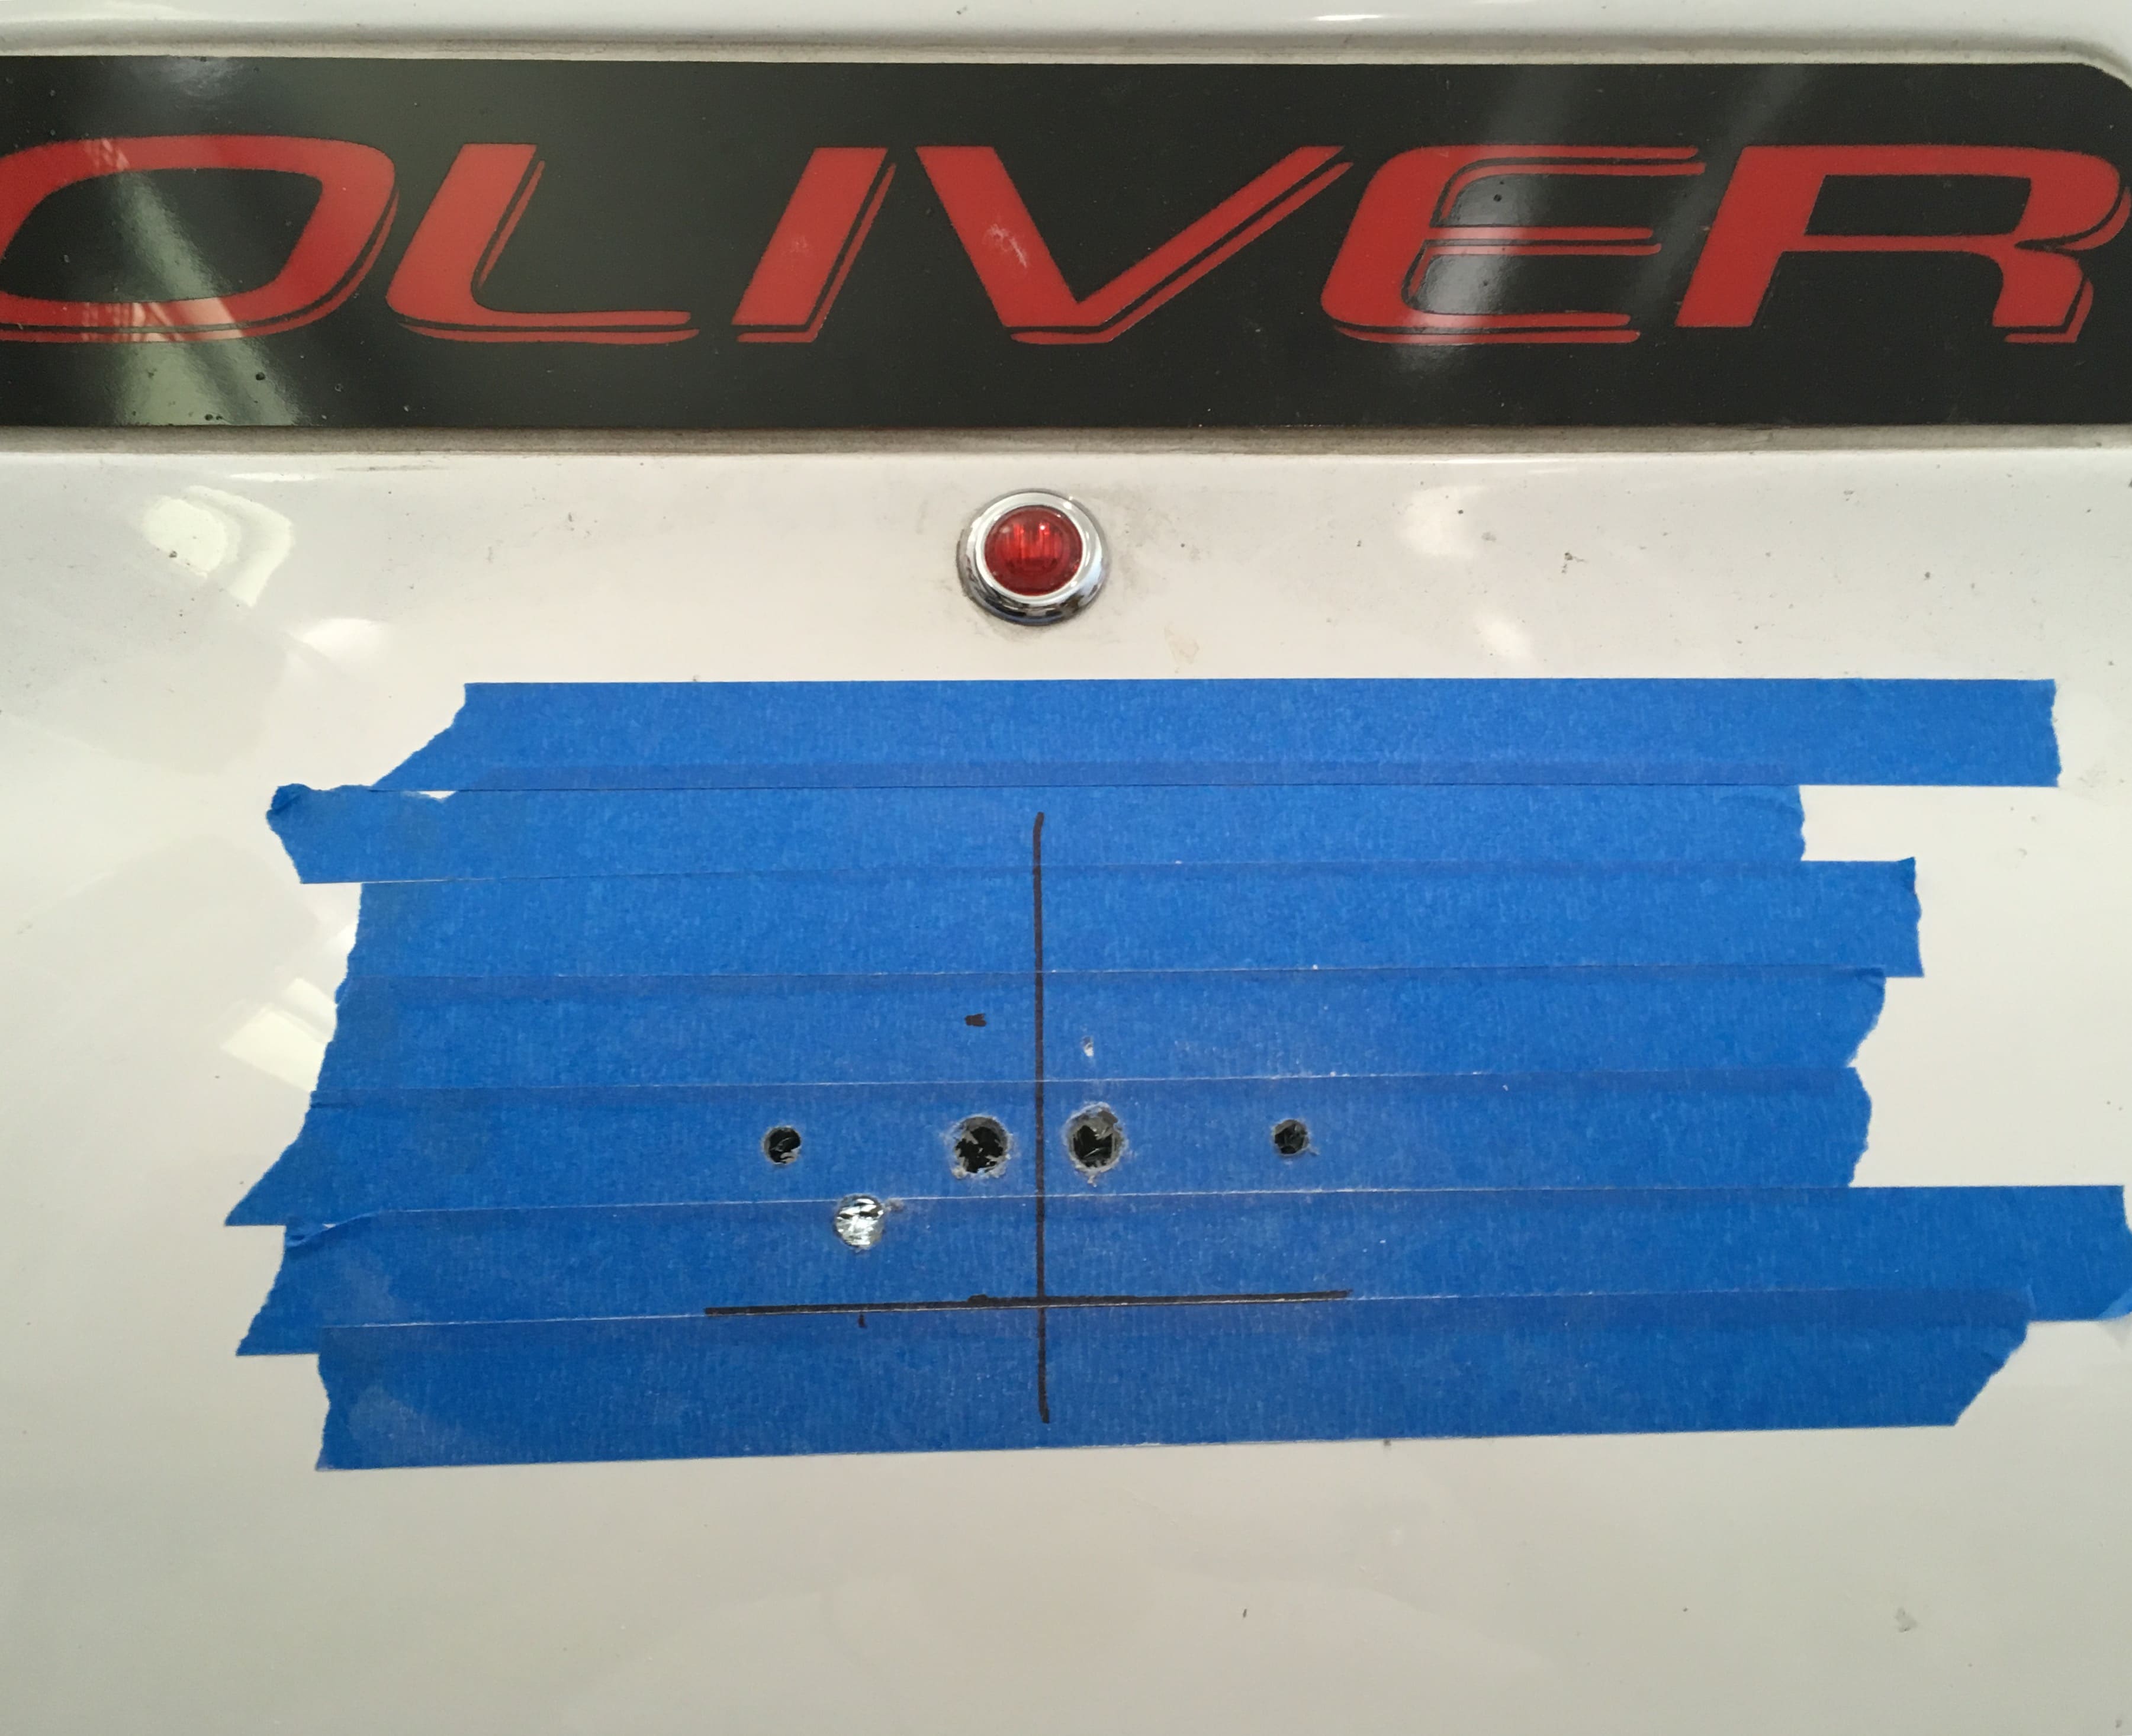
Installing a Garmin wireless camera with protective guard, to communicate with a Garmin GPS in the tow vehicle (mine is a RV660LMT). Here is a teaser shot: I had to take several deep breaths before I started drilling holes in the hull, but after the first one it was easy. The trailer is pretty dirty, I haven't been able to wash off 3000 miles of road grit yet. Lots more coming soon. John Davies Spokane WA
1 point
-
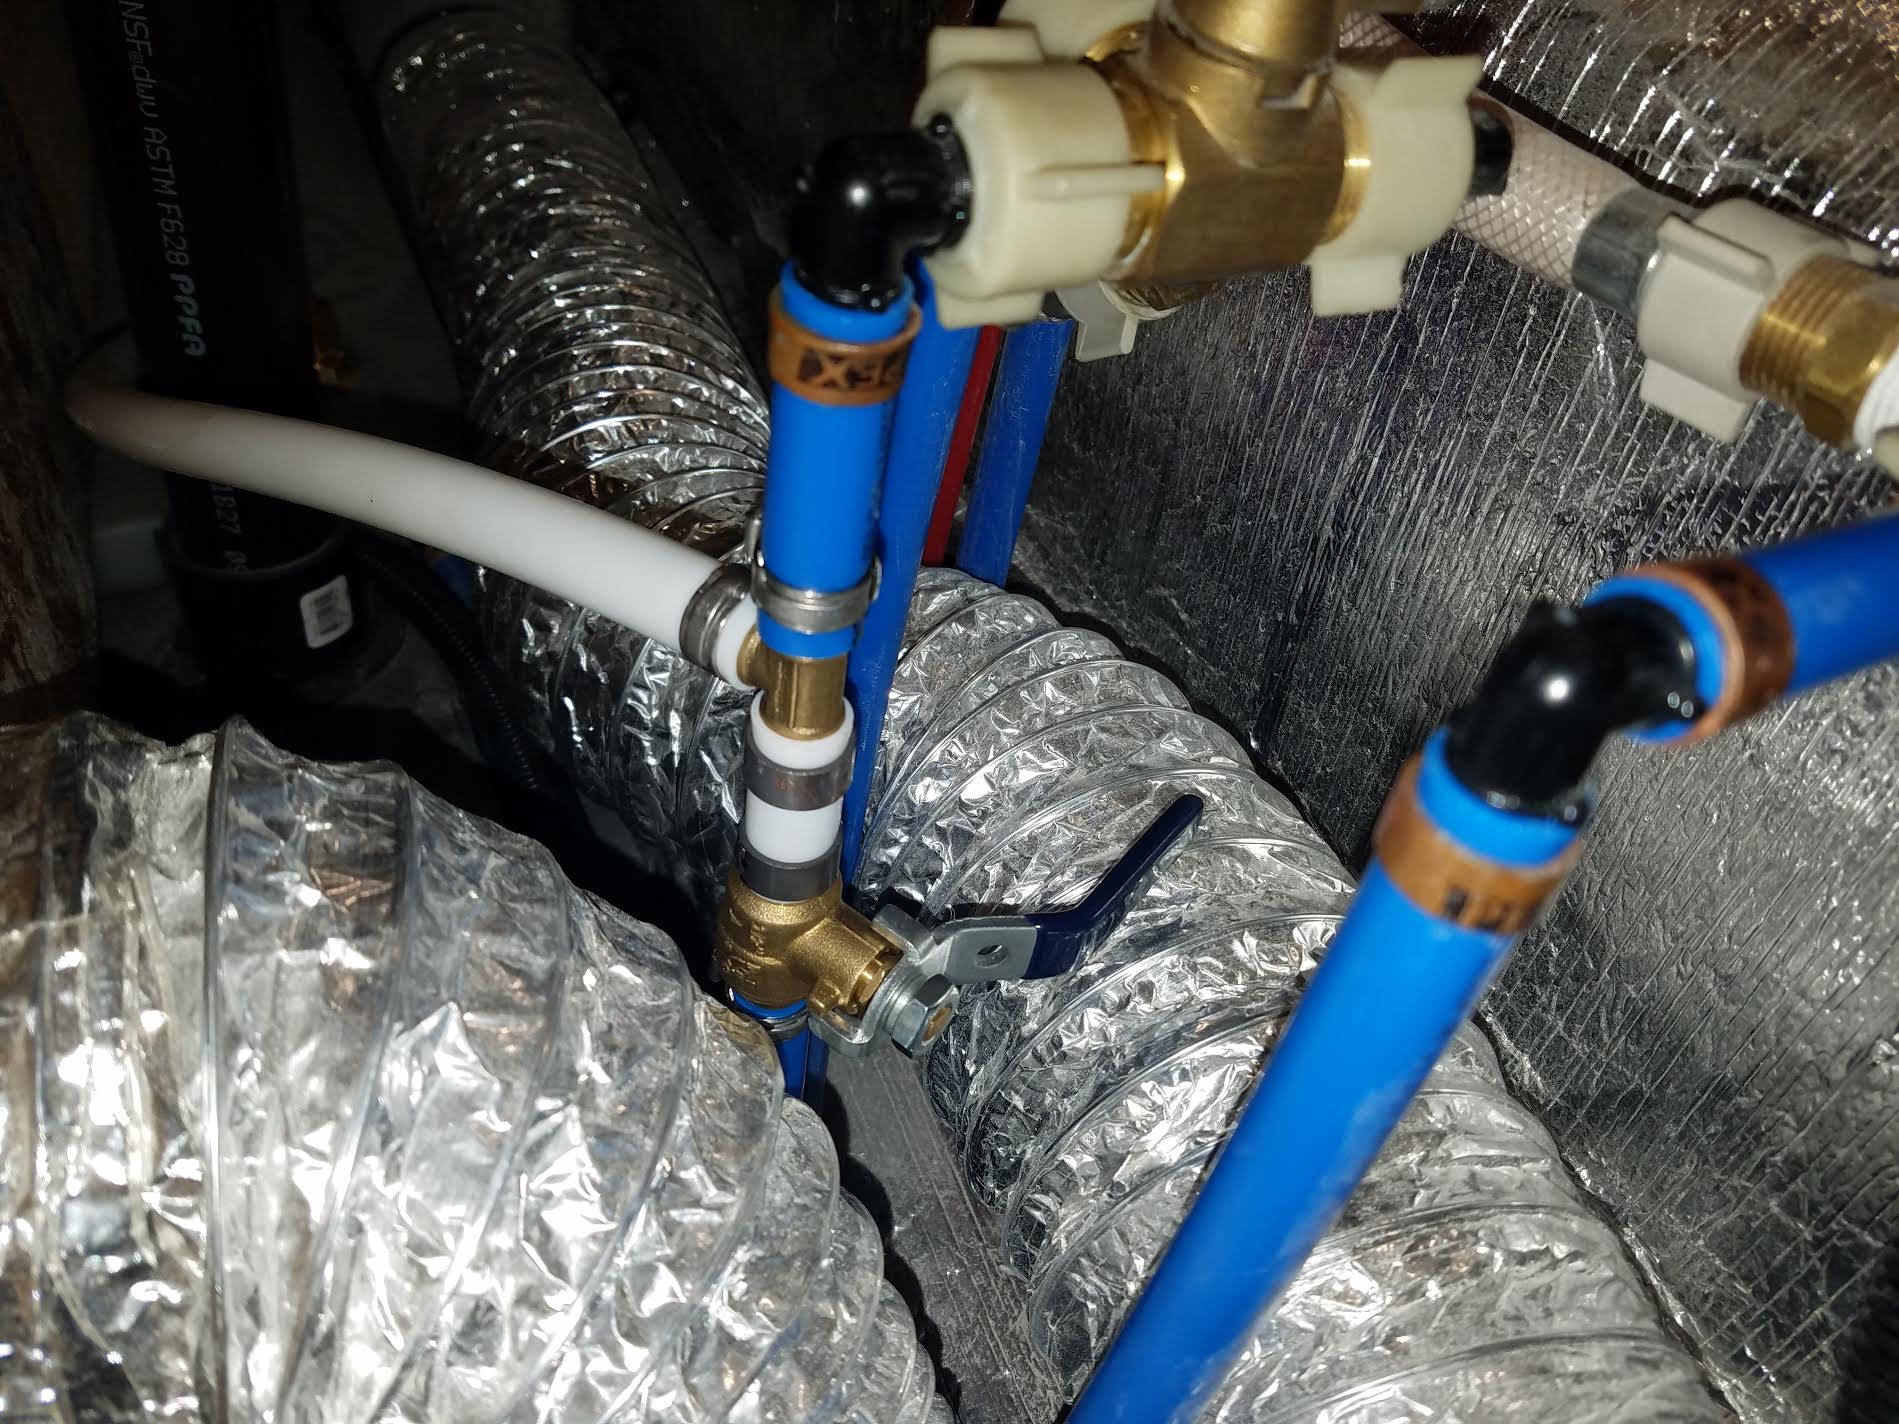
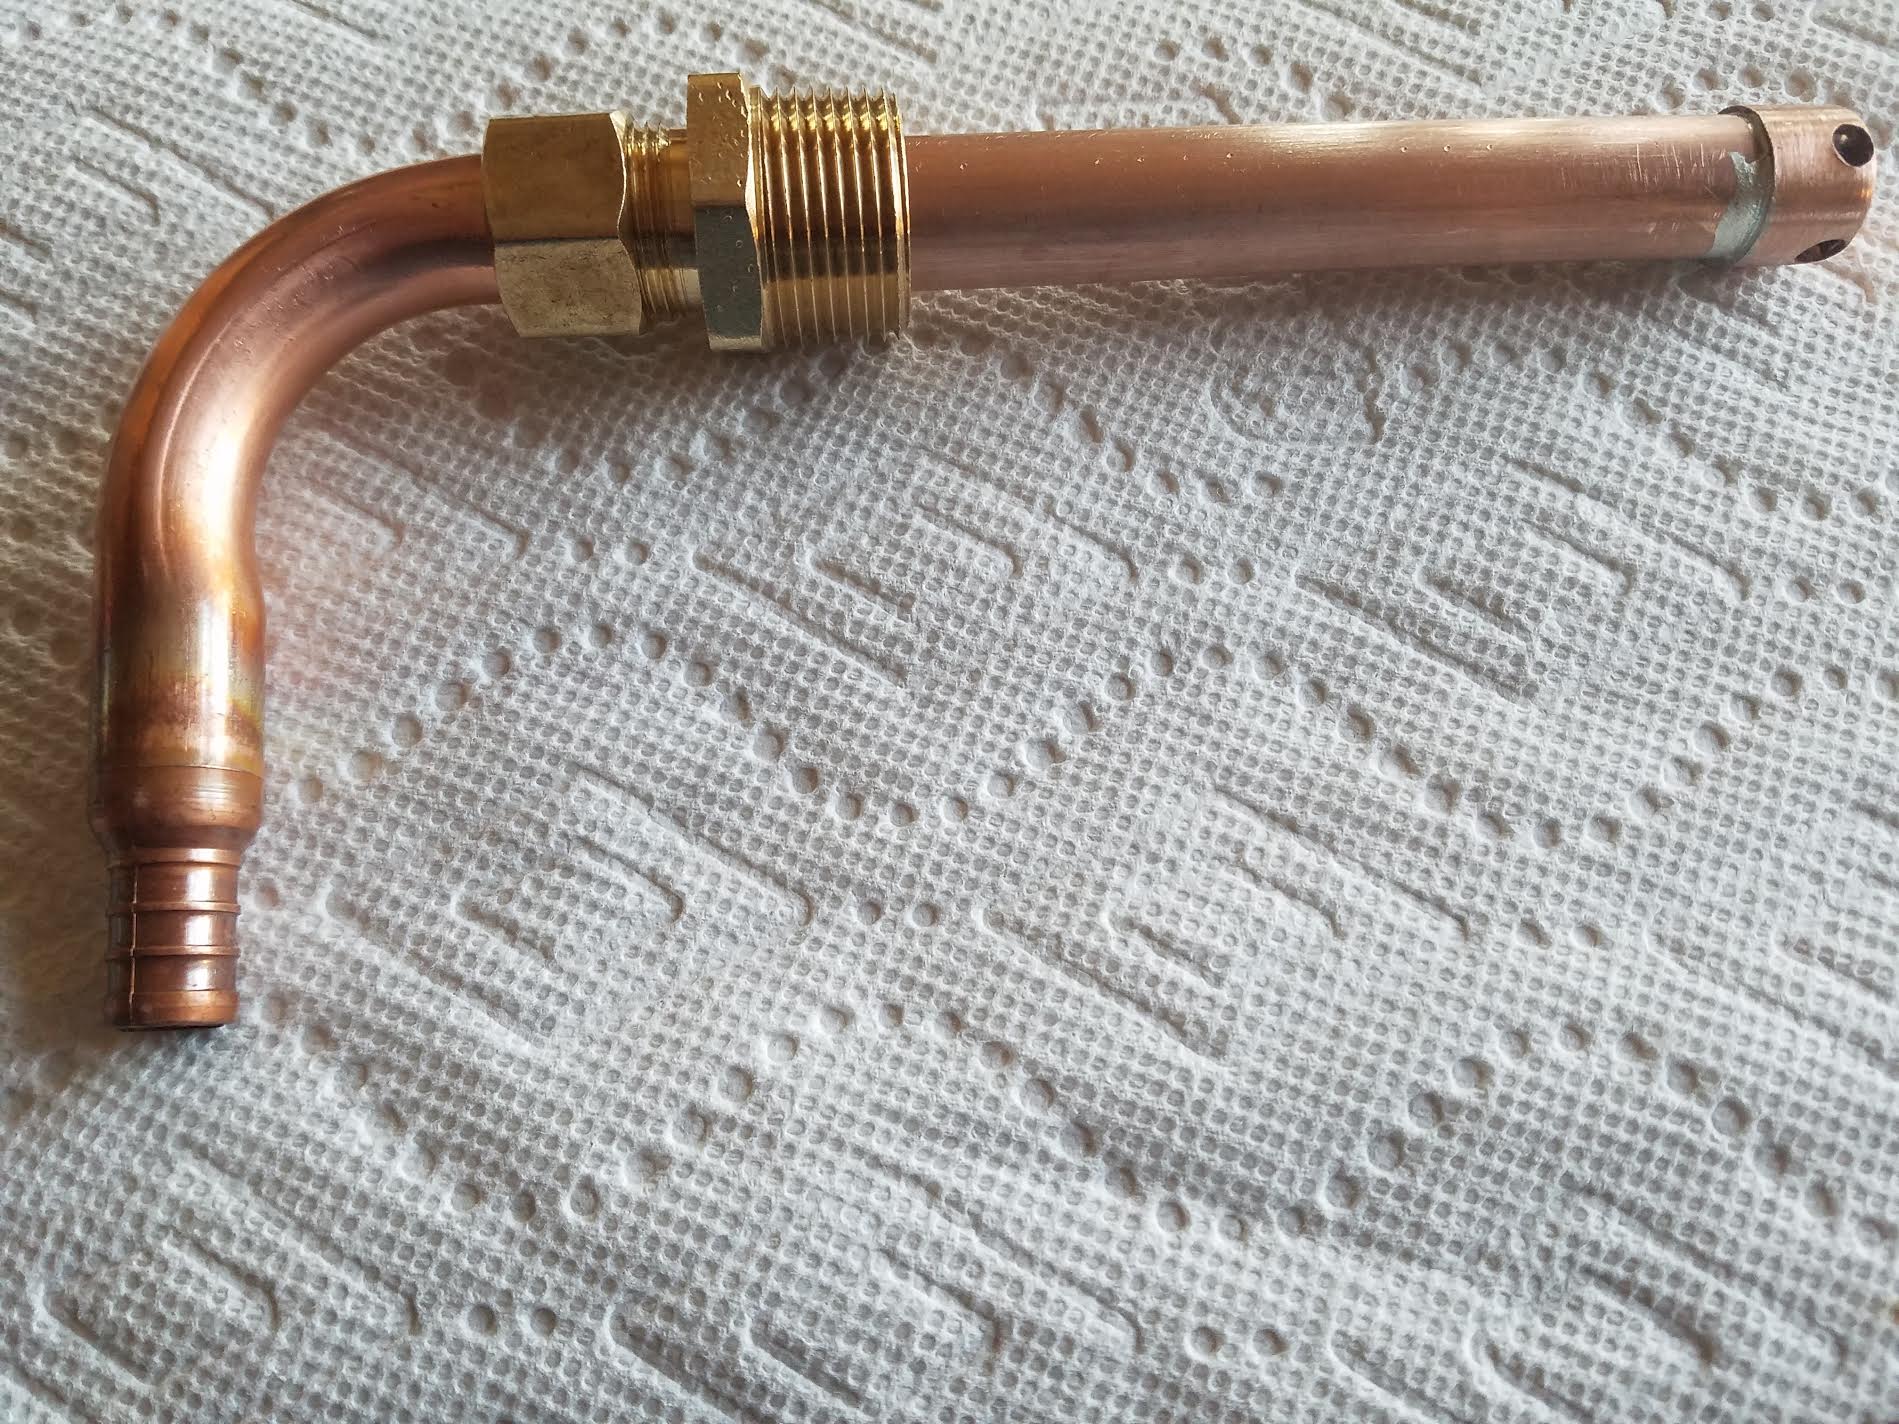
With all the talk lately about not being able to access all of the fresh water in the tank, I decided to make a new suction line and improve the situation. The stock line on mine will only draw water down to about 1 1/2" deep before it begins to suck air. In a 35 gallon tank that is only about 4" deep, this means about 1/3 of the water is not available, or about 11 or more gallons left in the tank. The stock pickup is on the side of the tank and cannot get all the water. So I made a top fitting that goes down and picks up the water at or below 1/4" from the bottom. When I started the installation I leveled the trailer and ran the water until it began to suck air. Mine did that at a reading of 25% on the gauge. If the front of the trailer is raised some, which I did not do, the reading would still be the same when the pump sucked air because the gauge reads right next to the pickup. You could get more water out of the tank with a raised tongue, but the gauge reading would be the same when it sucked air. After I installed the new dip tube, I continued to draw water and it began to suck some air at 6%. So, mine went from 25% (approx. 8 gallons left) down to 6% (approx 2 gallons left) when it began to get some air. Others have reported as much as 38% remaining which would be over 12 gallons. At a 6% reading I began getting aerated water, but a steady flow. Finally, the gauge went to 0% left. At that point is was about 1/2 water and 1/2 air at the faucet, but still flowing, or spitting. But even with a zero on the gauge it continued to pump out another gallon or so before I shut it off. All of this with cold only, not water drawn from the water heater. So, the volume from 6% to 0% was totally useable, probably not for a shower, but certainly for drinking. This is a prototype that works well, but it might still improve a bit with the next one. The pickup touches the bottom of the tank, but draws radially from below 1/4". It adjusts to any small differences in various tanks. It can be pulled out and cleaned easily if debris ever clogs it. All plumbing connections, where the new line ties in, are easily accessible and the existing tank fittings are not touched. The stock tank drain is retained. The area of the tank where the new fitting is installed is easily reached and the tools to do it all fit in the available space. After clearing all of this with Oliver to make sure there is no conflict with forum rules or warrantee issues with them, I can send anyone that wants to do this, a kit with the following: the pre-made dip tube fitting, a Polyethylene tank fitting, the special spin weld fitting driver, a 1 1/2" hole saw (if needed), the pinch ring tool and a PEX cutter. I'll also provide step by step directions for anyone who is interested. You'll have to have a powerful router with a 1/2" collet and a drill to drive the hole saw. Or, I can help you with a set of directions here on-line and you can assemble the parts yourself. The parts required are: (1) dip tube assembly, (1) 3/4" spin weld fitting, (6) 1/2" PEX pinch rings, 24" 1/2" PEX, (1) 1/2" PEX ball valve, (1) 1/2" PEX tee, a small container of Rectorseal 5. The only real tricky part is the spin weld. Besides the special procedure for spin welding itself, you have to make a new hole in the tank and vacuum out the chips. Here are some pictures:
1 point
-
Awesome idea. I just sent the link to a friend who does woodworking to ask if she'd make me one before I pick up my Oliver in September. Thank you for sharing.1 point
-
FYI they are looking for pics with a visible custom personalized name on the trailer. Here is Mouse, with Zadie and Zack asking to go for a walk. John Davies Spokane WA
1 point
-
"Olivia" Hull # 204 and an awesome lady to travel with. Of course, my beautiful wife and special lady, Ursula, has made my whole life complete for 47 years now. Monlezun1 point
-
You do beautiful work! I love the sink cover/cutting board! I don't know why Oliver doesn't make a cover for the sink. All the campers we have owned have come with them, not a nice wood one like yours of course but something. It really is a necessity in a small camper like ours. Good work ????1 point
-
Foy & Mirna, What a wonderful story! I love the name and your graphics! Your brother does nice work. Does he have a business we could order from online ? When we decide on a name I would love to have it on our trailer ????. Yvonne1 point
-
Thanks for the responses everyone . My internet has been down for the past several days due to a bear scratching on the utility pole! Anyway, it is fixed now. Dennis, it is reassuring that that you have seen the same pattern while boondocking and the solar is working well. Maybe it is a misprint in the manual as Brad suggested. Reed & Karen, we are not plugged in. Our camper has been sitting unplugged since we returned from our maiden voyage in early May. We did buy a Honda 2000 this week and had it jetted for high altitude since 99% of our camping will be above 8500 feet. The easy start is to be installed tomorrow. We are headed to the Rockies once we leave the factory. I hope we don't have to fire up the generator too often. Wish us luck ????.1 point
-
On our way to the campsite we passed a couple of nice ladies with a farm fresh produce stand. We just could not pass it up ! That roadside produce stand is located just west of Mount Ida on US Hwy 270 just before you turn north on Arkansas 27 when headed towards the boondocking location.
1 point
-
We named ours "Roamy Mc Roadhouse."
1 point
-
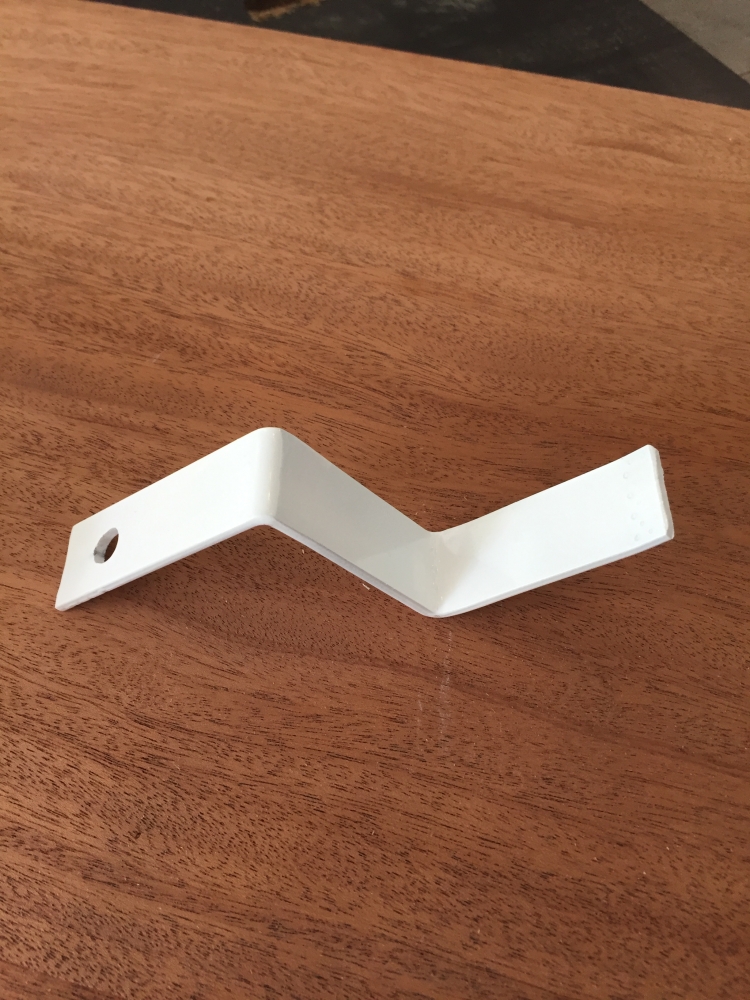
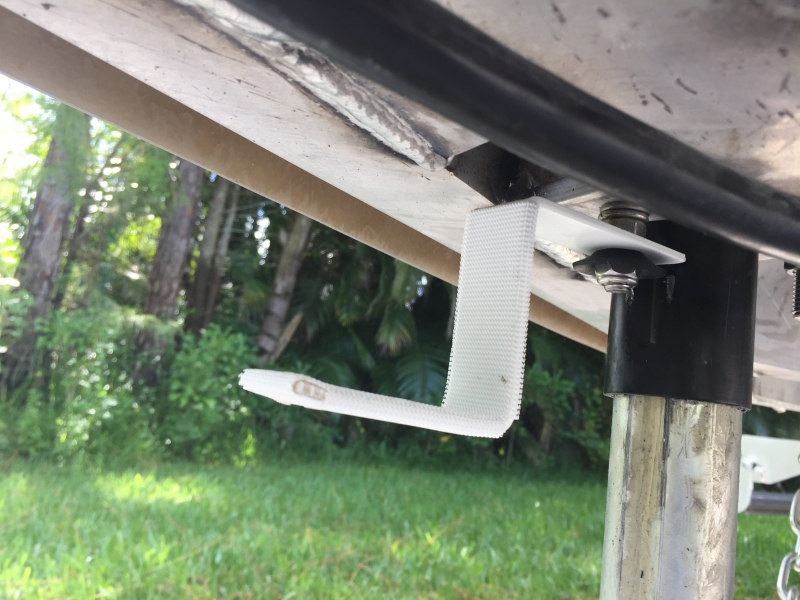
With Bill's lead, I used a piece of 3/4" flat steel and bend it into "Z" shape. Drilled a 3/8" hole to use the existing front jack bolt. Powder coated the hook and lined it with Velcro as a wear guard. Used stainless steel lock nut with rubber washer between nut and steel. Holds the Anderson wing and chains off the ground.
1 point
-
Wow. Peyton place? Yes, old enough, but almost forgotten this groundbreaking show ...1 point
-
HMD - most of had that dream and most of us can attest that dreams do come true. Keep on dreaming until they come true for you. Bill1 point
-
I don't own an OTT yet, but I am hoping to own an Elite on day. I will name her "The Lolly Olly". I know you want real owners with real names, but from one who dreams....1 point
-
The Lone Star Oliver.
1 point
-
Jason - email sent with pictures attached Hull # 117 Named "Twist"
1 point
-
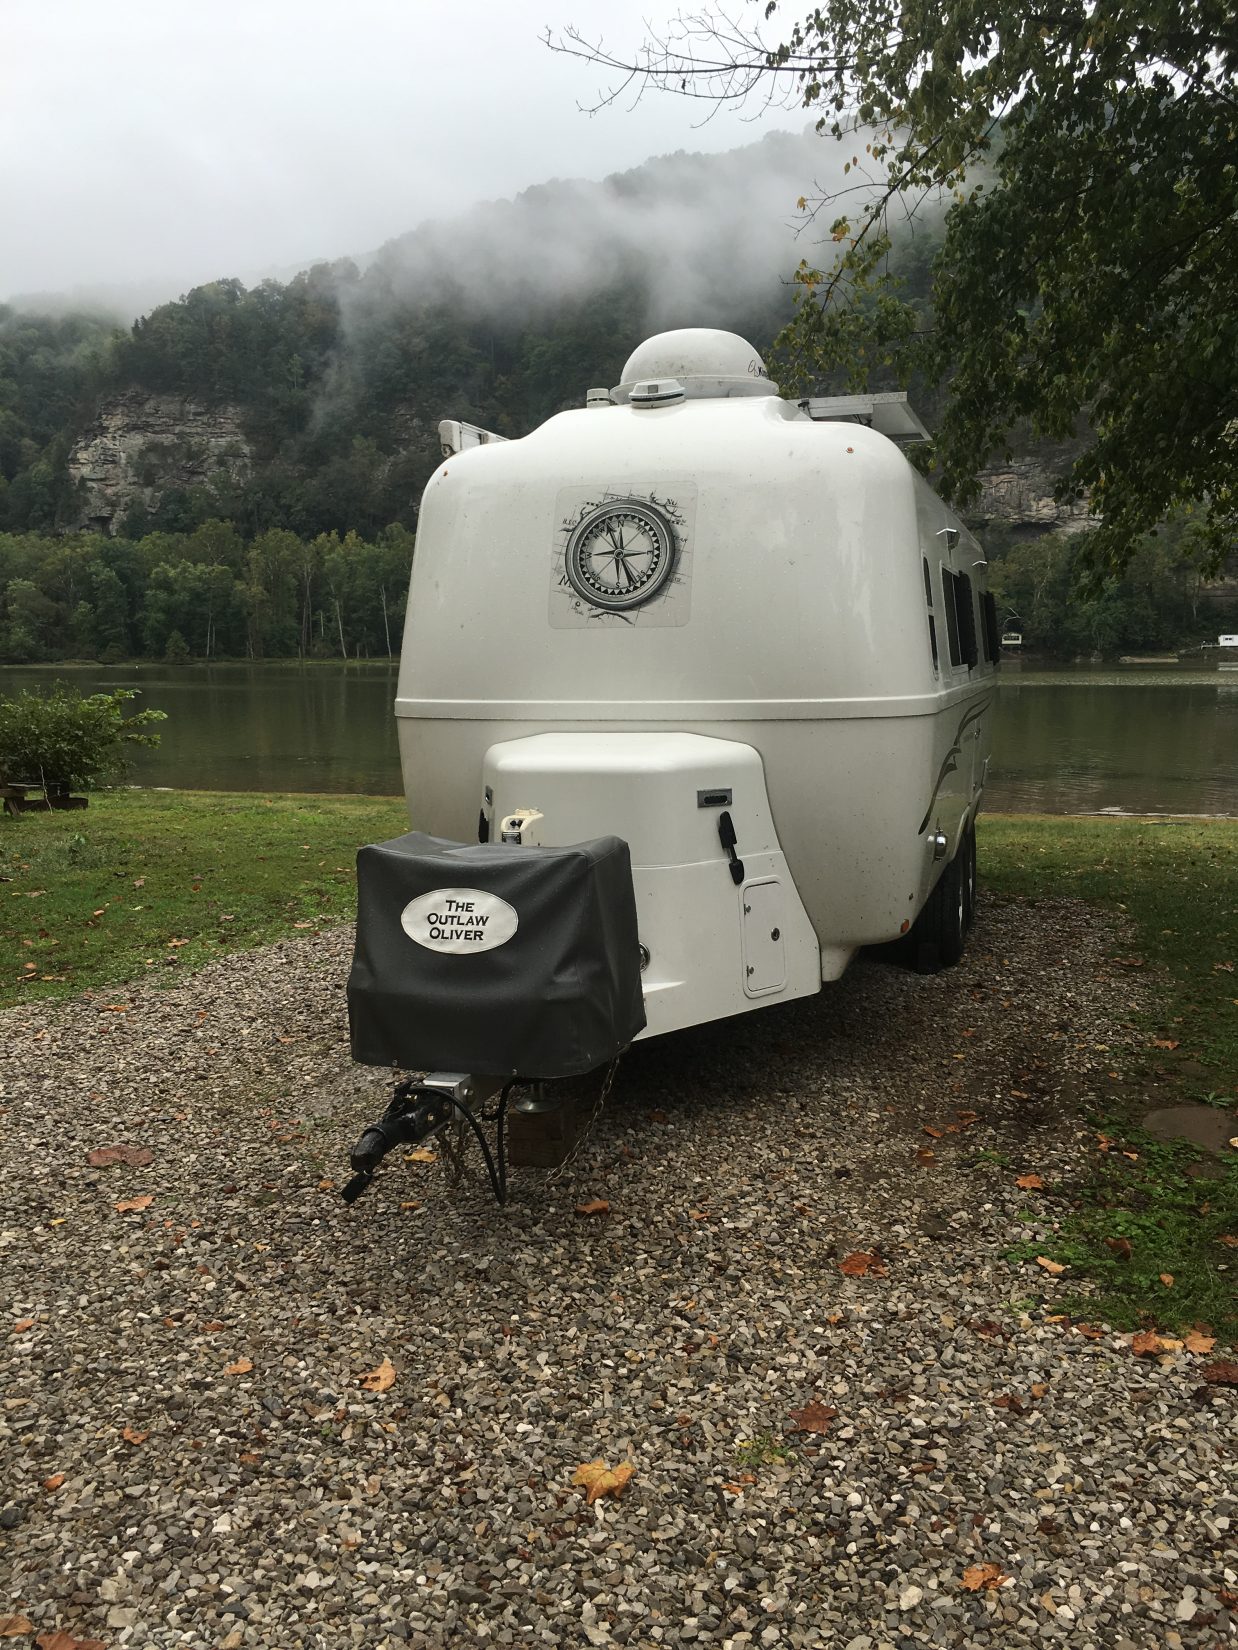
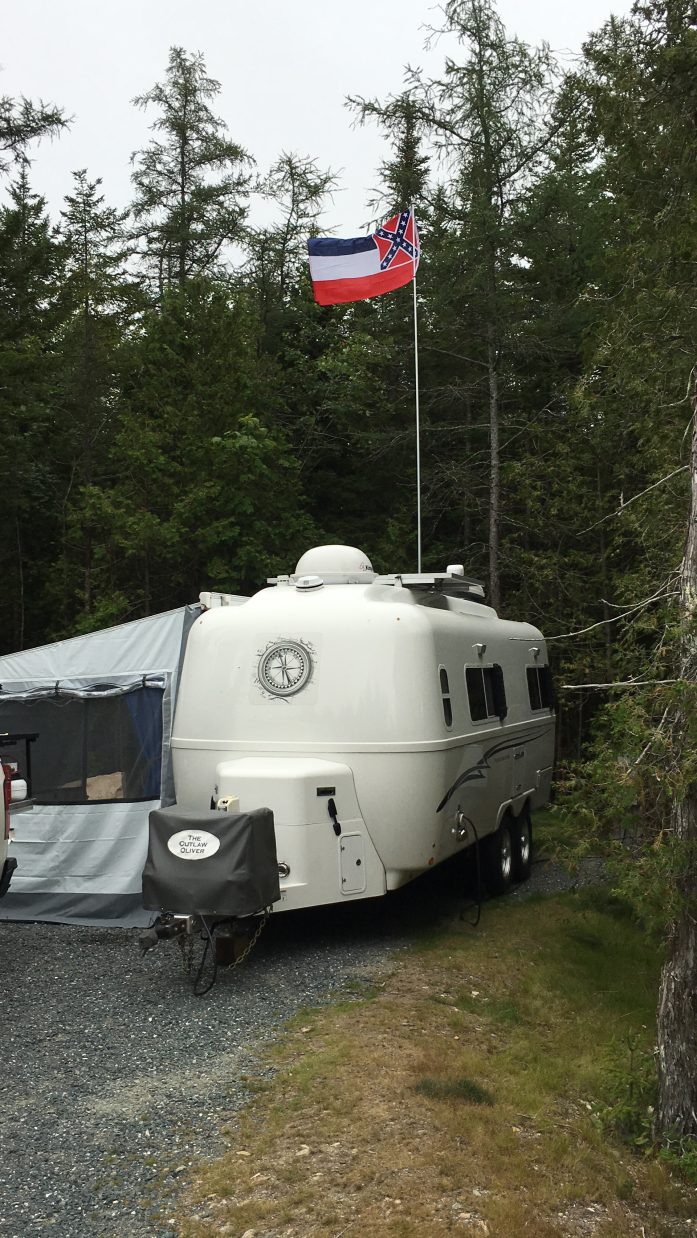
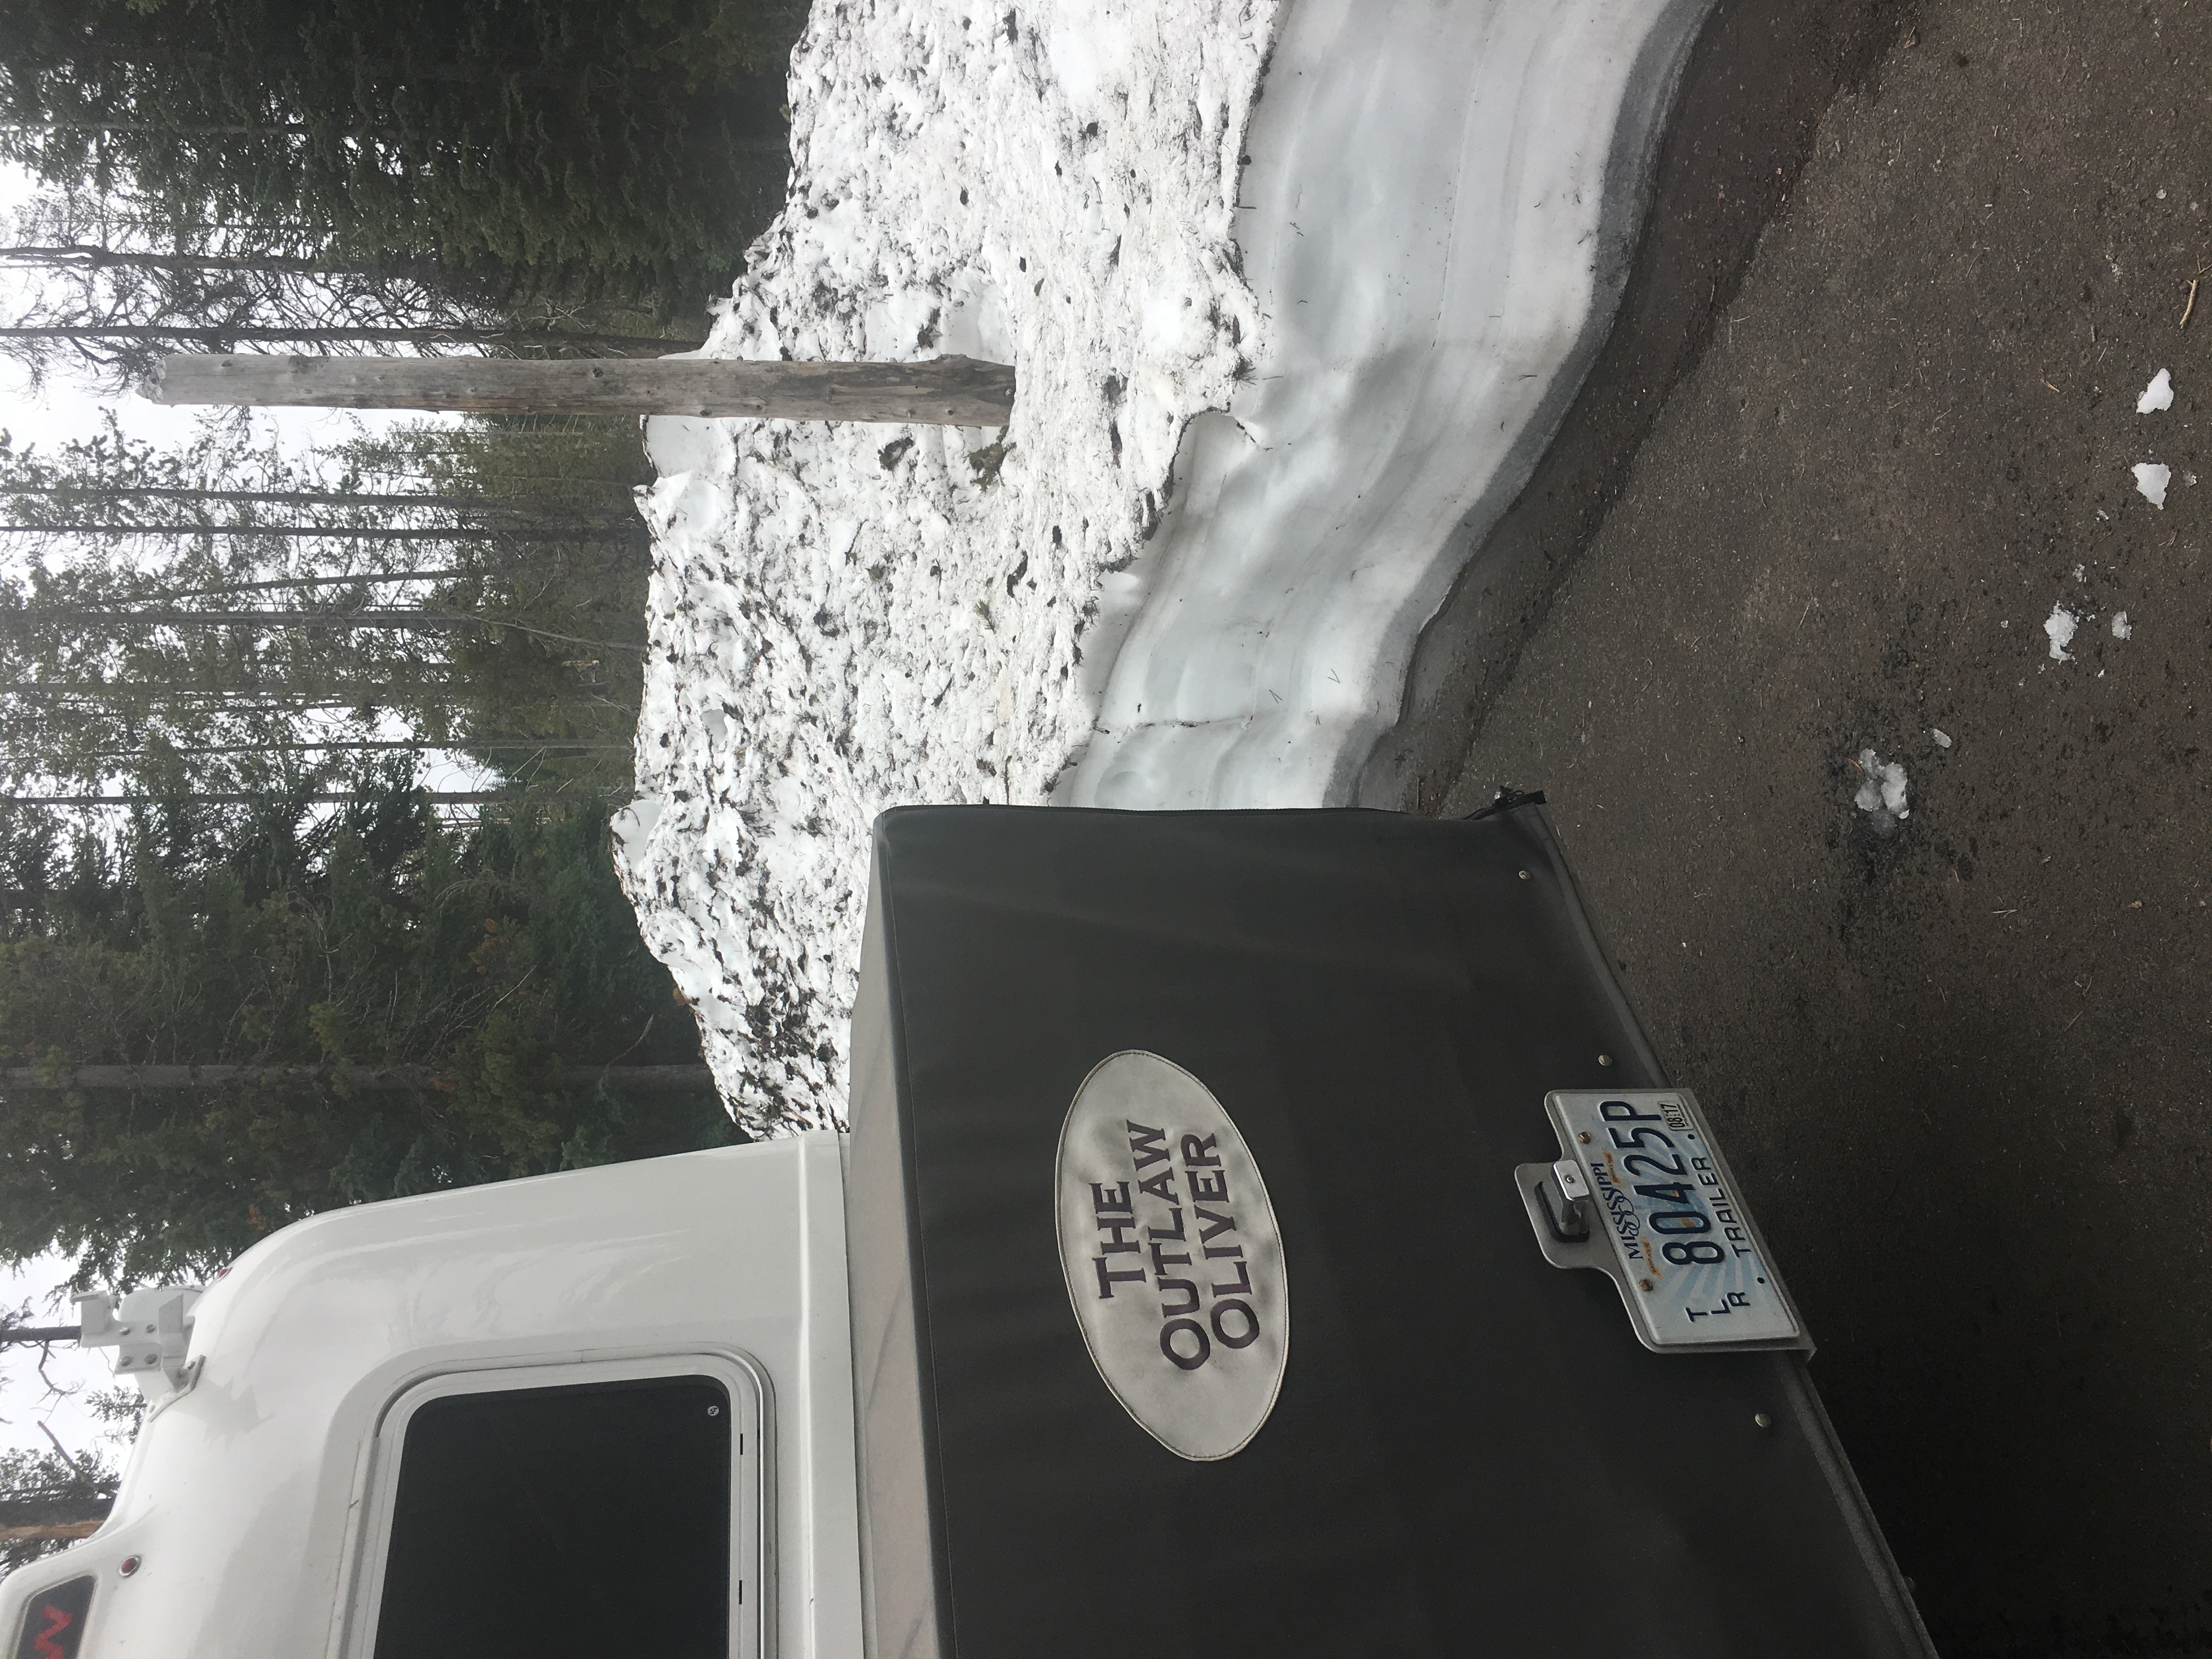
Hull #50 The Outlaw Oliver...
1 point
-
Randy - I too have the "couch" arrangement similar to the one you bought from "Windcrasher" and I do have pictures, but, I believe that Brandi is asking for information regarding the Elite I. Bill
1 point
-
I am really unclear on why anyone would want to POUR water into their freshwater tank when there is such an easy and elegant method already available to PUMP it into the tank. I can fill my tank in 15 minutes without ever having to hoist the weight of a water can. I did replace the manual valves with electric ones so that I do not have to manually turn them after crawling down under the bed. From then it's a simple matter of dropping my custom sump hose into the Scepter water cans and turning on the pump. We have all already got all the equipment needed installed in our trailers without any modifications whatsoever. Please feel free to enlighten me if I am missing something.1 point
-
Not to change the subject, from your nicely done cutting board, you make me miss the old sandingmaster 3000, but are your window cover frames pure white and not really OFF white? What about a nice teak shower floor?1 point
-
Thanks Foy! We don't even have our Ollie yet and my Missus has already decided that's a must-have. I have no woodworking skills, how much are you charging? :) Reminds me of the classic Chris Crafts. Beautiful workmanship...1 point
-
Nice job!1 point


-
Recent Achievements
-


")


")


")
