Leaderboard


Popular Content
Showing content with the highest reputation on 03/09/2018 in all areas
-
I started this as a PM to GeronimoJohn and it got so wordy, I decided to post it here. I researched these systems a long time and decided on the Tire Traker. They have stellar customer service and are sometimes at (really) big RV shows and places like Quartzite. The sensor batteries are to be replaced annually, but may last longer - they use cheap button cells. I bought a repeater in case the distance was too far but have NOT needed it. I suggest that you buy the four sensor set, an extra sensor for the spare tire, and the maintenance package. The only thing I did not like was that the trim on the perimeter of the display is bright and it reflected sunlight in the windshield. I painted the upper part on mine flat black. Some electrical tape would also work. The display is rechargeable and runs up to a month, and in sleep mode it wakes up when there is a signal from the wheel sensors. They too wake up when moving, to save the batteries. I try to remember to shut my display off every evening. The mount is a suction cup and very nice. There is no case for the display; I use a soft cloth drawstring bag from a set of sport goggles for storage. The system shows individual tire pressures and temperatures. There are preset alarm levels for both. If you get a slow leak, the alarm will come on at a reduced level to let you know that you need to pull over. By watching the display you can tell if it is slow or a big one. If it is a big leak the alarm is more intense. The sensor on the spare tire lets you know that it has not gone flat, since it is a small PITA to check. If one of the main sensors fails, you can swap the spare onto that wheel until you can get a replacement. Or just order an extra sensor now... The temperature display is useful since it shows the temps increasing as the tires heat up during towing, which is completely NORMAL, and if there is one that is abnormally warm, you can stop and see if there is a brake or bearing issue on the hub. NOTE: because the sensors are spinning in ambient air on the end of the valve stems, I doubt that the displayed temps are especially accurate. A sensor inside the wheel would be a much more reliable and accurate system. I honestly don't see how the external sensors could read inside temps, but they do to a certain degree (pun intended). I don't think that the display dims, I have never used it at night. I suspect you would want to take it off the windshield and just set it in a low cupholder. It would still alarm if needed. If somebody knows if the lighting dims, please comment. The system gets very good reviews, you can get from Amazon, but I ordered direct from Tire Traker. Setup: Charge the display several hours. After first checking and adjusting your COLD tire pressures (I use 60 psi), it will take you about ten minutes to set it up, there are many videos showing how. You have to set the alarm threshold (enter the cold tire pressure), install batteries into sensors and put them on the wheels one at a time. As each one "wakes up" it will show up on the display and you can adjust its position of the vehicle diagram, for example "left rear" on the trailer drawing. Position of the display: I mount mine at the lower left corner of the windshield. It is easy to see, but neither in my direct line of sight, nor close to my Garmin gps. Aftermarket devices like a gps that use radio signals may possibly cause interference. My RV 660 is mounted along the center of the windshield and I have noted no interference when using my Garmin remote (trailer backup) camera. If you have trouble with the TT-500 signal, you may need to mount their booster inside the trailer connected to an always-on power source. If you have the factory backup camera, the area behind the switch would be a great location, and you can use the switch to power on the booster when you switch on the camera. https://www.tiretraker.com/proddetail.php?prod=TT500-4 https://www.tiretraker.com/proddetail.php?prod=TT50 https://www.tiretraker.com/proddetail.php?prod=TT-MAINT Installation video: If you are driving an older tow vehicle without its own TPMS, you can order extra sensors and use the Tire Traker to monitor those tires also. This system is versatile and mine has been reliable for a year. It gives great peace of mind when towing, especially in inclement weather and in remote areas, which is priceless. Anything you can do to reduce your anxiety level while towing is a good thing. HIGHLY recommended! I towed trailers for 45 years without TPMS, and I am very glad I invested in this. John Davies Spokane WA
 2 points
 -
I agree that a TPMS is a critical safety addition. While I went with the TST product a couple of years ago there are a number of good systems out there, the Tire Tracker is certainly one of them. I check it before starting any drive and I glance at the display periodically as we travel. It’s interesting to watch both pressure and temperatures increase as we drive. It also shows higher temps on the sun side of the trailer. Mike2 points
-
Why would you need an a/c tester when it tells you all of that on the built in surge protector? You either have a/c or you don't... and when you don't in these trailers it's usually the gfi under the dinette. Either that or the surge protector is already telling you why your power is shut off when you plug in. For me, a multimeter that allows me to check either a/c, d/c or ohms is the Only needed electronics tester because it does it all and most of the problems will be on the d/c side anyway. When the a/c power outlets go off, reset the gfi and unplug the blow drier :) Reed2 points
-
John D.: Once again you have gone above and beyond in the good advice category! Many thanks. New Ollie Owners. I checked out the videos and the Tire Traker TT500 comes in various capabilities. With a reasonably new vehicle with it's own tire pressure monitoring system (TPMS), for the Elite II application I believe we would want the TT500-6 to be able to monitor six tires. They likely would be the four on the ground under Ollie and its spare. Having a spare sensor in the glove box is a good idea. I would suggest a slightly different upgrade. I would put all six sensors in play. Of course the five on Ollie, but the sixth one on the full size spare tire of my Sequoia ..... that also is a PITA to check the pressure on! This is value added as most of us do not bother to change out our spare tire sensor when we buy four new tires for the Tow Vehicle (TV). For peace of mind, knowing that my TV spare also is road ready would be very nice. That said, I agree with John D. that purchasing a spare sensor beyond the six they send with the TT500-6 unit is a good idea. How many of us have a son/daughter that helps with our set up? It would be good to have an extra sensor in the glove box to keep handy for when they back the trailer tire into a curb and eat the rear Ollie tire sensor. Or as John D. suggests, just to have an extra one should it be needed. The TT500 - 6 is $359 at both their site and Amazon. Extra sensors are $35, Sensor caps replacement is $5 for 12, or better get the Maintenance Pack at $29 as suggested by John D. Wishing you all a great season! Geronimo John Tire-Tracker-TT500-6-Tire-Monitoring.docx1 point
-
We have a similar rack, and have had good results. We have found that with the blades down the steak knives will come loose on real rough roads. With the handle down they seem to stay put. Maybe the momentum of the heavier handle? The rest of the utensils seem to stay just fine. If we know we will be rough roads they may end up in a drawer...
1 point
-
Overland, I did get up there and look and try to reposition it (without adding any heat). It does not appear to be the screws holding it out of place. Seal seems to be pretty dense foam and is pressed out of shape and since it (awning) is in the closed position more than not, it is holding that shape. I am convinced it is the black plastic on the awning because it is evident at every location where they are but the one in the photo I posted is the worst one. I "think" that seal is cosmetic only but cannot be sure since it being out of place exposes the screws. It doesn't look good either way.1 point
-
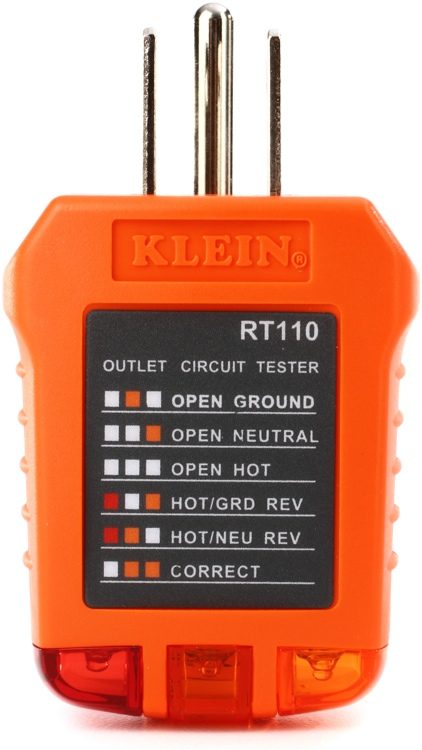
You need to add an AC circuit tester to your tool kit, I suggest that you keep it in a galley drawer with your electrical stuff, extension cords, and odds and ends .... something like this one. First rule when any AC device quits, is check the outlets. I’m glad it was something simple, just watch it in the future to see if something continues to trip the Ground Fault outlet. There may be a wiring problem, or somehing else is tripping it... John Davies Spokane WA
1 point
-
Ours quit working once, too. The 110V plug in the overhead had come out of the socket. I should have checked that first! Mike1 point
-
Easy fix. Jason returned my call and reminded me of the GFI receptacle under one of the dinette seats across from the fuse panel. It was flipped. I reset it and whammo! microwave works!1 point
-
I could use one of these in my life. Trade out the trailer for an Oliver tho.
1 point
-
1974 VW https://youtu.be/56XL0TysIn01 point
-
Mine was/is like that in places also. Like Tom said, what you're seeing is the seal that Oliver installs, and they don't always get it even. It looks like it may be trapped under those screws a bit. You can try getting up on a ladder and pulling on it to see if it will pull away from the screws and lift into place. Might help to hit it with a hair dryer to soften it up and reshape it around that plate.1 point
-
I don’t recall this being mentioned, it is pretty darned cool and will be very useful to anyone who camps west of the Black Hills. http://www.hogtimemusic.com/nomad/MultiYrCampsiteMap.htm Note that he has a truck camper, so with a trailer you should probably study the satellite maps before commtting to an isolated forest road.... more here: https://www.truckcampermagazine.com/camper-lifestyle/the-25-best-campgrounds-of-the-west/ John Davies Spokane WA1 point
-
I just looked at ours and it is the same way. That seal appears the be a seal to keep water from running down the side of the camper from under the awning. It looks like the part touching the camper shell is what is important. The black plastic things appear to hold the awning in place when closed. I don't think the screws being exposed are a big deal but I am curious to hear what Jason says. Let us know what he tells you.1 point
-
I found a few Everloc pieces in Springhill. One of them is the shelf ShallowGal found. It’s not going to work for us so I’m going to return it. I’ll hold on to it if you what and see you at the rally or meet locally. Just let me know one way or the other.1 point
-
That's a nice rack, and what looks like a nice set of knives. I love the handles - don't blame you for wanting them out in the open.1 point
-
I have been involved with Oliver Travel Trailers almost since day one. The fact that we have owned two of their fine trailers should indicate to everyone that I am very pro-Oliver. As well as the Oliver family, I have personally known virtually all the workers on the line during these past 10 years. I can attest that they are all fine, Christian, honest folks with the customer’s best interests at heart. I have placed this post in this thread since it seems that, once again, an old problem has reared its ugly head. That problem being the attacking or speaking disparagingly against Oliver’s employees. I want to make it very clear that from this point on there will be ZERO tolerance for negatively commenting on an employee’s performance or words within this forum. This is not the proper venue for venting toward an individual. Case in point is the recent comment alleged to have been made by Anita in the sales office. I have spoken with Anita concerning this matter. She is very upset about this accusation and vehemently denies ever having said those words. Further, it has been addressed with management. You may feel free to rant on about anything Oliver Trailer related but if you have a problem with an Oliver employee or if you perceive they have acted in a manner that you deem unprofessional, you are to address that matter directly with Scott Oliver.1 point
-
WINTER STORAGE OF CAMPER When storing the camper for the winter you will want to ensure that it is done properly so you don't run into any issues when you get ready to get it out of storage. Winterize: Make sure you properly winterize the camper with an RV Antifreeze. Using air to blow out the lines will NOT remove all of the water in the system. There are valves throughout the camper that can hold the smallest amount of water, freeze and crack causing an unwanted repair. Make sure the filter or anode is removed from the water heater and it is empty. Batteries: The on-board batteries are susceptible to cold weather and can drain even when disconnected from the camper. It is best to leave the camper on a charge keeping the batteries topped off. This will prolong the battery life as well as ensure that the camper has 12v power when it comes out of storage. Tires: The tires on your camper may develop flat spots if left sitting on concrete/asphalt while being stored. This is okay as the flat spots should straighten out as you drive the camper down the road about 10 miles and the tires heat up. Even if the camper is being stored inside a building, if the building temperature is not regulated to stay above freezing and/or the building heat source fails, then you may have something freeze inside the camper causing damage. Winter Usage The camper is designed to be used during the winter months just as you use your stationary house. However, the biggest difference is that with your camper you may turn off the heat source and travel to your next destination. This trip might just be enough for the water left behind in your water lines, water filter, toilet, and or water heater to freeze and cause damage. Recommendations: While traveling in freezing temperature (32 degrees) it is recommended that you drain your water heater, cut off the water to the toilet and flush to remove as much as the water from the toilet as possible. Depending on the outside temperature and how long your drive will be, this may not fully protect against freezing. It is best to use RV Antifreeze to pump through the lines when in extreme temperatures to ensure that nothing freezes. What factors impact how quickly your water will freeze? Water Mass - 6gallons of water will take longer to freeze compared to 1ml of water. The valves inside your camper may have less than 1ml of water resting on them as you travel creating a potential freeze condition. Water Temperature - The starting temperature of the water before it loses its heat source. Water that is in the cold lines may already be at 50 degrees and it only has to drop to 32 degrees for it to freeze. Hot water in the lines requires even less time compared to cold water to freeze. Outside Temperature - If the outside temperature is 0 degrees then the inside temperature will fall faster than when traveling in 32 degree weather. Speed of Travel - When traveling down the roads at 70mph the wind chills across the camper can drop the temperature quicker. *When traveling during the winter months please keep up with each states laws for campers. Many states do not allow the propane system to be on while driving on roadways, bridges, and tunnels. Space heaters may keep the main cabin warm but may not provide a sufficient heat source for the water lines between the shells.1 point


-
Recent Achievements
-


")


")


")


