Leaderboard


Popular Content
Showing content with the highest reputation on 10/07/2018 in all areas
-
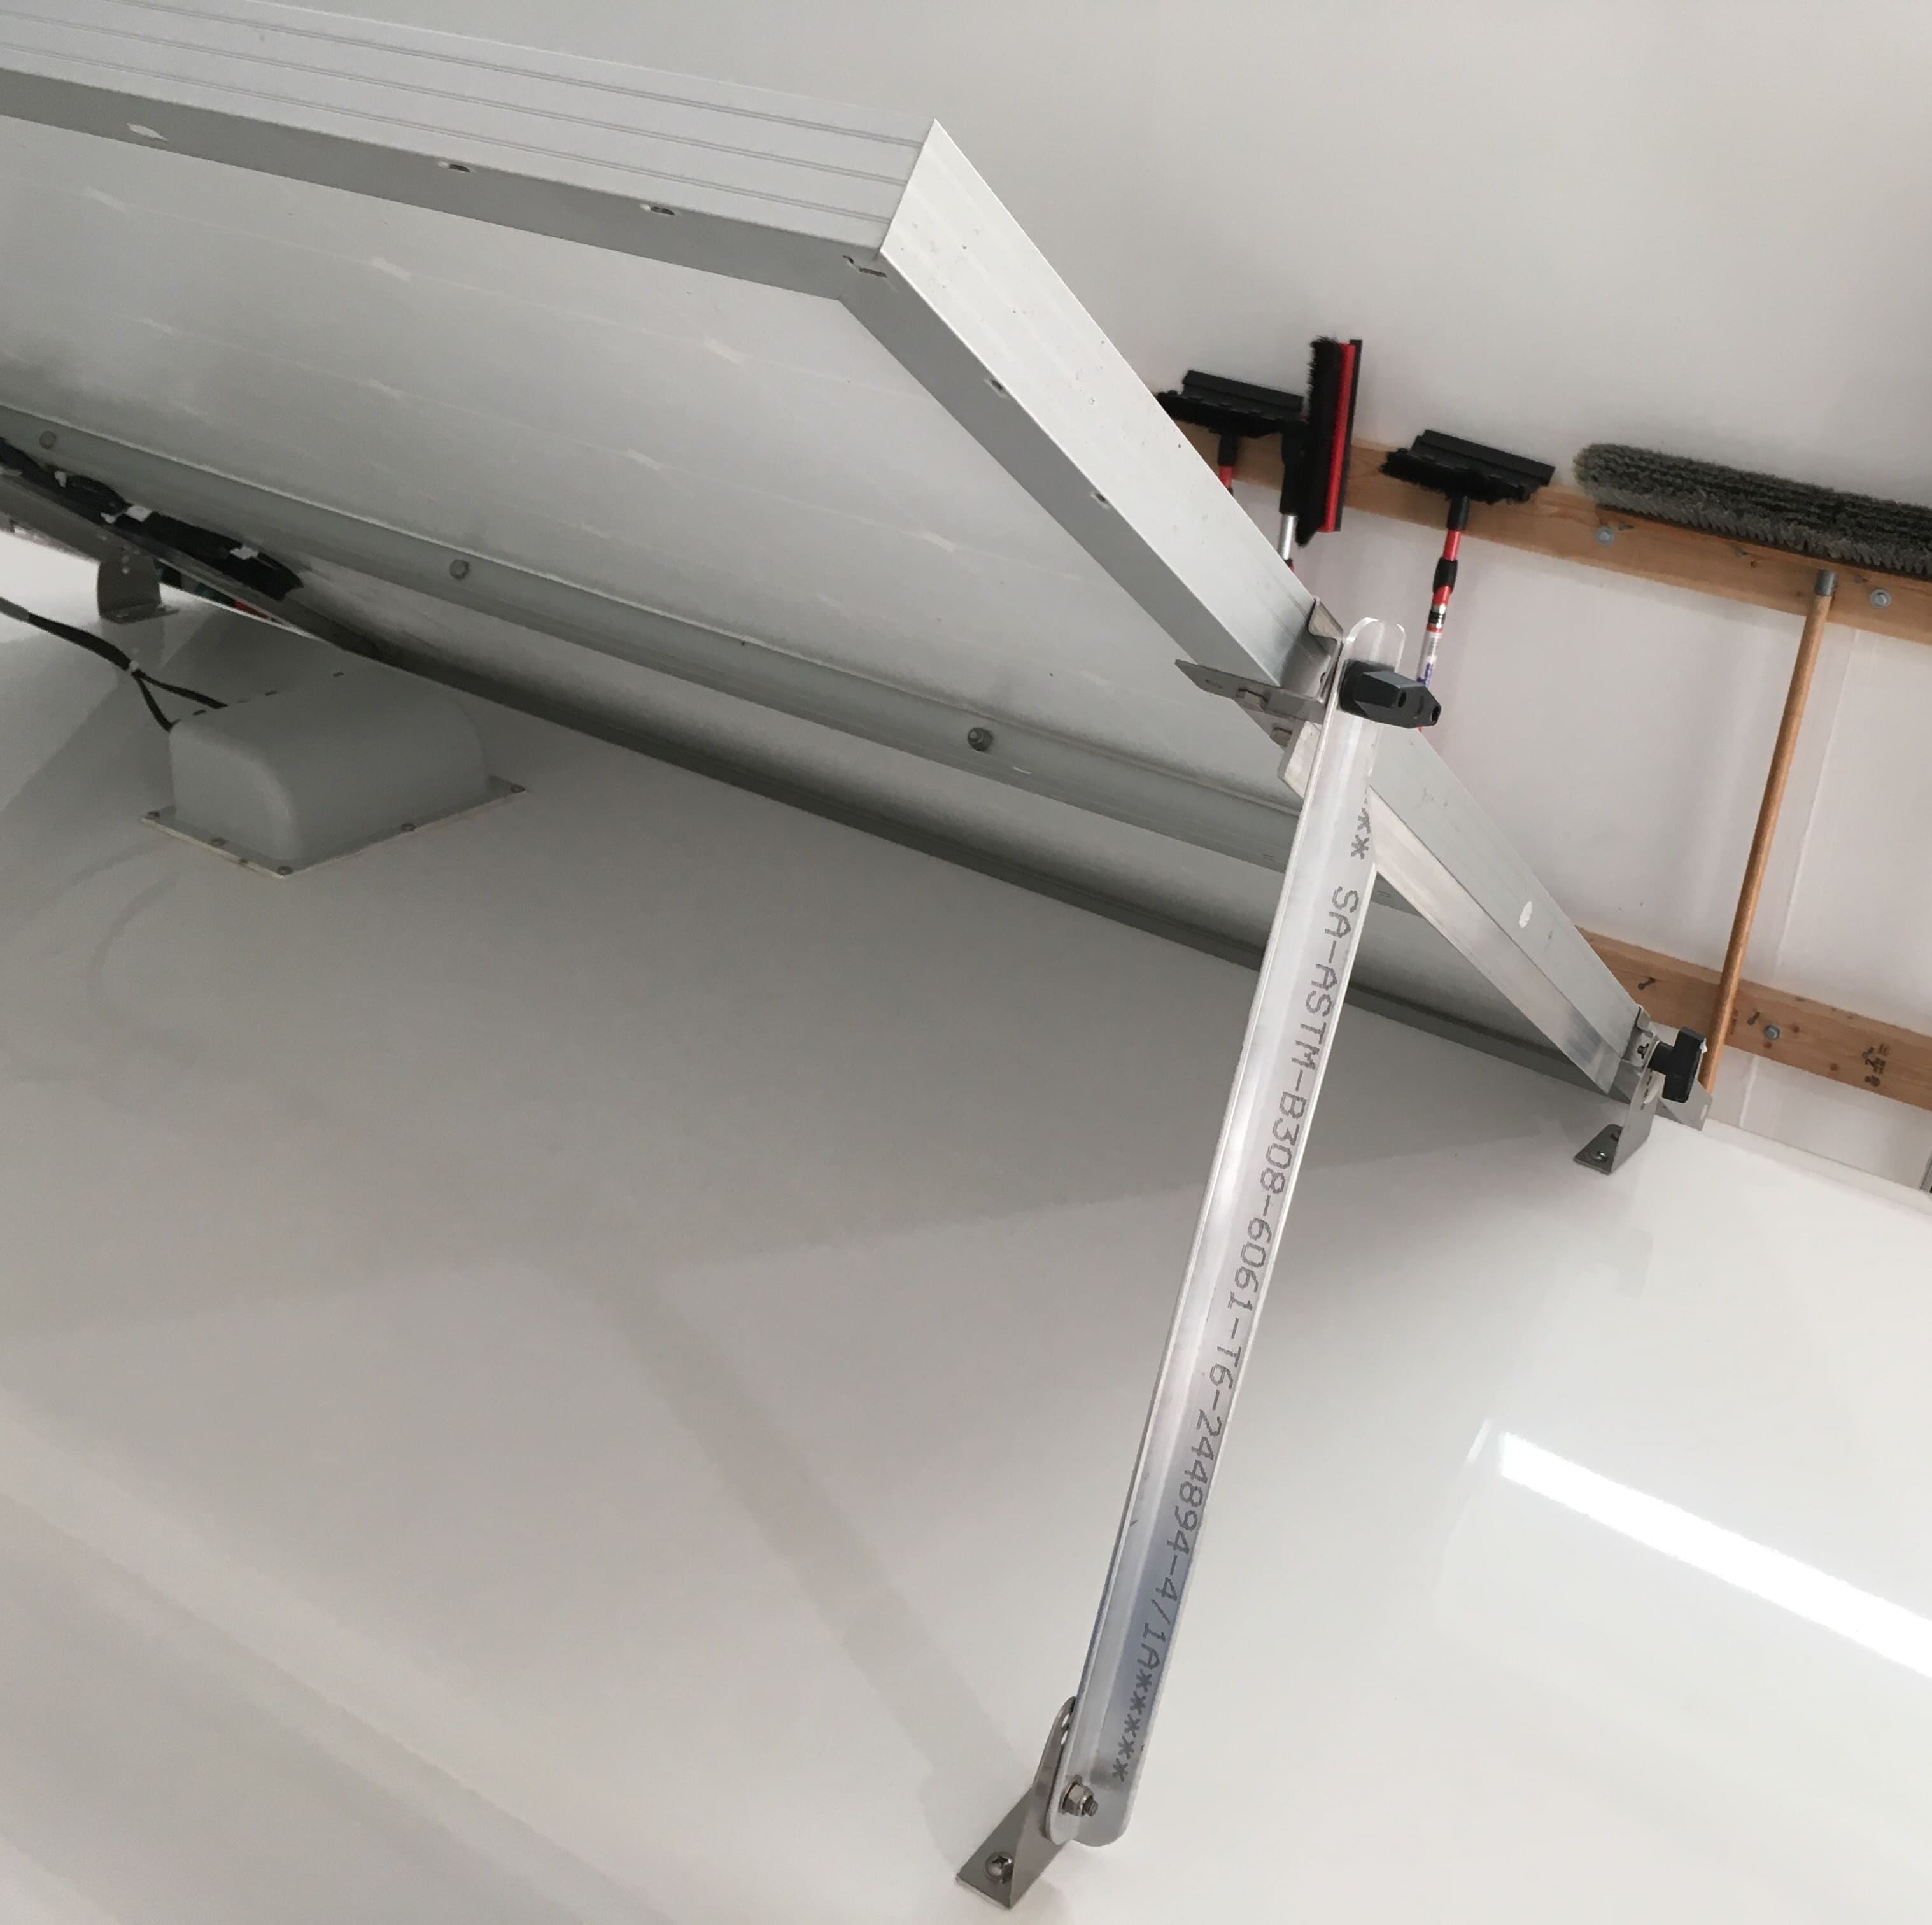
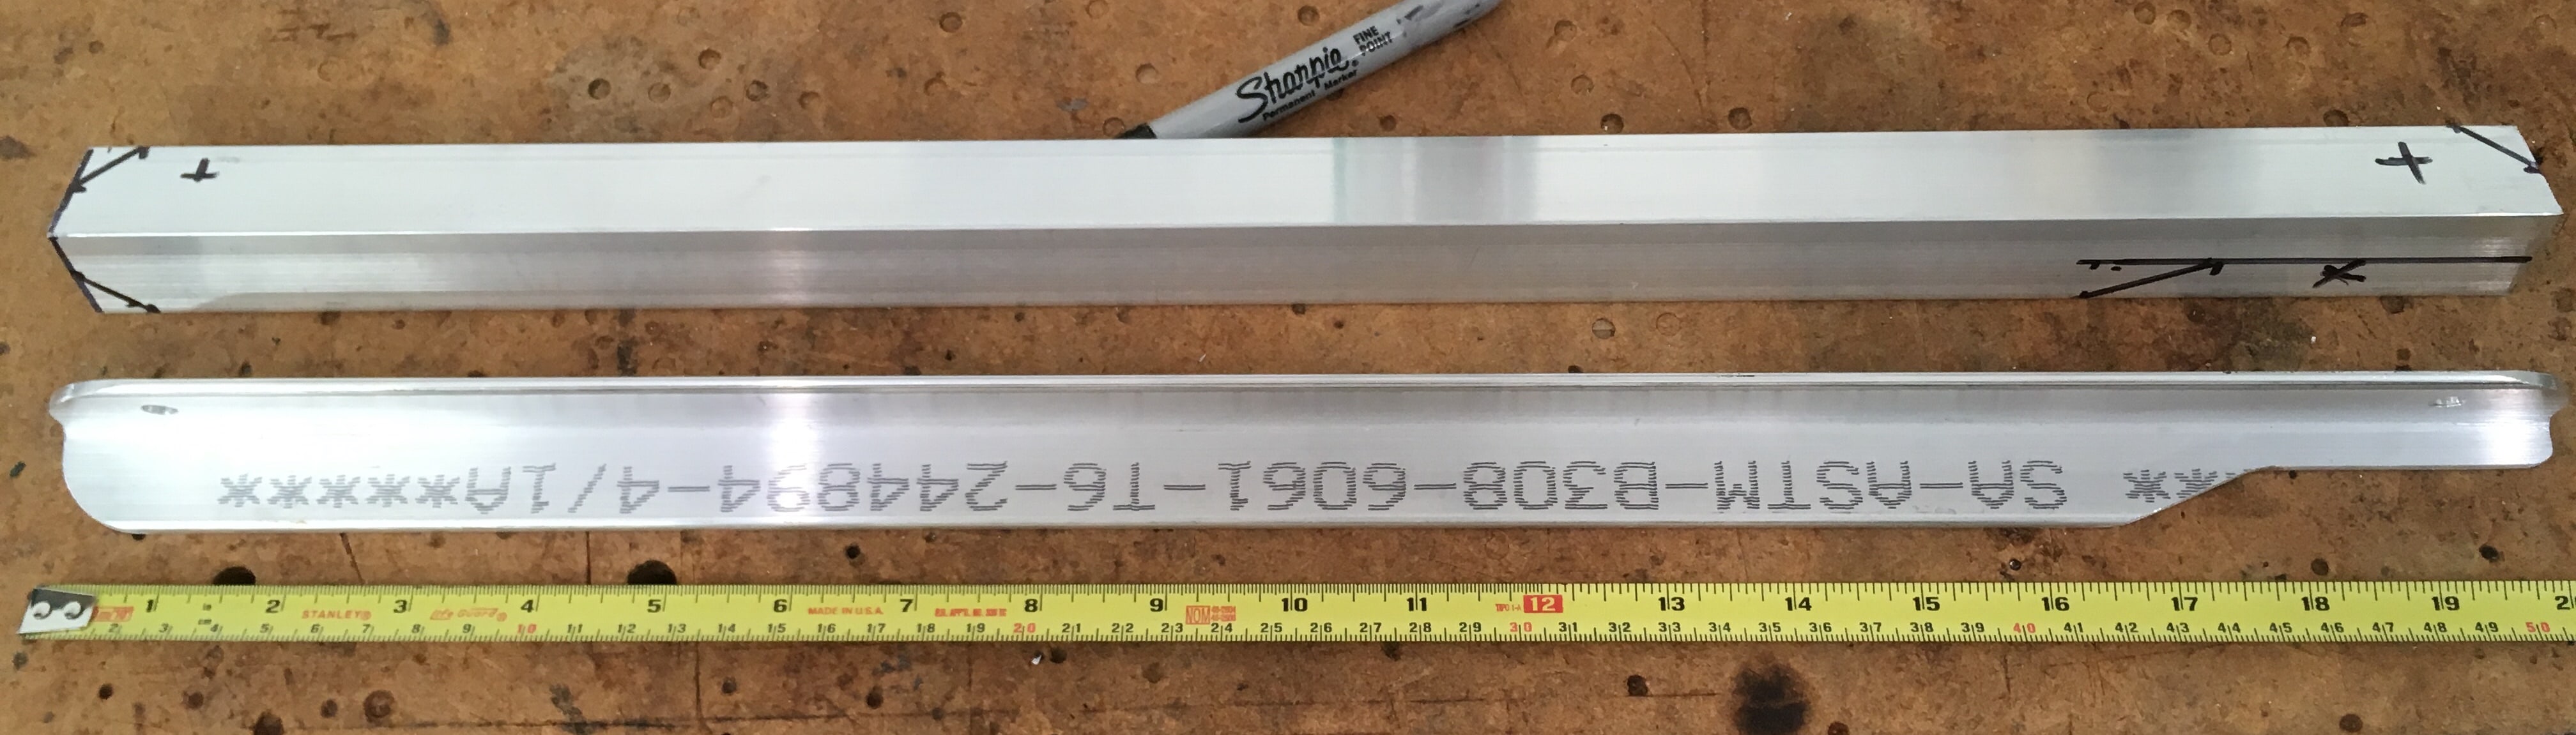
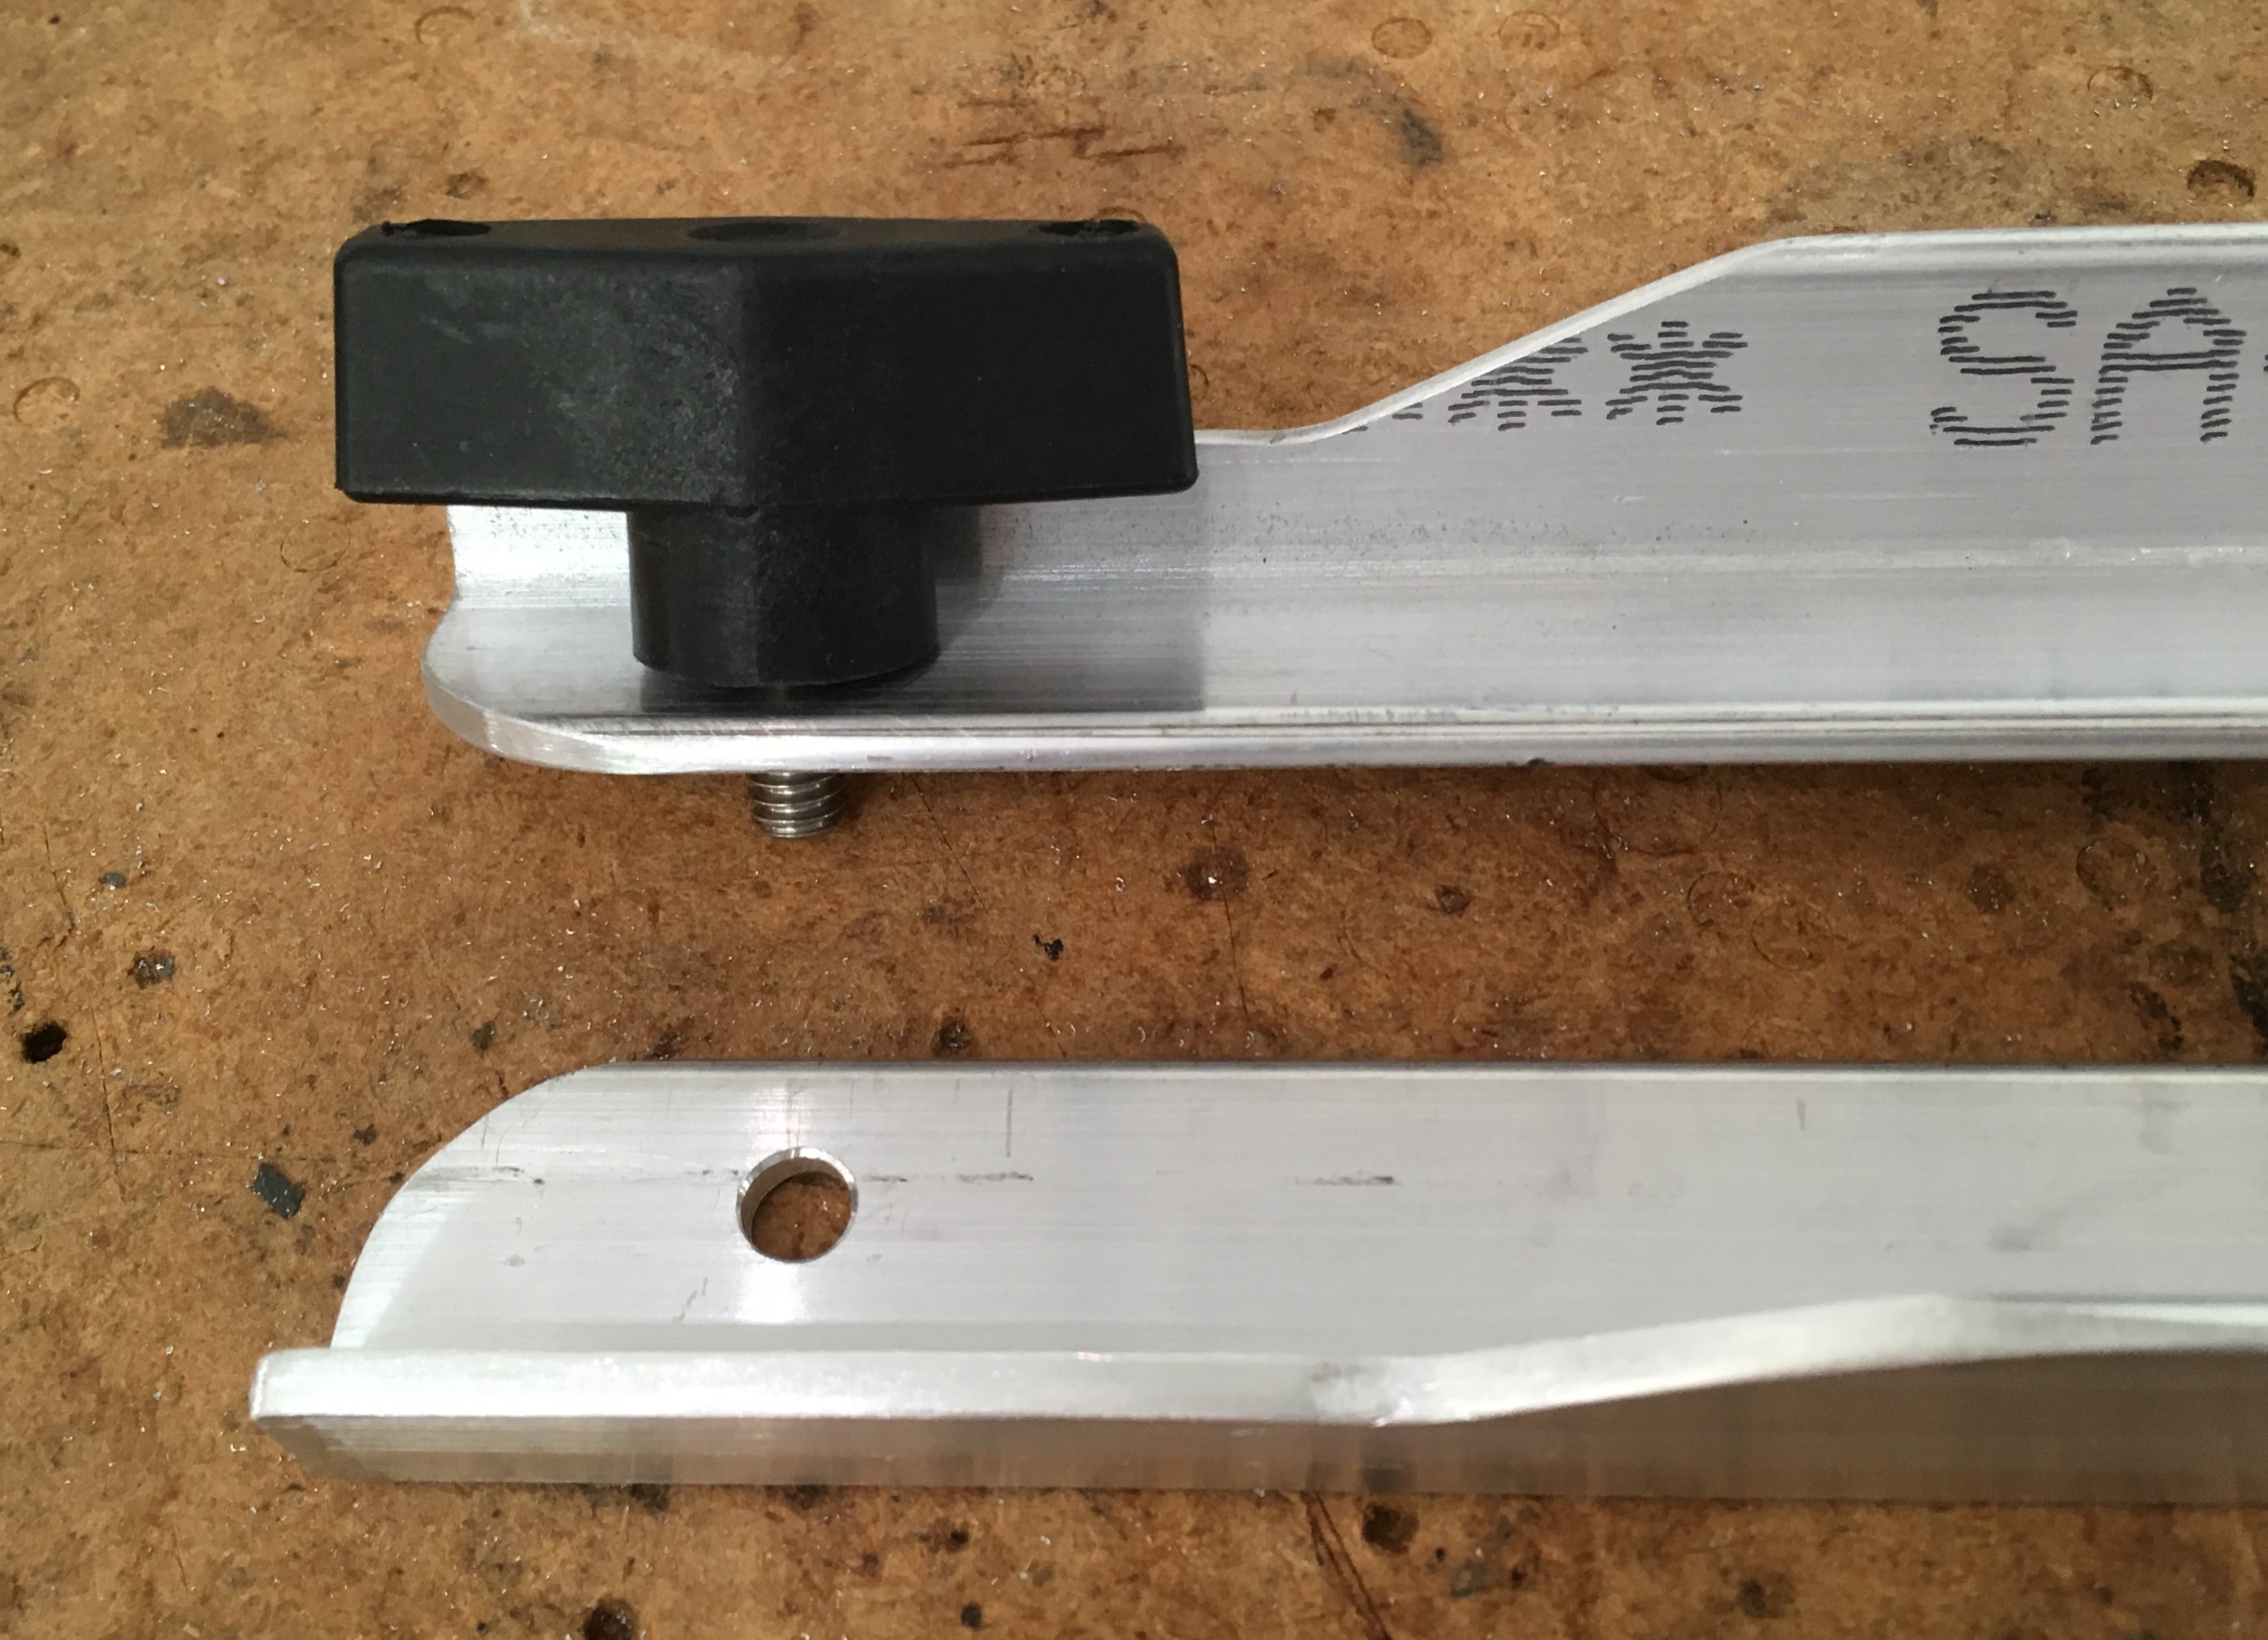
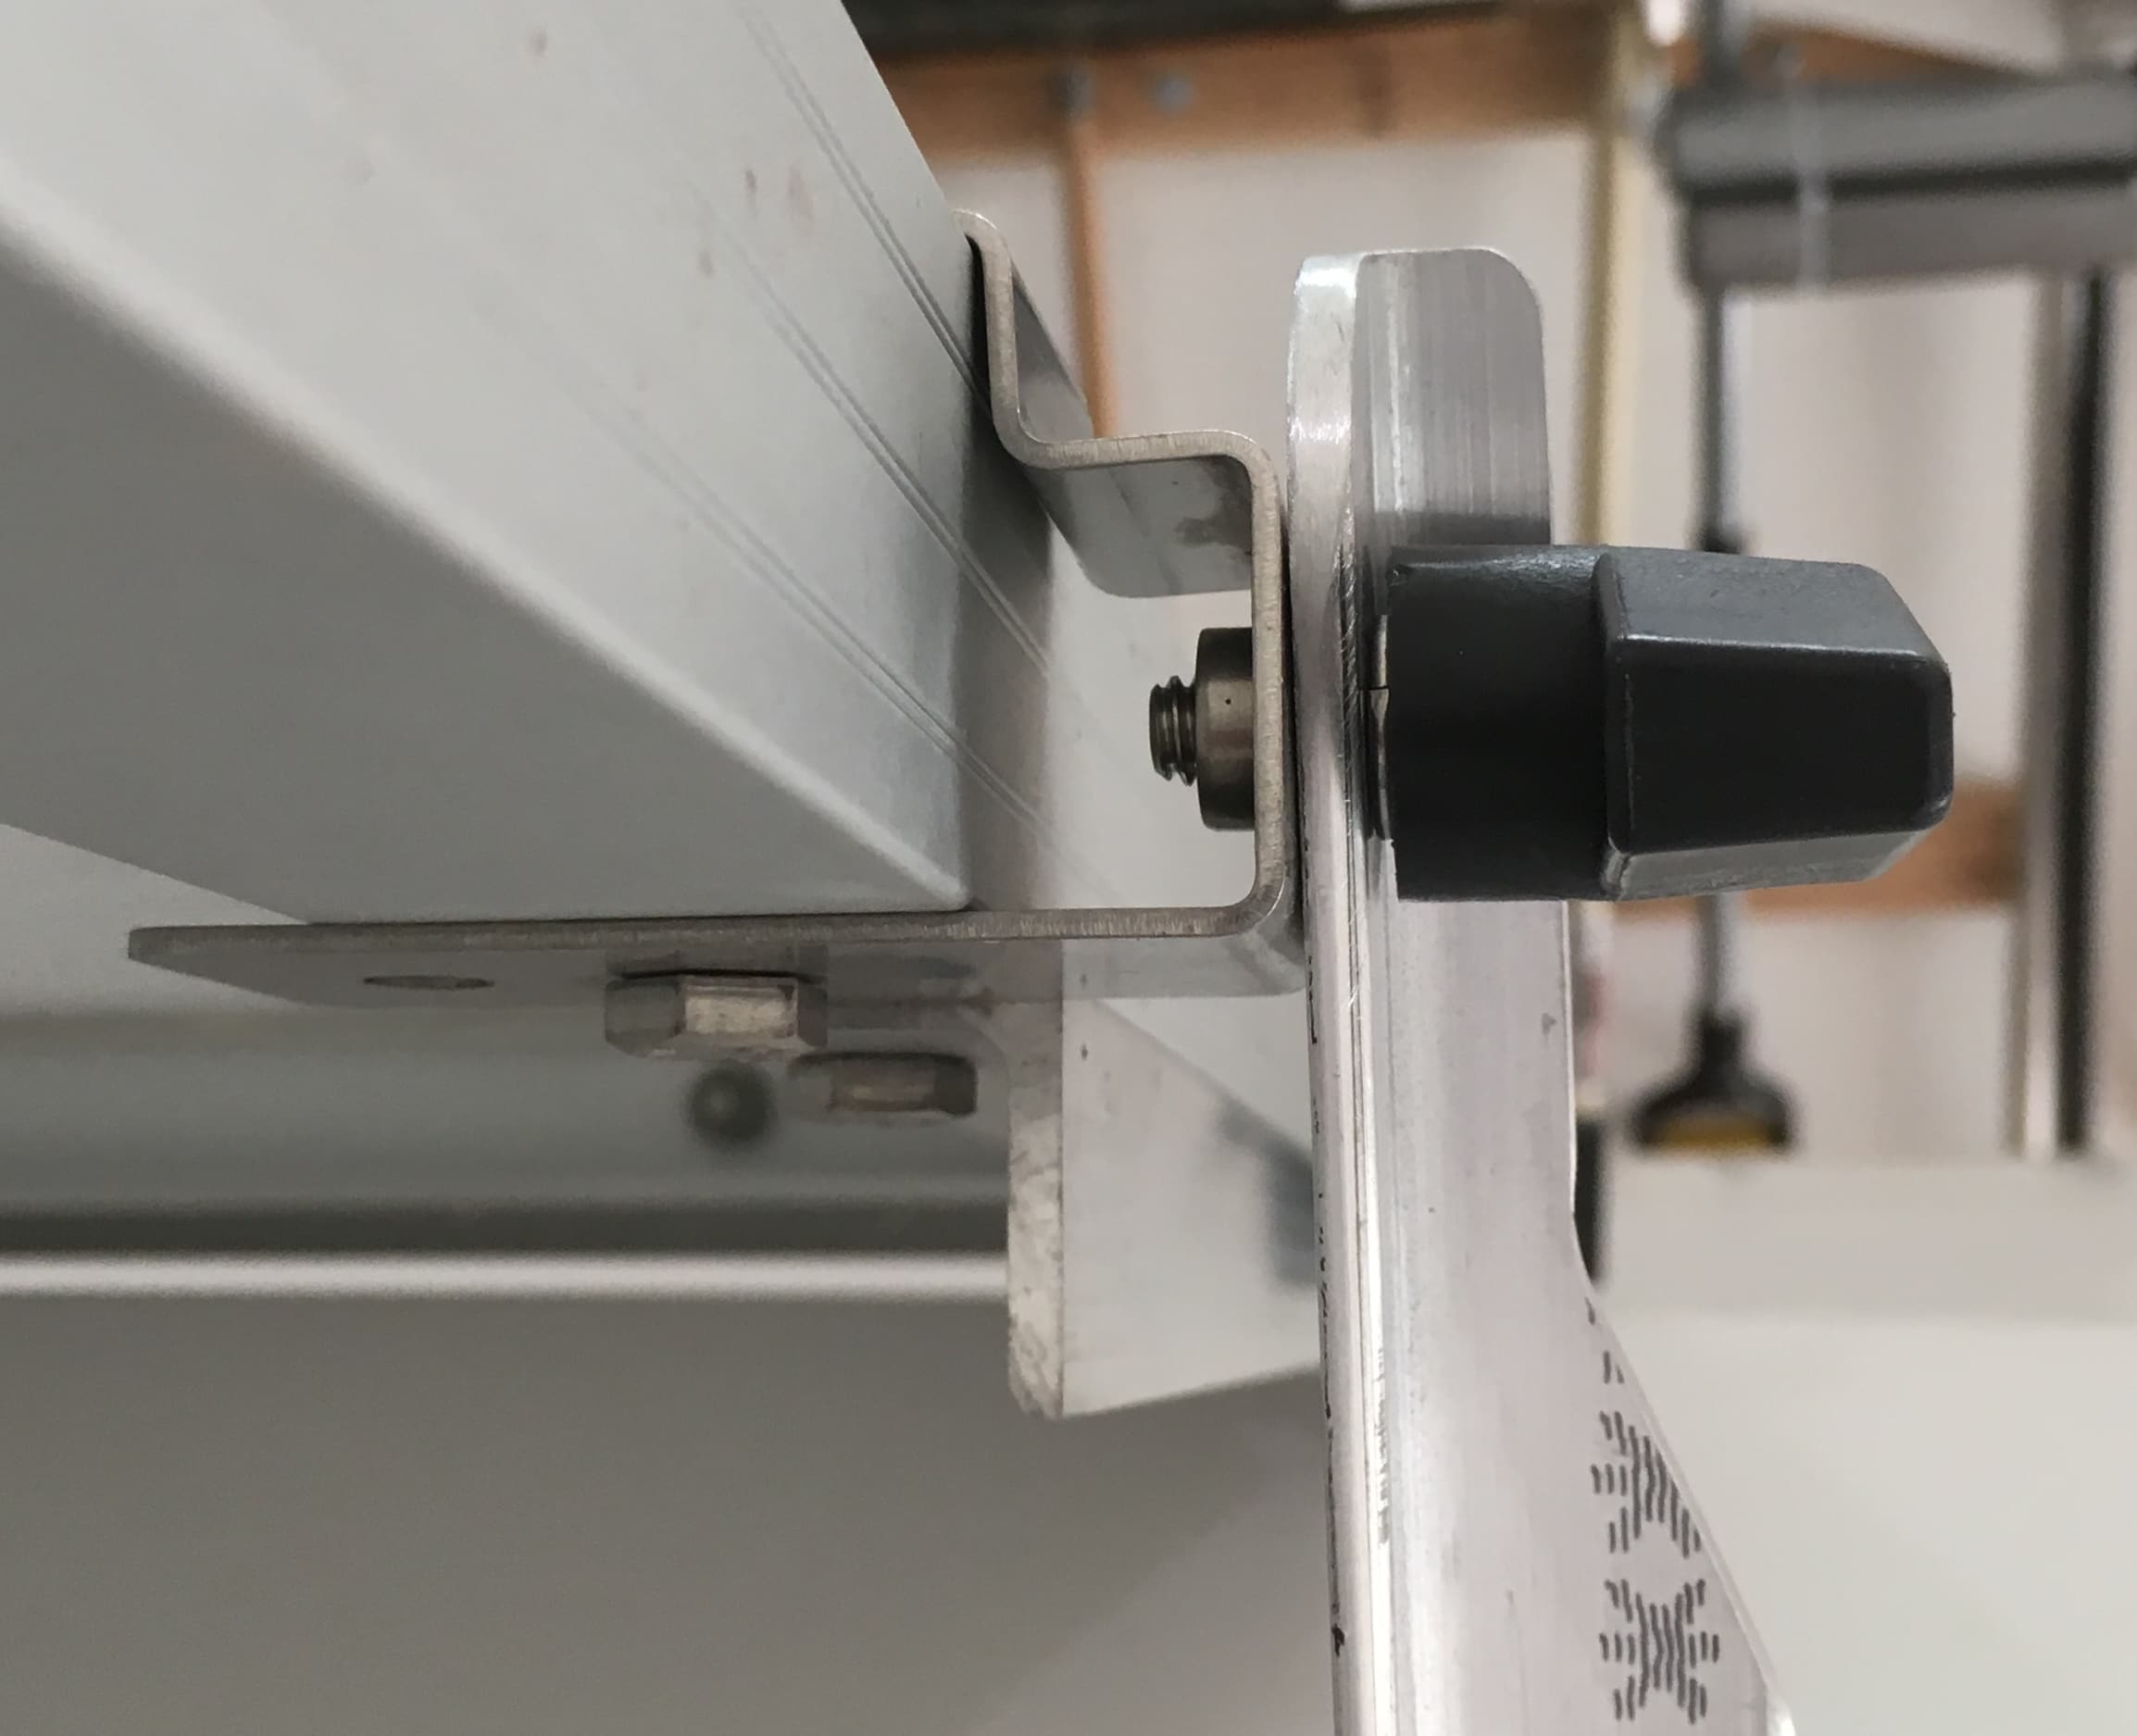
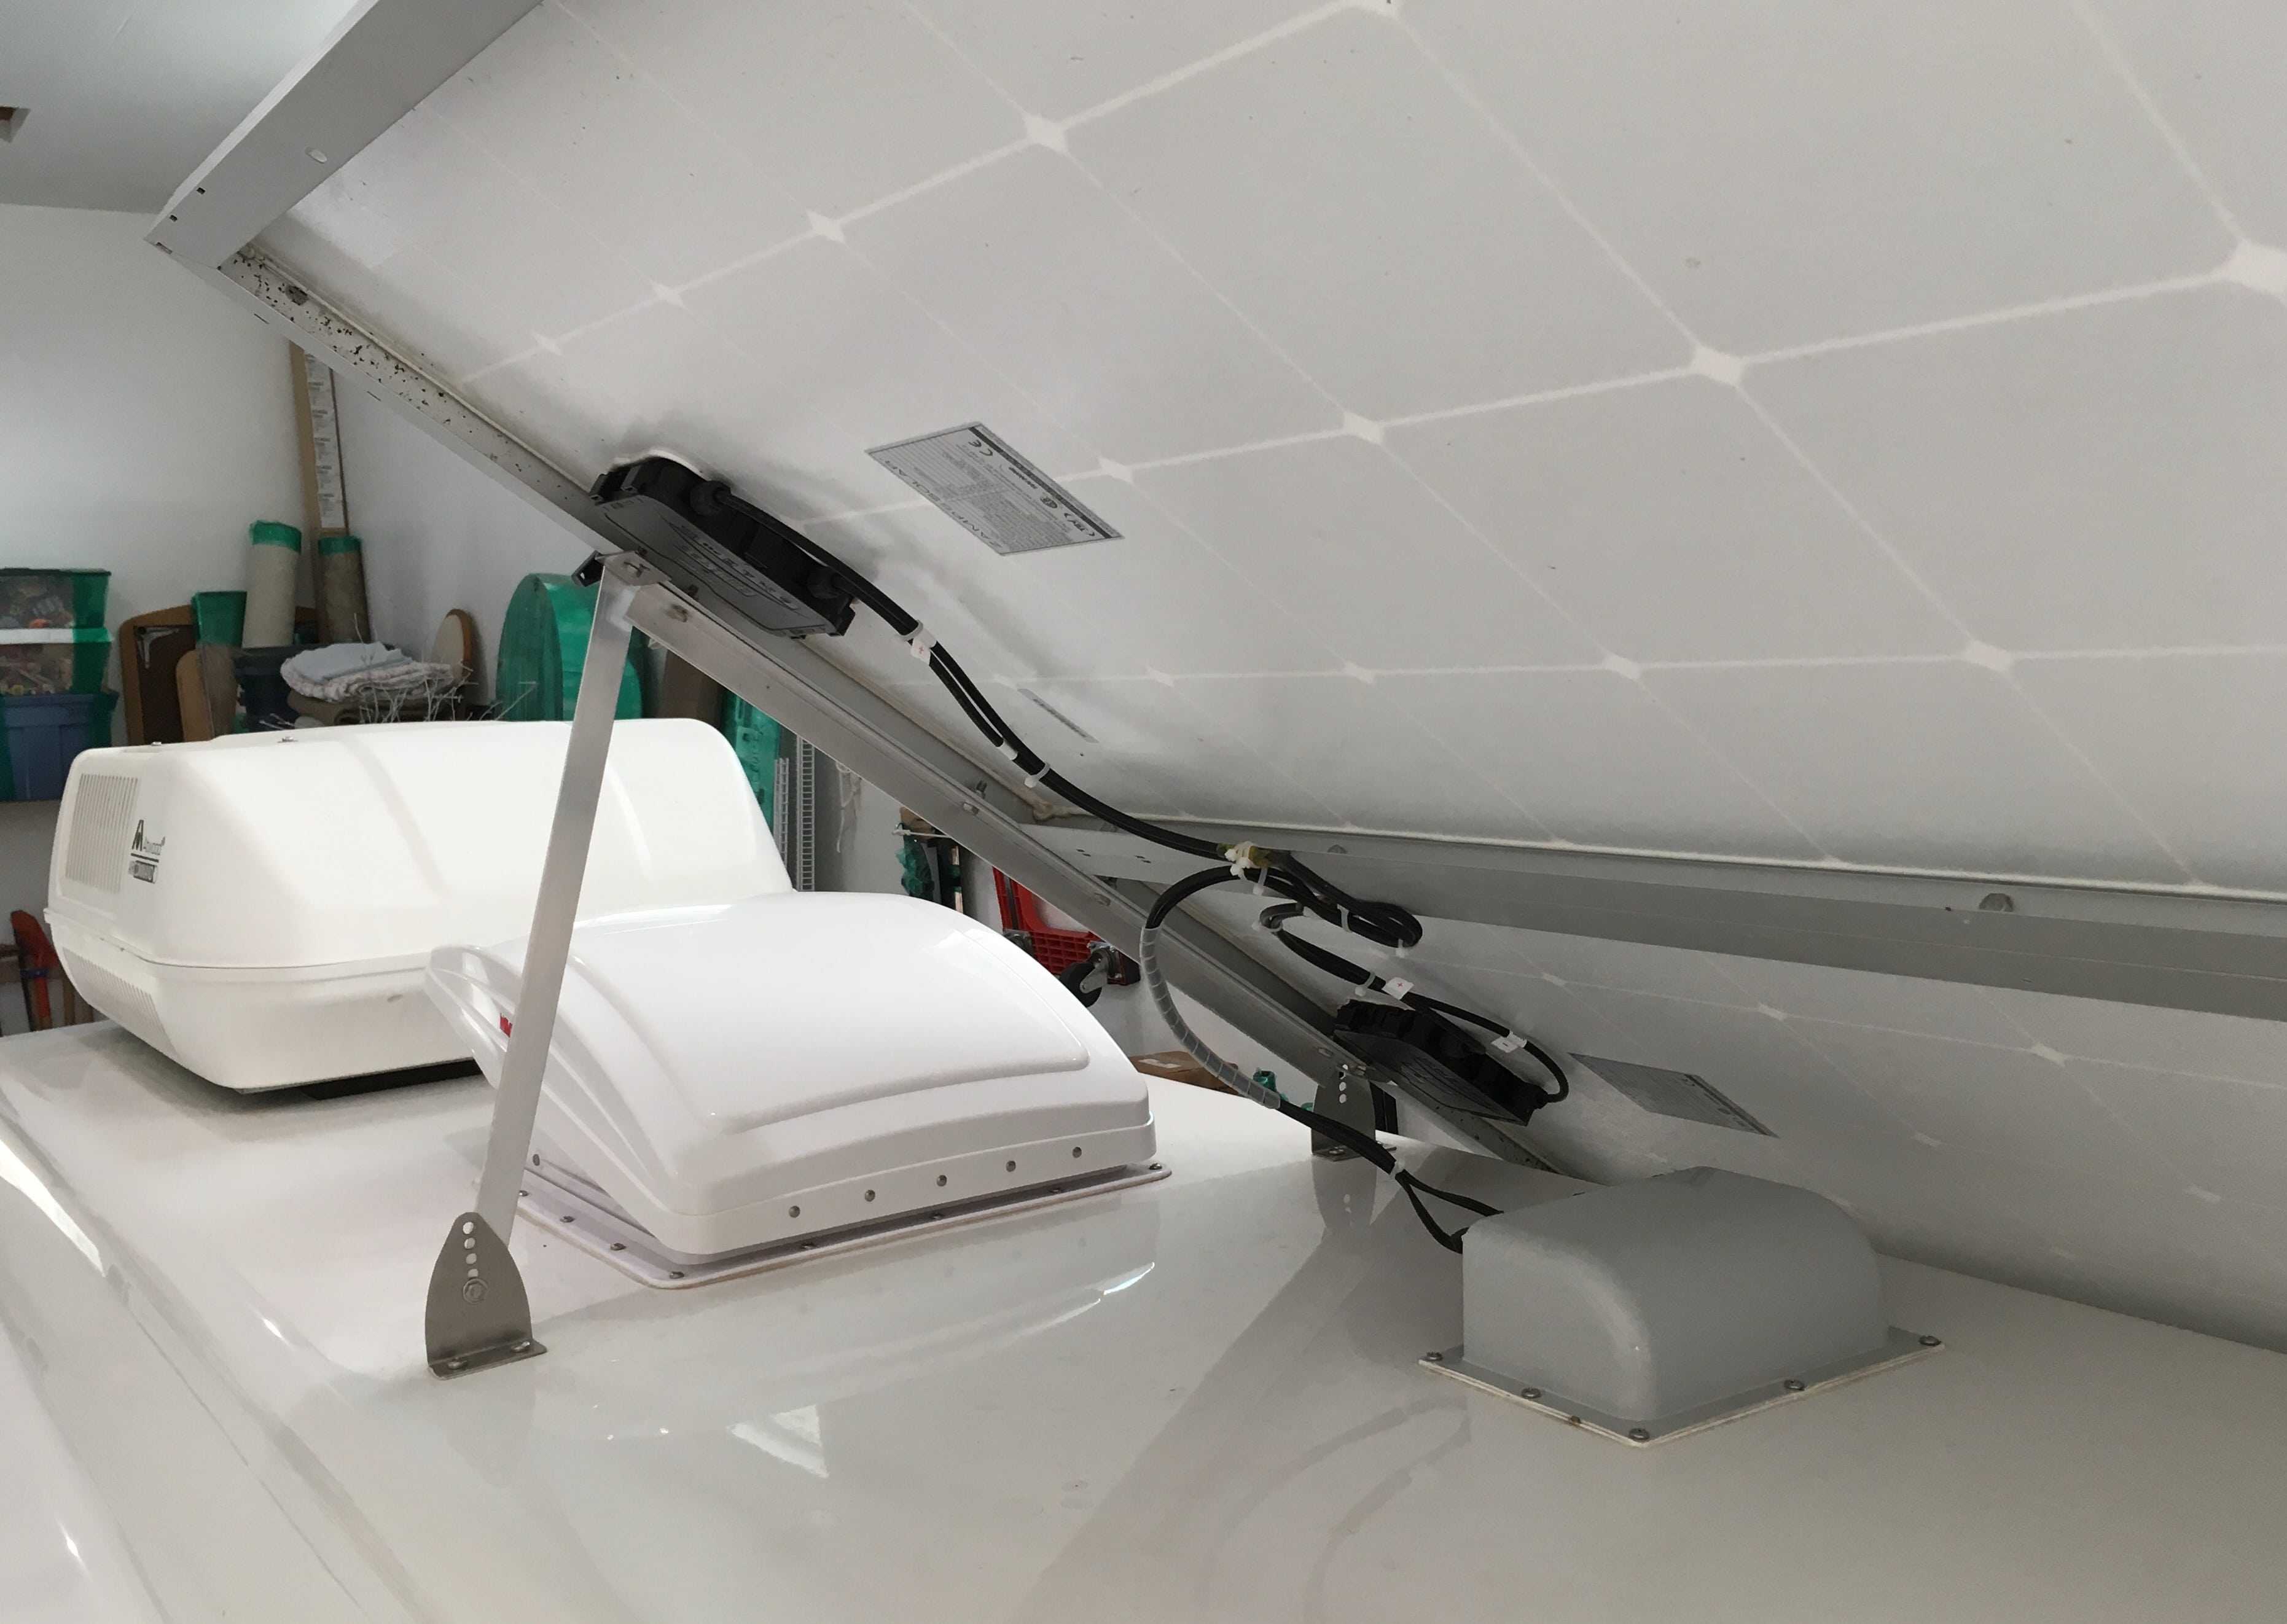
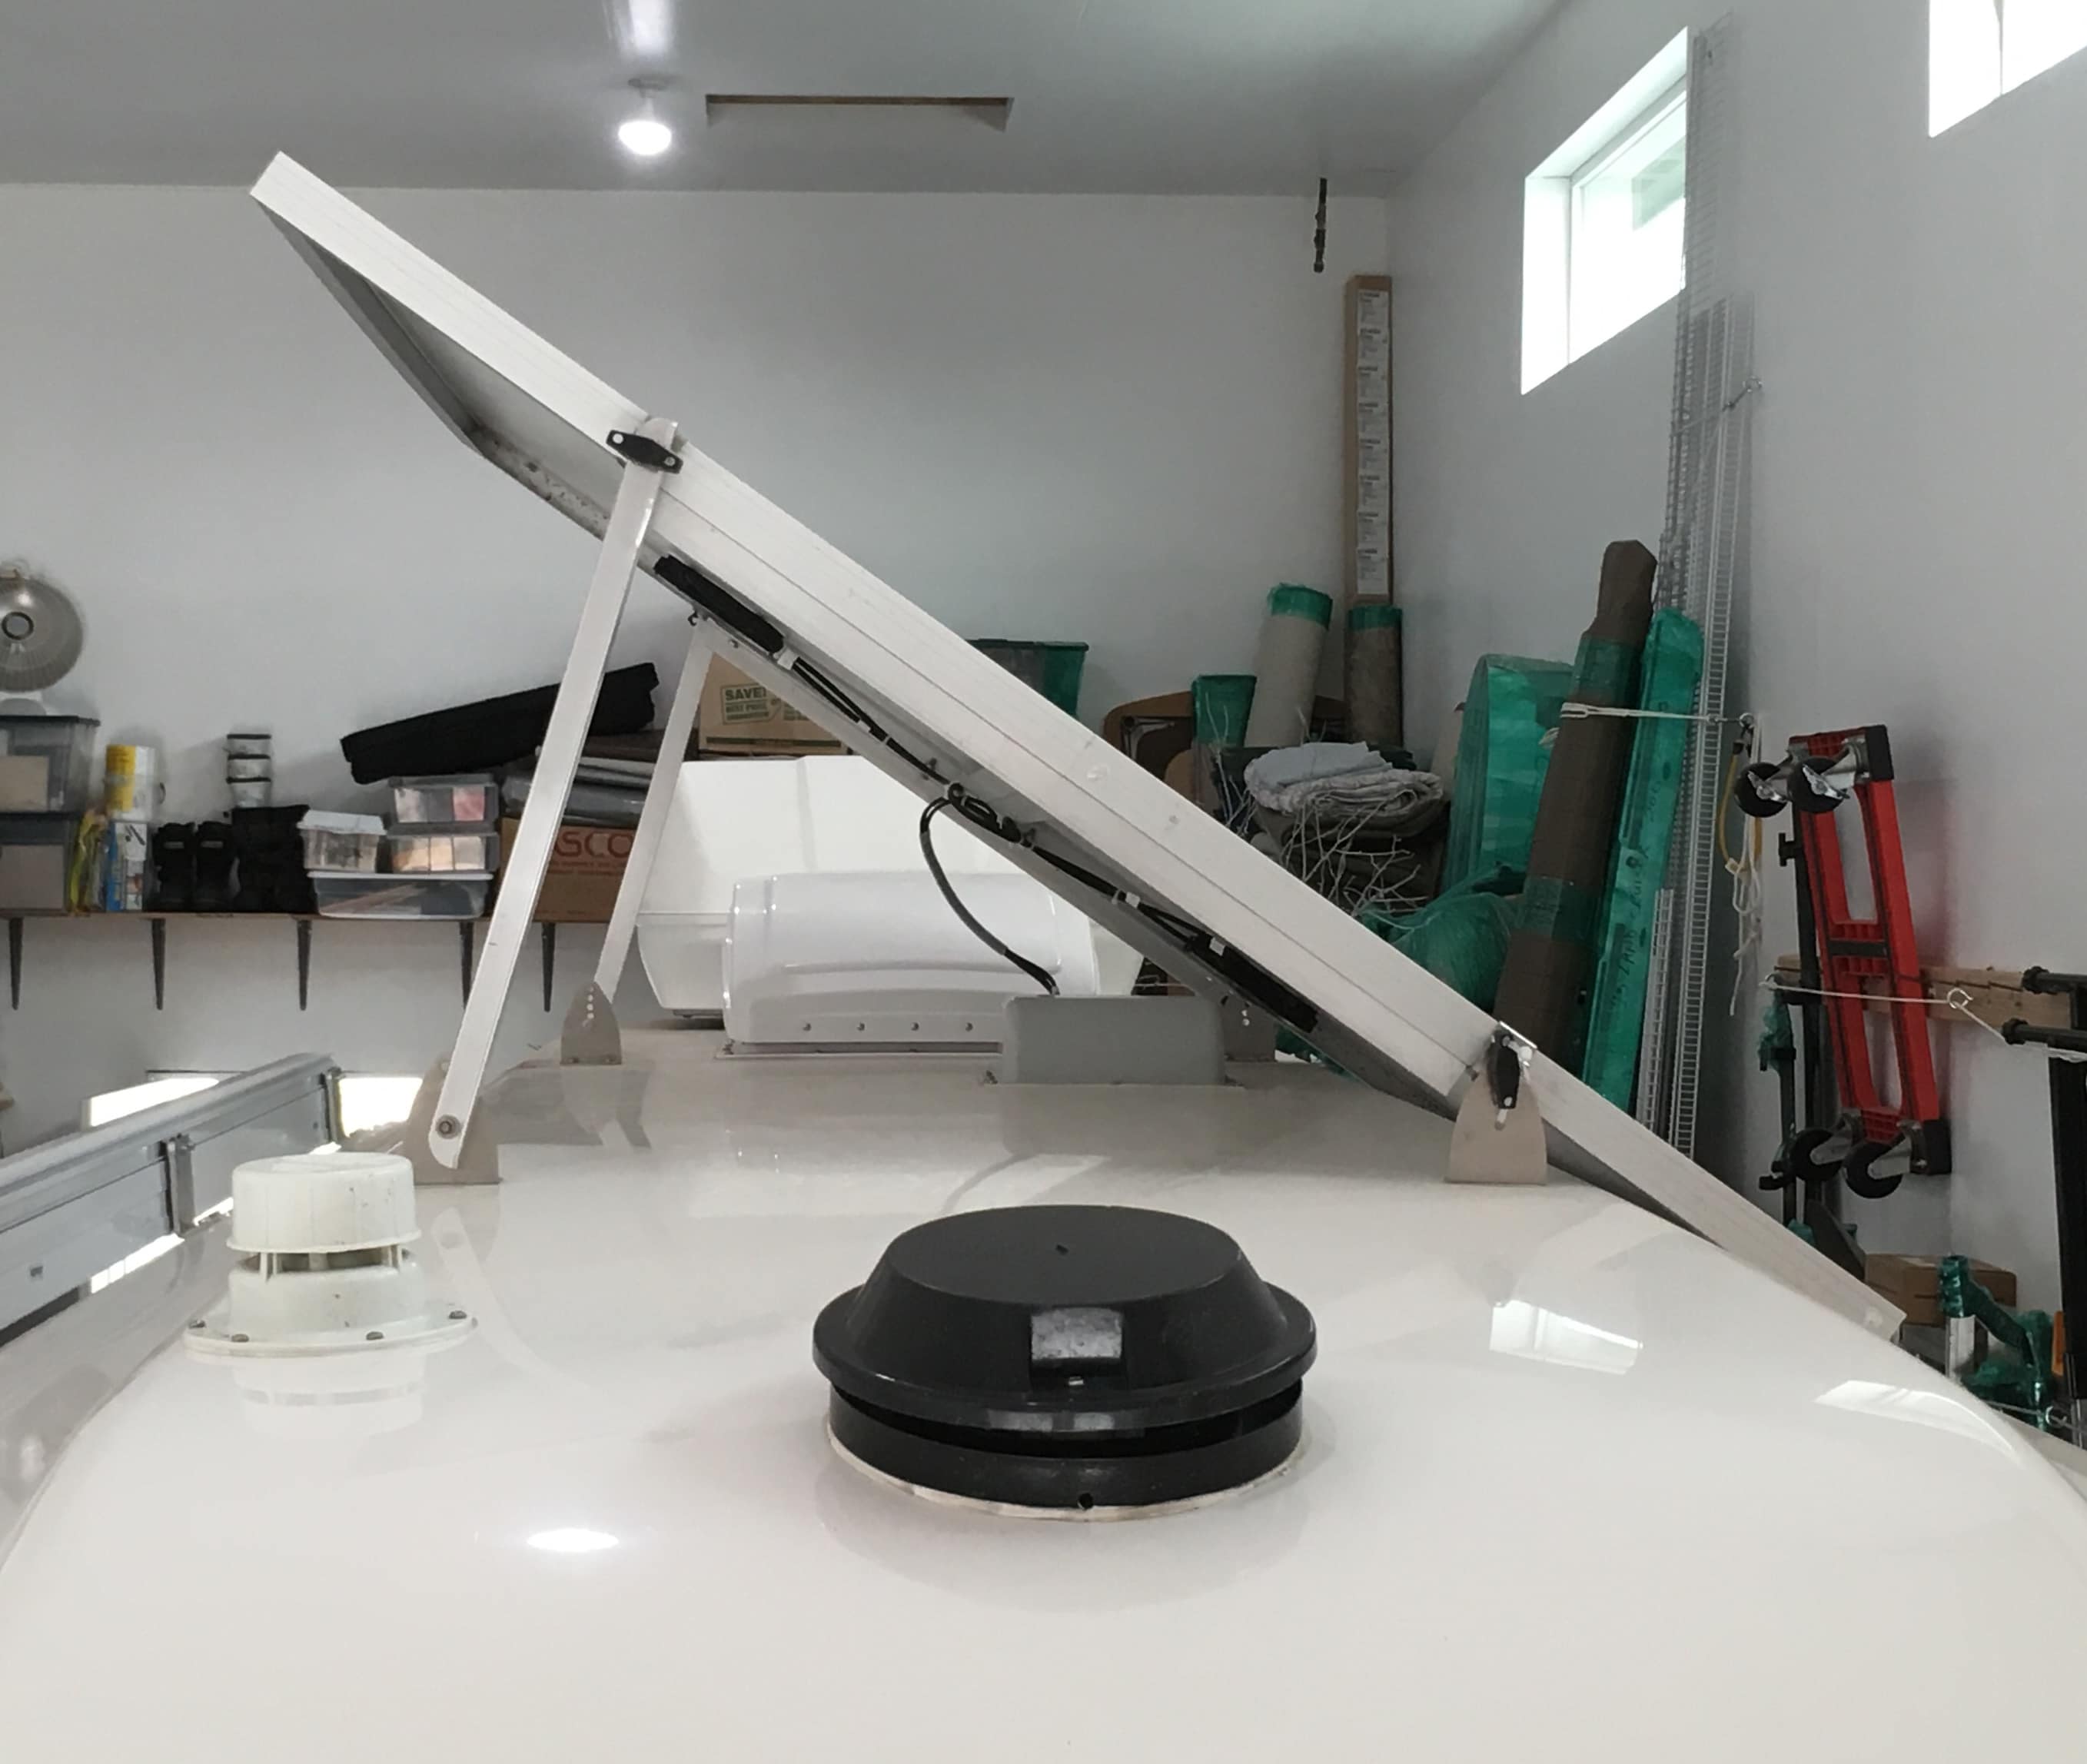
This mod is great for either working on your roof, for repairs or detailing, or for angling the panel toward the sun if your Ollie is parked long term, such as in the off-season. I used the following: 40” of 6061-T6 angle, 1 x 1 x 1/8”. For ease of fabrication, you could use 1 x 1/4” flat bar. I wanted angle since it is more rigid for the same weight, but I think the flat bar would be adequate. 2 - 1/4-20 x 1” stainless bolts, 4 - flat washers 2 - self locking nuts (nylocks) Cut the material into two 20” sections. Drill a 1/4” hole 1 inch from each end along one side of the angle. Center the holes in the inside of the angle (3/8” in from the edge). Since I wanted to use the existing knobs at the top of the arms, I trimmed away a section to allow the “ears” to clear. I left a 3/8” wide section for strength. You need to make two “mirror image” arms (front and back). Radius the corners, and file and sand with 180 grit paper. A workbench belt sander like my 4x36” Harbor Freight one works great for this. To use the arms, you have to climb up carefully with a ladder with padding under the top part. You can start at either end of the panel, the right side is shown in the pics. Attach the appropriate arm at the bottom hole of the bracket using a bolt, snug it down. Make sure that it can rotate up. Remove the knob and let the panel settle. You can put some foam underneath but I didn’t need any. Go to the other end and attach the second arm. Remove the knob, raise the panel and screw the knob back through the arm, into the panel. Go to the other end, raise the remaining arm, and secure it. You can see in the above pic that there are lots of threads sticking out the back of the nut, so if you use thicker 1/4” flat bars, they should work fine. If you are going to leave the panel up long term, in the weather, tighten the lower bolts and all knobs. If you are just going to have the panel up for maintenance you can leave the lower ones slightly loose. With the arms in the bottom holes of the roof brackets, the panel will be at a 35 degree angle. You could get a few extra degrees by selecting higher holes, but the other end of the panel frame might hit the gelcoat on the roof. Use caution. I have NOT tested this mod outside in strong winds. It feels very solid when the hardware is tight, but I cannot guarantee how well it will work in violent weather. Use caution. I thought about not mentioning this last part, but I will anyway.... Please leave a prominent note inside the trailer on the table, or a bright piece of surveyor’s tape flying from the panel, so you do not drive away with the panel up. John Davies Spokane WA
 2 points
 -
That sure is one heck of a curve you're going around. Didn't know that they had those in Florida! See you two/three/four on Monday! Bill2 points
-
Our travels have taken us several interesting places this fall. A week ago we visited the Road America Speedway in Elkhart, WI to go to the VSCDA Elkhart Lake Vintage Festival which showcased several impressive machines including many pre-war racers and Can-Am enthusiasts reliving history. Clair was interested in watching the races and finding a 1960 Austin-Healey “Bugeye” Sprite similar to one his brother had. While viewing the race cars we saw this interesting racing rig that was being used to haul a vintage MGB race car. The area was pretty crowded so it was difficult to get good photos but I think you will enjoy this one anyway. Kathy
1 point
-
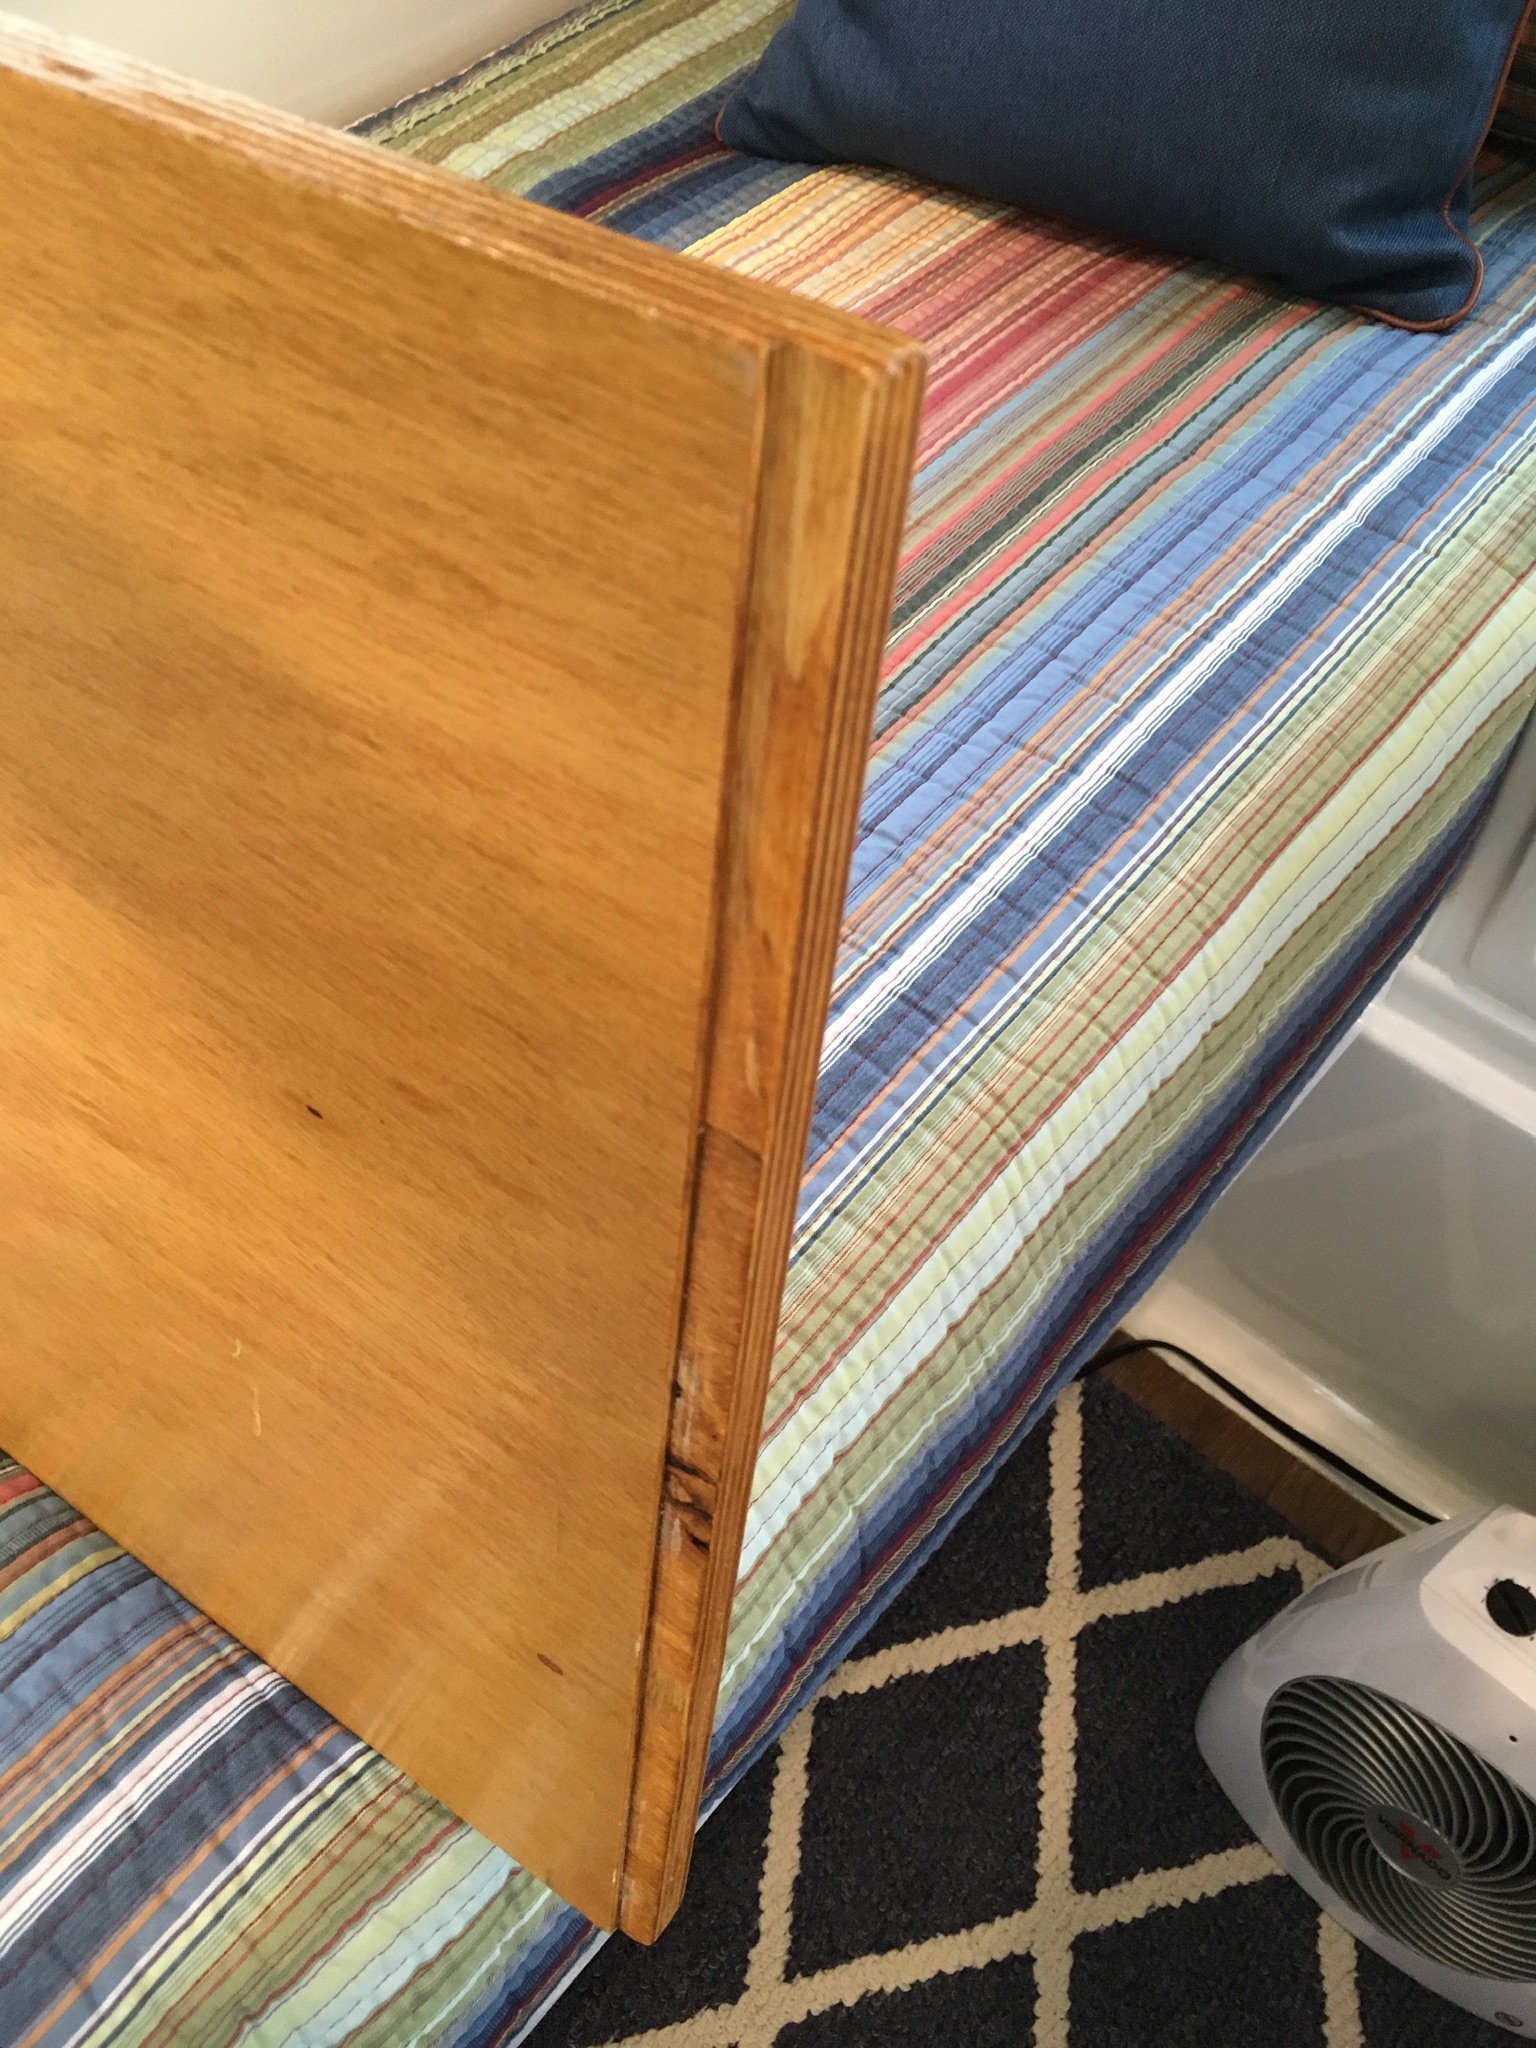
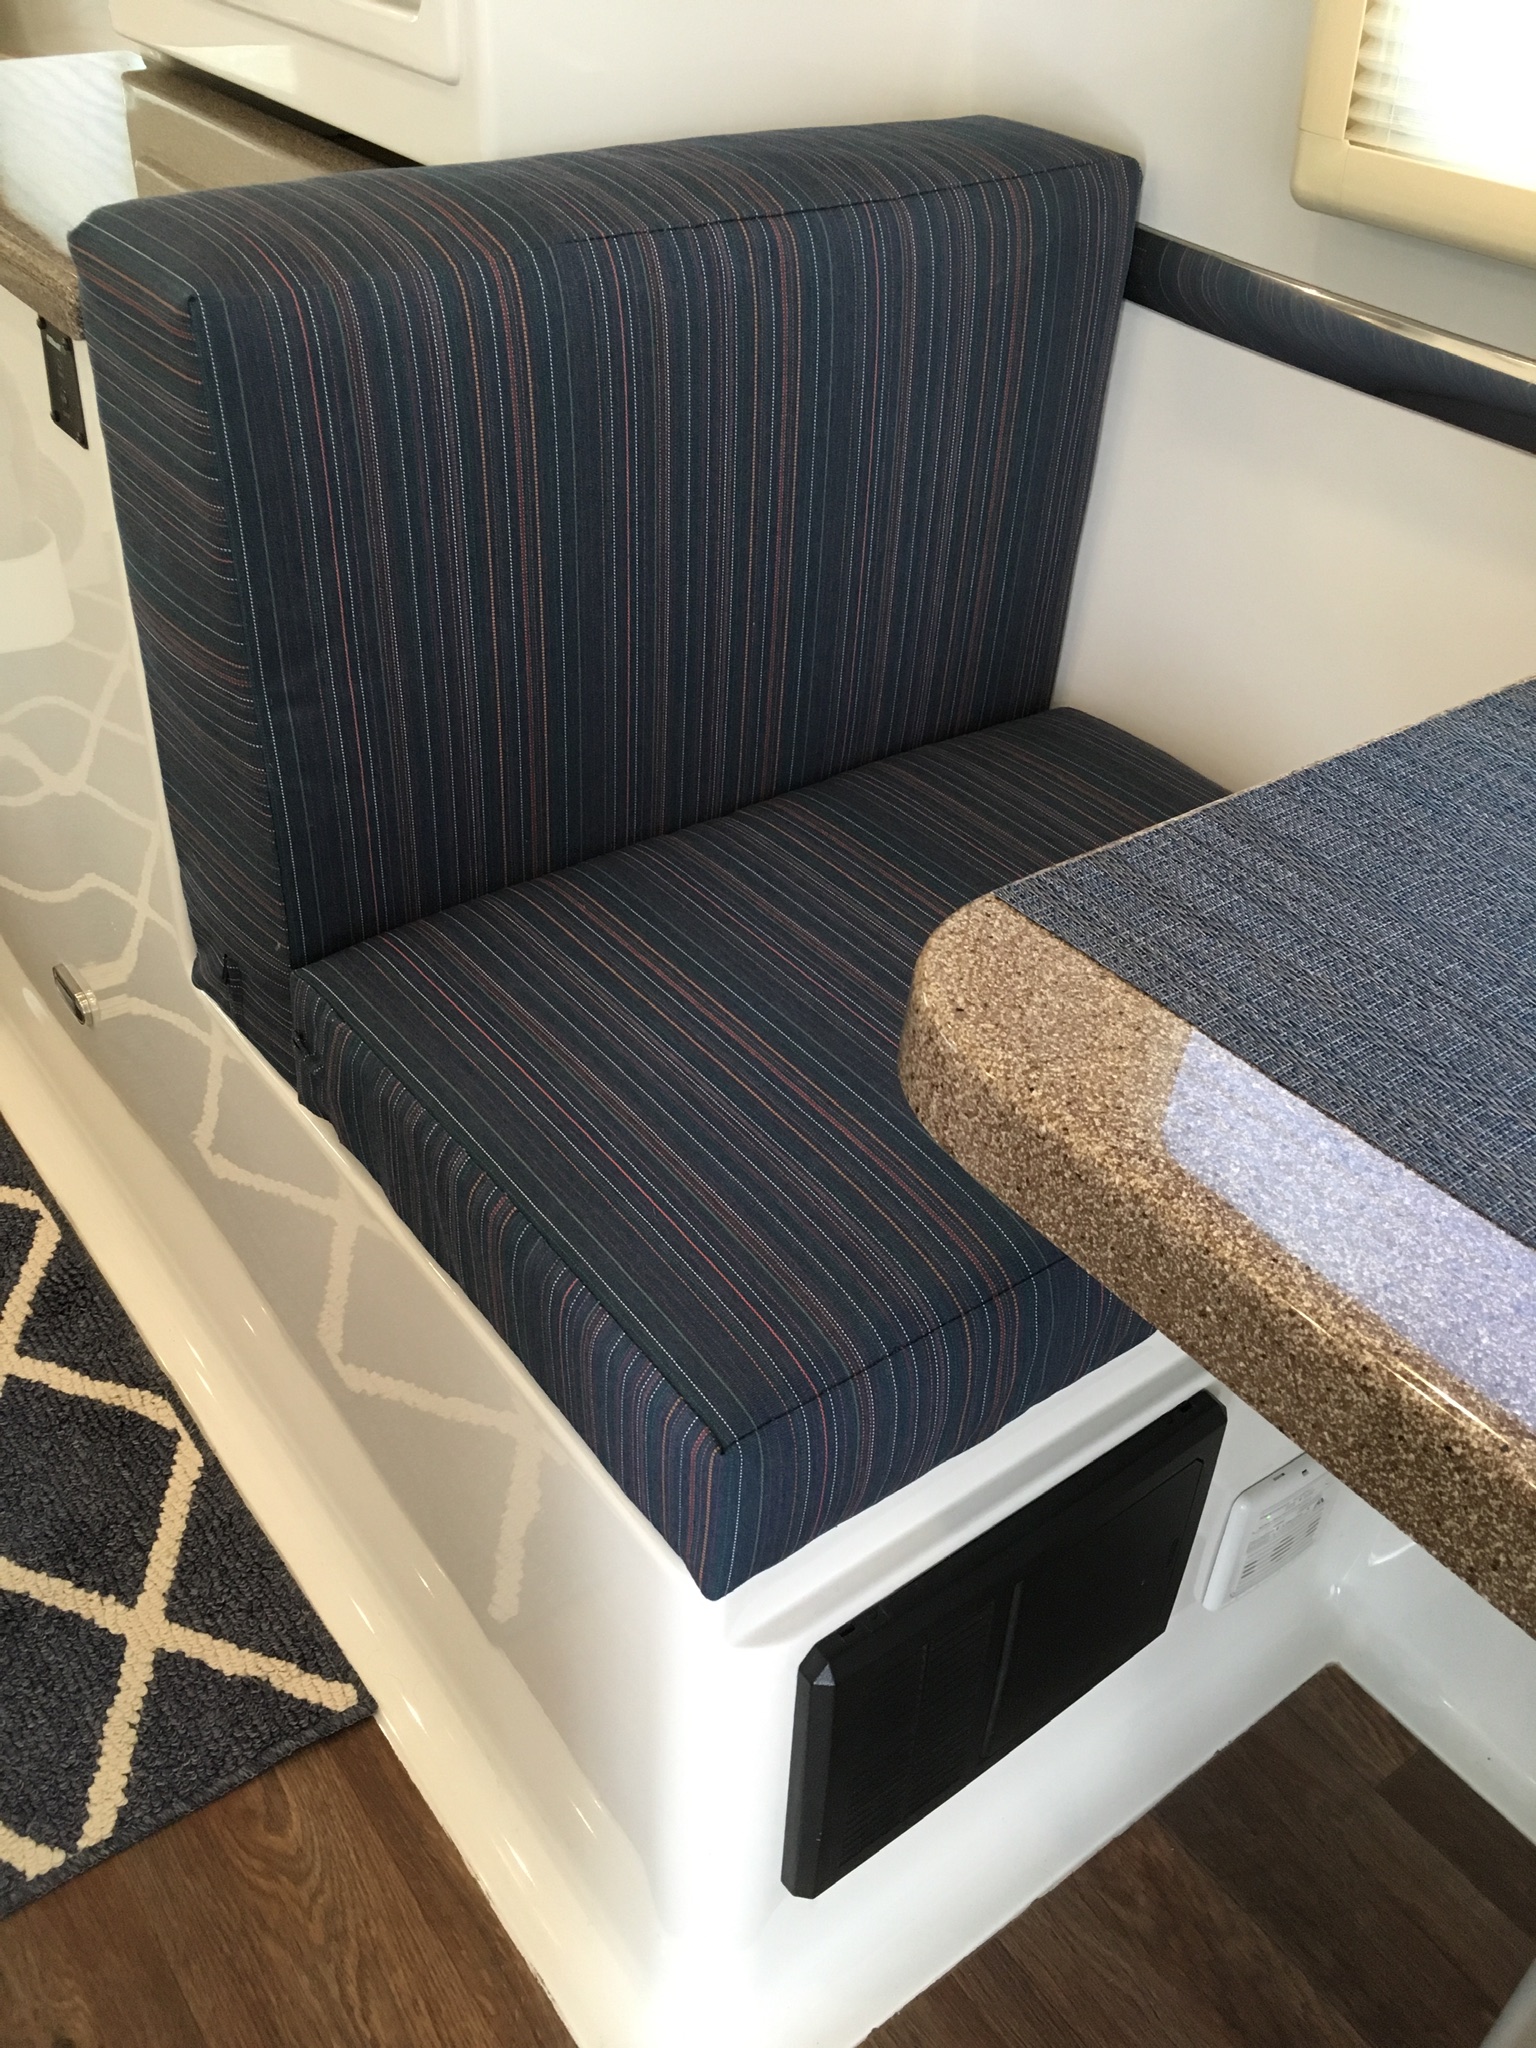
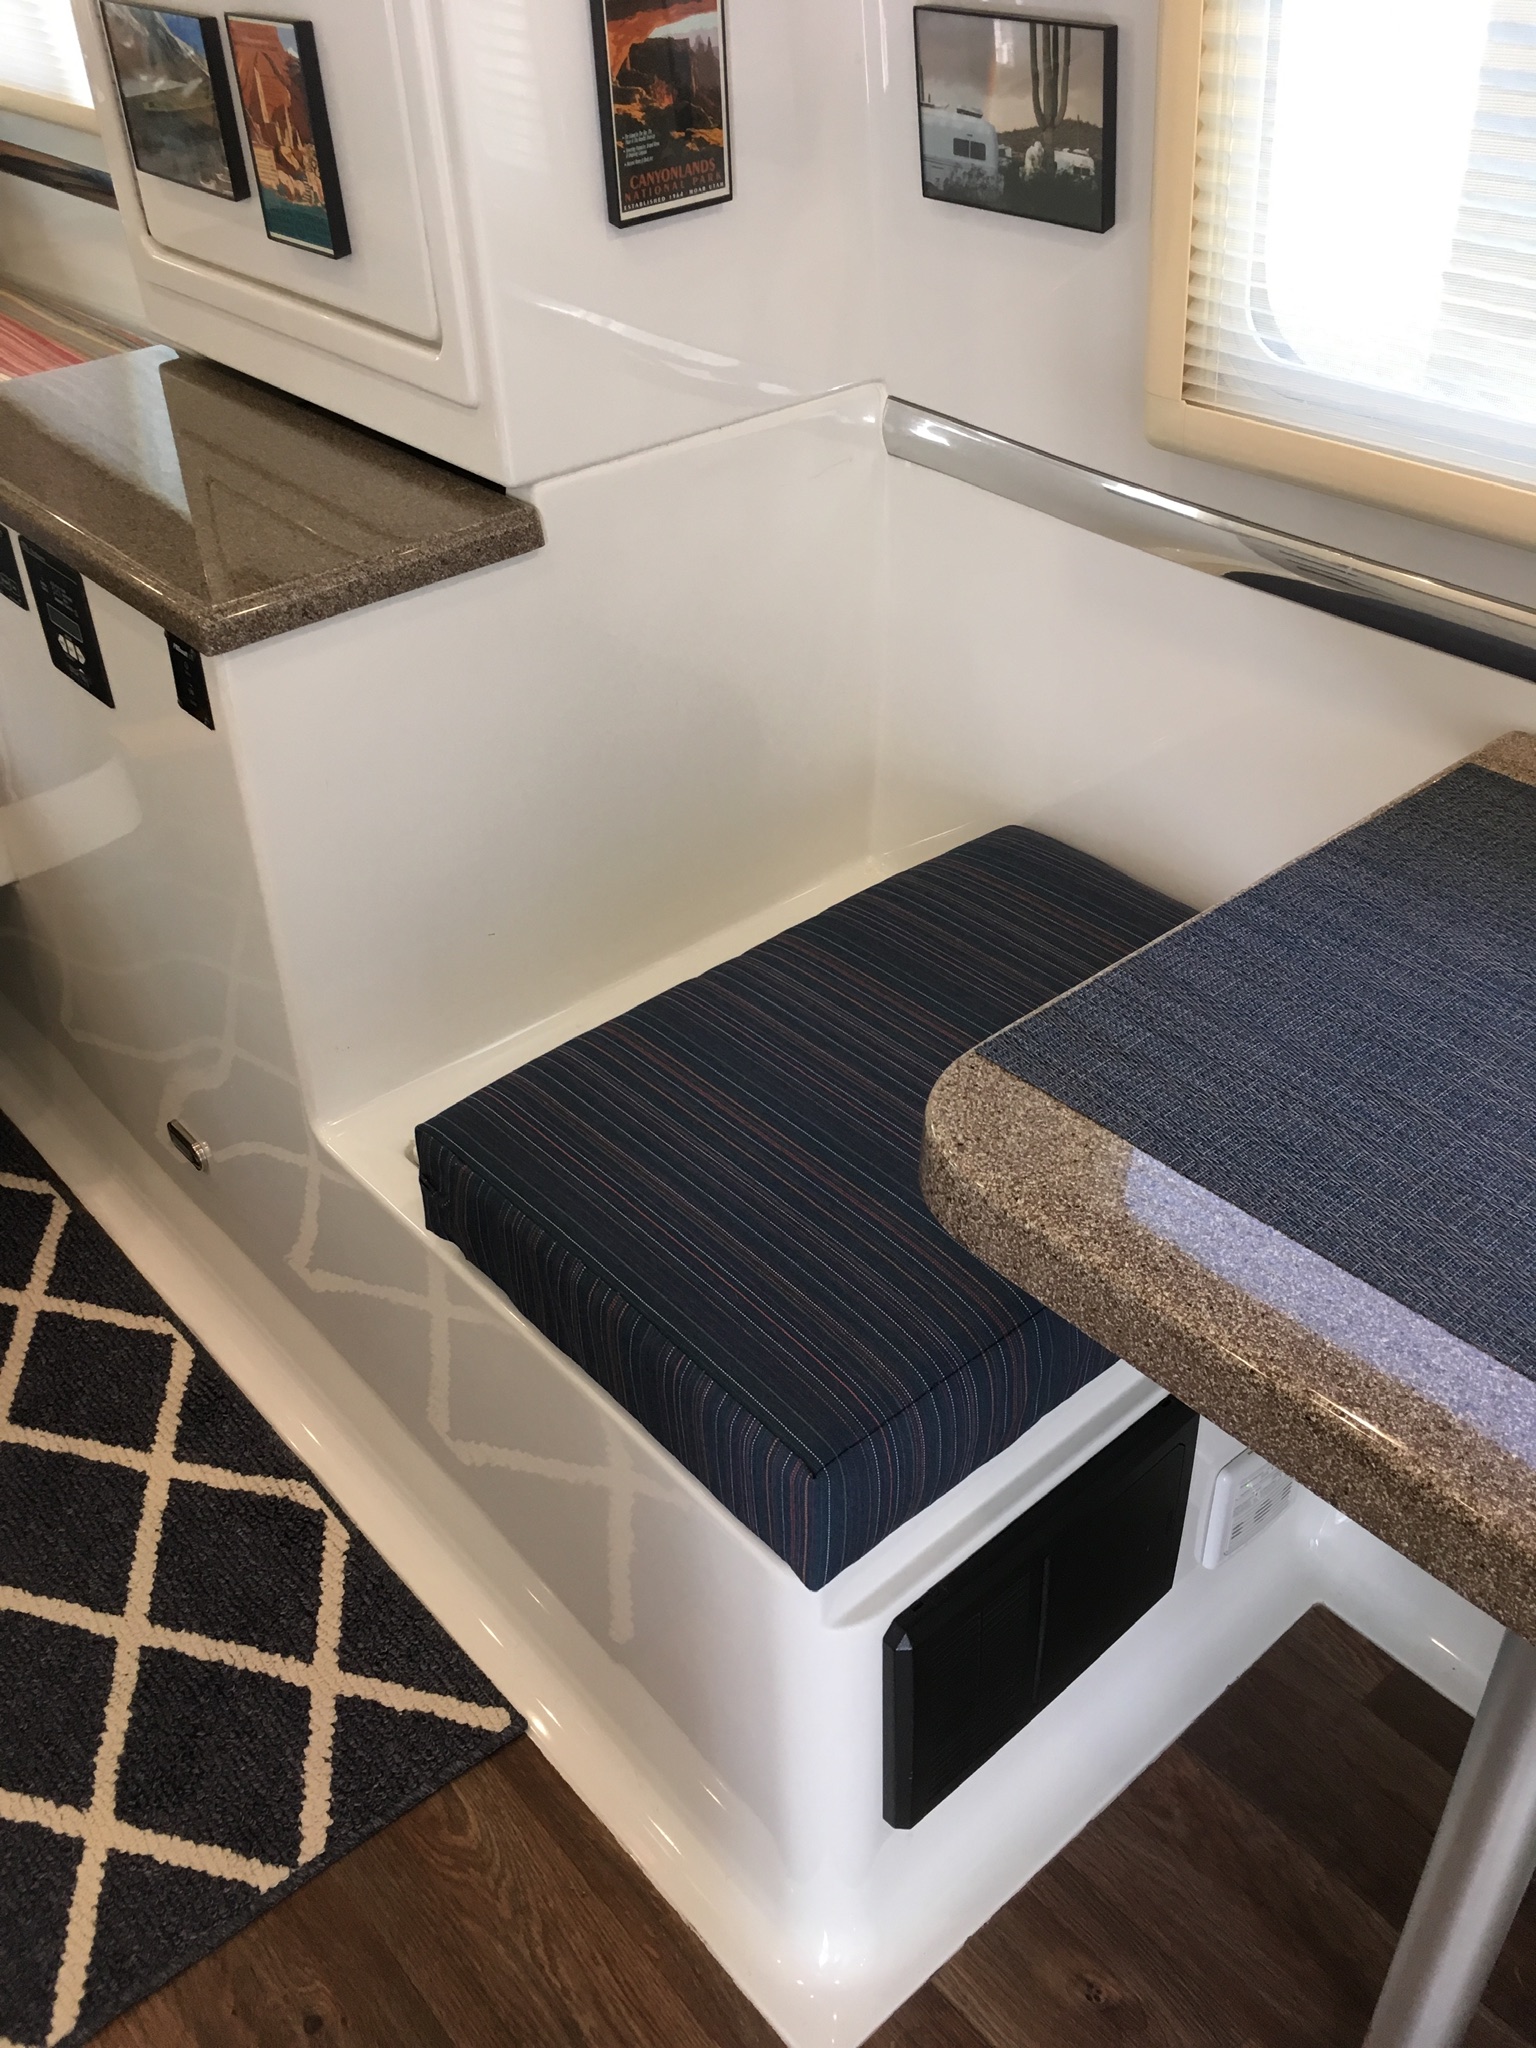
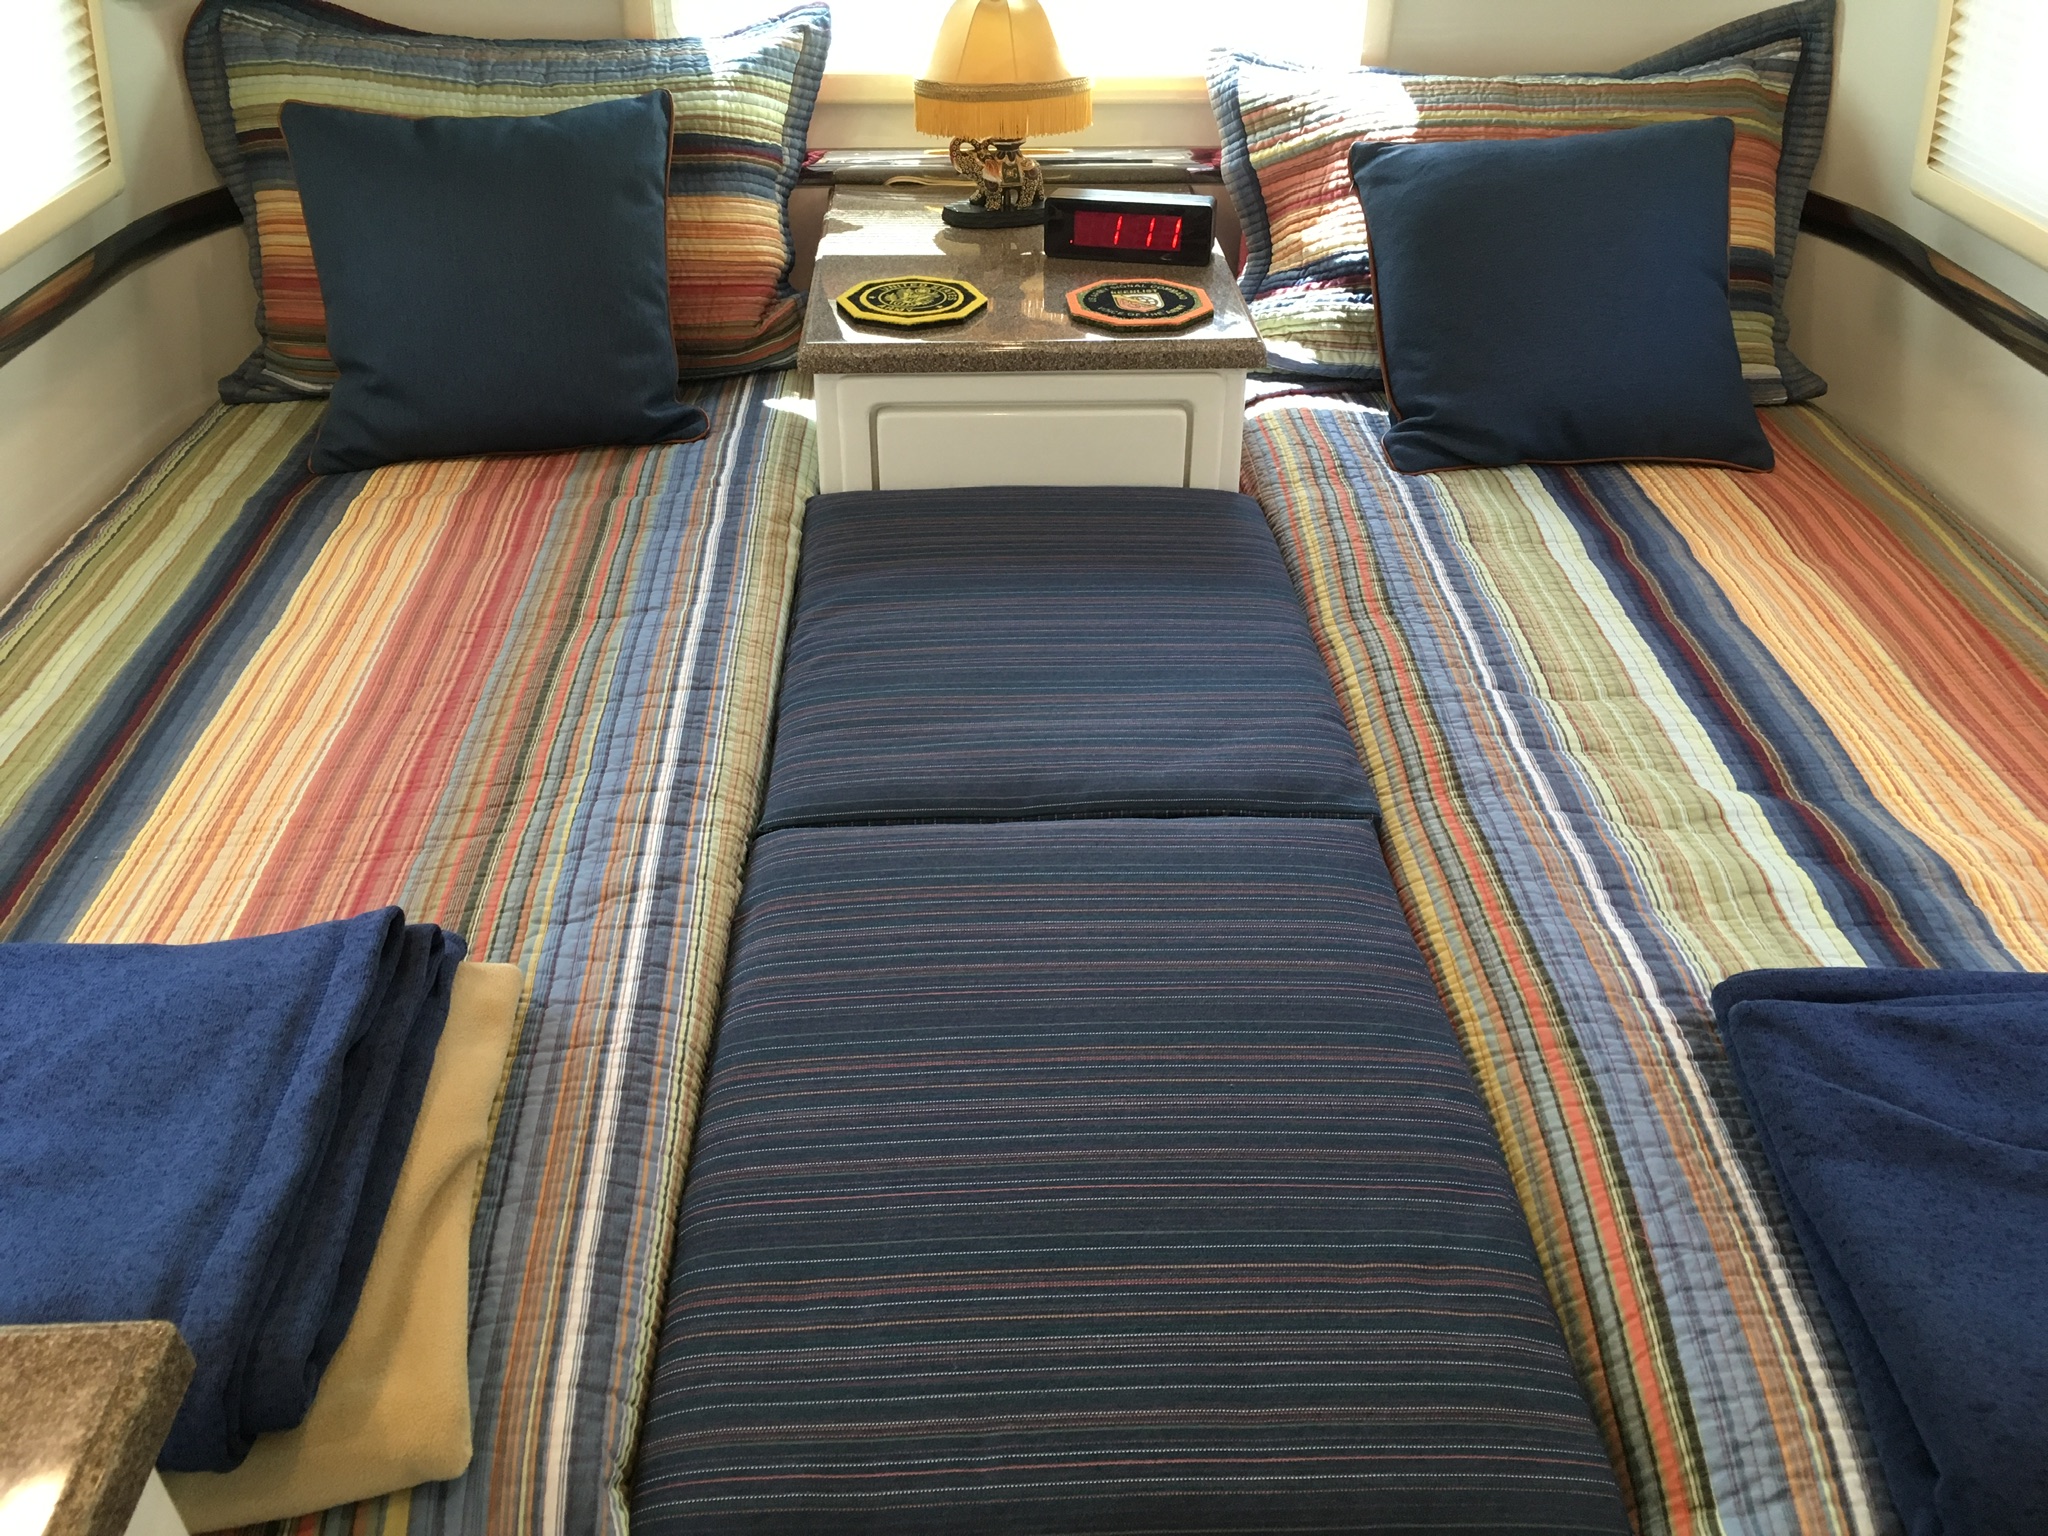
We have the twin bed version of the LEII. After the first year we realized that we were so used to sleeping together that it would be nice to be able to occasionally convert the twin beds to a double bed. I made some plywood pieces to span the gap between the twin beds and we bought some foam to sit on the plywood and create a double bed. We went with this for a year+. The problem was storing the foam when we were in the twin bed mode. So, we measured and discussed and this is what we came up with to eliminate the extra foam. We are leaving tomorrow for a month or so to go up to South Dakota so we’ll see how it works. Here is the gap between the twin beds. It measures 18” X 51”. It’s actually 50” from the nightstand to where the curve starts on the bed frames. Here is the same gap with the plywood. There are three pieces measuring 19” X 17”. It’s 3/4” plywood. The plywood stores easily under the mattresses when not in use. I cut a 1/2” X 1/8” recess on the short side of the plywood so that when placed on the fiberglass mattress frame is locks in place and won’t slide. In order to eliminate the extra foam that required a place to store we reconfigured the dinette cushions. We had new cushions made that included a larger back cushion that measures 25” X 19” and is 6” thick. In the dinette it sits on the fiberglass, not the bottom cushion. The new bottom cushion is smaller, 25” X 17” and butts up against the back cushion. The larger back cushions sit on the plywood when in double bed mode. Here are the new dinette cushions. Notice the back cushion does not sit on the bottom cushion. Here’s a shot with the cushion removed to make the double bed. Here are the cushions on the plywood. We were a little concerned that the dinette seats wouldn’t be as comfortable with the thicker back, but sitting in the driveway the last few days it seems okay. Also, we wondered if the bottom cushion would stay put without the back cushion sitting on top of it. We’ll see how it works out this next month on the road. Mike
1 point
-
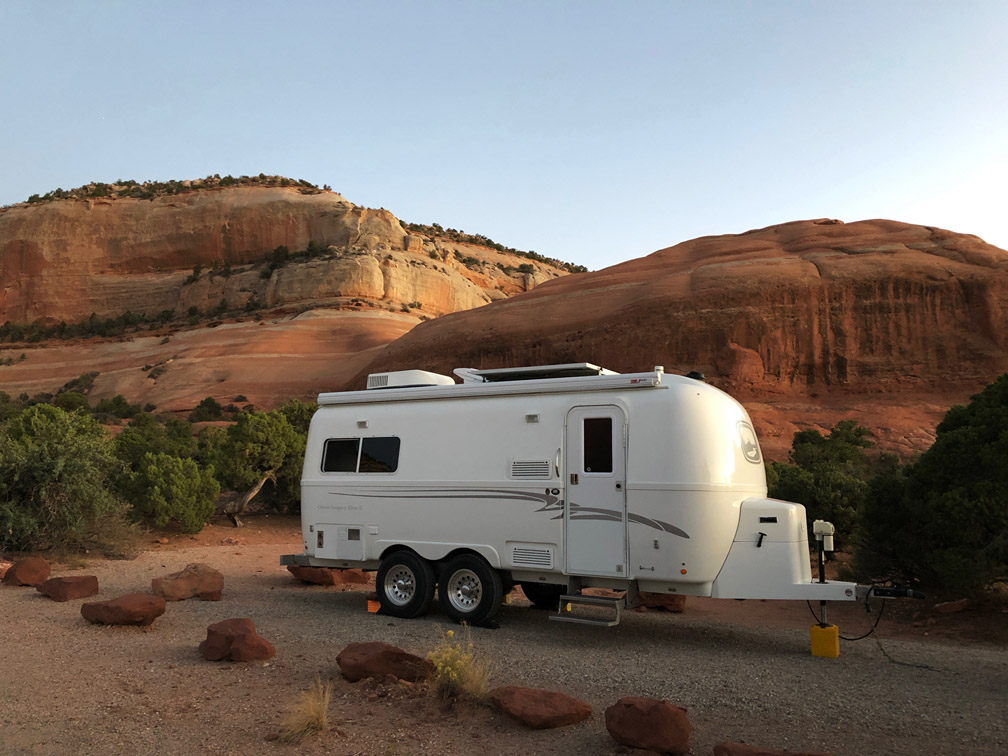
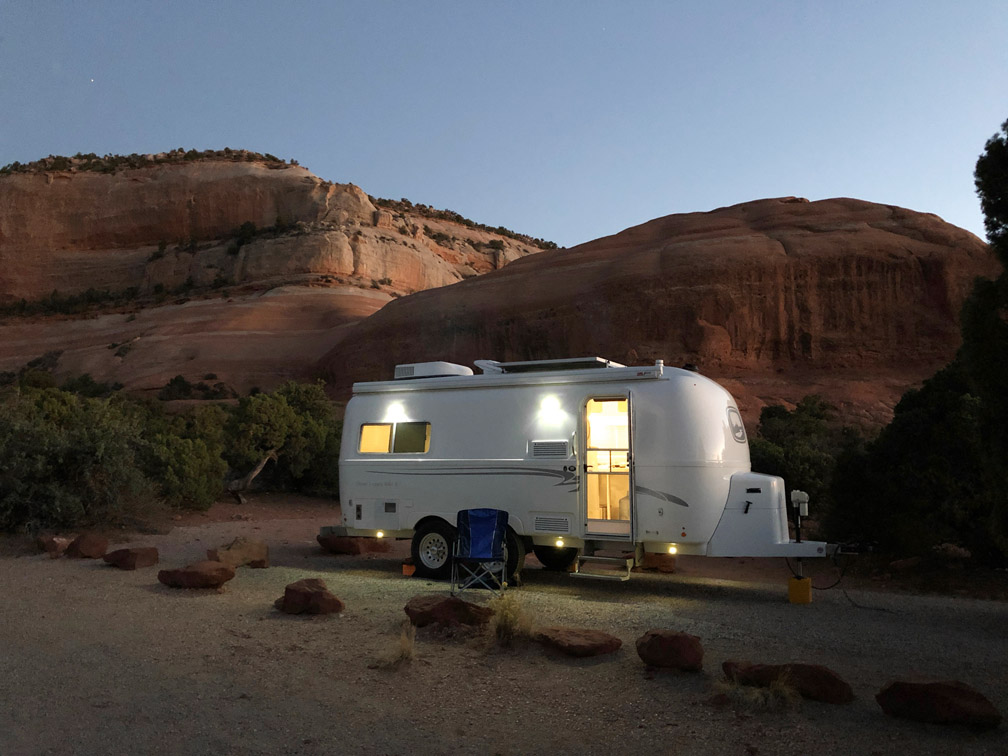
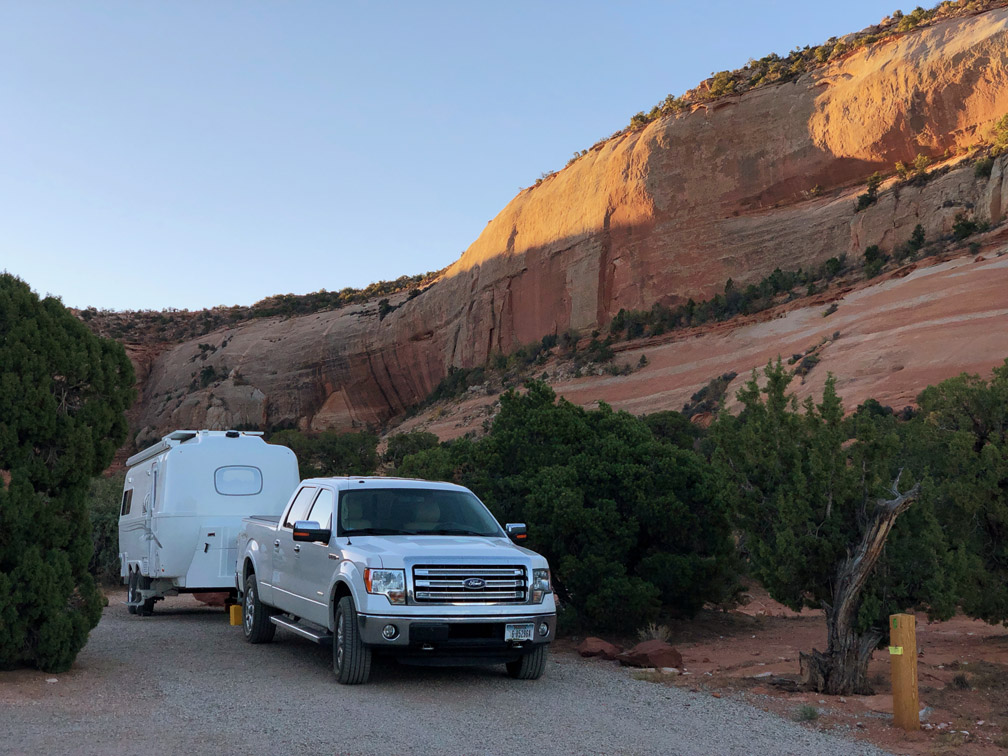
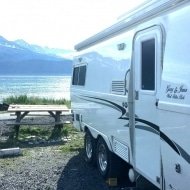
Just returned from a two week trip down in the southwest, thought I might show a couple of campground pics. Thanks for looking.
1 point
-
Hi June, At the risk of duplicating/contradicting prior posts from other good folks I would like to offer my thoughts. I am located in Maine and this will be my first winter with the OTT. I did a fair amount of research, spoke to OTT, and the manufacturers of various covers. I knew before making my purchase that indoor storage would not be a realistic option for me. I also know folks in Maine who prepare for winter by waxing the camper well and remove snow as needed. They report very positive experiences. With that info as background, I plan to use a CalMark cover as it is specifically designed not to chafe and will protect the surface from potential issues where I park my camper. (pine pitch, bird droppings, etc) You may have read other posts in a separate thread describing positive experiences with the CalMark Cover and the OTT. In my humble opinion, storage for the OTT is like finding a pair of shoes: you must find what fits you. FYI: After washing, waxing and winterizing I plan to use pool noodles (slit as needed) on the edges of the solar panels. I will also strategically place some pool noodles behind the awning to raise the cover a bit and eliminate the 'valleys' on the roof. I may create a lightweight 'skirt' to avoid build up or drifting snow beneath the unit. This will make it easier for me to 'unwrap' if I decide to bug out before the snow on the ground has disappeared. I used this general approach(noodles, skirt and cover) for many winters with considerable snow on both my boat and a prior camper with fiberglass sides and had very good results . Congratulations on your purchase of the OTT. I am truly enjoying mine and continue to be impressed with the design and quality of the trailer! Good luck with however you choose to store your OTT!1 point
-
I used a cover once on a stick and staple trailer. I frankly cannot imagine any universal cloth cover surviving a winter of wind and heavy snow on top of the solar panels. It would tear immediately. You would have to either remove the panel entirely, whch would be fairly easy, or build some sort of perimeter support frame to keep the cloth free of it. I would just leave the Ollie uncovered. It won’t hurt anything, especially if you clean and treat it with Rejx before storage. It leaves an extremely slick surface that the snow will slide off easily, there will be no worries about trapped ice or cosmetic damage from chafing.... and it will be really easy to clean in the Spring. https://www.amazon.com/Rejex-High-Gloss-Protective-Finish/dp/B00GM6NF0I If your parking area lines up correctly, you can angle the panel about 30 degrees toward the sun. That will maximize the charging rate in your high latitude, the snow will slide off, and any ice on the cells will melt from the heat. http://olivertraveltrailers.com/topic/how-to-solar-panel-extension-arms/ Total protection by using a fixed shelter would be best, but avoid a loose fabric cover entirely! It just won’t work well. IMHO. Have you asked the factory about their recommendation about covers? John Davies Spokane WA1 point
-
Yes its the pump. If you recall I had problems with plastic in my fresh water tank from the Water pickup upgrade. I am still dealing with it as not all the plastic has been removed.1 point
-
My guess is that with such a small amount of water in the very flat fresh tank any slight deviation from level is going to make a large impact. Mike1 point
-
I had this problem and it was the pump. I replaced the pump and no more problems. Except one new one. After replacing the pump about three weeks ago I periodically checked the level in my fresh water tank which began at 19% and held steady until last week when it read 13%. That was a bit strange but OK. It then read 19% a few days later so I figured maybe the gauge was out of whack a bit. This morning I checked and it read 0%. I looked in the basement and all was dry. I have not noticed any water coming out of the bottom of the trailer except for A/C and fridge drips. We have remained hooked to "city water" throughout and only unhooked and re-hooked twice in three weeks traveling. I ran the pump this morning and there was no water to be had. The fresh water tank really was empty. I re-filled to 13%, the pump runs fine, and now we'll see what happens. I have no idea where the water could have gone unless the fresh water tank was siphoning back into the main plumbing. Very odd. Anybody have this problem?1 point
-
Sounds like I need a new pump! We’ll be home at the end of the month so I’ll order one to be there when we arrive. In the meantime I’ll use the fresh tank to empty it somewhat so we don’t have the annoying drip outside the door. Mike1 point
-
Hey all I went through this for over a year and was the pump check valve leaking back into the fresh water tank. I replaced it and all is well, it would stop for a few days on and off but never went away till i replaced the pump. I took the pump apart and could not see why it might be leaking and by the time you buy the replacement parts for about $30 bucks more you can just replace and put a new one in just my opinion. Thanks Gary1 point
-
Or maybe at least a rebuild kit.1 point
-
I'm beginning to wonder if a spare water pump is worth carrying. The peace of mind might be worth $75.1 point
-
I started having this problem today. We travel with a full fresh tank and after hooking up to city water earlier this afternoon we started getting a steady slow leak from the overflow. I just checked the valves and they all seem okay. Will check the pump. Foy, did you get yours figured out? Mike1 point
-
I was going to use 1/8” plywood but that didn’t leave much for the edge recess to lock. ? I cut it on my table saw with a dado set. It’s a bit more exact than a router. Mike1 point
-
The mounts that Oliver uses for the solar panels are from AM solar and they carry two sizes of tilt bars that work very well. If your not inclined to make your own or like the embeded nut on the AM solar bars for ease use check out their site. https://amsolar.com/rv-mounting-accessories/91m-tbs1951 point


-
Recent Achievements
-


")


")


